
Users can log in to your chat instance with Google, Facebook, and other accounts. In order to do this, you need to set up OAuth 2.0 as a user authentication method in your TypingMind instance.
This page will guide you on how to set up OAuth 2.0 for user authentication.
OverviewStep 1: Create an OAuth app in your identity providerStep 2: Add a new OAuth connectionUse other identity providers (Generic OAuth 2.0 with OIDC)Notes and limitations
Overview
TypingMind supports OAuth 2.0 / OpenID Connect (OIDC), which means all providers that provide OIDC compatible authorization flow can be integrated into TypingMind for user authentication.
We have built-in support for the following providers:
- Microsoft
For other providers, you can still integrate but you have to add all the parameters manually. We’ll show this in a later section of this document.
Step 1: Create an OAuth app in your identity provider
TypingMind needs an OAuth Client ID and OAuth Client Secret to integrate with the OAuth provider. In order to have this information, you will need to create an OAuth app with the provider.
In this example, we will use Google as our provider.
The steps to create an OAuth app are mostly the same across all providers (Facebook, Microsoft, LinkedIn, etc.). If you don’t know how to create an OAuth app with your provider, a quick Google search should give you the necessary information.
Go to https://console.cloud.google.com and sign up an account if you don’t already have one.
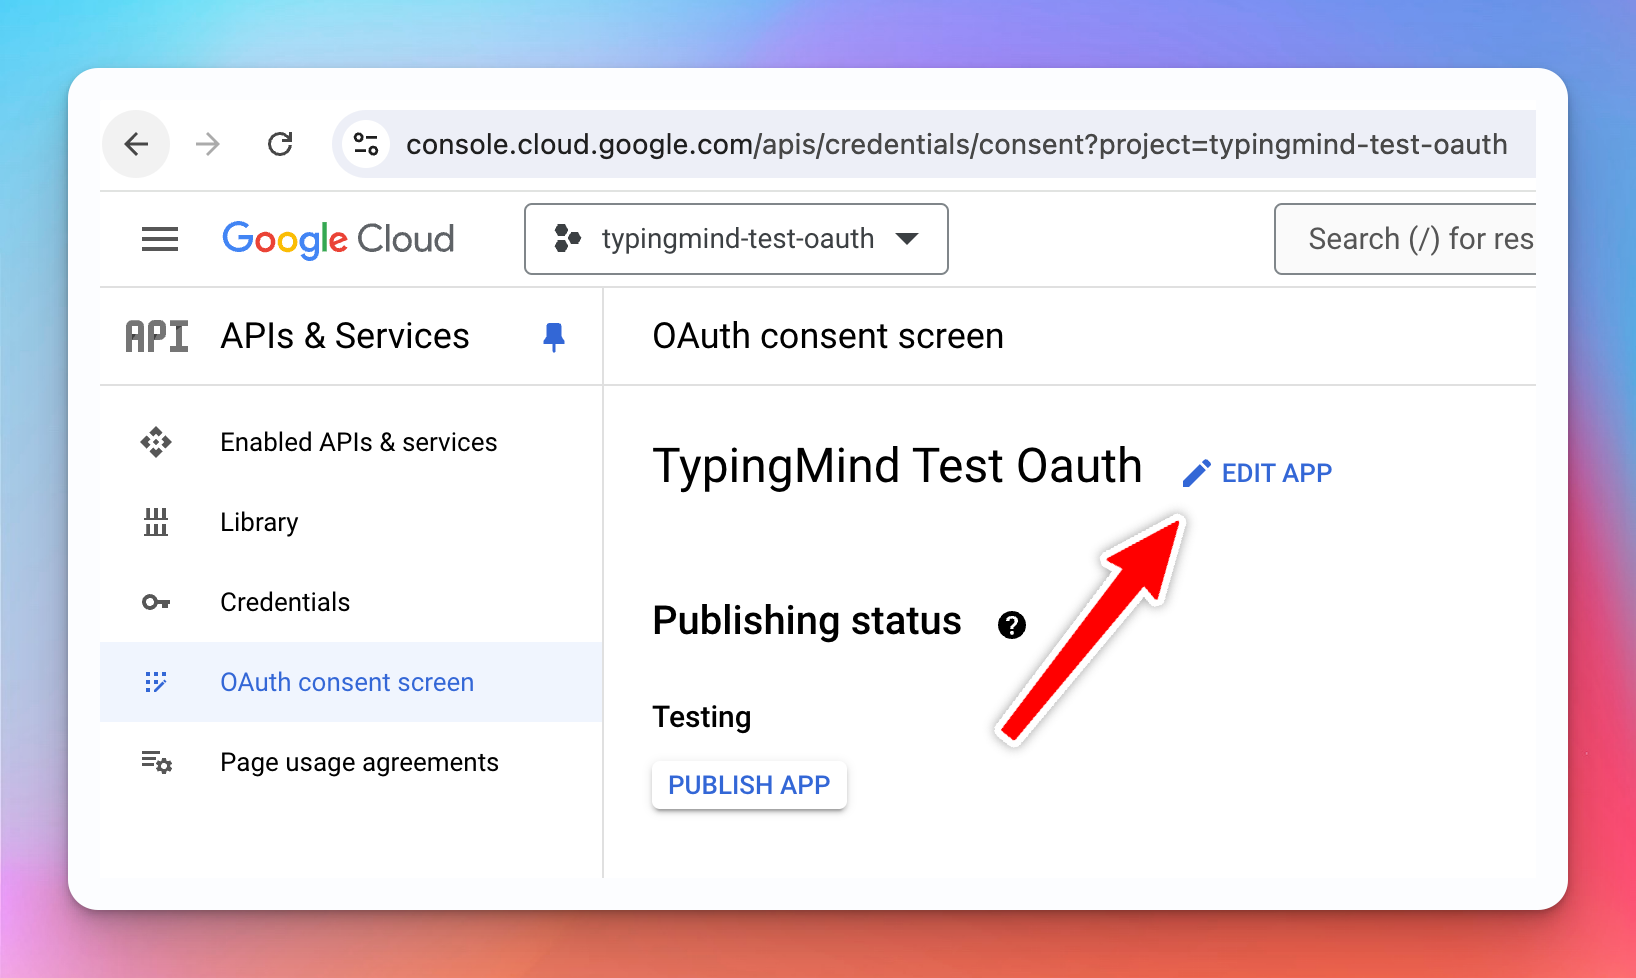
Then click “OAuth consent screen” and start setting up your OAuth app info (name, logo, website, etc.). This info will be shown to the user when they try to login to your chat instance with Google.
Then go to “Credentials” and create a new credentials using OAuth Client ID

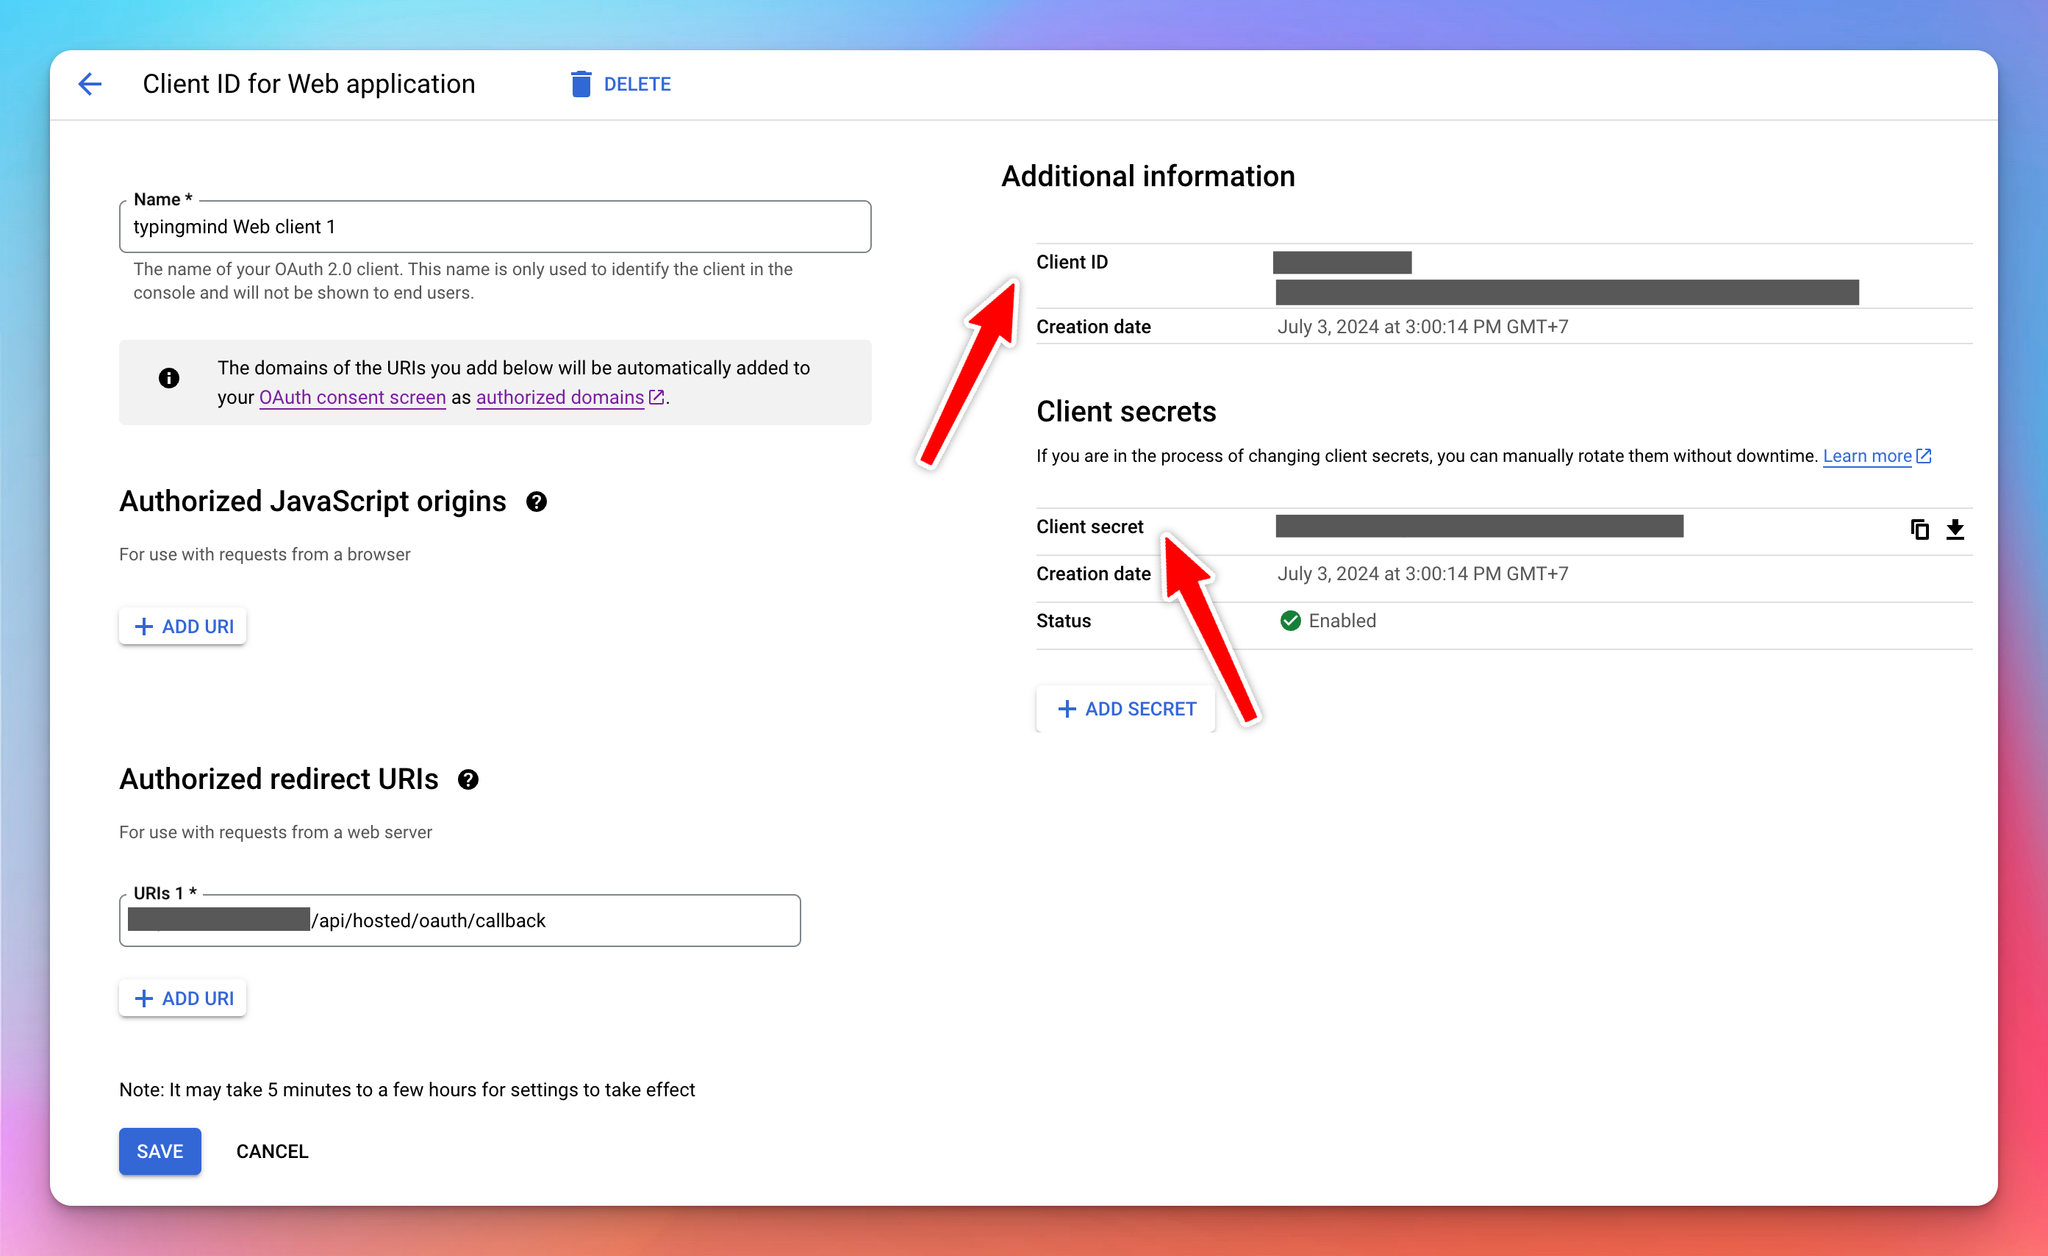
Under the “Authorized redirect URIs”, enter the following value:
You will also see this URL at a later step and copy it.

Once you are done, take note of the Client ID and Client Secret. You will need to use these values in the next step.
Step 2: Add a new OAuth connection
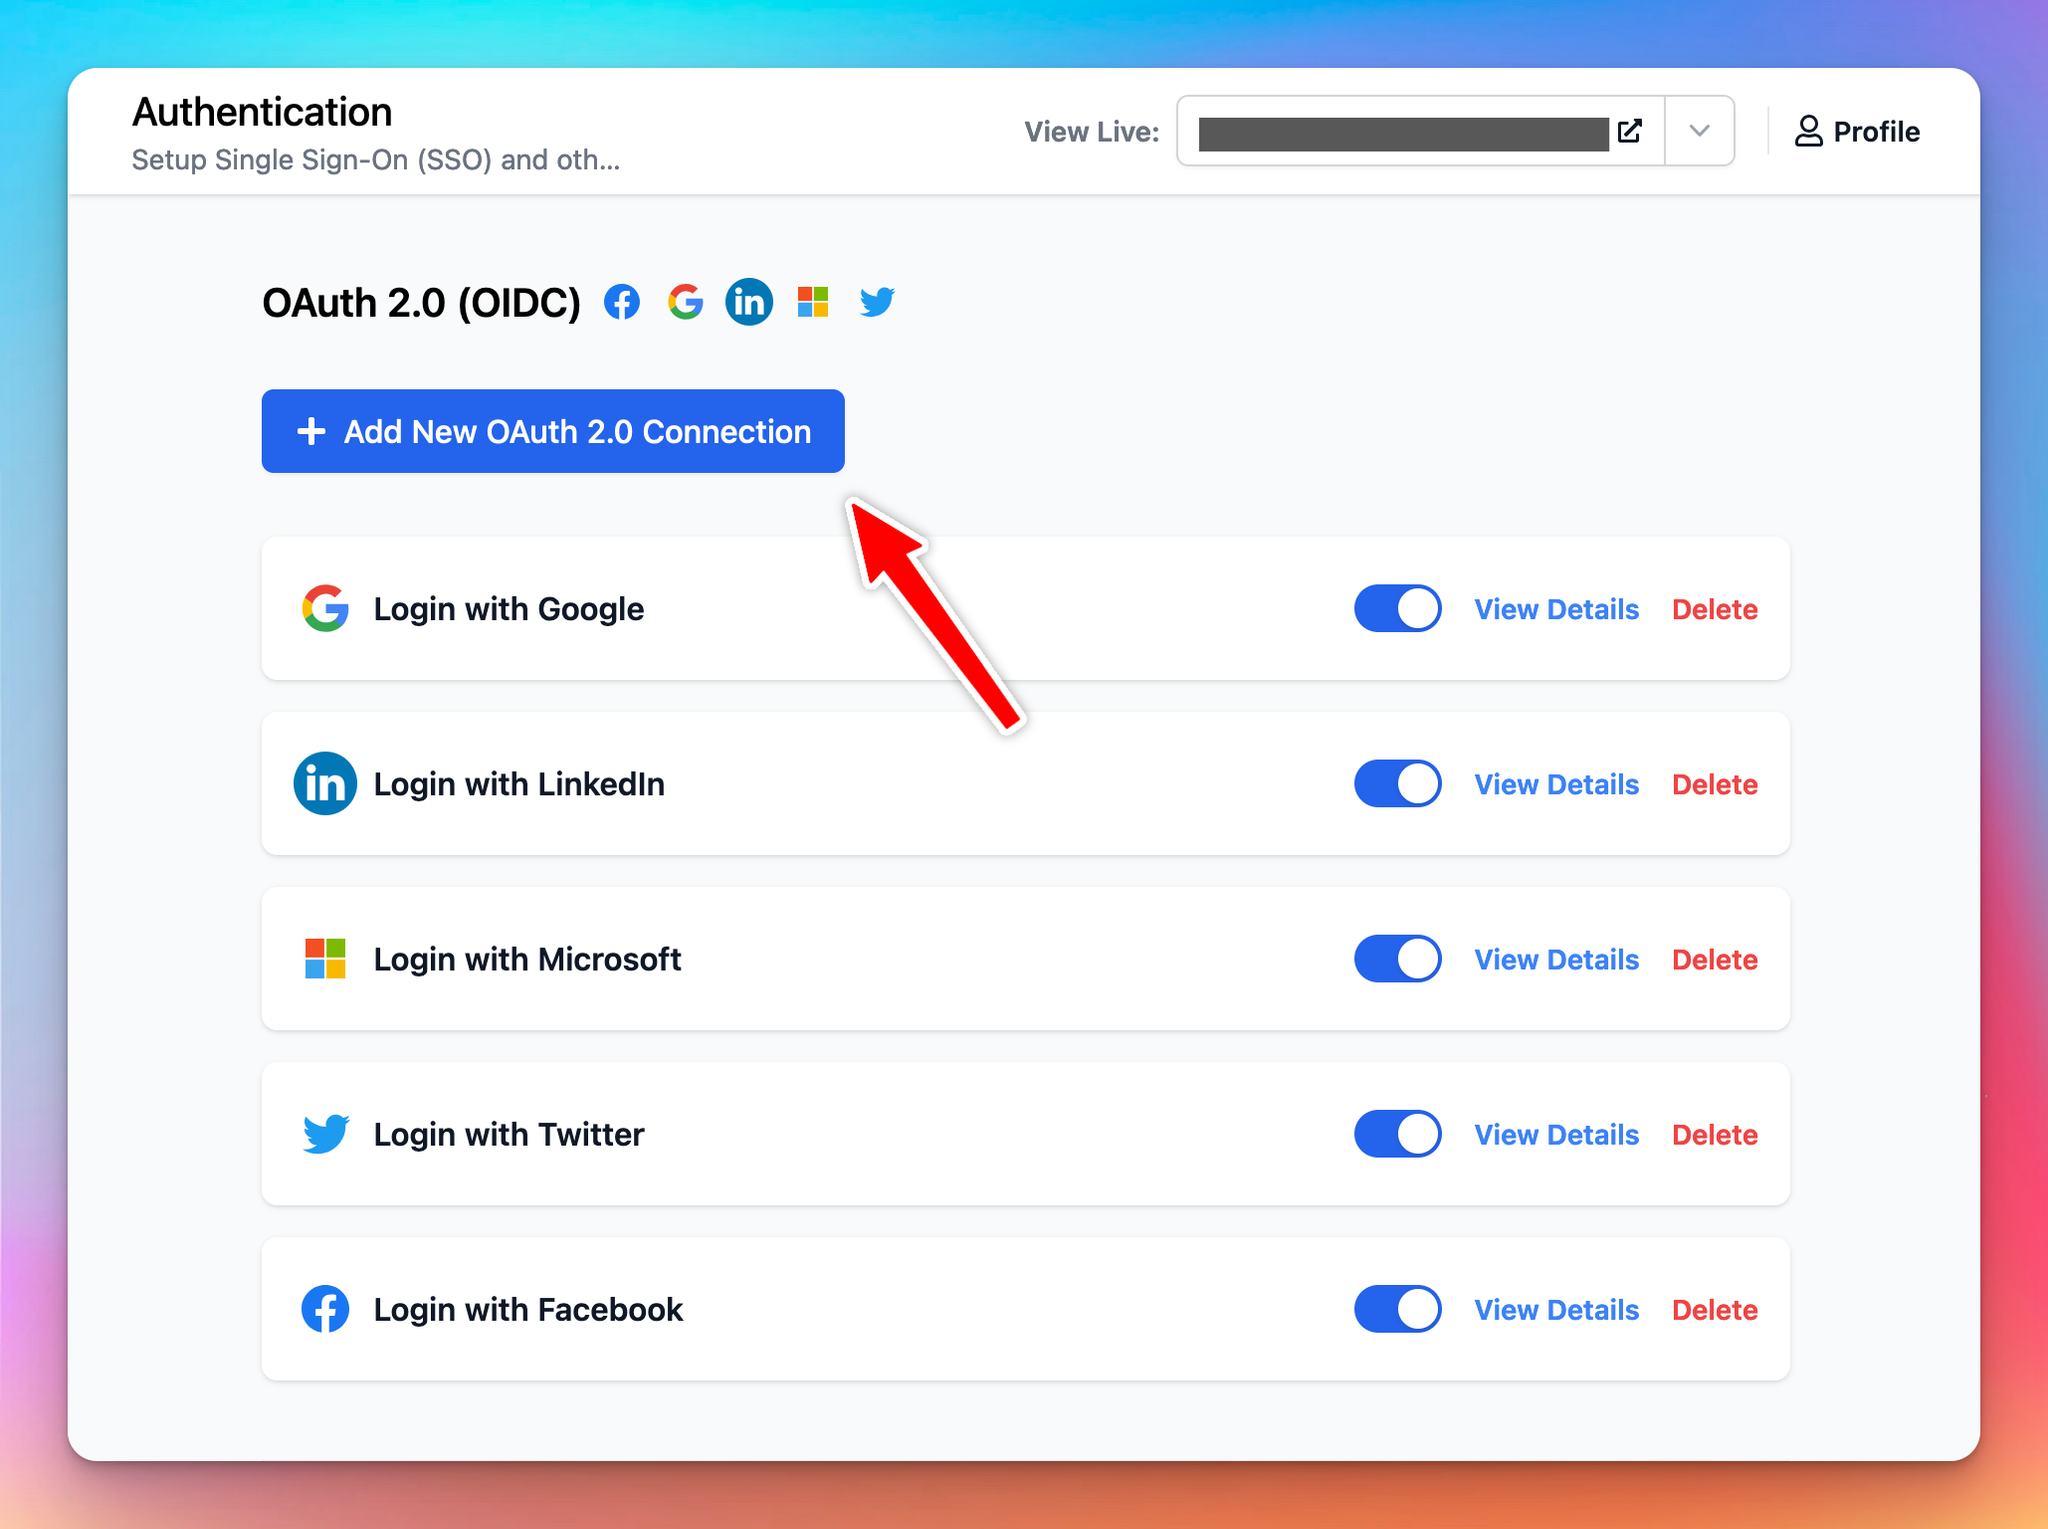
- Login to your Admin Panel → User Management → Authentication → OAuth 2.0
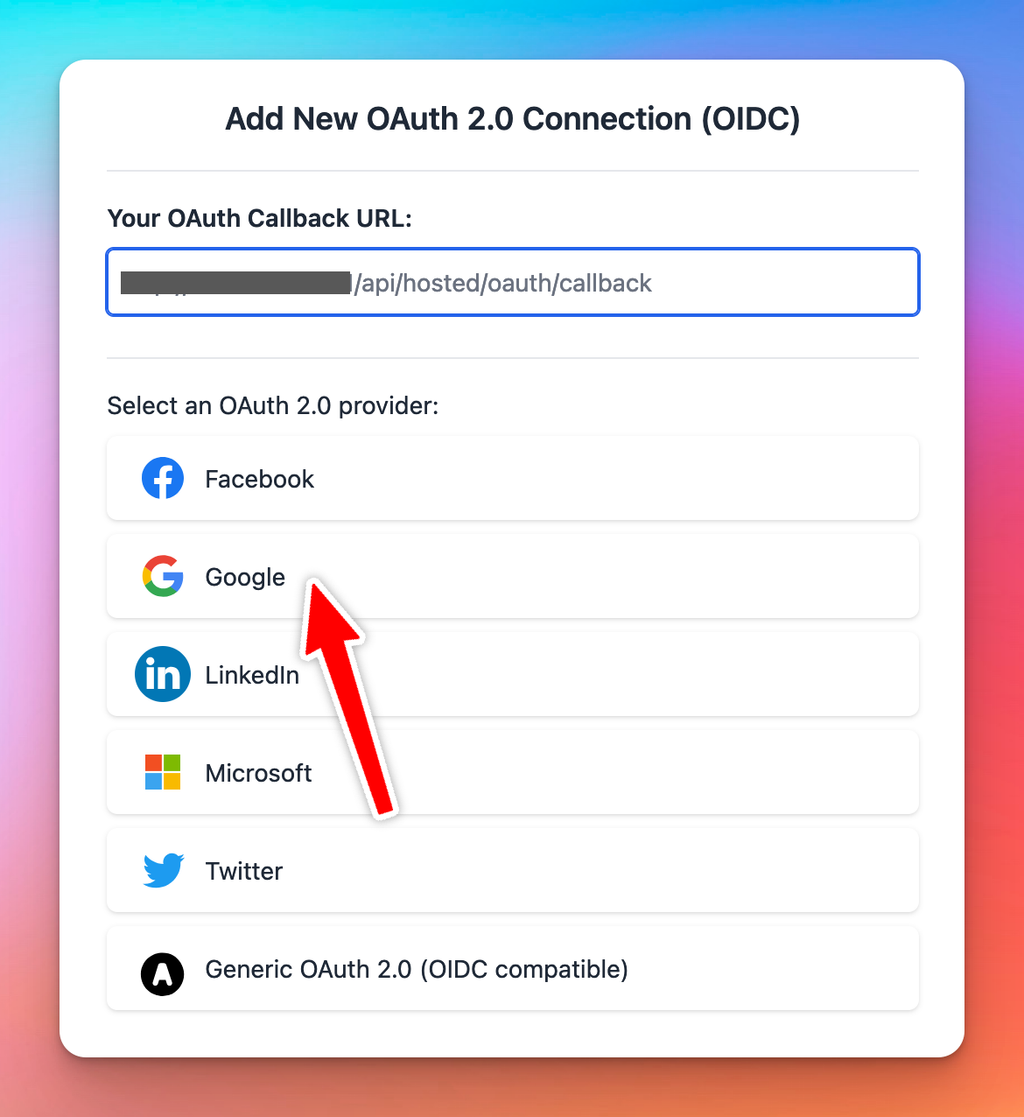
- Click Add New OAuth 2.0 Connection
At this step, you will see your OAuth Callback URL. You need to set this URL in your Google Cloud OAuth credentials setting, under the “Authorized redirect URIs” section.
Then select “Google” from the UI.
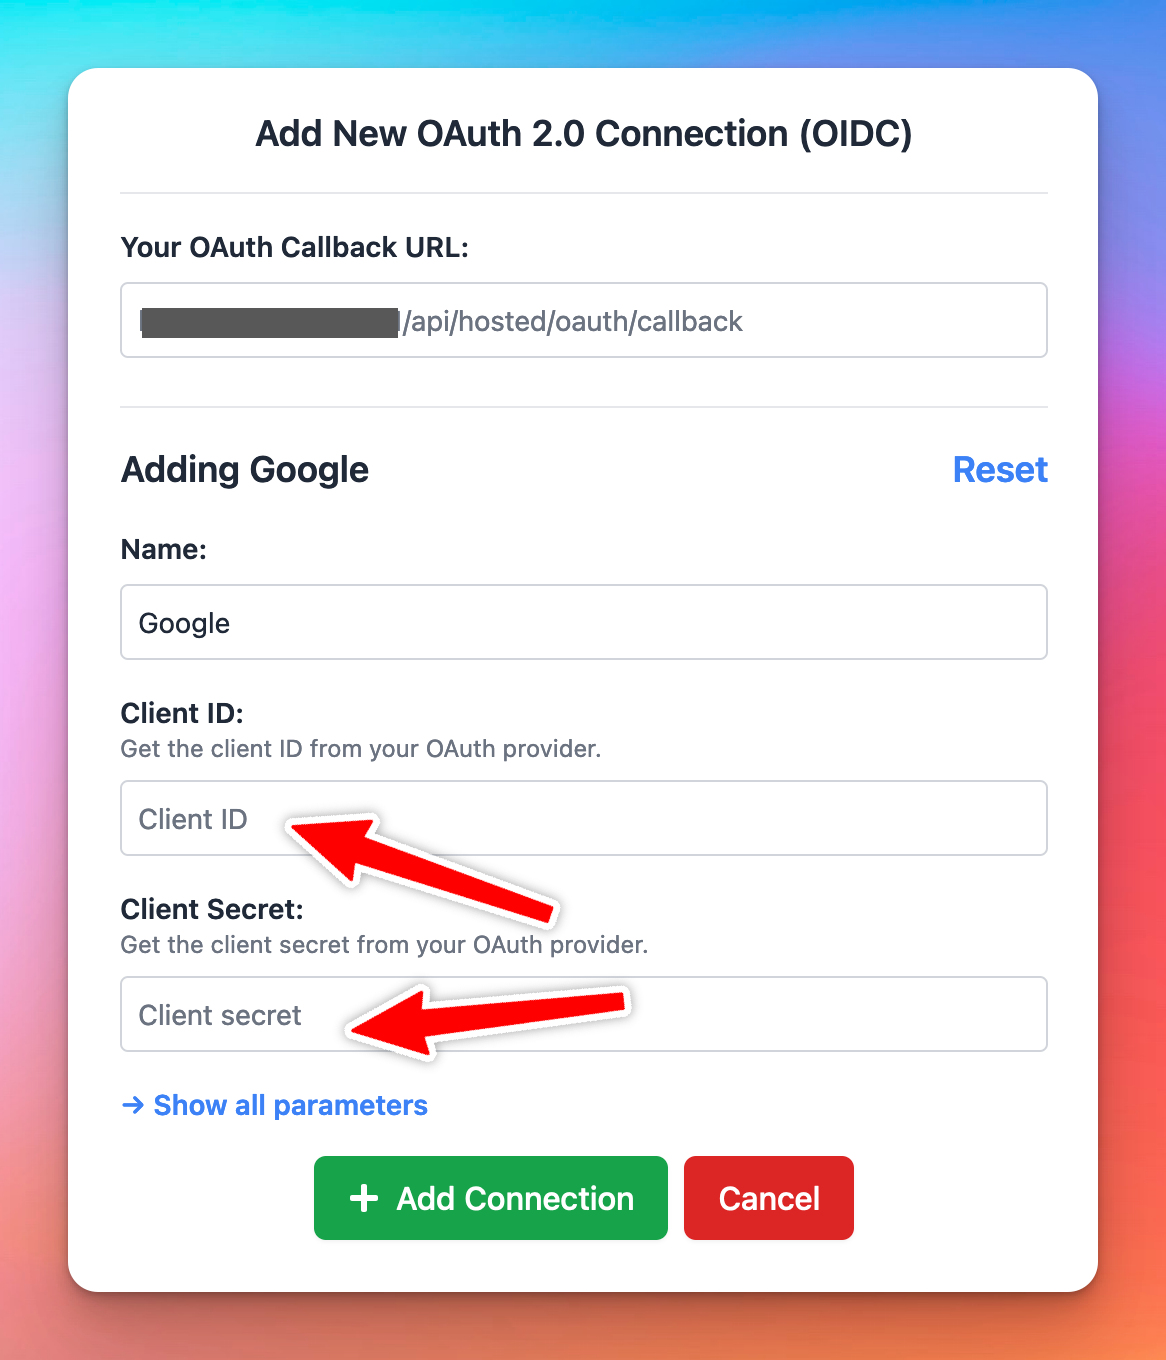
Next, enter your Client ID and Client Secret. Then click Add Connection.
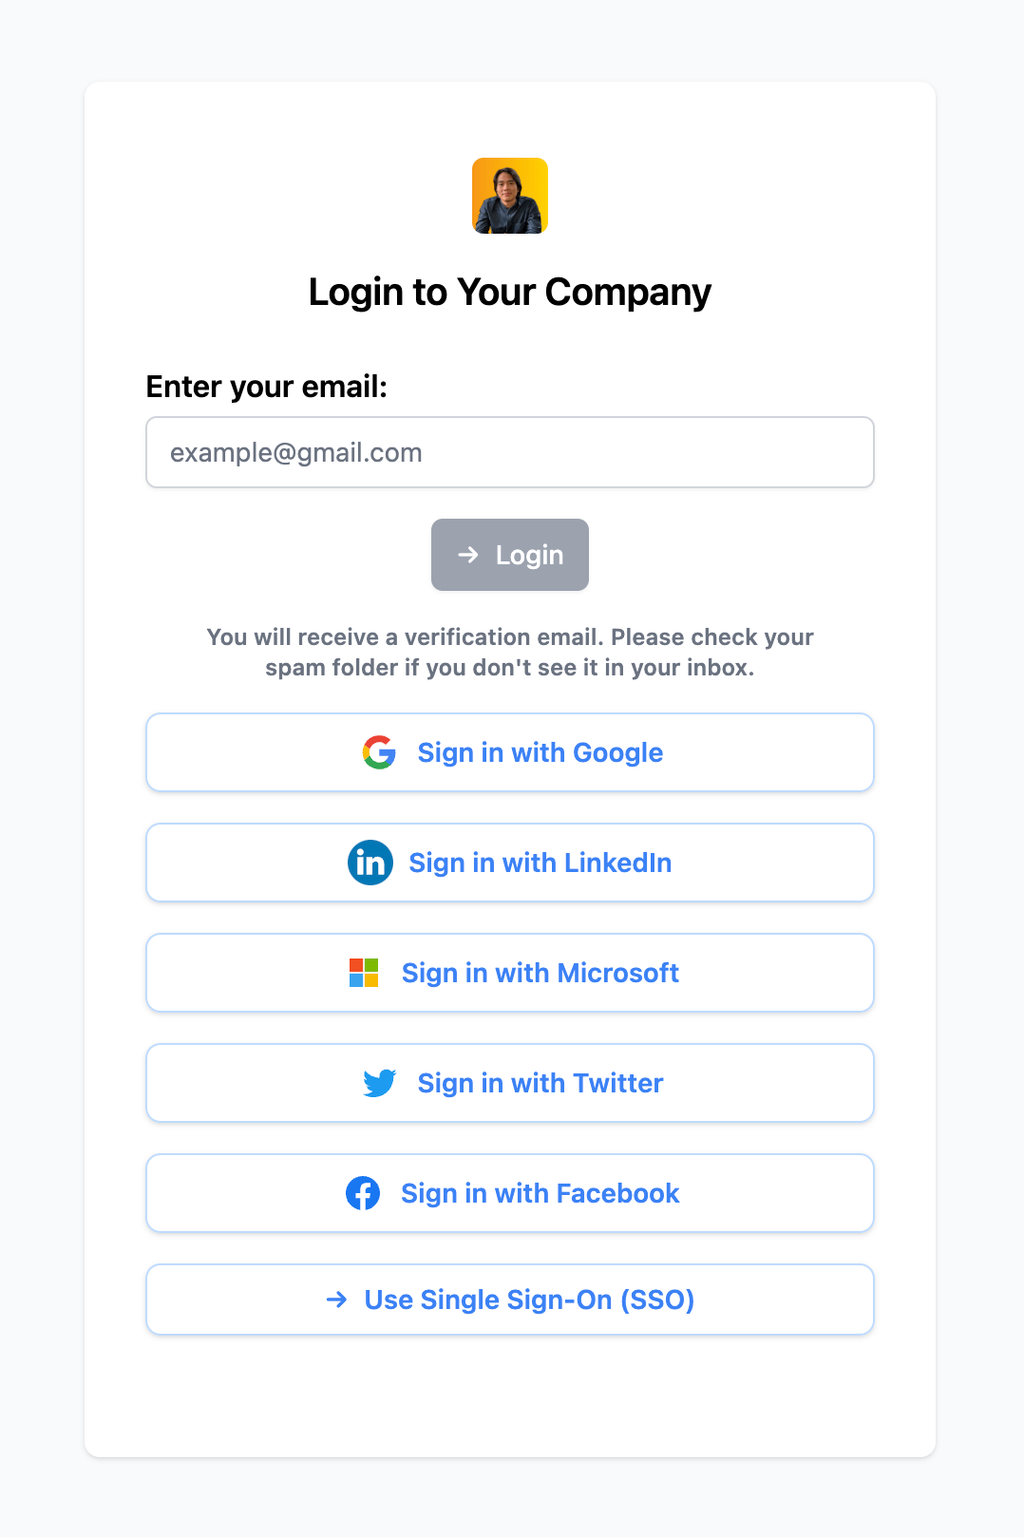
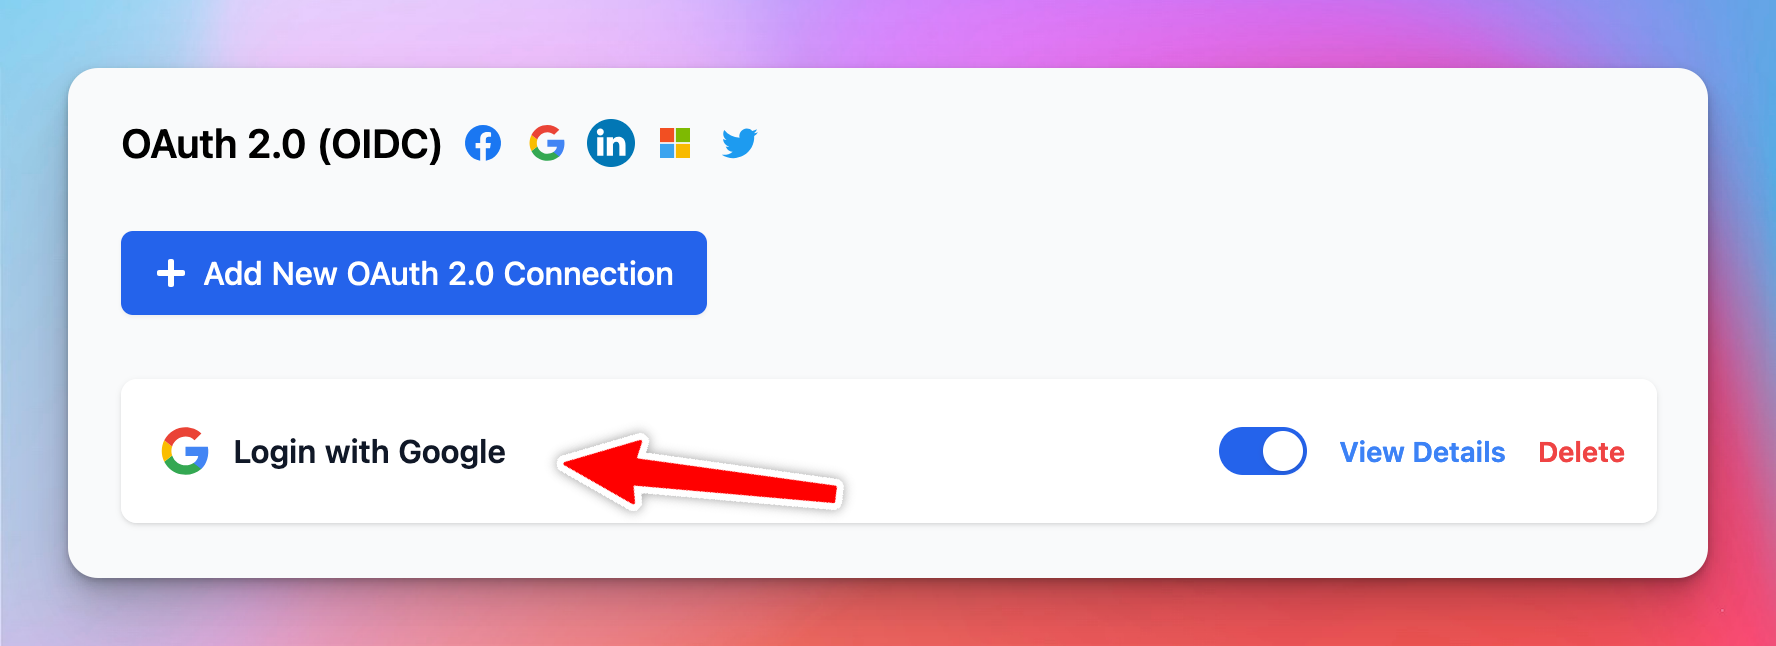
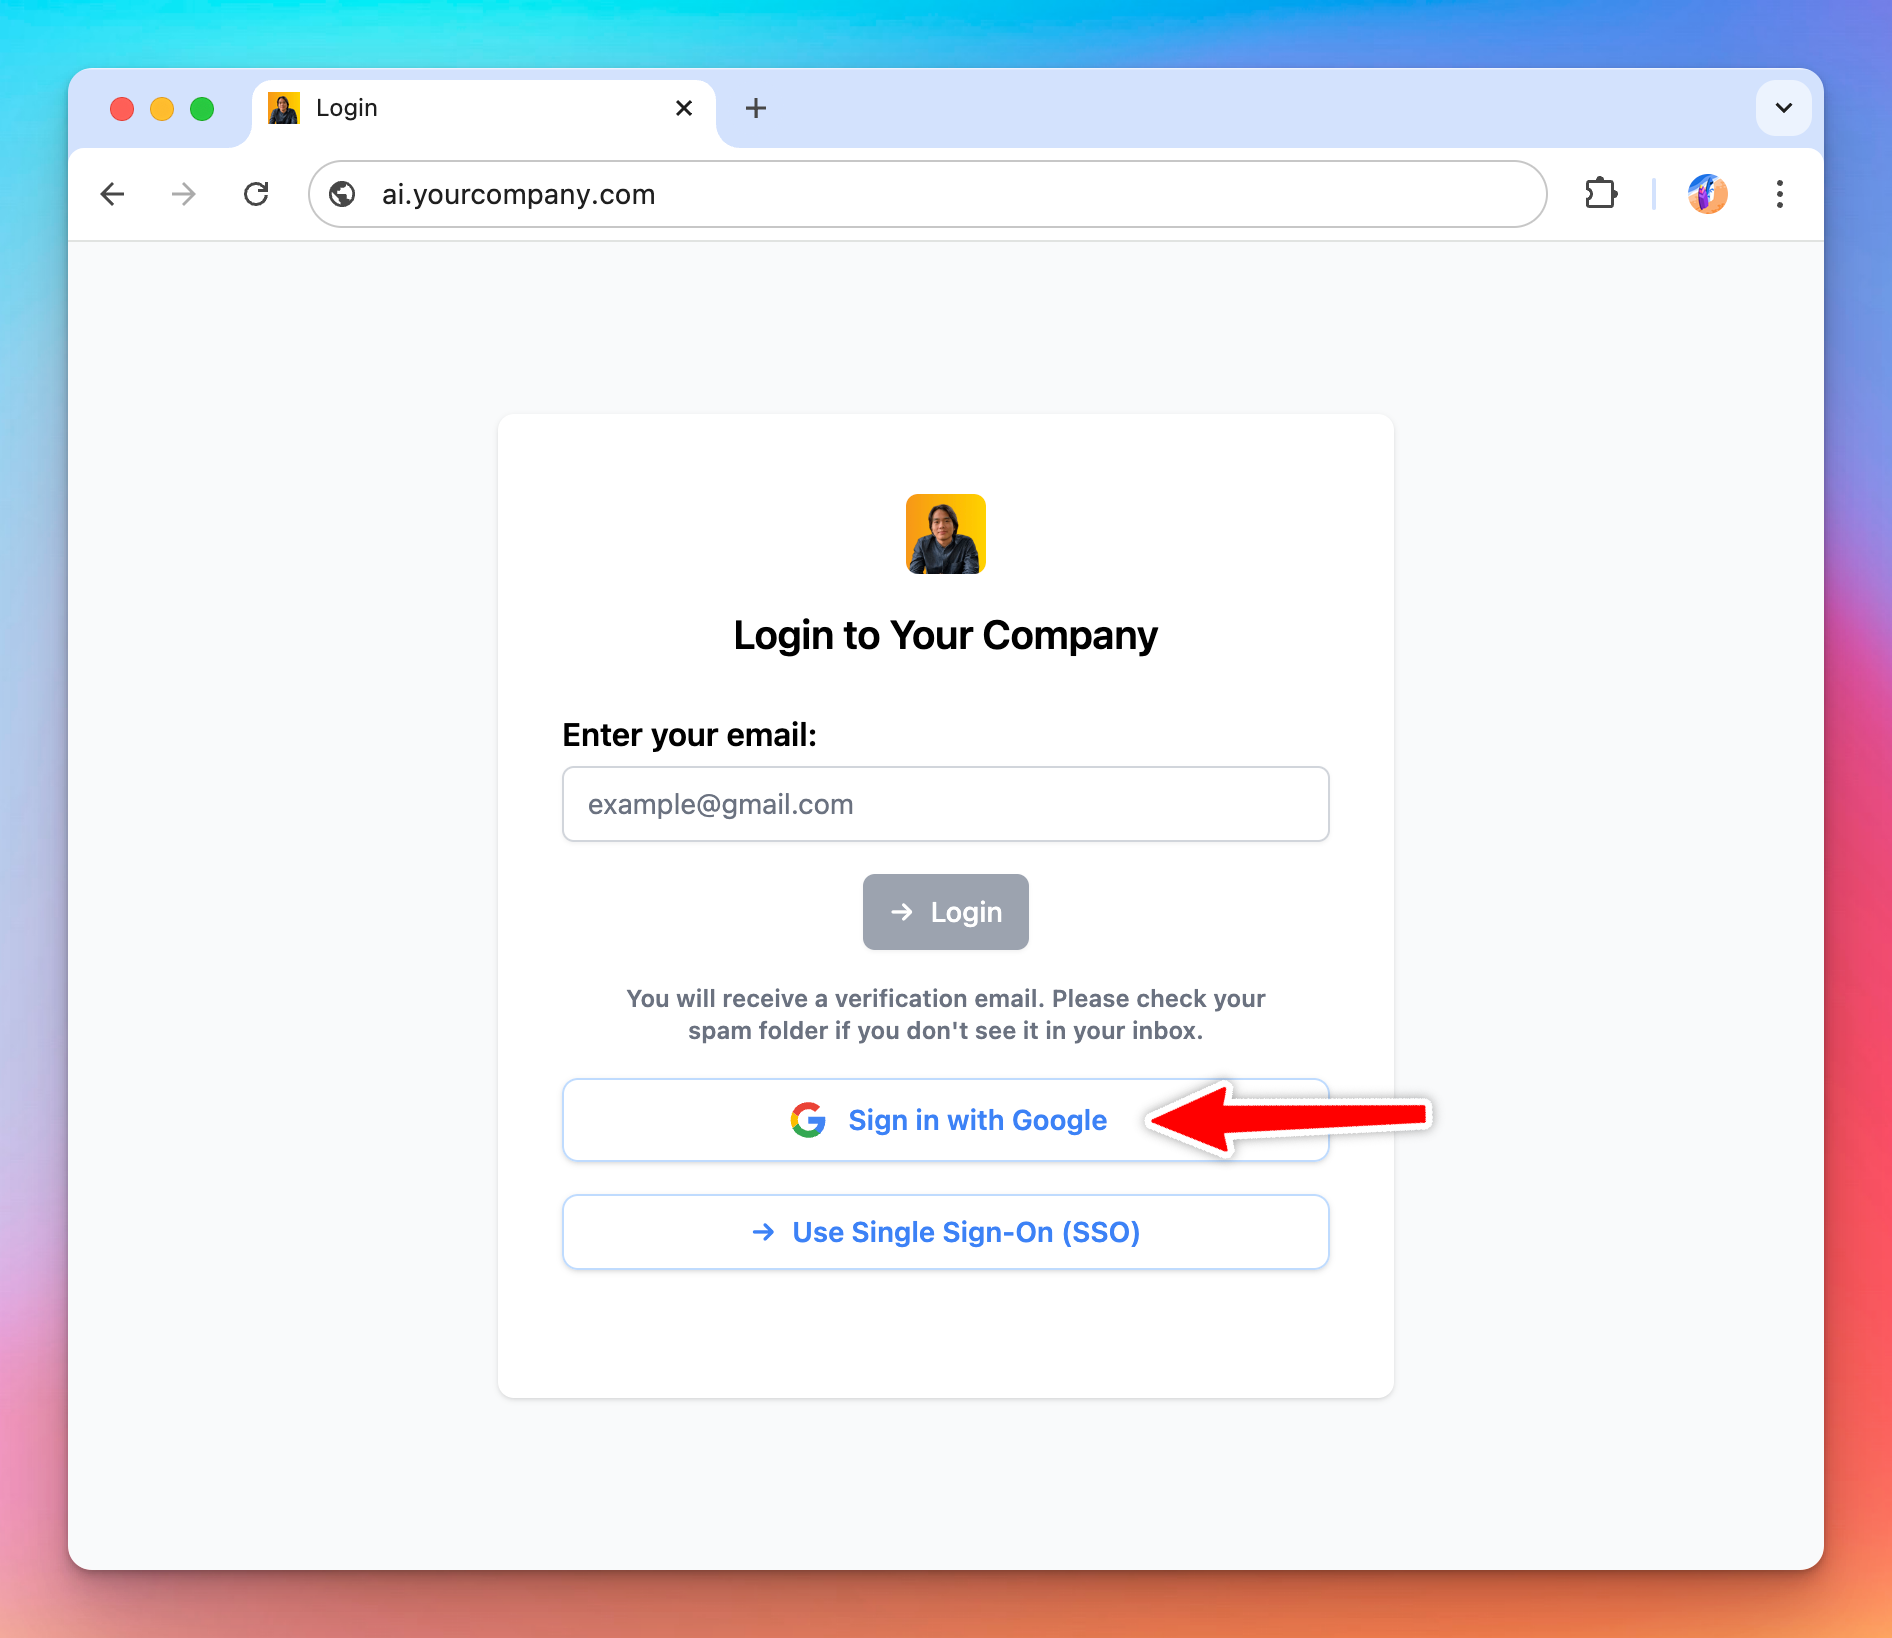
Once the connection is added, you will see the new entry in the admin panel and under the login section of your chat instance.
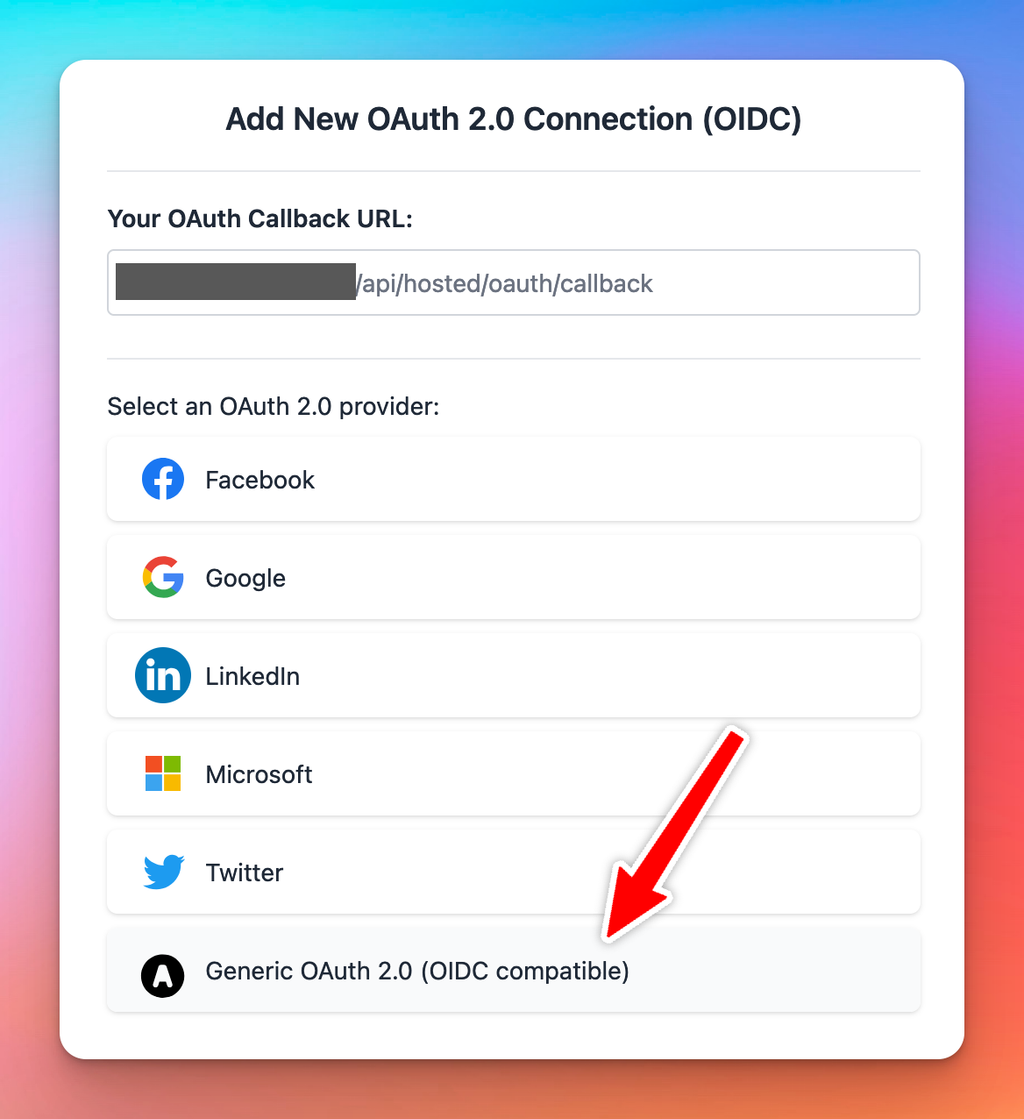
Use other identity providers (Generic OAuth 2.0 with OIDC)
If you want to integrate with a custom identity provider, select “Generic OAuth 2.0” option.
In this mode, you will need to provide all the relevant information needed to for the authorization flow to work. The required parameters are:
- Authorization URL
- Token URL
- User Info URL
- Content Type
- Scopes
TypingMind uses standard OAuth 2.0 / OIDC authorization flow to identify the user. For this reason, if your OAuth provider does not follow the OAuth 2.0 standard and OIDC protocol, the user authorization flow might not work.
Here are some tips and workarounds if the user authorization fails:
- Ensure that the
access_tokenandid_tokenproperty is returned from the request to Token URL.
- The
id_tokenmust be a JWT token with the following property in its payload: sub: system wide unique user identification numberemailgiven_namefamily_namepicture: URL to the user’s profile picture.
Notes and limitations
- User account will be created the first time they login with OAuth. This user account will take up a seat in your instance. If you don’t have enough seats, the login will fail.
- When OAuth 2.0 is enabled, new users can login to your instance without having to be invited first. This is equivalent to setting your instance to Authorized Mode.
- The user profile (name, picture) will be updated every time the user login again.
- At this time, the user account does not get logged out or deleted if you revoke the access token from the identity provider. You will need to remove the user manually from TypingMind’s Admin Panel. If you encounter this case and need a better solution, please contact us.
- If the OAuth account have the same email as an existing account in your instance, the user will be automatically connected to that OAuth connection.
- At this time, a user can only connect with exactly one OAuth connection. For example, if they already connect using Google login and later connect again using Facebook login, they will need to unlink their account from Google login first.
- You can use the
access_token(orid_token) via plugins using a special parameter in the plugin’s code, see the TypingMind Plugins for more details.