The Azure AI Search plugin allows you to connect TypingMind to your training data in Azure AI Search (Cognitive Search). When you ask the AI a question but the AI does not have the answer, the AI will query the training data in Azure AI Search to find the answer.
Azure AI Search supports many data sources within the Microsoft ecosystem, including Azure SQL Database, Azure Cosmos DB, SharePoint, Azure Blob Storage, and more!
In this tutorial, we will use Azure Blob Storage as the data source.
Let’s check out the detailed guidelines!
Step 1: Create the AI Search ServiceStep 2: Create a storage accountStep 3: Upload your training data Step 3: Import data to Azure Blob Storage and create an indexerStep 4: Enable CORSStep 5: Set up Azure AI Search Plugin on TypingMindFor TypingMind Custom - Admin usersFor TypingMind individual users (using the app directly via the chat interface)Step 6: Test the plugin!
Step 1: Create the AI Search Service
- Log into the Azure AI Portal at https://portal.azure.com/
If you don’t have an account yet, please sign up for a Microsoft Azure account (a credit card may be required for verification) and create a subscription for your account first (no charge).
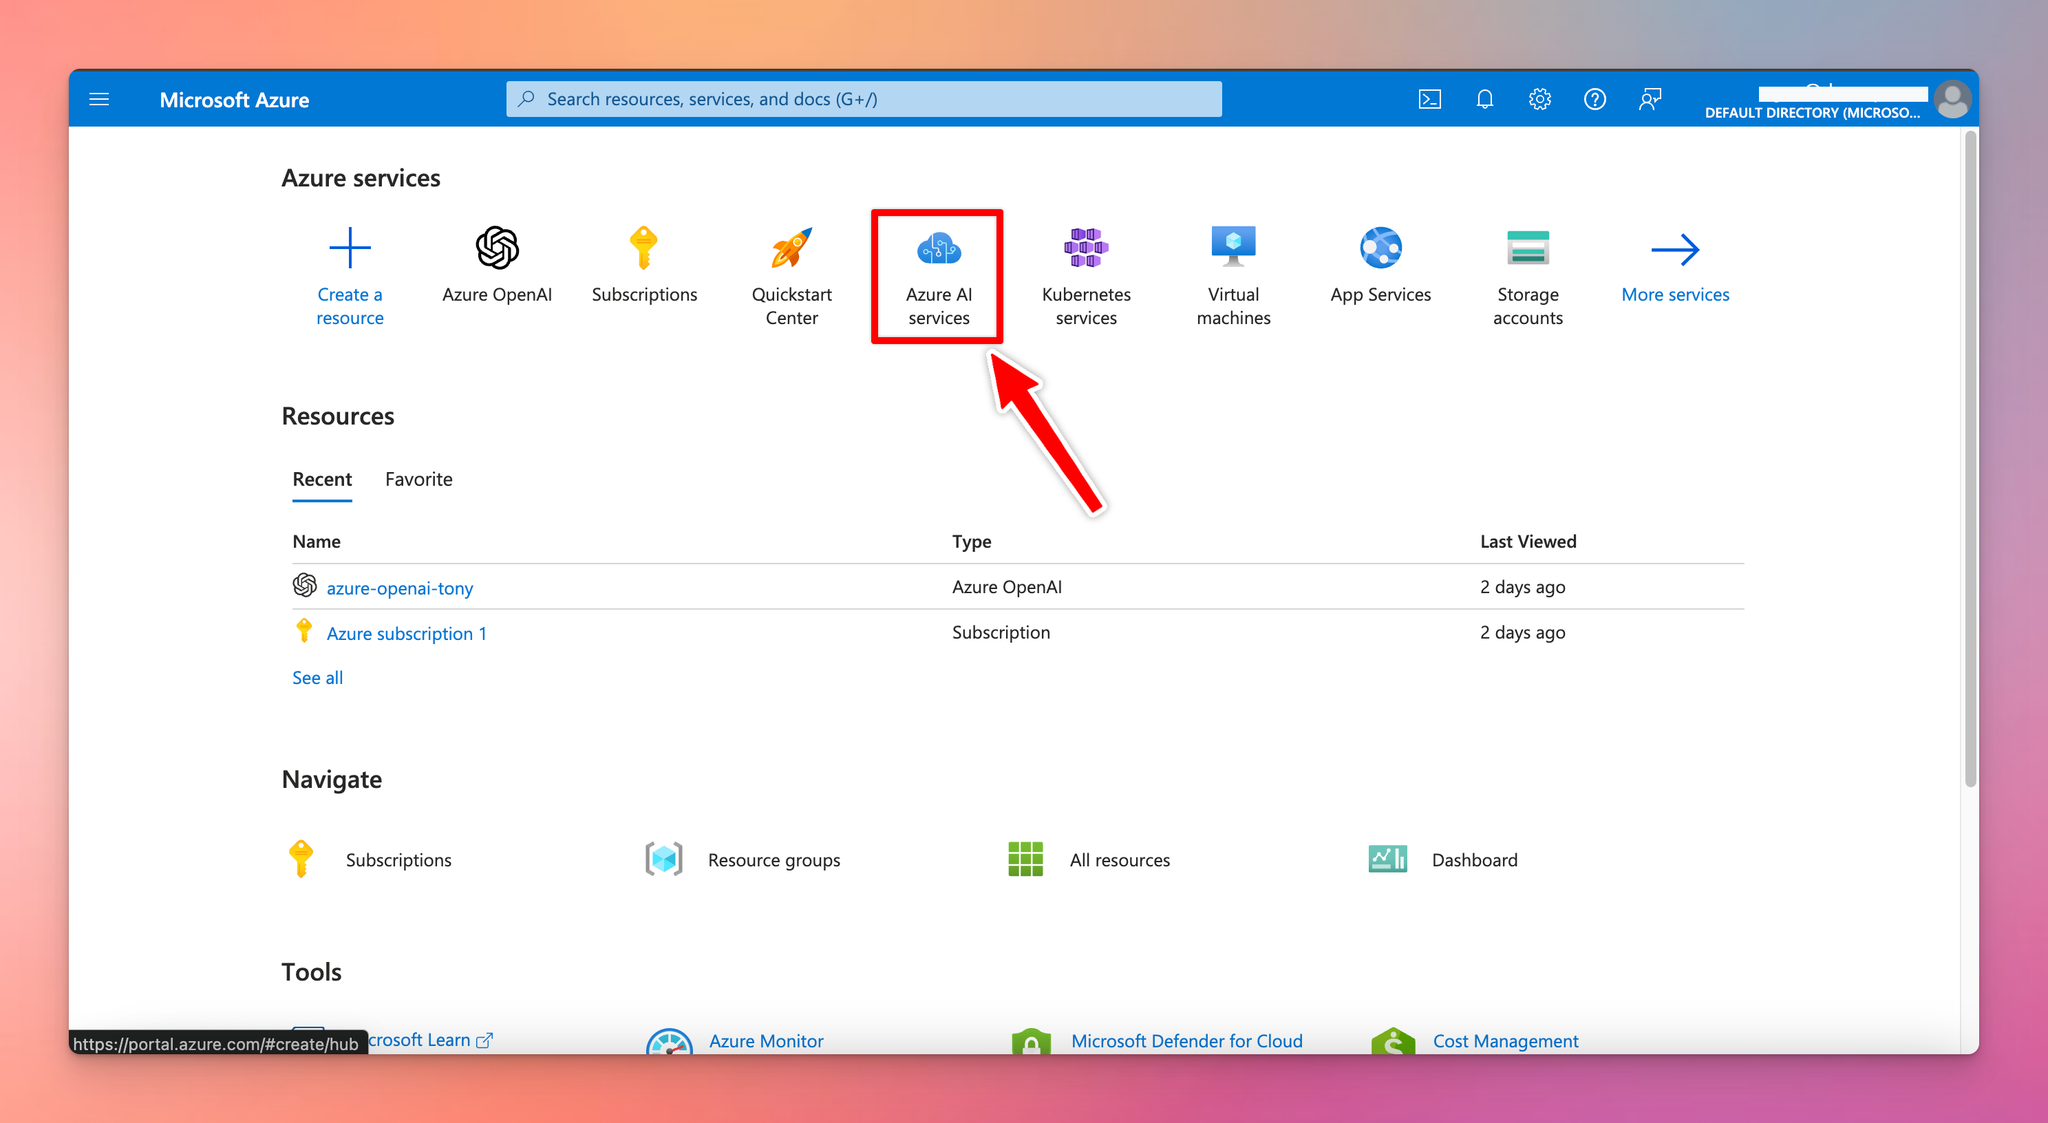
- On the Azure homepage, click on “Azure AI Services”.
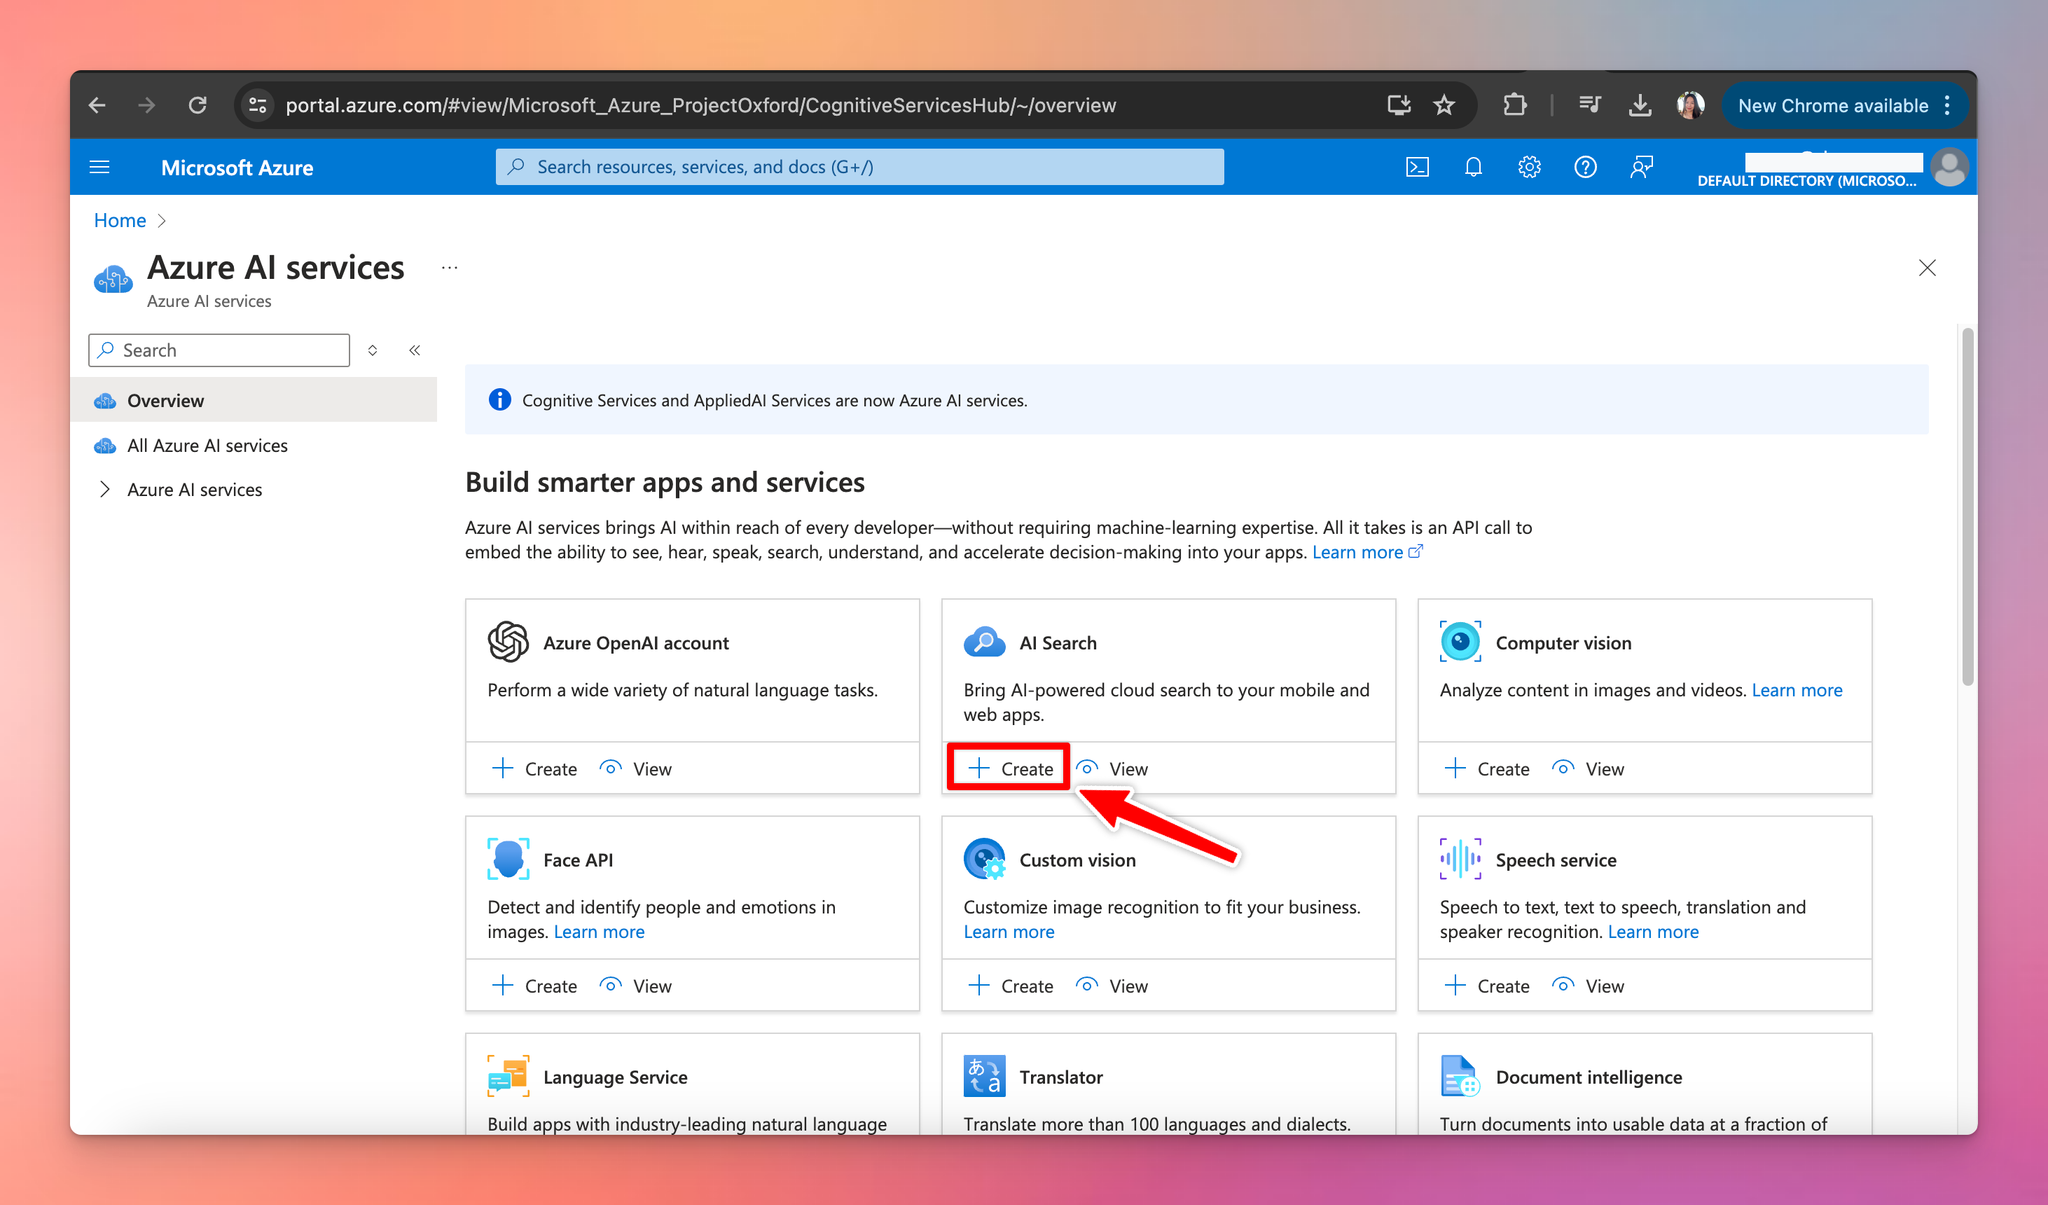
- Click on “Create” the AI Search service
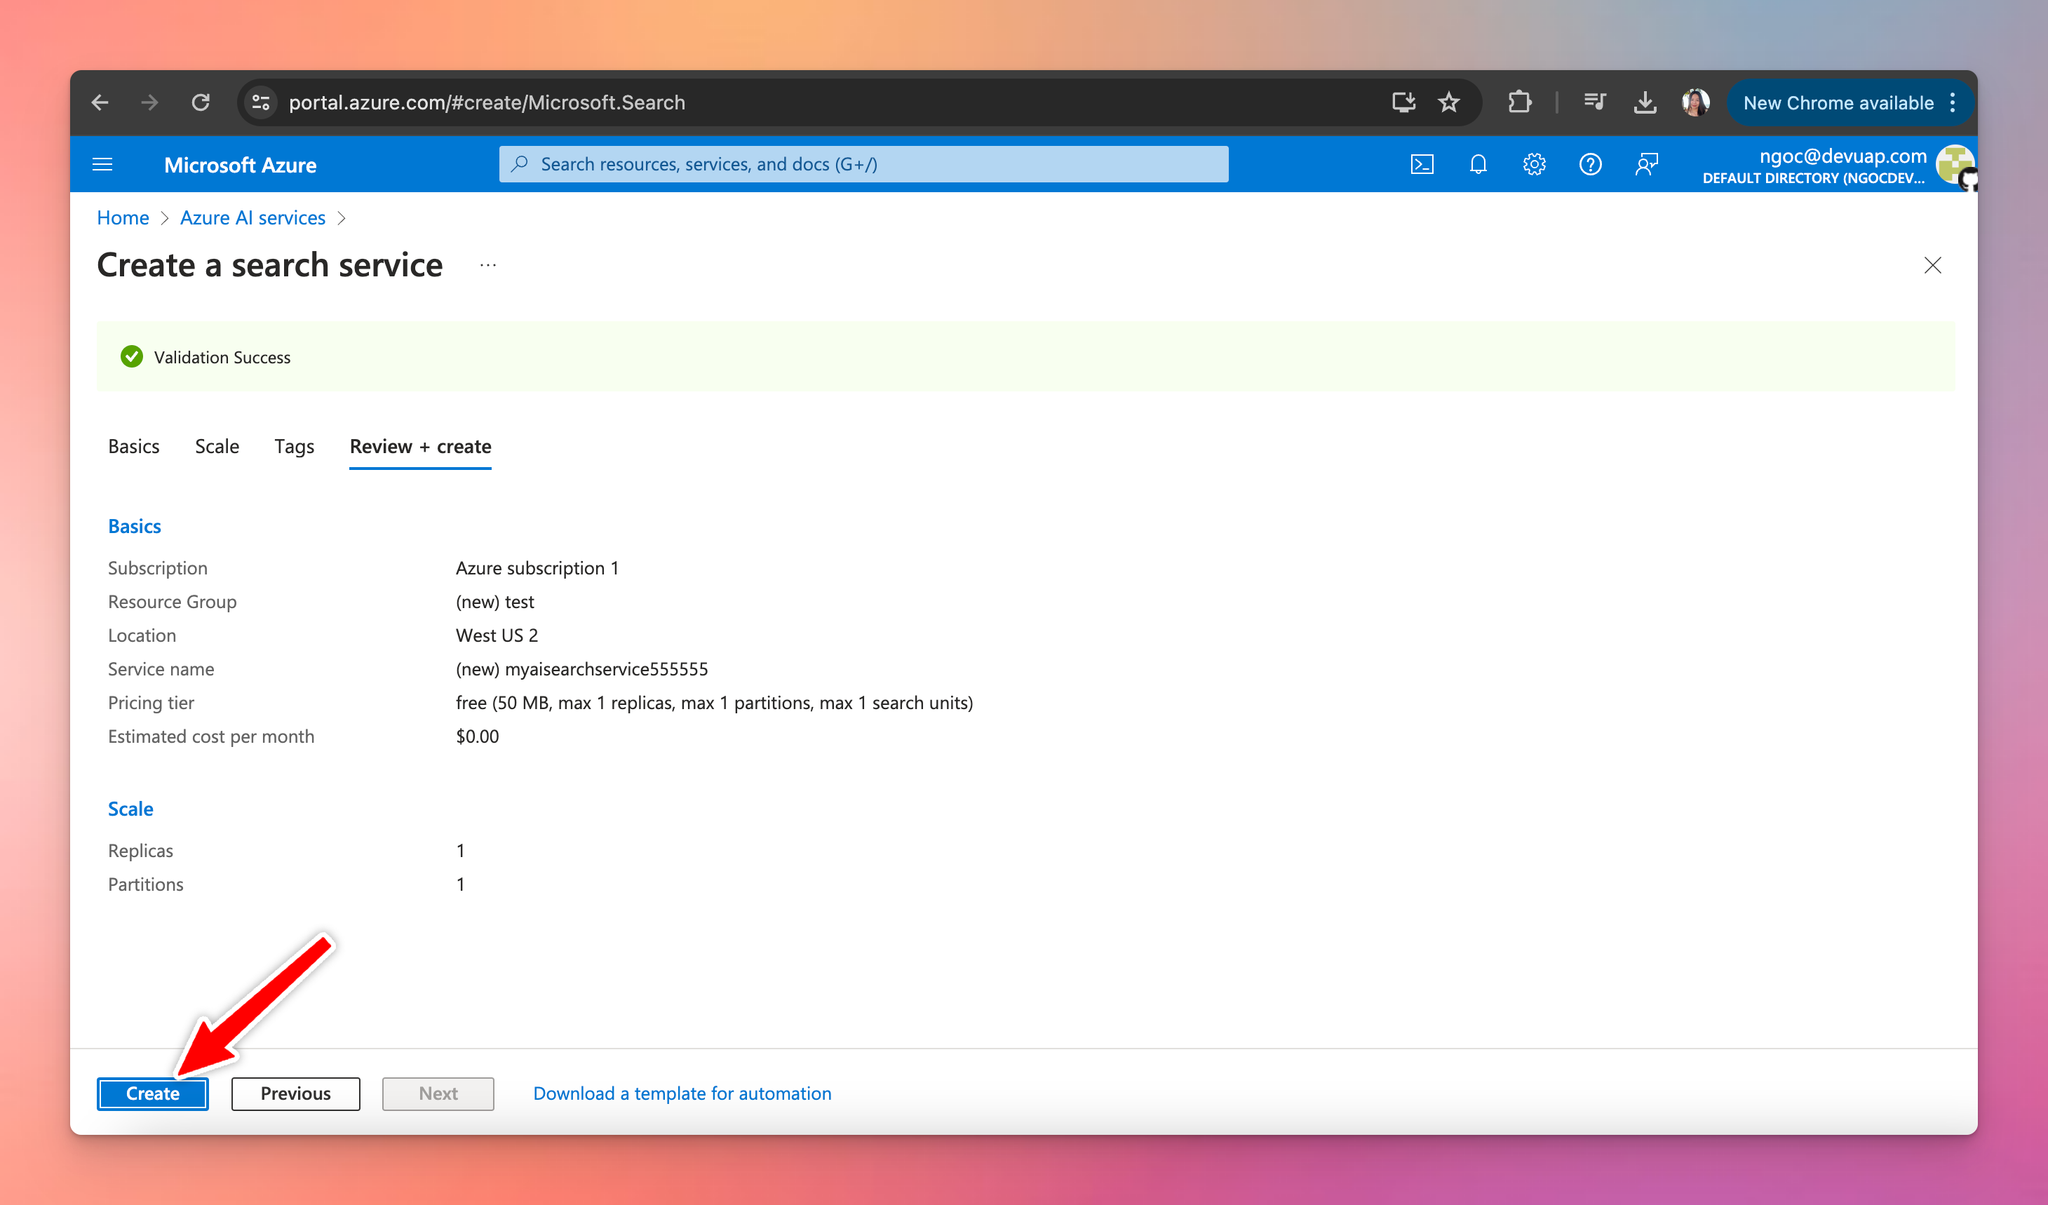
- Configure Search Service settings as follows:
- Subscription: select your subscription.
- Resource group: choose from existing or create a new resource group.
- Service name: enter a unique service name
- Location: pick your preferred location.
- Pricing tier: click on “Change pricing tier” and select the free tier.
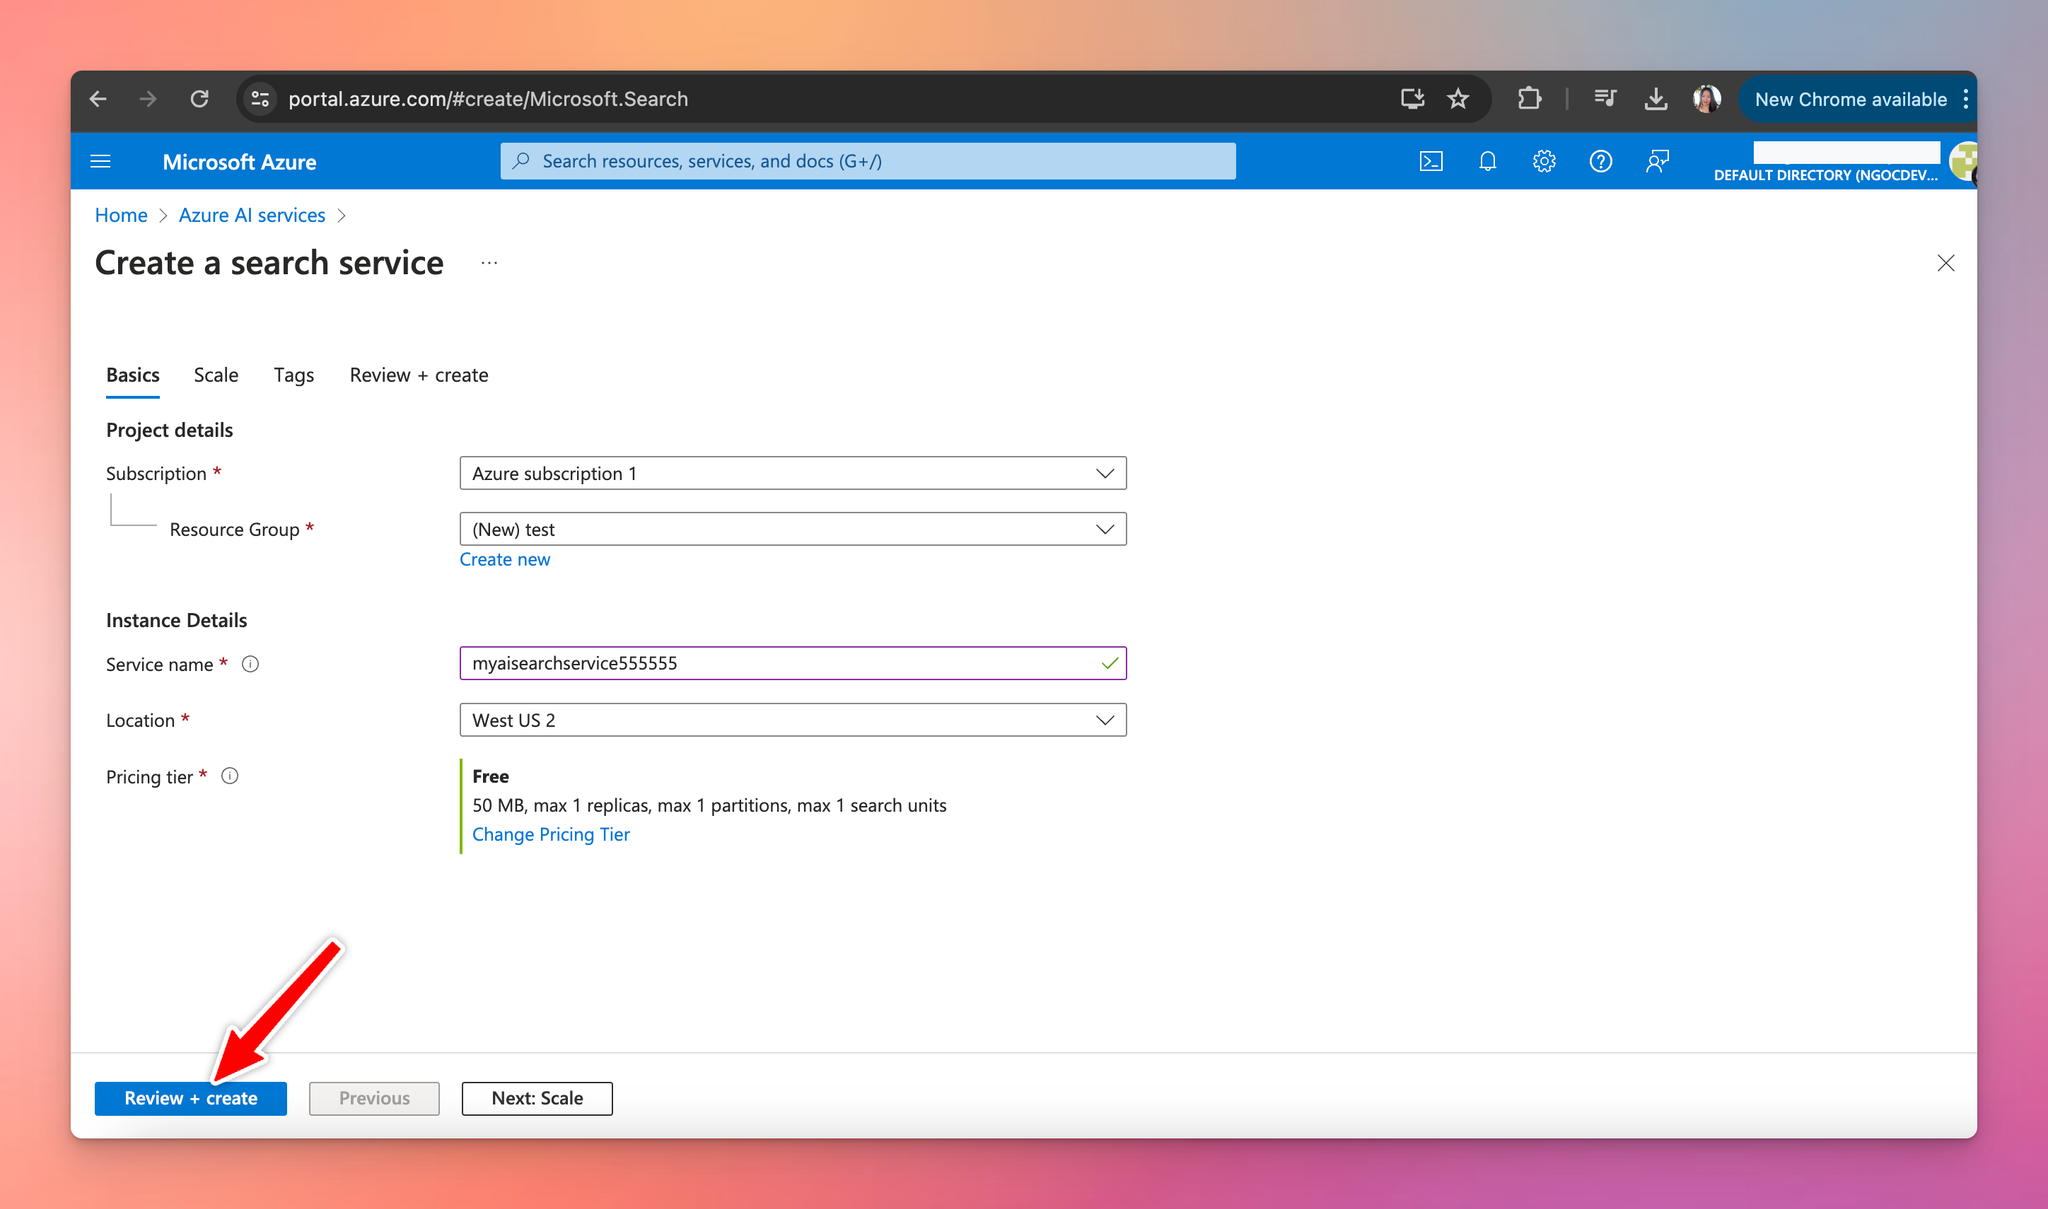
- Click "Review + create" and then confirm by clicking "Create" to create your AI Search Service.
Step 2: Create a storage account
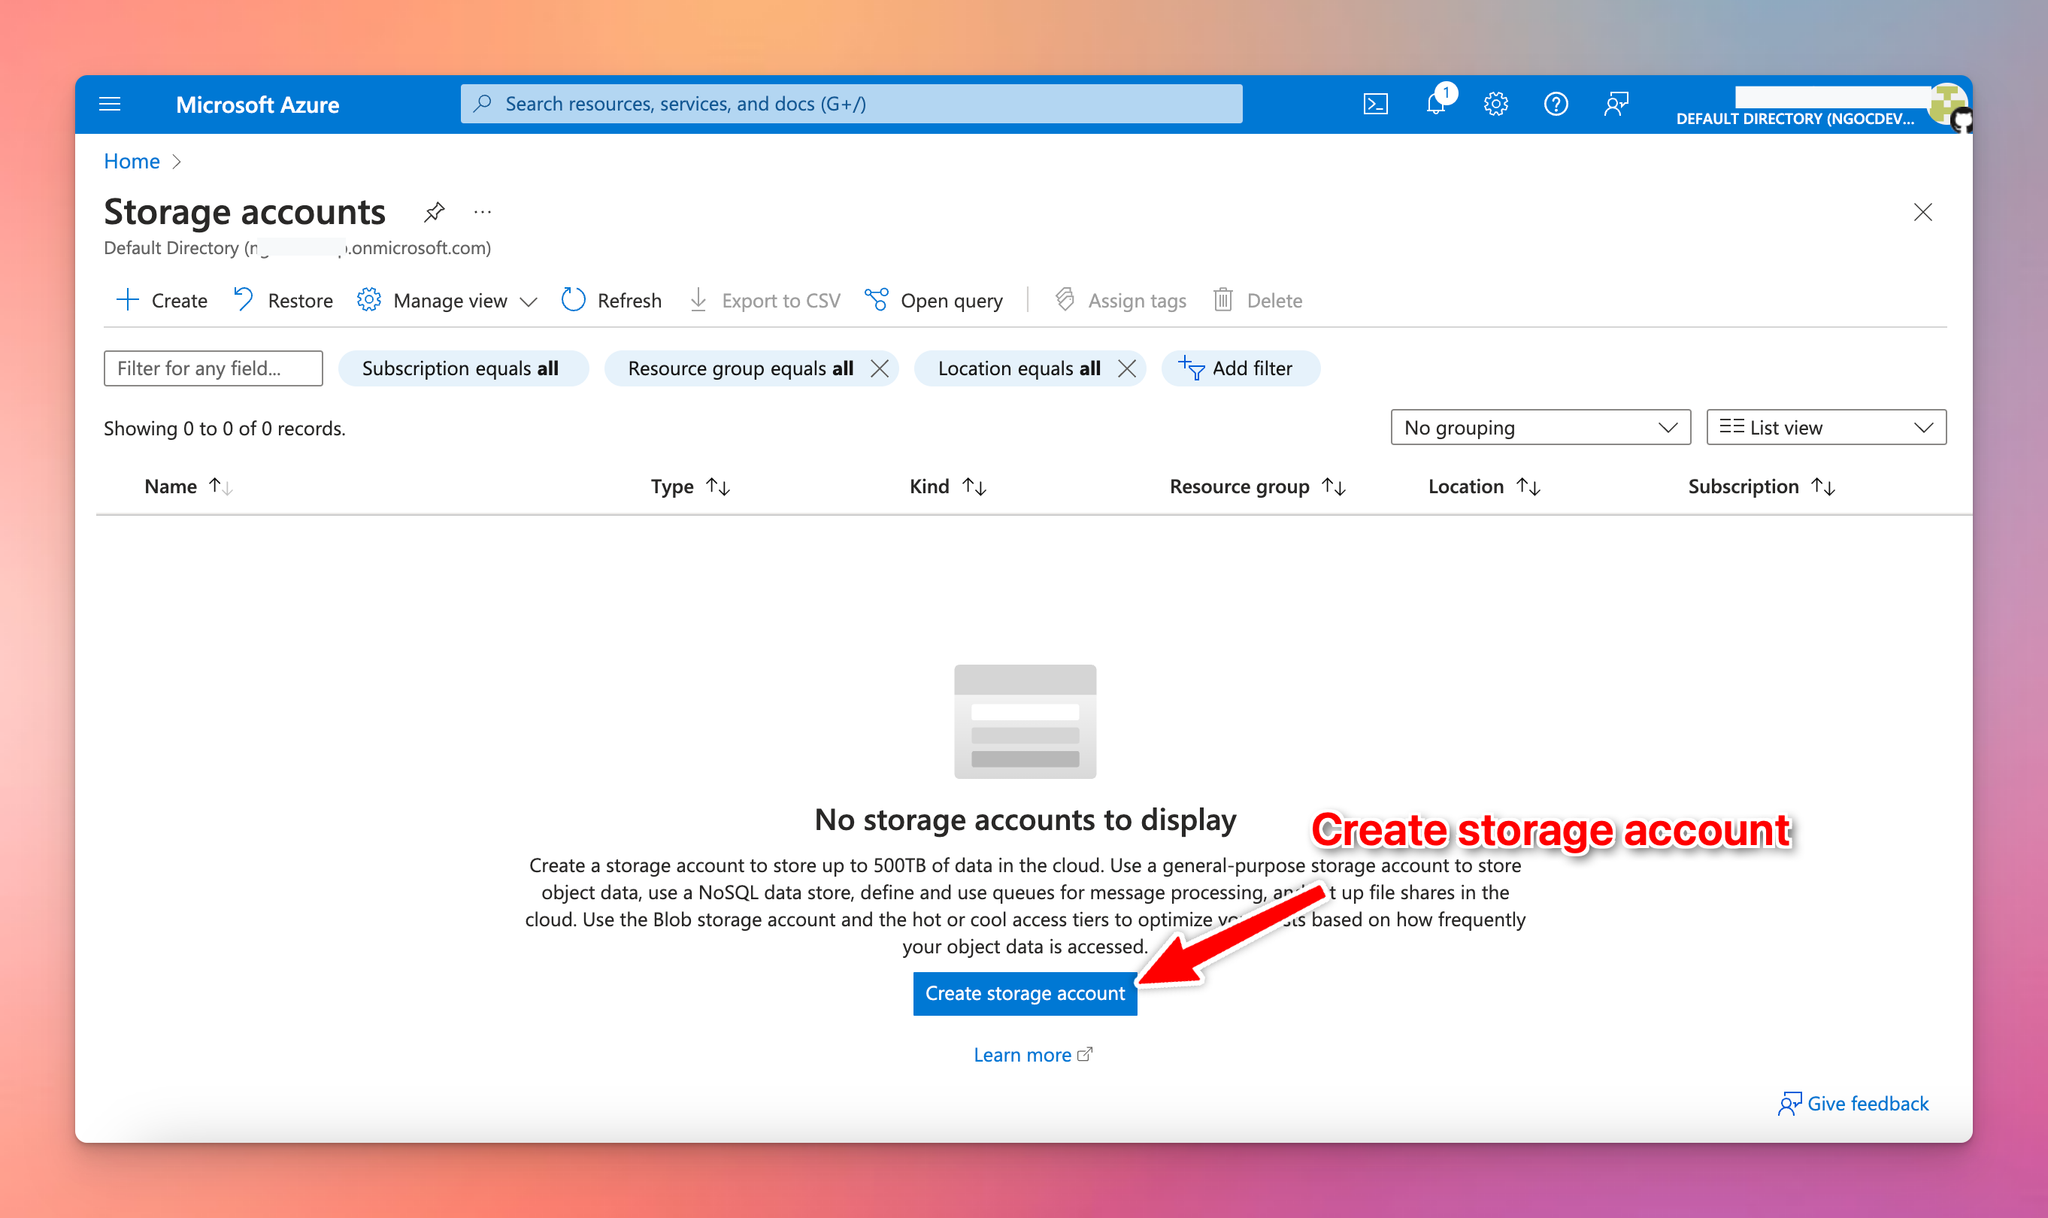
- Use the search bar at the top to find "Storage accounts".
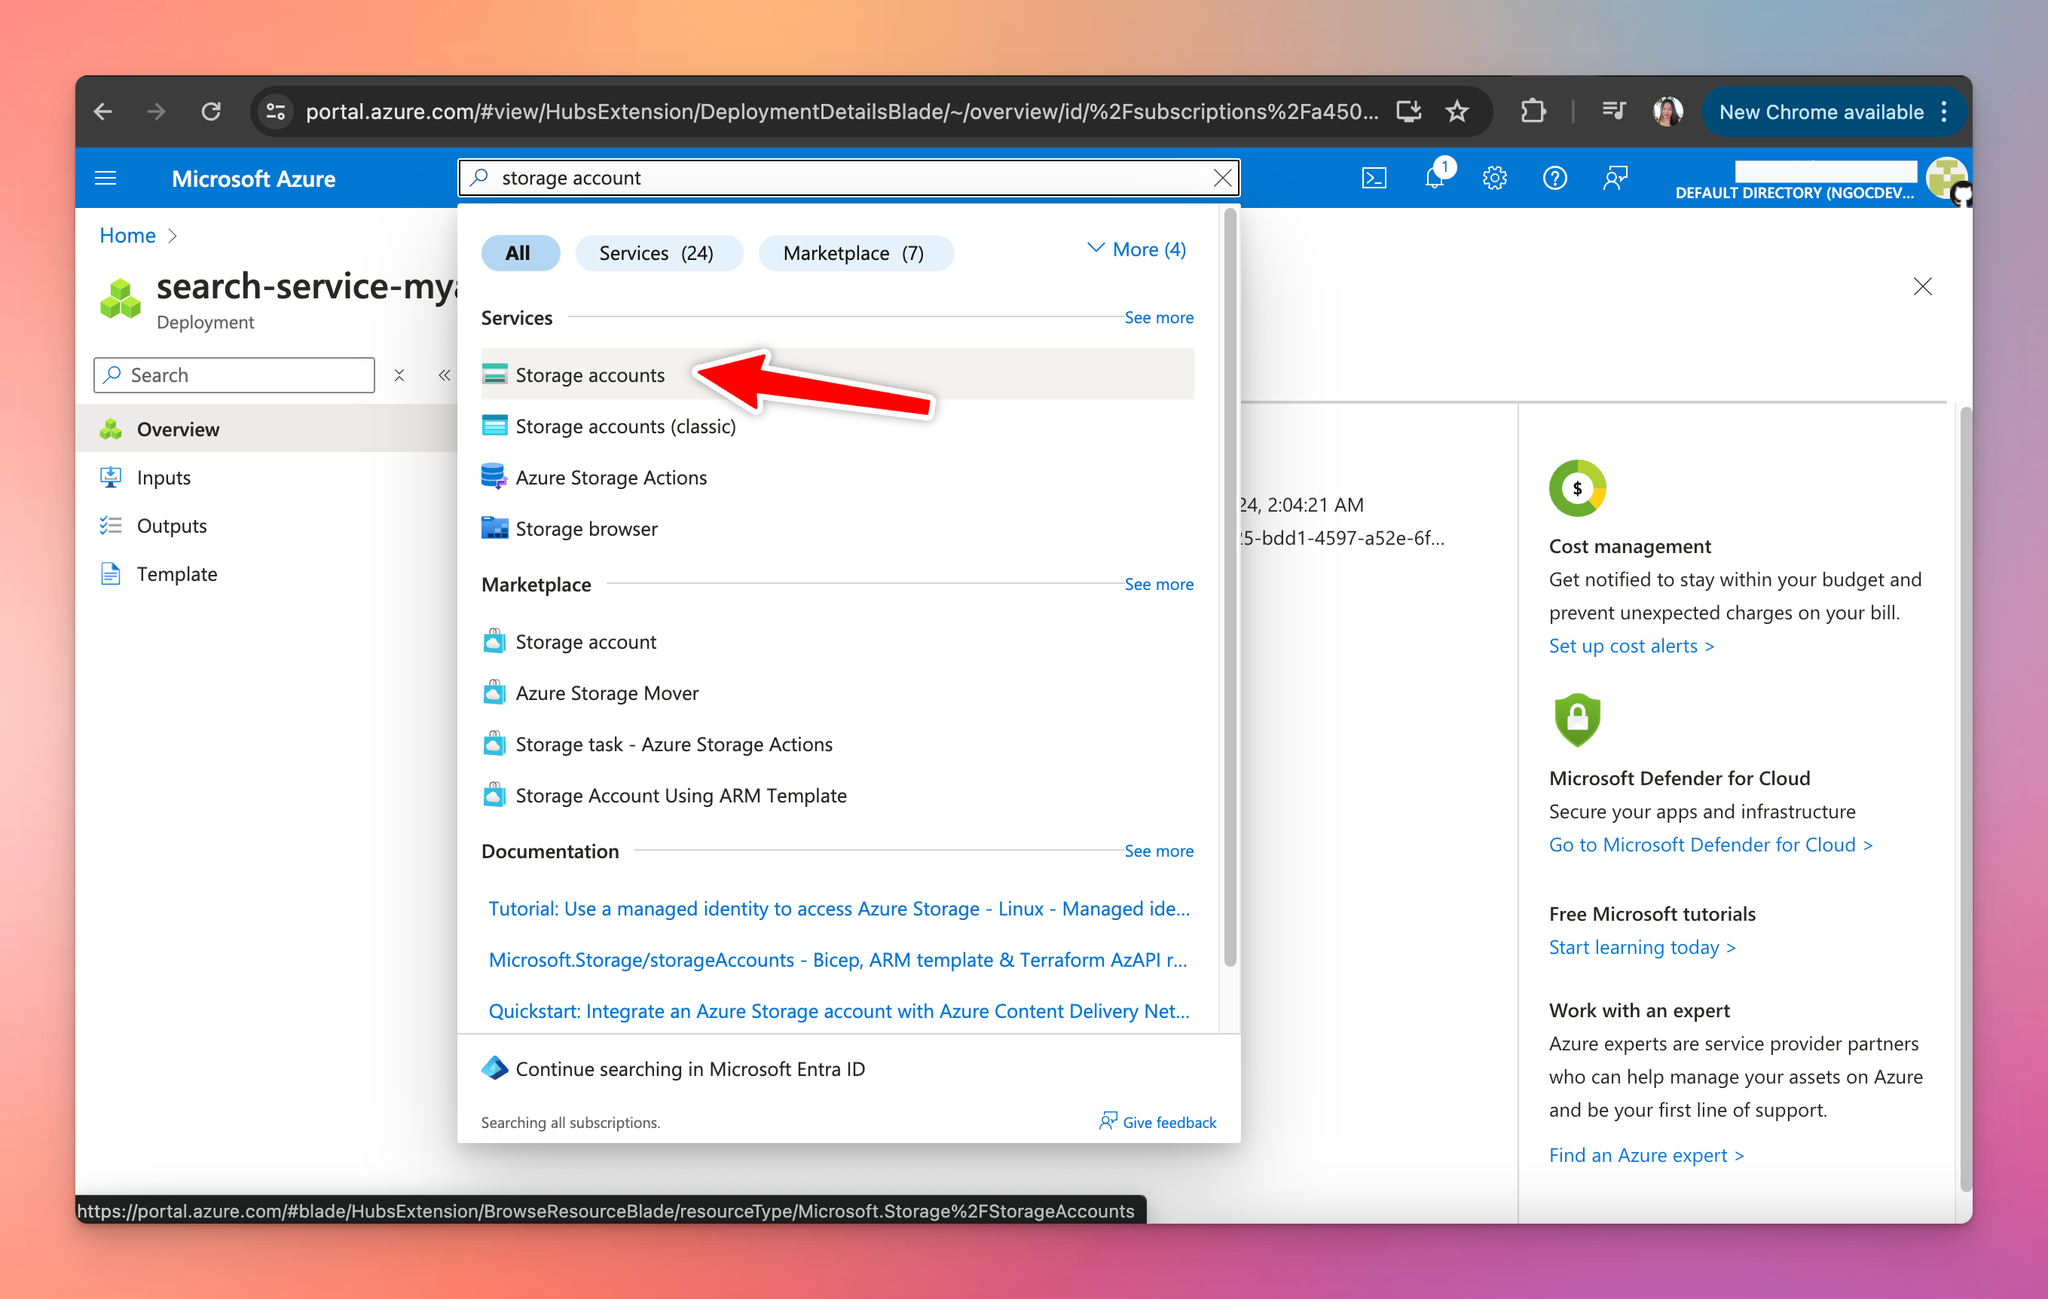
- Click on "Create a storage account".
- Fill in the necessary details to create your Storage account as follows:
- Subscription: use the same subscription as your AI Search service
- Resource group: use the same resource group
- Storage account name: enter a unique name.
- Region: select the same region as your AI Search service
- Performance and Redundancy settings: leave as standard.
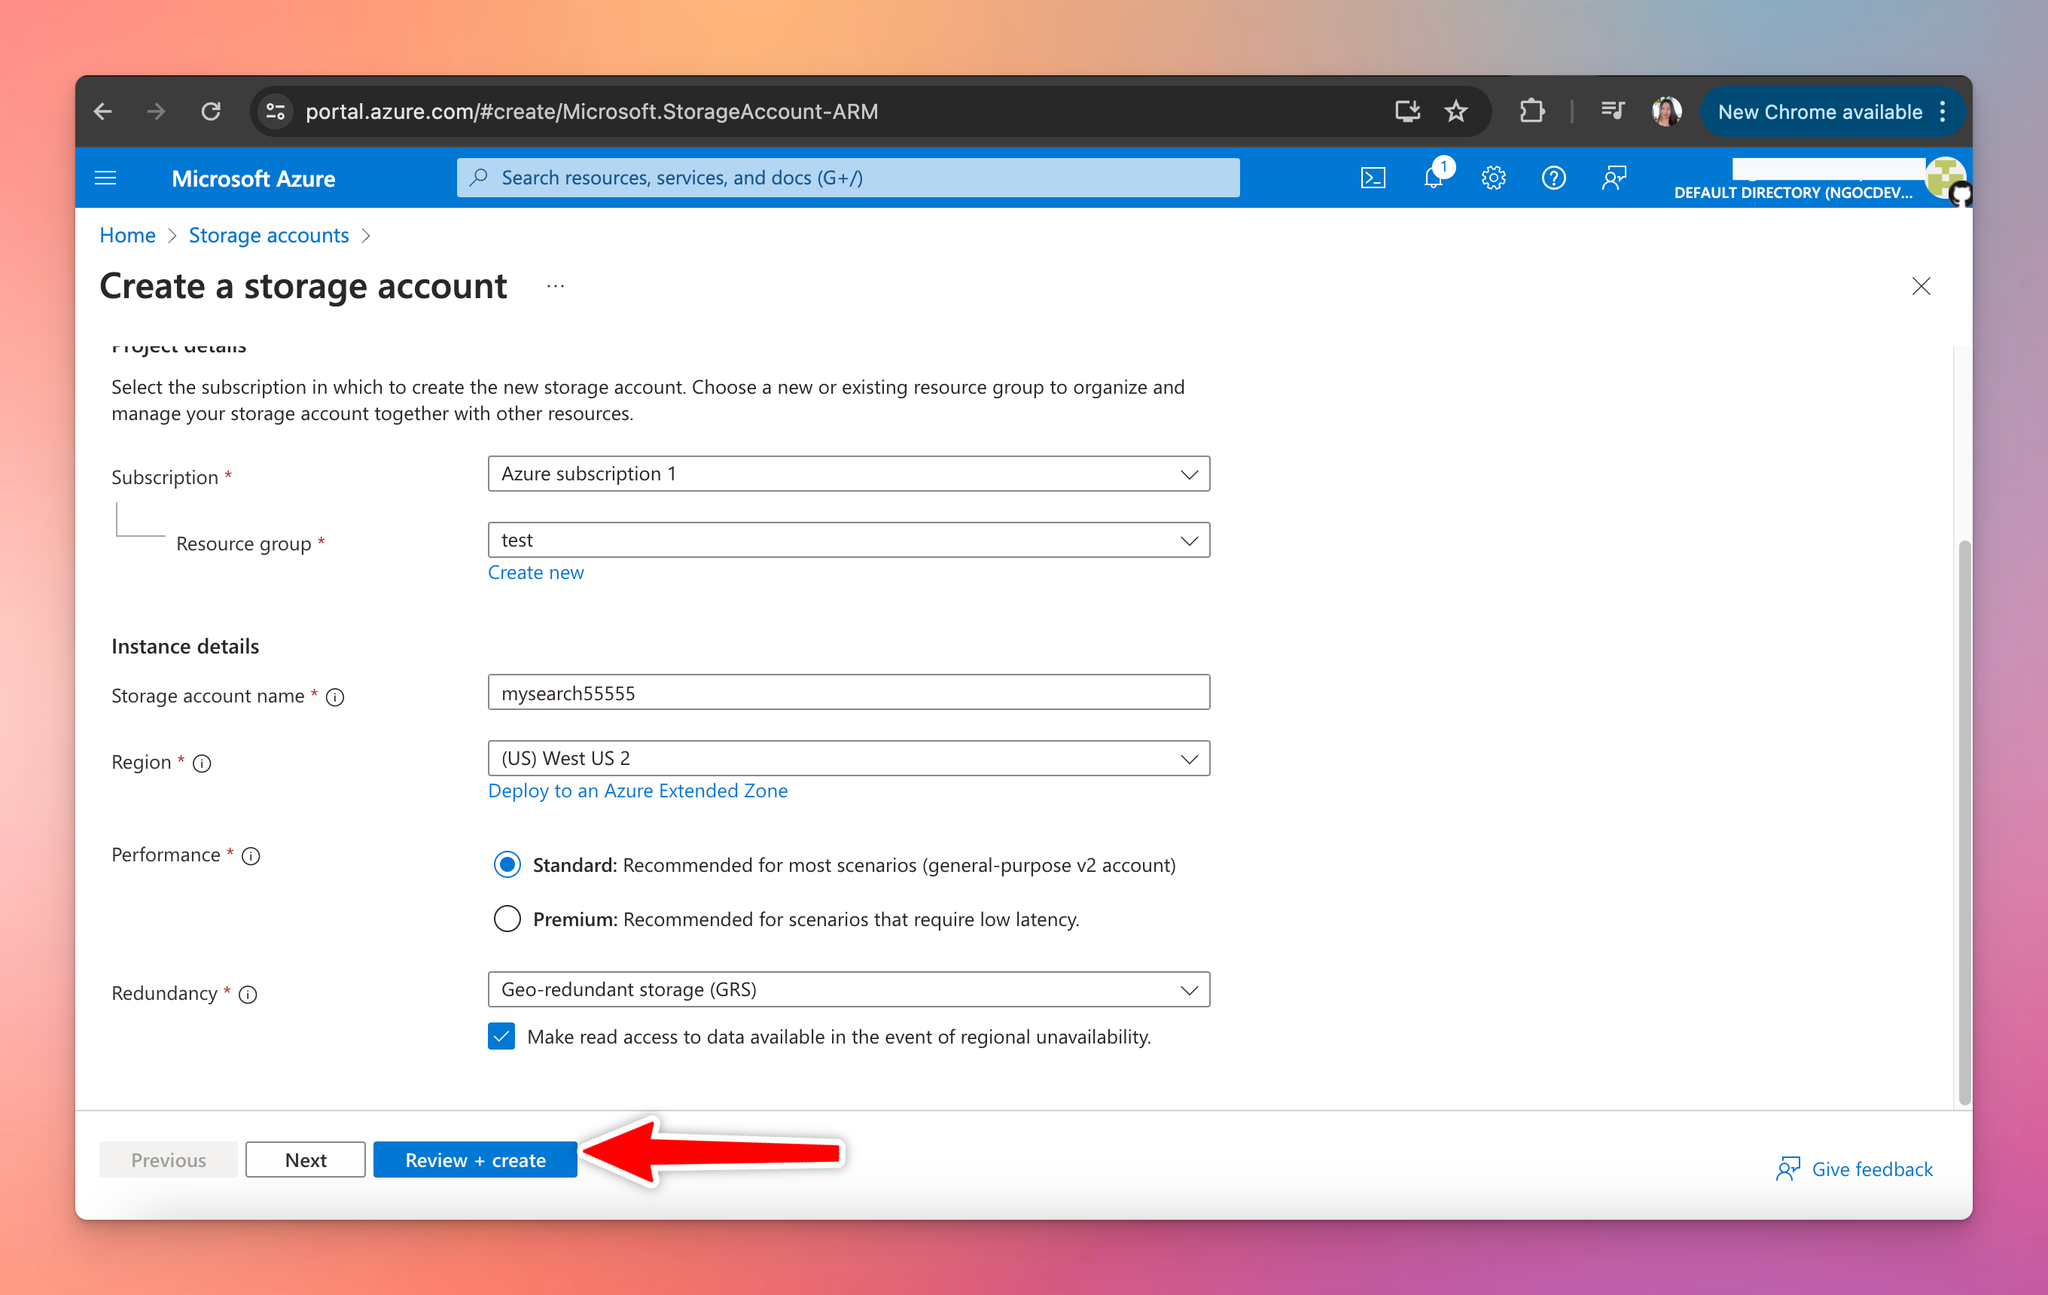
- Click “Review + Create”, then “Create” the storage account and wait a few minutes for the storage creation process.
Step 3: Upload your training data
After your storage account has been created successfully, you can upload your training data as following steps:
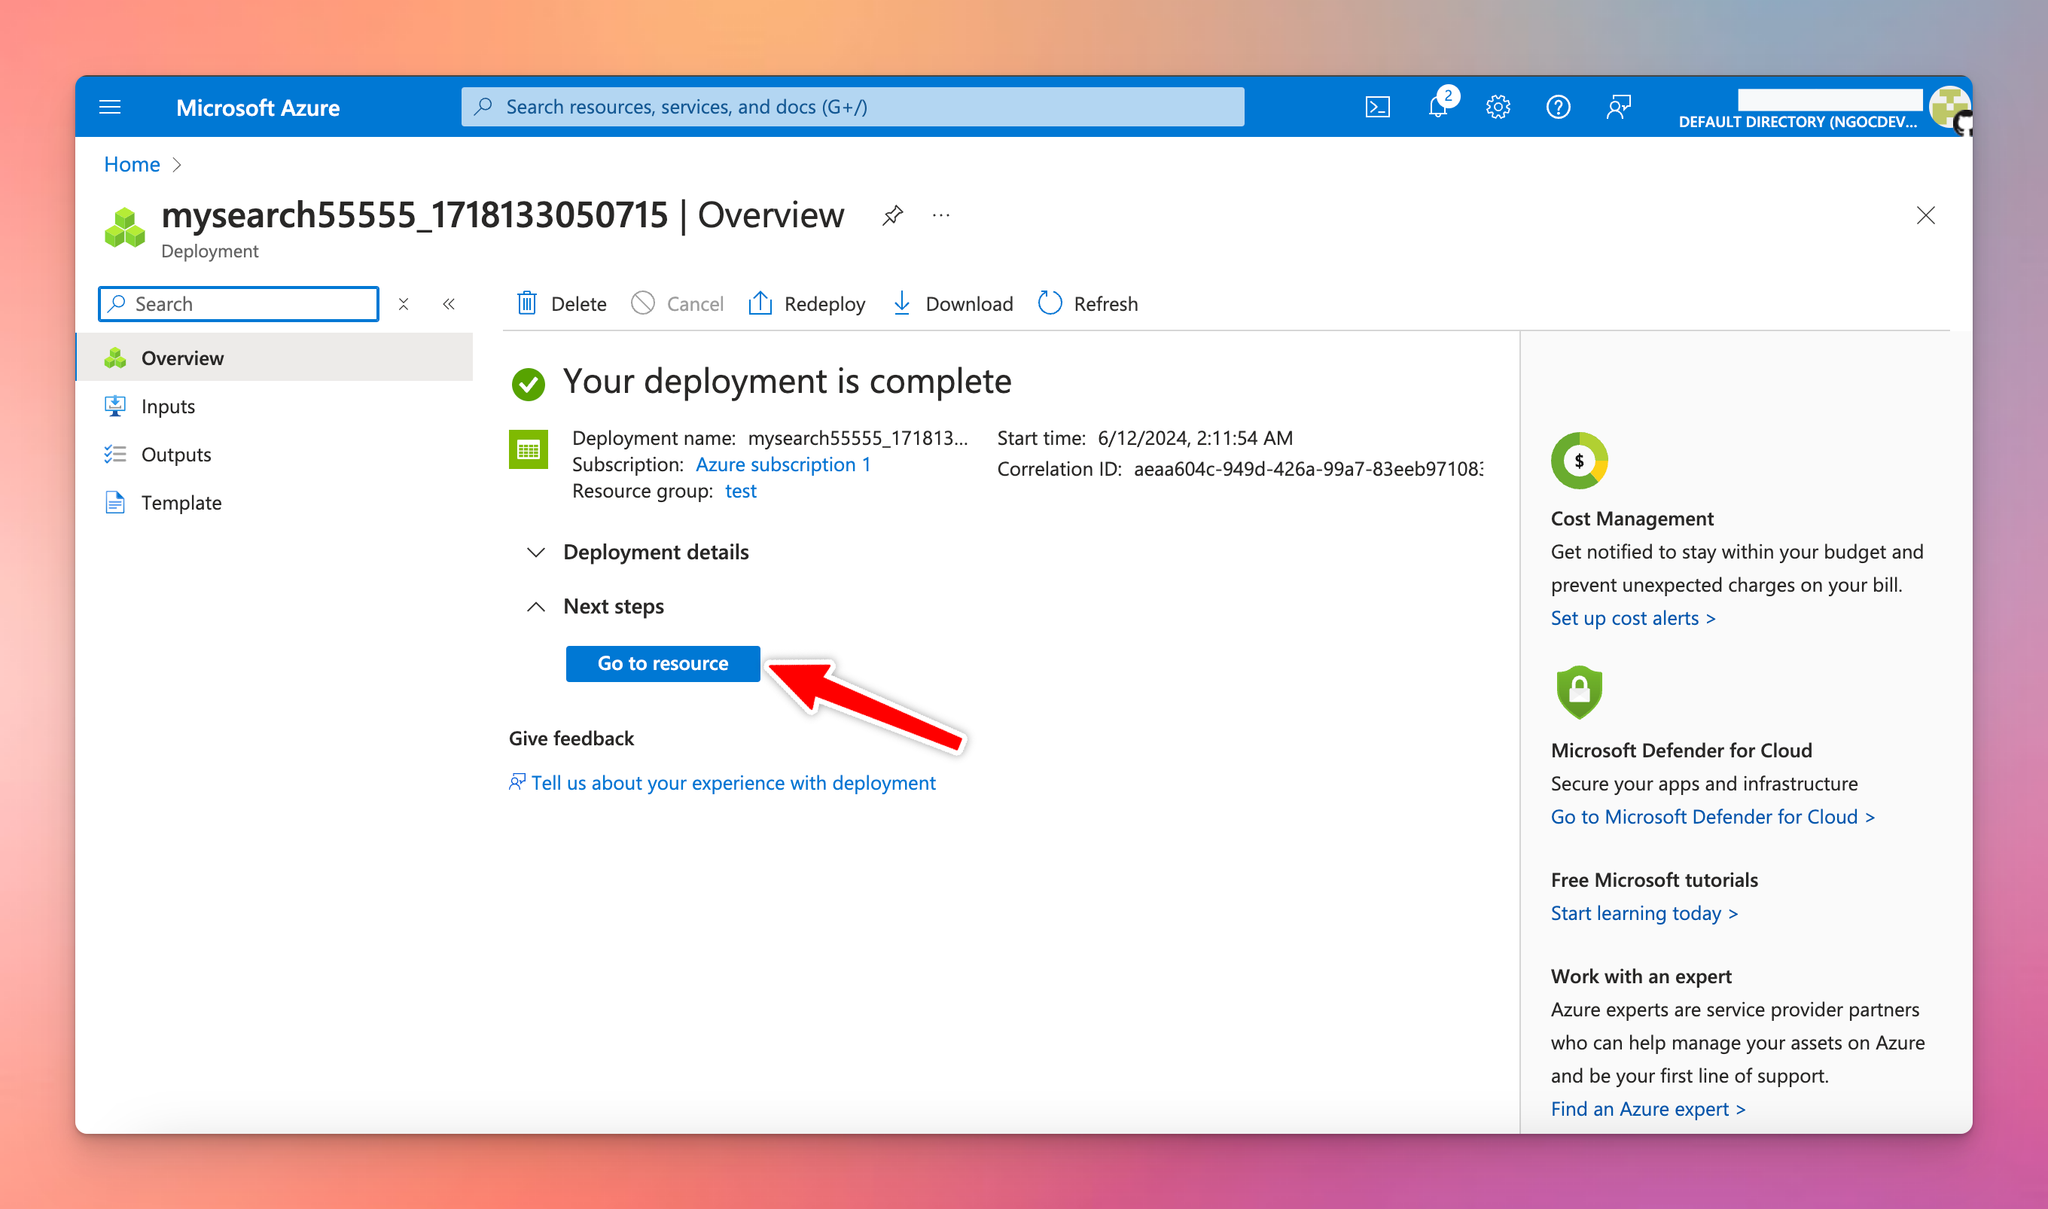
- Click “Go to resource” to go to the storage account you just created.
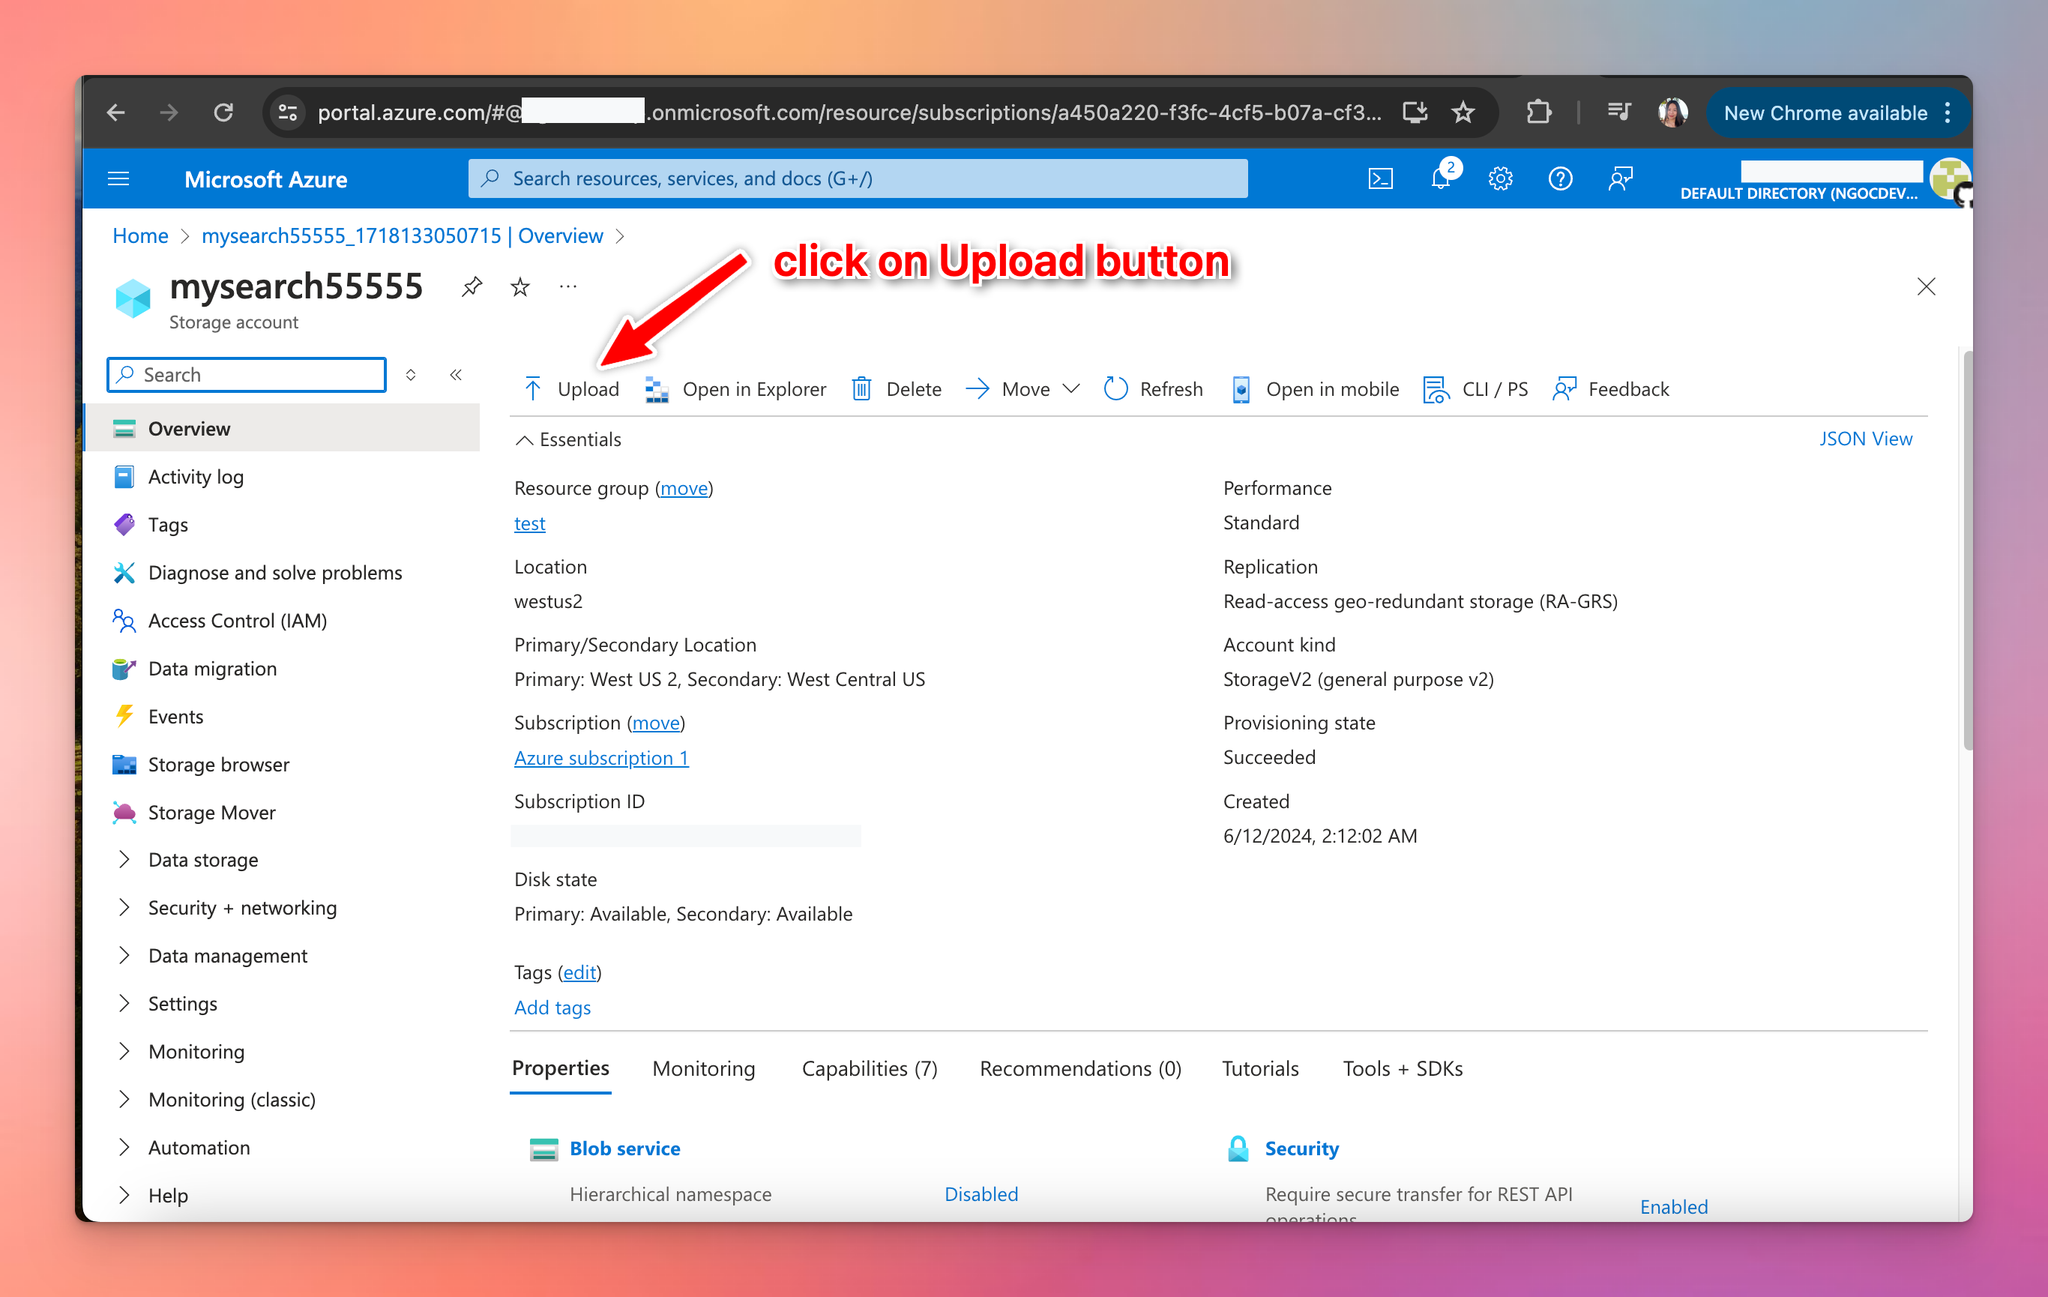
- Click on the "Upload" button.
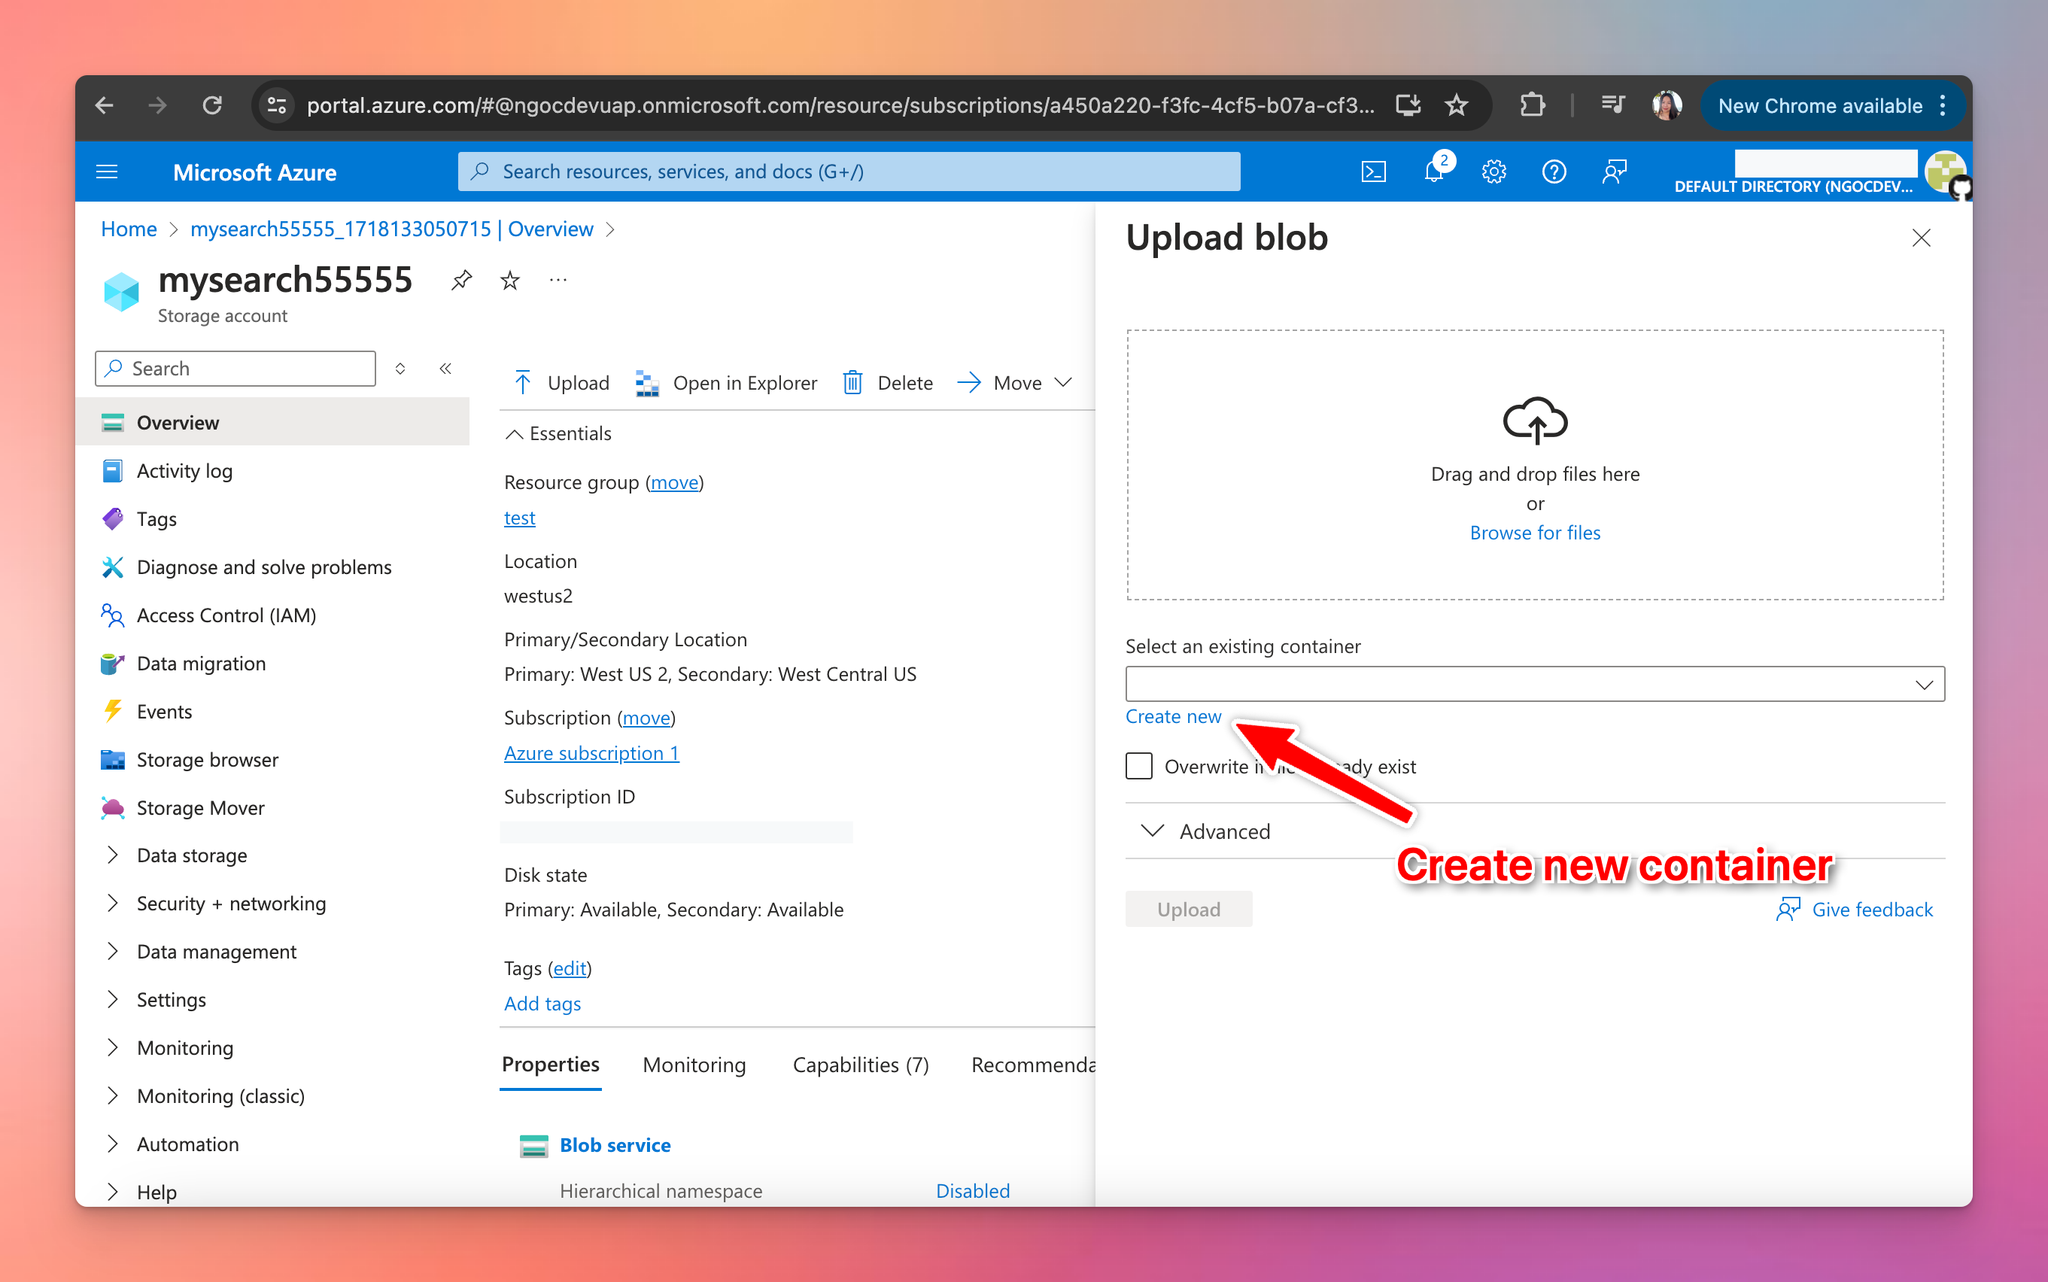
- Create a container by entering a name you want and hit "Create".
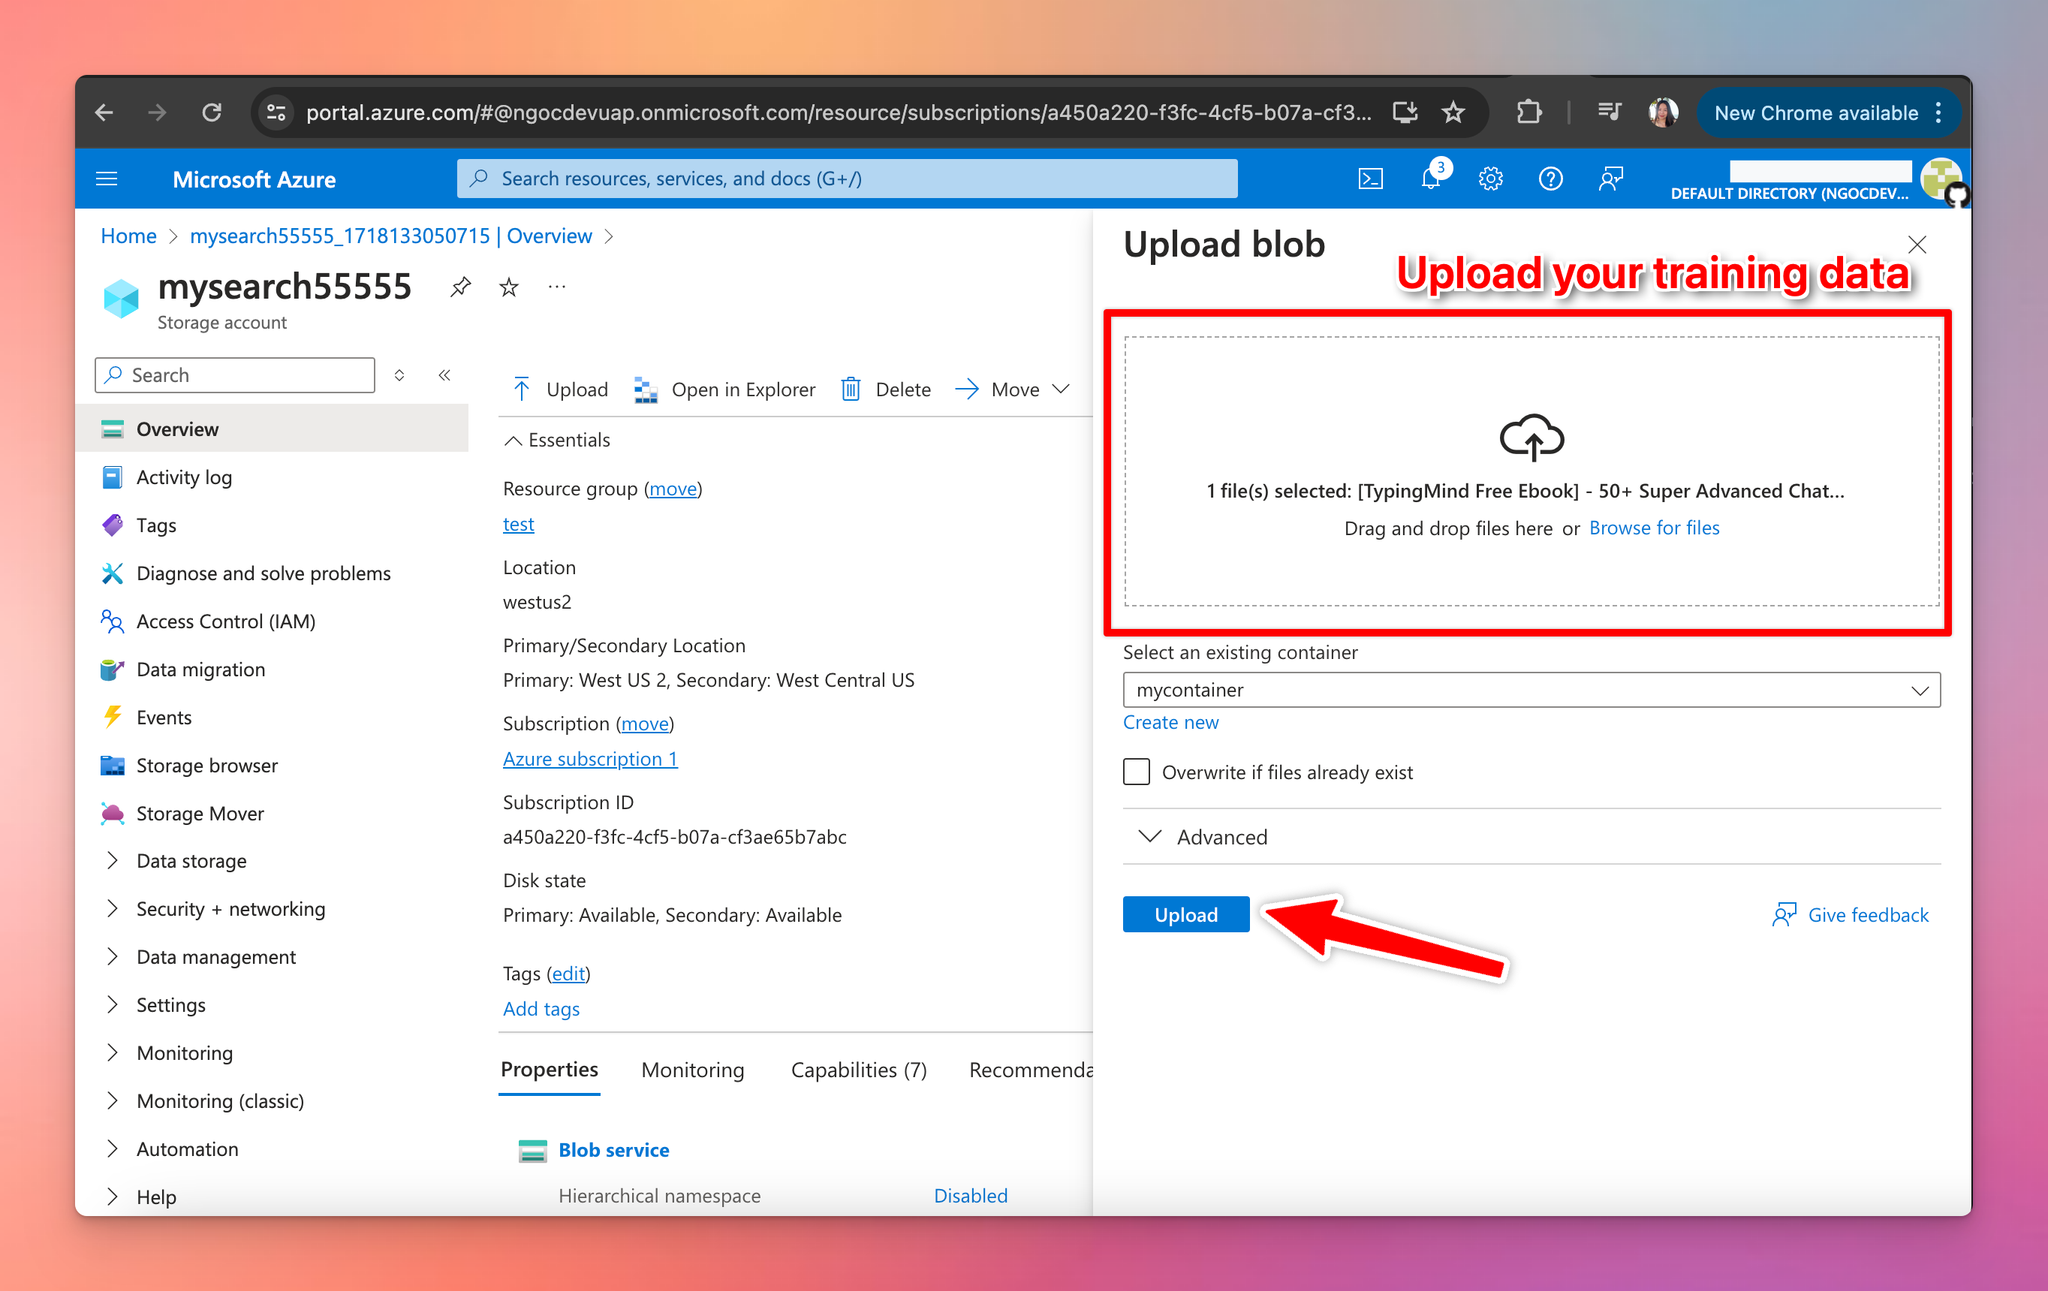
- Upload your training data files to this container and click “Upload”
Step 3: Import data to Azure Blob Storage and create an indexer
- Go back to the Azure AI services dashboard (use the search bar at the top), and select your newly created search service in step 1.
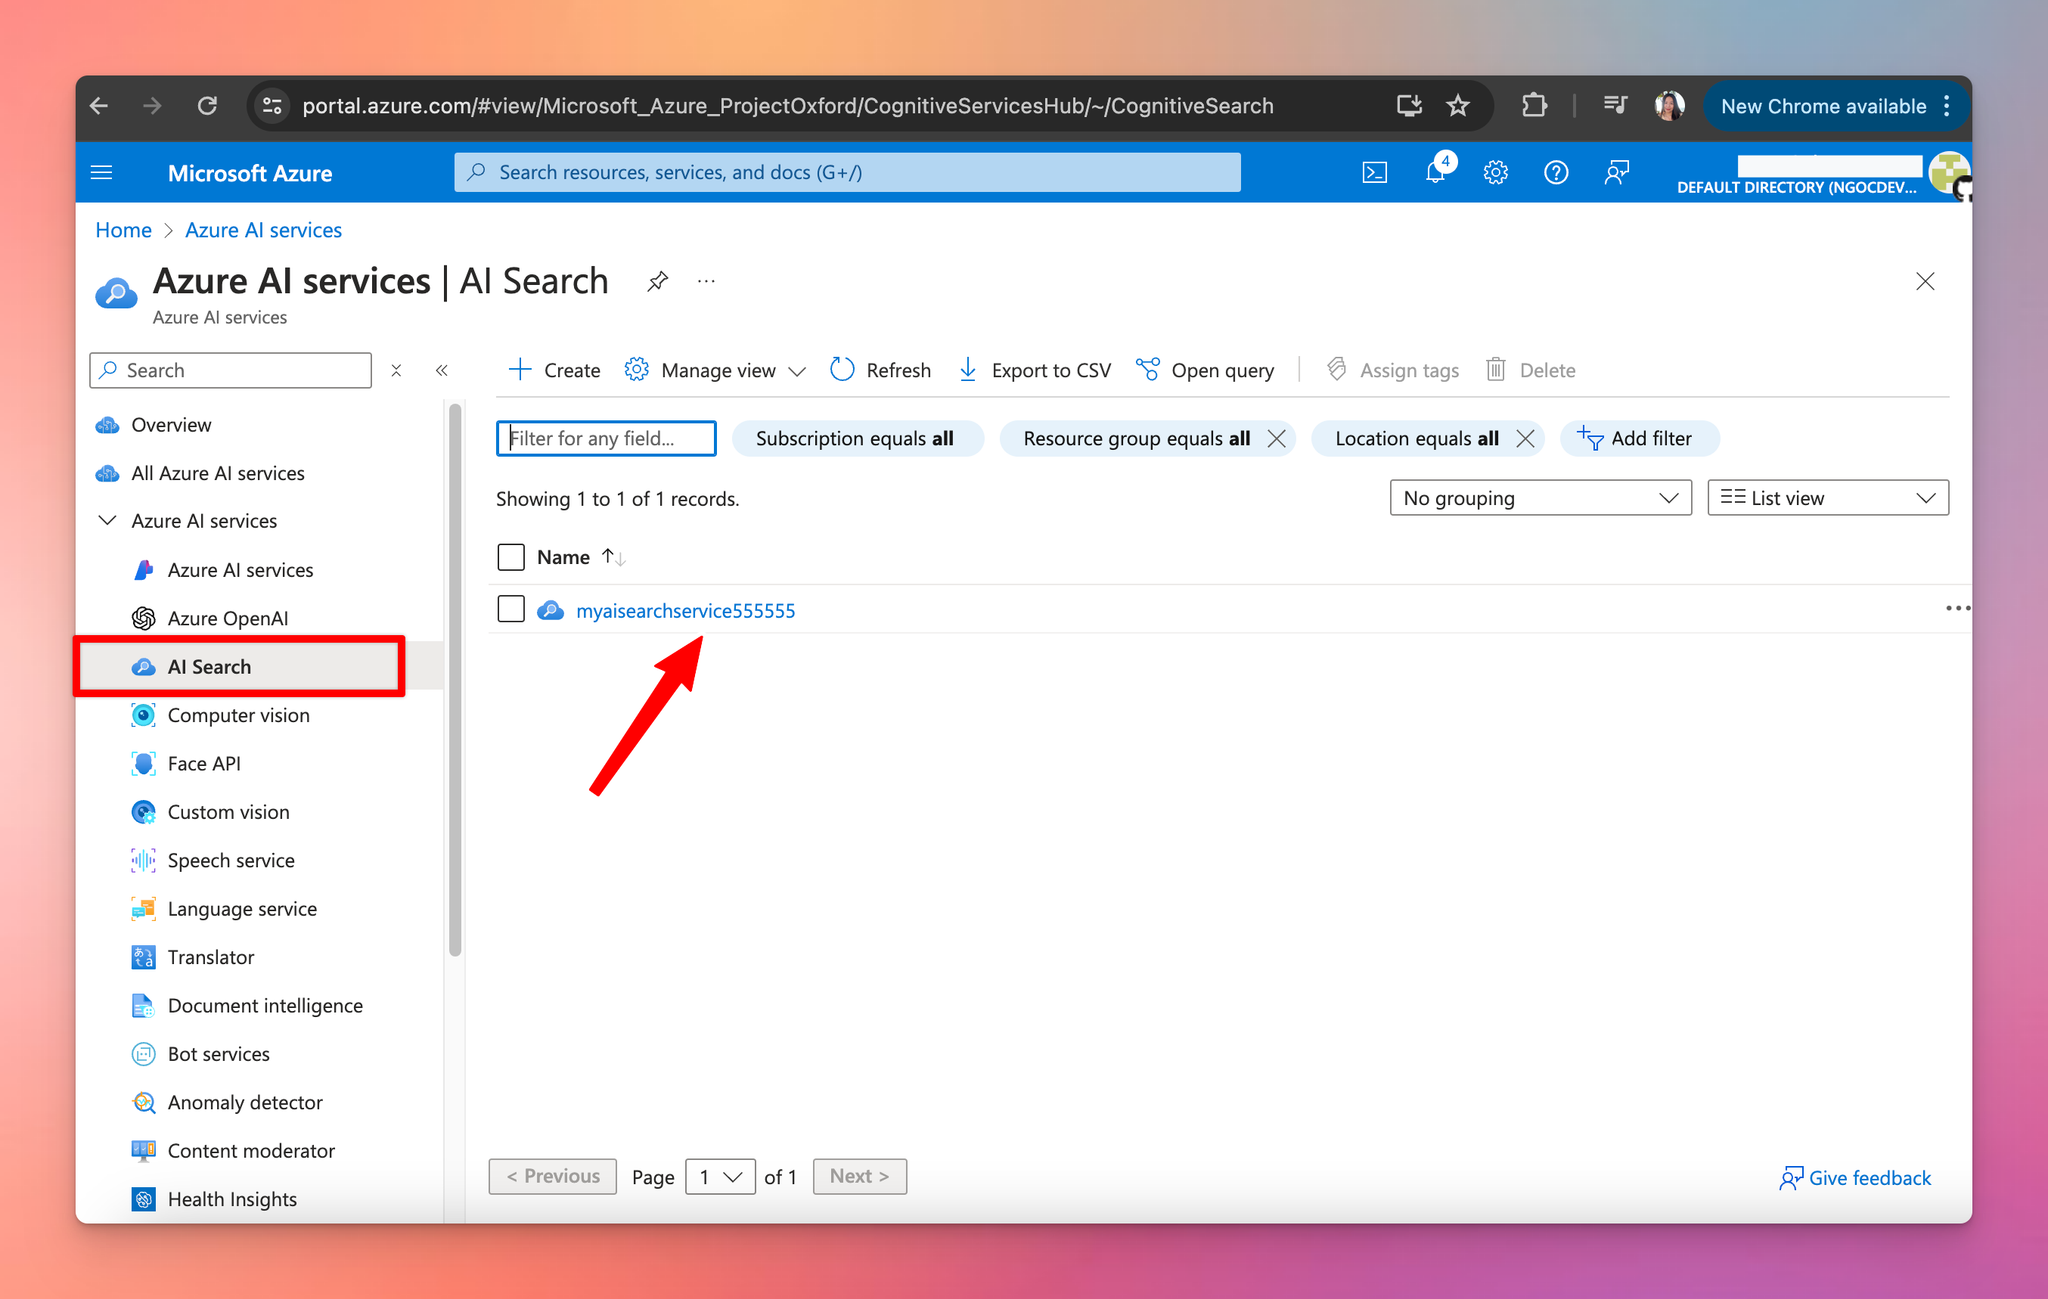
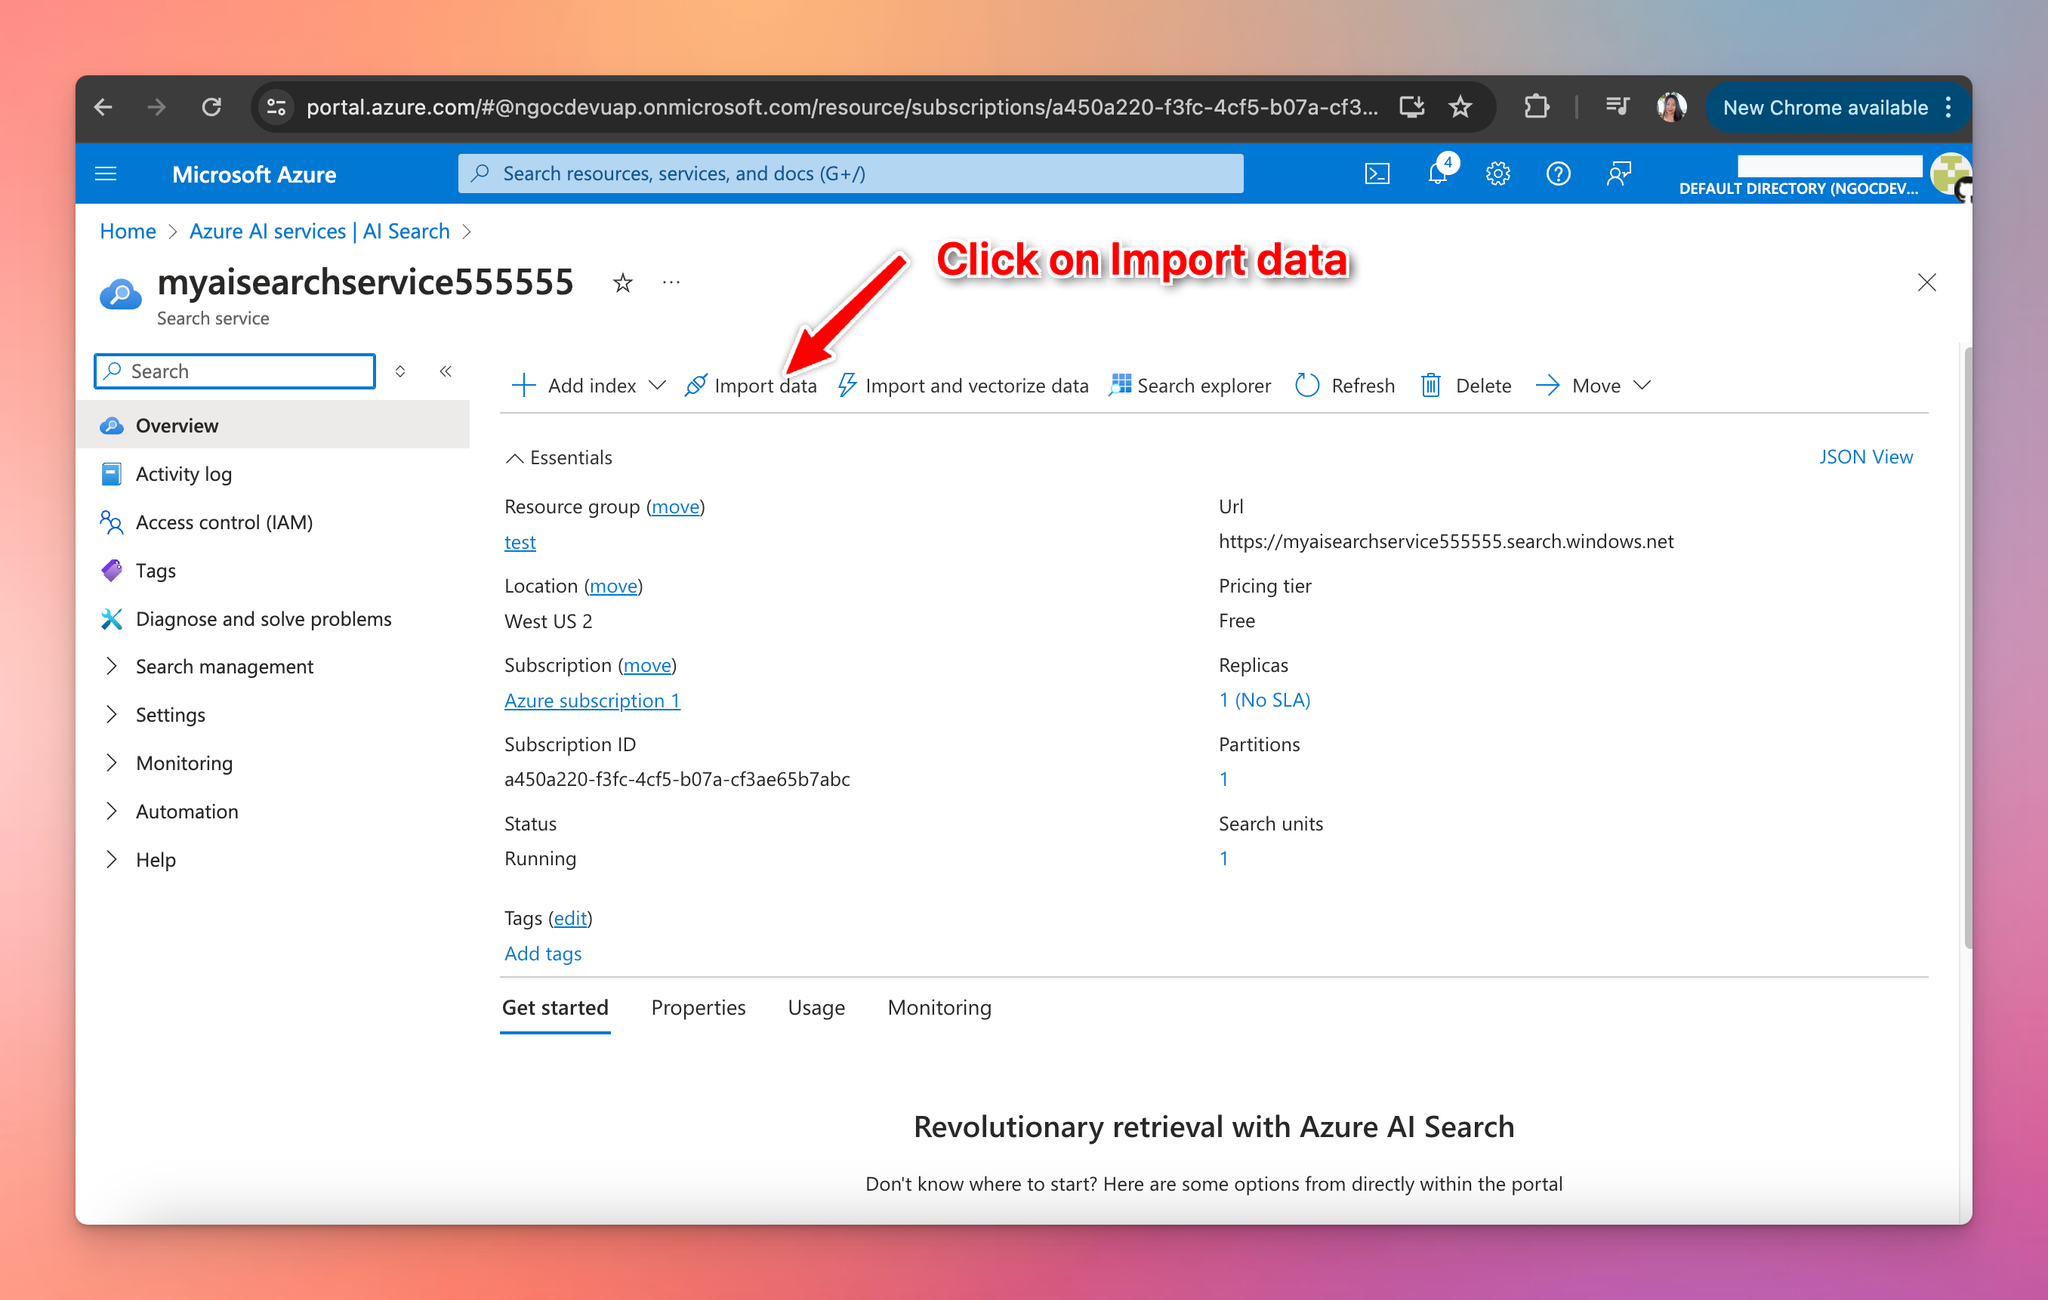
- Click on "Import data".
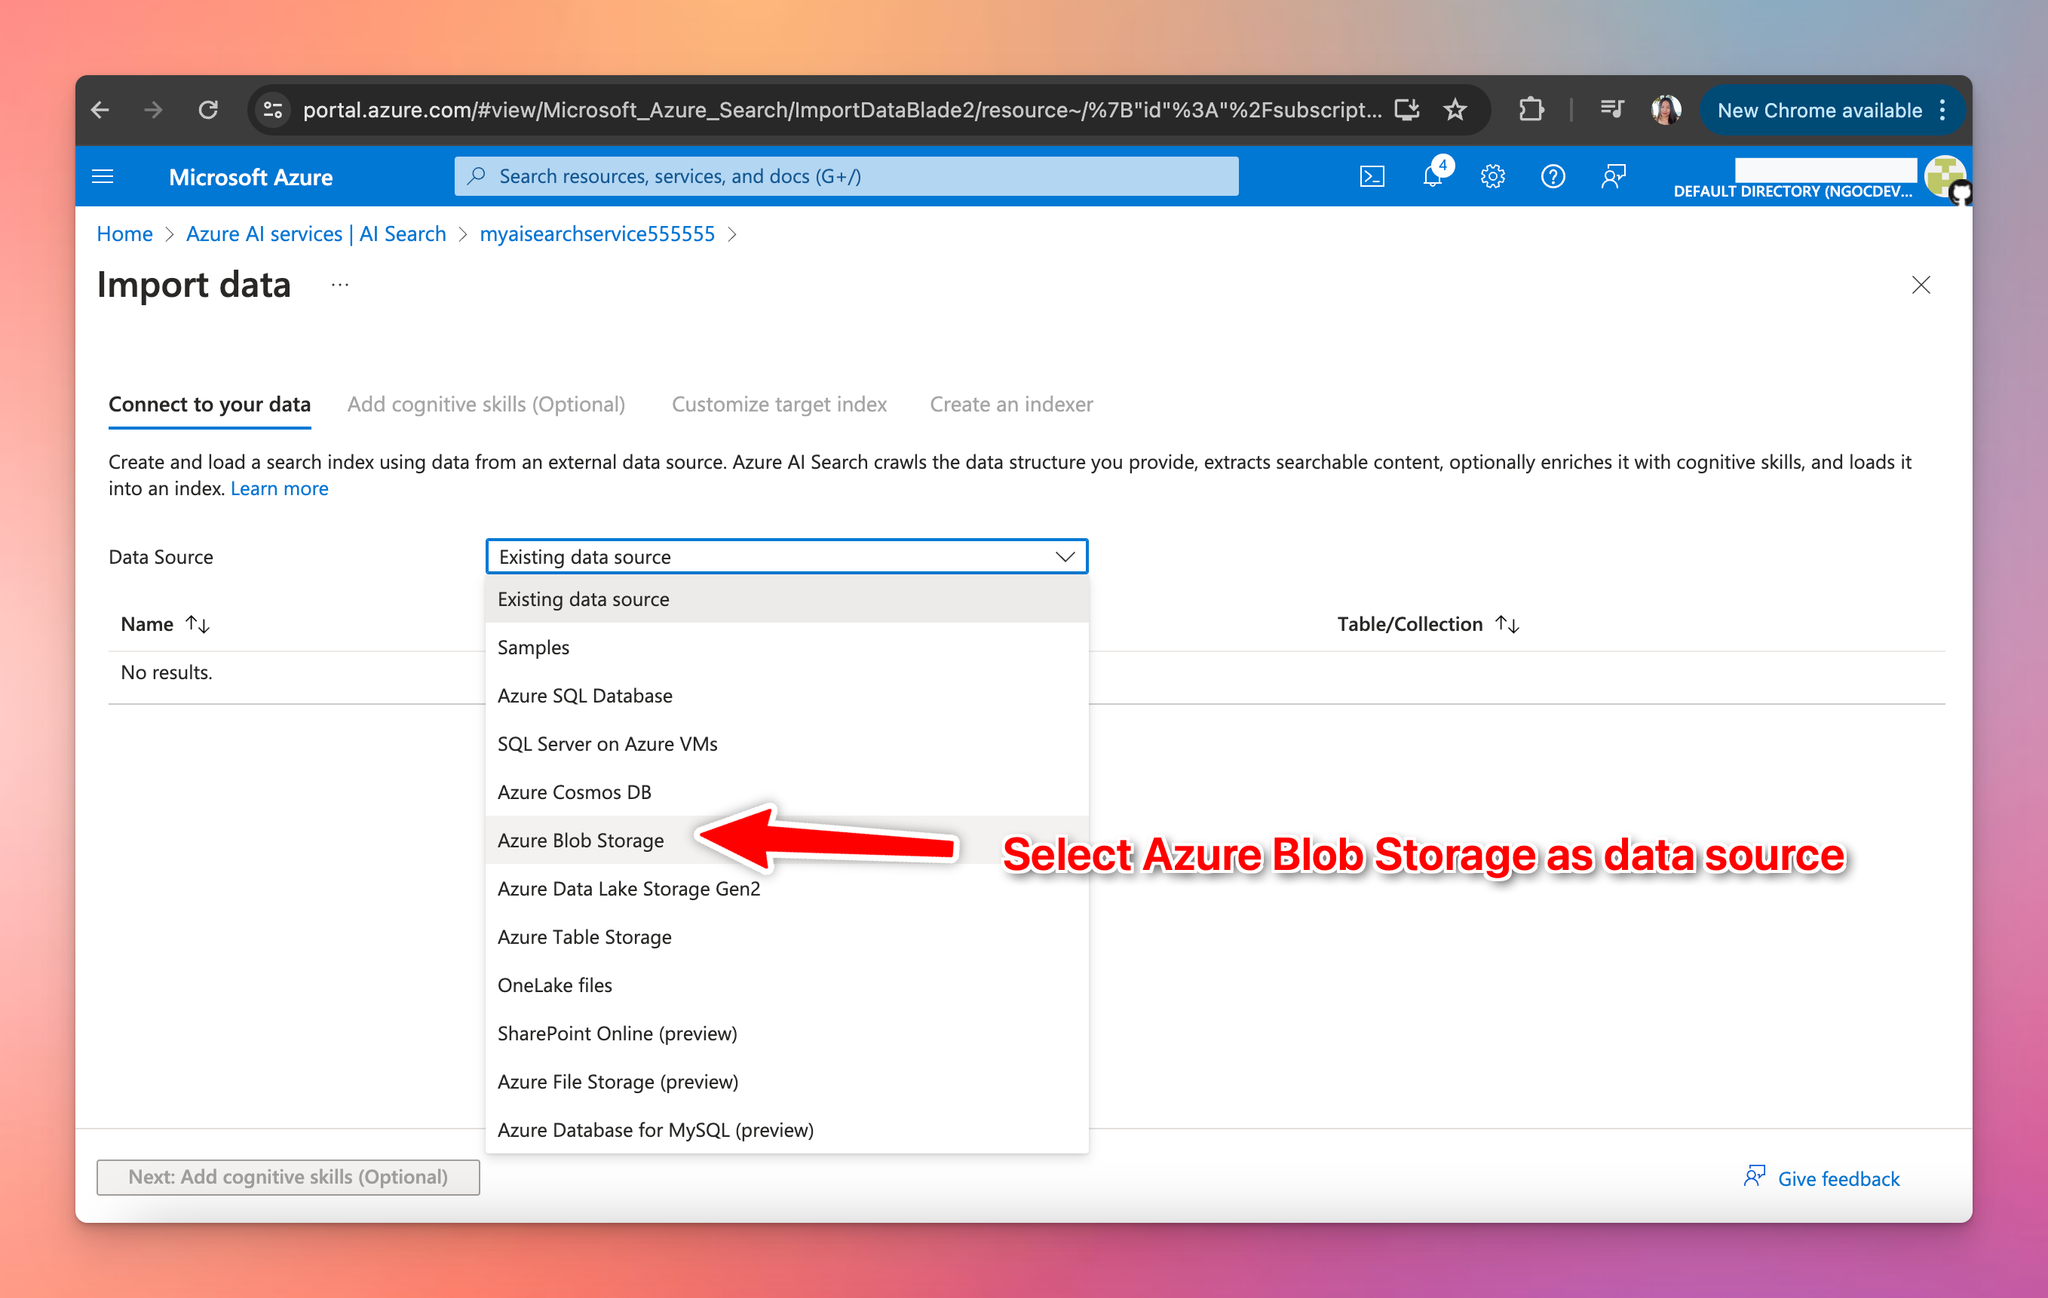
- Choose Azure Blob Storage as a data source
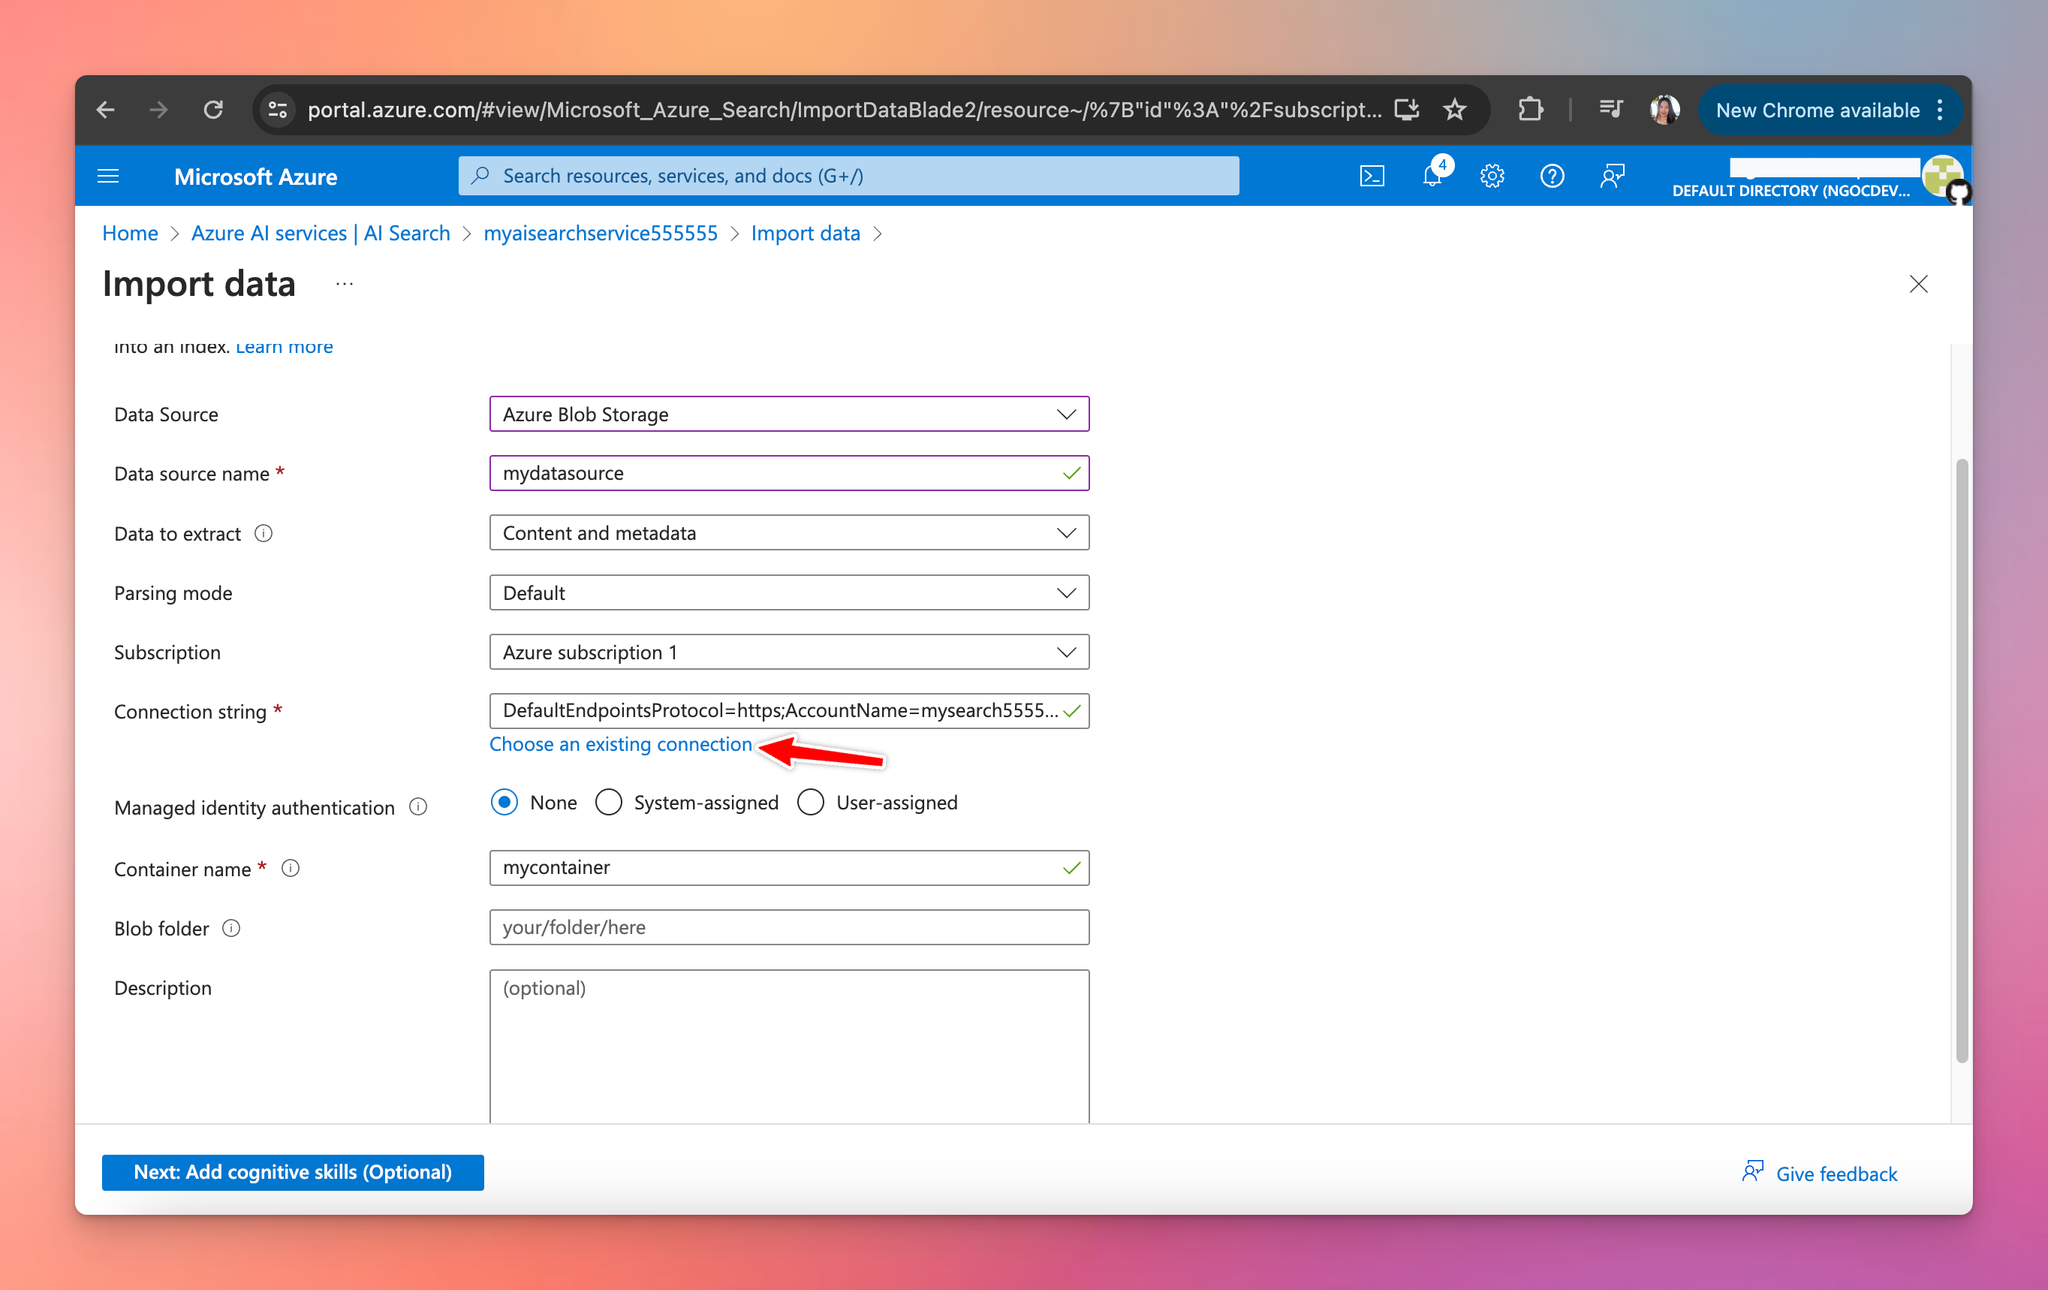
- Configure data source as follows:
- Data source name: provide any name you want
- Data to extract: Content and metadata
- Connection string: click on “Choose an existing connection”, select your storage account, and click on the container name you created in step 2.
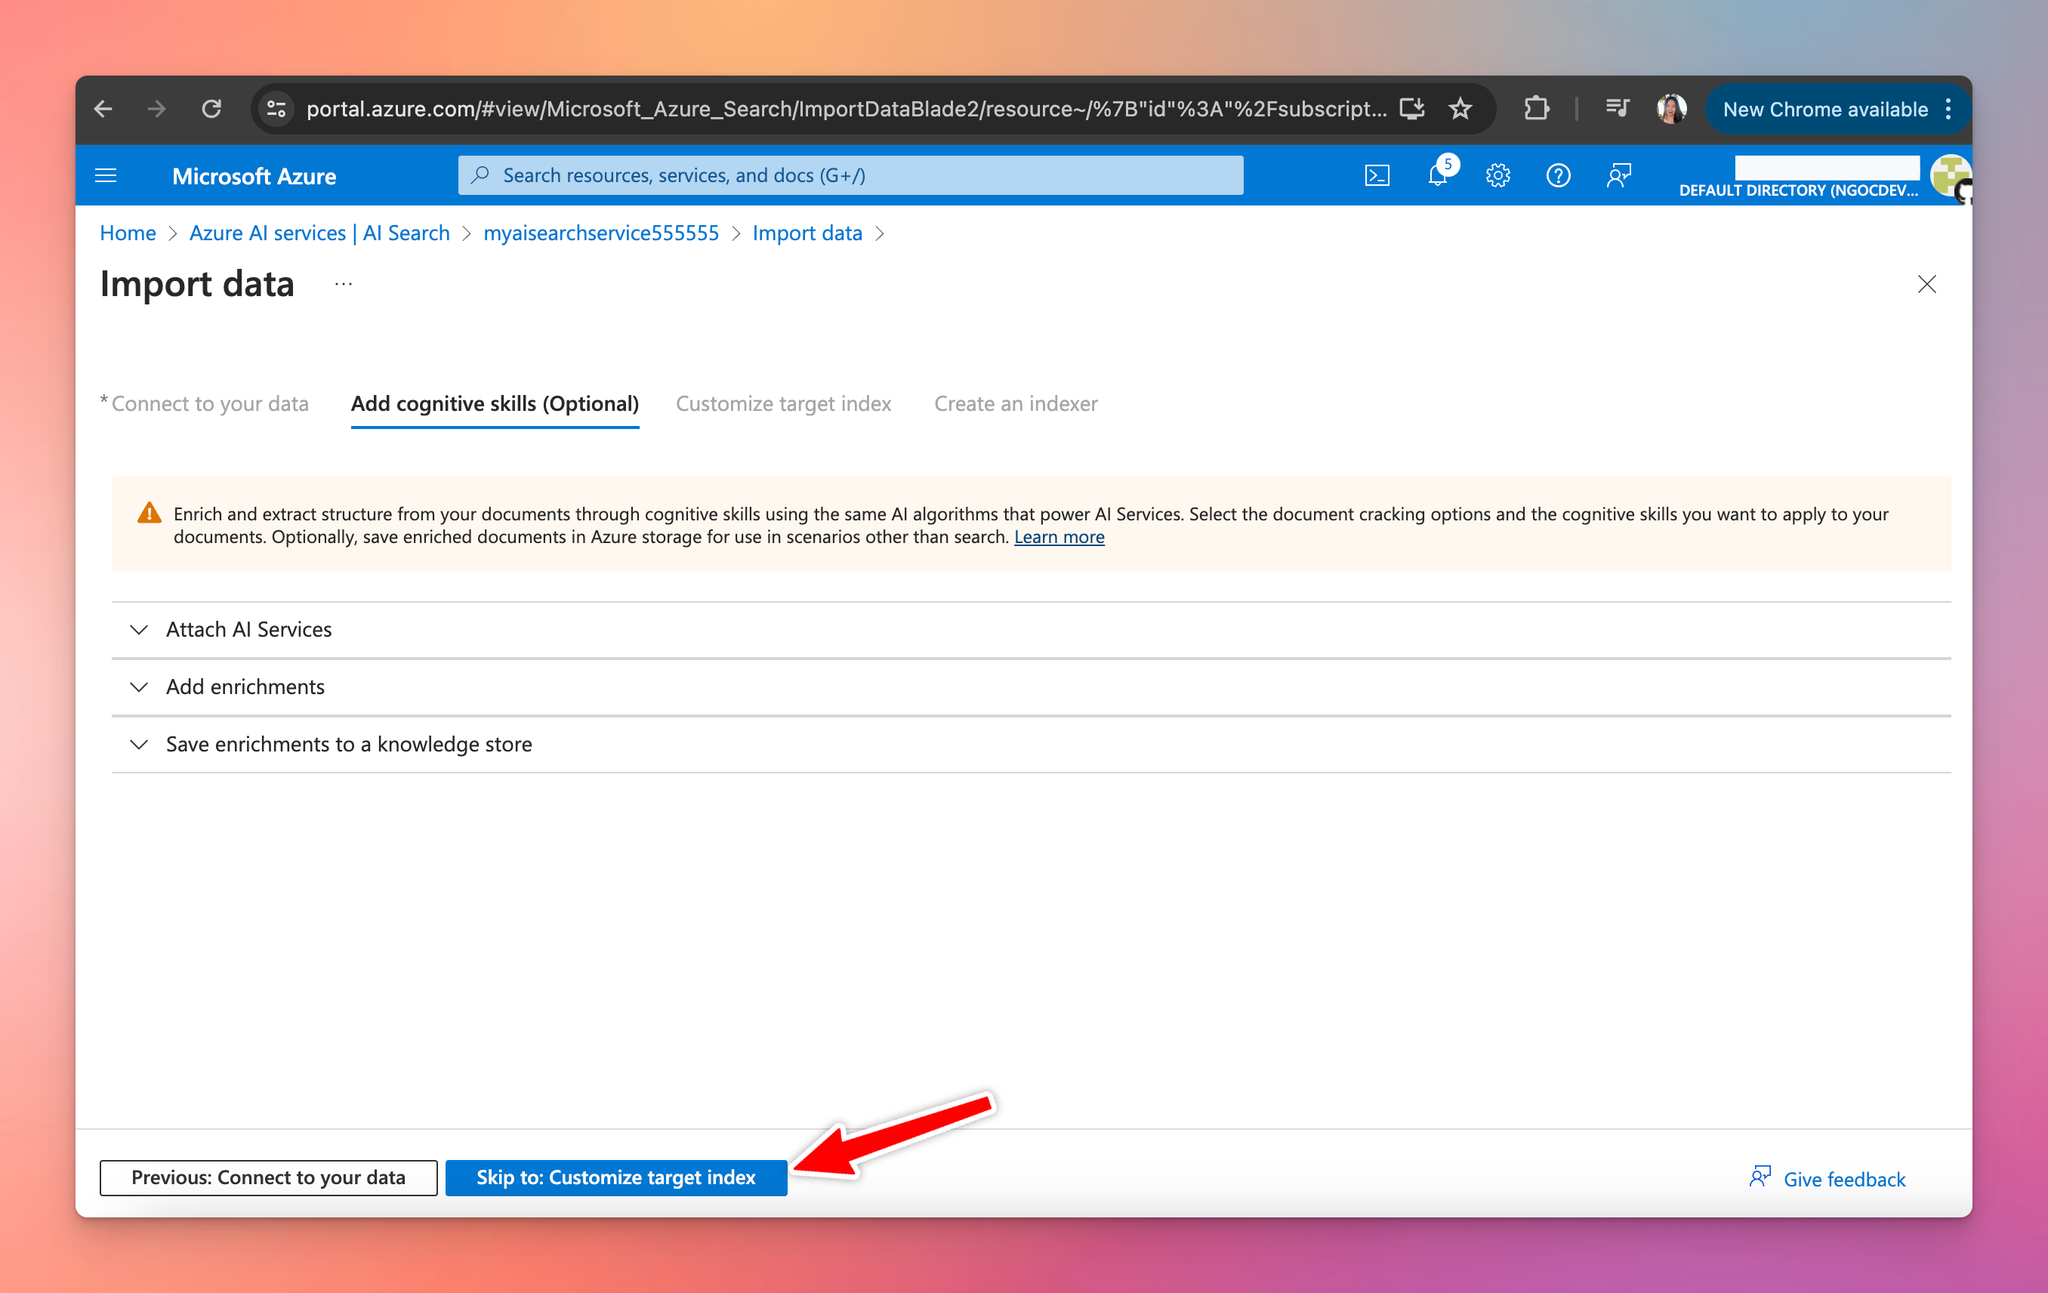
- Skip the Add cognitive skills step by clicking "Next" then click on “Skip to Customize target index”
- In the Customize Target Index tab, ensure you check the "Retrievable" box for metadata_content_type and metadata_creation_date.
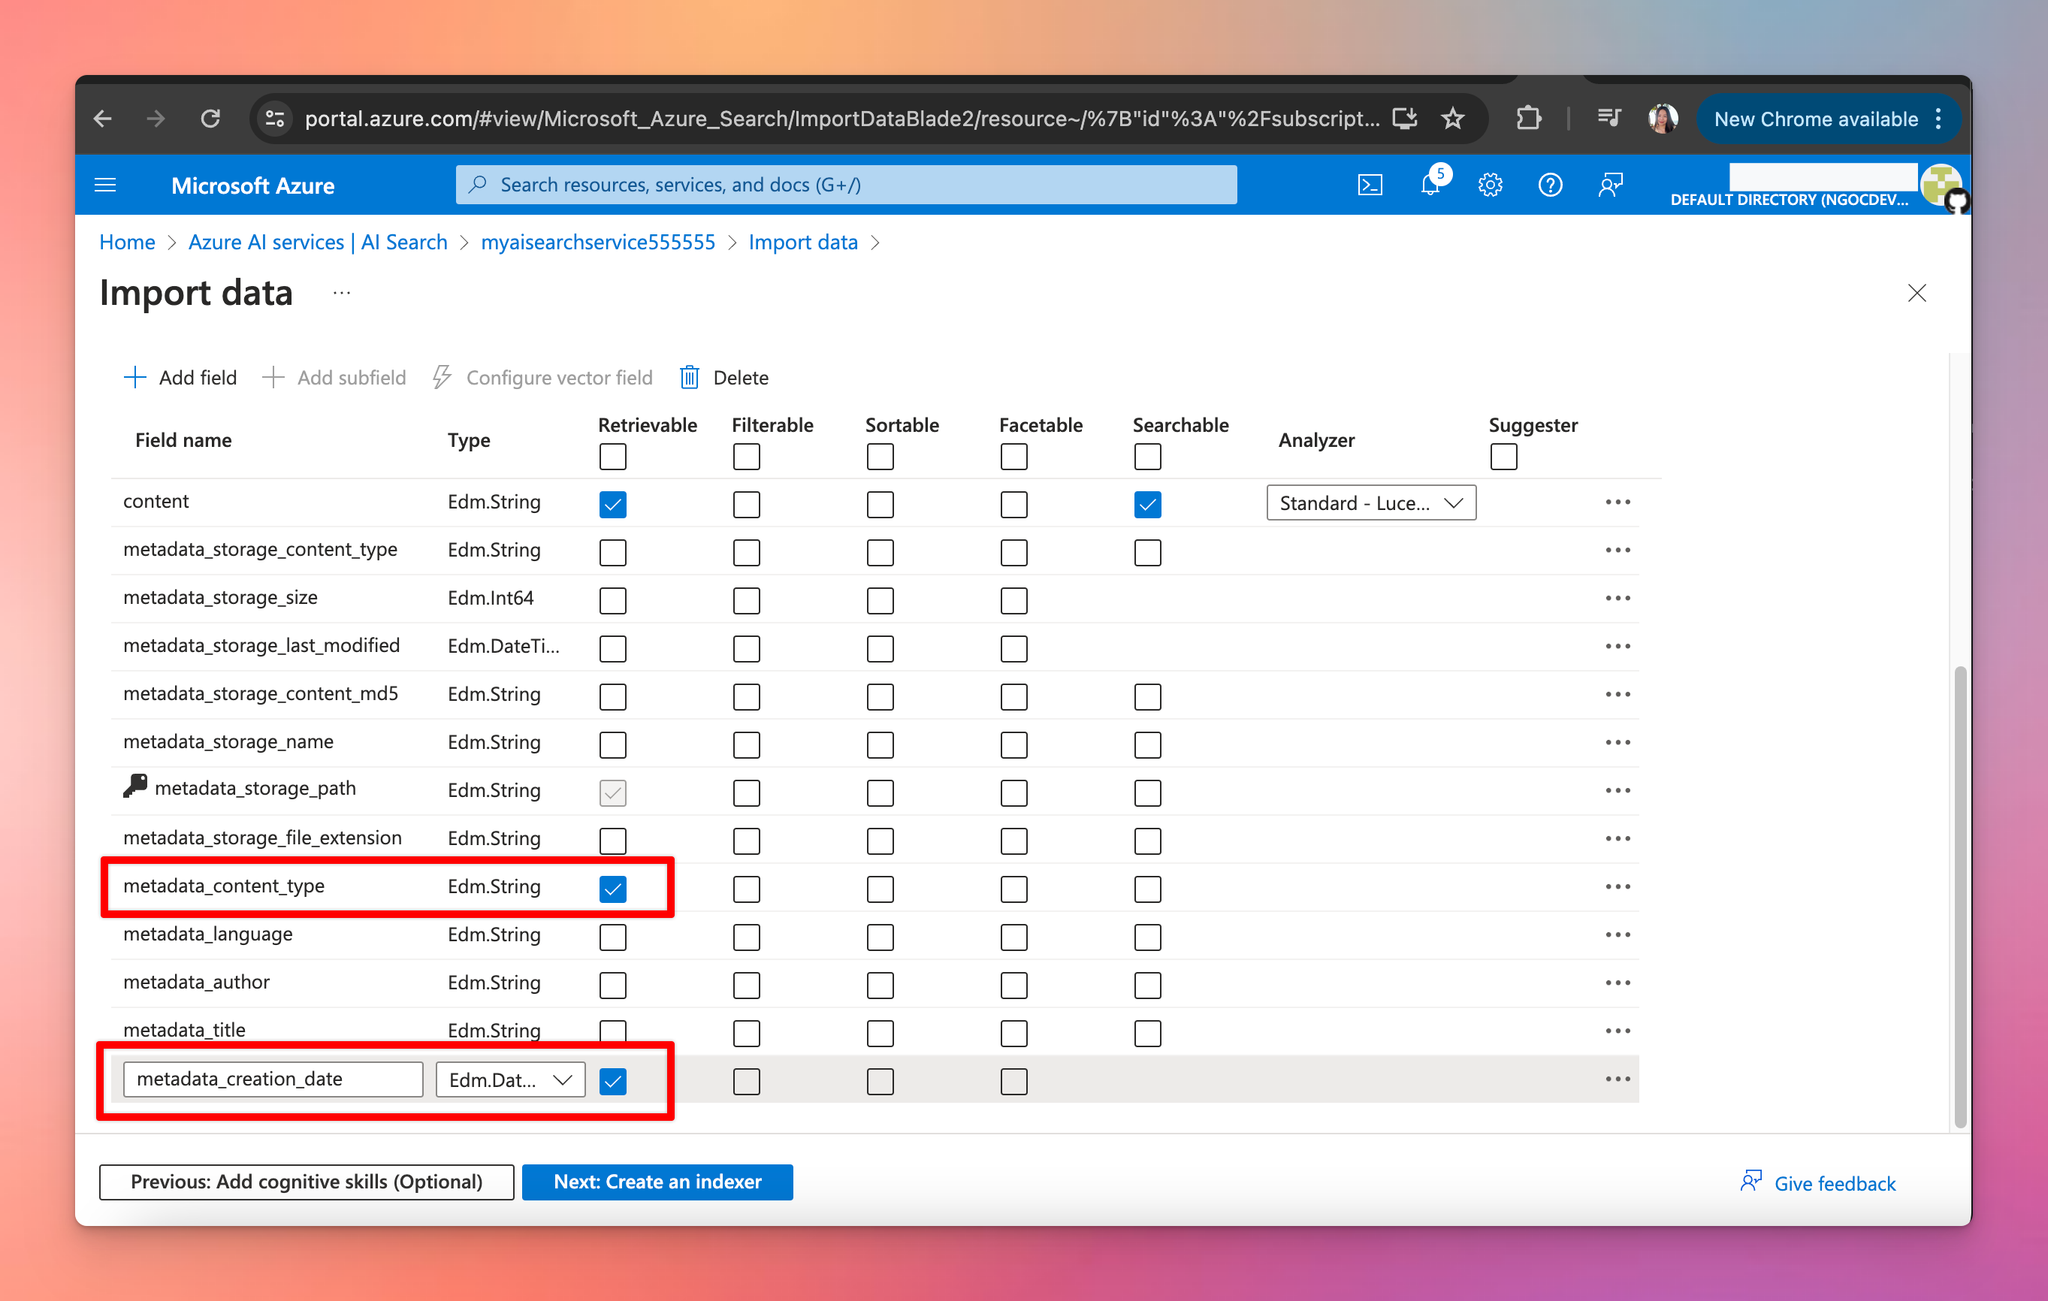
- Click "Next: Create an indexer".
- Enter a name for your indexer and choose the frequency for Azure to run the indexer.
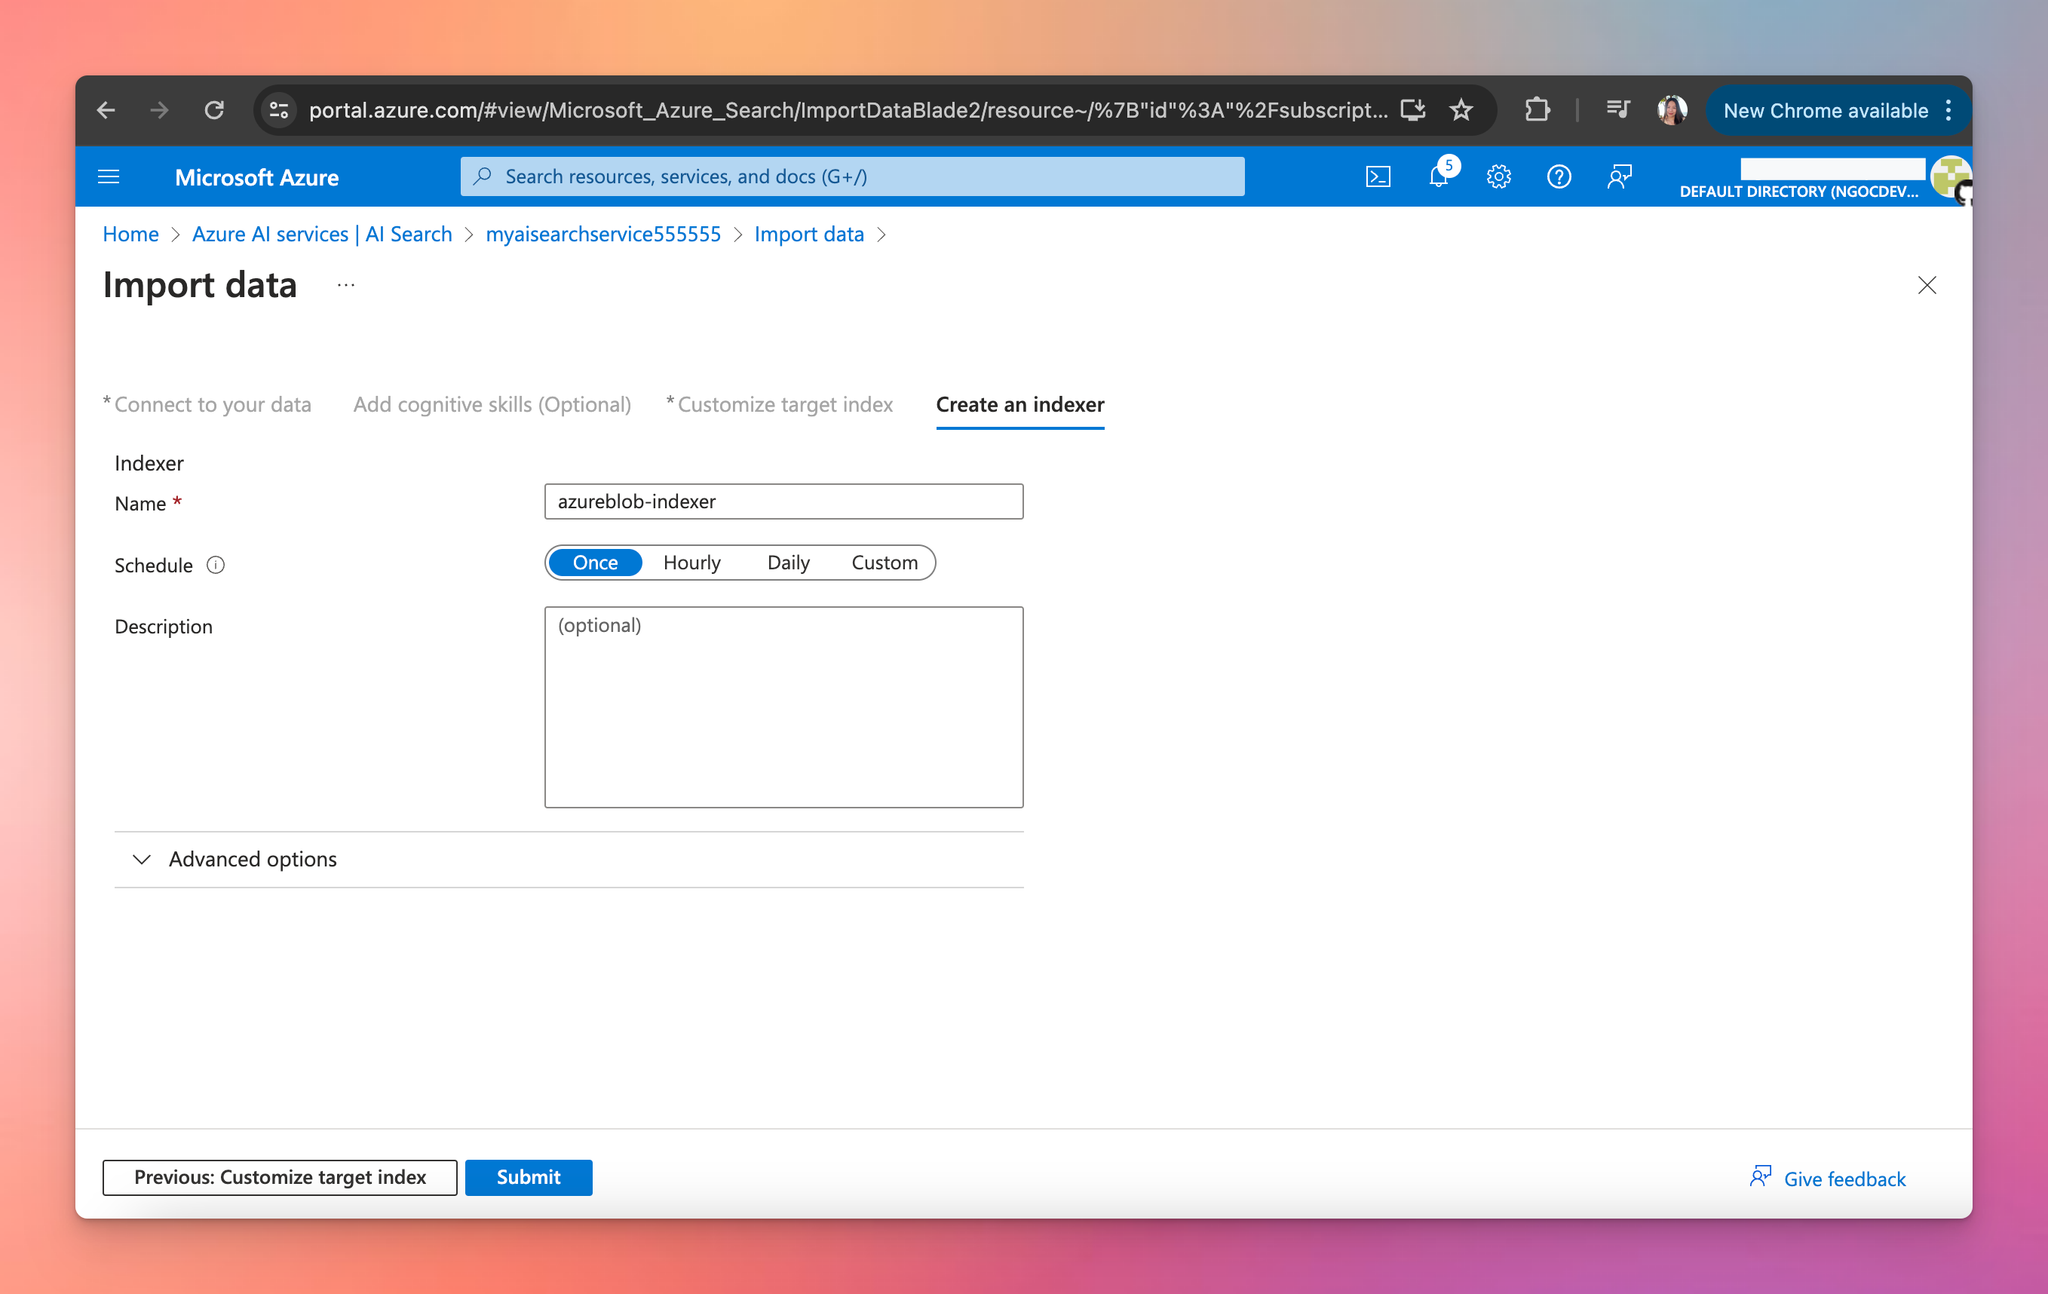
- Click "Submit".
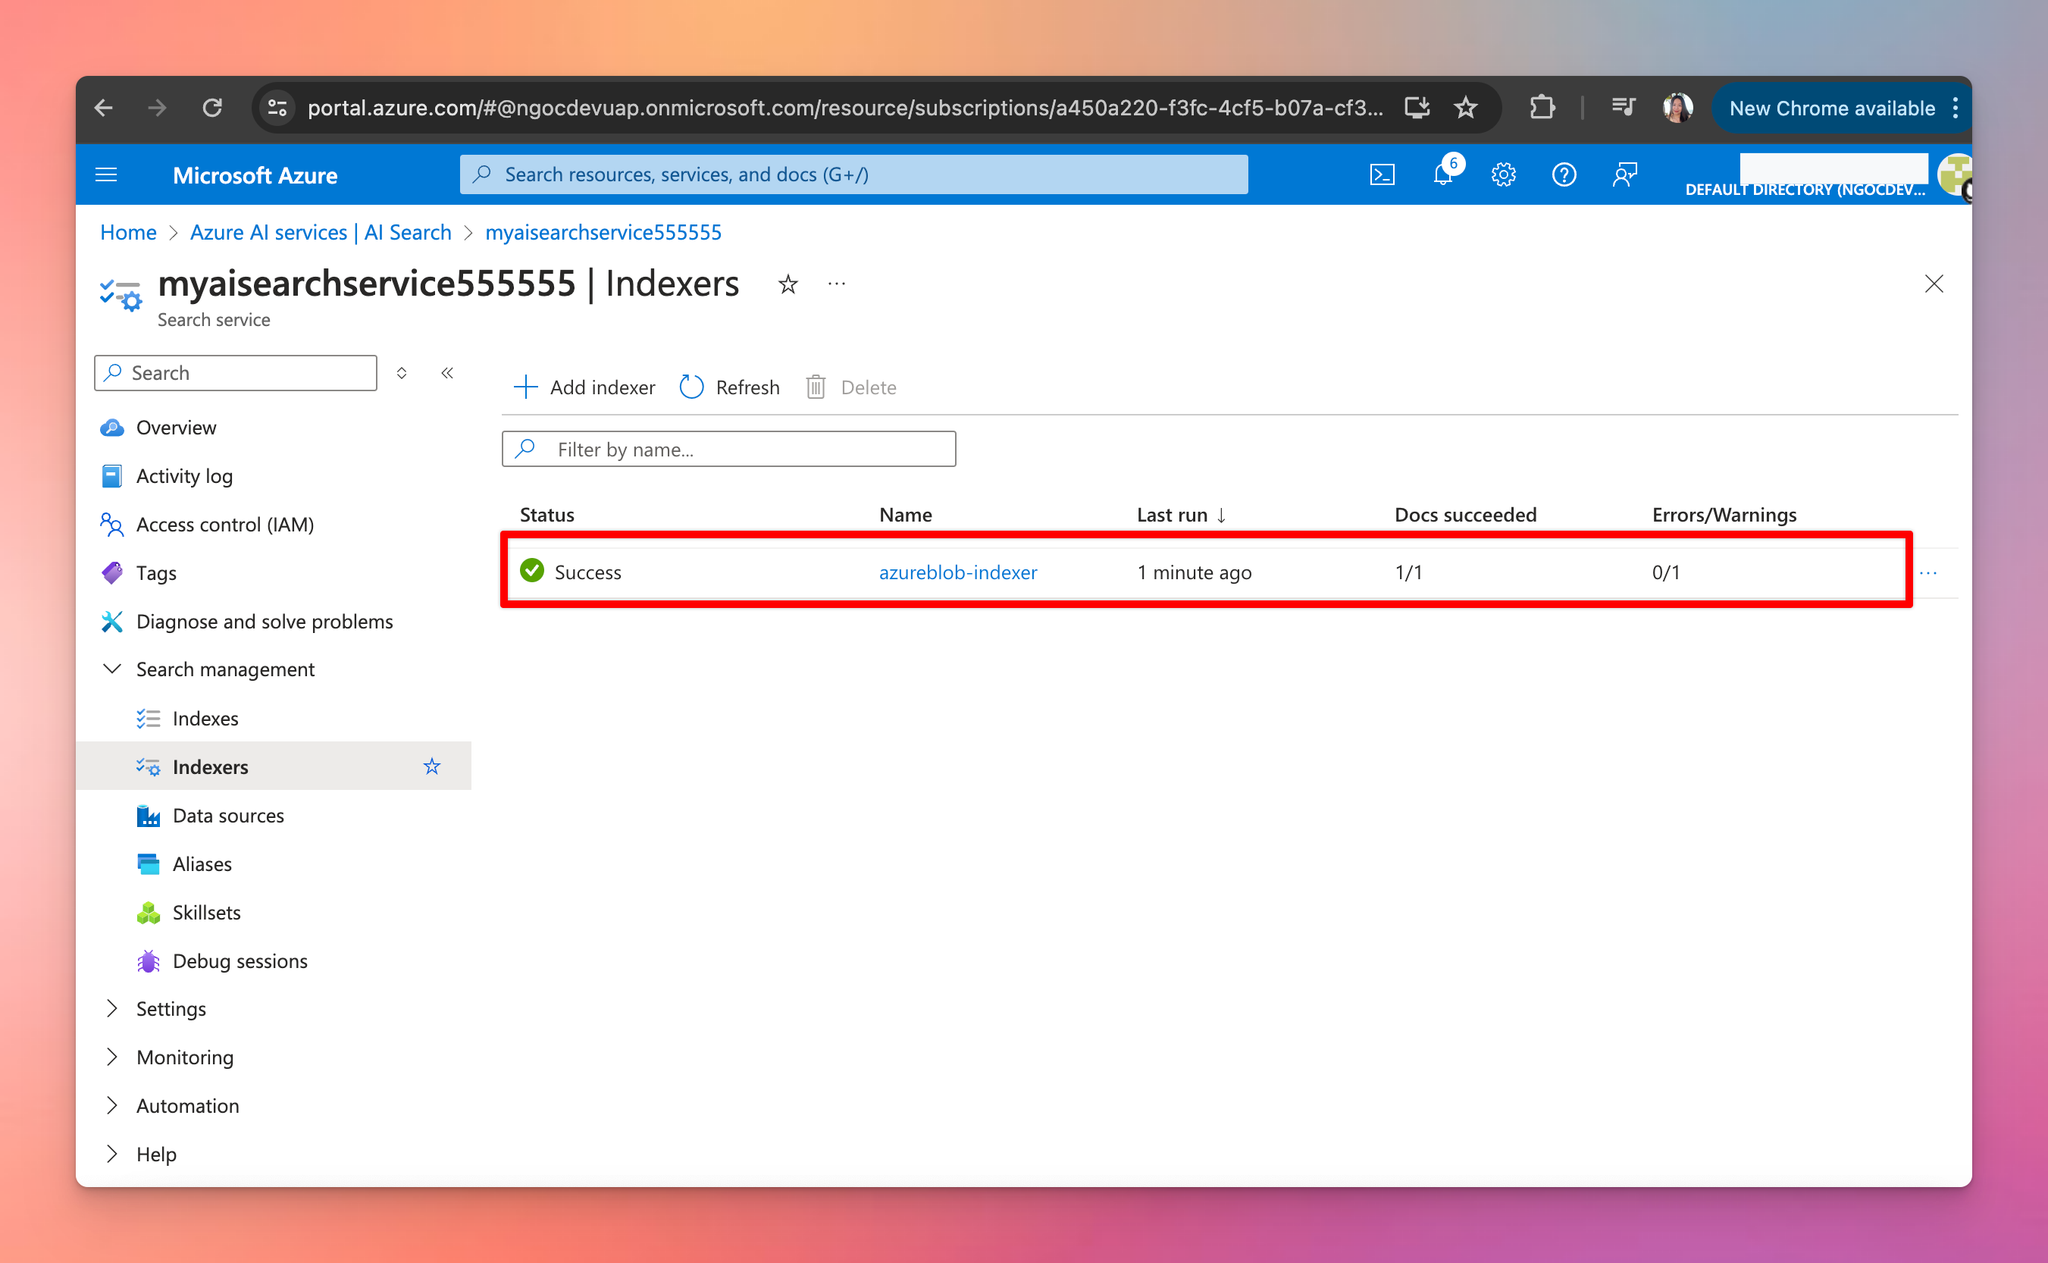
- Verify the indexer is working by checking the "Indexers" section under the “Search management” menu. If it shows the status as “Success”, then you can move to the next step!
Step 4: Enable CORS
For TypingMind Custom Admin users, you can skip this step.
For TypingMind individual users using the plugin directly through the chat interface, you will need to enable CORS. This allows the browser to send requests from the client side to Azure AI Search without CORS issues.
Here’s how:
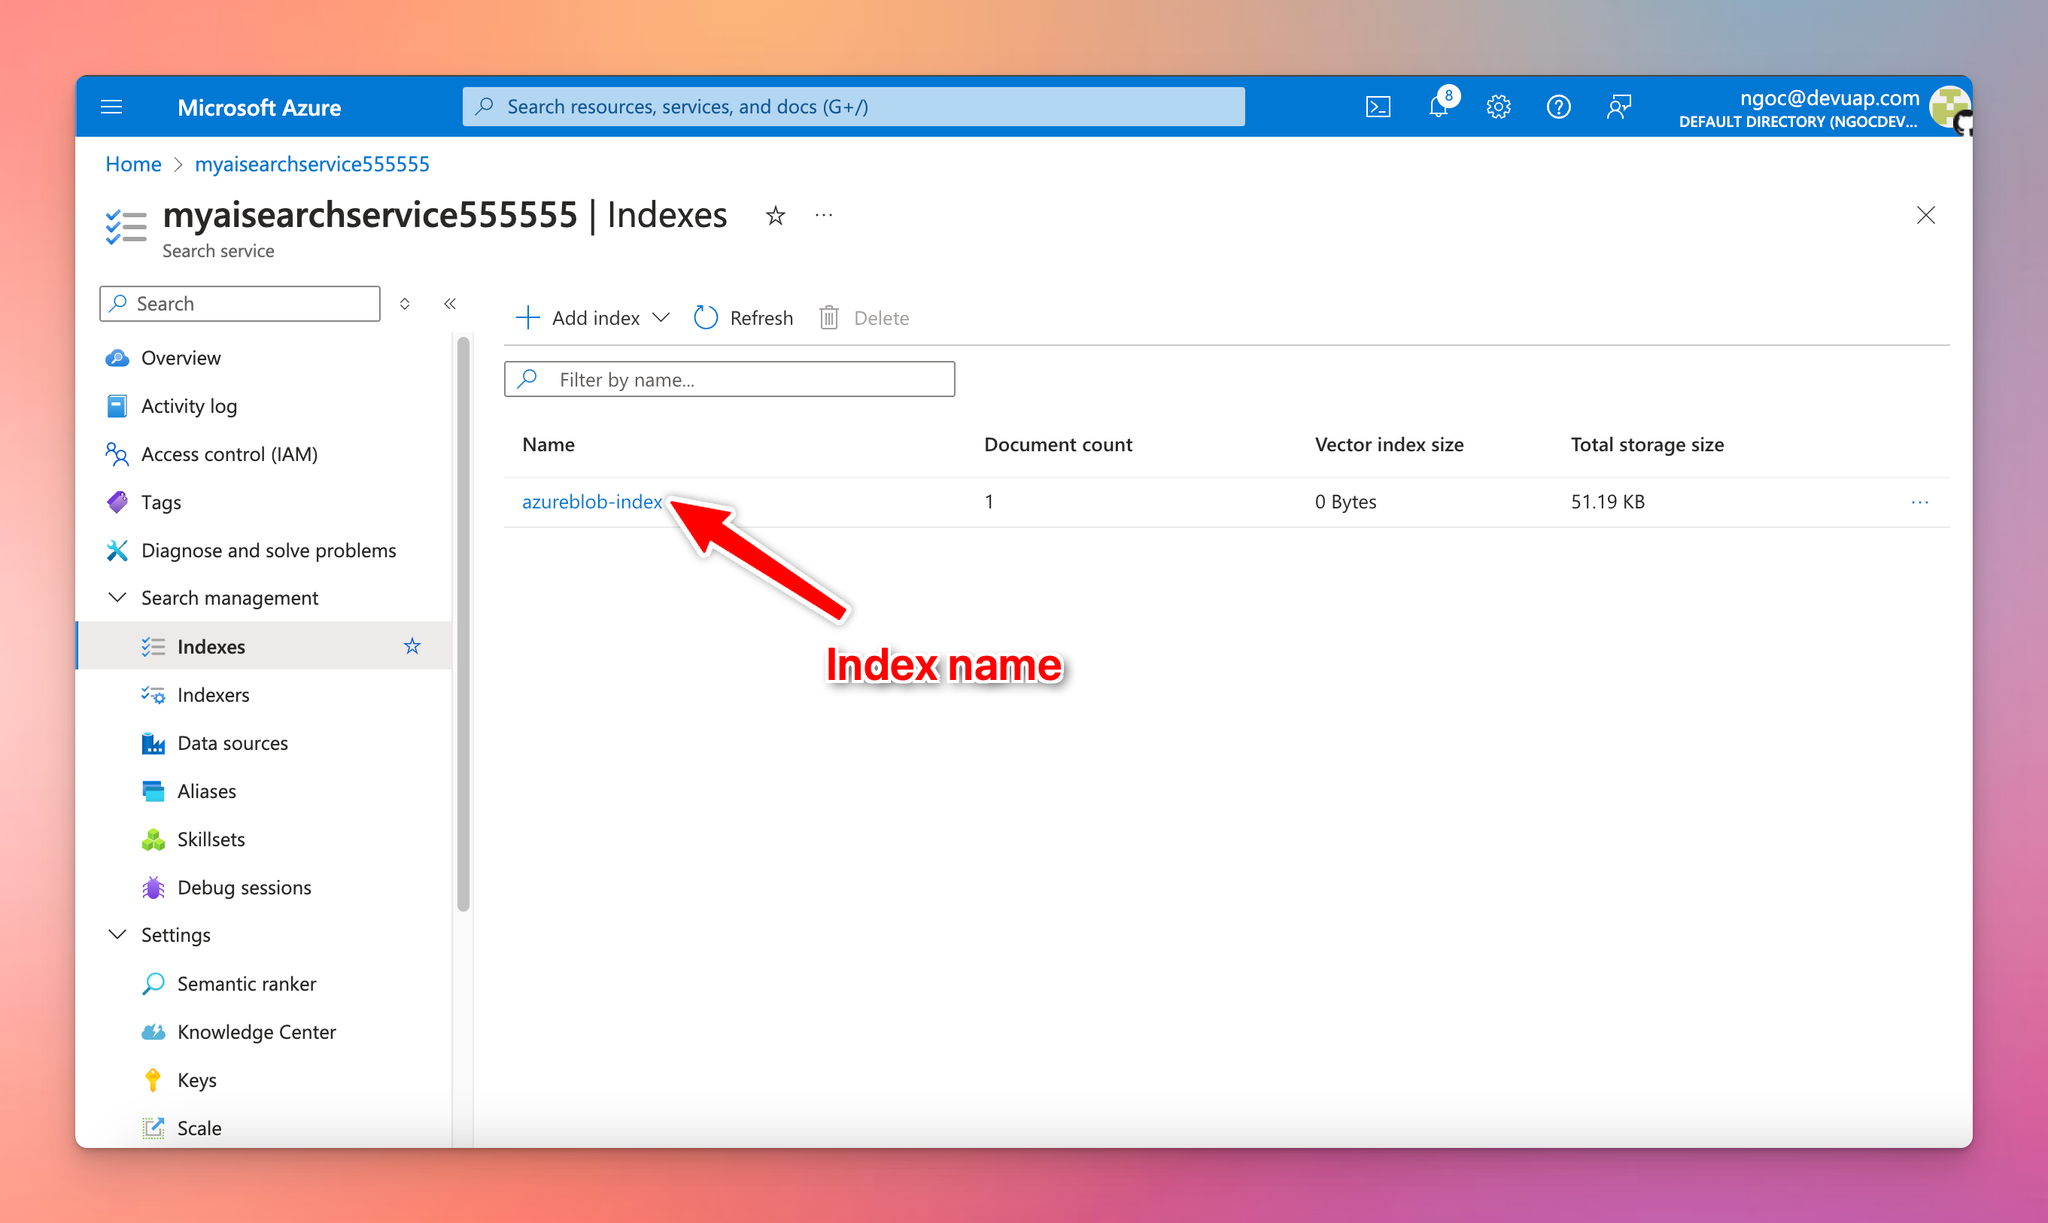
- Go to the "Indexes" section.
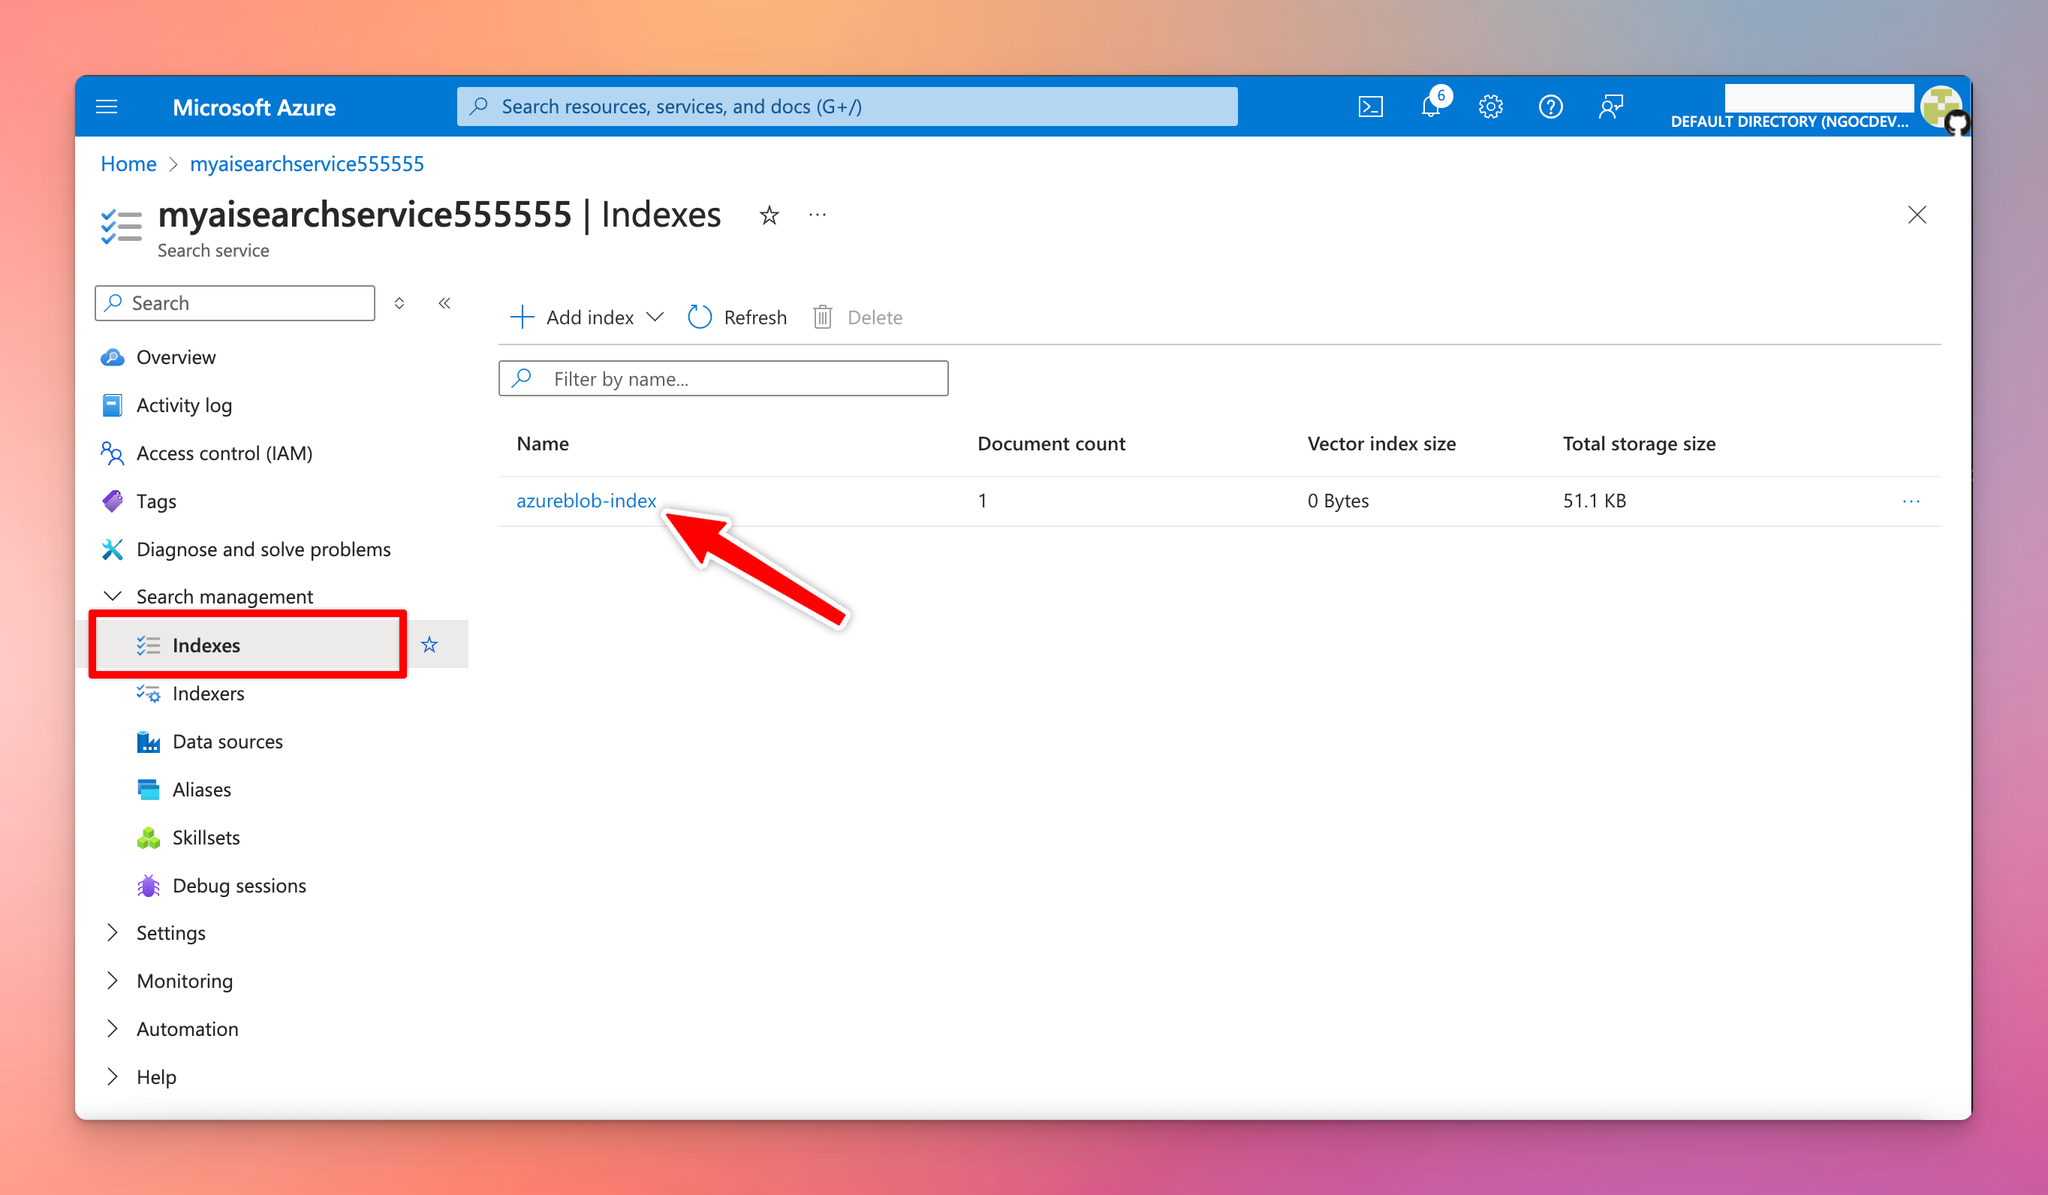
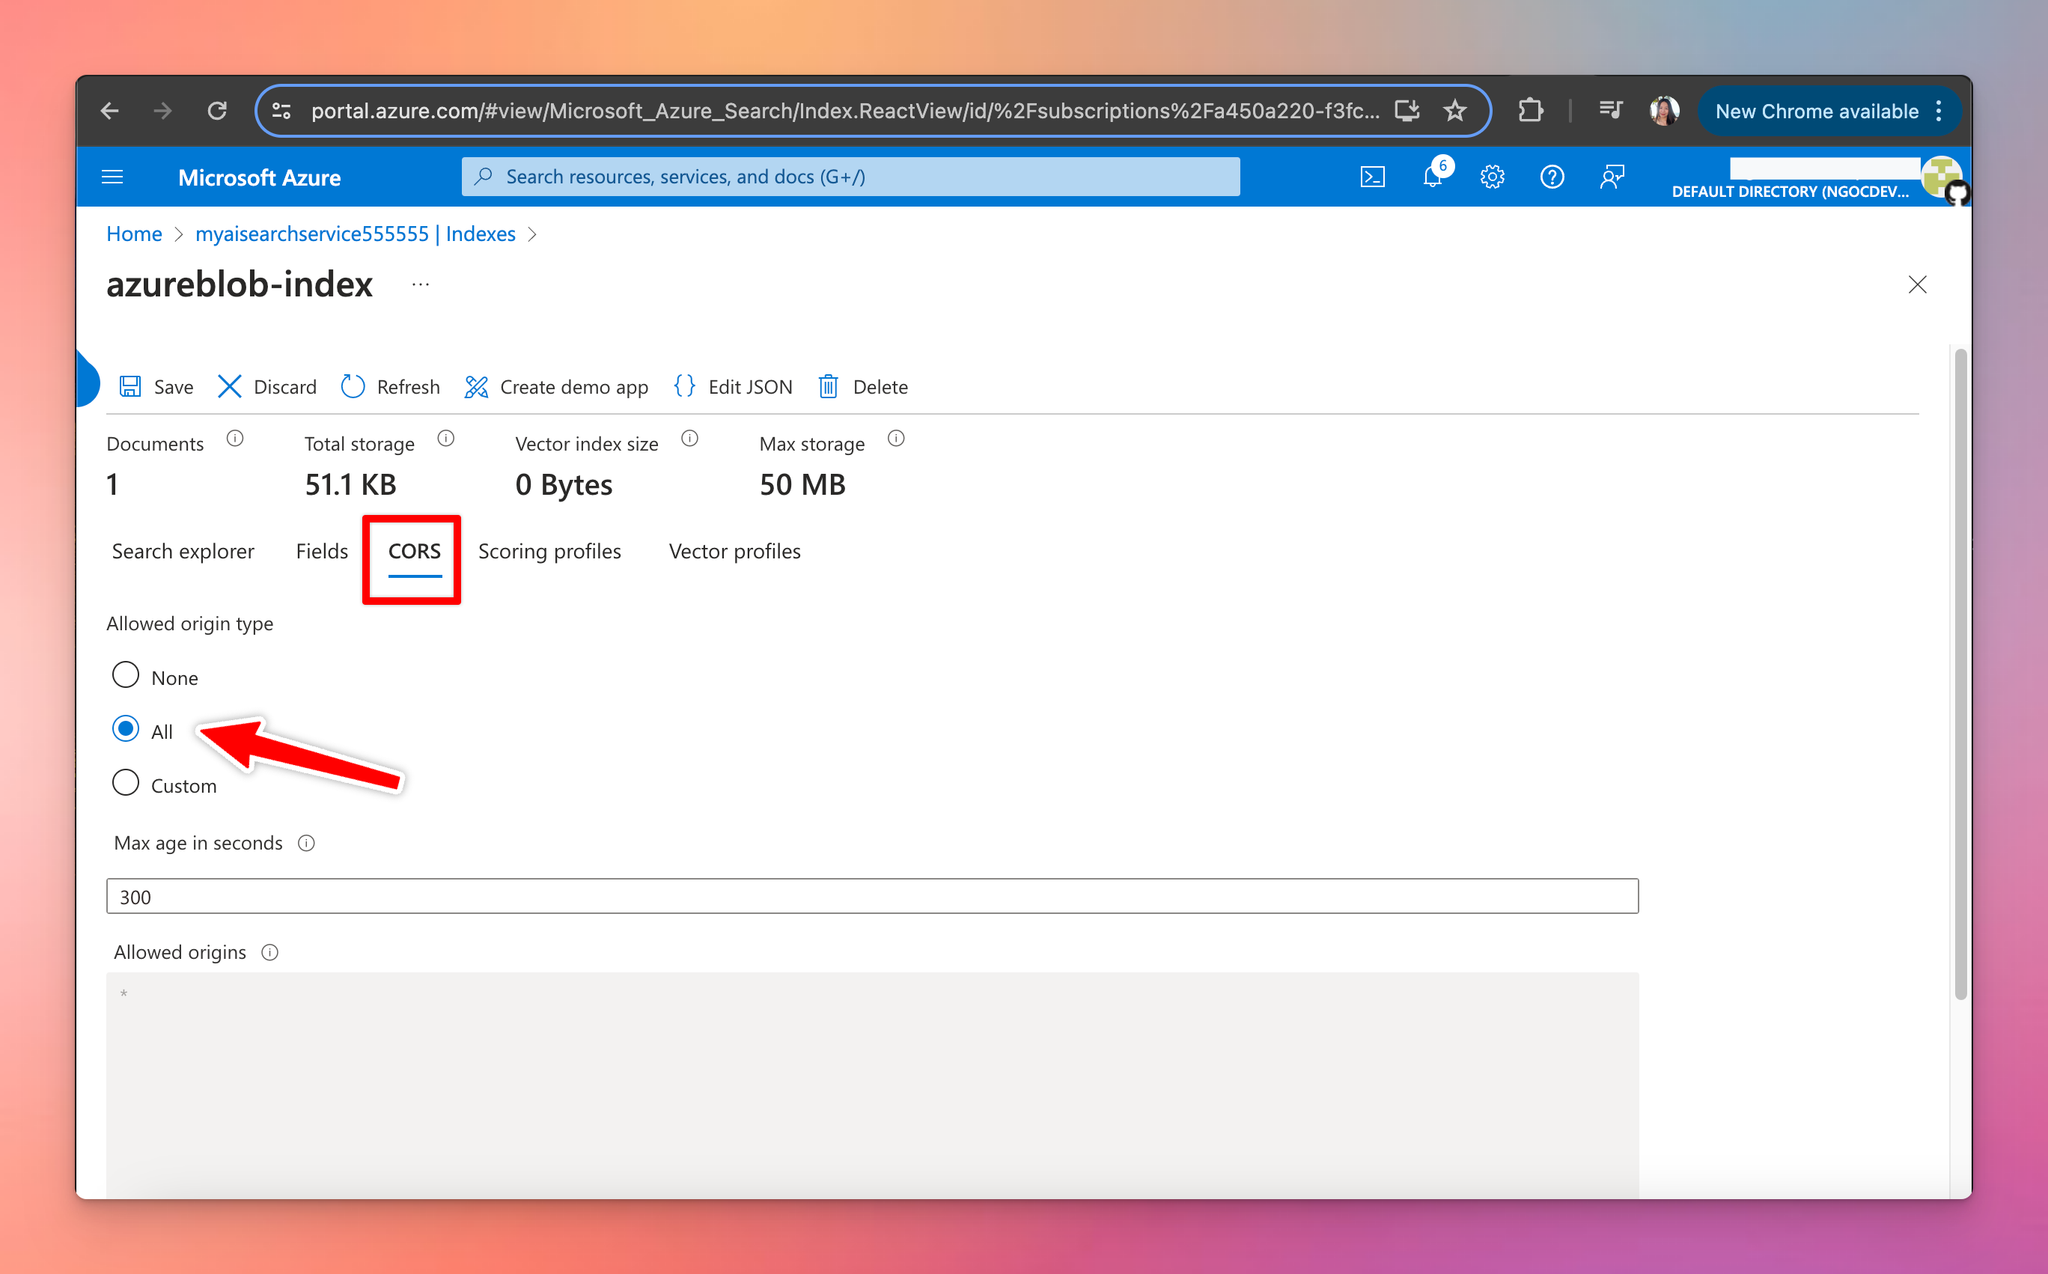
- Select the CORS setting and set the Allow origin type to "All" and click Save.
Step 5: Set up Azure AI Search Plugin on TypingMind
For TypingMind Custom - Admin users
- Log into your Admin Panel
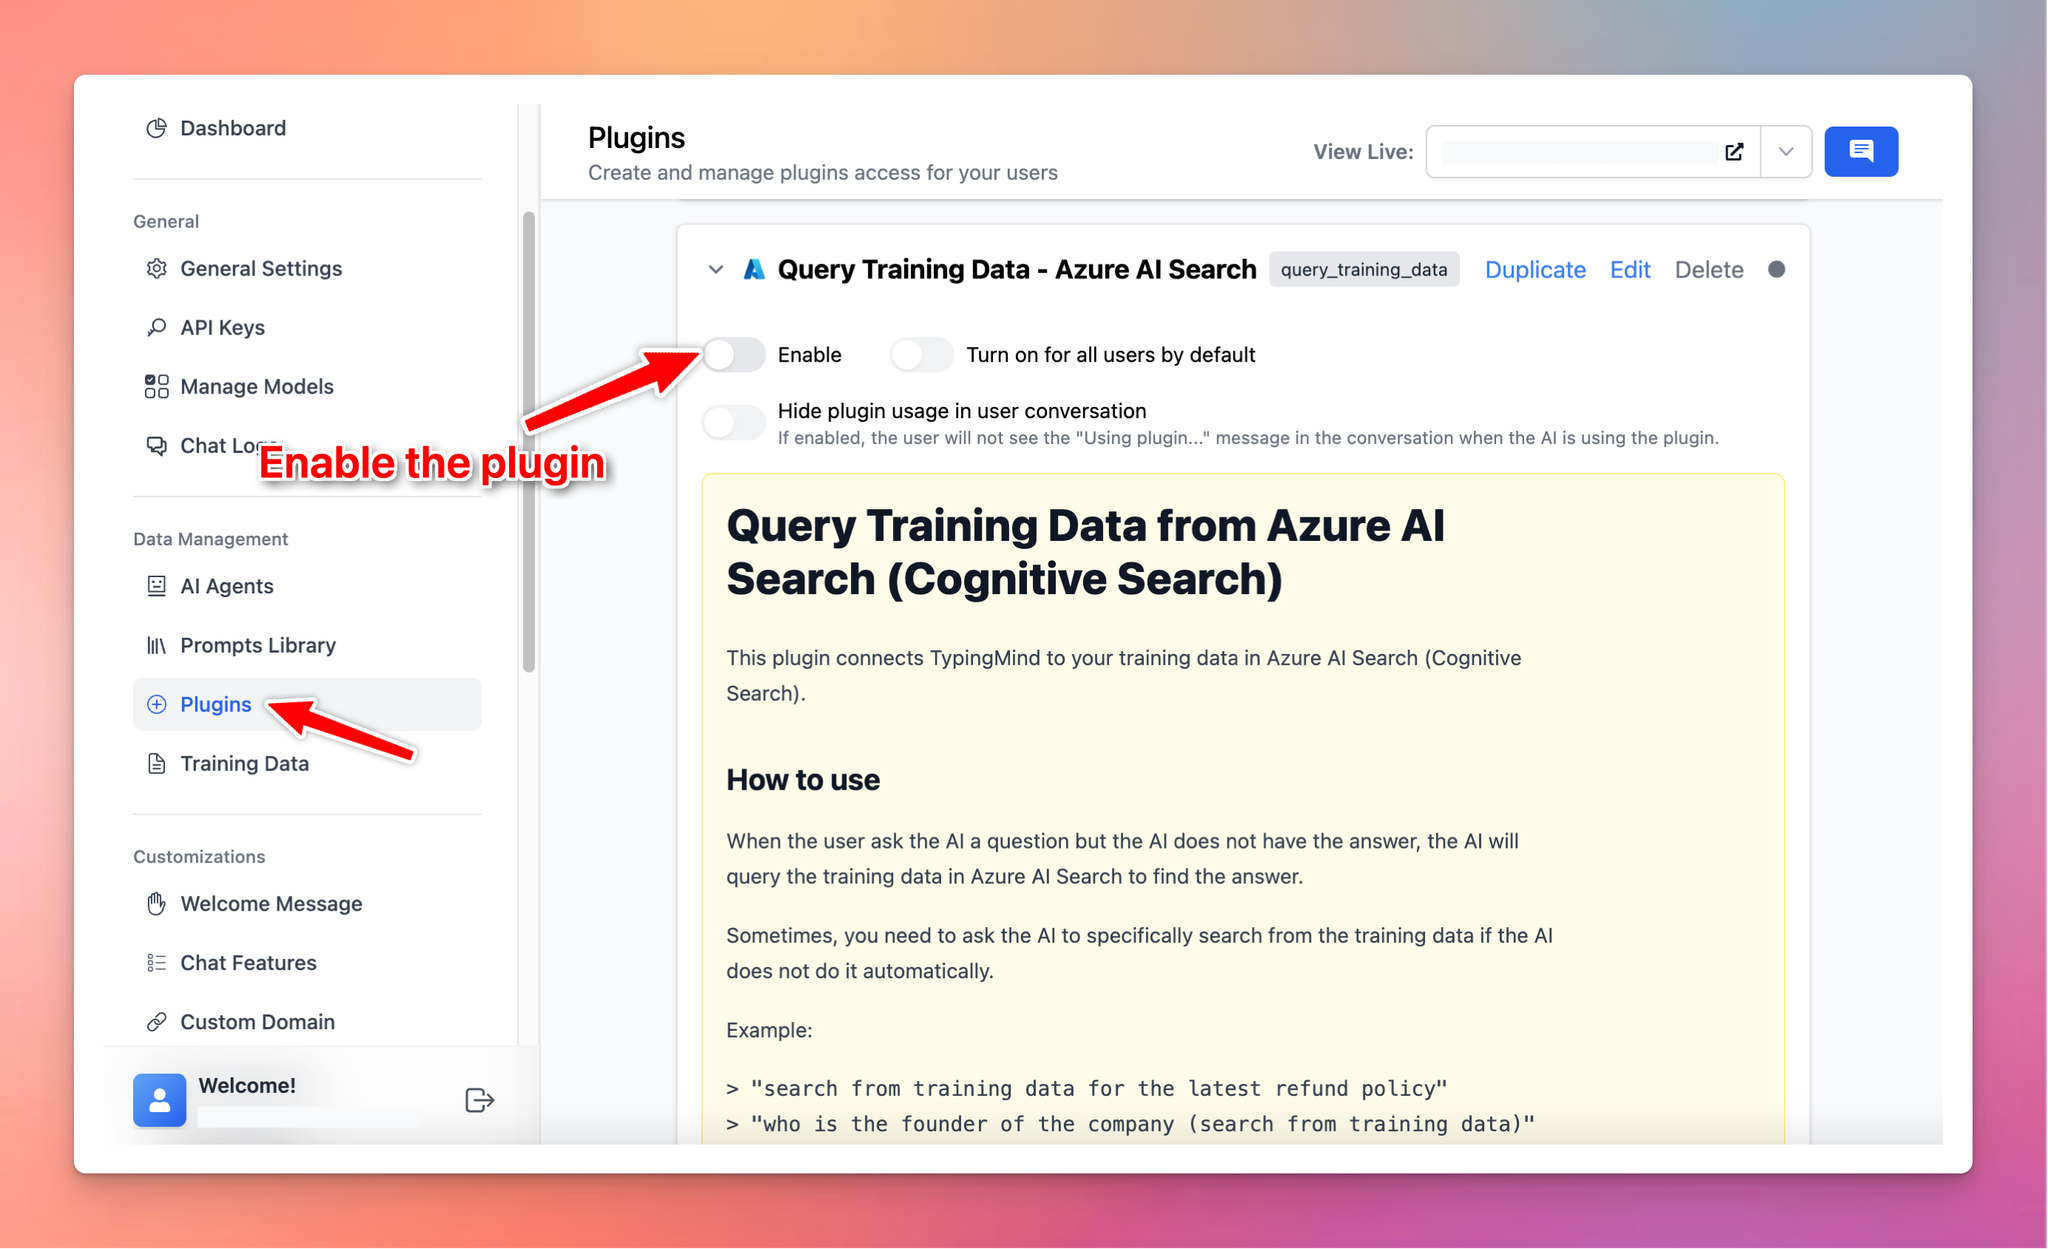
- Find the "Plugins" section in the side menu and enable the plugin “Query Training Data - Azure AI Search”
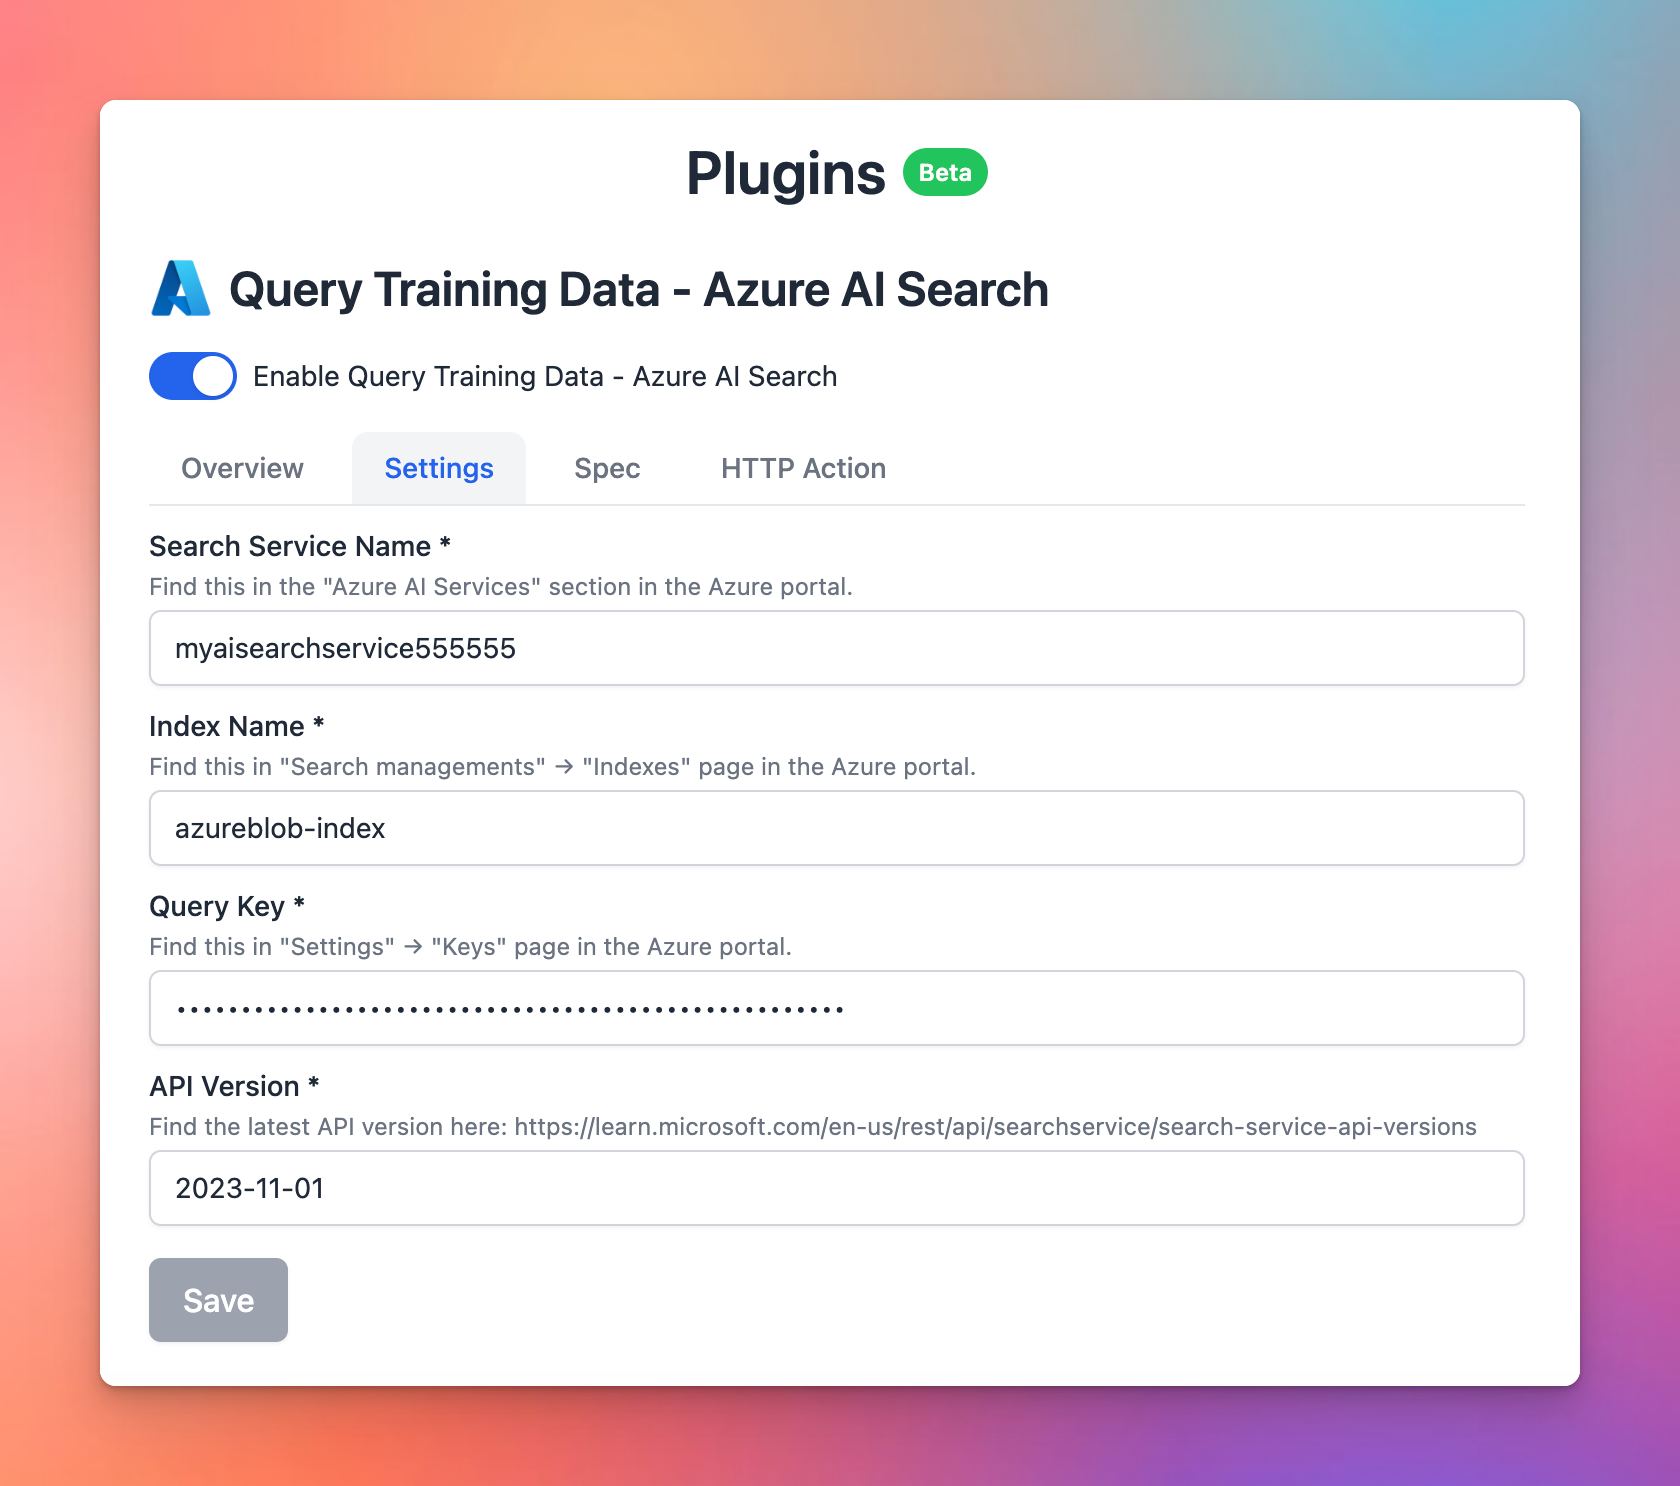
- Enter the following details:
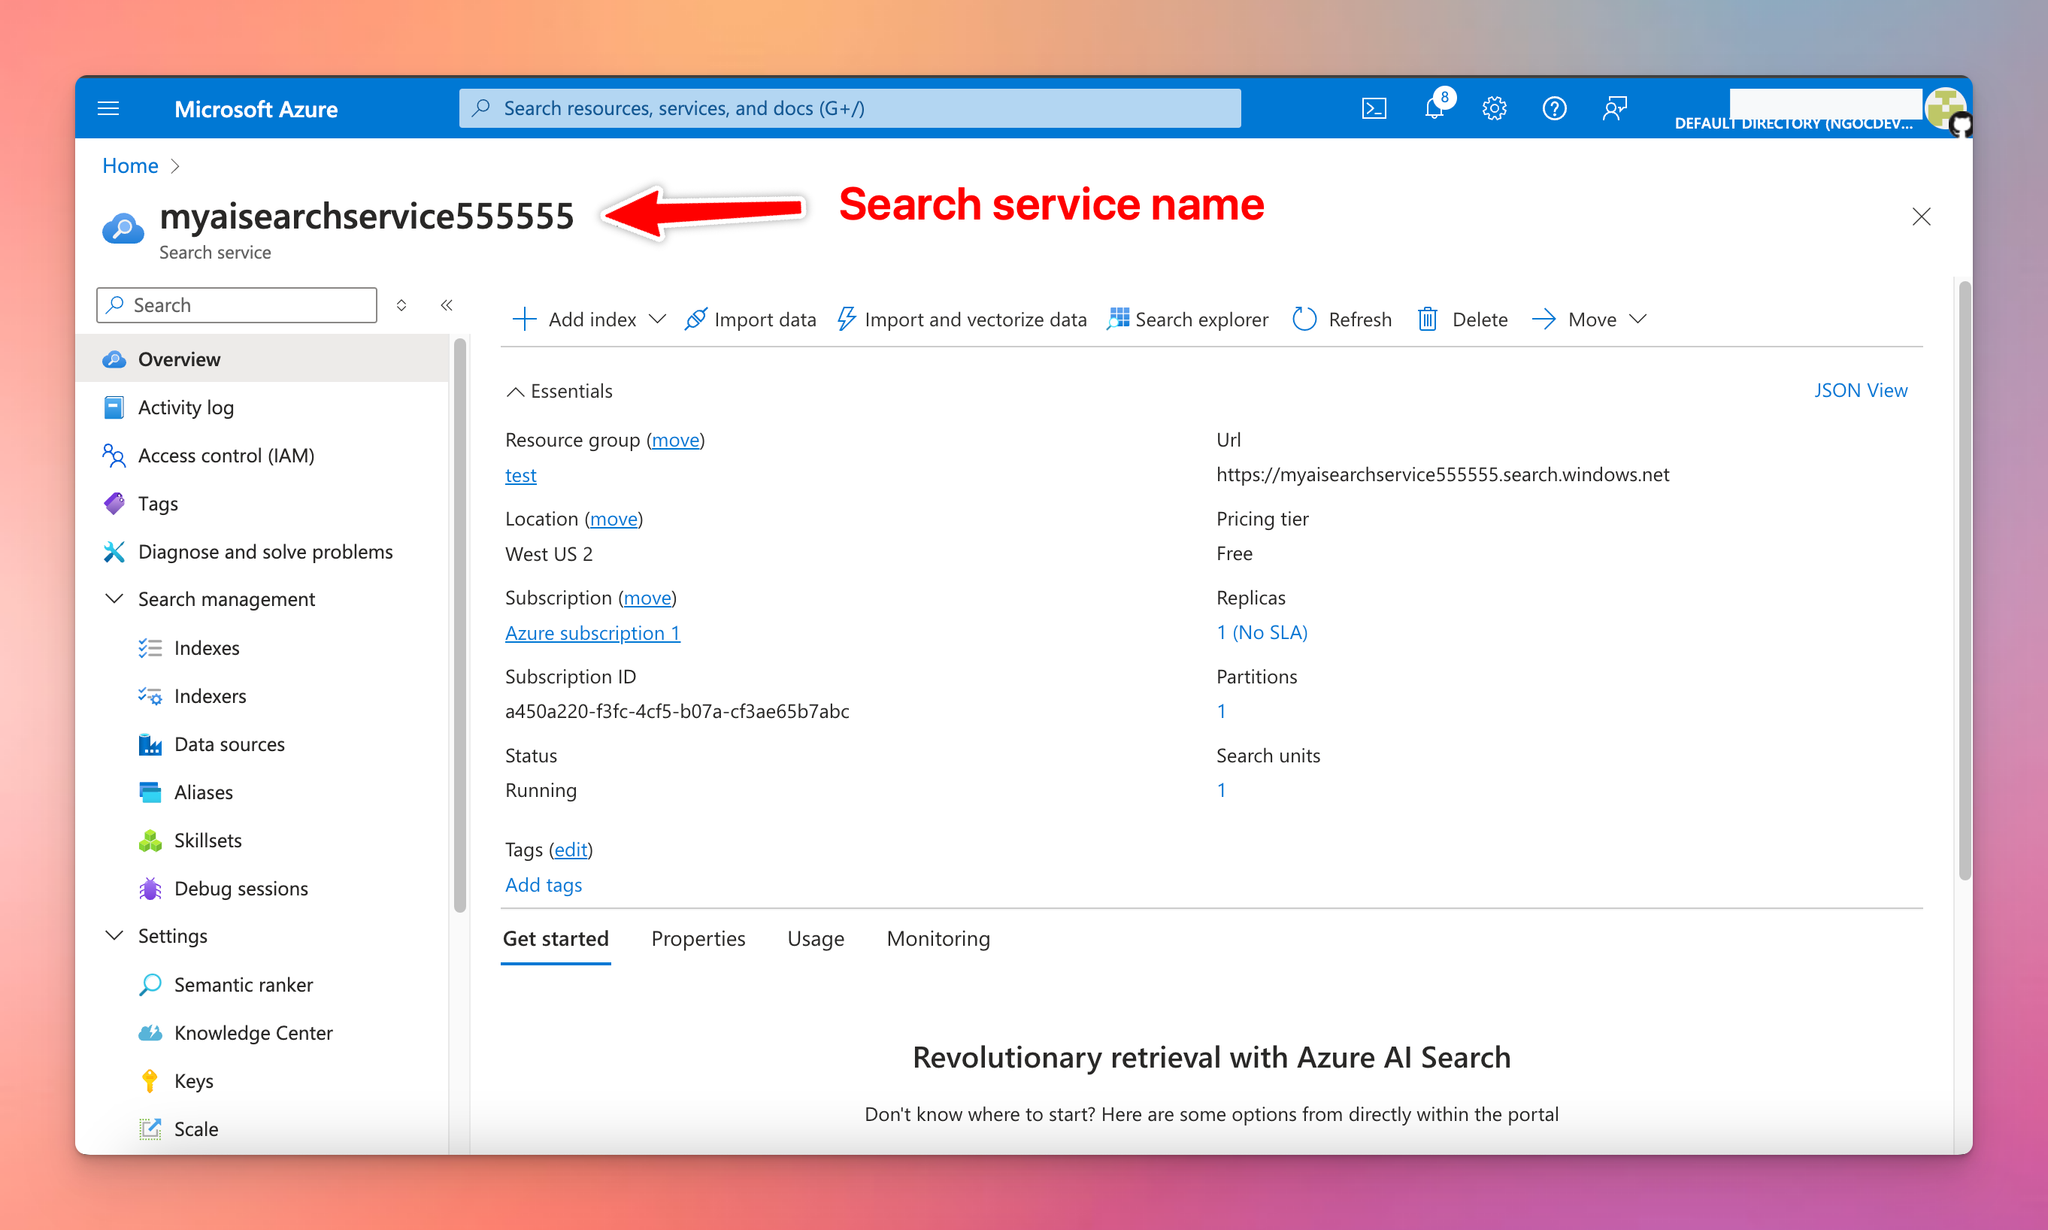
- Search Service Name: your created AI search service at step 1
- Index Name: check the "Indexes" section in your Azure Search Service
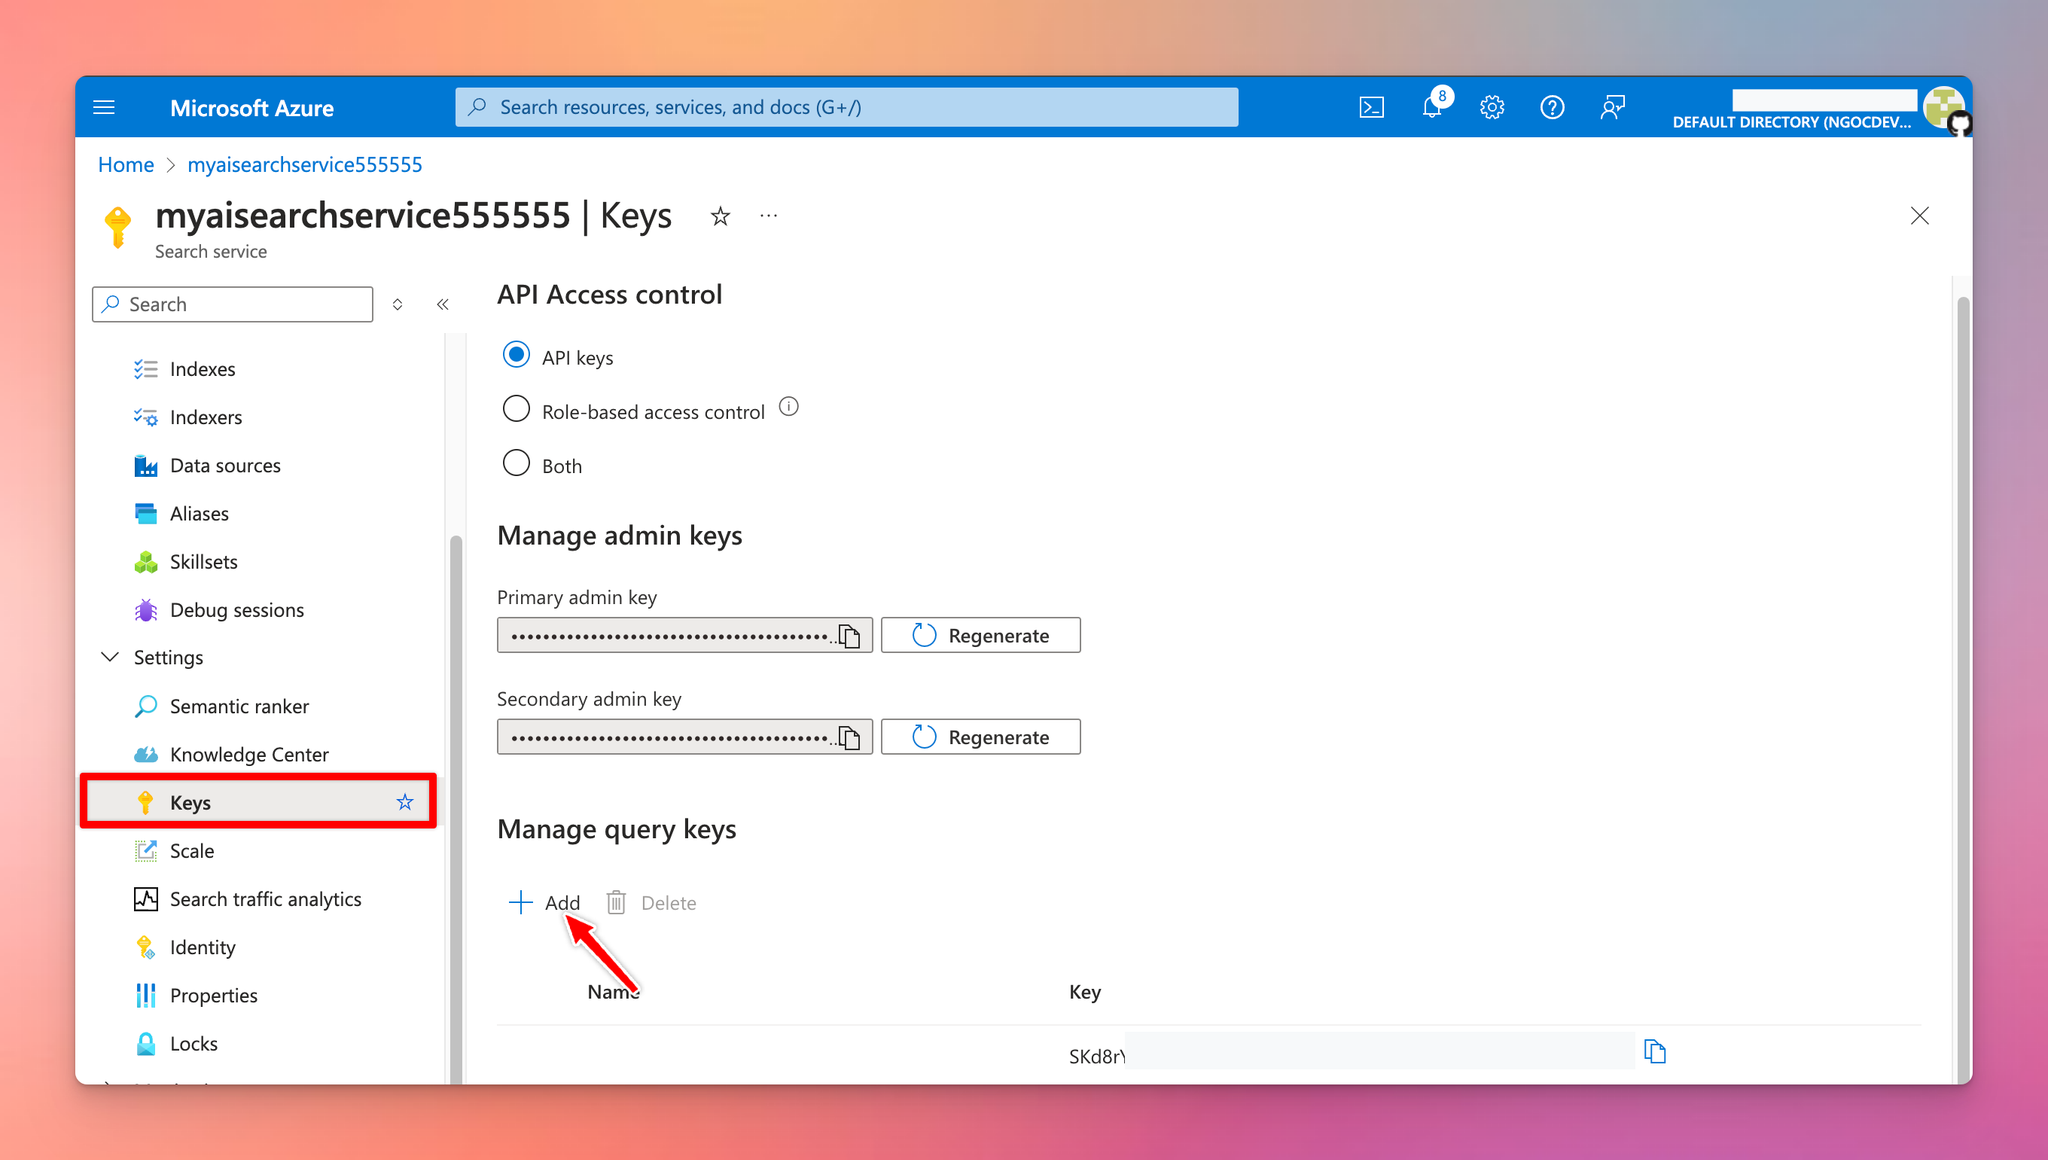
- Query Key: go to the "Keys" section under the Settings menu in Azure Search Service, navigate to the Manage query keys section, and click “Add” to create a new API key
- API Version: select the latest version from https://learn.microsoft.com/en-us/rest/api/searchservice/search-service-api-versions
- Here’s what the plugin settings look like:
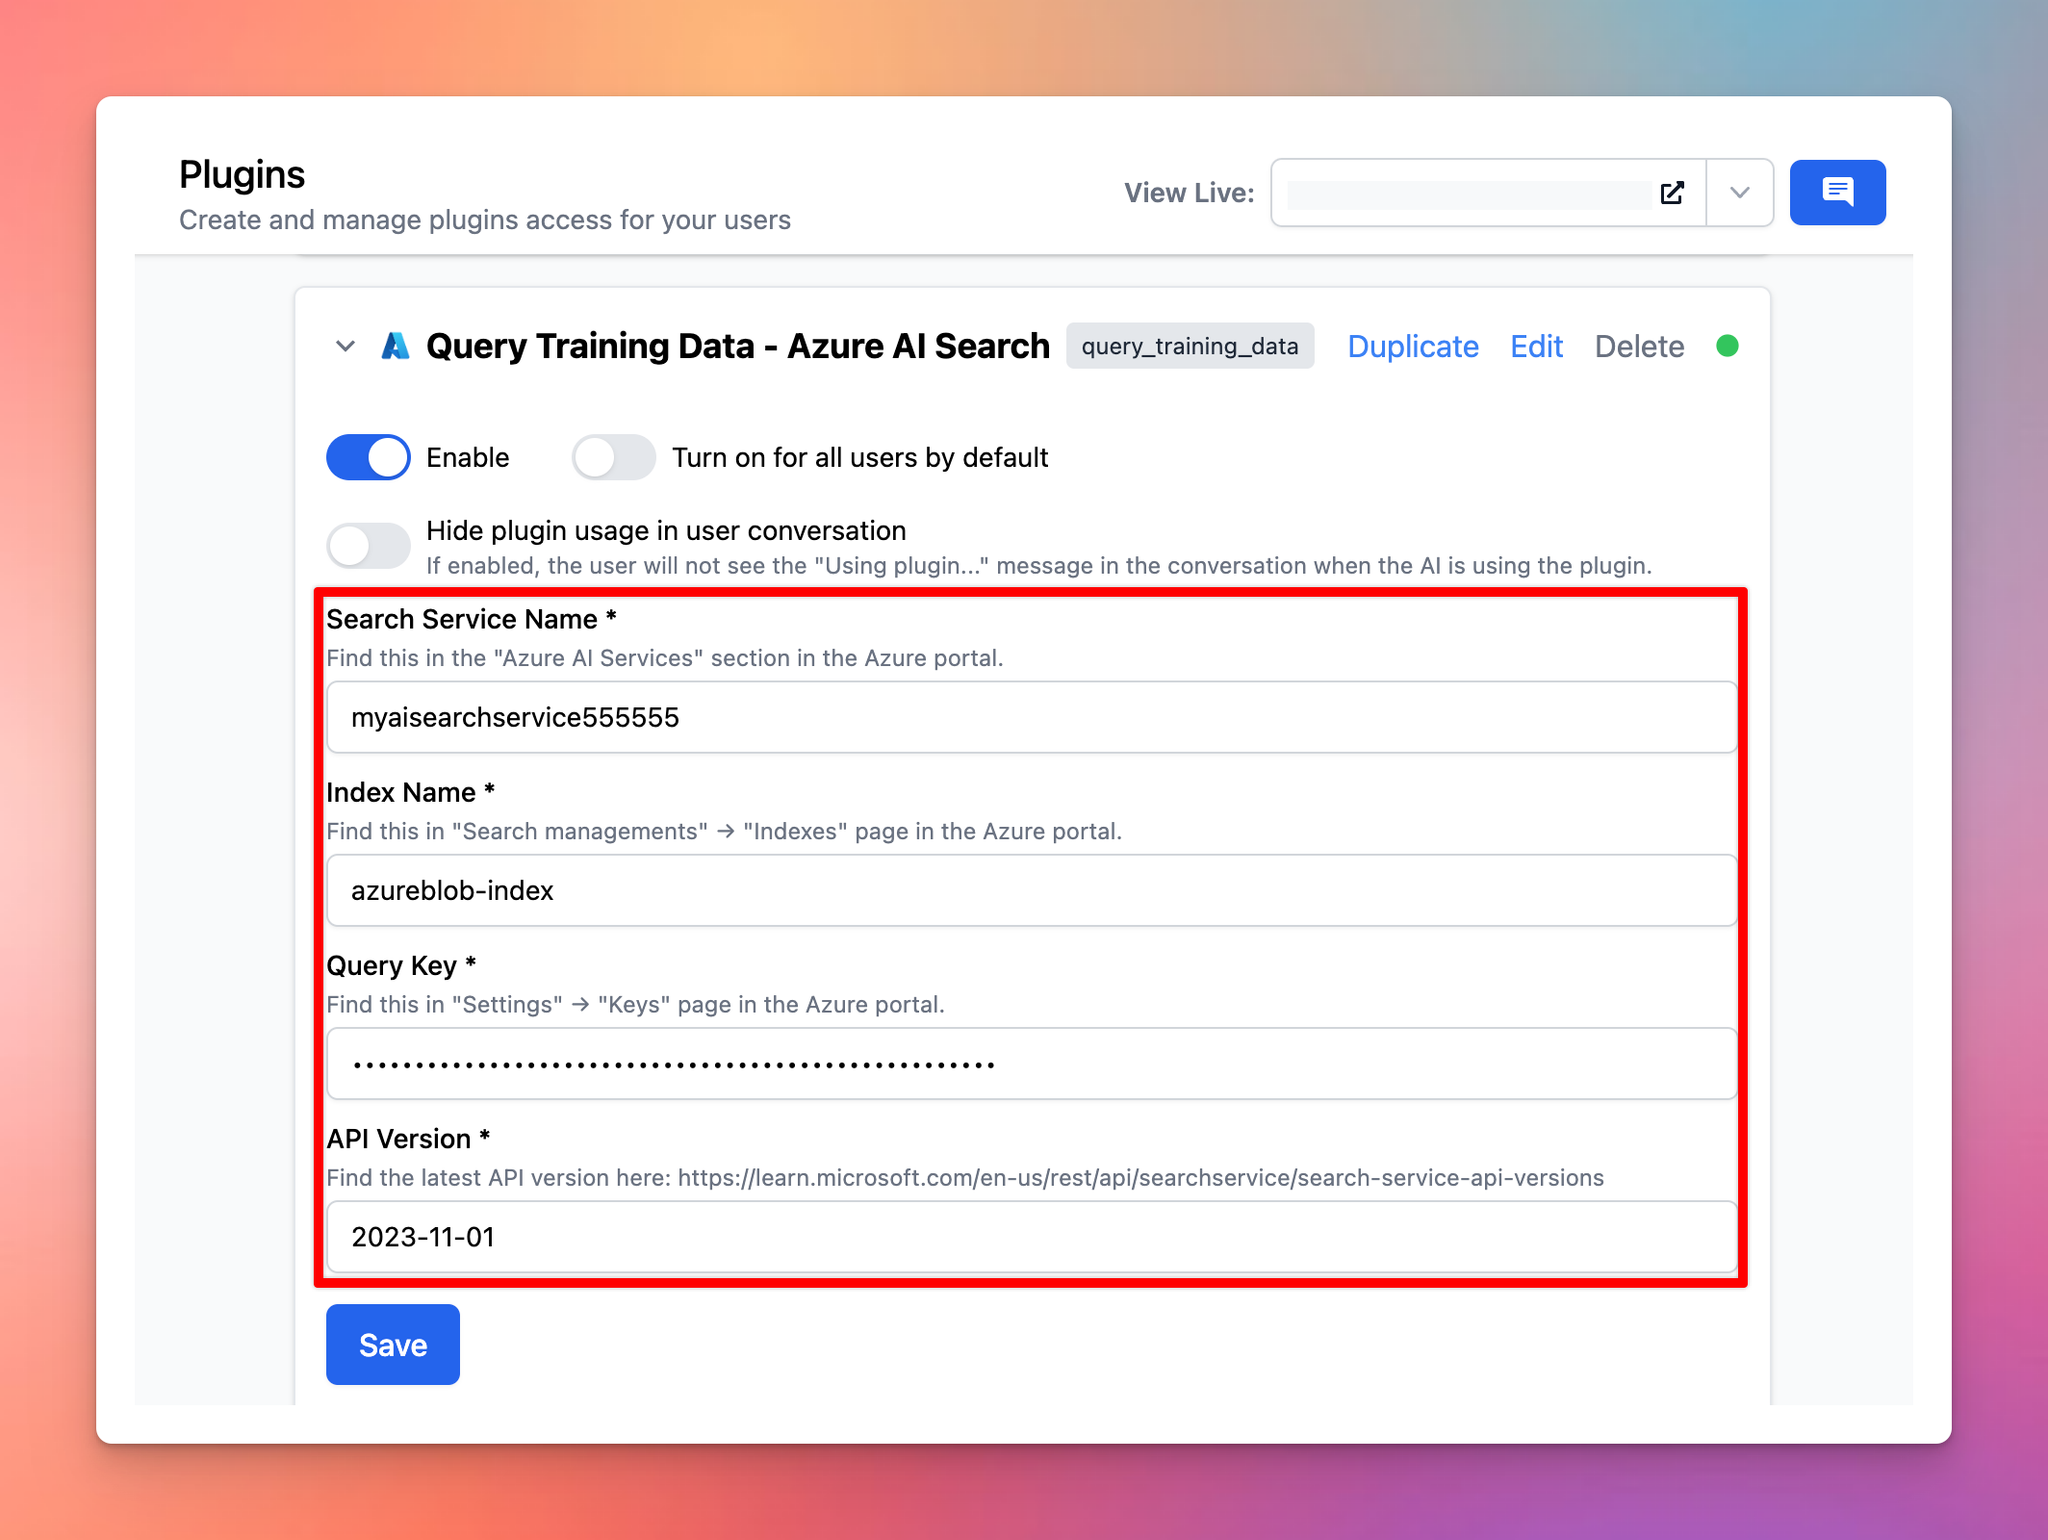
- Click "Save".
For TypingMind individual users (using the app directly via the chat interface)
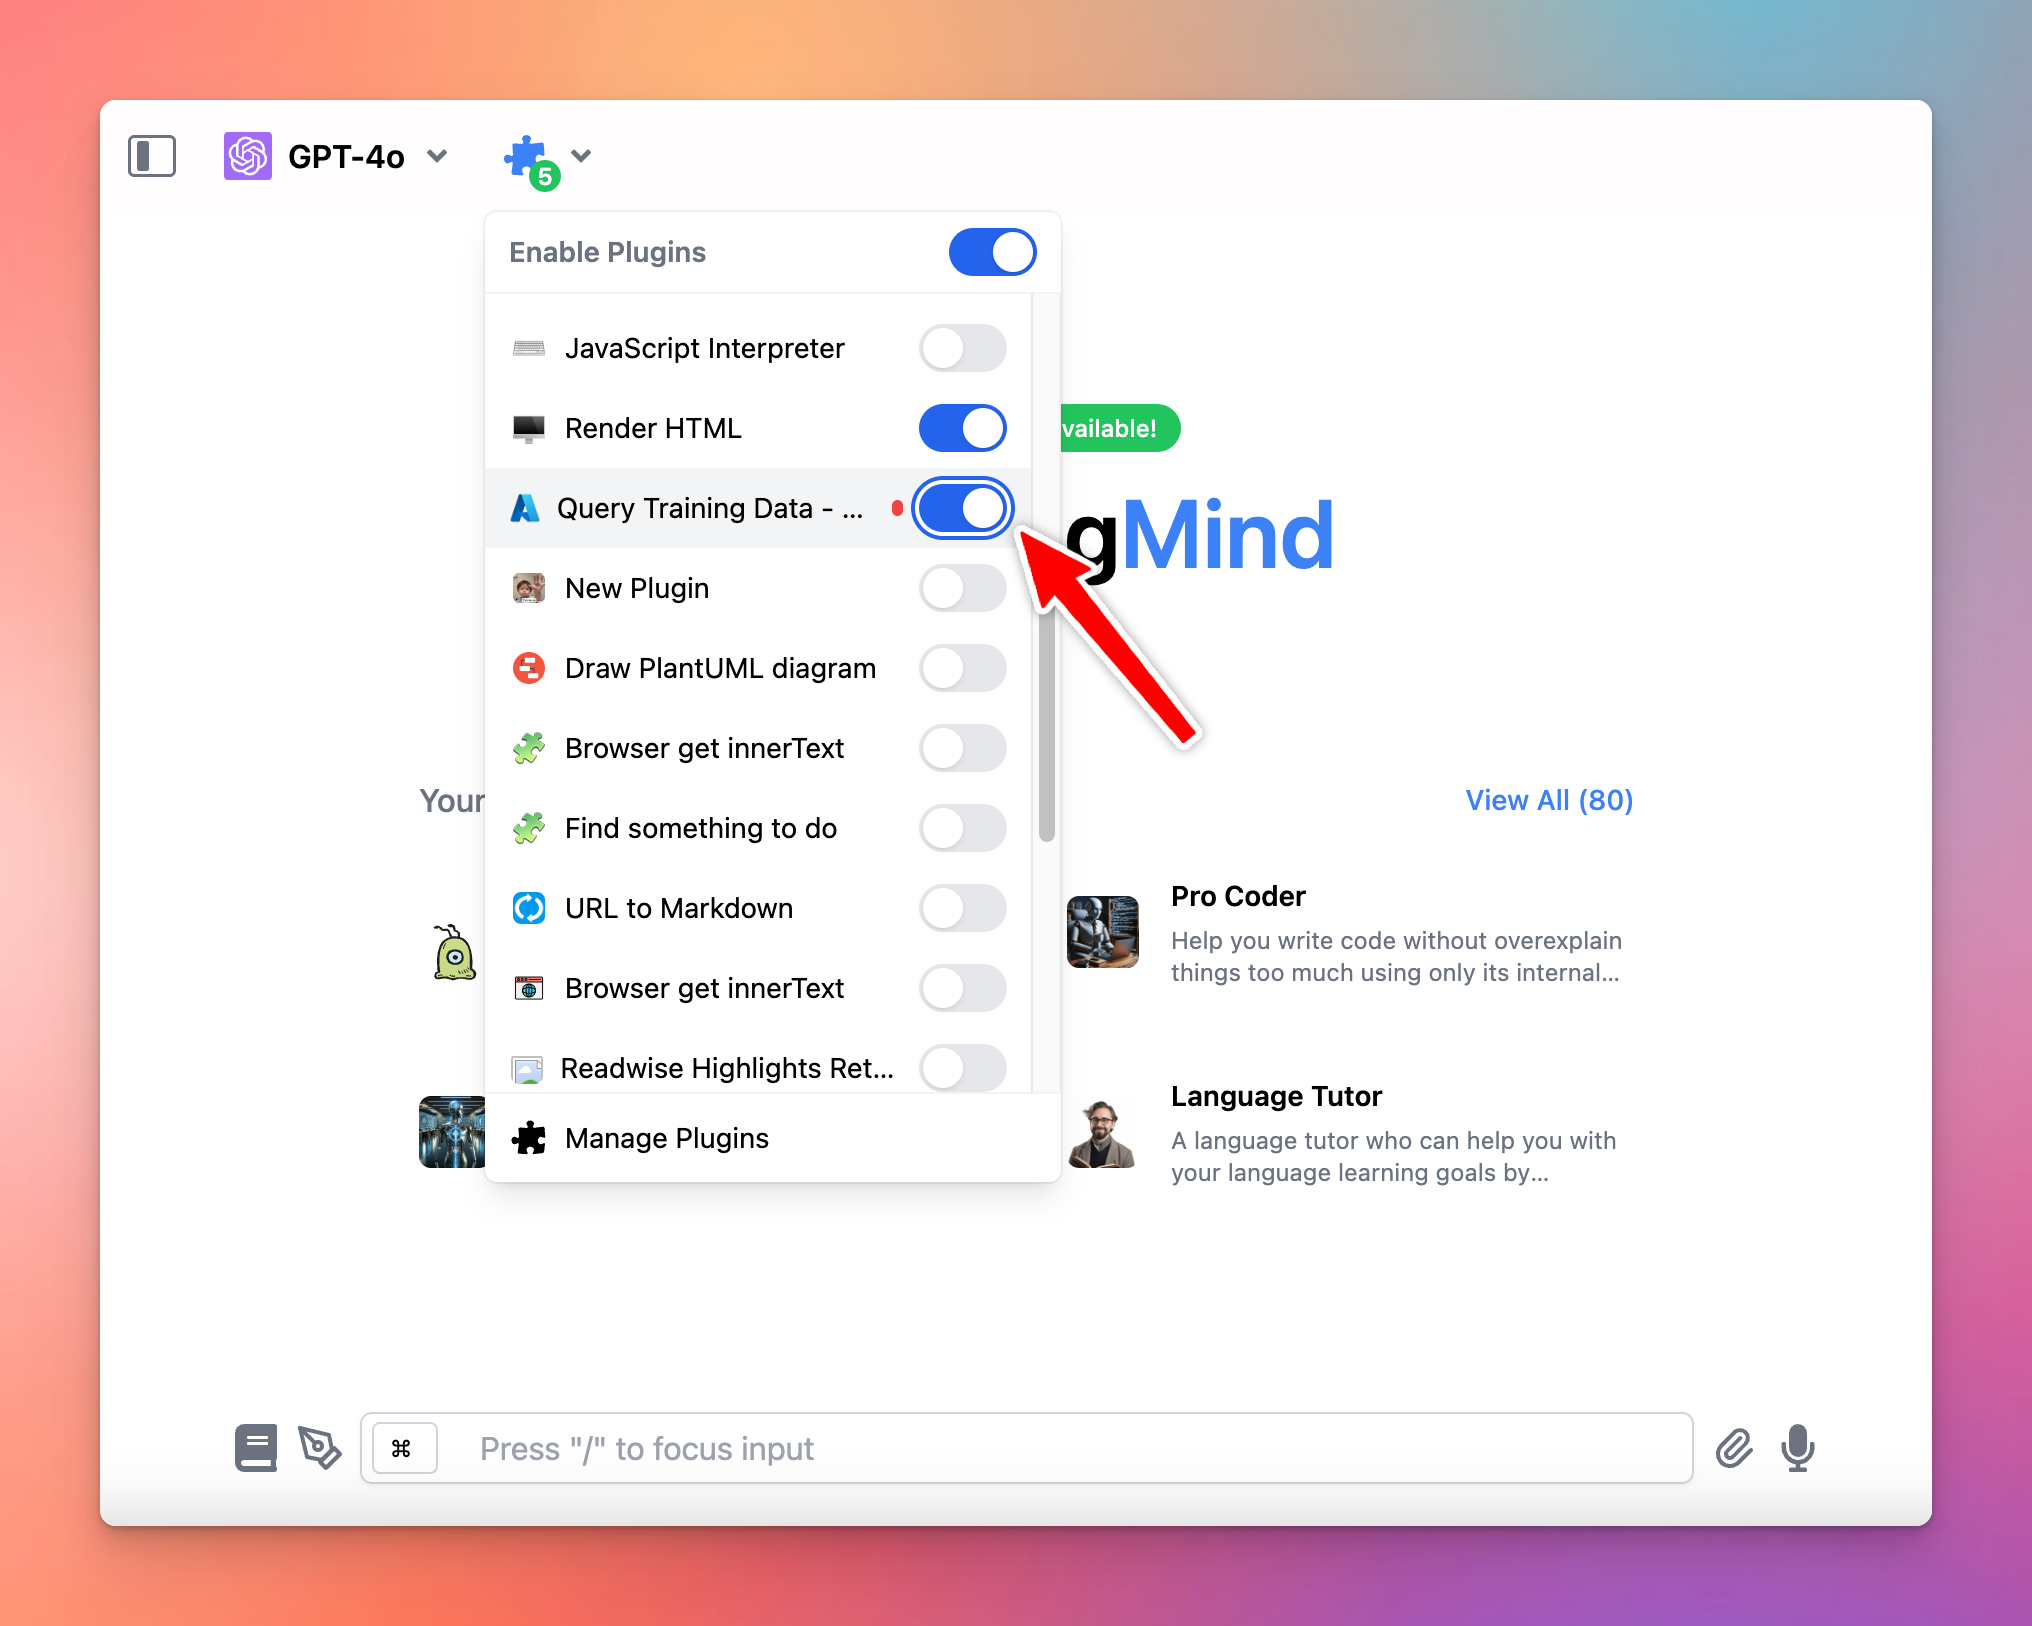
- Open the Query Training Data - Azure AI Search plugin settings and enable plugin
- Enter the settings as steps within the TypingMind Custom - Admin users above and click “Save”
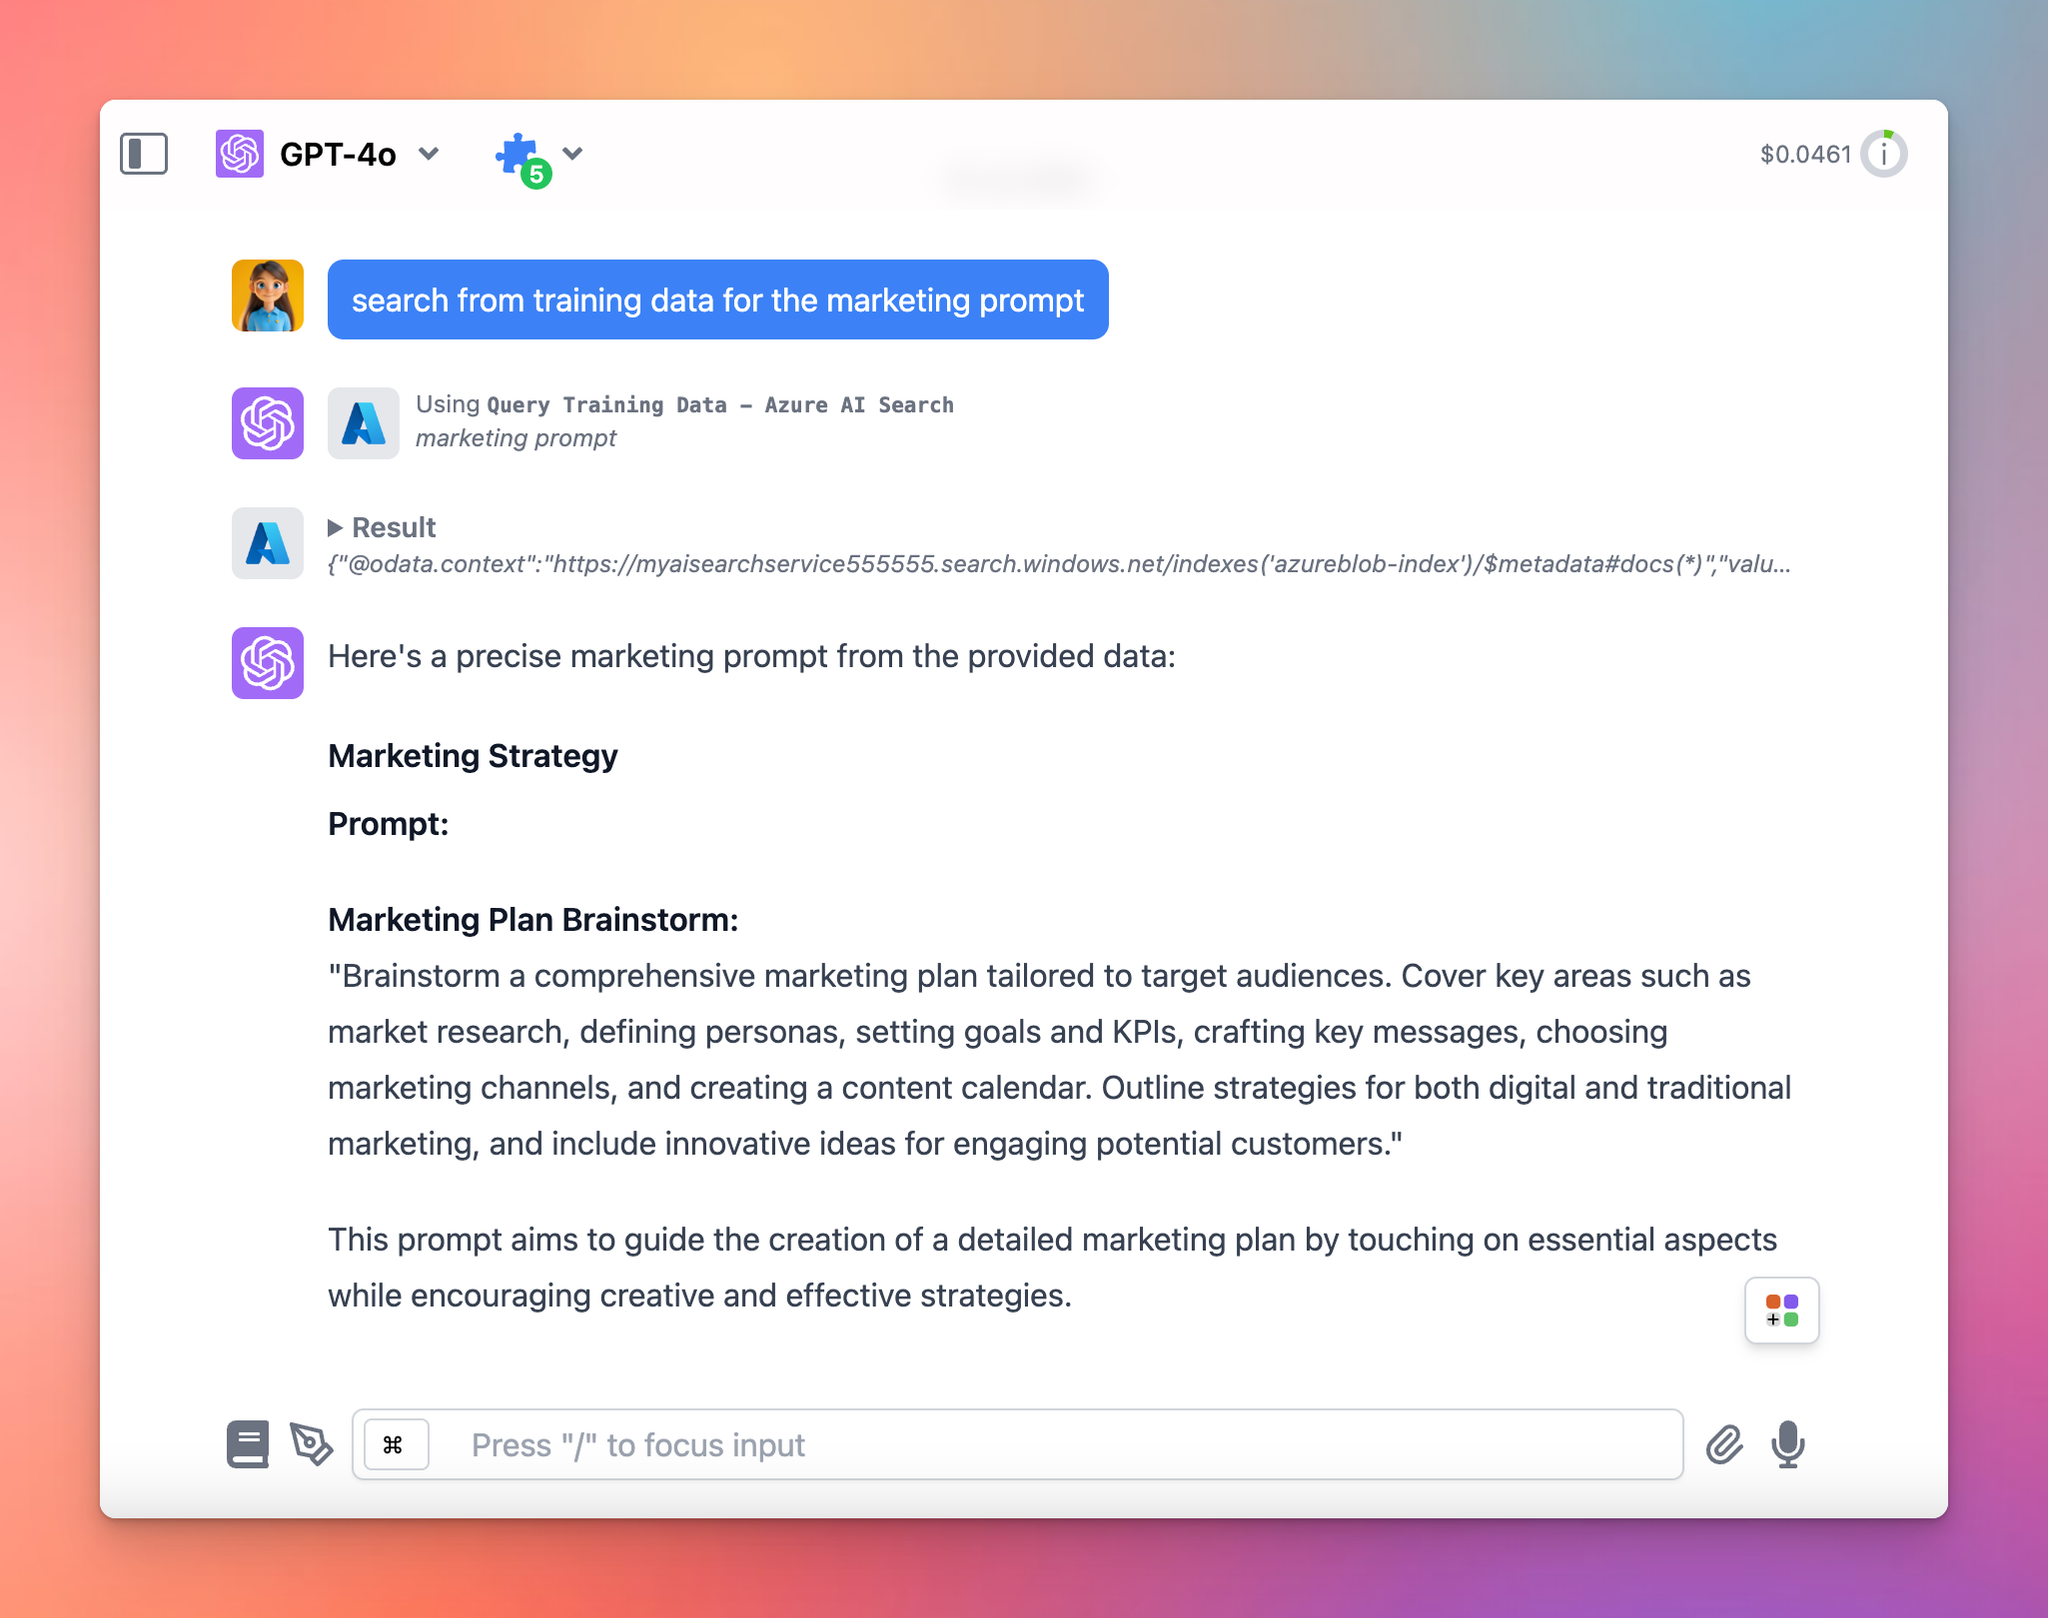
Step 6: Test the plugin!
Sometimes, you need to ask the AI to specifically search from the training data if the AI does not do it automatically.
Example:
"search from training data for the latest refund policy" "who is the founder of the company (search from training data)"