
The Excel Generator plugin enables you to quickly create and customize Excel files directly within TypingMind.
Step 1: Set up Plugin Server
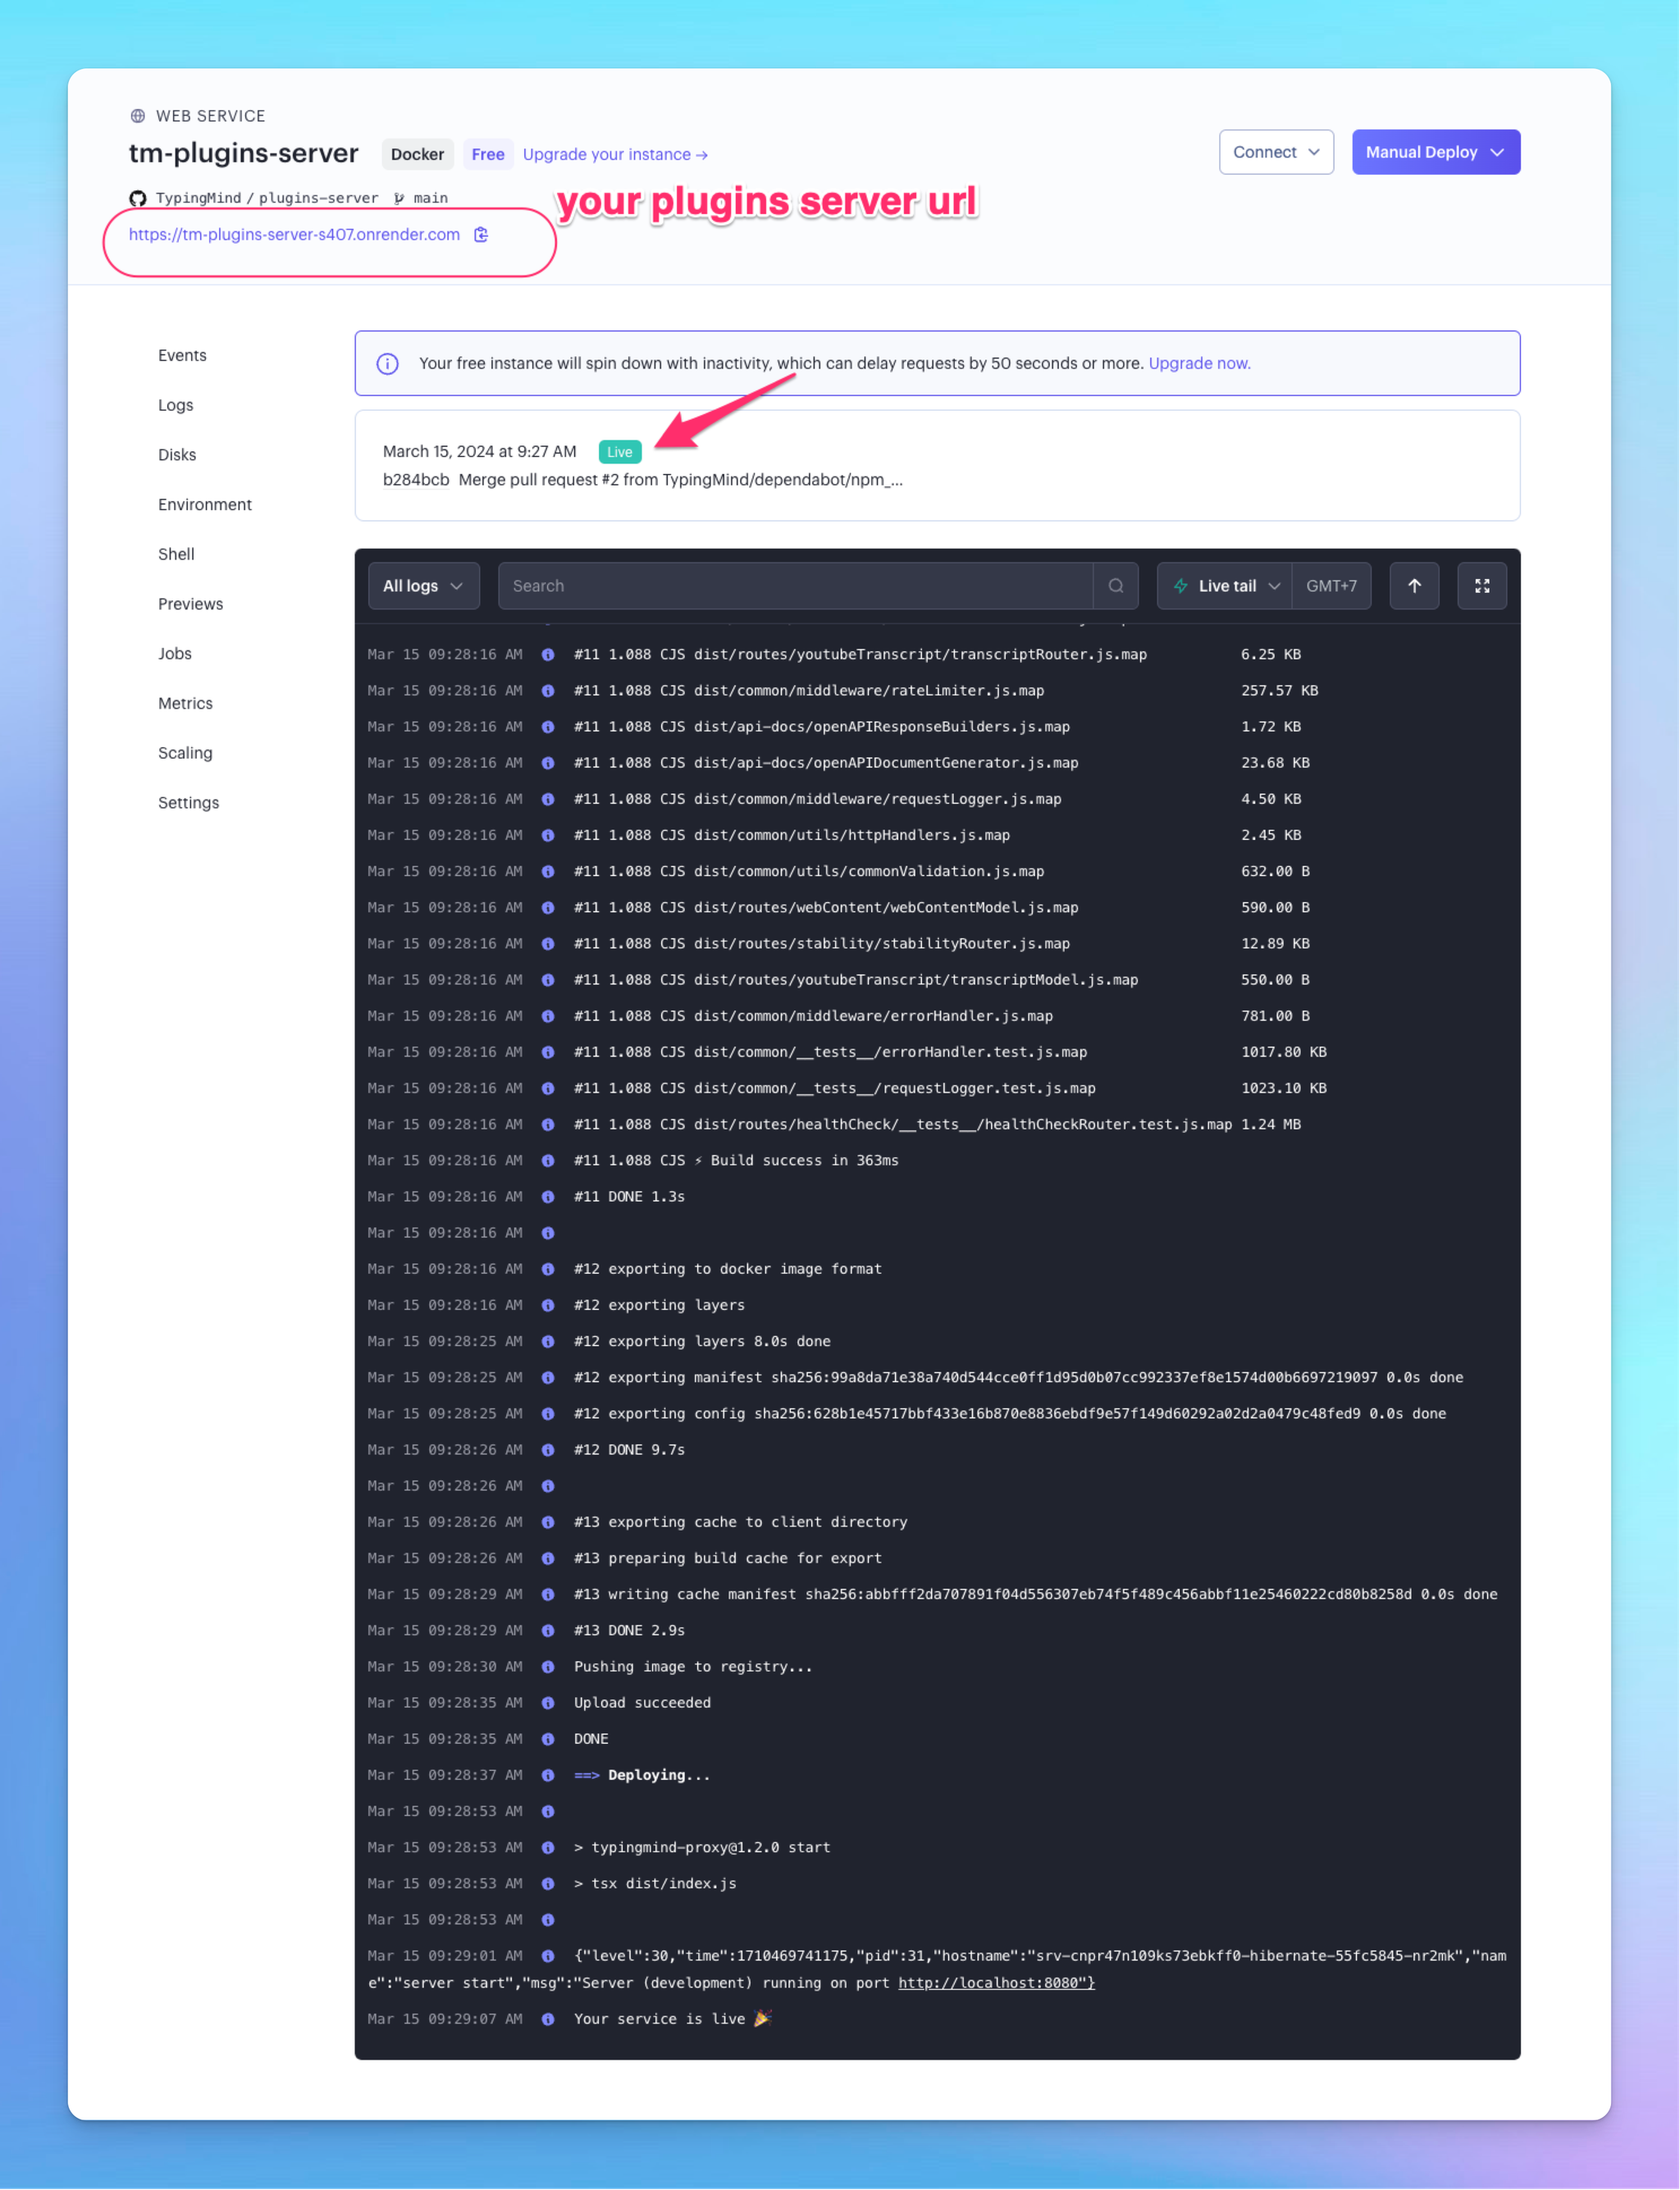
- Before using the plugin, you must set up a plugin server. This server will process your requests and generate the Excel files.
- Once deployed, copy the Plugin Server URL—you'll need it in the next step.
Step 2: Set up Excel Generator on TypingMind
After setting up the server, follow these steps to configure the Excel Generator plugin:
- Open TypingMind and navigate to the Plugin Store.
- Install the Excel Generator plugin.
- Click on the Excel Generator plugin to open its settings.
- Switch to the "Settings" tab and enter the Plugin Server URL that you copied in Step 1.
- Customize your Excel output using the available configuration options:
- Font Settings: Select a custom font family and adjust font sizes for text, table titles, and headers.
- Border Styles: Choose from thin, double, dashed, or thick borders.
- Column Formatting: Enable options for auto-fitting column width, auto-filtering, and text wrapping.

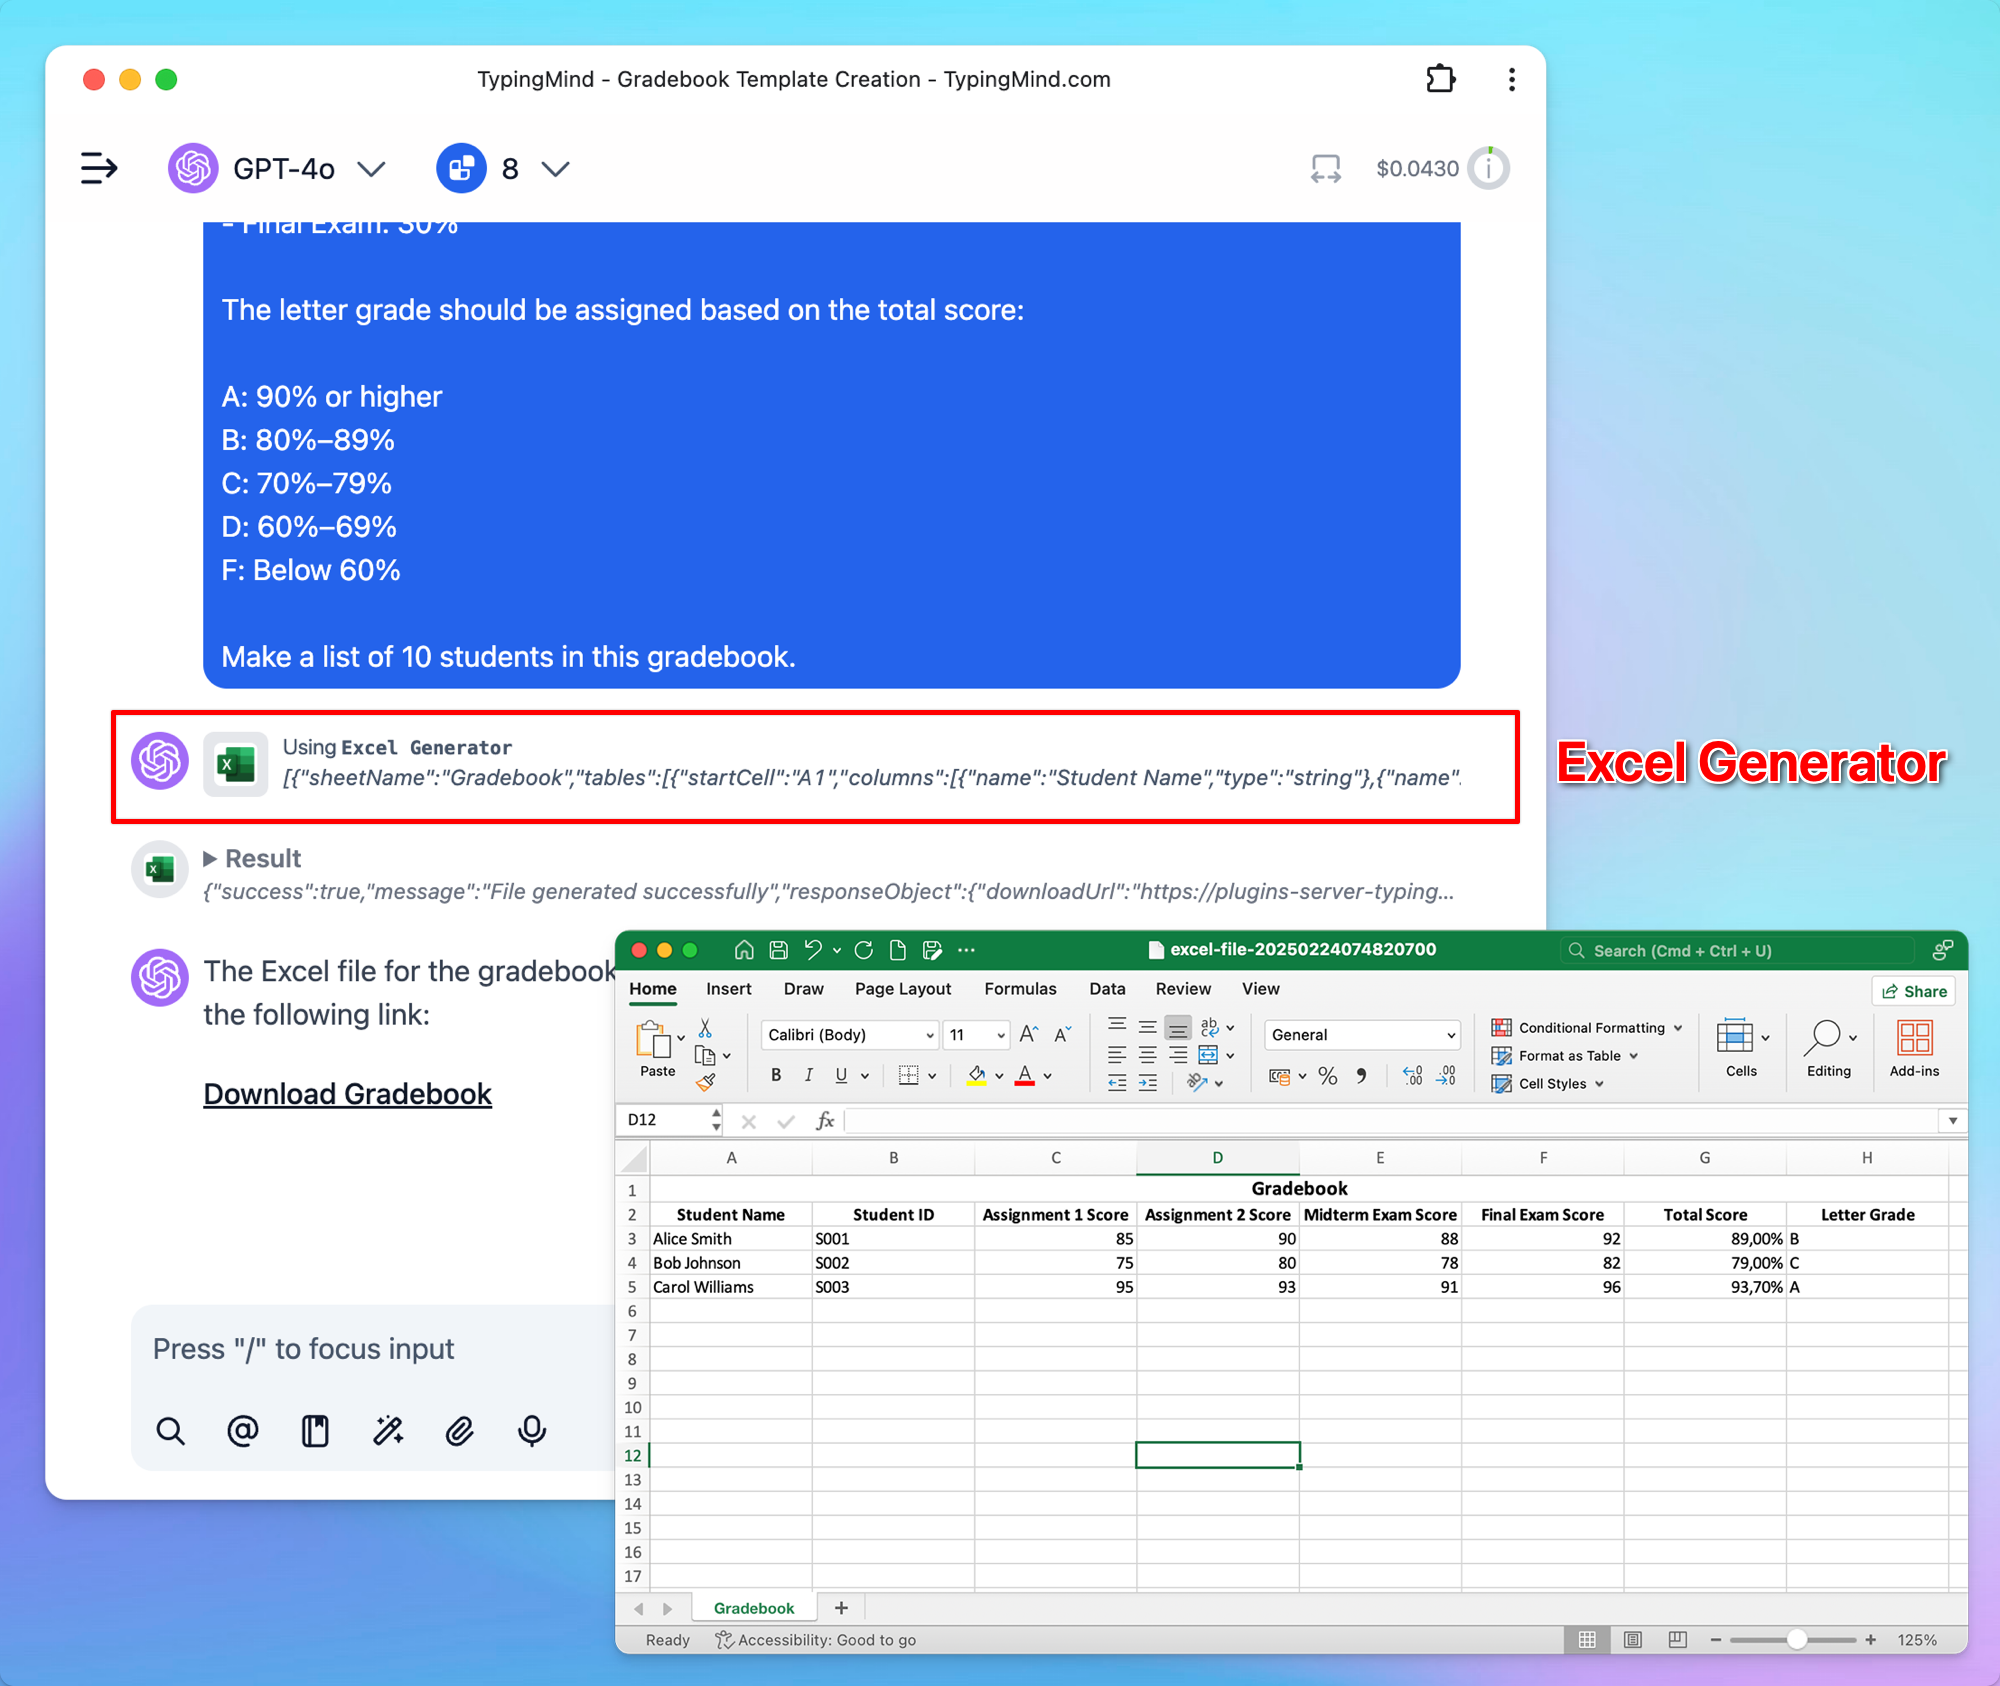
Step 3: Test the plugin
Once the setup is complete, test the plugin to ensure it works correctly:
As of now, the plugin supports:
- Multiple Sheets: Create and organize data across multiple sheets in a single workbook.
- Multiple Tables per Sheet: Add multiple tables with independent configurations to each sheet.
- Formula Columns: Define and apply formulas using Excel's syntax (e.g.,
=SUM(A1:A10)).
- Auto Filtering Mode: Enable or disable automatic filtering on table columns.
- Customizable Headers: Option to include or skip headers for tables, ensuring flexibility in design.
- Dynamic Cell Range: Specify starting cells for tables to ensure accurate placement.