Follow this guide to integrate Single Sign-On (SSO) for your instance by creating an application in JumpCloud and configuring the SSO connection.
Step 1: Create an SSO Application
- Access SSO Applications
- Log in to the JumpCloud Admin Dashboard.
- Select SSO Applications from the left menu.
- If you don't have any SSO applications yet, click Get Started to create a new one.

- Create a Custom Application
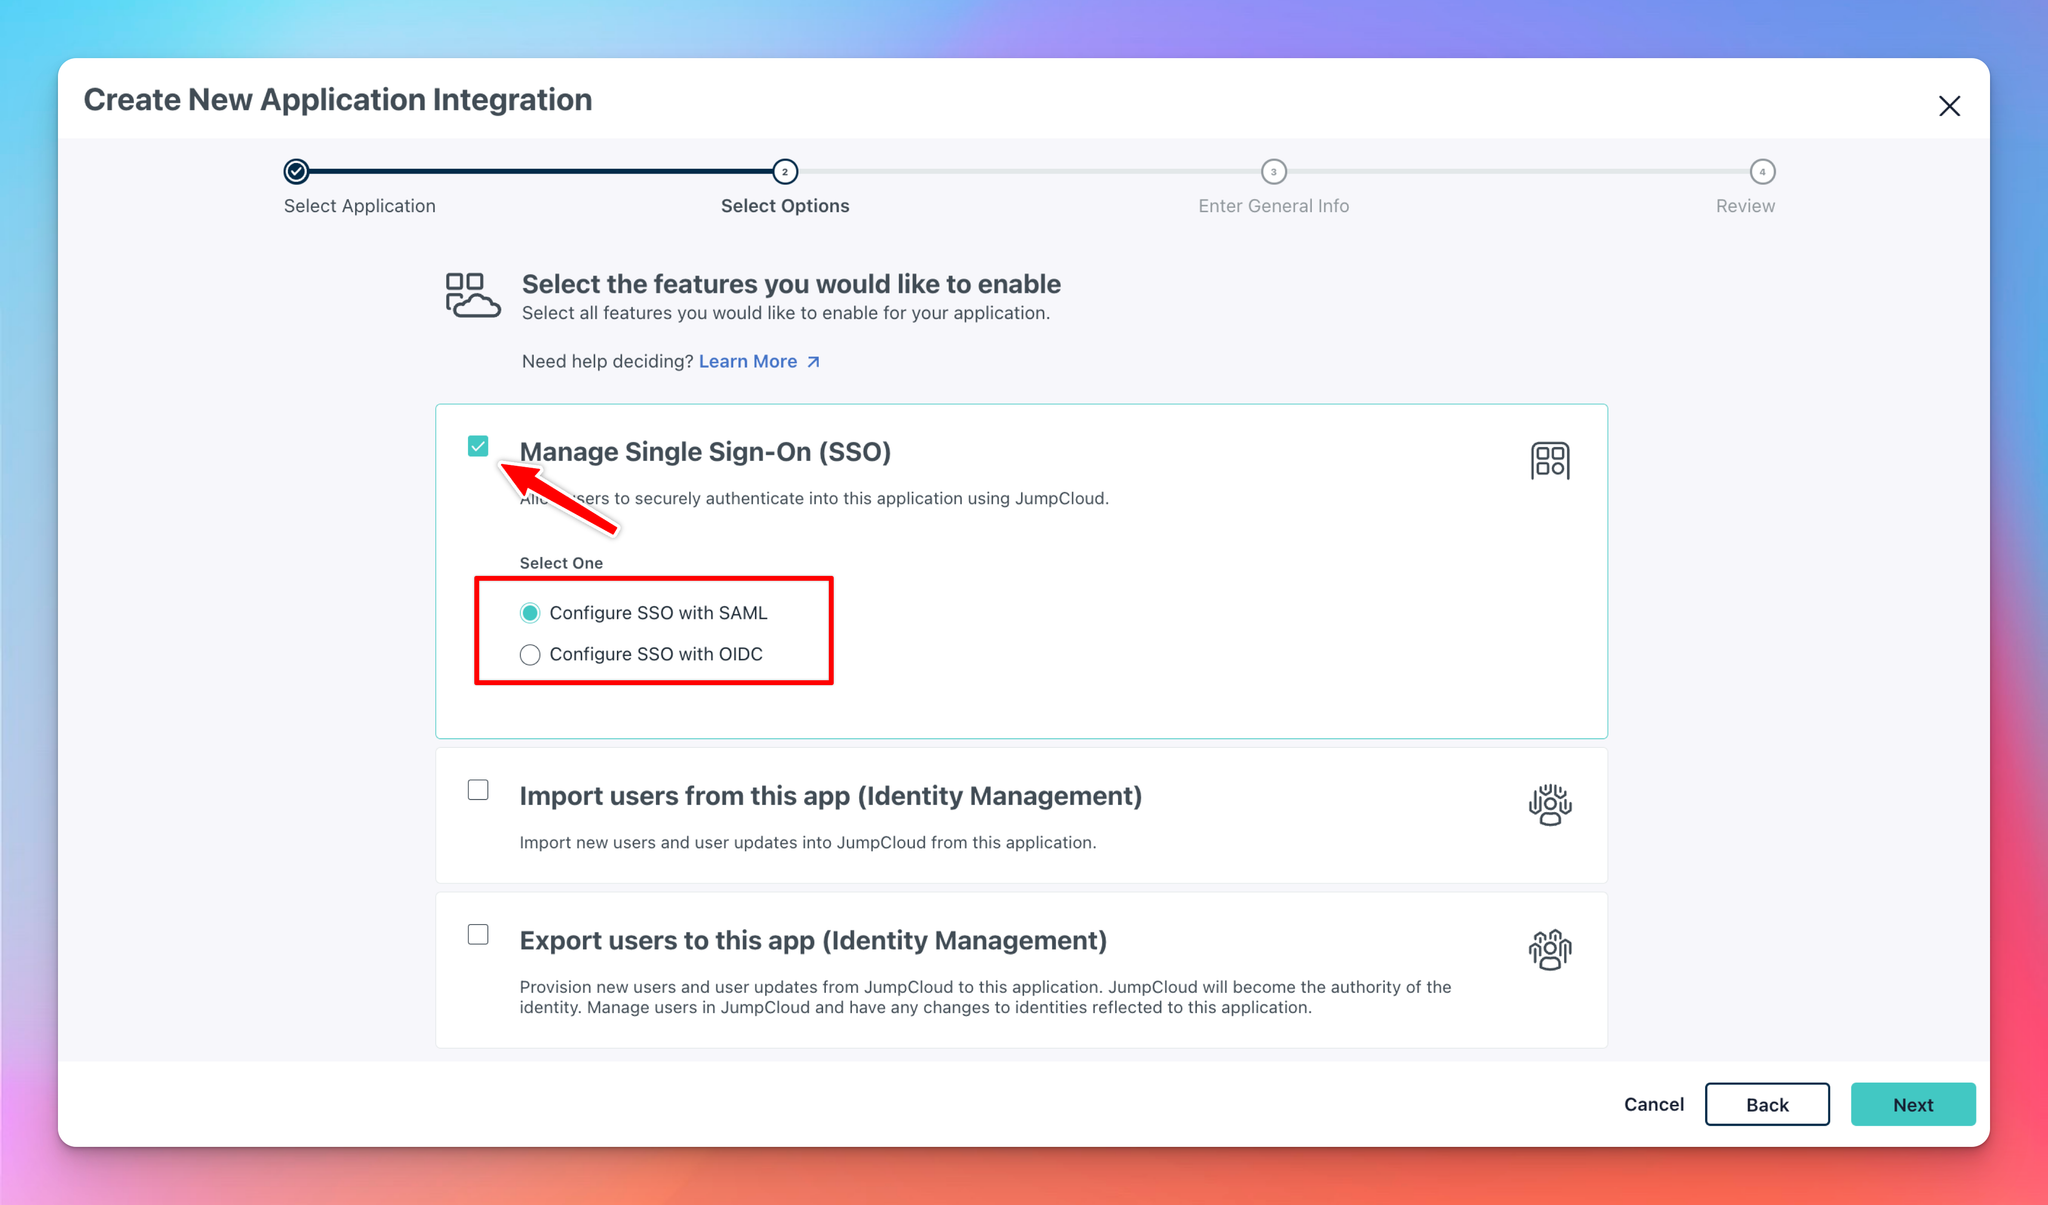
- In Step 1, select Custom Application.

- In Step 2, select Manage Single Sign-On and click Configure SSO with SAML.
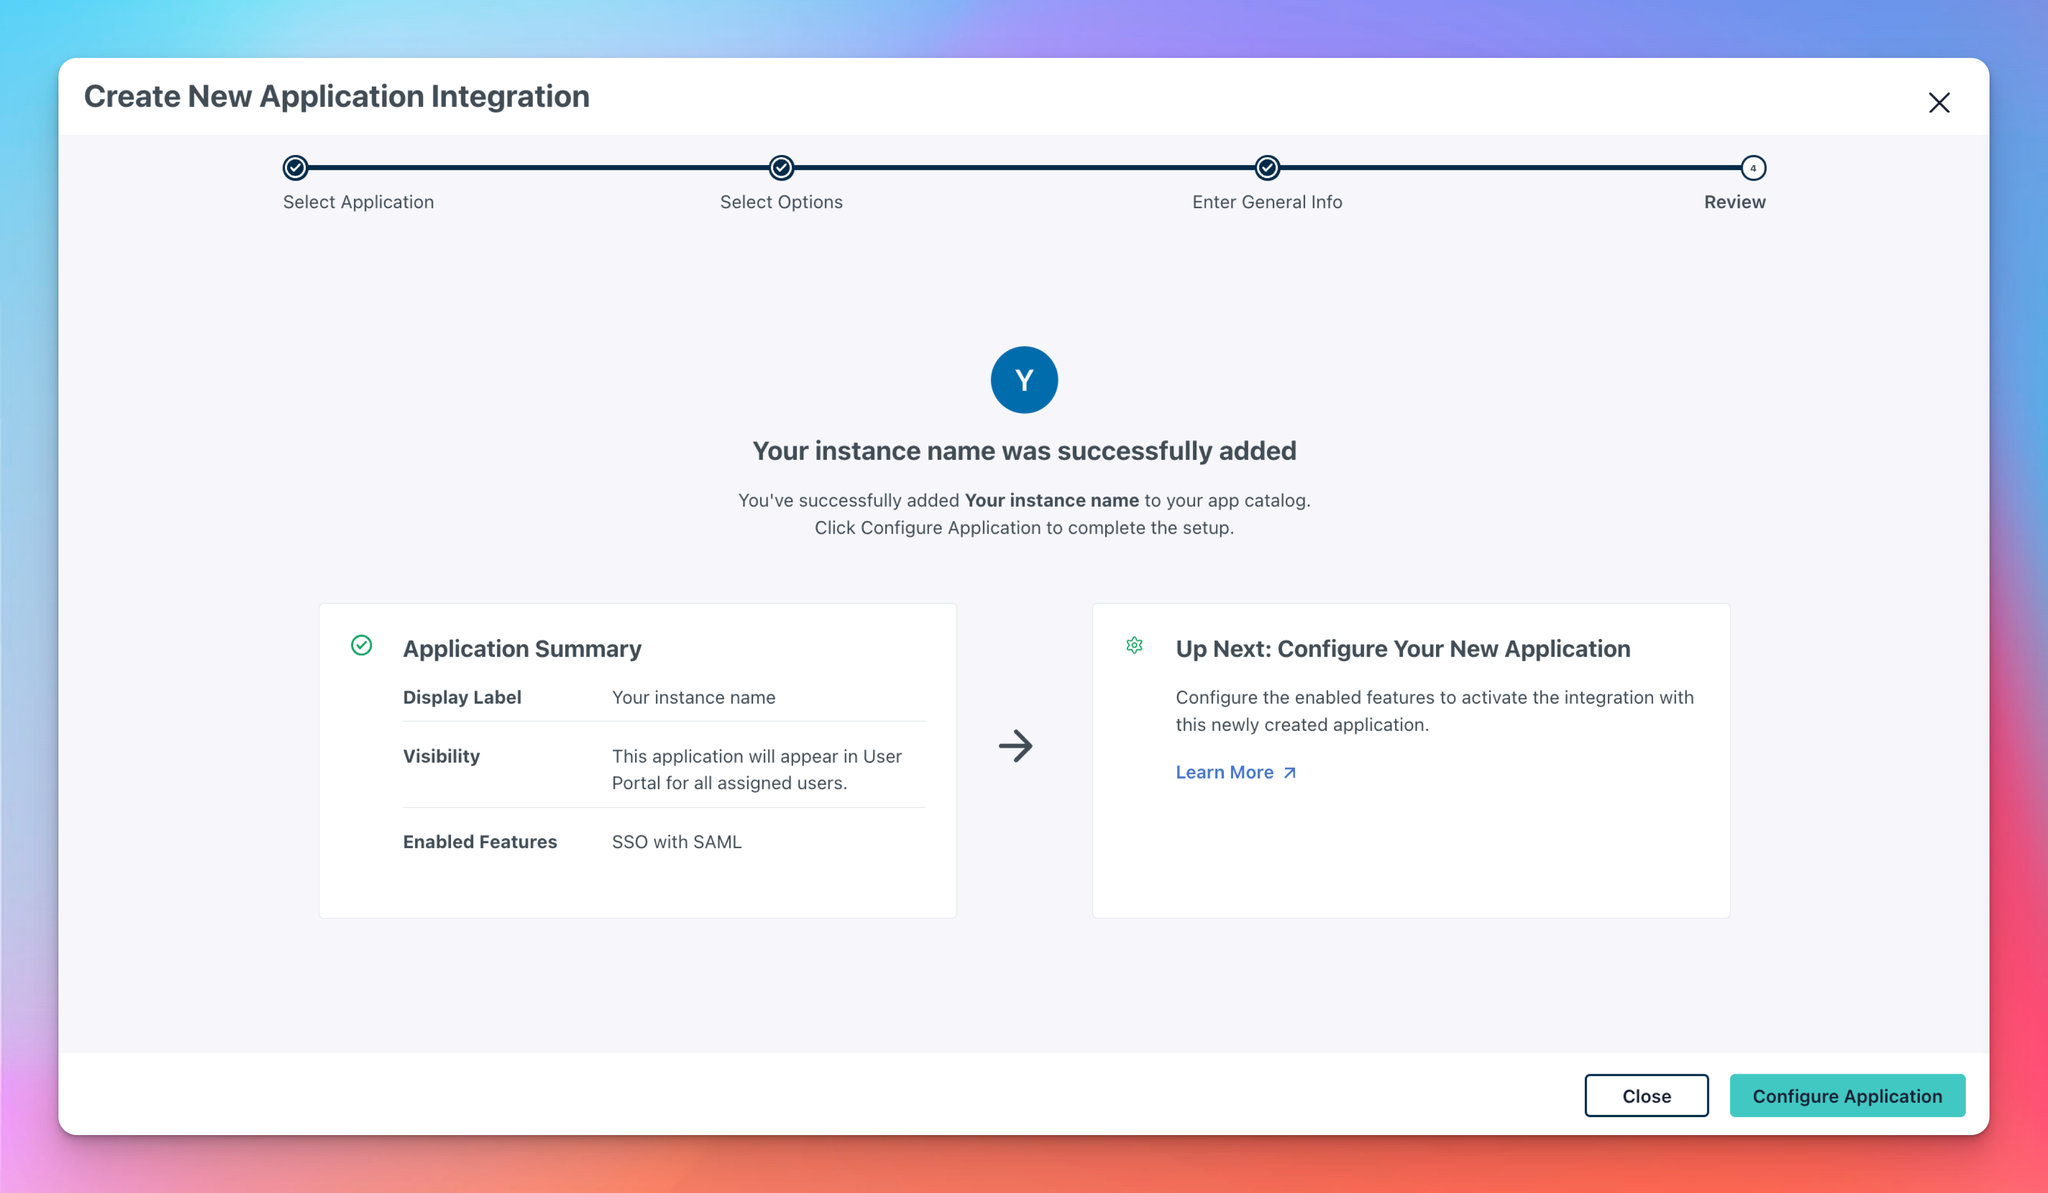
- In Step 3, provide basic information for the application. For example:
- Application Name: Use a name such as Your Instance Name.
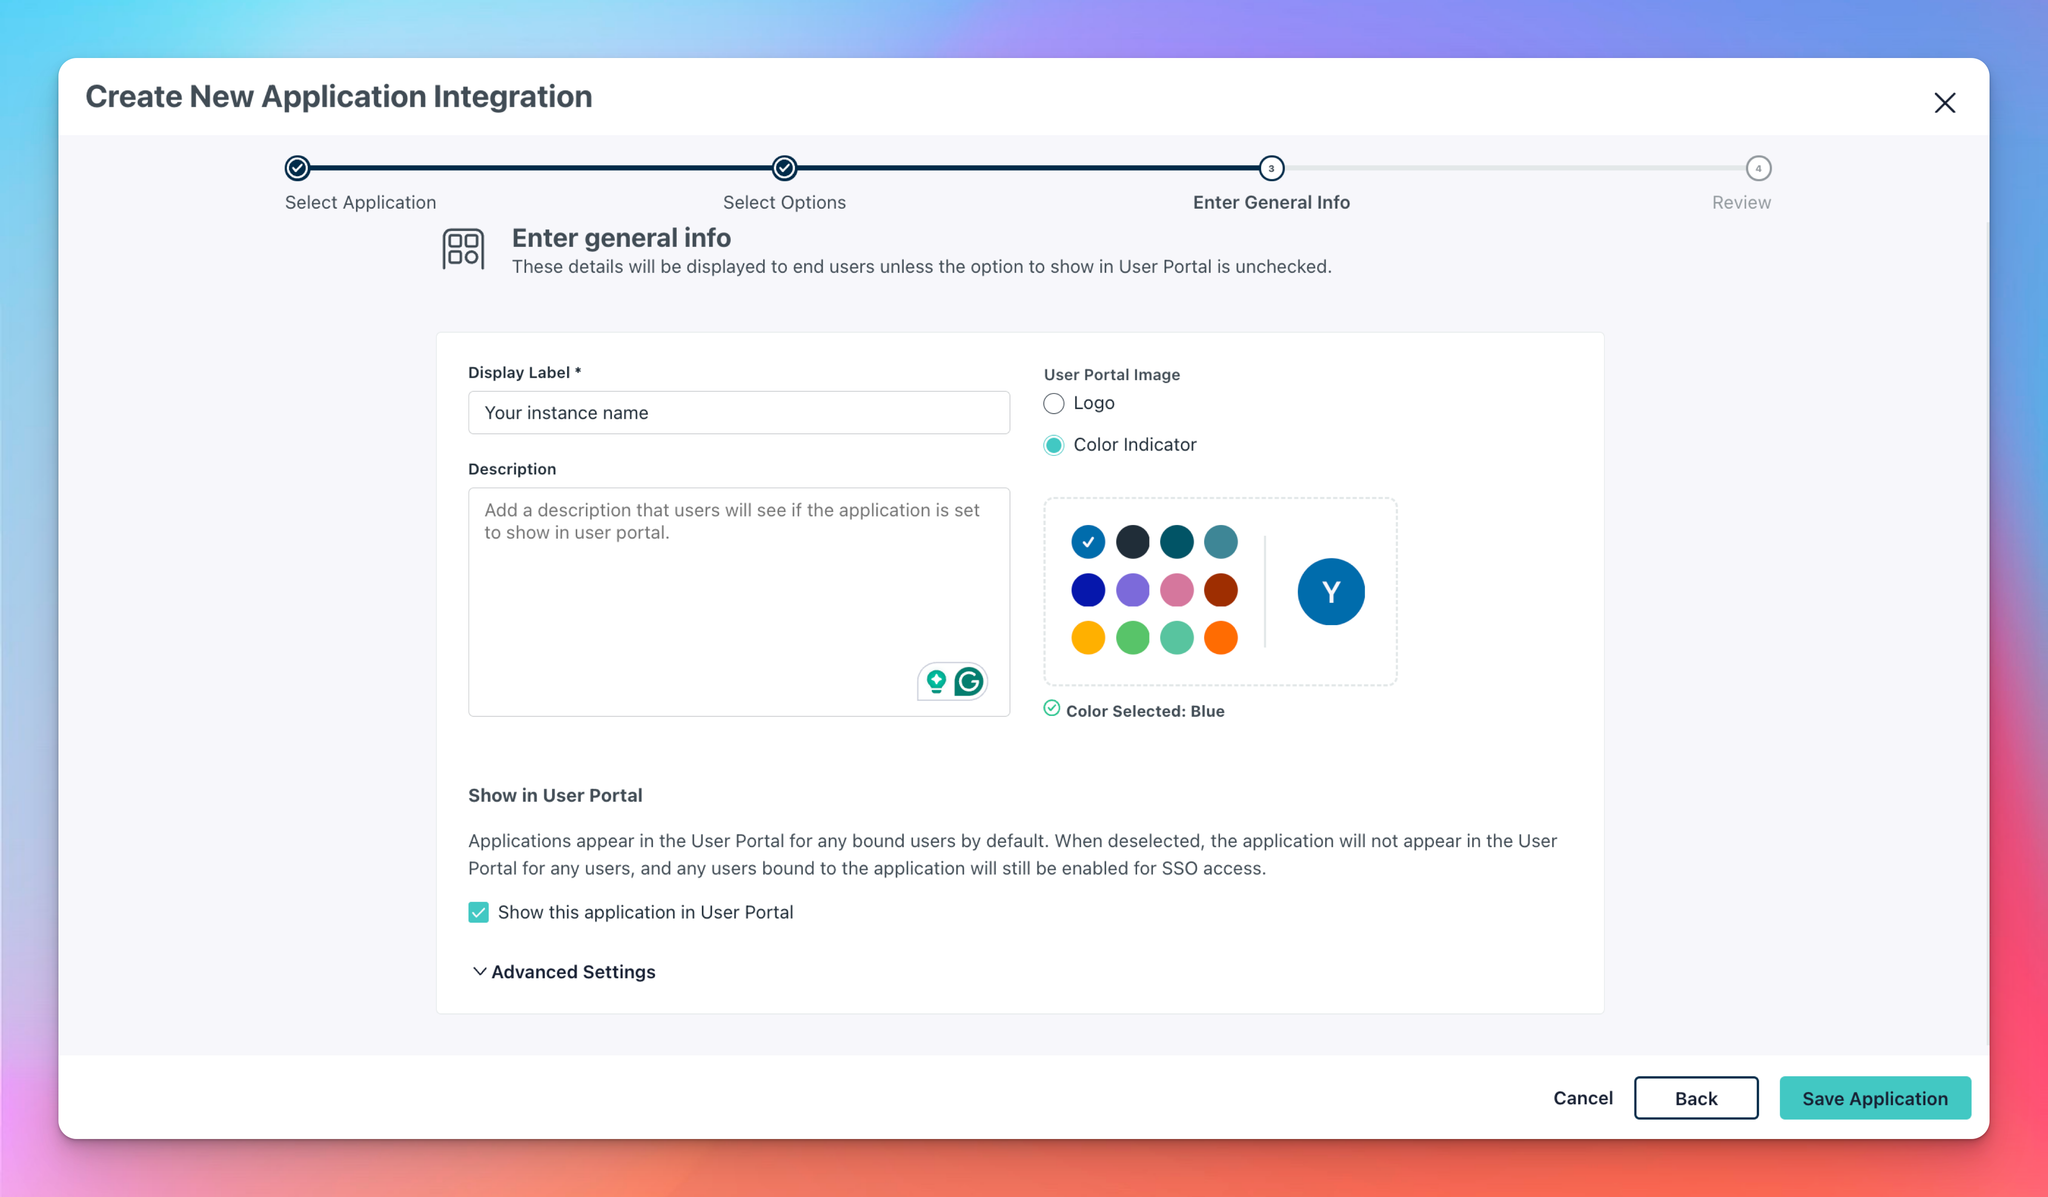
- Review your setup and, if satisfied, click Configure Application to complete the process.
Step 2: Configure the SSO Application
After creating the application, you need to set up its SSO configuration.
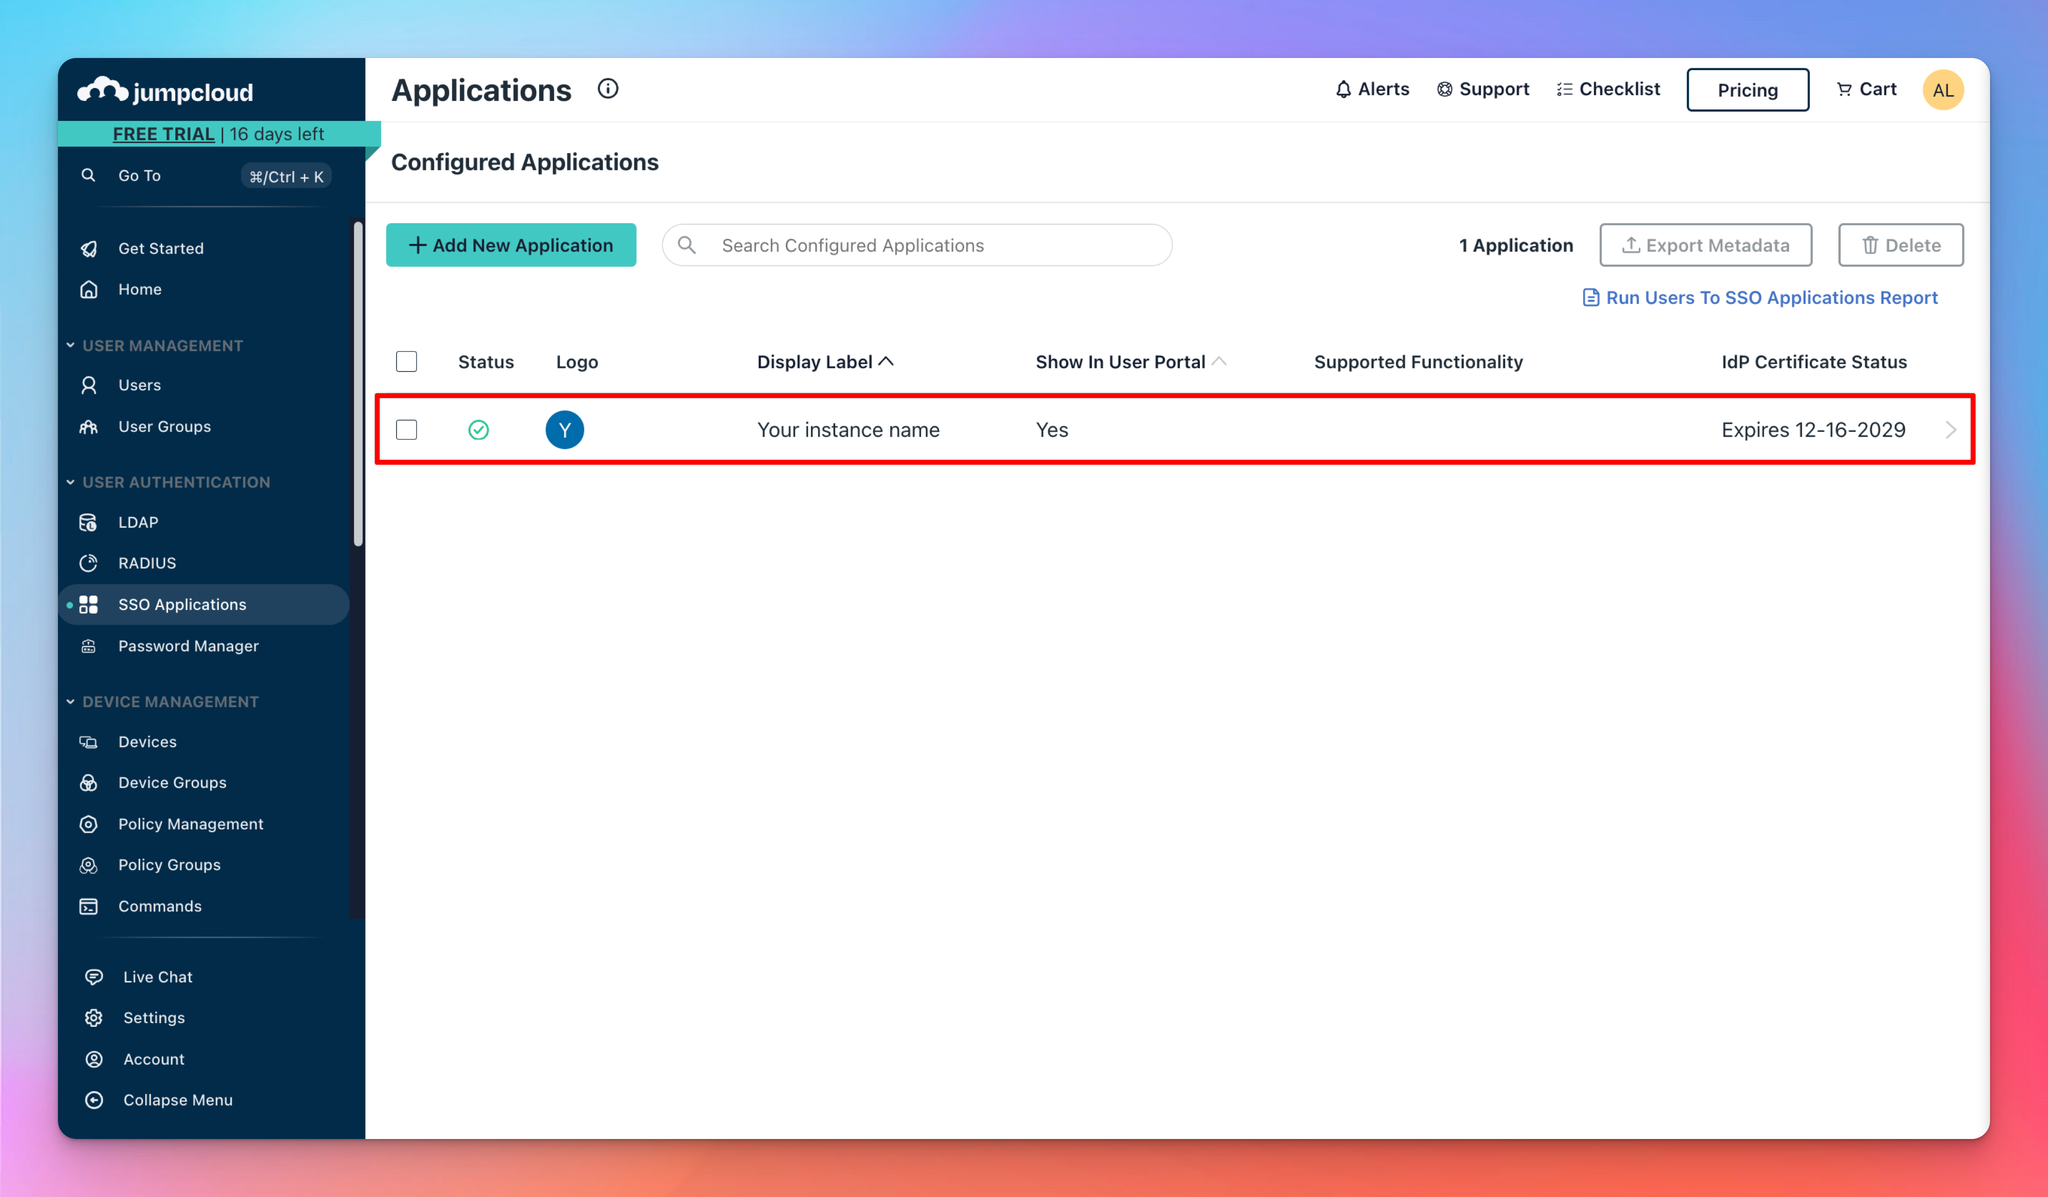
- Open Application Settings
- Select the newly created application and go to the SSO tab.

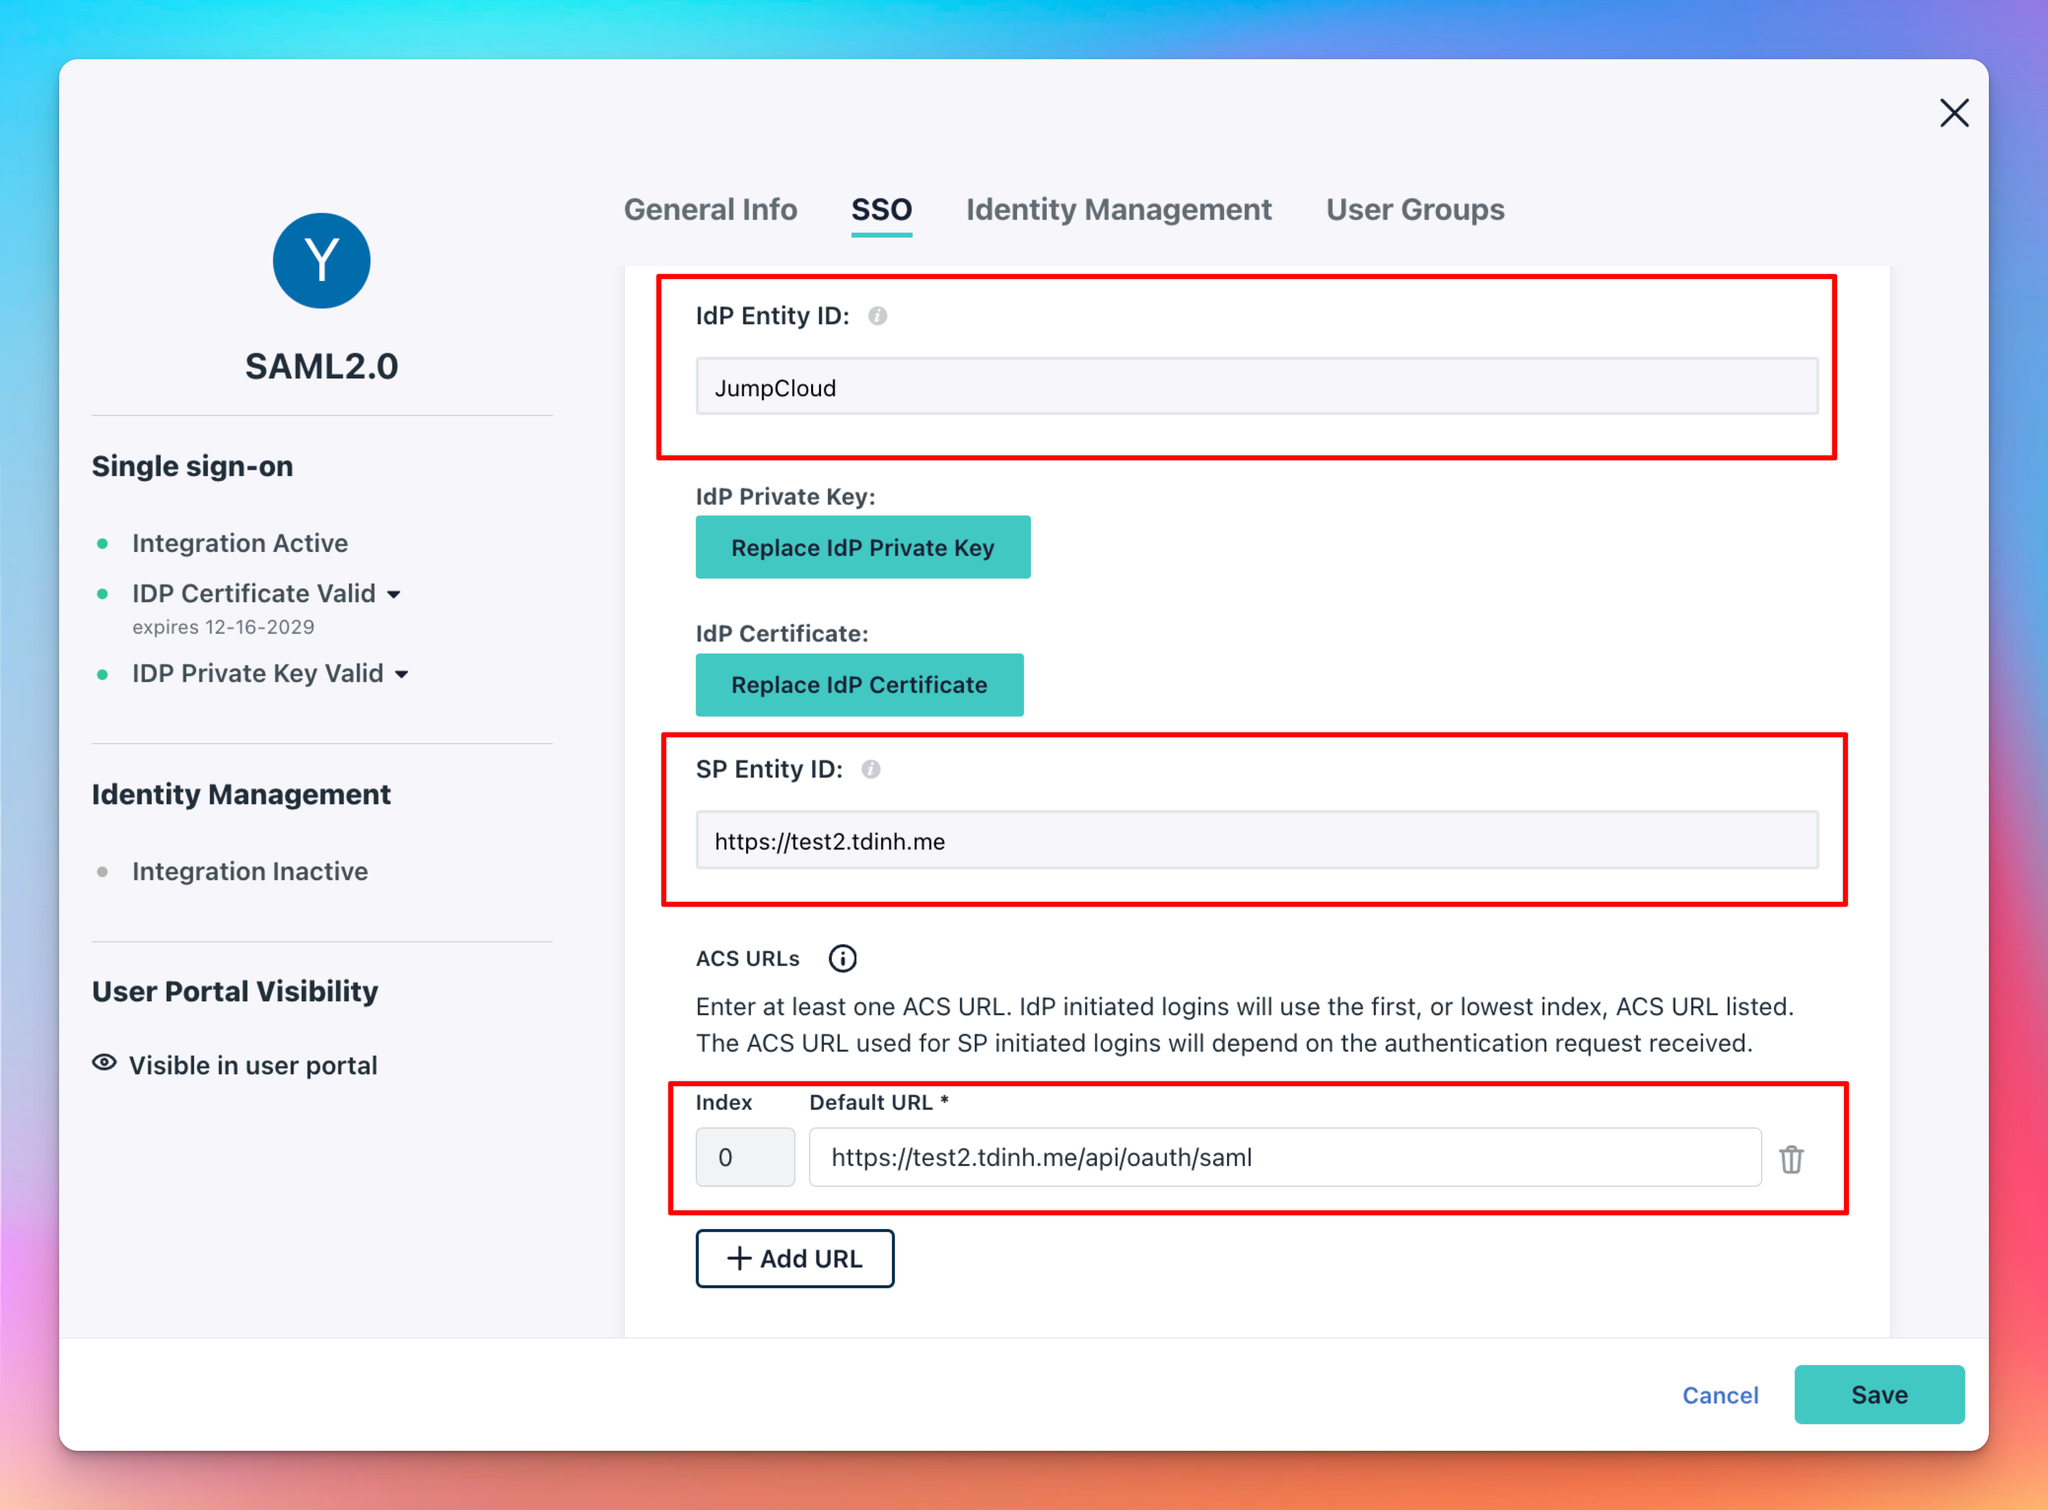
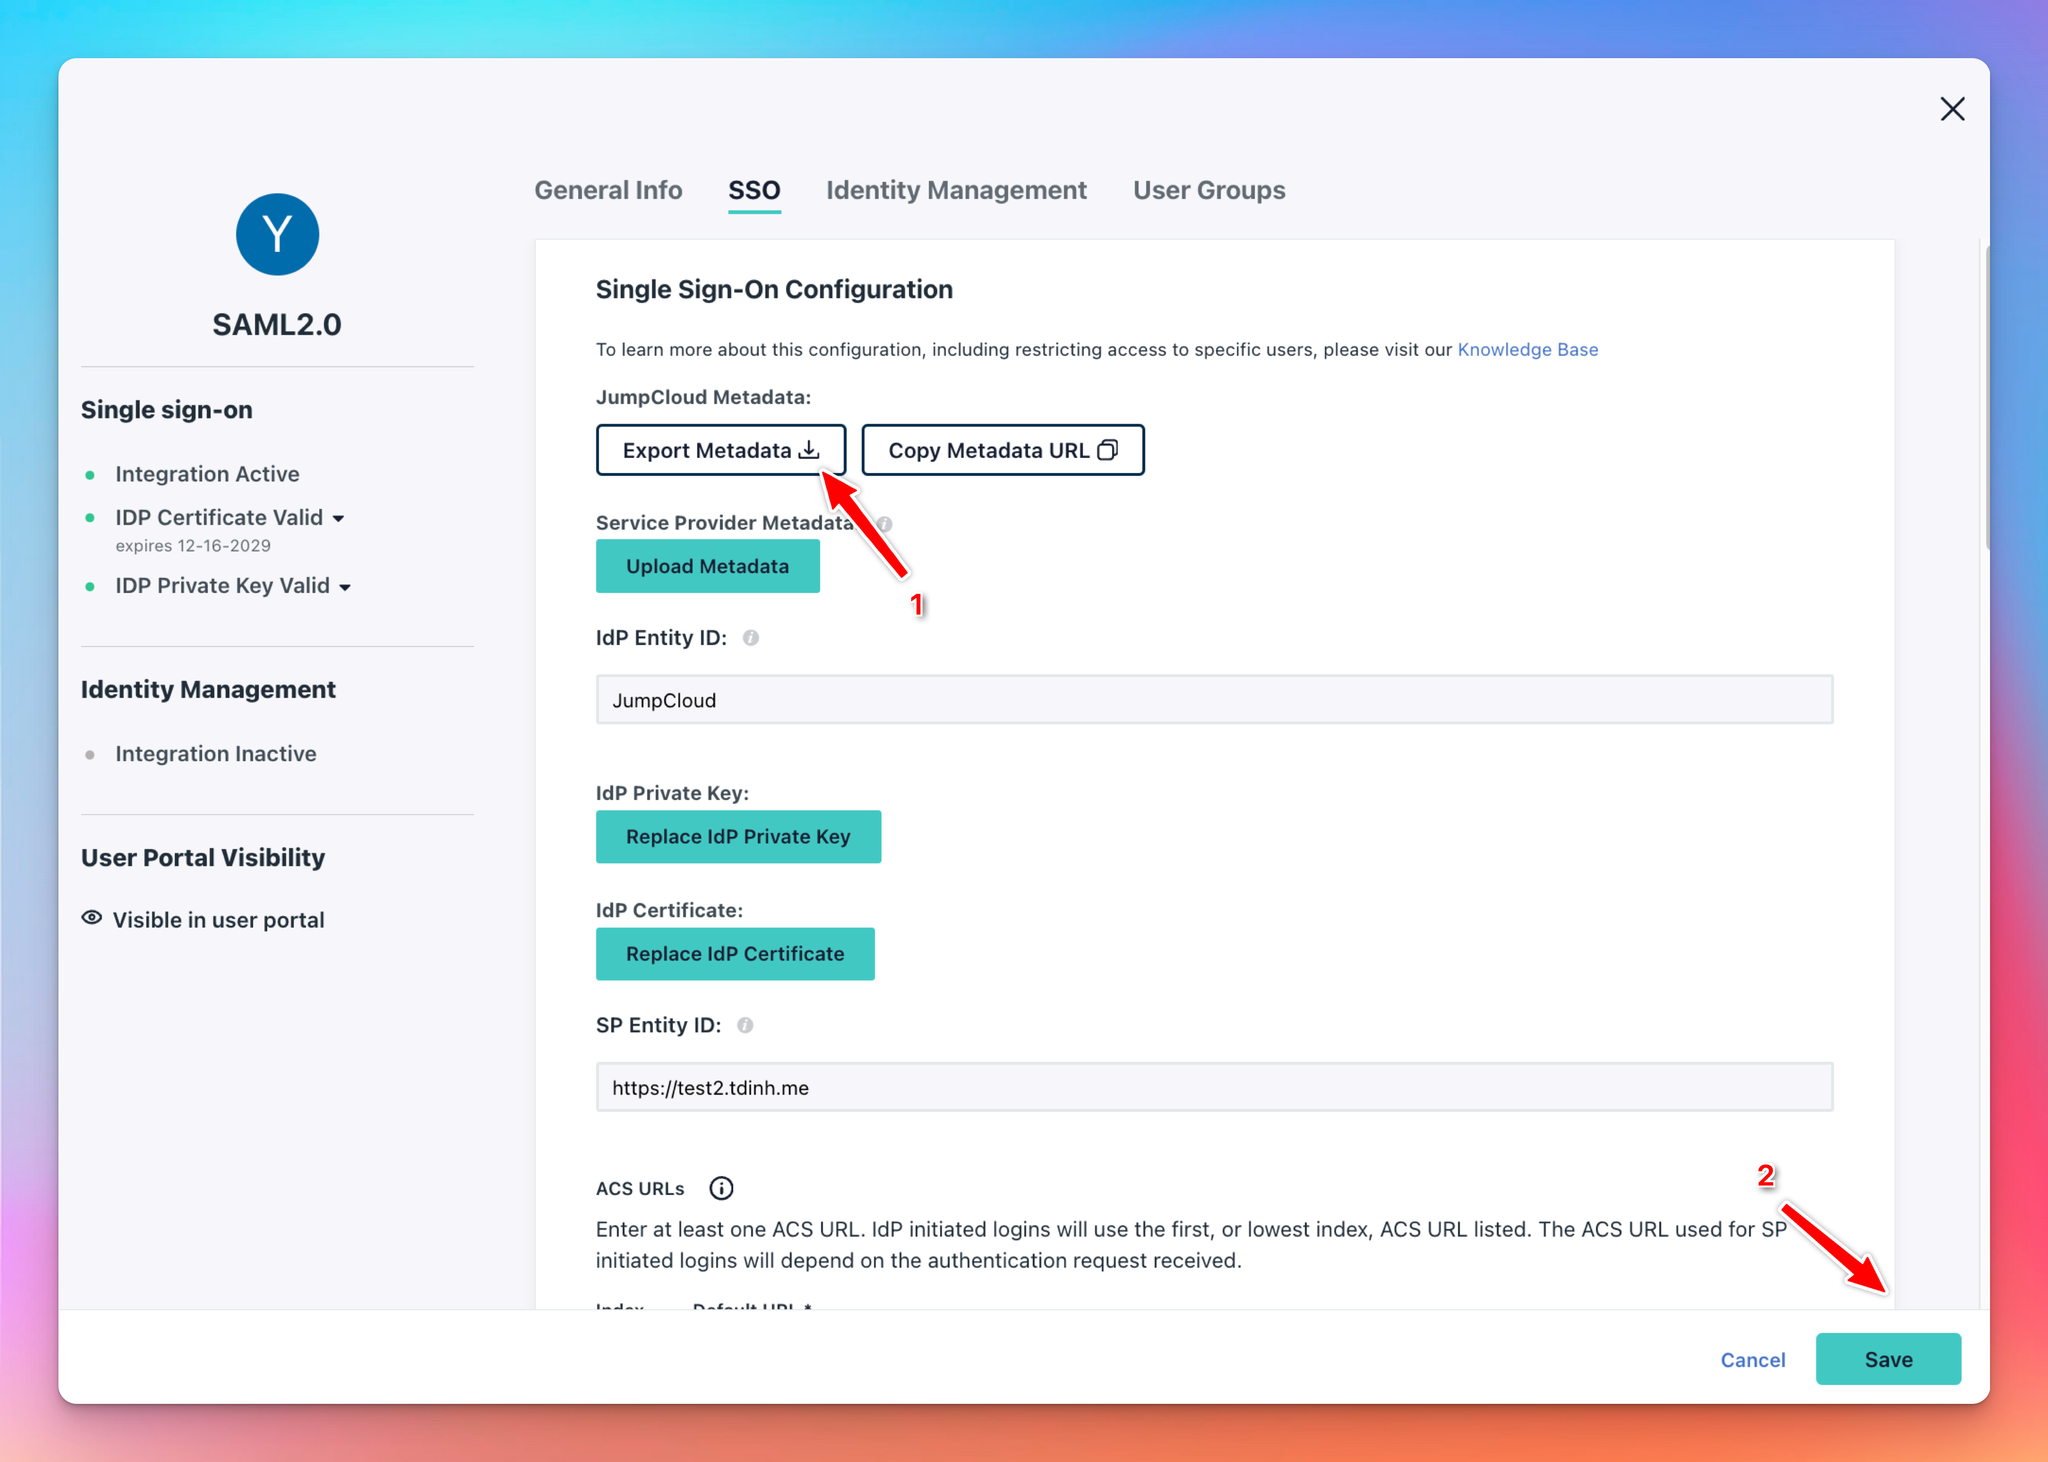
- Fill in SSO Details
Configure the SSO settings as follows:
- IdP Entity ID: Enter
JumpCloud
- SP Entity ID: Enter the value from the connection you created in your TypingMind instance. For this guide, use
https://test2.tdinh.me
- ACS URLS: For this guide, enter
https://test2.tdinh.me/api/oauth/saml
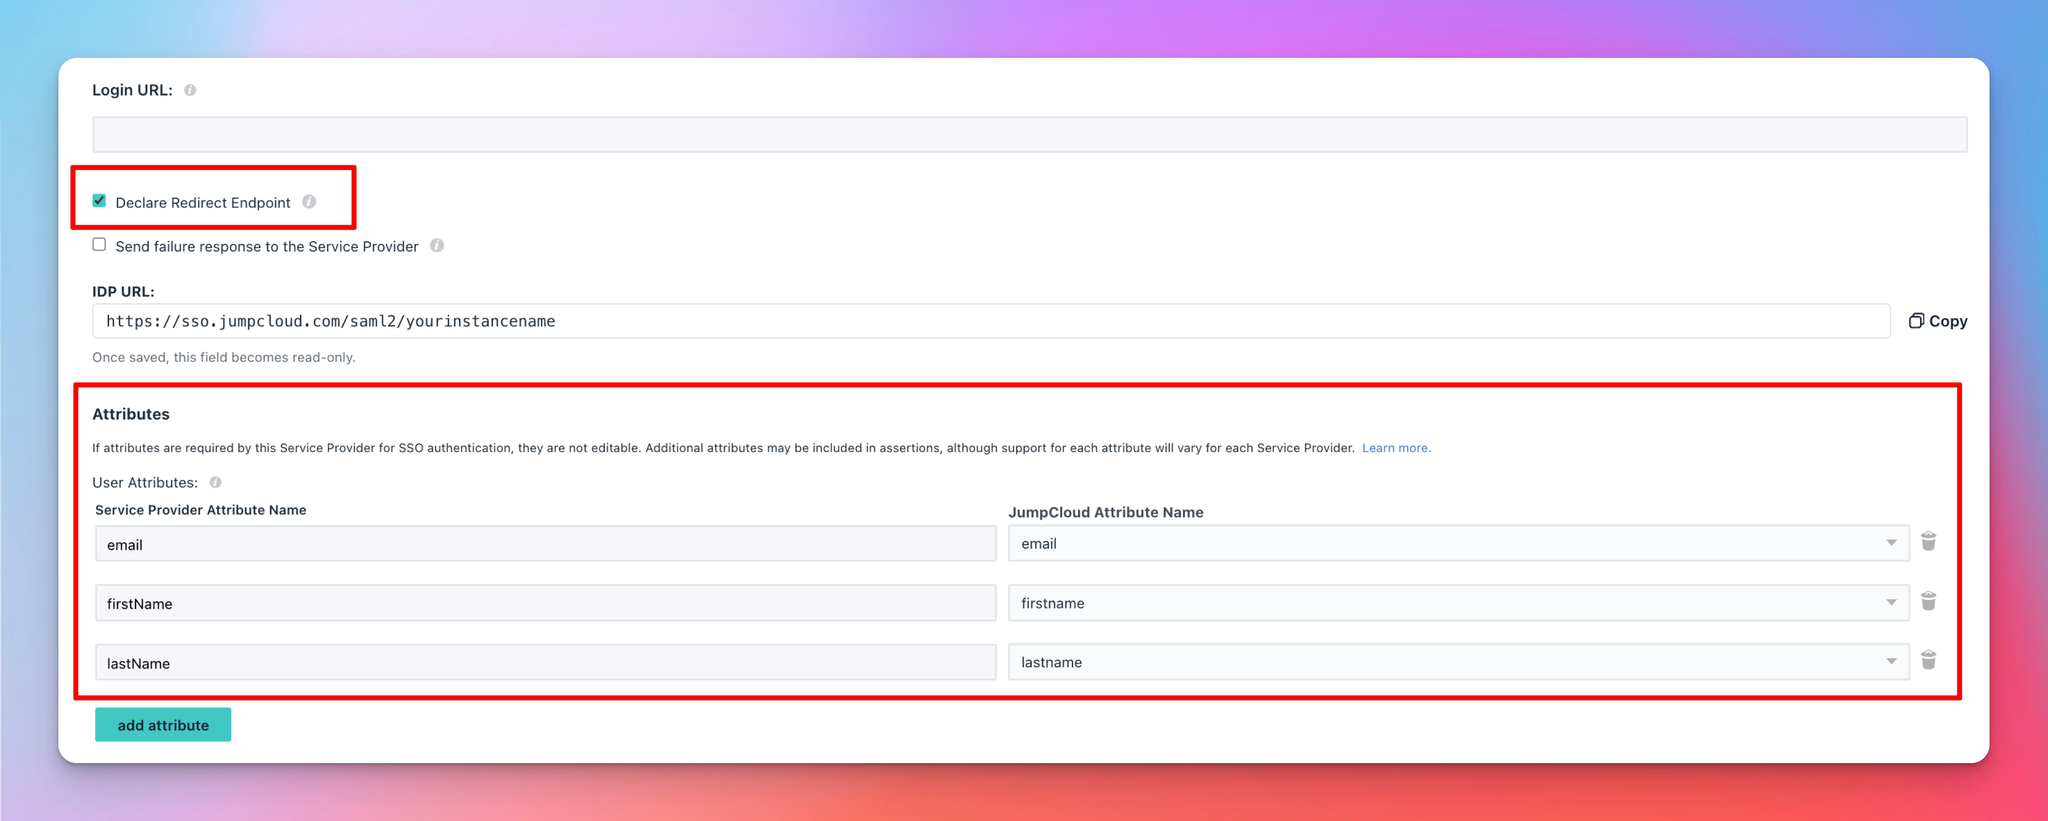
- Add User Attributes
Scroll down to add the following attributes:
- Attribute Name: email → Attribute Value: email
- Attribute Name: firstName → Attribute Value: firstname
- Attribute Name: lastName → Attribute Value: lastName
Make sure you also check the Declare Redirect Endpoint checkbox.
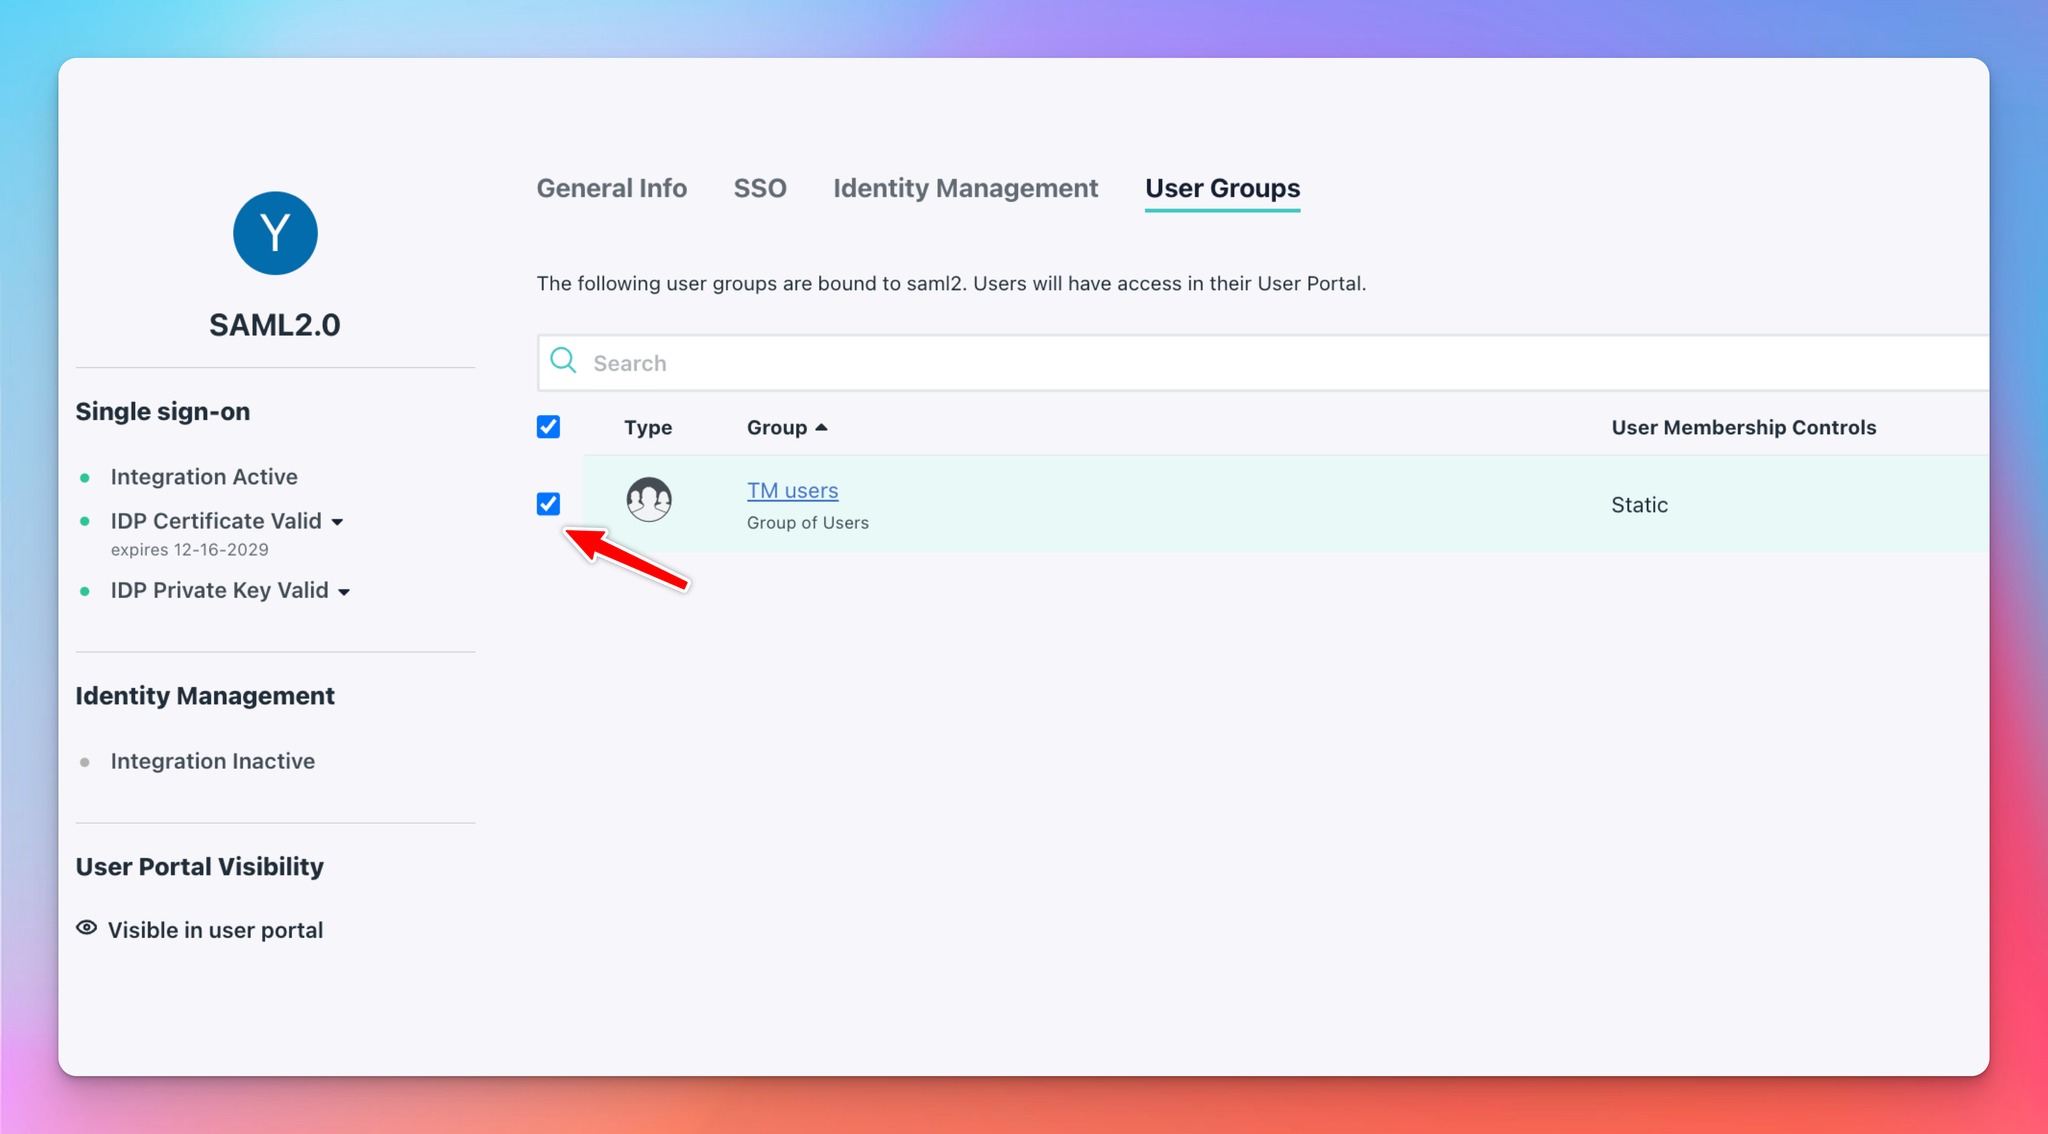
- Add user groups
Choose the user groups that you want to grant access to logging in with Single Sign-On (SSO).
- Export Metadata
Once all fields are filled correctly:
- Scroll to the top and click Export Metadata to download the XML file.
- Click Save to finish.
Step 3: Finalize SSO Configuration in Your Instance
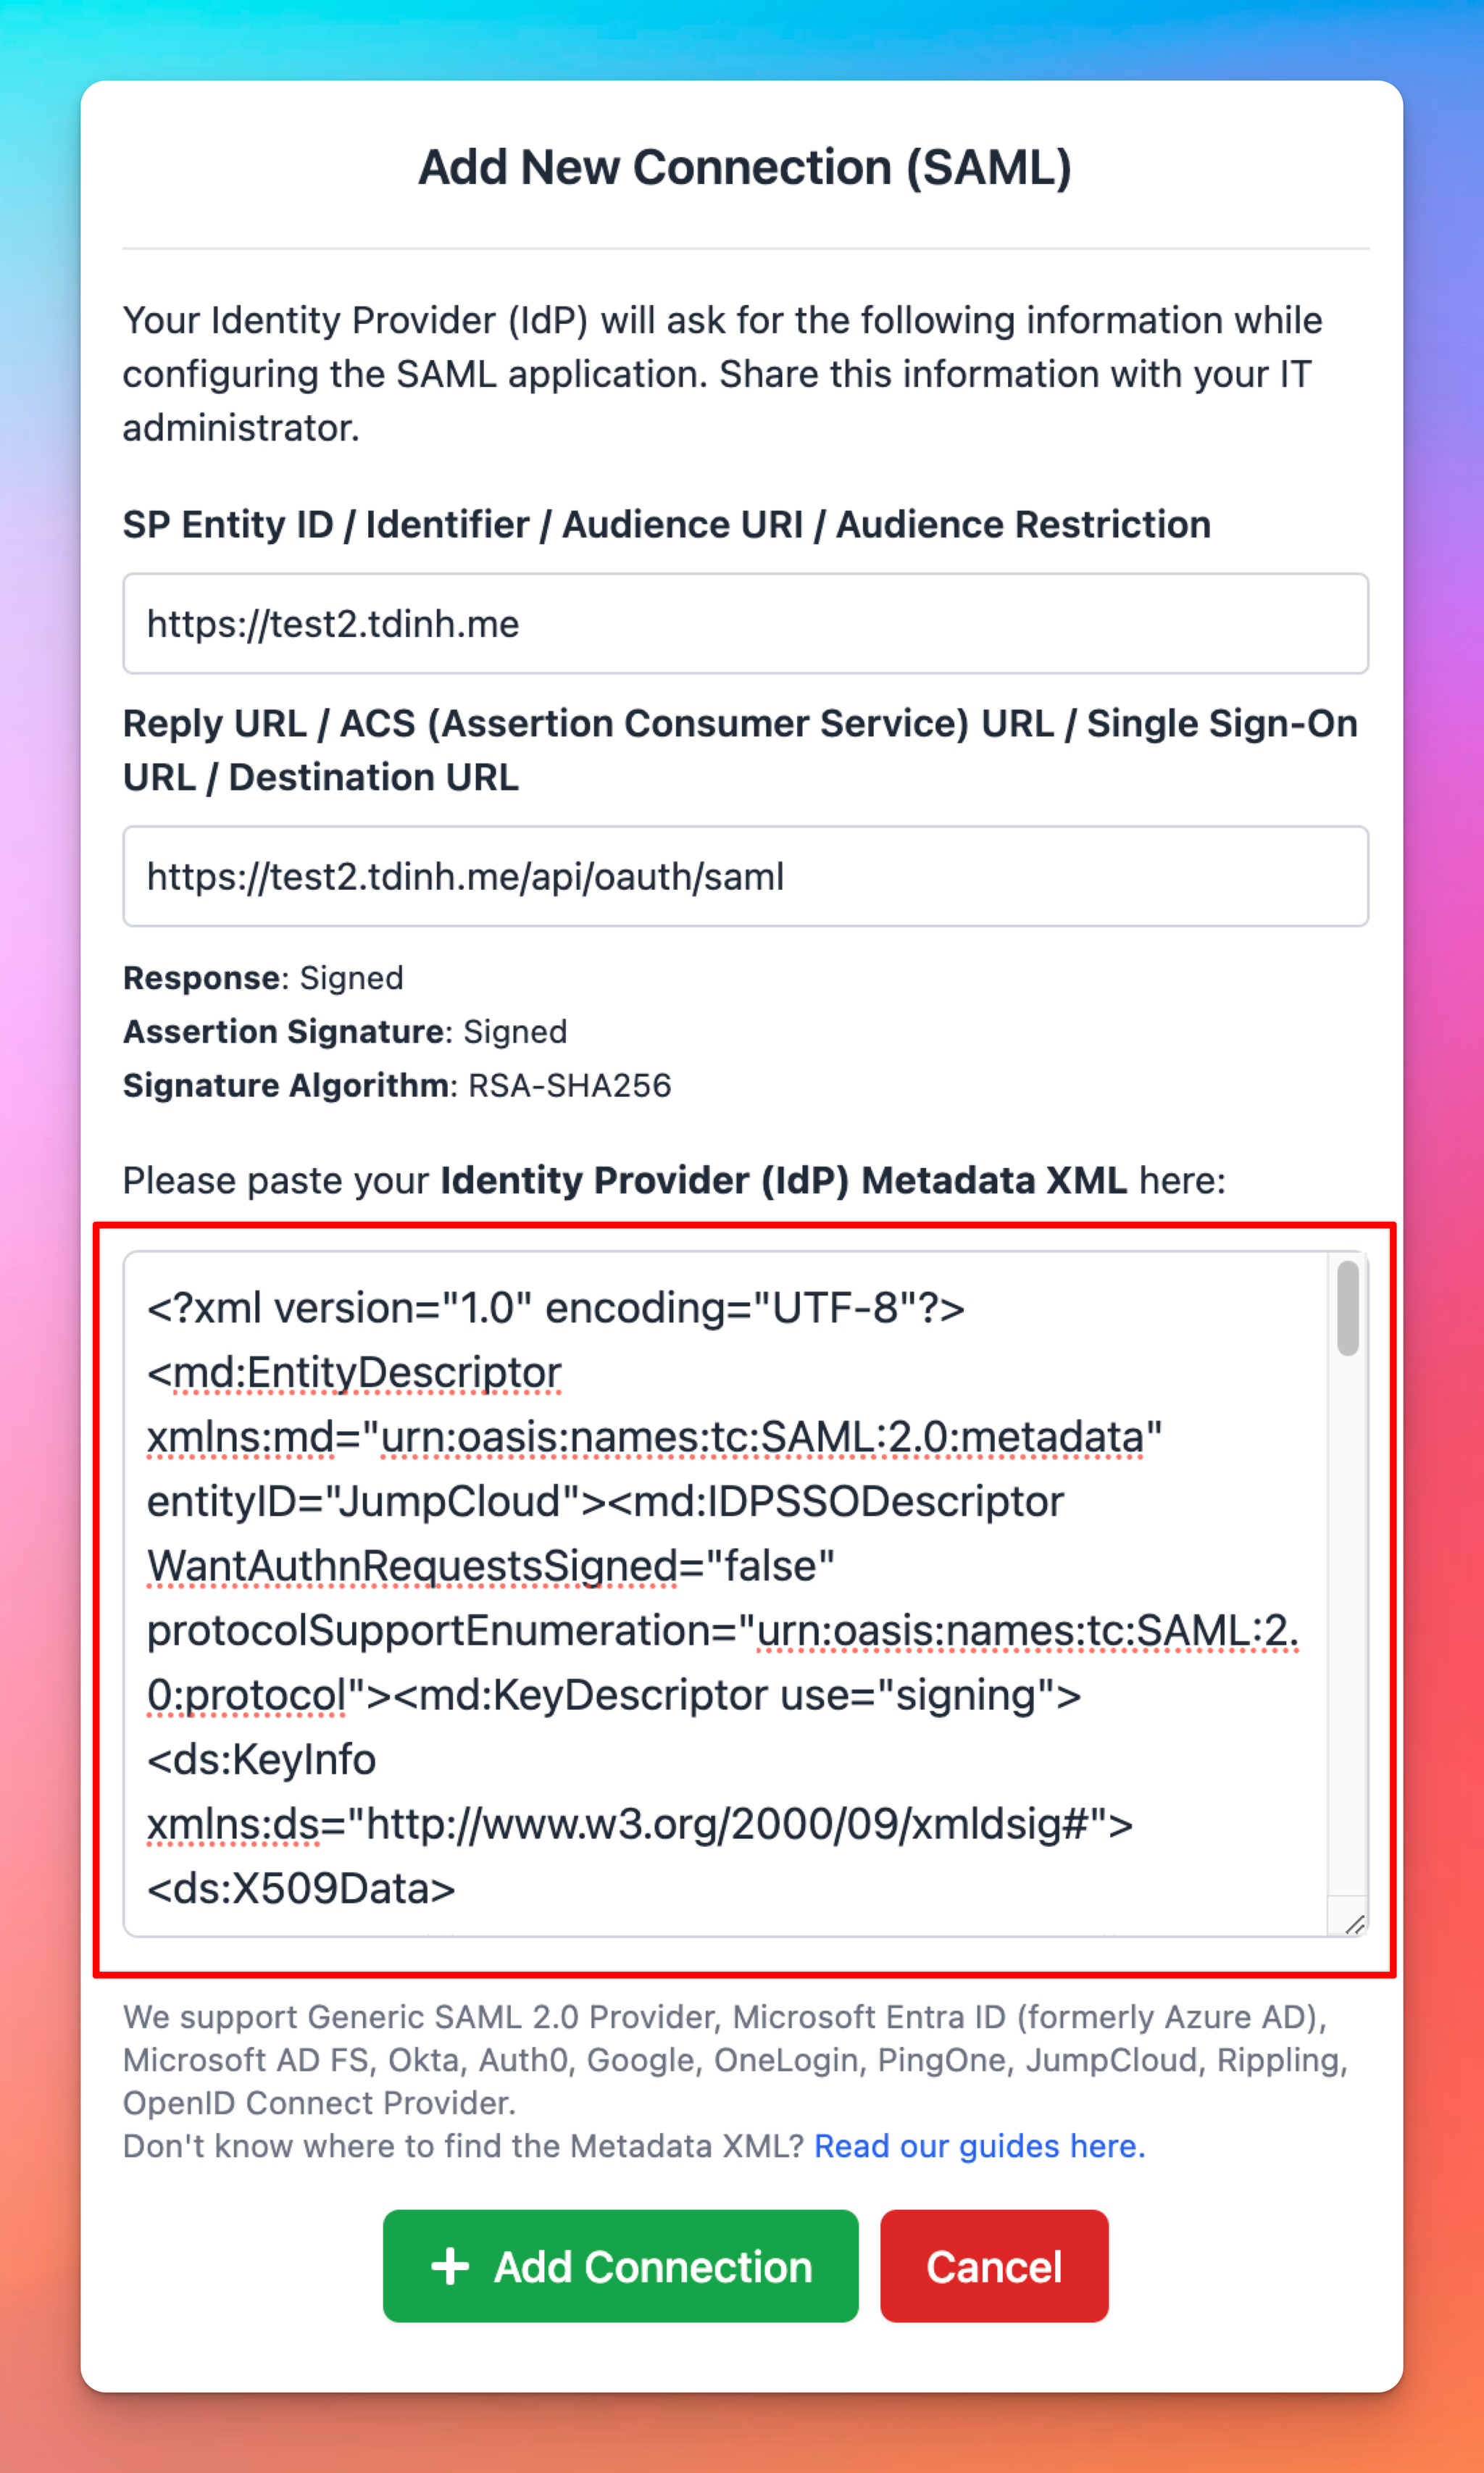
- Paste Metadata XML
- Copy the content of the XML file you exported from JumpCloud and paste it into the corresponding configuration section.
- Click Save to finalize the SSO connection setup.
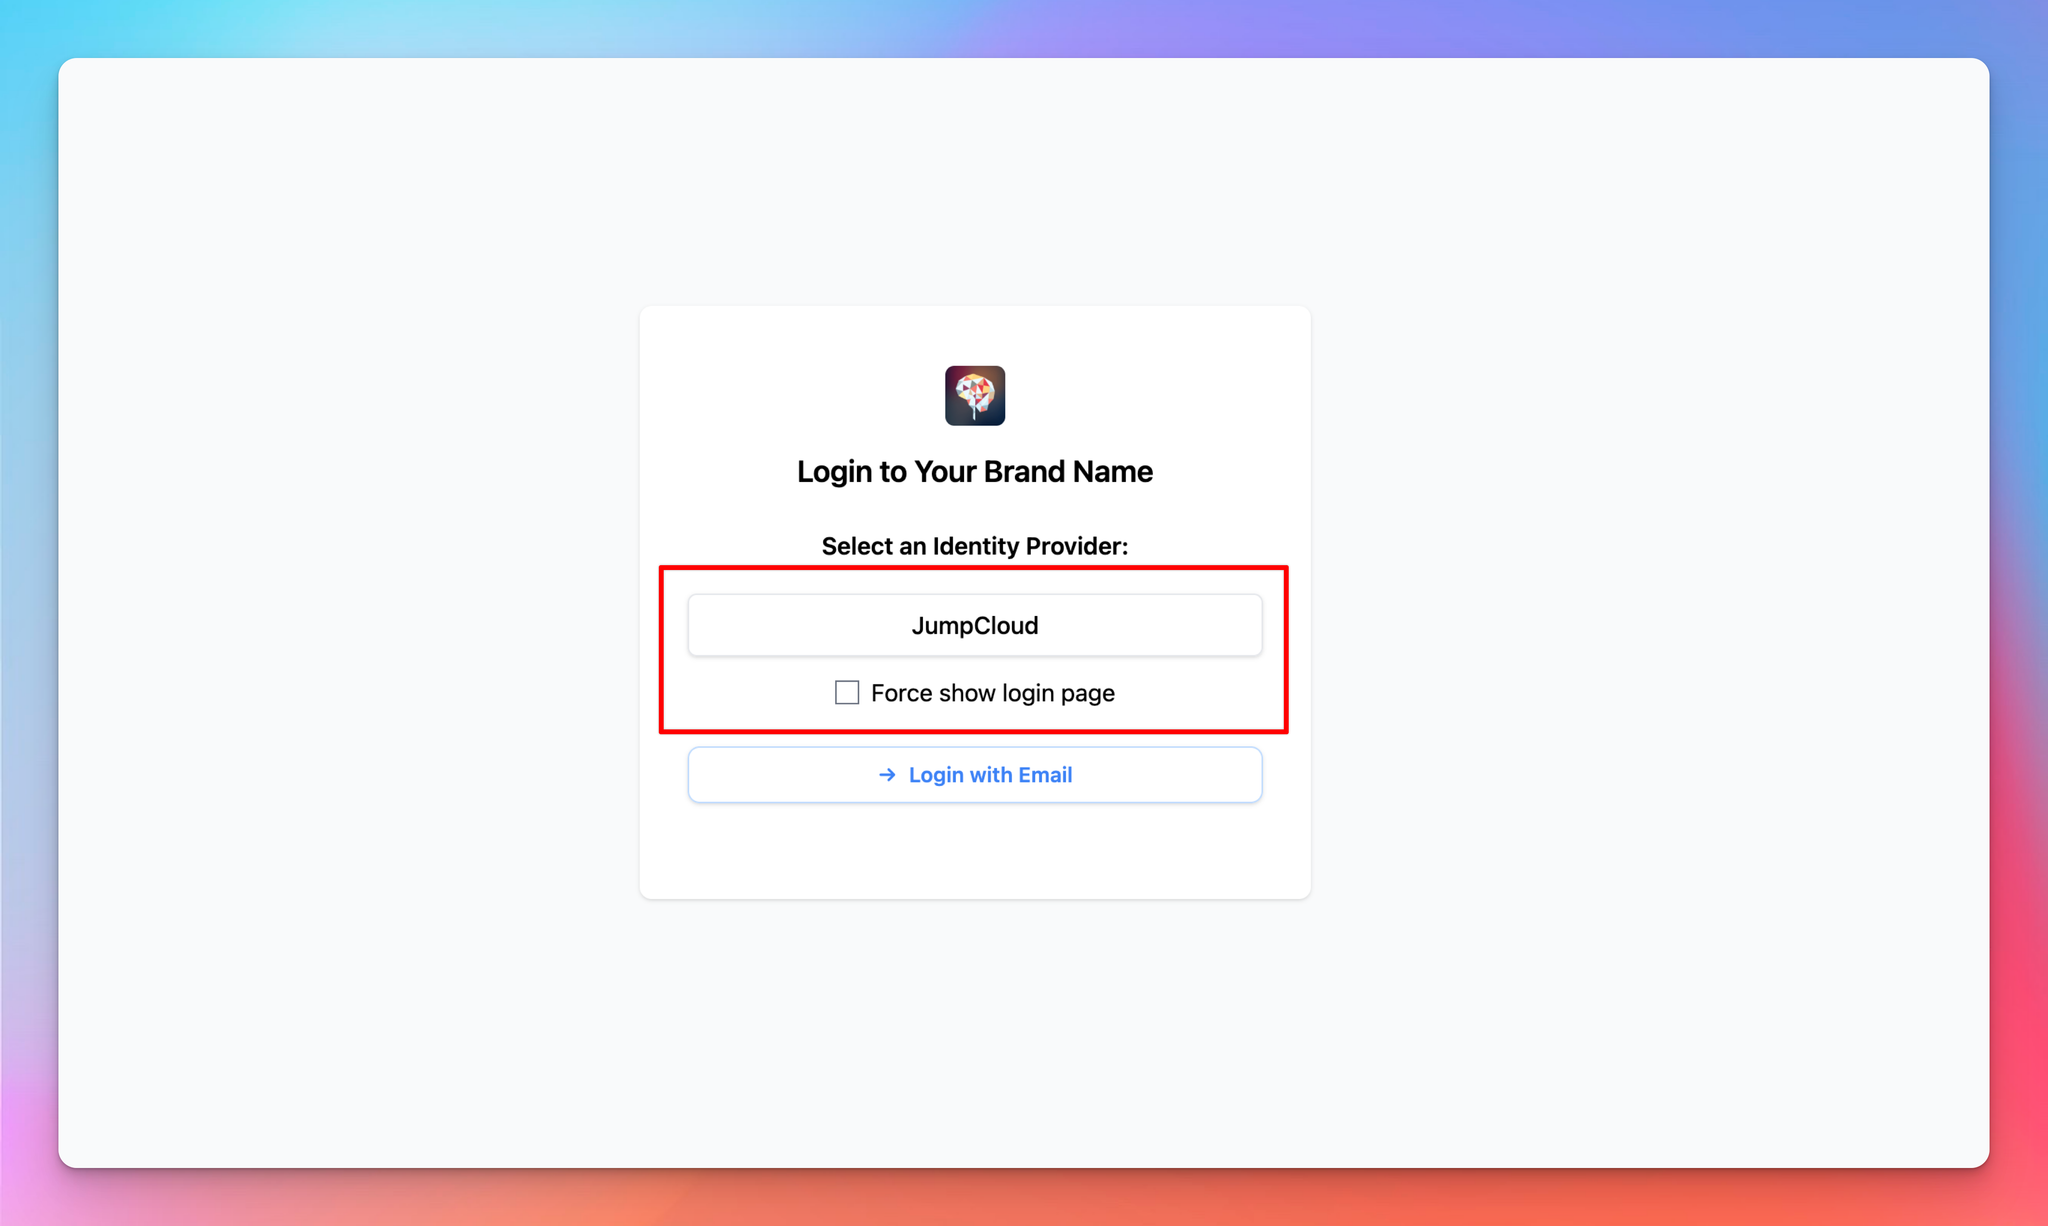
- Login to your instance using JumpCloud SSO
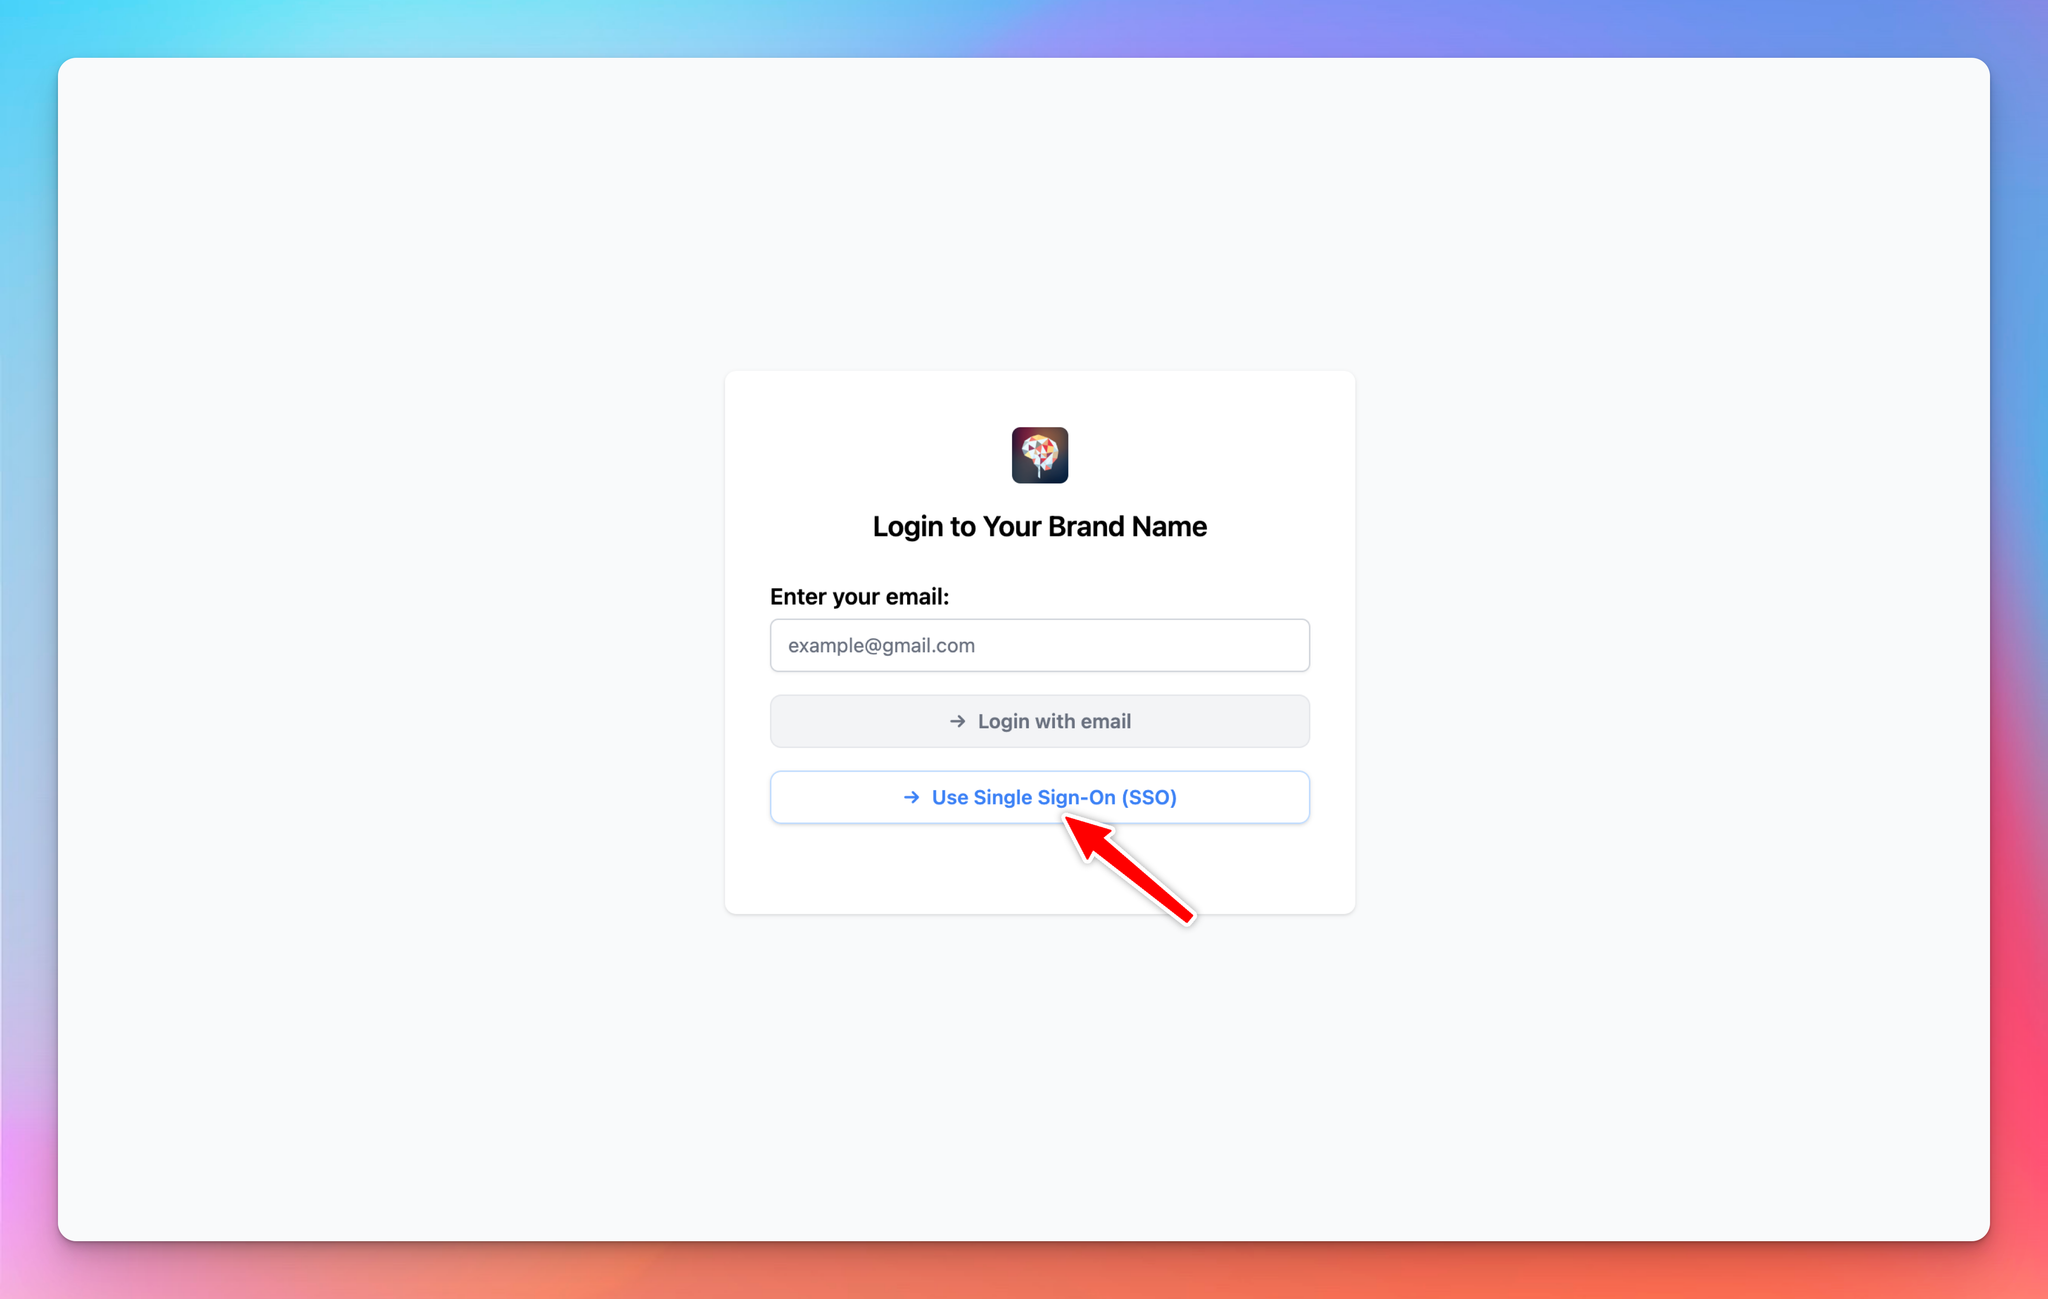
You have successfully set up SSO for your instance using JumpCloud. Your users will see a new button “Use Single Sign-On (SSO)” in the login popup.