- Allow user access to the admin panel with specific roles in your workspace
- Manage user access to workspace resources like AI agents, prompts, models, etc.
- Assign different usage limits to each group
What is User Group?
User Groups allow you to organize your invited users into different categories or teams, called groups. These groups can then be used to:- Manage resource access: control which AI agents, prompts, models, or other workspace resources are available to each group.
- Set usage limits: assign specific limits, such as model usage, number of messages a group can send, to each group to better manage your resources and cost.
How to use User Groups on TypingMind?
Step 1: Create a User Group
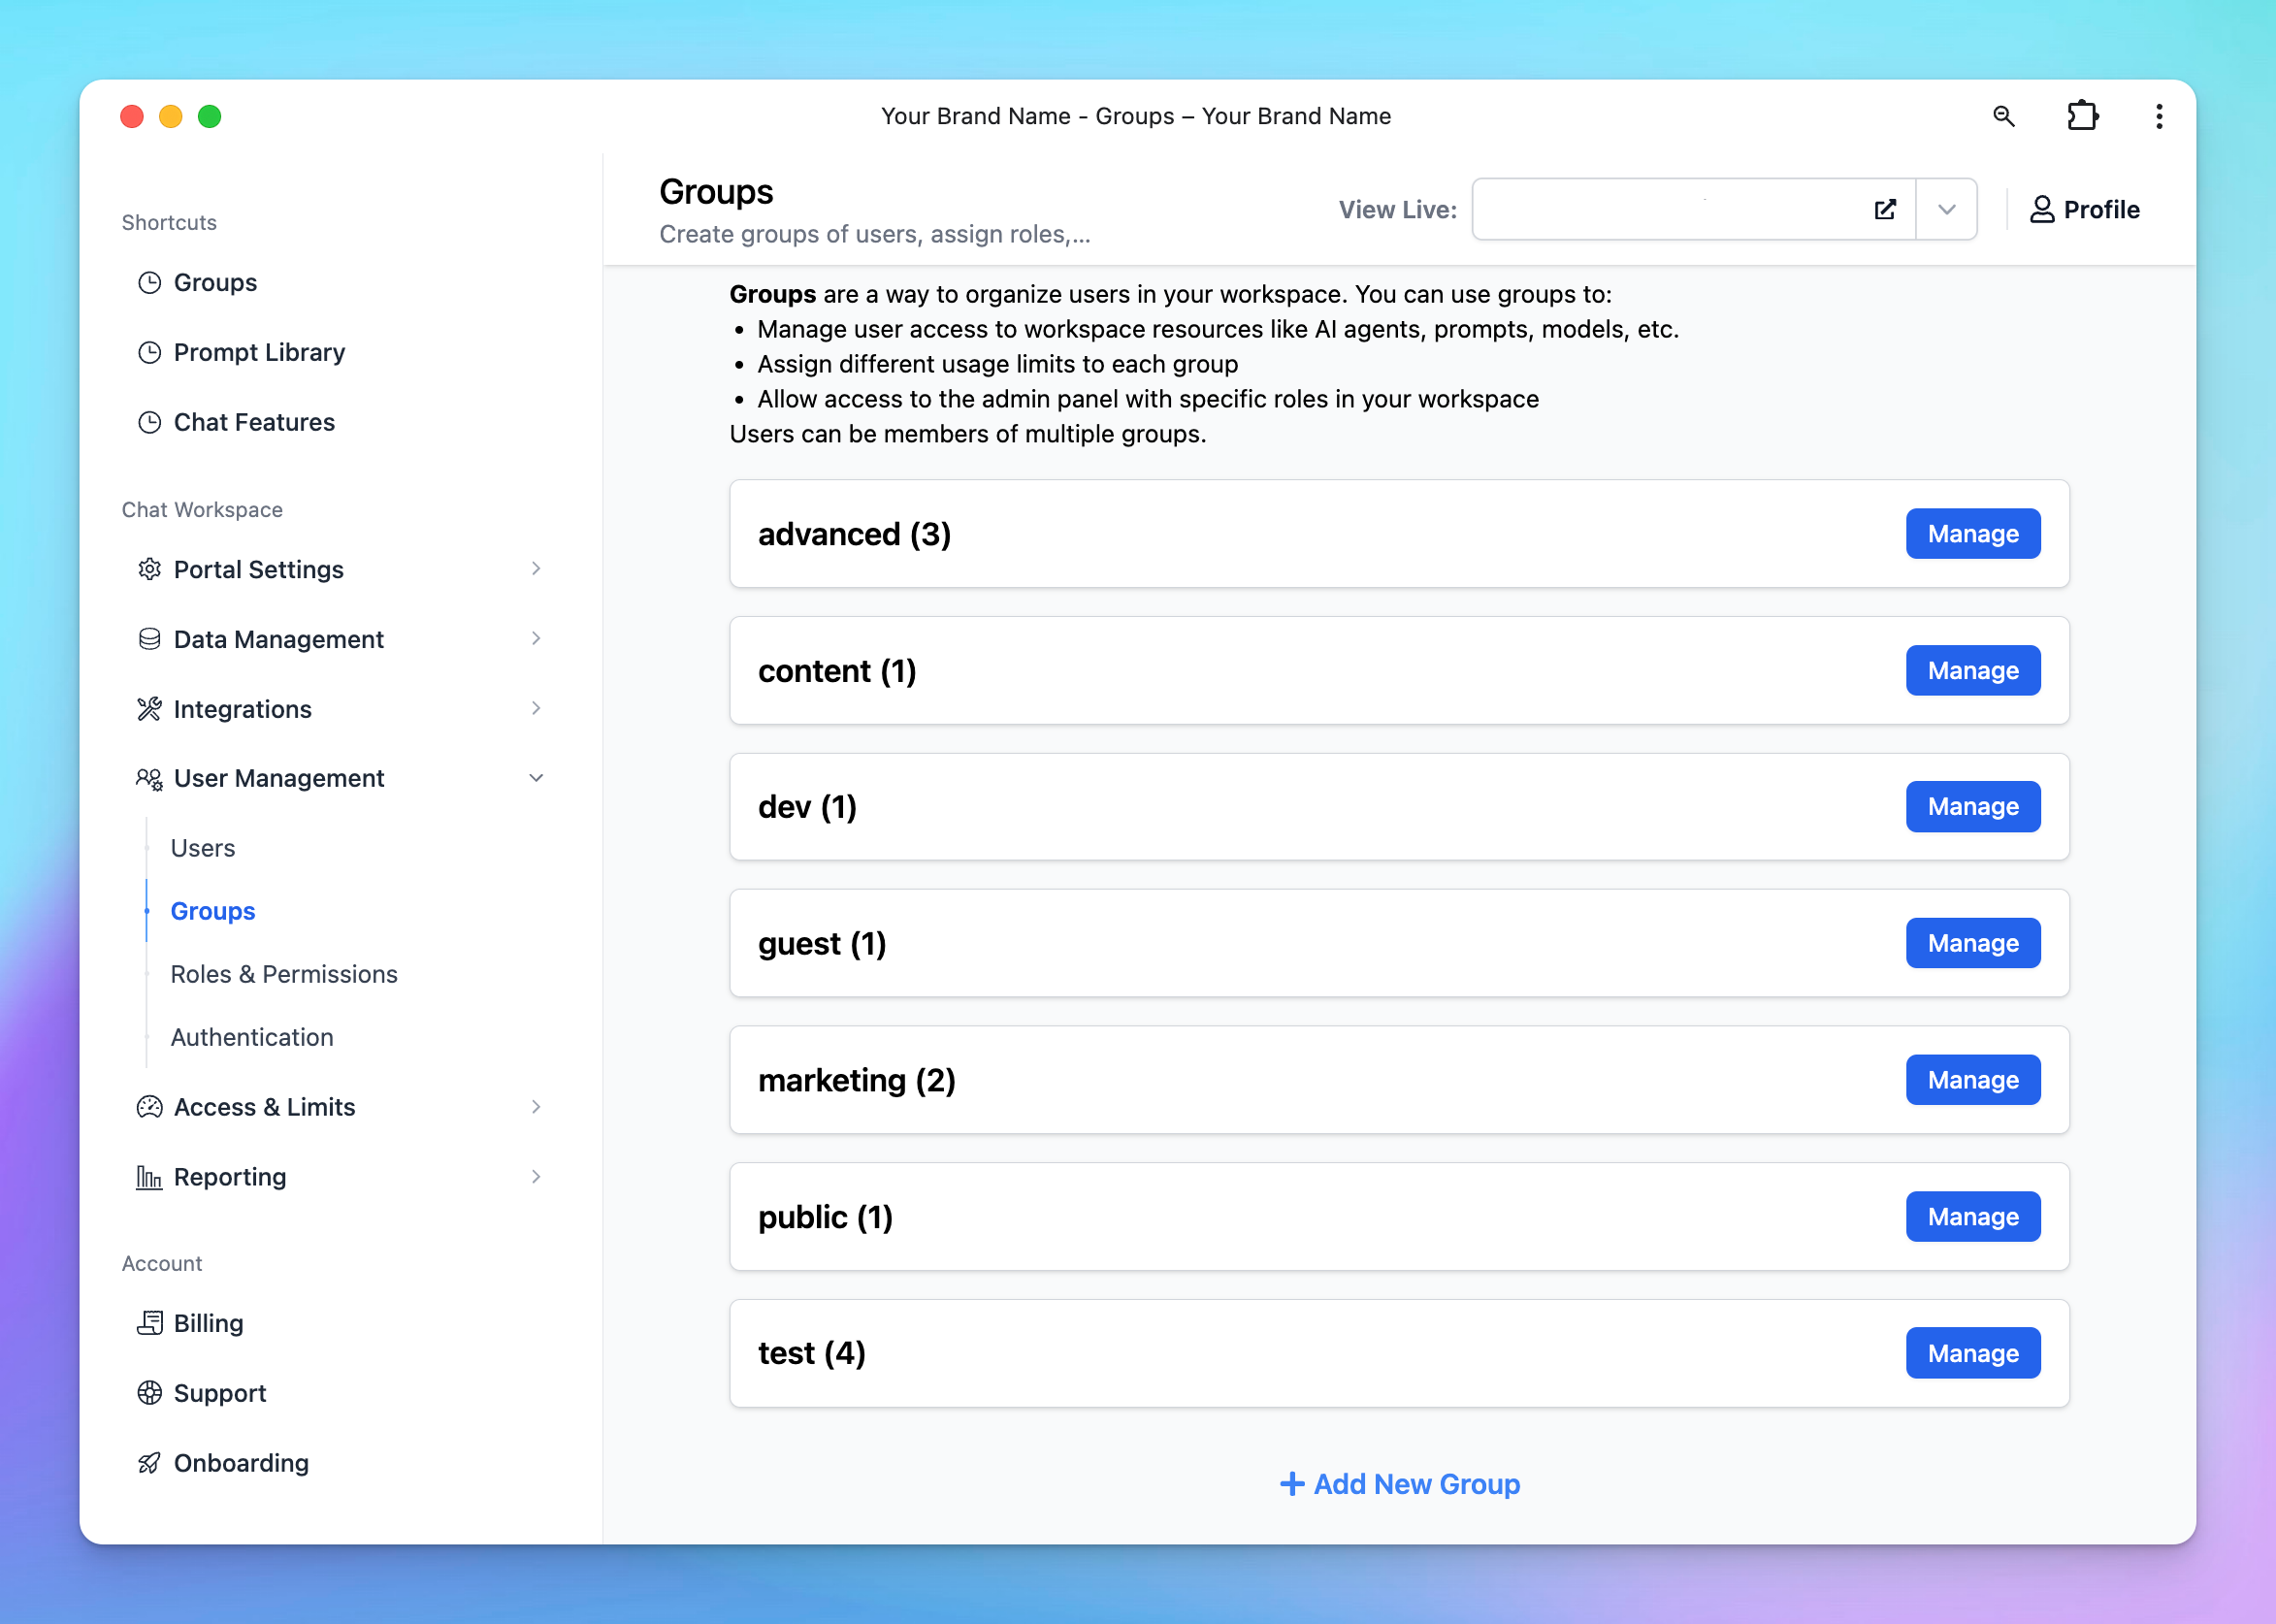
- Go to the Admin Panel in your workspace.
- Navigate to the Groups section under User Management.
- Click on Add New Group.
/image%2020.png)
- Enter a Group Name that reflects the purpose or role of the group.
- (Optional) Enable Admin Access for this group if they can have access to the admin panel.
- If you enable this option, ensure you assign appropriate Admin Roles to the group. These roles should align with the permissions you’ve defined in the Roles and Permissions settings.
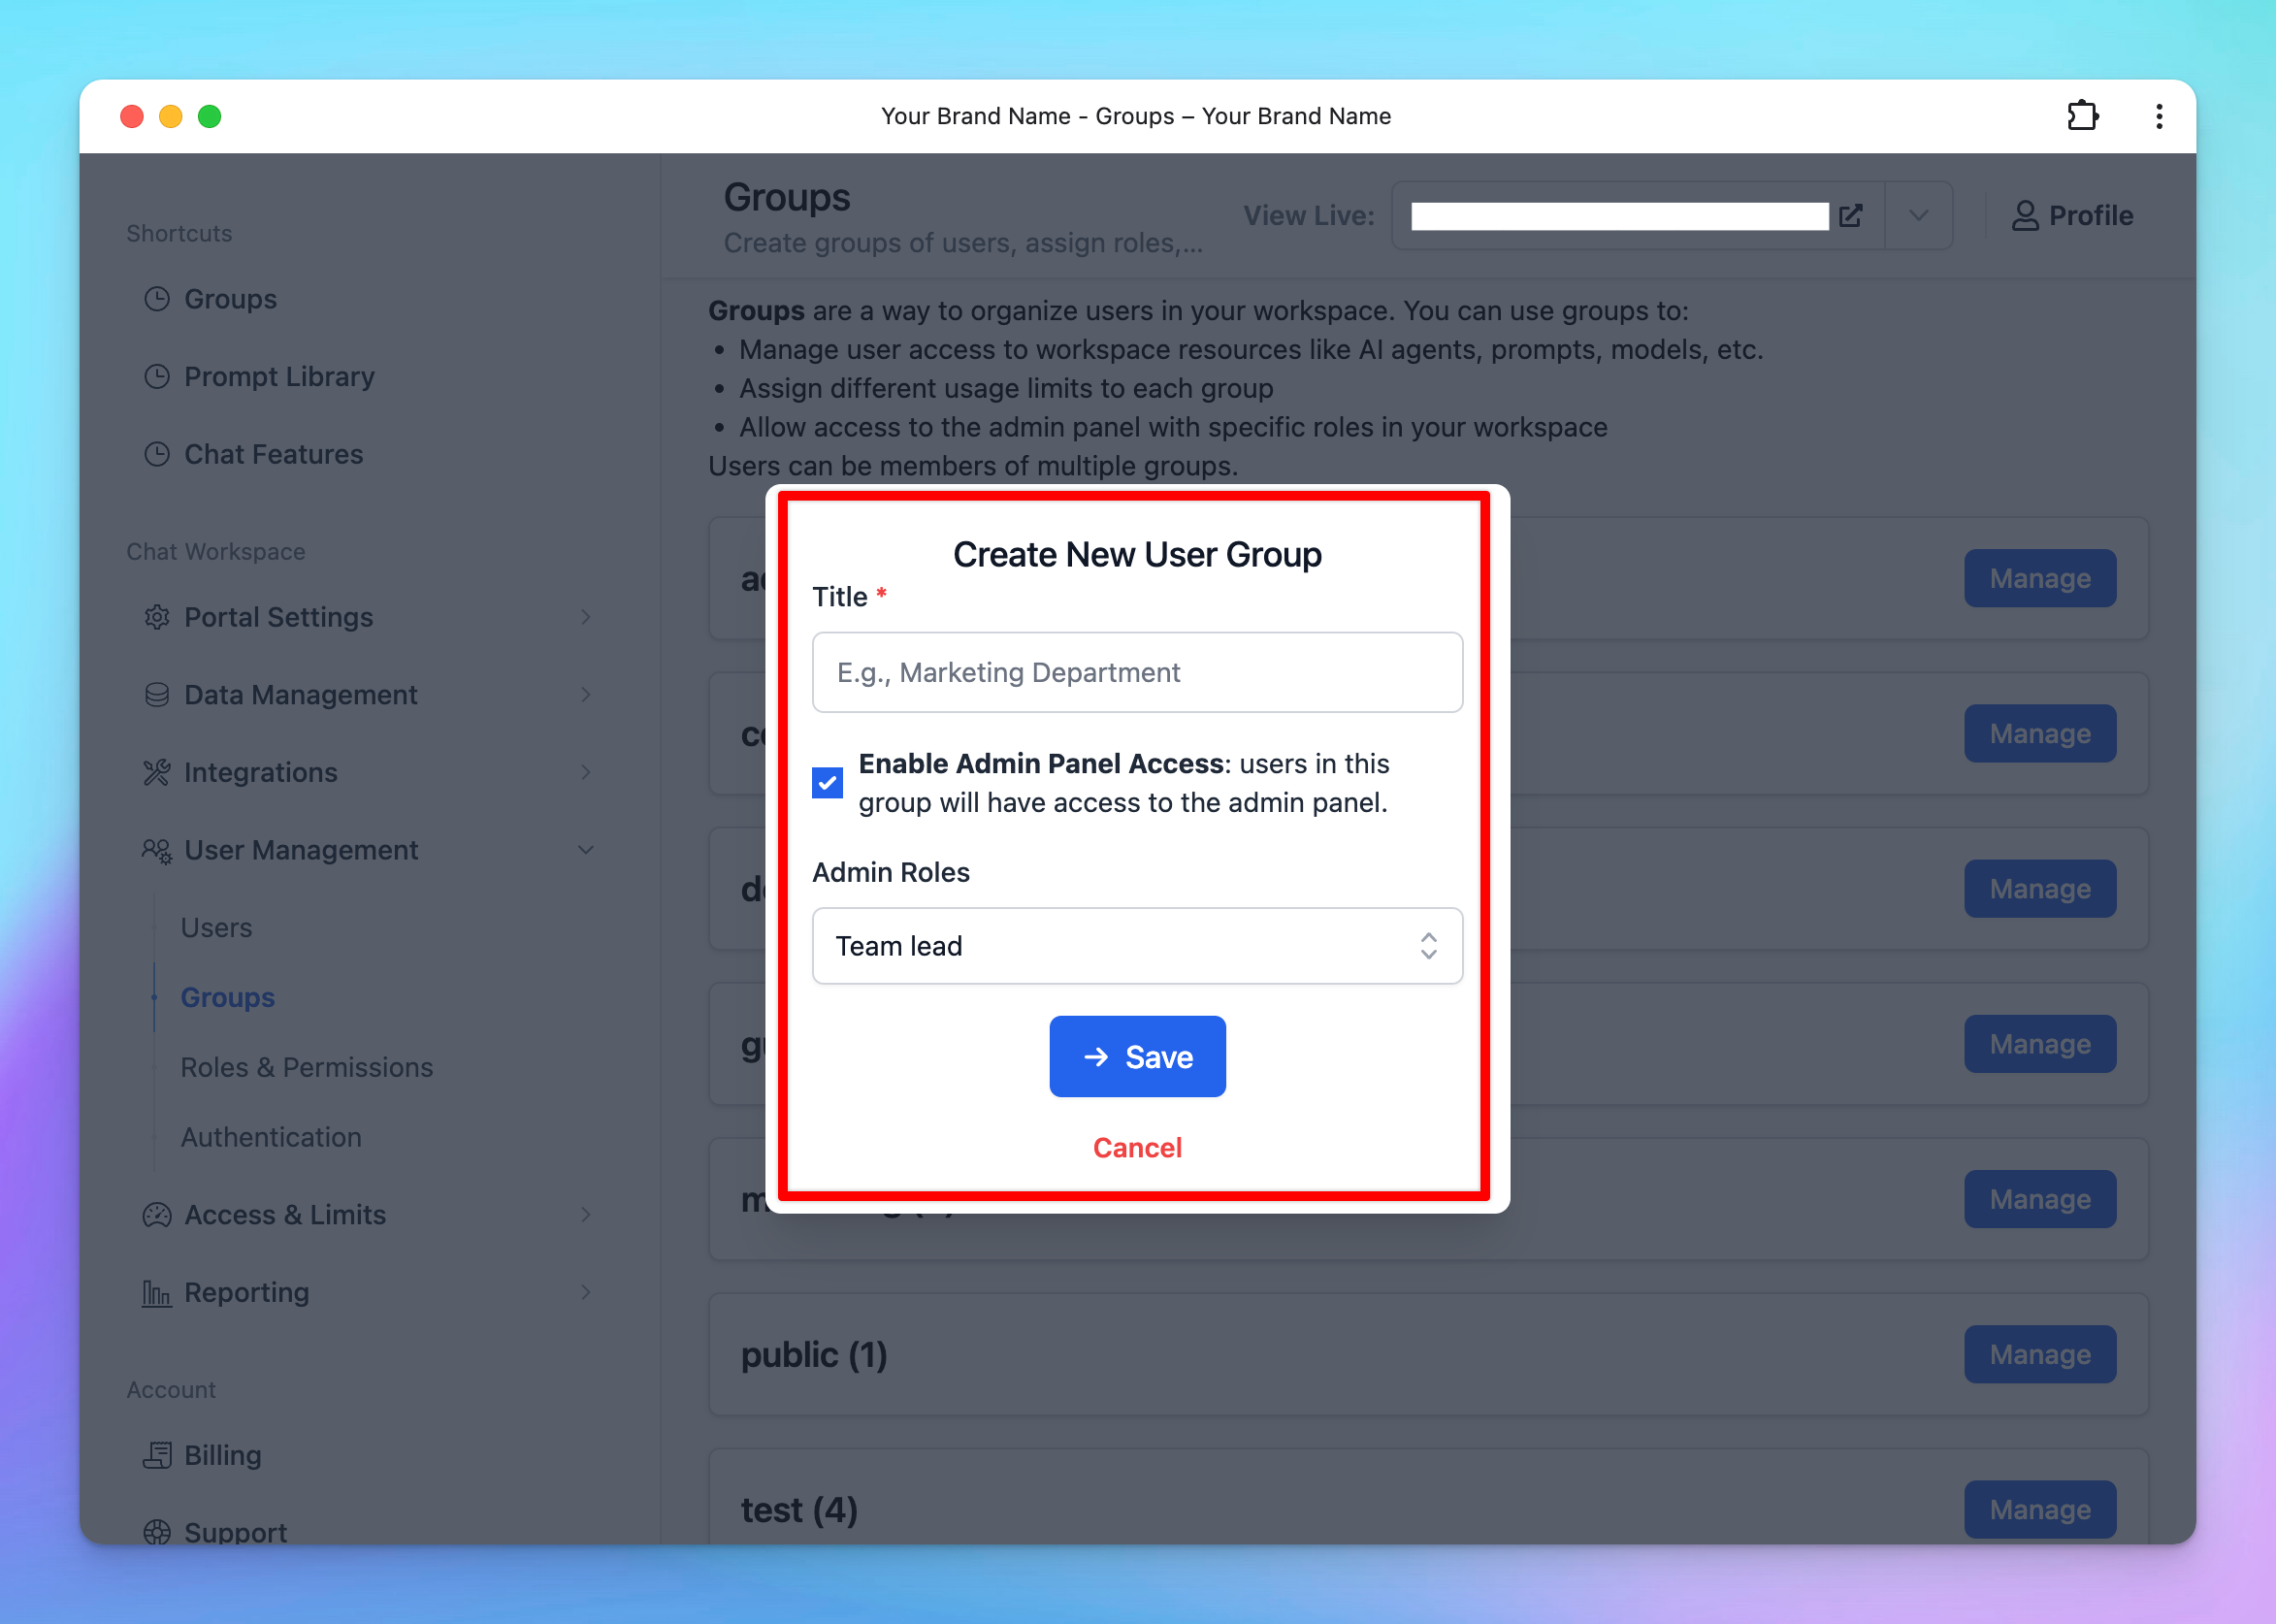
- Click Save to create the new group
Step 2: Add Members to the Group
You have two options to assign groups for users:- Add members directly via group
- Click Manage next to the created group
- Click Add Members
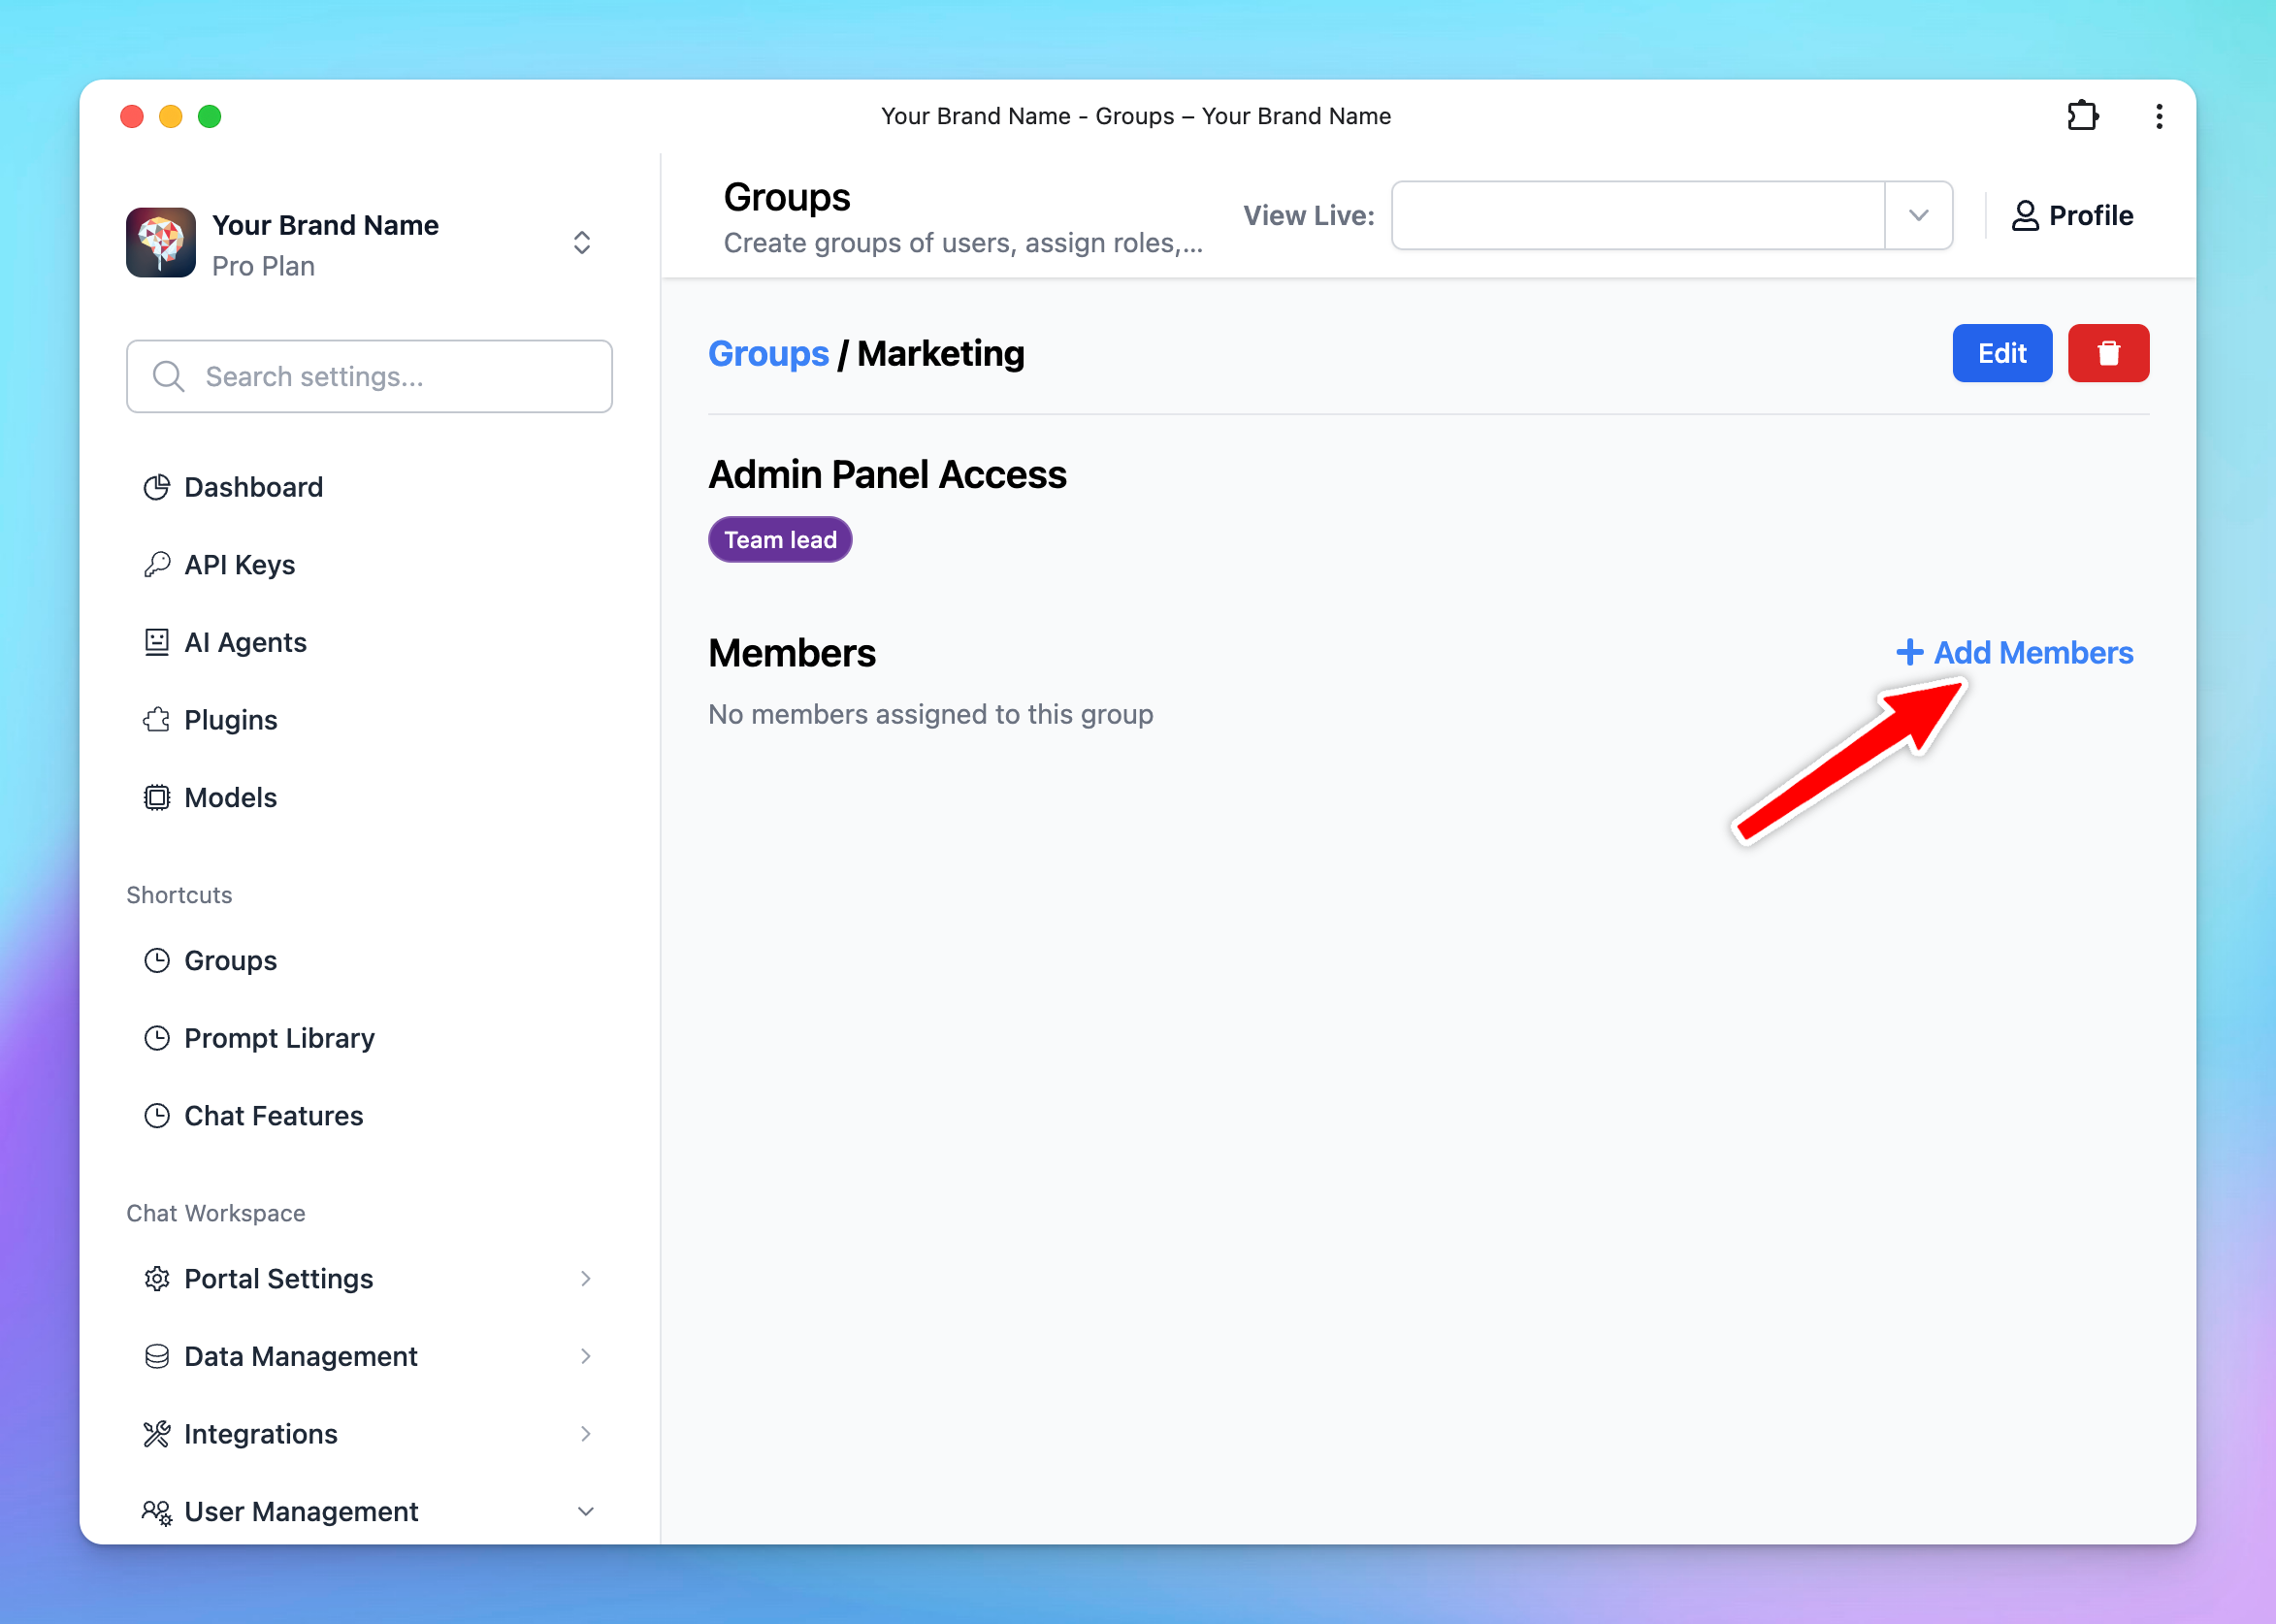
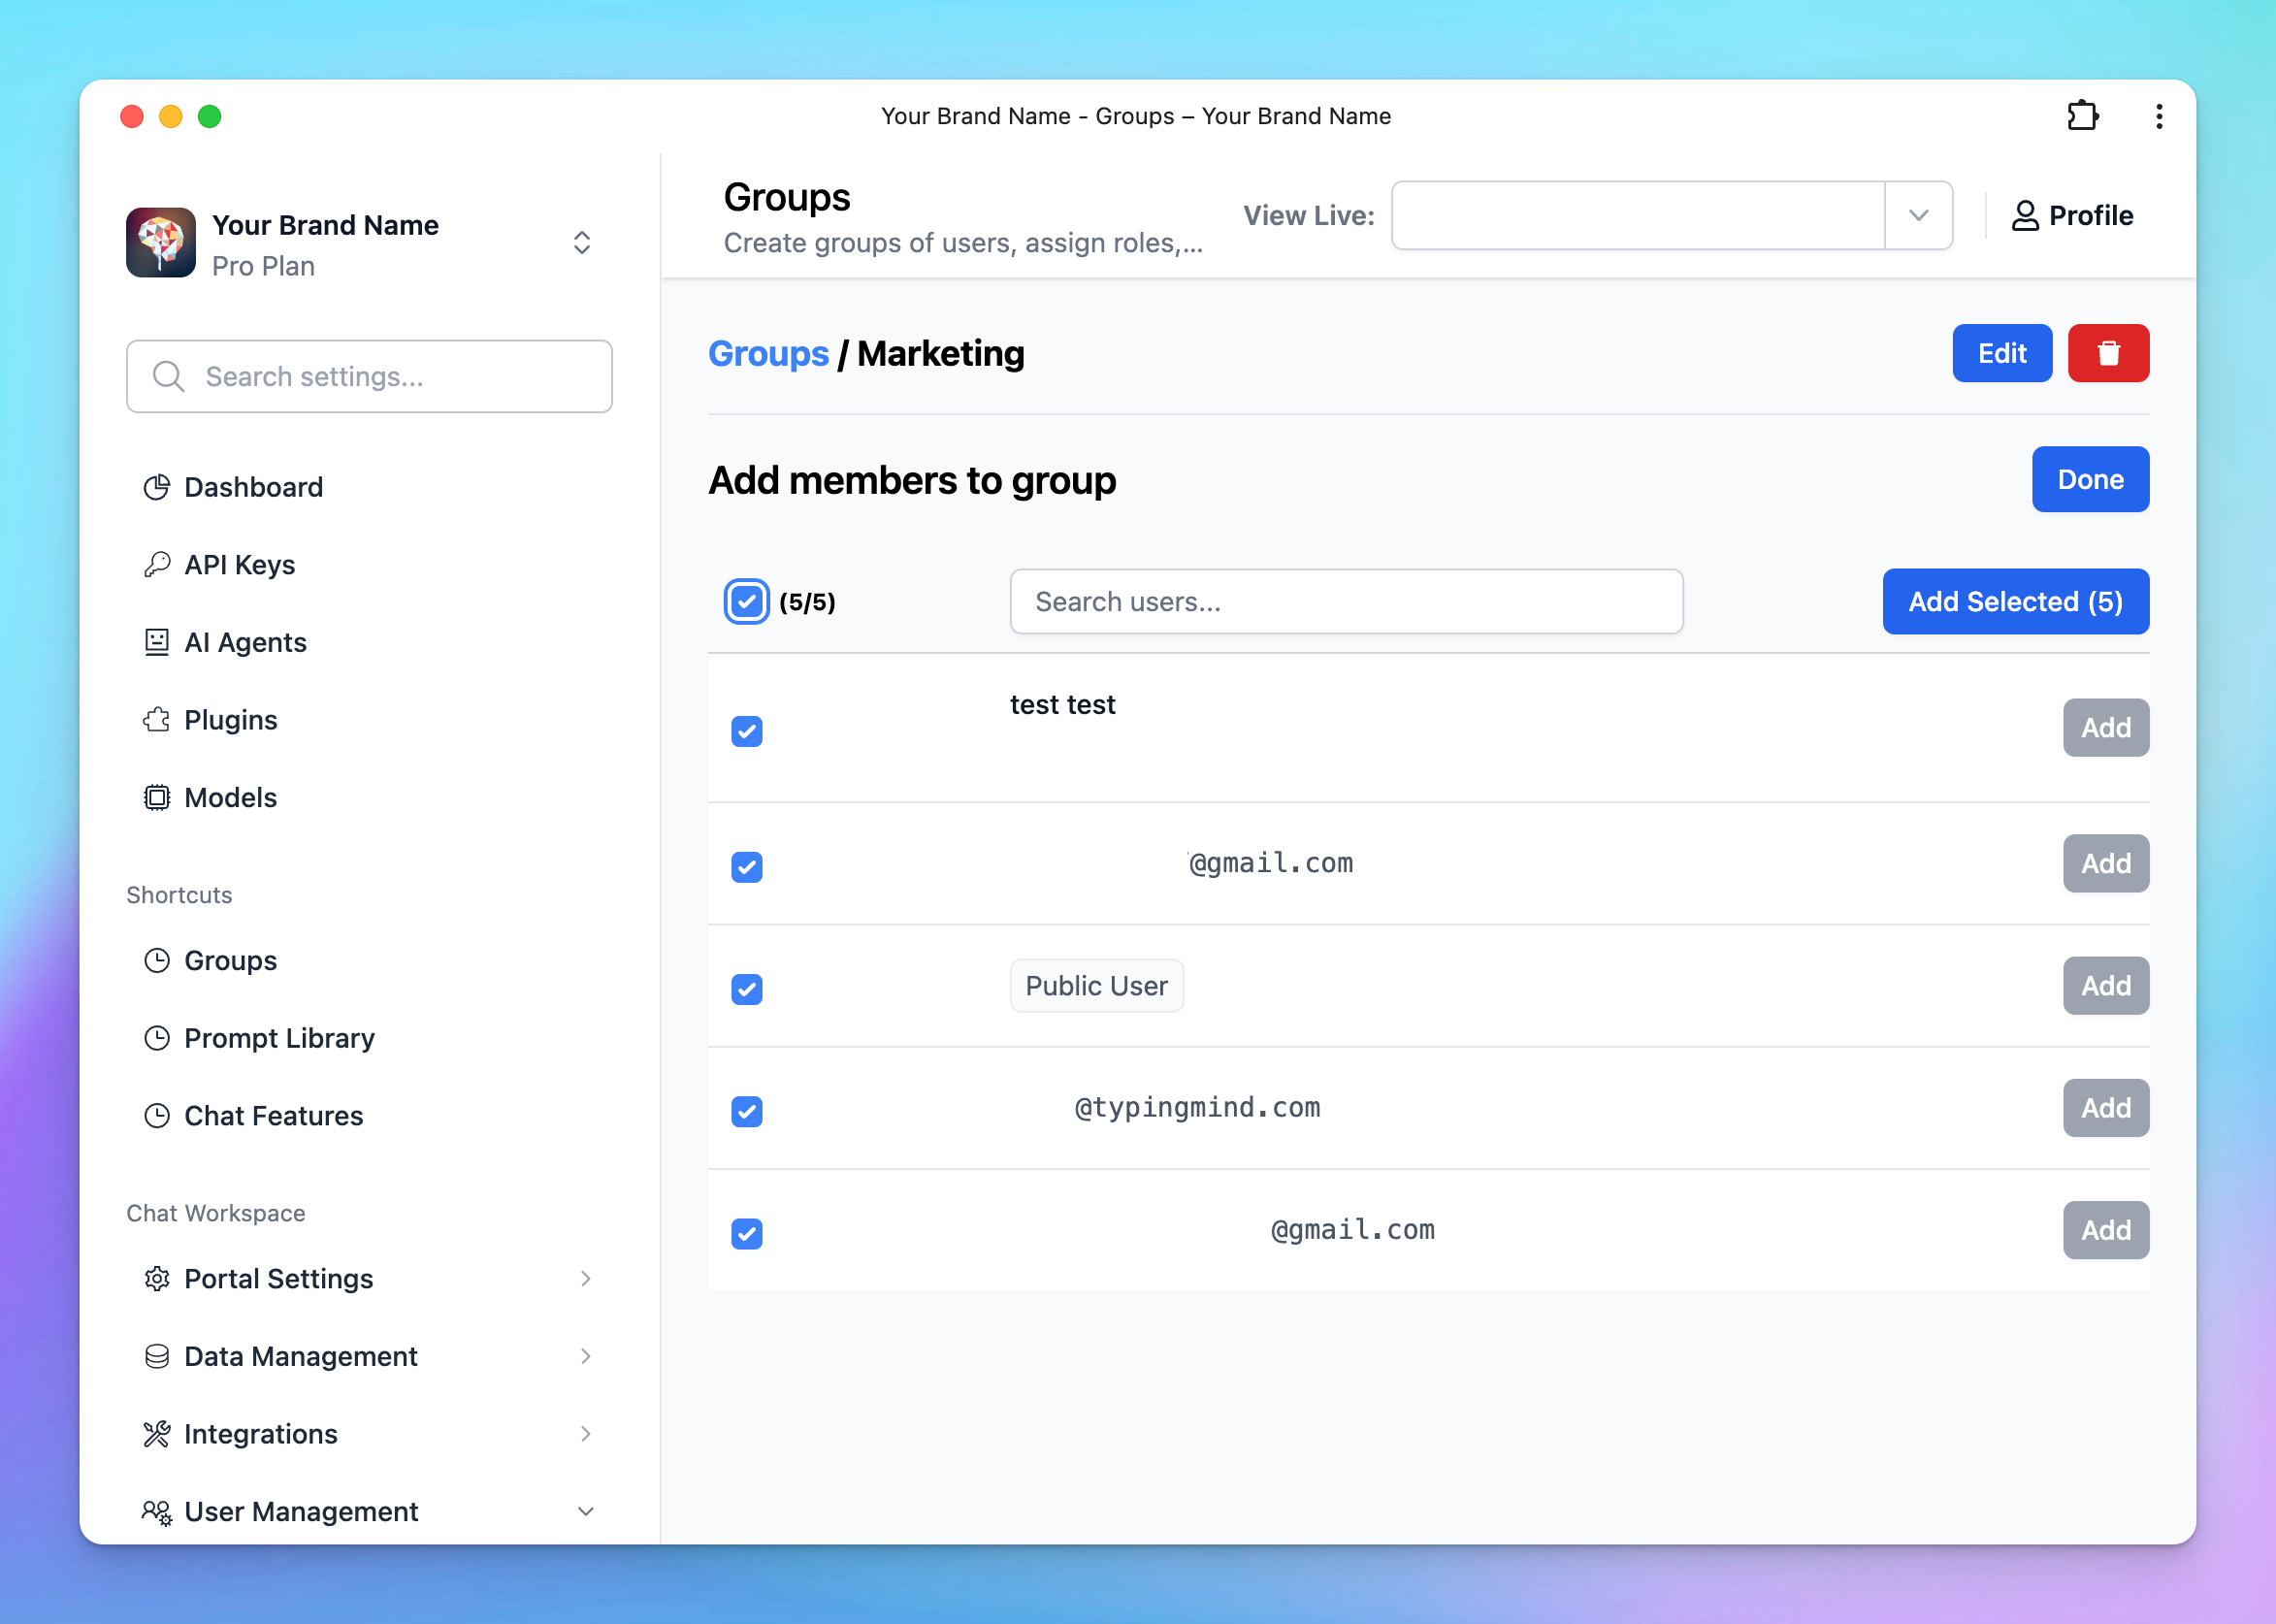
- Select the users you want to include in this group from the list.
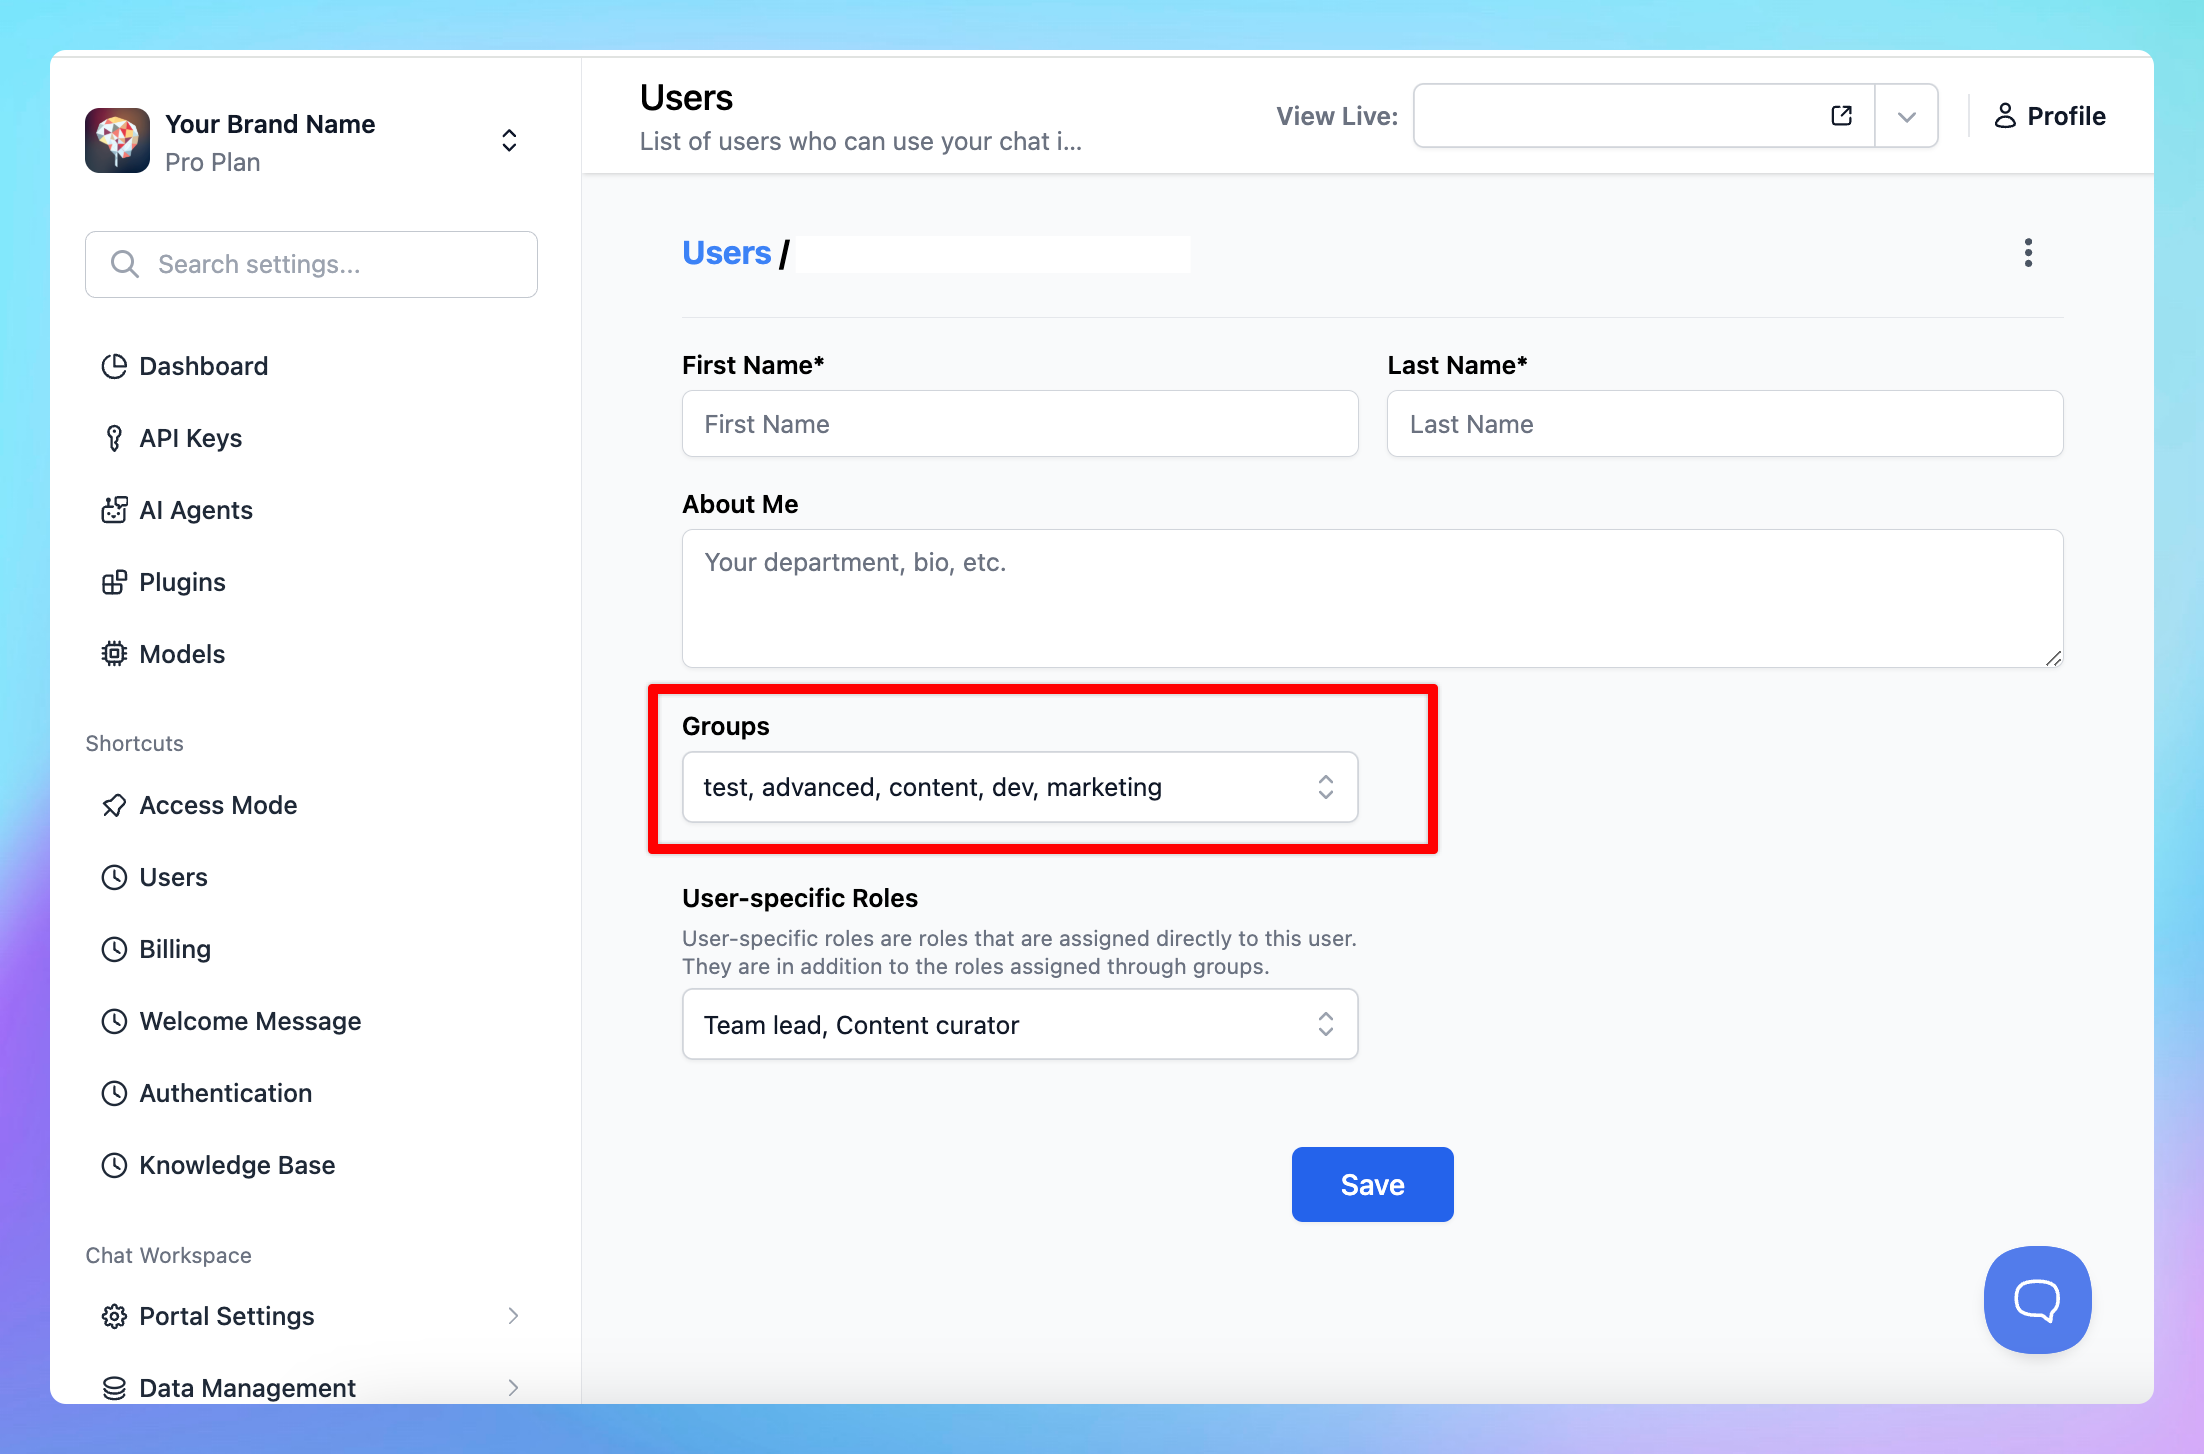
- Assign groups for users via User list
- Go to Users and click on a specific user
- Assign a group to the user
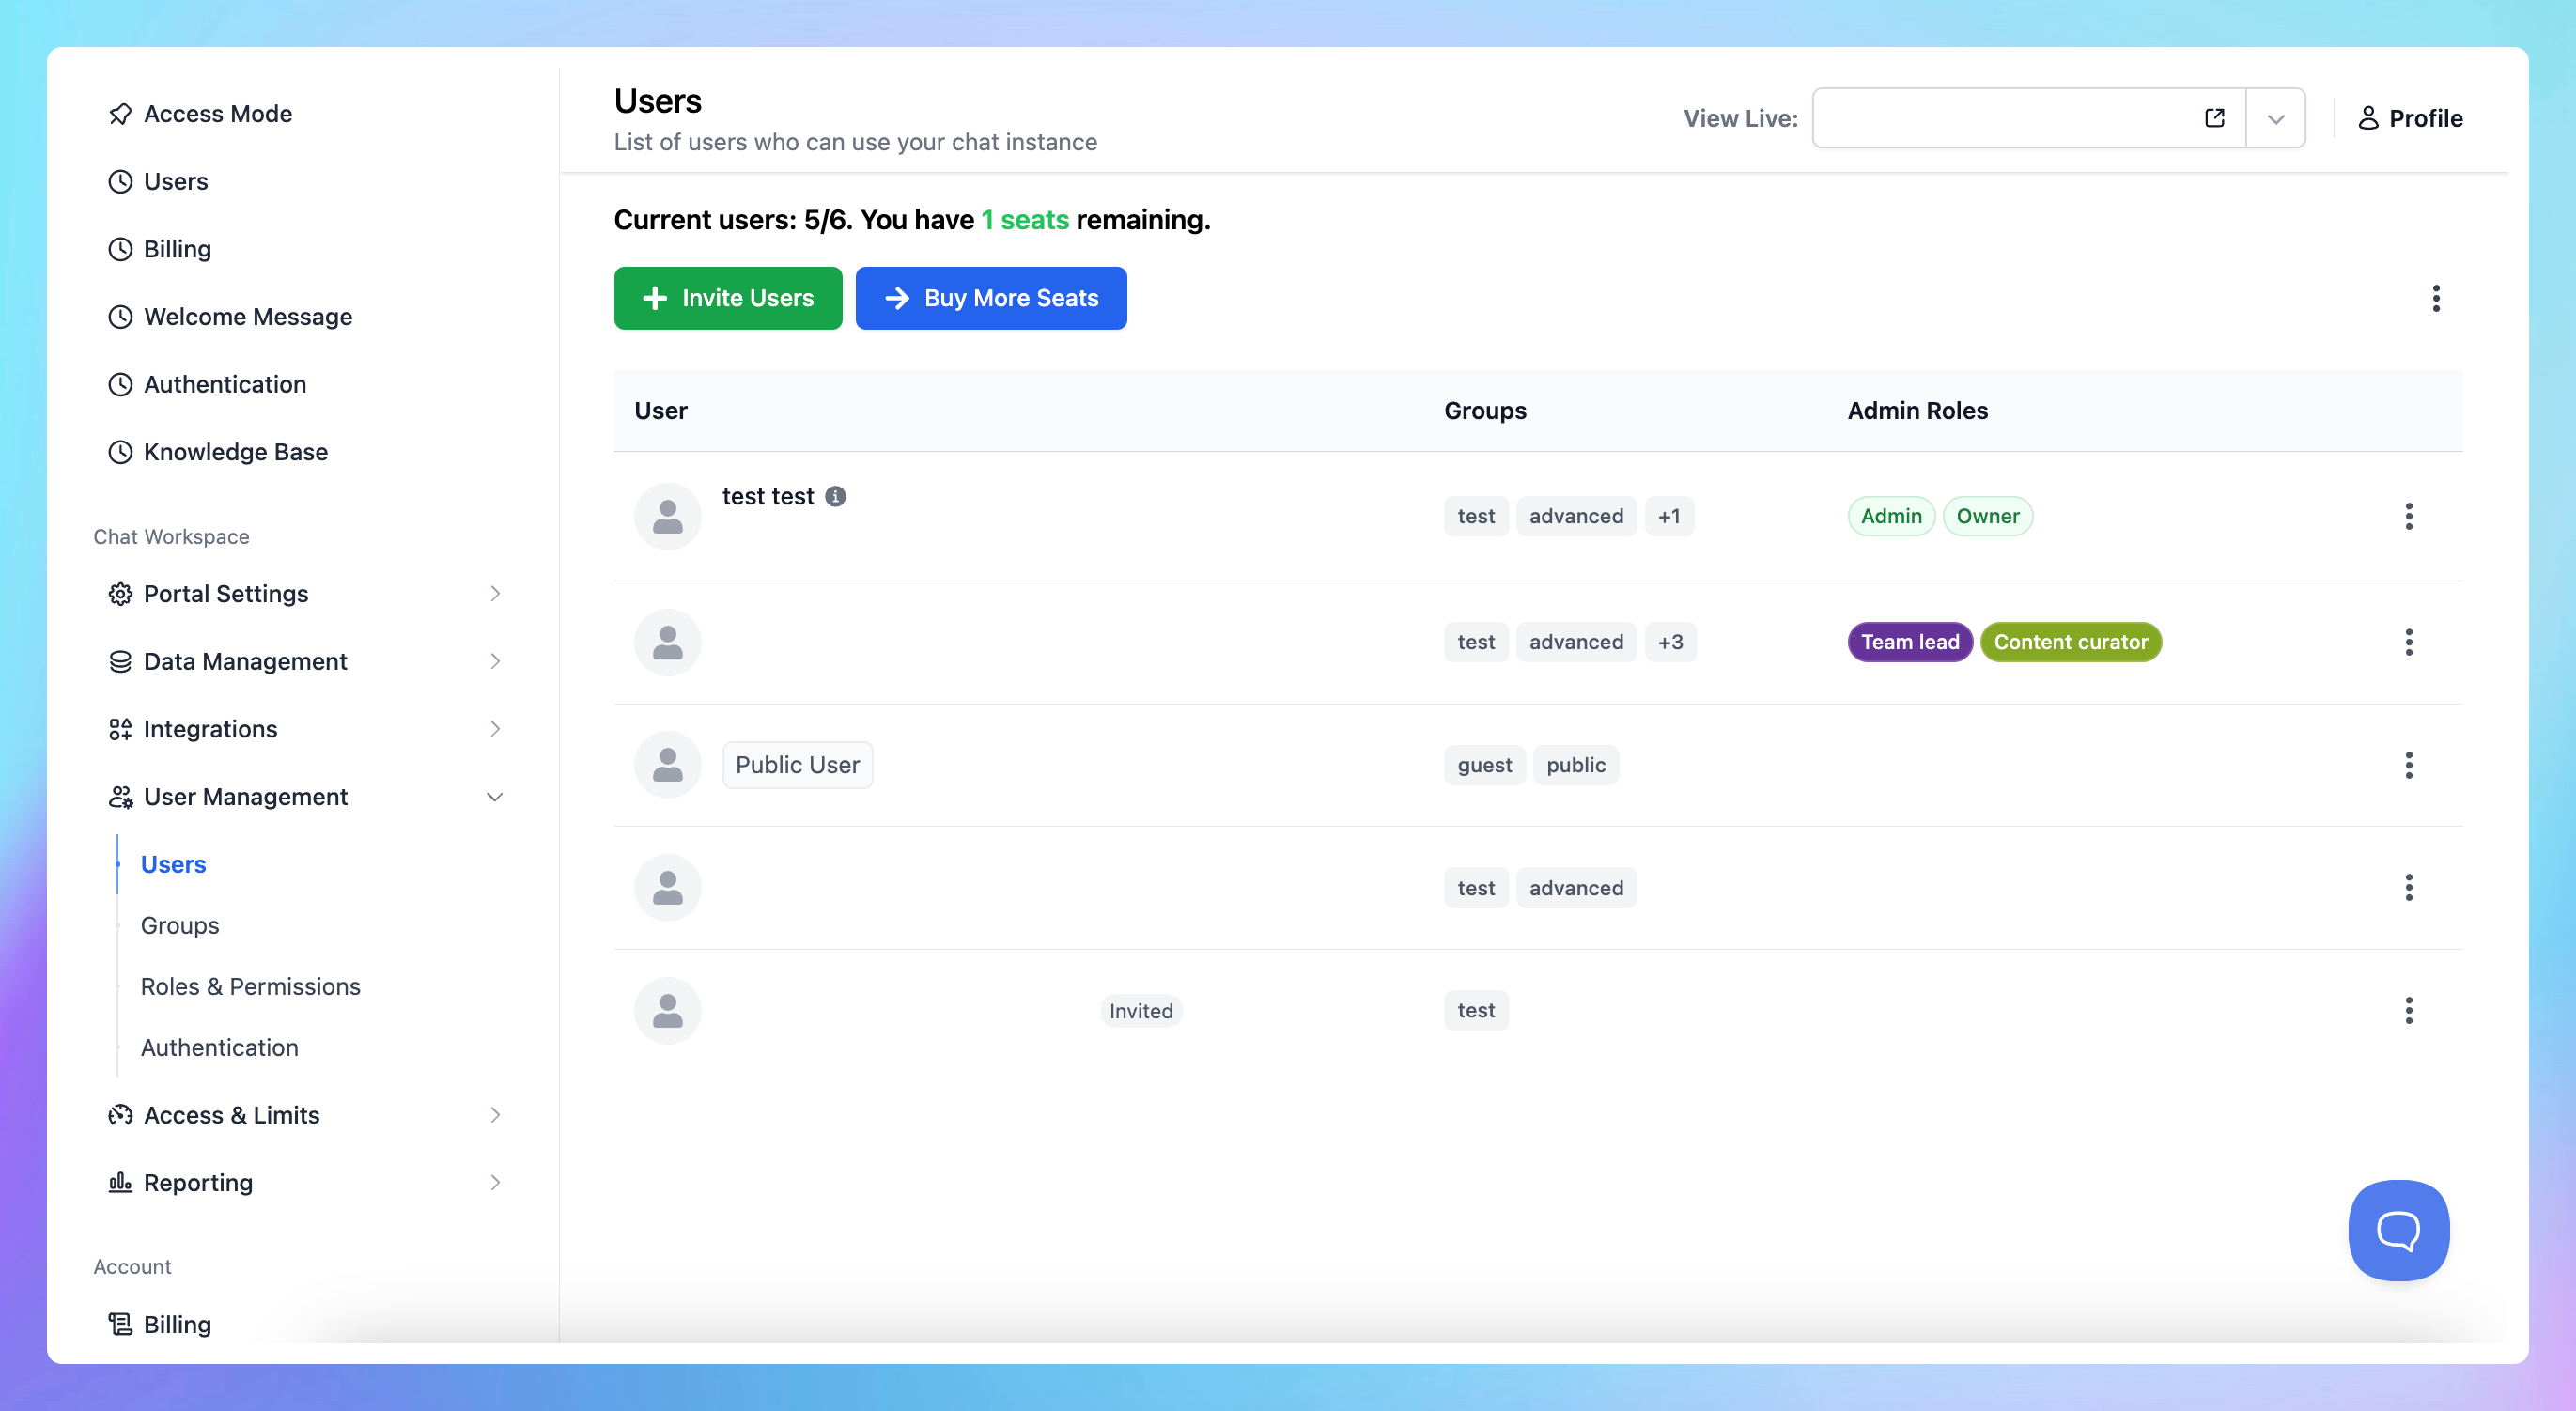
Remove users from Groups
- To remove a user in a group, return to the Manage section of the group.
- Remove the desired user by clicking on “Remove” button next to their email account.
Step 3: Control the resources and usage limit based on user groups
After completing your setup with user groups, you can use these groups to restrict member usage to specific chat models, prompts, or AI Agents. Please find the next section on how to do this.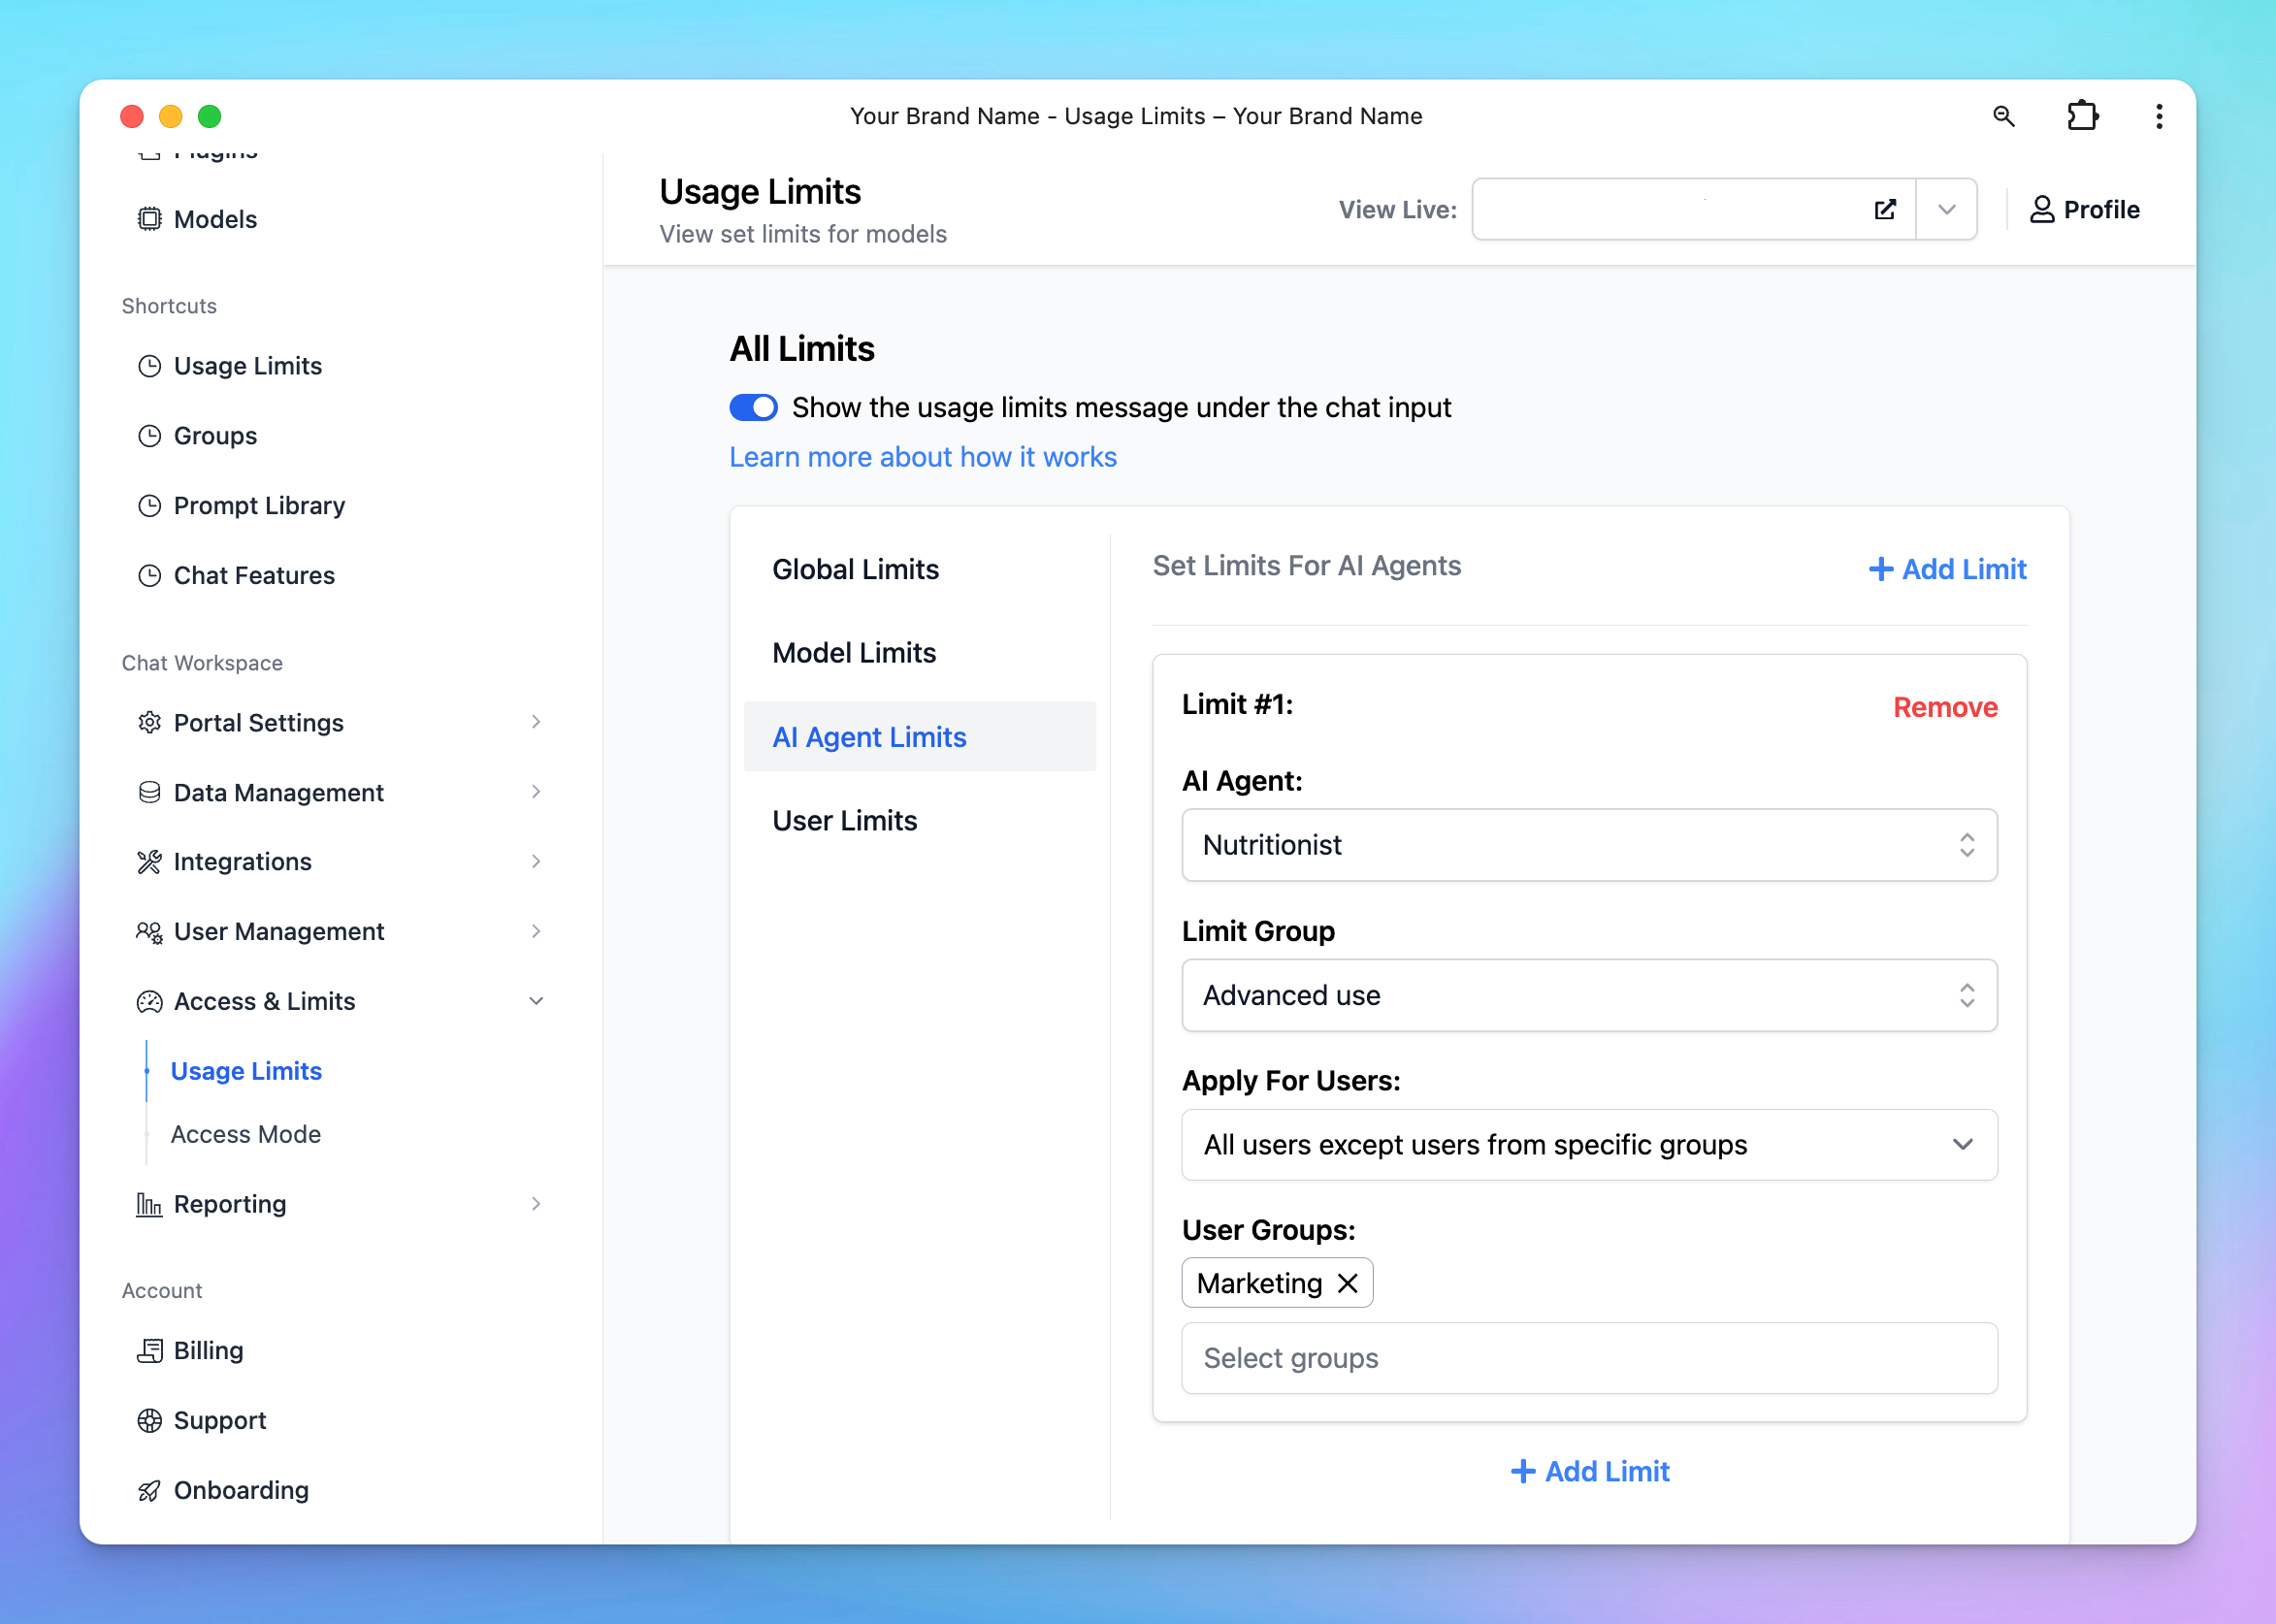
Restrict AI Model, AI Agent or Prompt Usage with User Groups
1. Restrict chat model usage
You can manage and restrict the usage of AI models for your team members with the user groups through the following settings:- Decide which AI models are accessible to specific user groups.
- Set limits on message usage for each AI model—control the number of messages or characters that can be sent (by specific user groups or all users) within a certain time frame.
How to set up model usage restrictions:
To set this up, please follow the steps below:- Navigate to the “Usage & Limit” under the Access & Limits section in the Admin Panel.
- Click on Model Limits and select Add Limit.
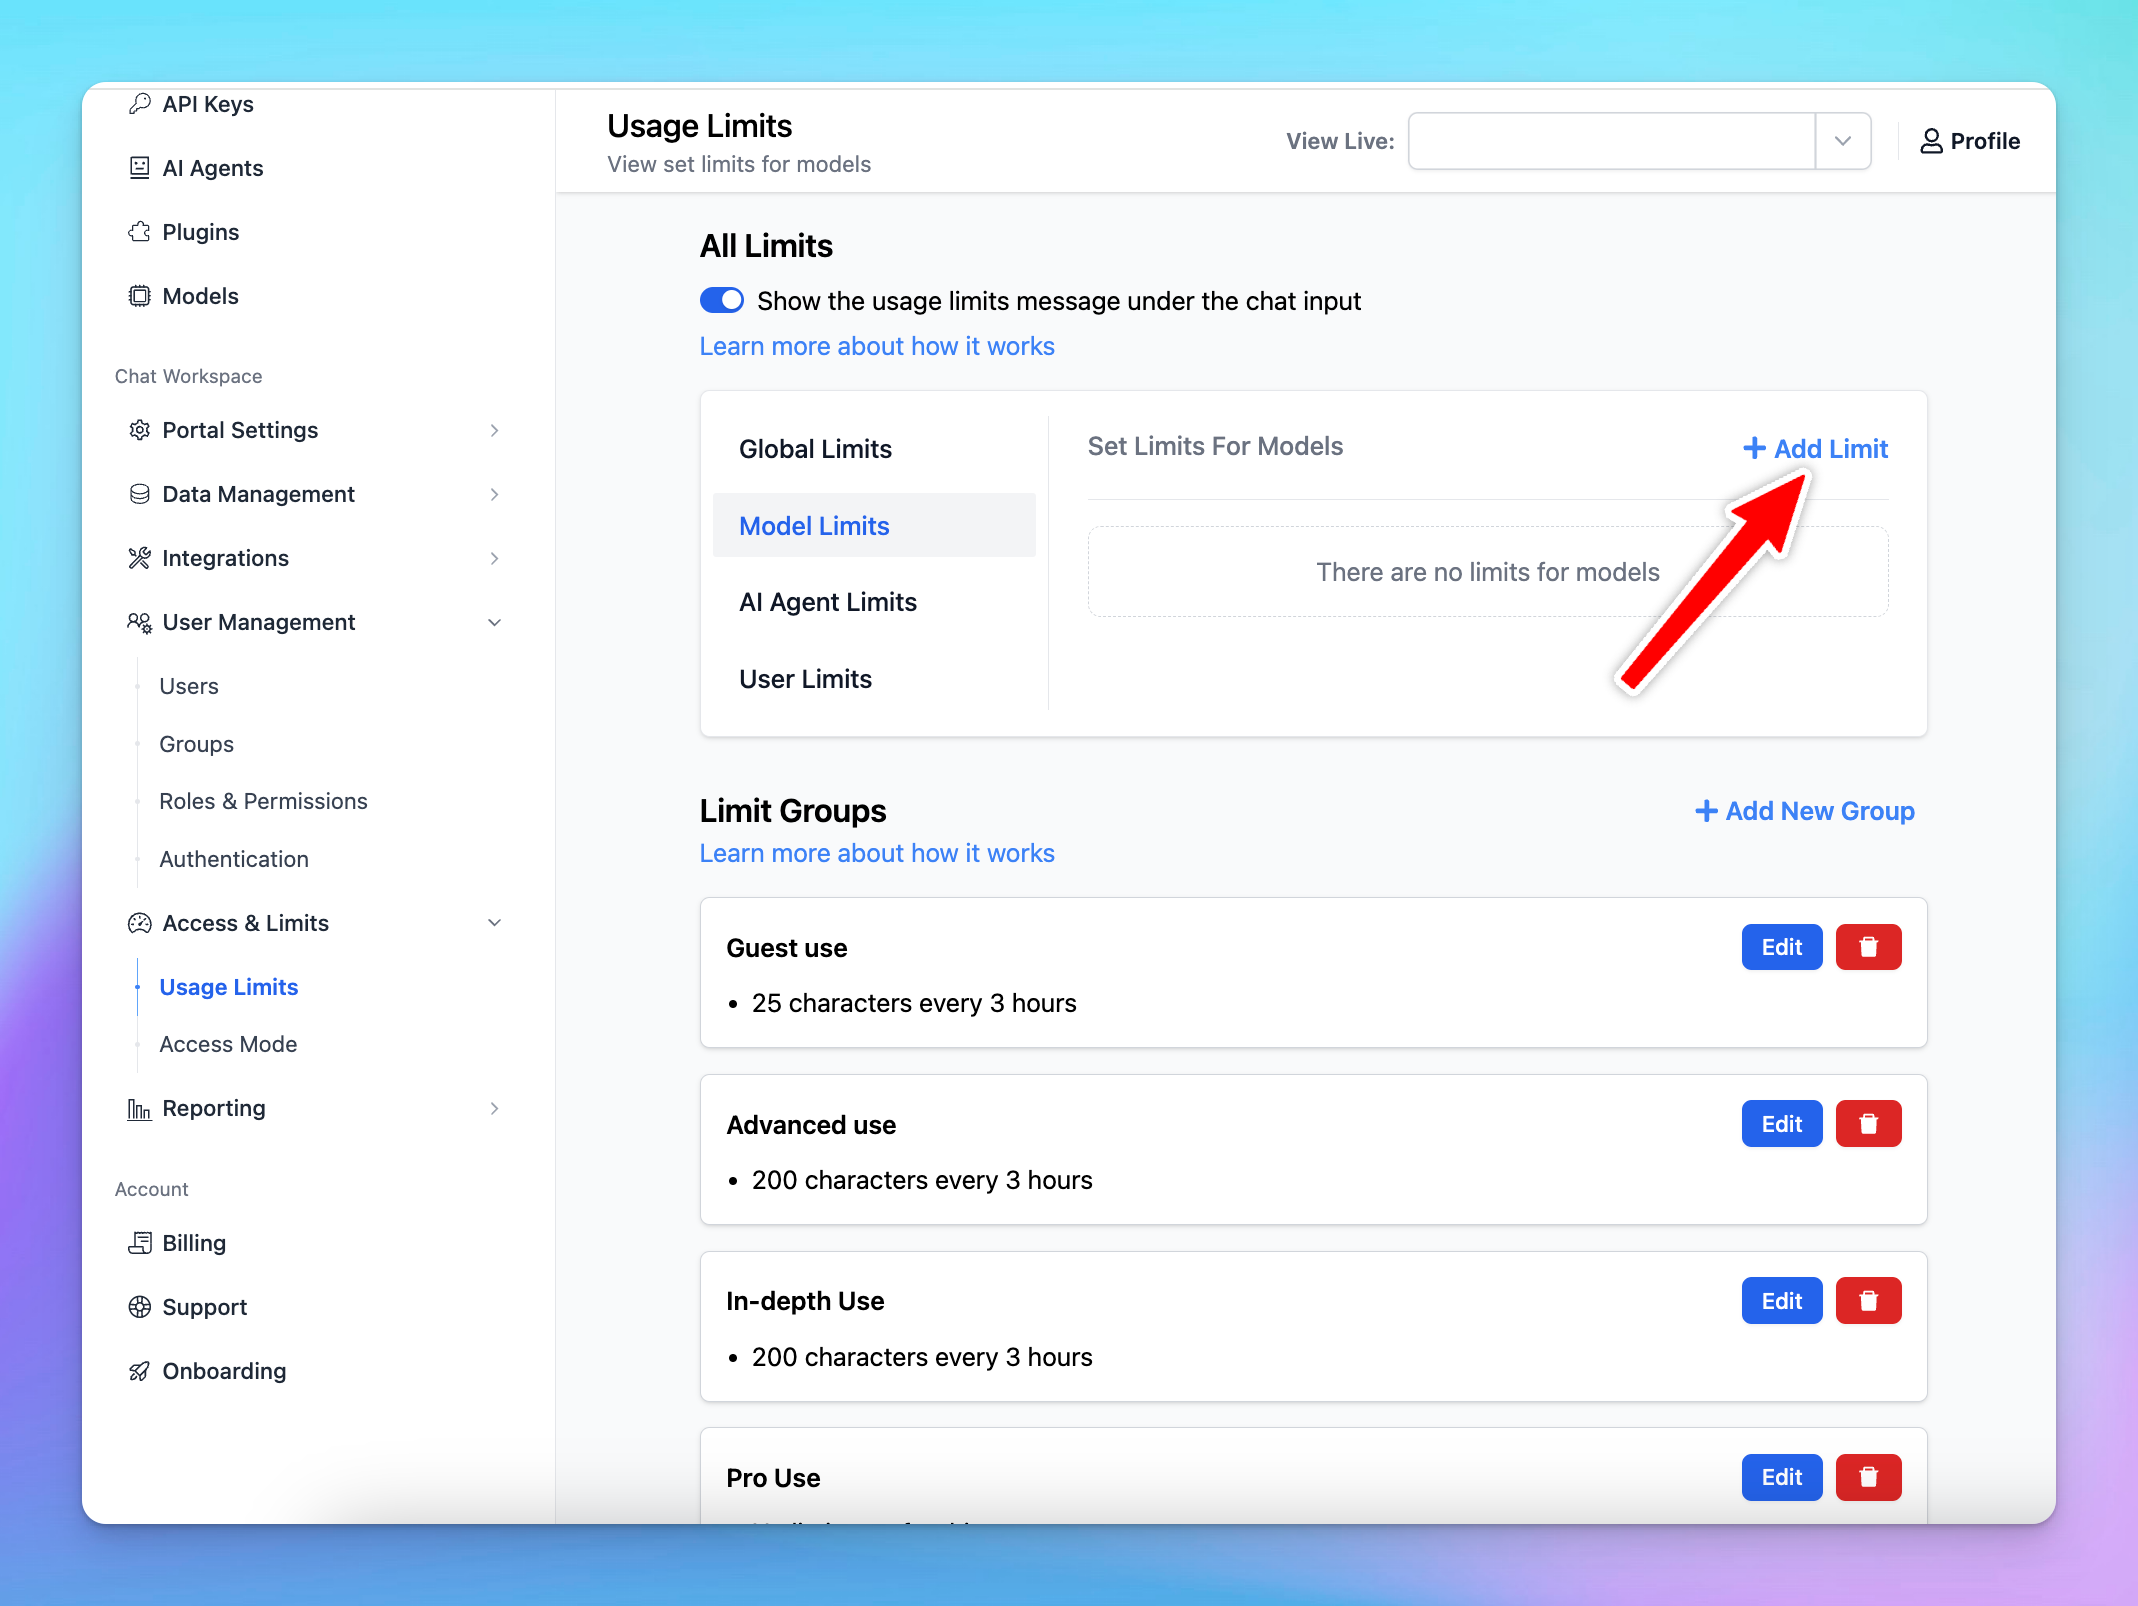
- Choose the AI model you want to restrict
- Click to Limit Group —> Add New Limit Group —> Add limits for messages and characters
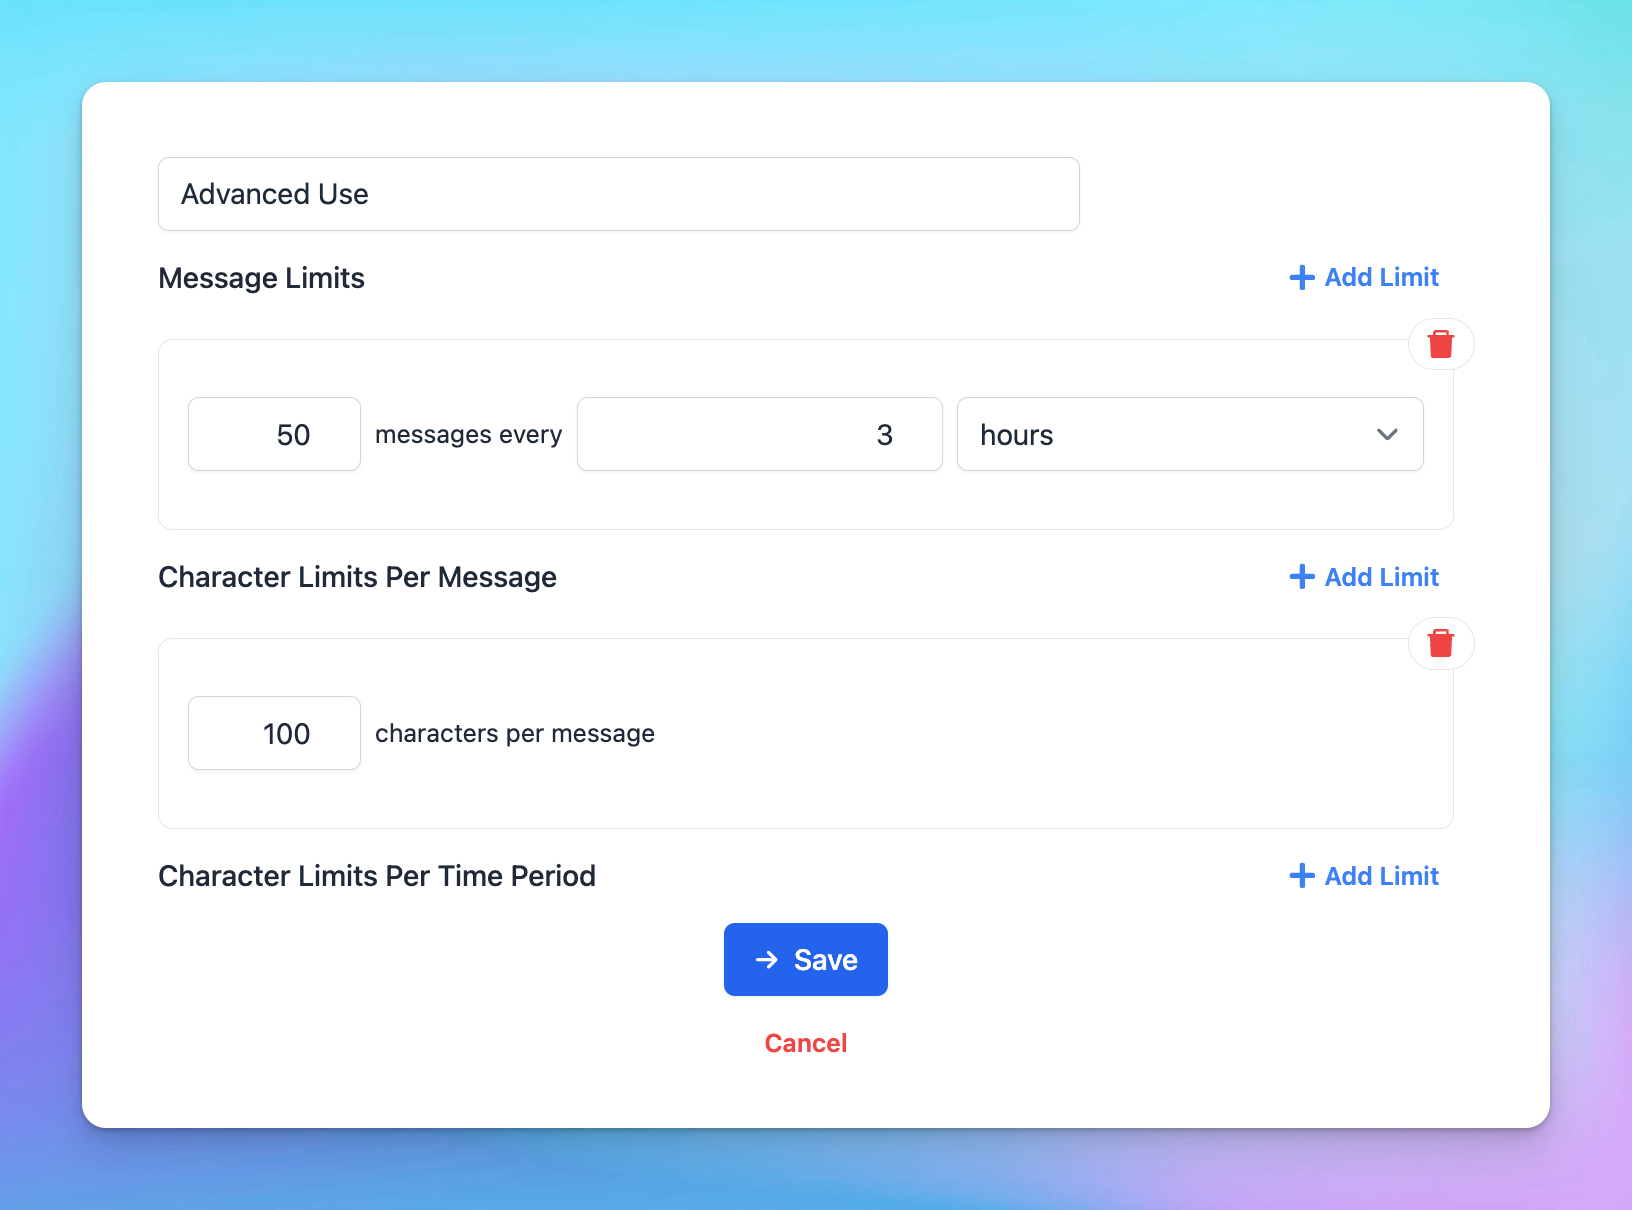 If you don’t want to impose limits, create a group called “No Limit” and leave the message and character limit fields empty.
- Scroll down to the Apply for User Groups section. Select the user groups you want to apply the limits to by choosing Users in specific groups.
2. Restrict AI Agents access
You can manage the AI Agents visibility and usage limit using User Groups following the below guidelines:Option 1: Manage via Usage Limits (Same as Model Limit settings)
- Navigate to the “Usage & Limit” under the Access & Limits section in the Admin Panel.
- Click on AI Agent Limits and select Add Limit.
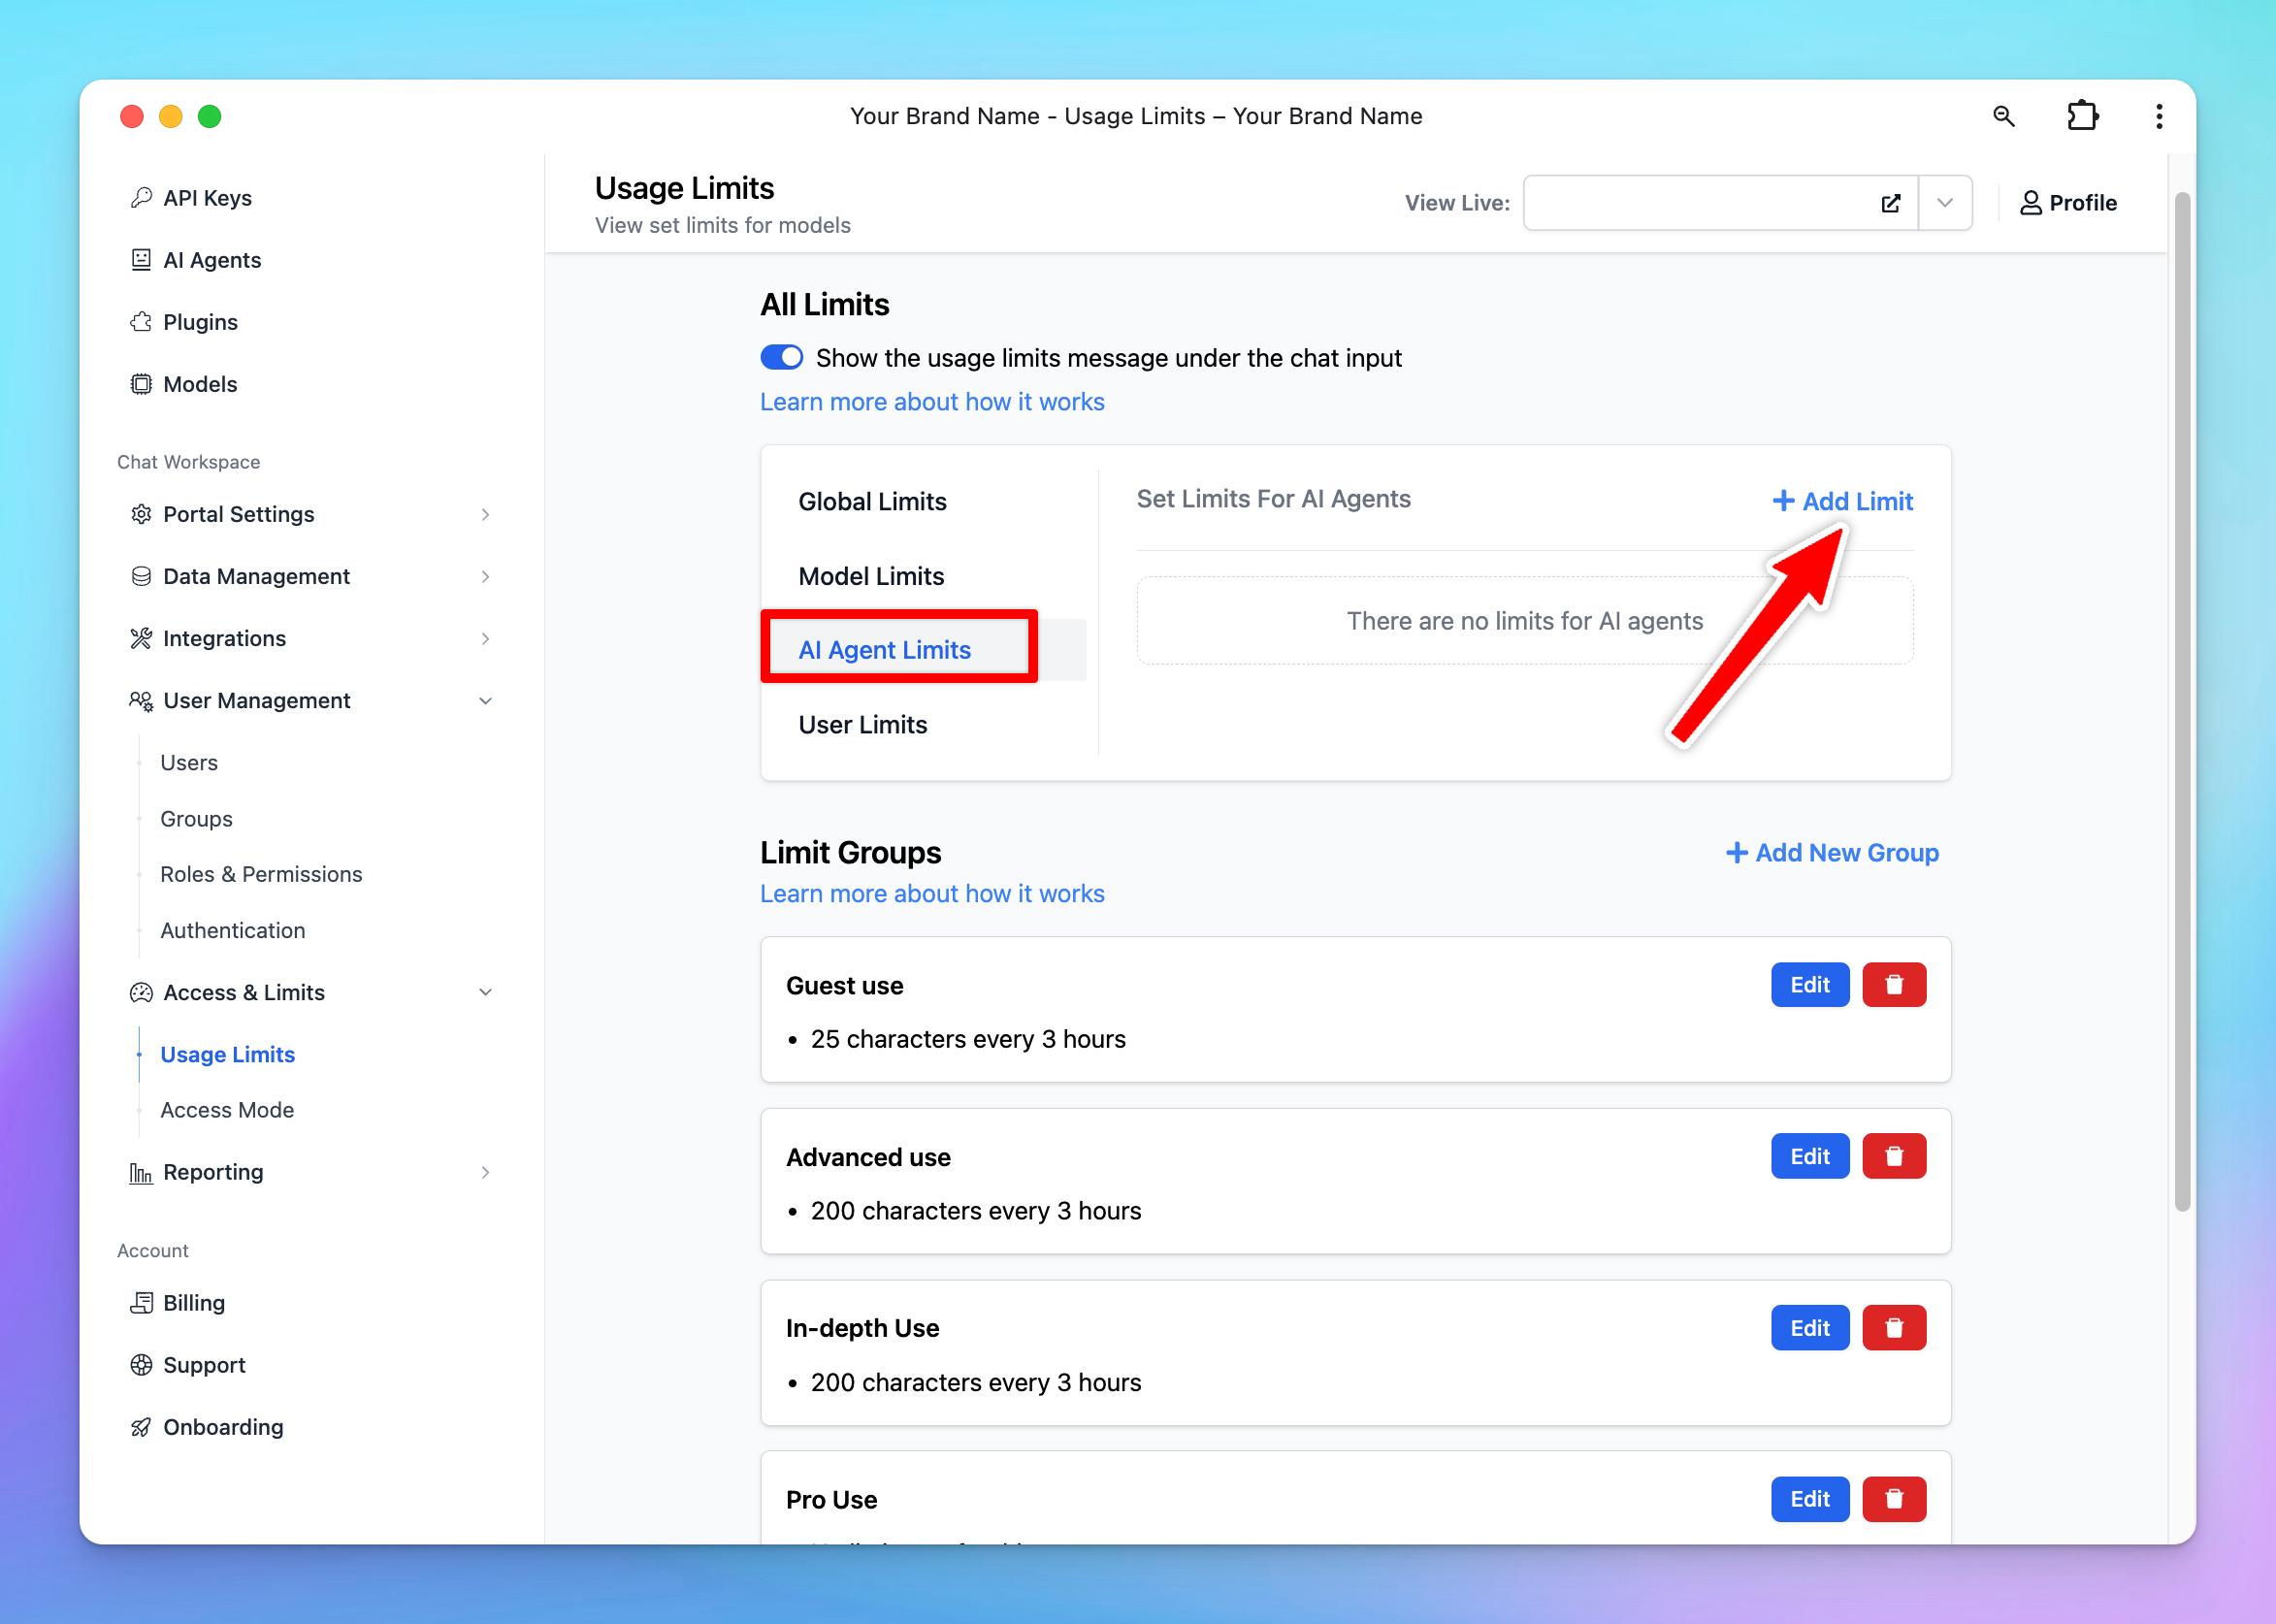
- Select the AI Agents you want to set the limit
- Click to Limit Group —> Add New Limit Group —> Add limits for messages and characters
- Scroll down to the Apply for User Groups section. Select the user groups you want to apply the limits to by choosing Users in specific groups / All users except users from specific groups.
Option 2: Manage limit directly within AI Agent Settings
- Go to AI Agent section
- Click Edit your current AI Agent or Create new AI Agent
- Navigate the Usage section within AI Agent settings:
- Set up Visibility: choose the user group that can access to the AI Agent
- Set up Usage limits: create a new limit group or select from existing limit groups to manage messages and characters users can send while using the AI Agent.
3. Restrict Prompt access
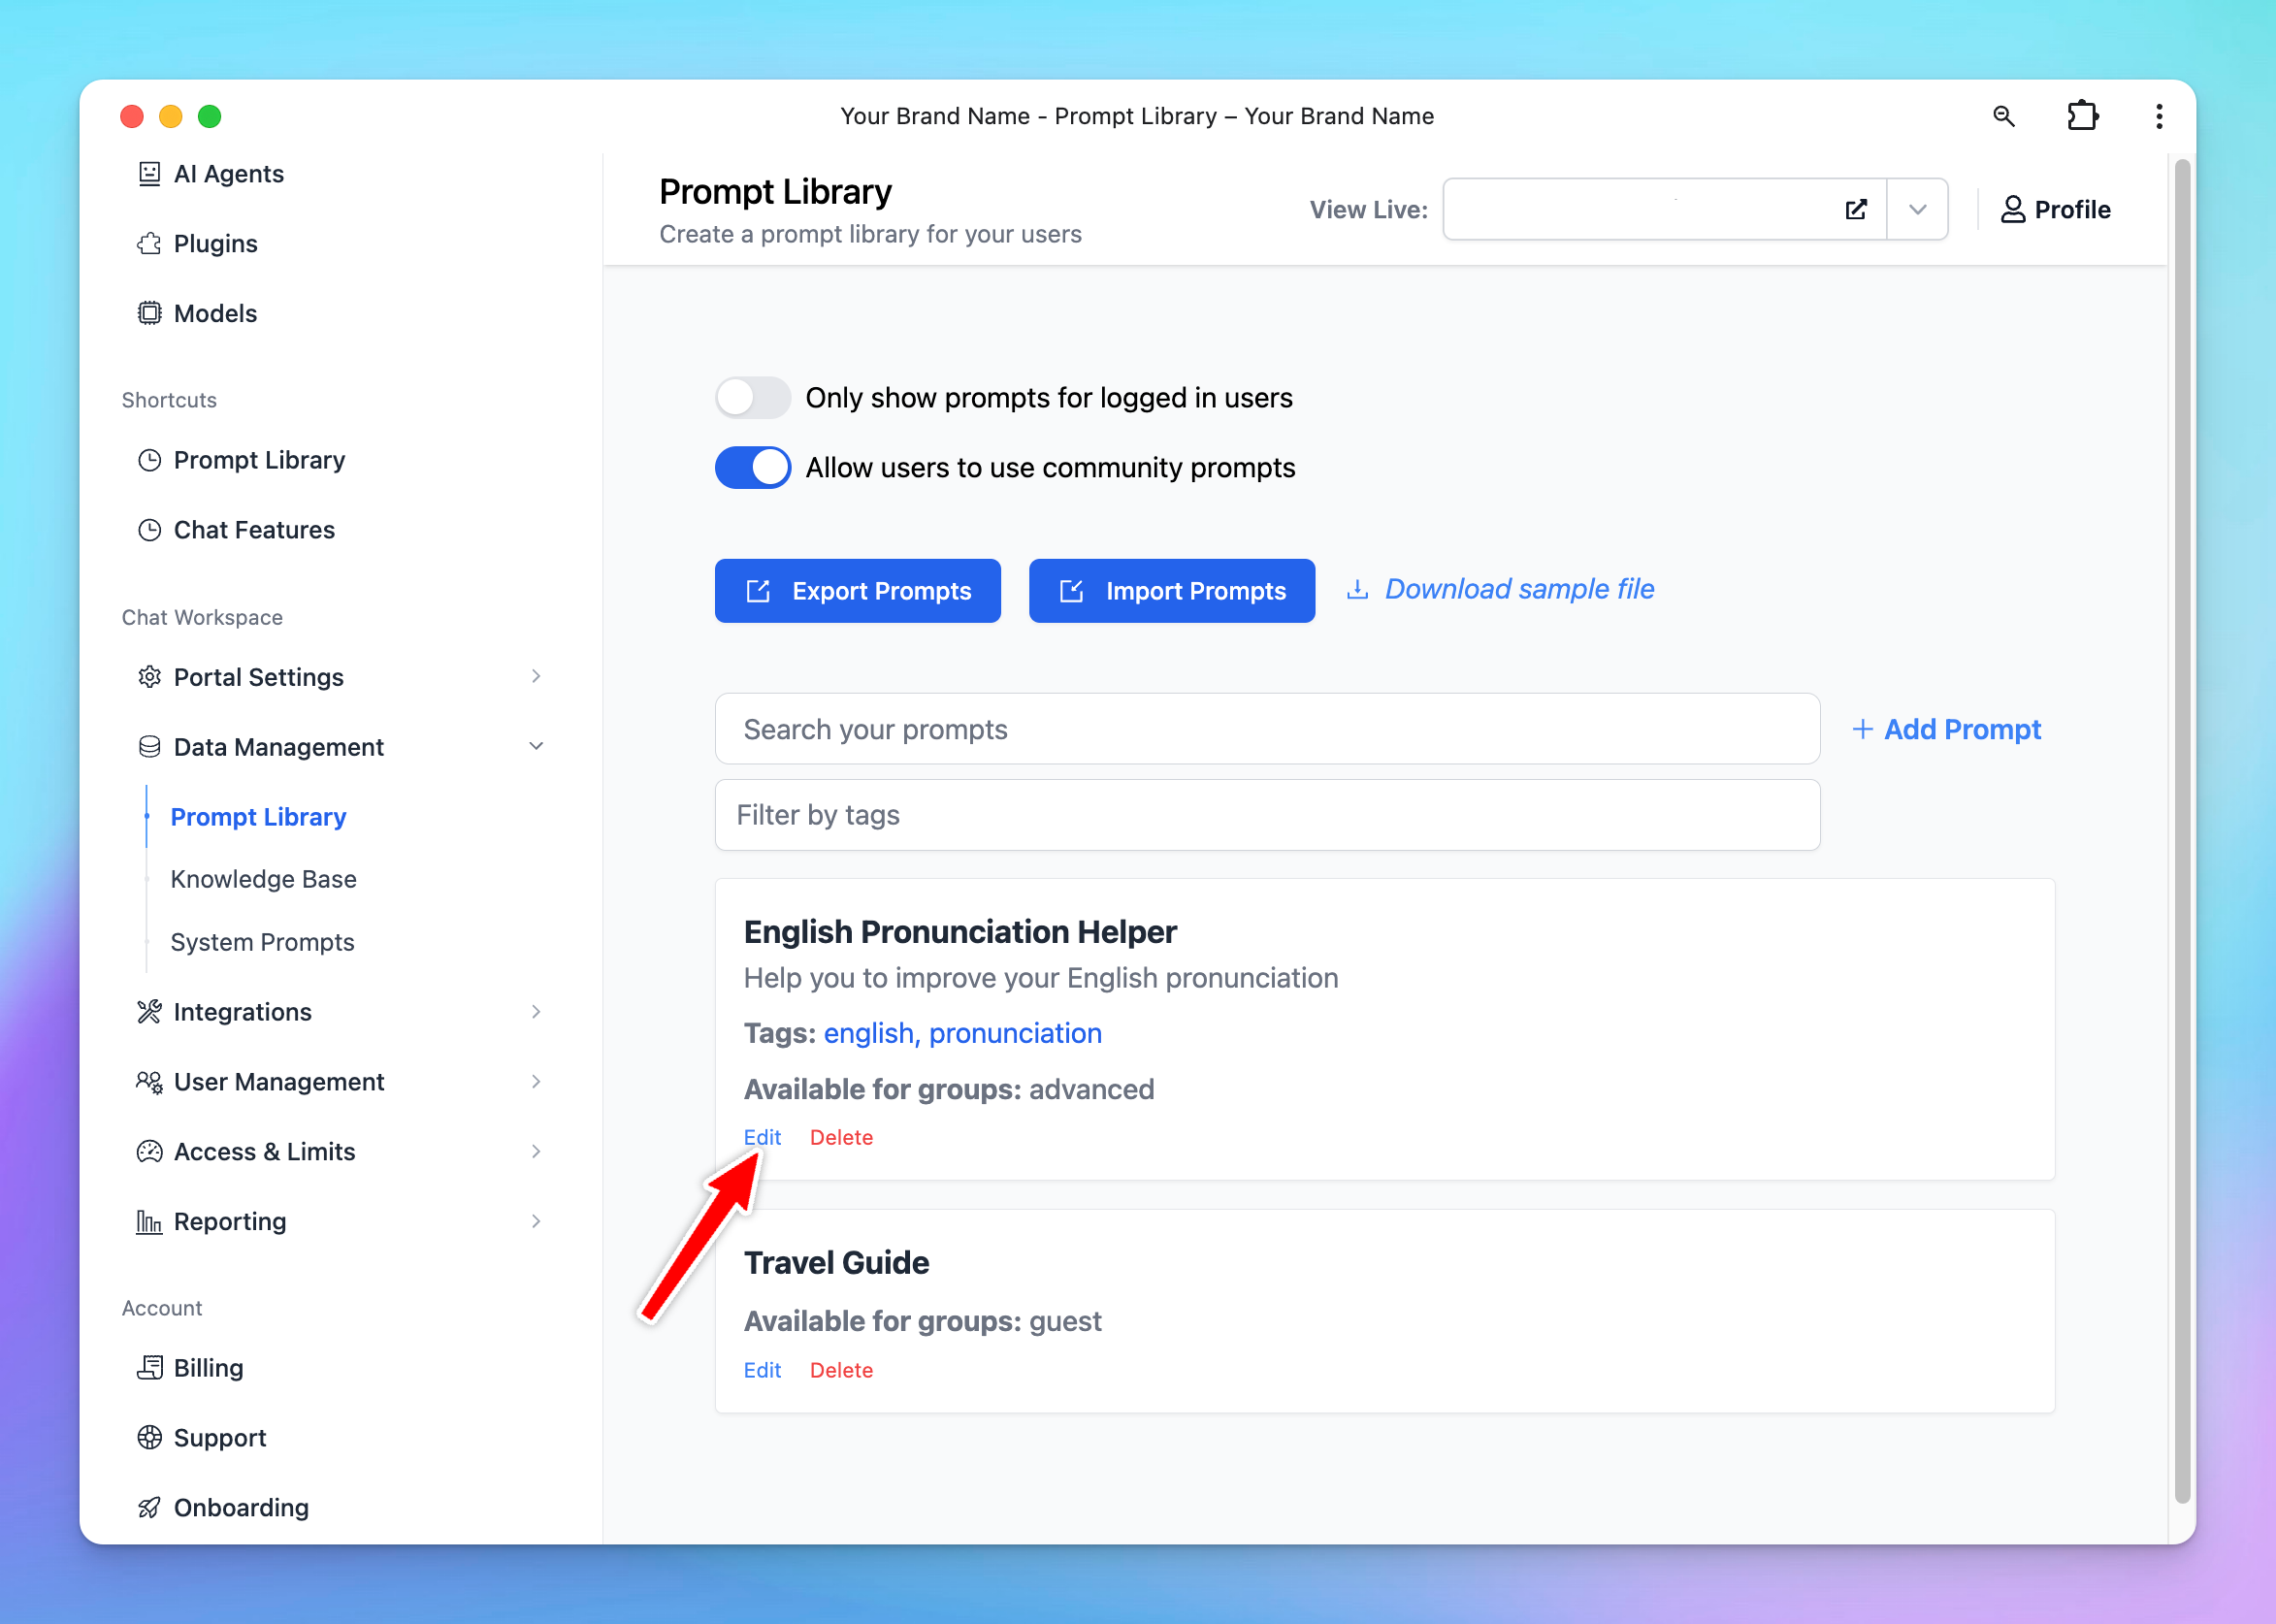
You can control the prompt visibility to specific user groups as follows:- Go to the “Prompts Library” section from the Admin Dashboard.
- Select “Add Prompt” to create a new prompt, or “Edit” an existing prompt.
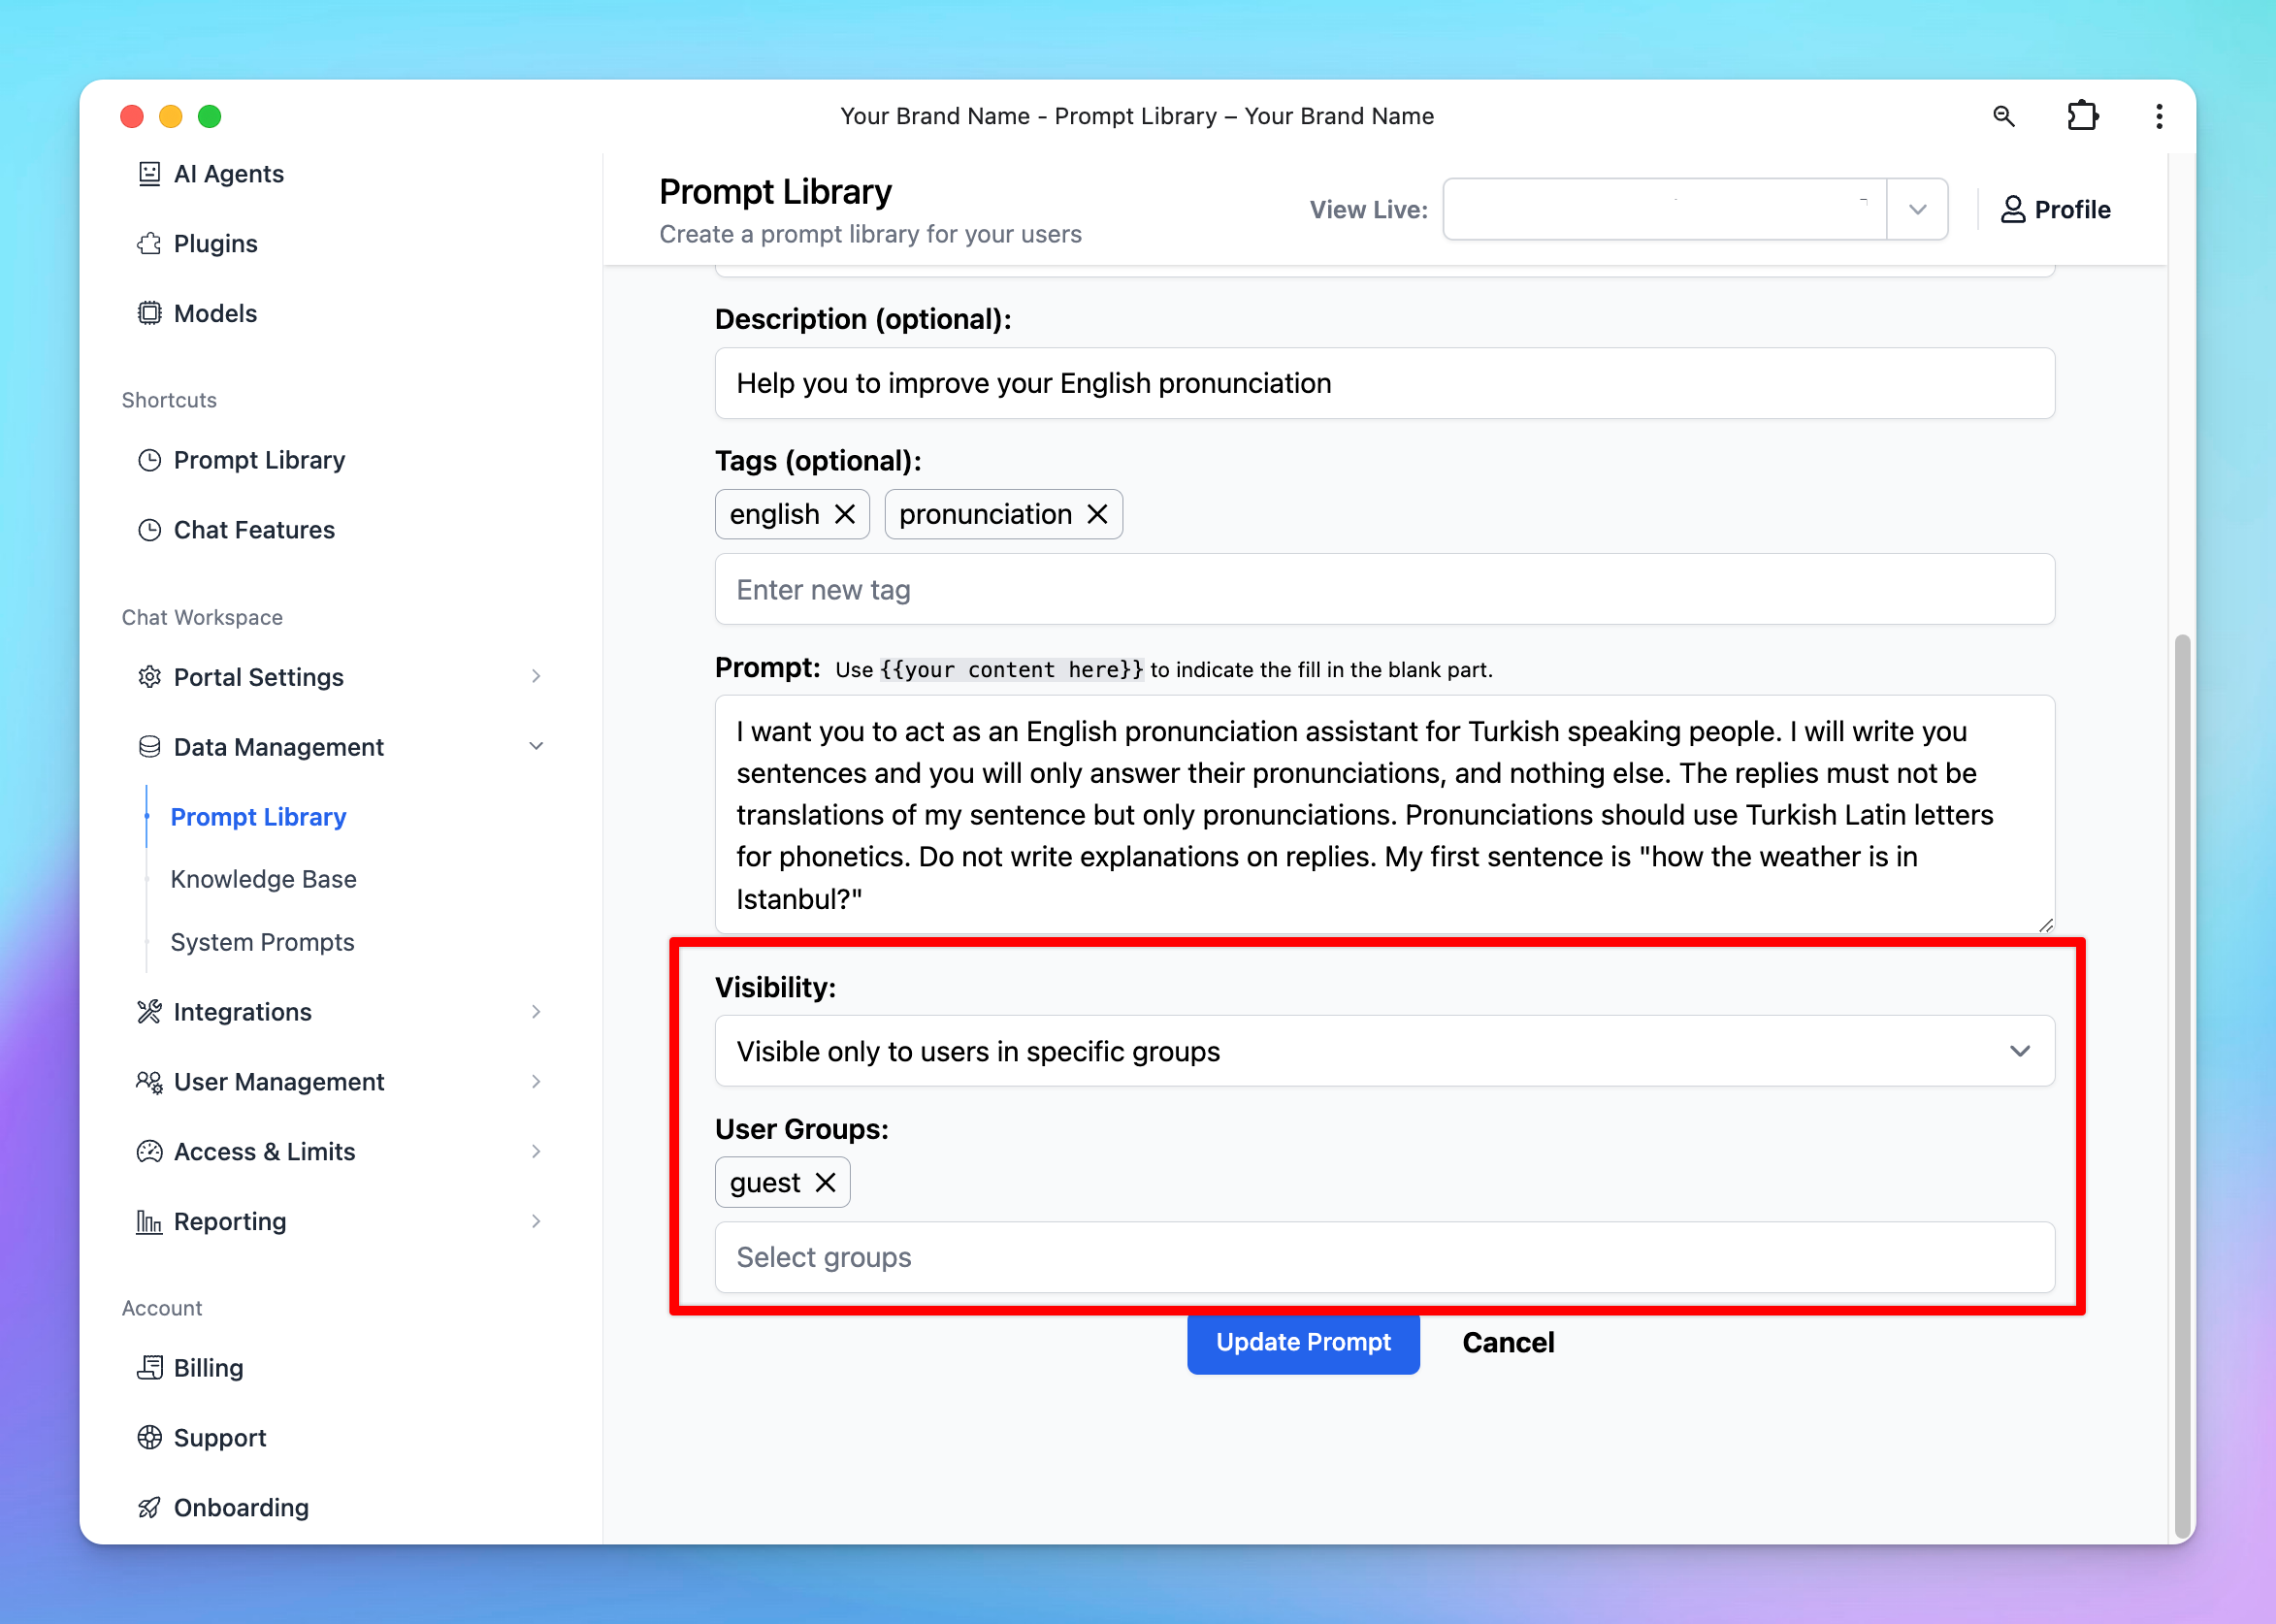
- Scroll down to the “Visibility” section and select from the drop-down menu:
- “Visible only to users in specific groups”: once you add groups, users in these certain groups are allowed to use the model
- or “Visible to all users except users from specific groups”: once you add groups, users in these certain groups ARE NOT allowed to use the model.
Some important notes
- If a user belongs to multiple groups, they will have combined Admin access based on the union of those groups’ settings.
- In cases where usage limits overlap for specific users in a group, the more restrictive setting will typically apply (for example, if one group has a limit of 100 messages and another has 50, the user will be capped at 50).
- We recommend reviewing your group configurations to ensure consistent and clear permissions and to avoid any unexpected overlapped.