Managing AI resources effectively for your chat instance is more important than ever. That’s why we’ve revamped our Usage Limits system which provides you with better control over your AI resources! This guide will walk you through the different types of usage limits you can set - Global Limits, Model Limits, AI Agent Limits, Plugin Limits and User Limits - and how to implement them step by step.Documentation Index
Fetch the complete documentation index at: https://docs.typingmind.com/llms.txt
Use this file to discover all available pages before exploring further.
Why Usage and Limits Matter?
With TypingMind, you can set up multiple AI Agents and prompts, enabling your team to interact with various AI models. While this flexibility enhances productivity, it also requires careful management to control API costs. Setting usage limits helps you:- Prevent overuse: make sure that no single AI model, agent, or user consumes an excessive amount of resources.
- Optimize costs: keep expenses in check by regulating usage.
- Enhance fairness: distribute AI capabilities evenly across users or departments
How Usage Limits work
Basically, you can set limits based on:- Message limits: the number of messages a user or group can send.
- Character limits per message: the maximum number of characters allowed in a single message.
- Character limits per time period: the total number of characters a user or group can send within a specific time frame.
- Tokens limit per time period: the number of tokens can be used within a specific time framce
 You can apply the limits from your Limit Groups as follows:
- Global Limits: apply limits to all users or specific groups across the entire chat system.
- Model Limits: set limits for each specific AI model, which can apply to all users or specific user groups.
- AI Agent Limits: apply limits to individual AI Agents for all users or specific groups.
- Plugin limits: apply limits to Plugins for all users or specific user groups.
- User Limits: set limits for individual users.
A step-by-step to set up usage limits
Step 1: Set up User Groups
Before setting limits, it’s helpful to organize users into different groups. This allows you to apply specific limits to different categories of users.- Go to the Group under the User Management section
- Click to Create a new user group
- Add members to your created group
/image%2020.png)
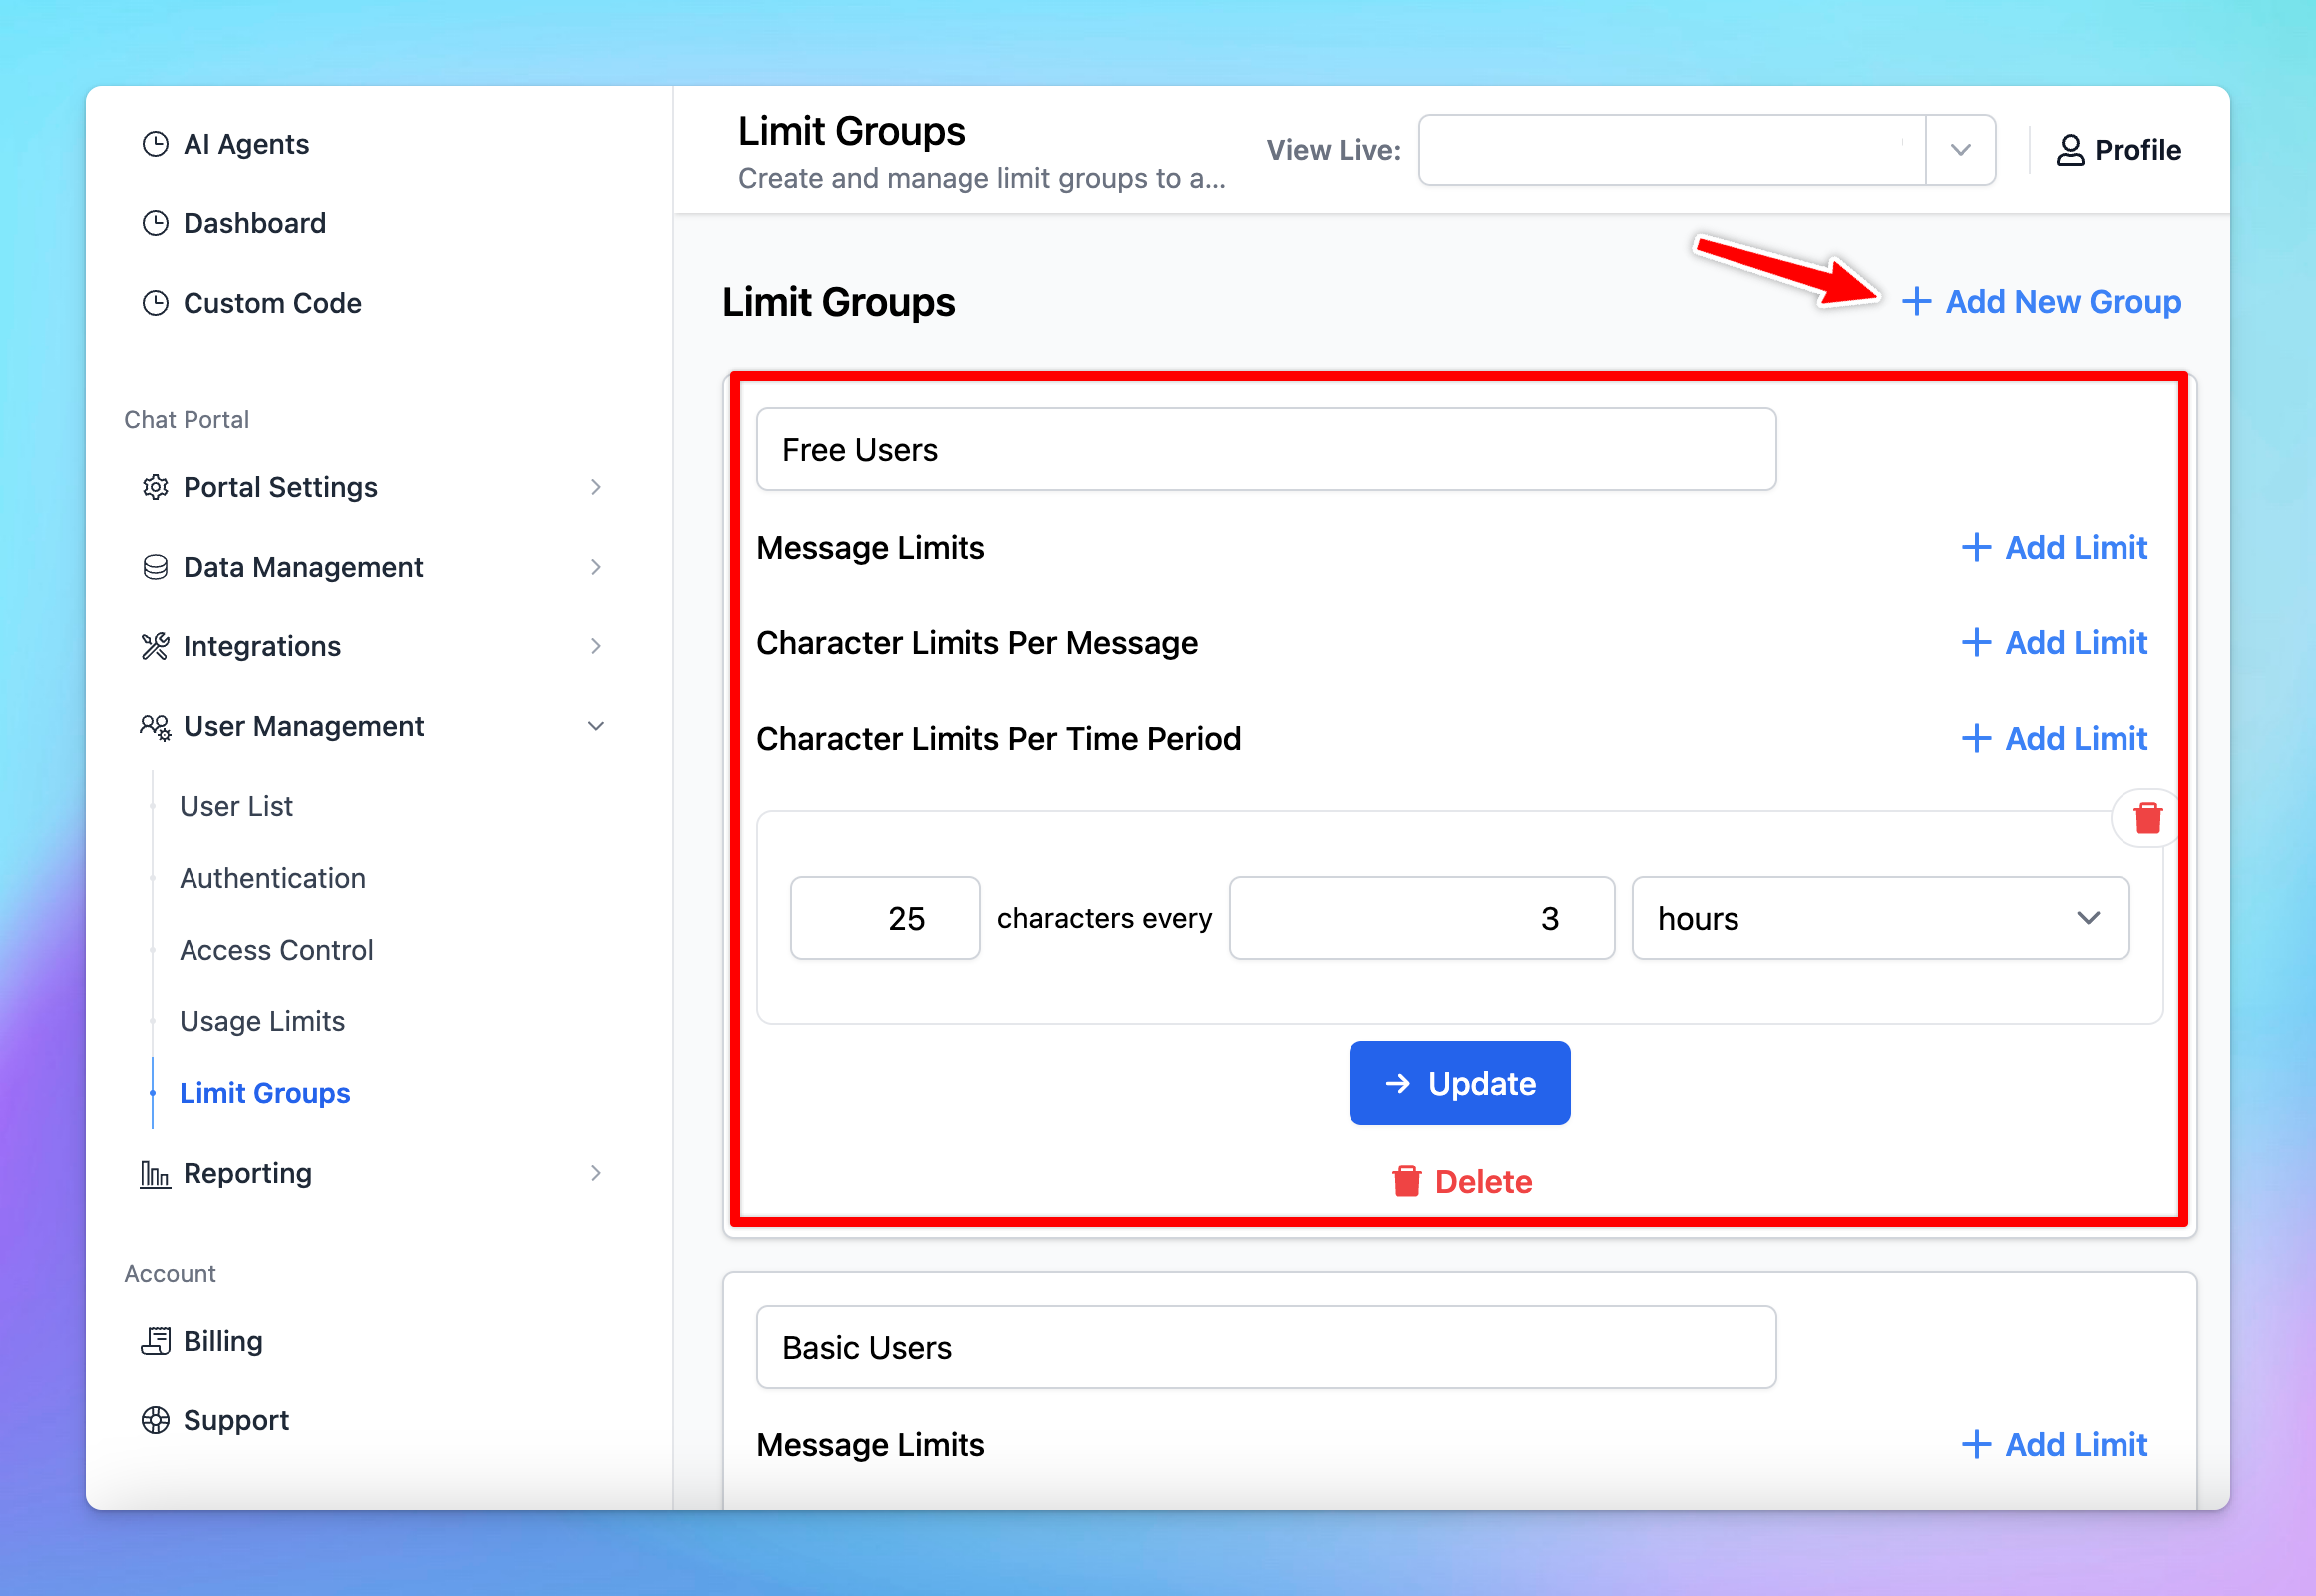
Step 2: Create Limit Groups
- Within your Admin Panel, go to Usage Limits within Access & Limits menu
- Scroll down to Limit Groups
- Click on “Add New Group”
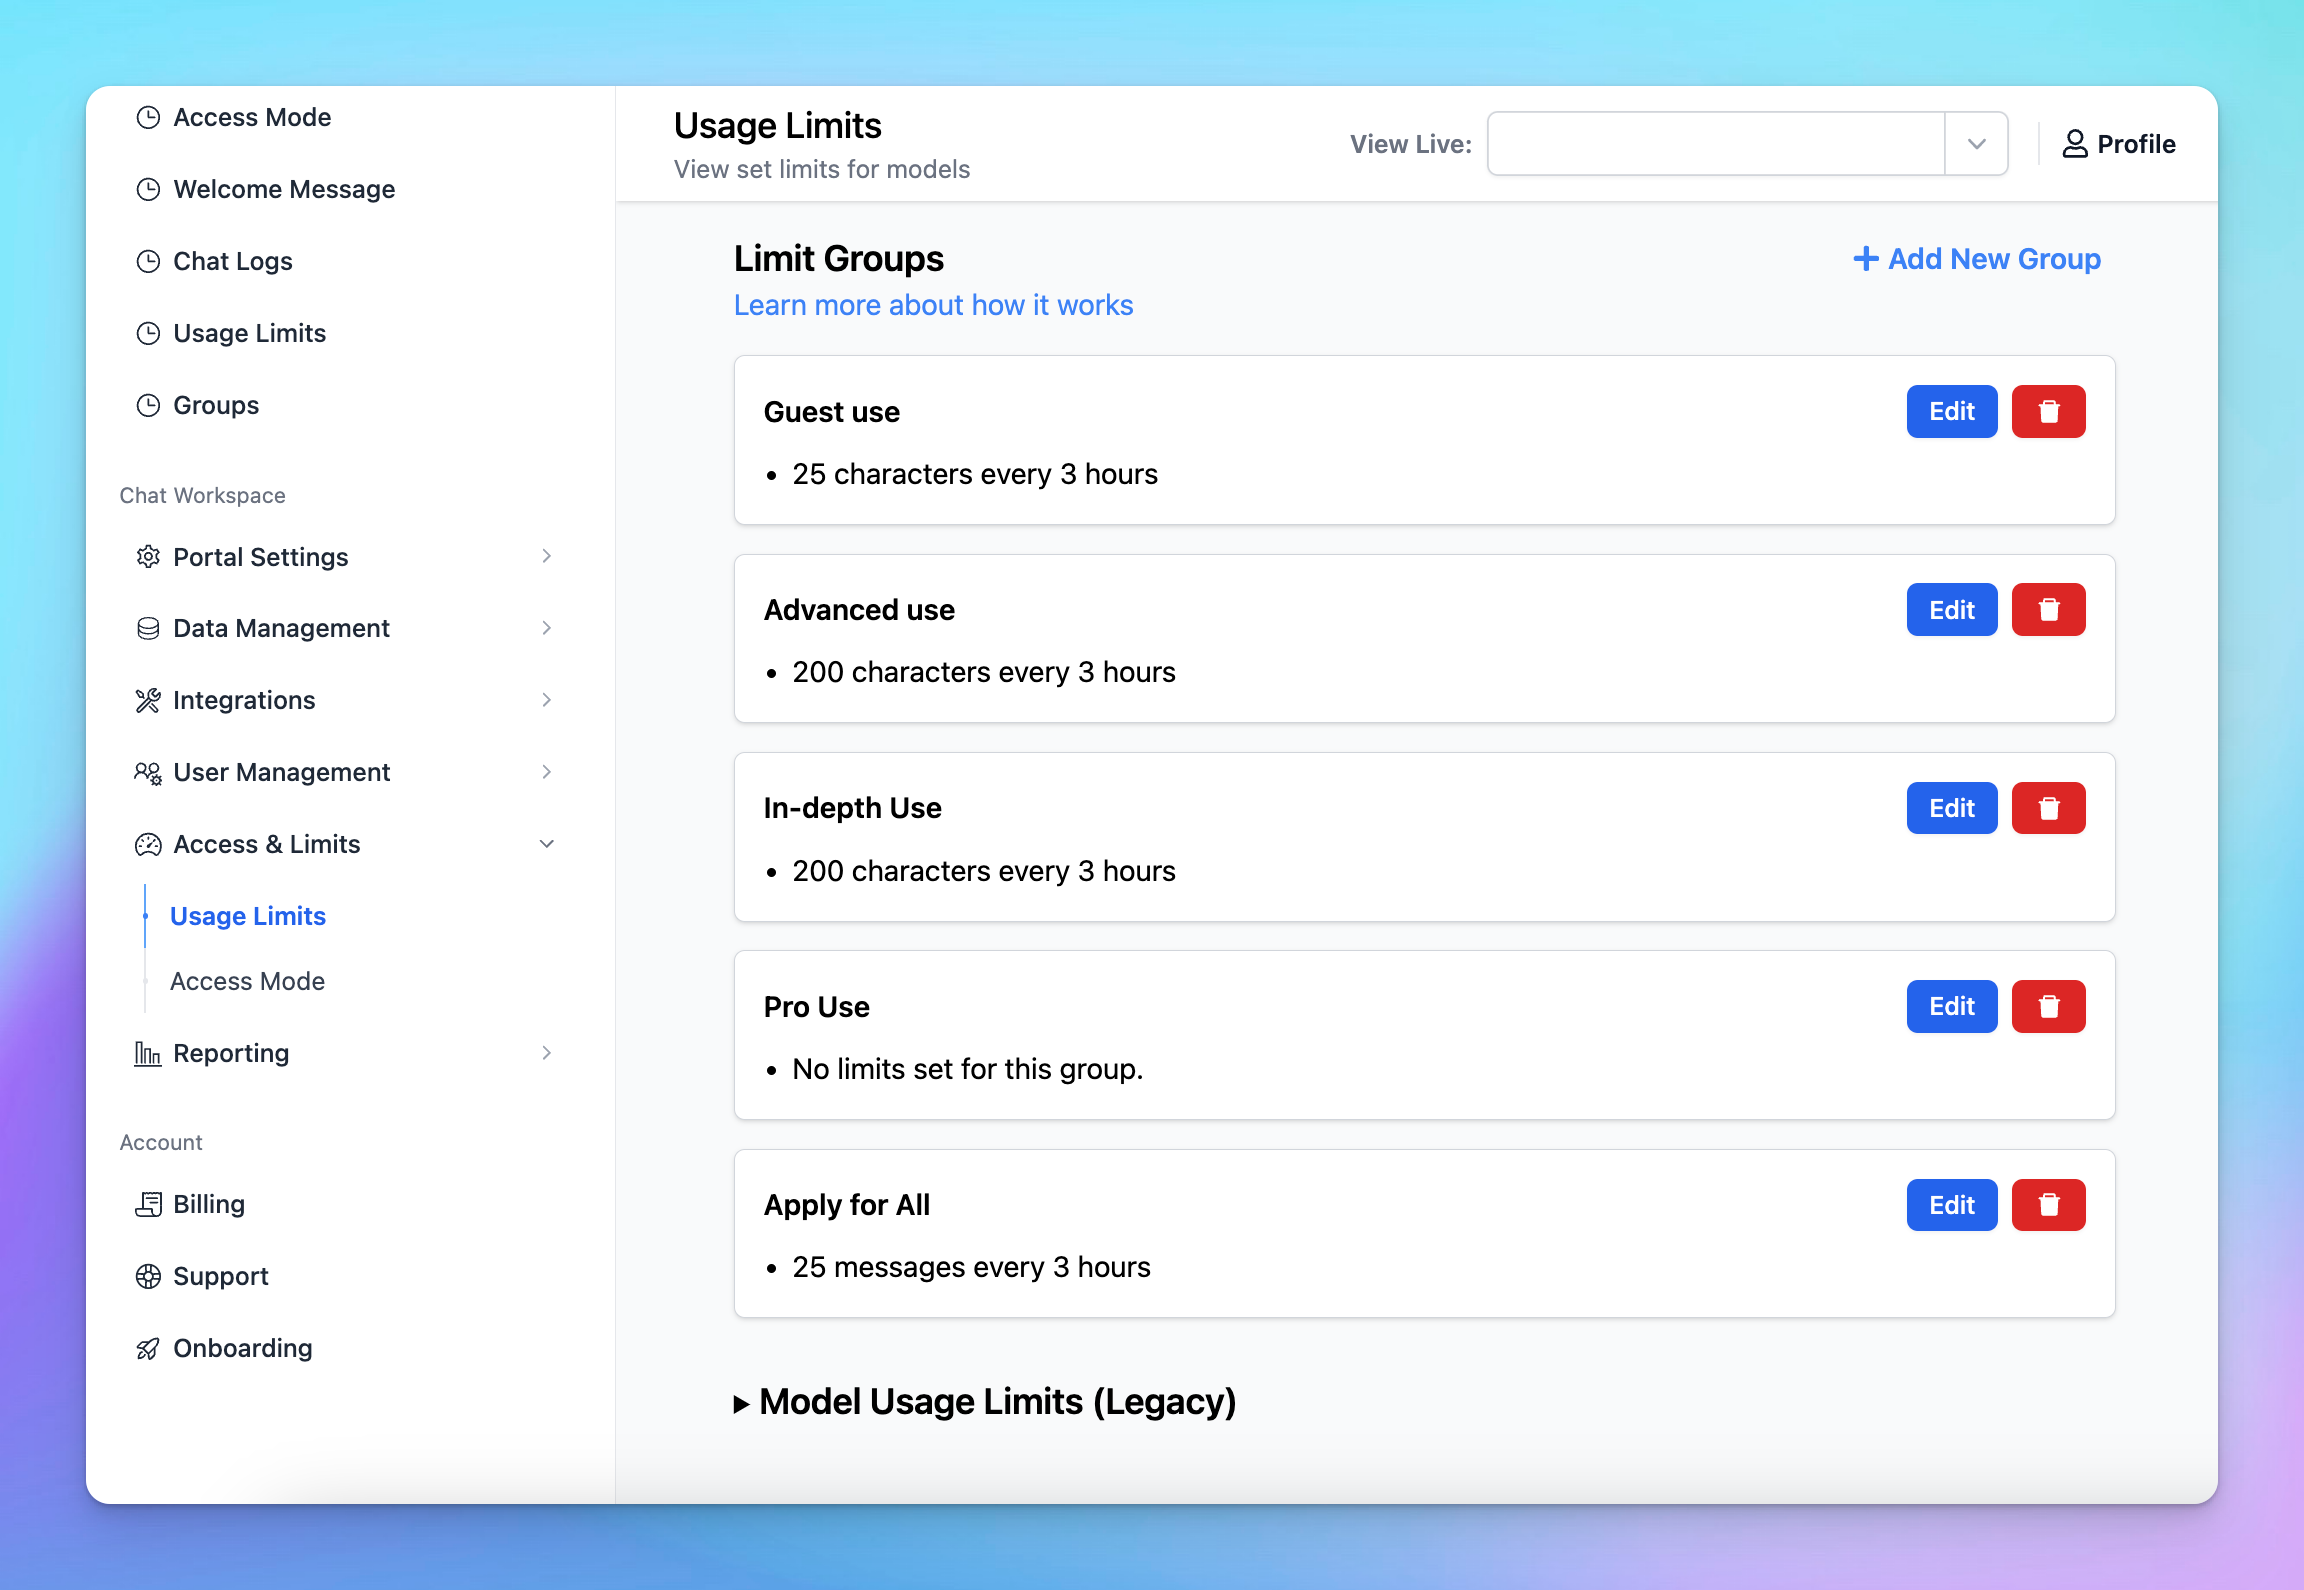
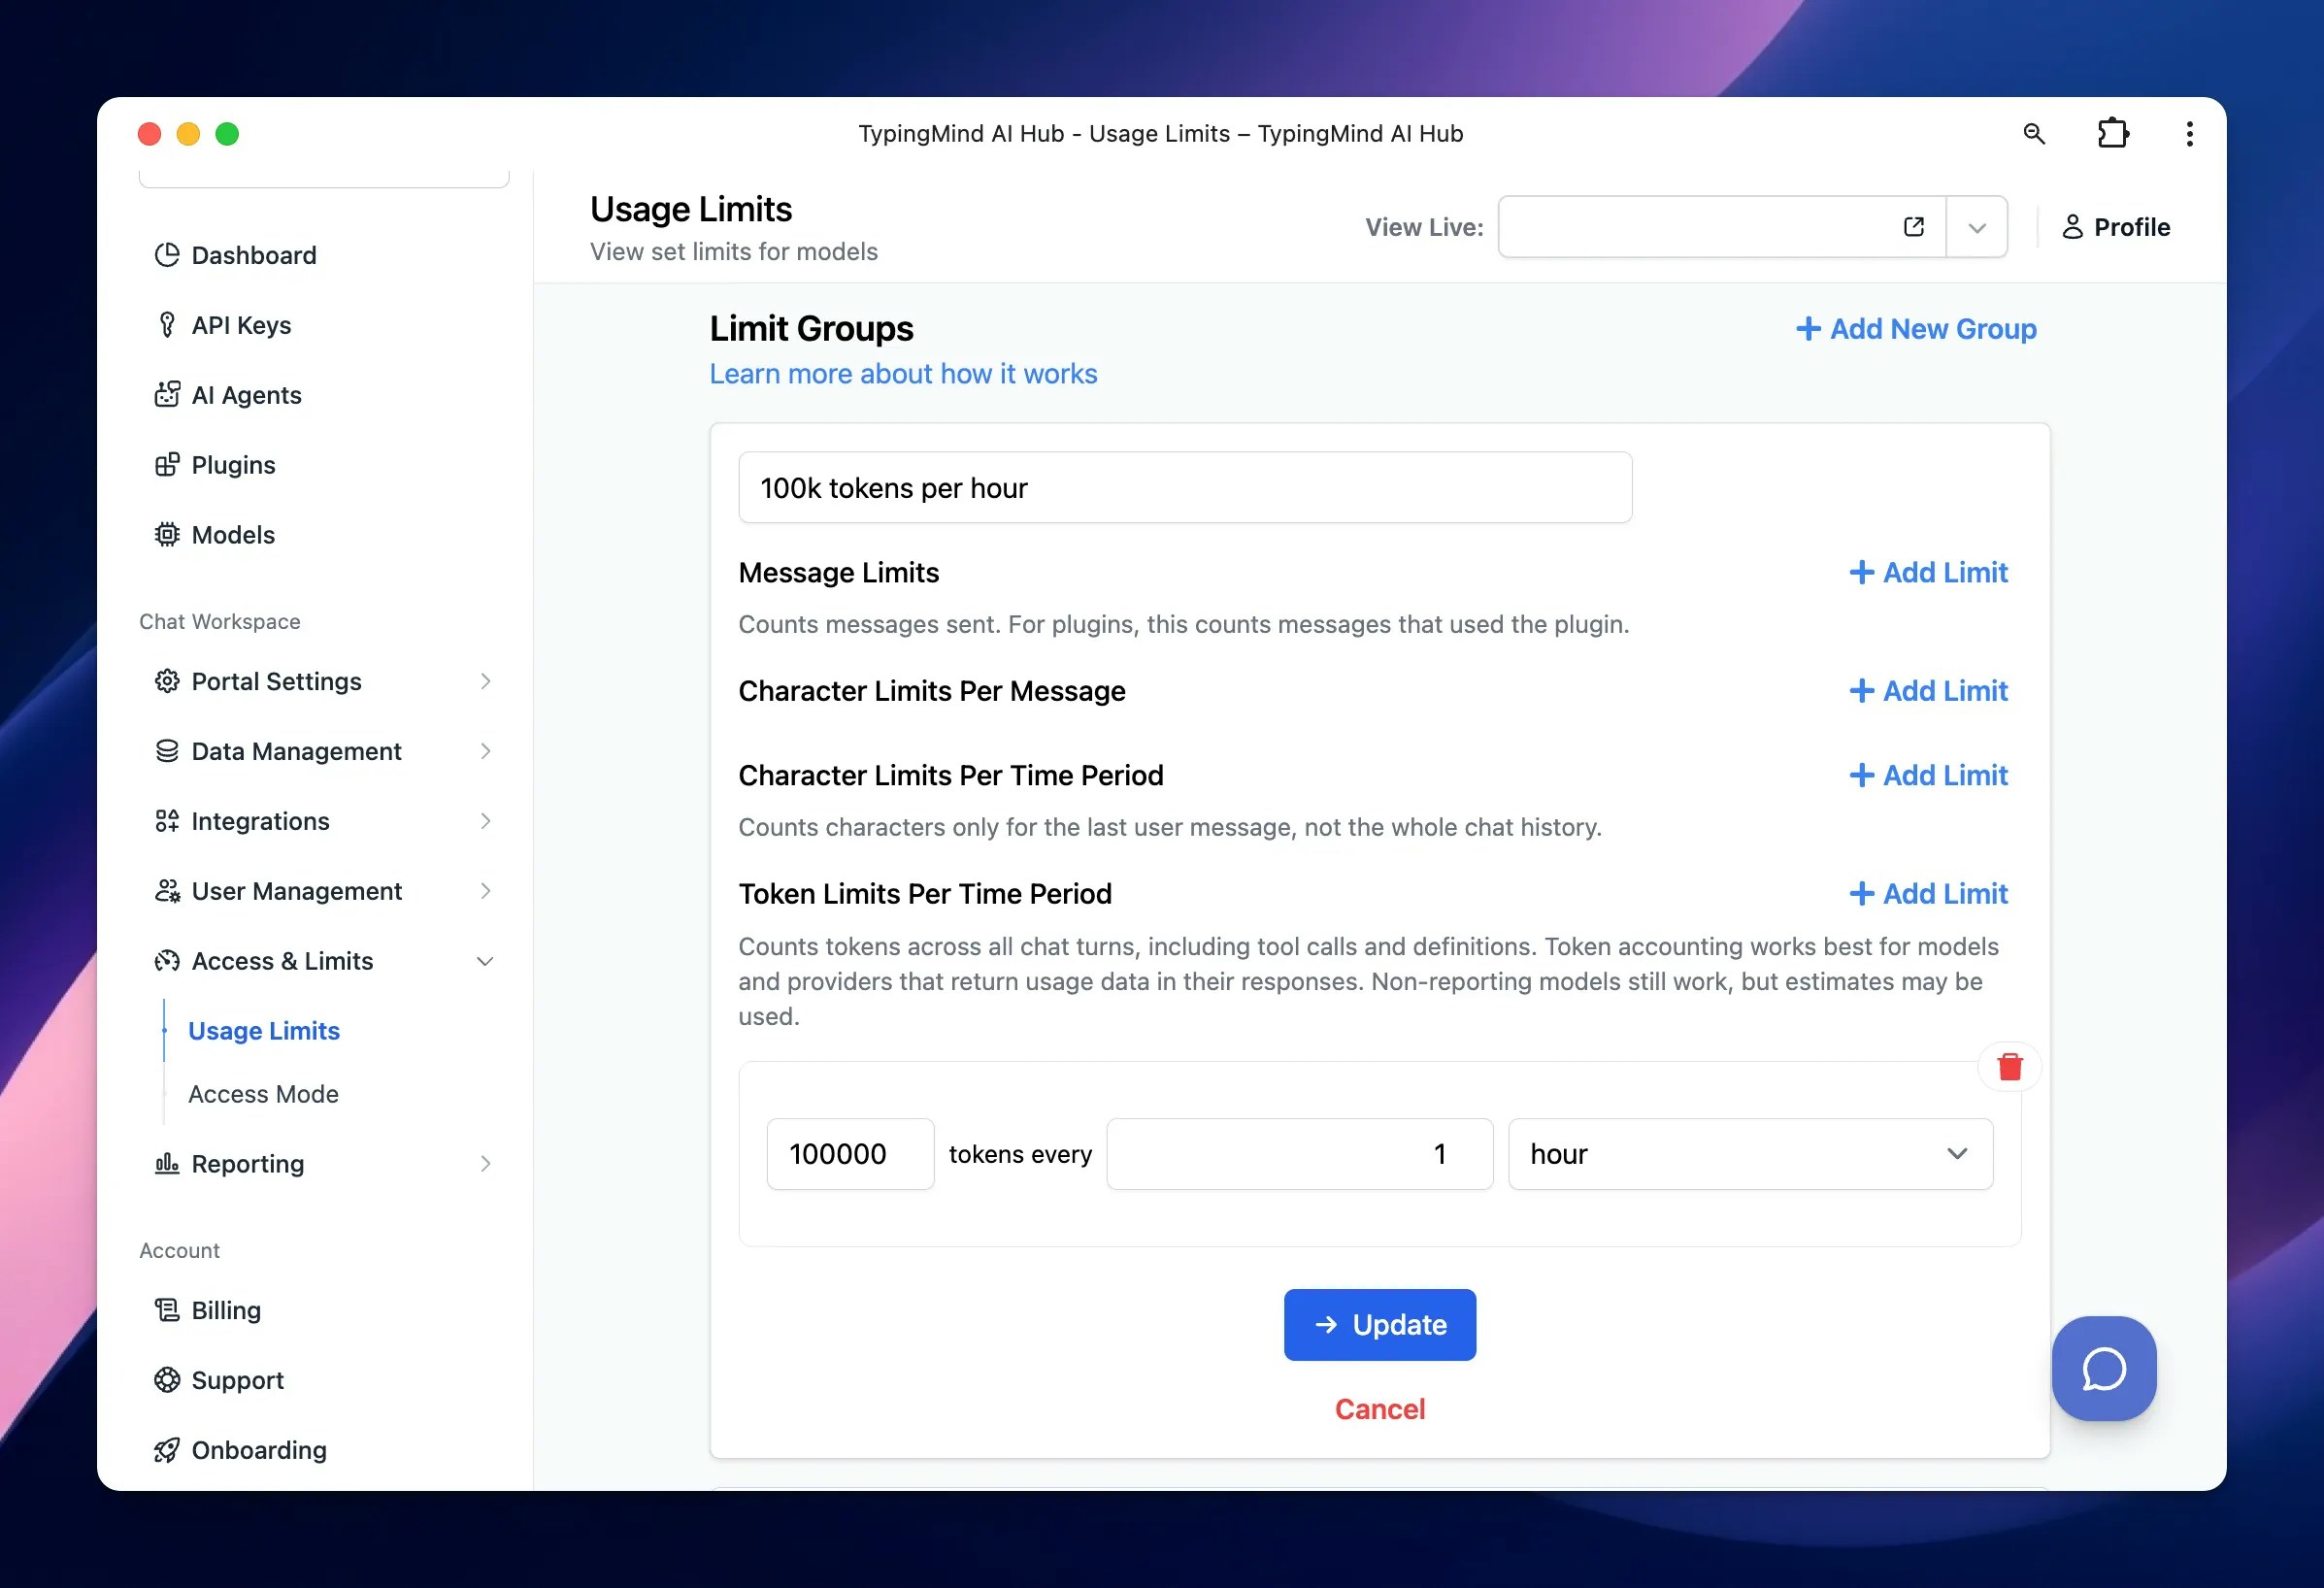
- Define the limits for your group by setting:
- Message Limits
- Character Limits Per Message
- Character Limits Per Time Period (If a particular limit is not needed, you can leave that field blank)
- Token limits per time period
- Basic Use: 50 messages can be sent per 3 hours - suitable for users who need minimal interaction with AI, such as those who send fewer messages or shorter content.
- In-depth Use: 200 messages can be sent per 3 hours - for users who require extensive AI interactions, allow sending more messages and longer content.
Step 3: Apply Usage Limits
You can now apply the limits in the following ways:- Global limits
- Model limits
- AI Agent limits
- Plugin limits
- User limits
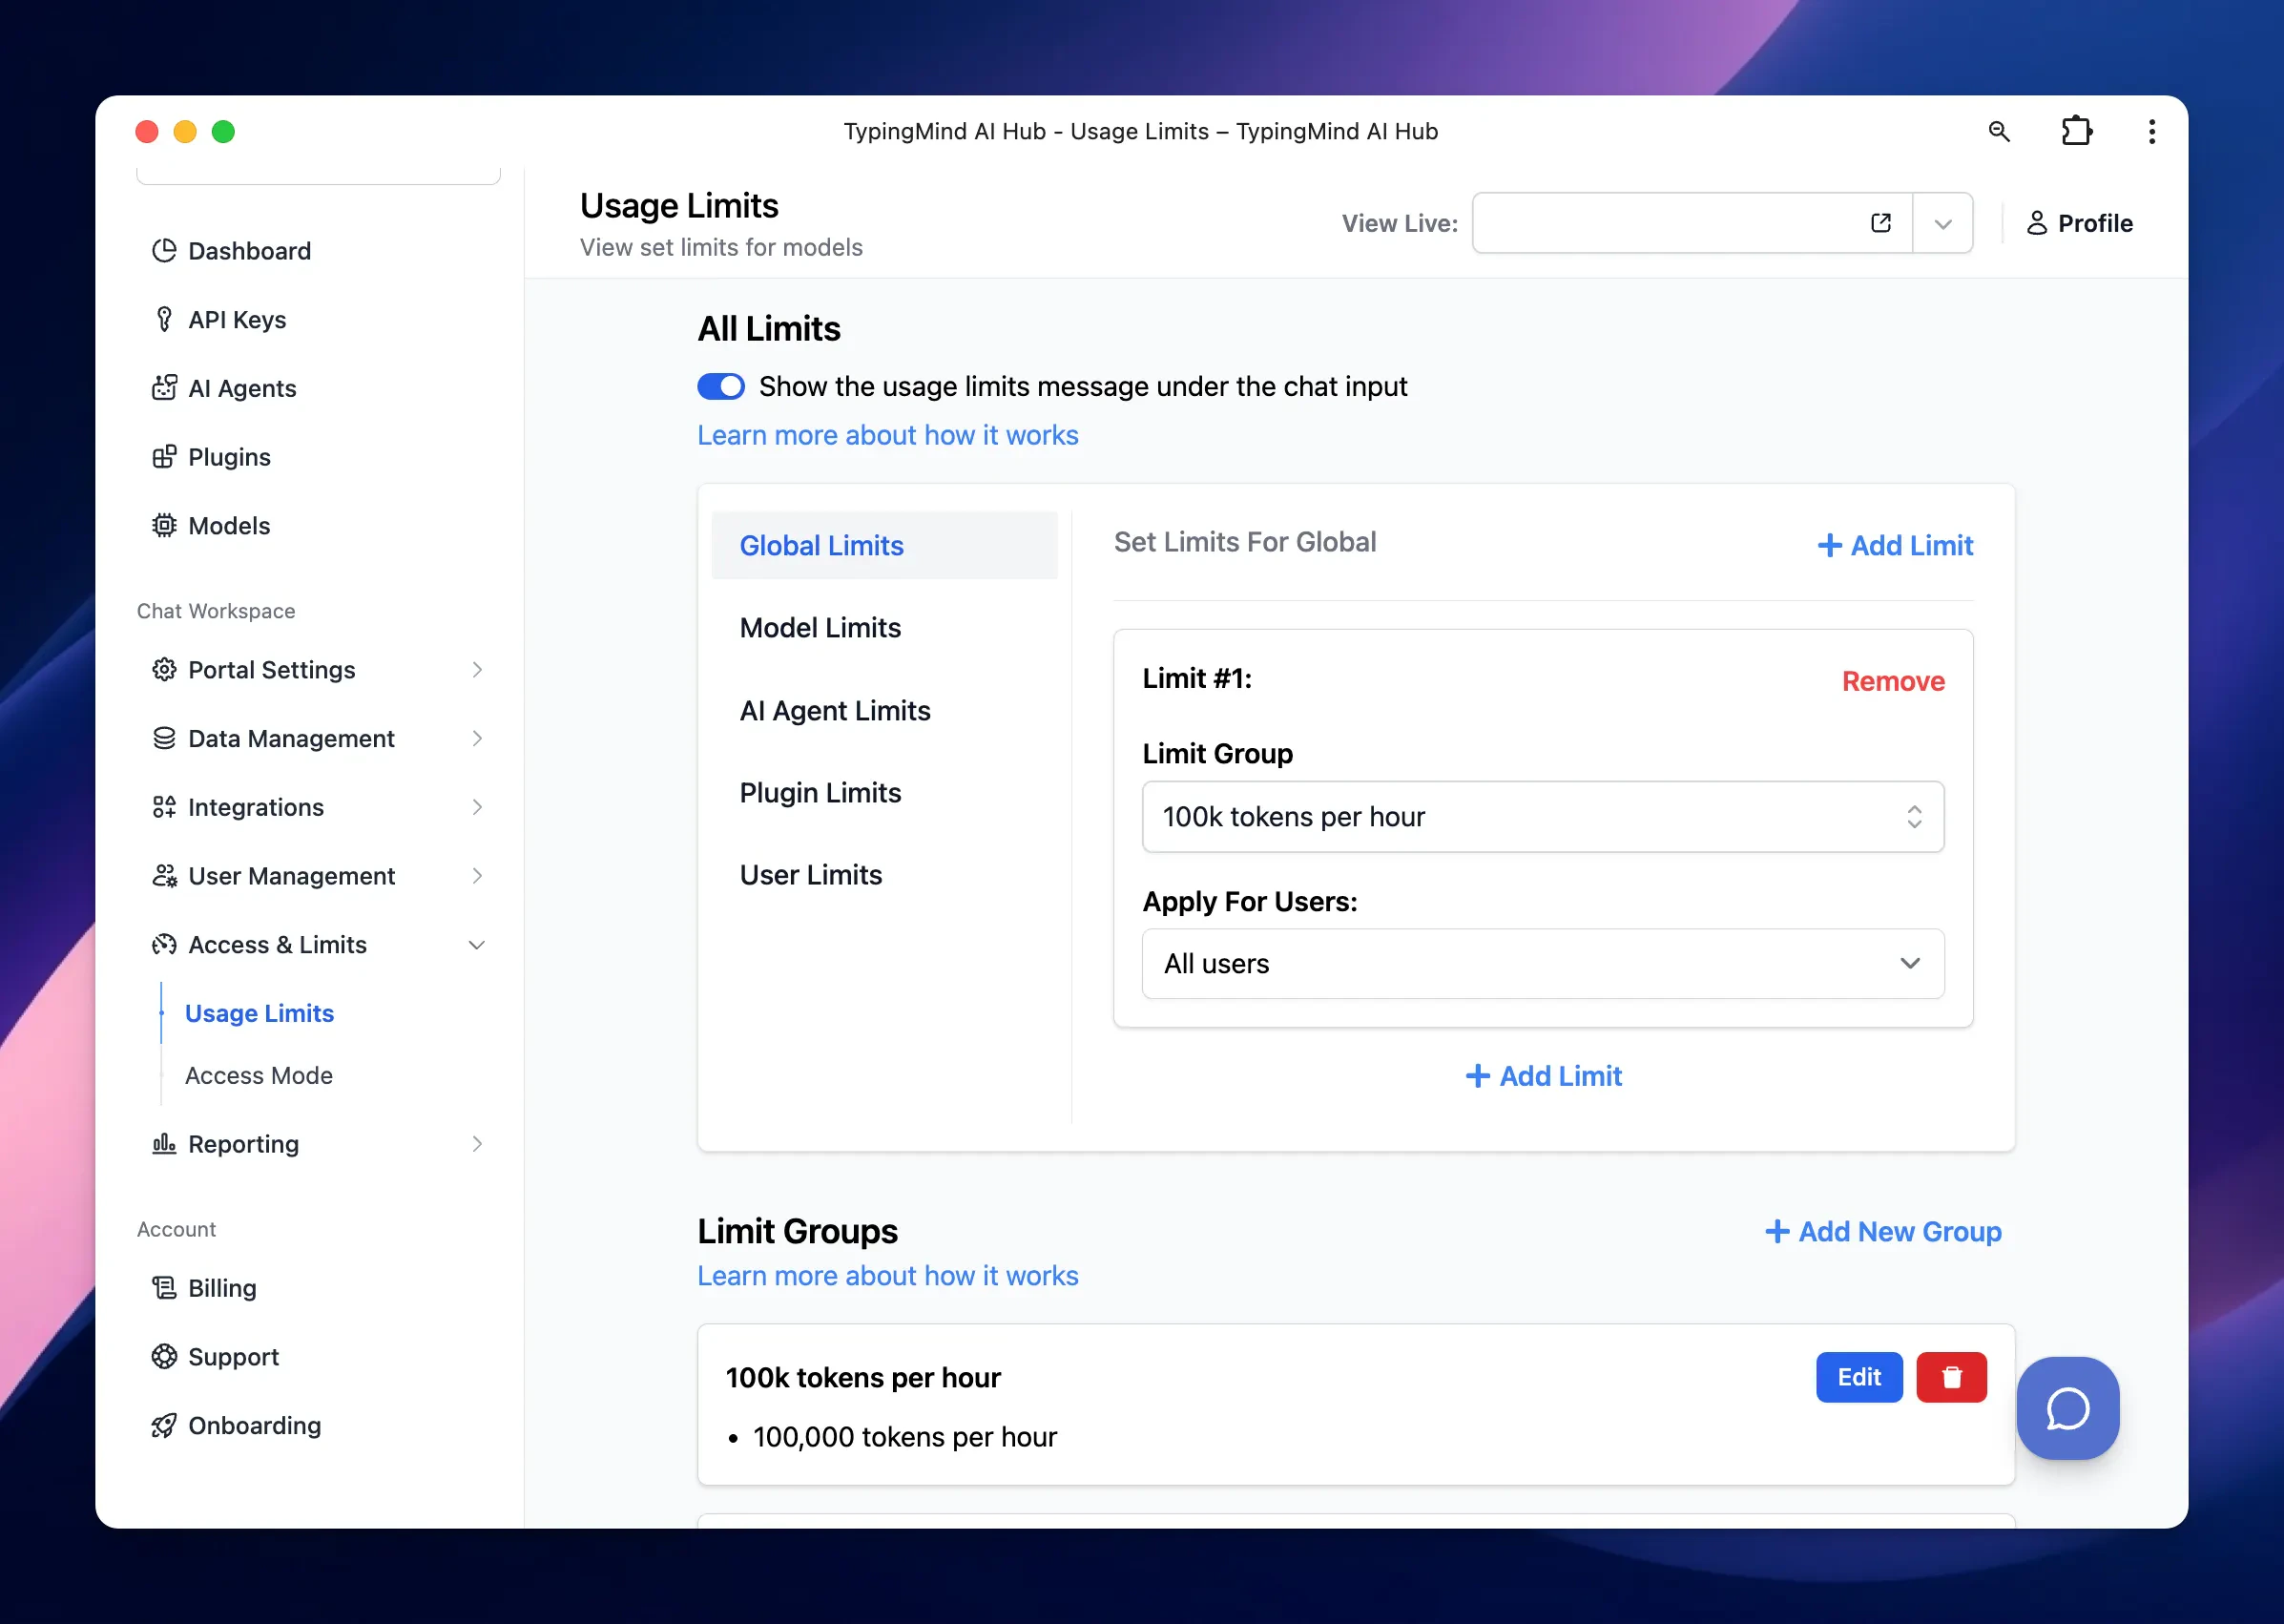
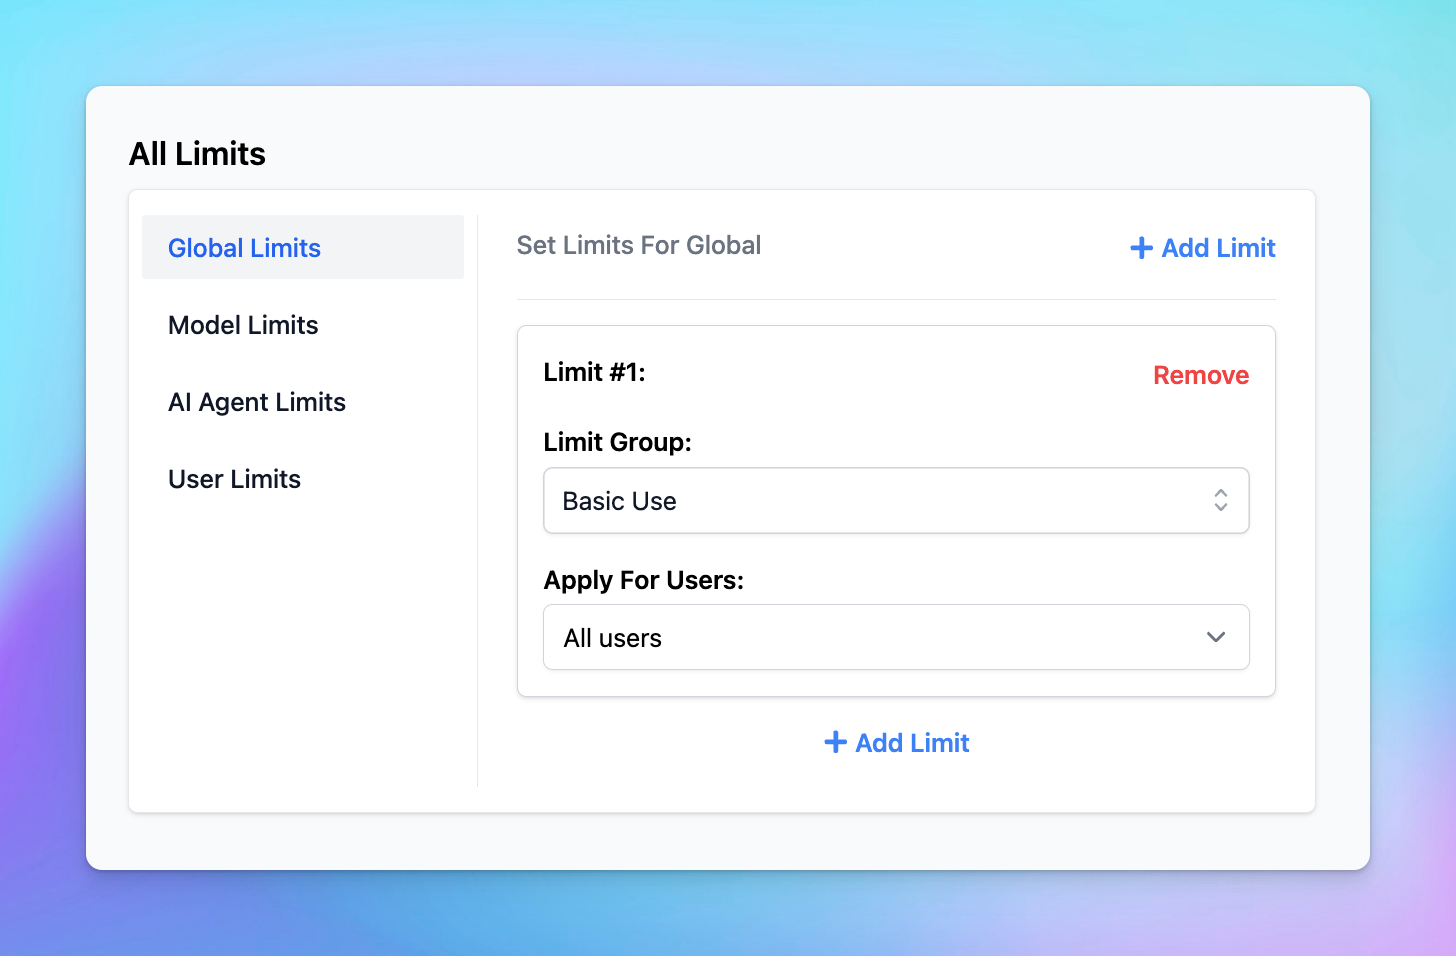
1. Global Limits
To apply limits across all users or specific groups:- Click on Global Limit.
- Select the desired Limit Group from the drop-down menu.
- Choose the user groups to which these limits will apply.
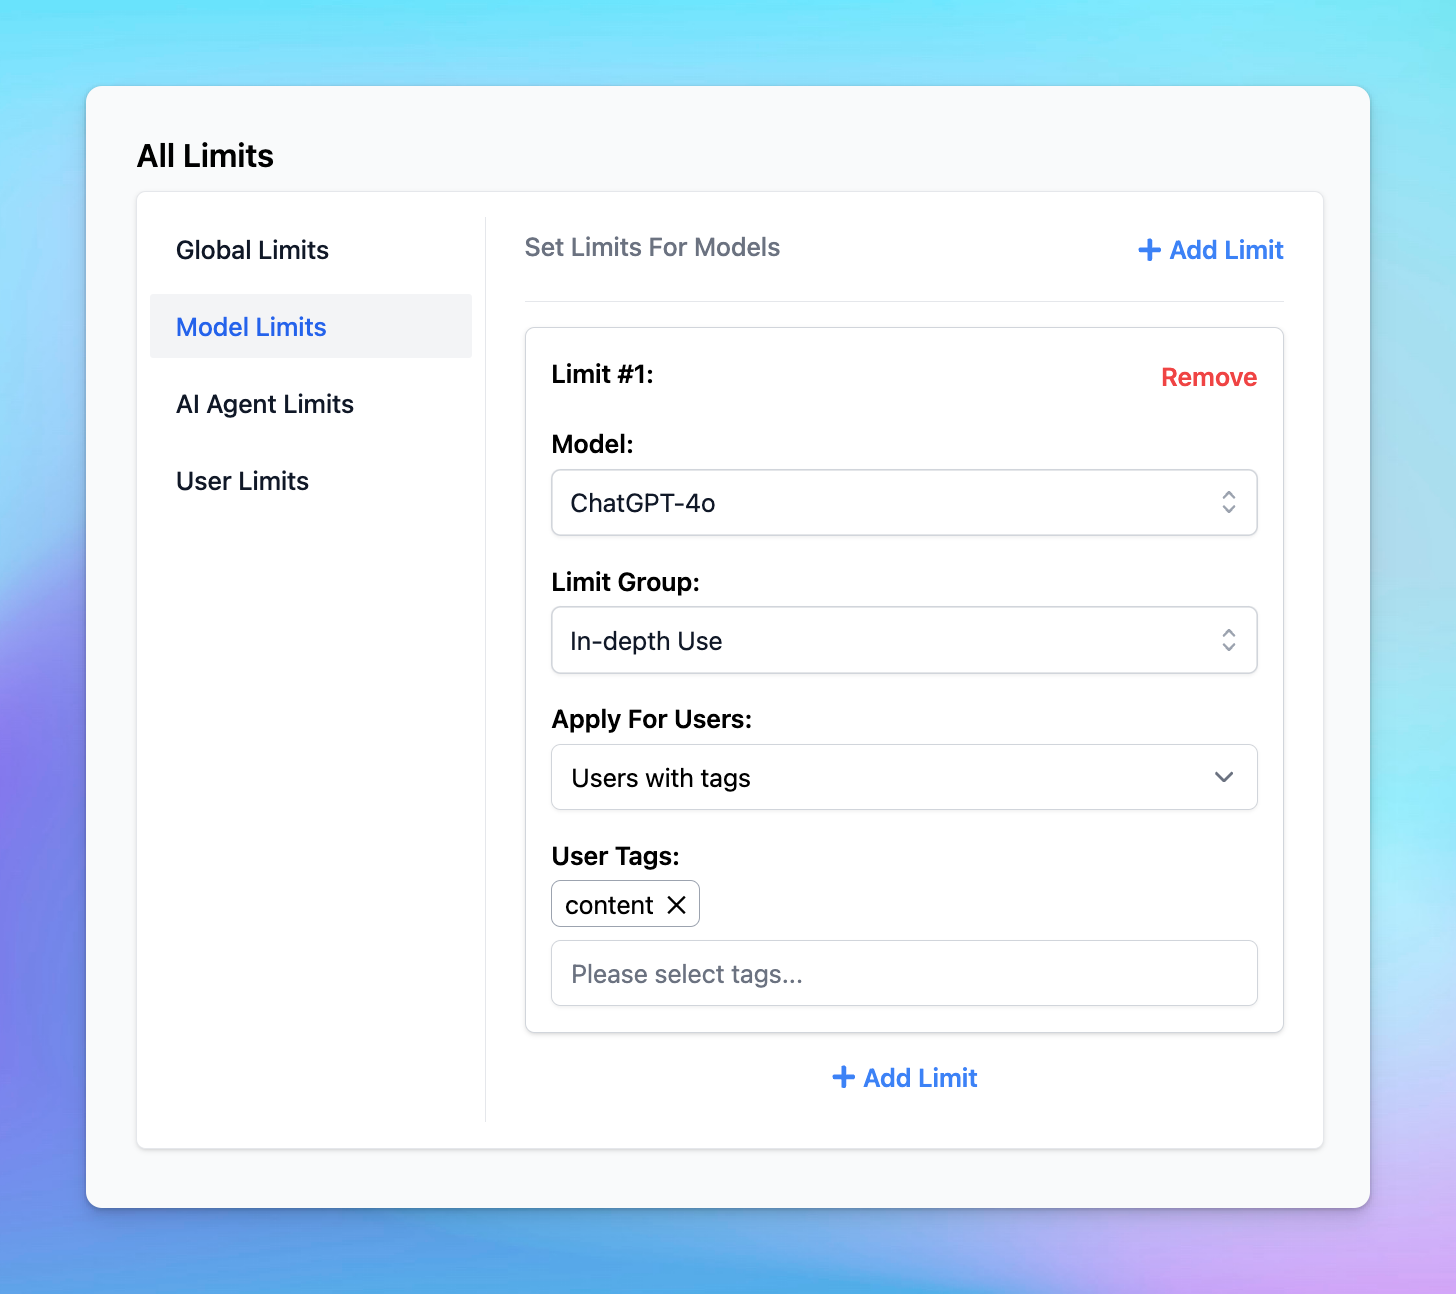
2. Model Limits
To apply limits to specific AI models:- Click on Model Limits.
- Select the AI model you want to restrict.
- Choose the appropriate Limit Group.
- Assign these limits to a specific user group.
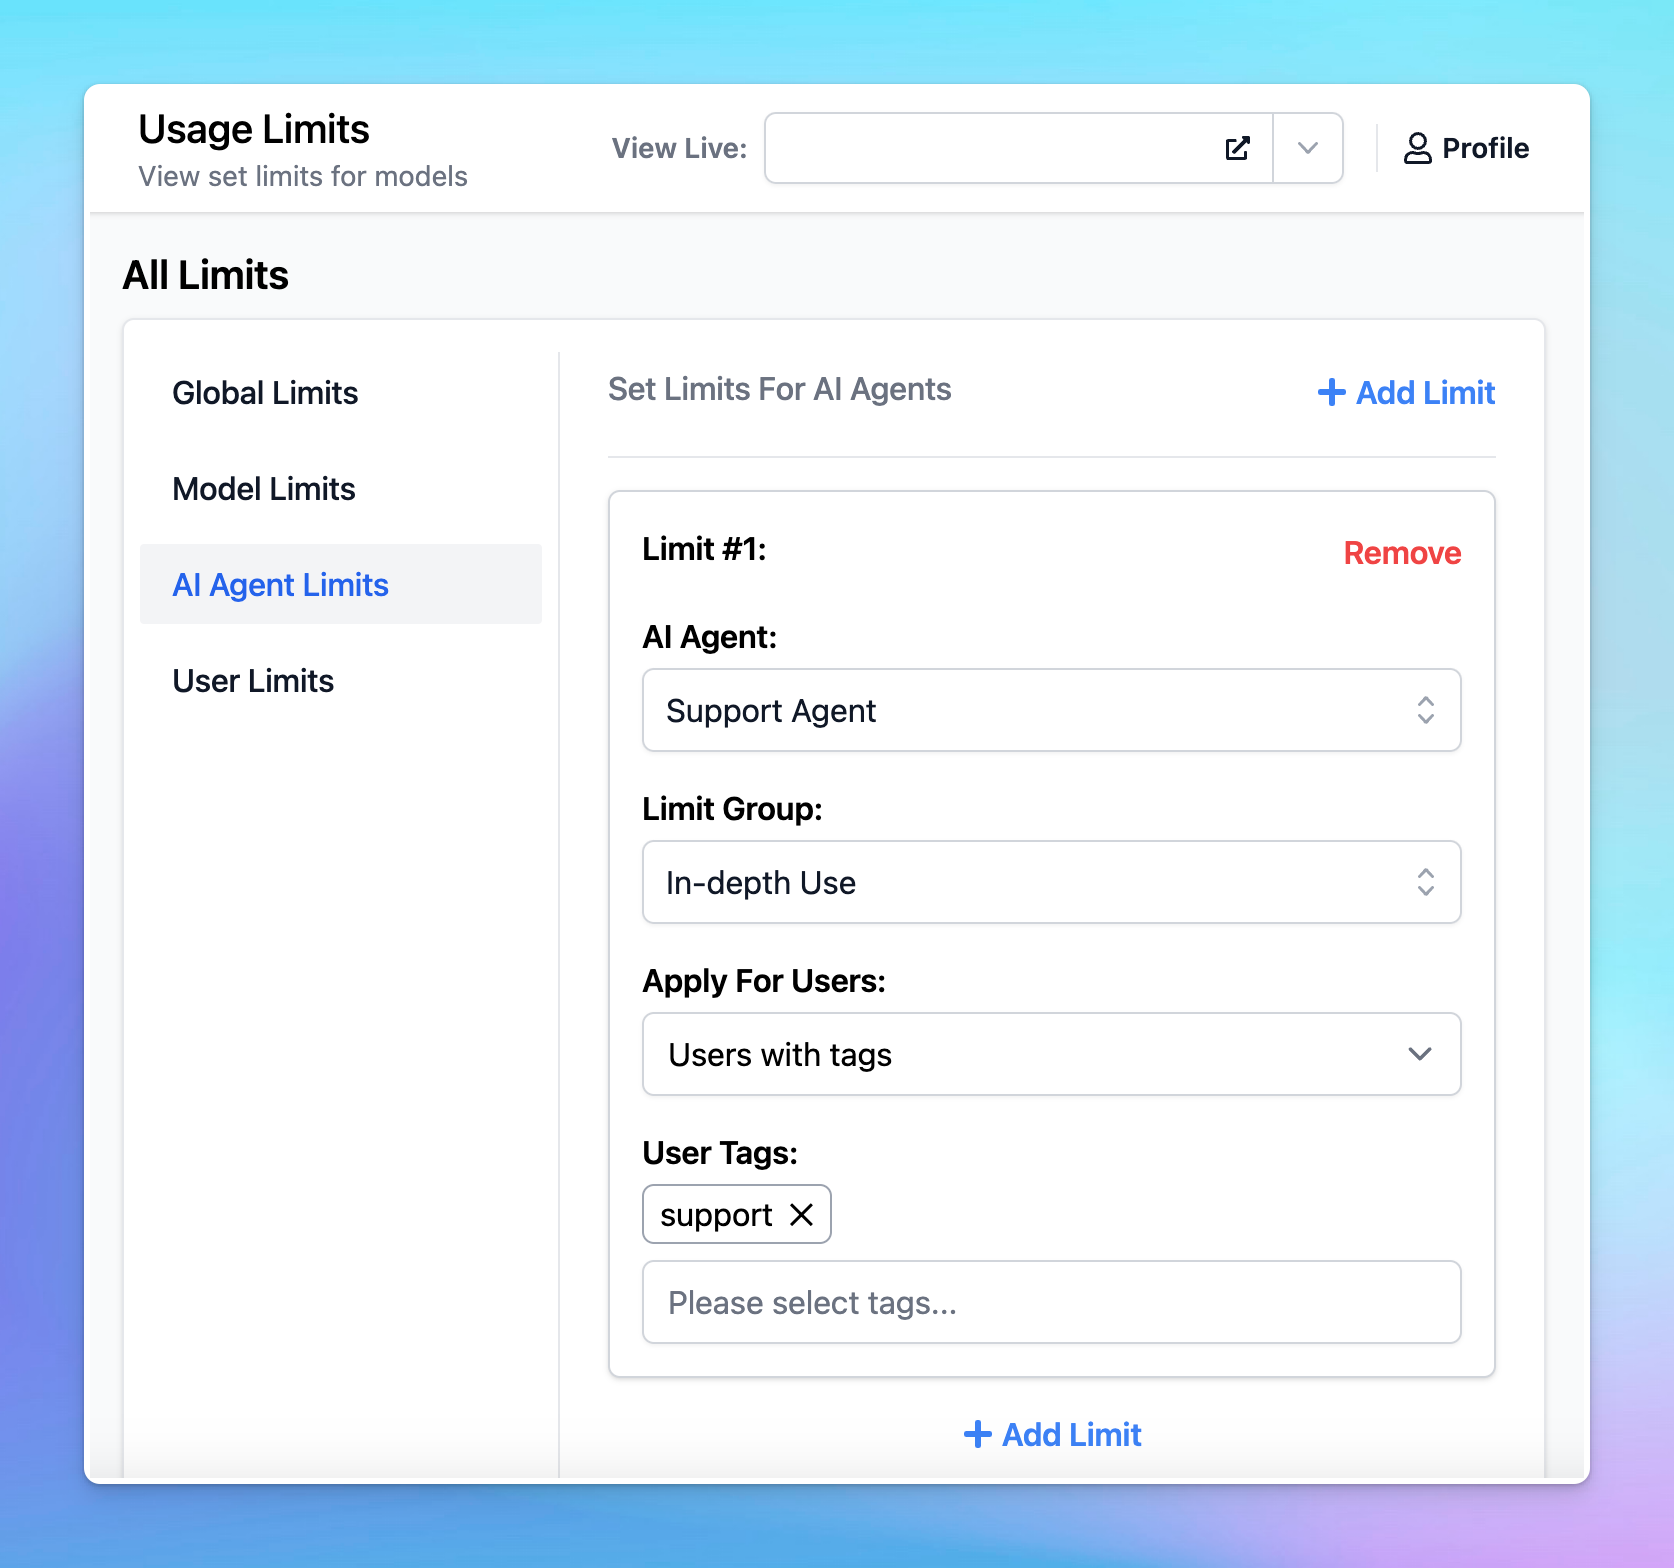
3. AI Agent Limits
To restrict usage per AI Agent:- Click on AI Agent Limits.
- Select the AI Agent you want to restrict.
- Choose a Limit Group.
- Apply these limits to the relevant user group.
- Basic Use for Marketing Team
- In-depth Use for Support Team
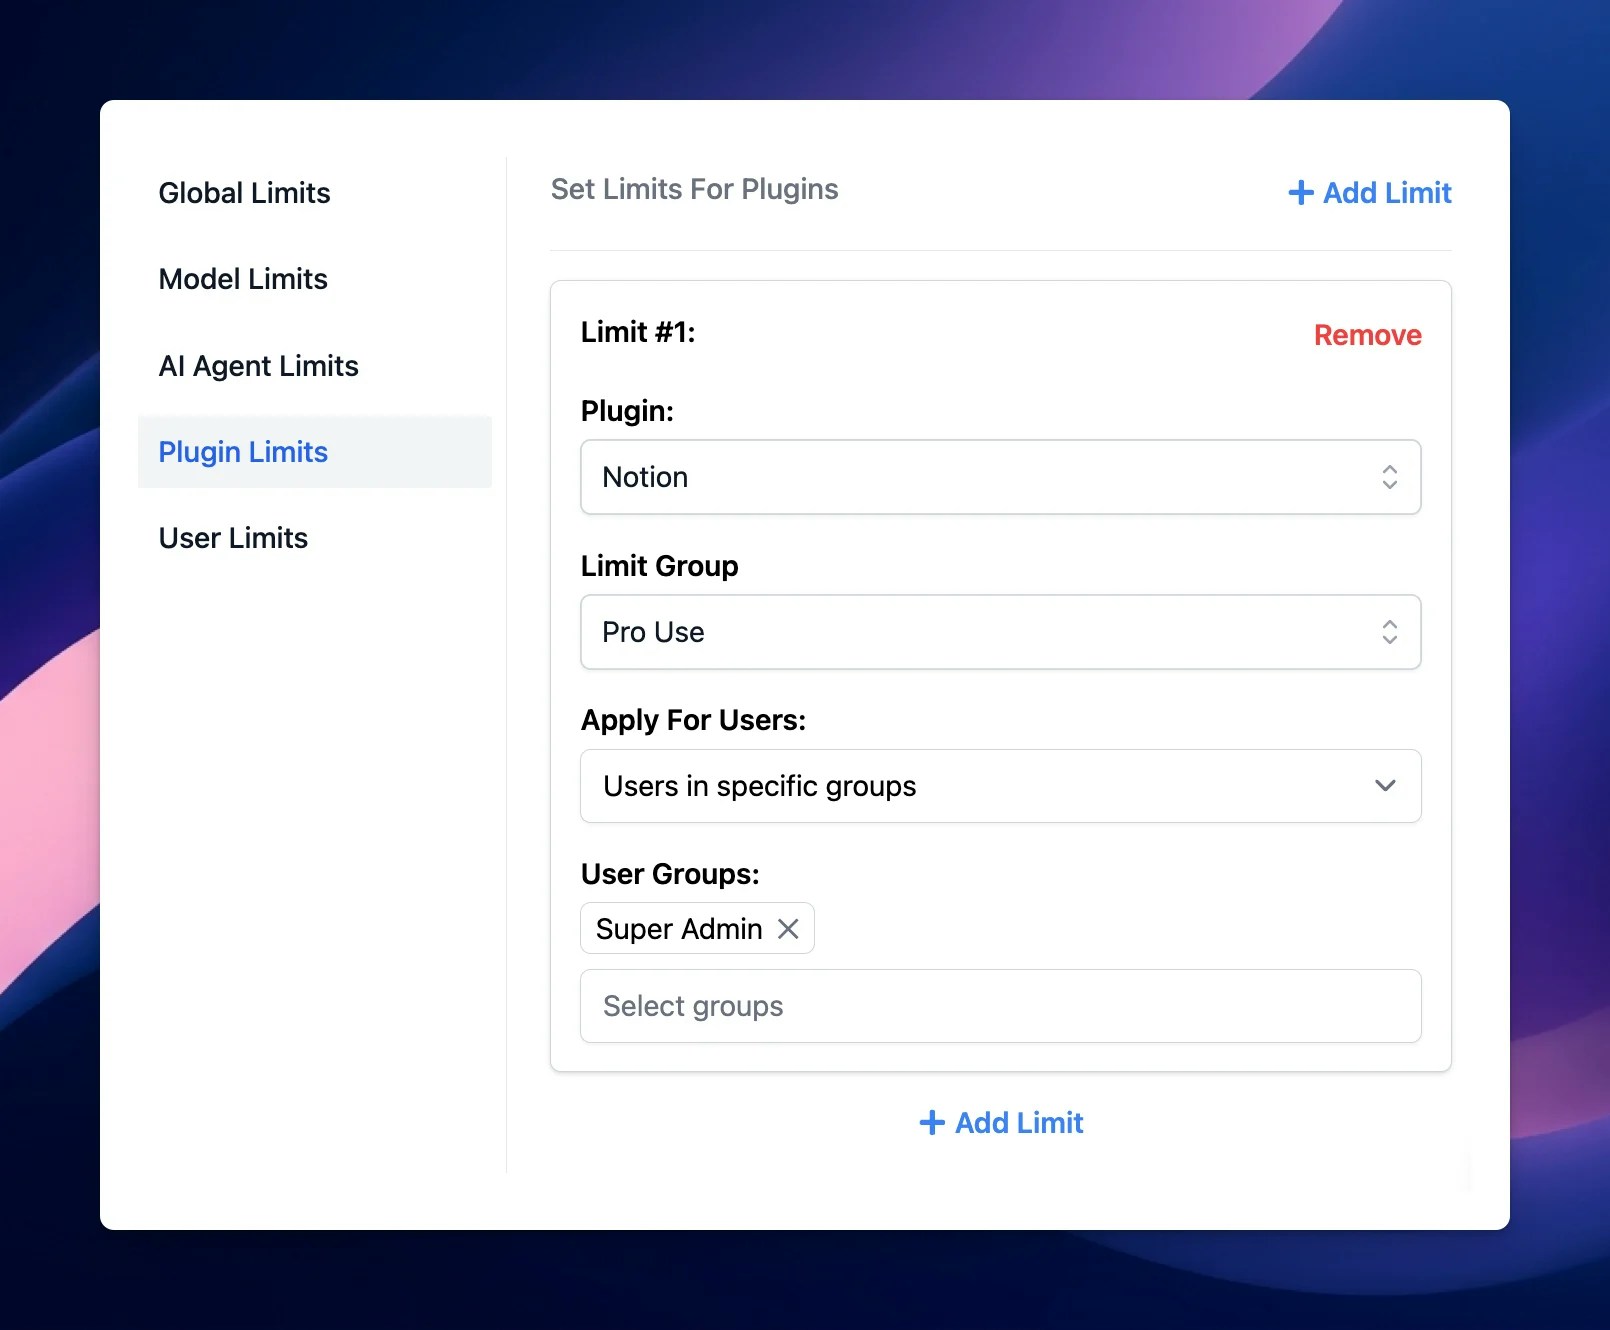
4. Plugin Limits
To set limits for plugins:- Click on Plugin Limits
- Select a plugin you want to set limit
- Choose a Limit Group
- Apply these limits to the relevant user group
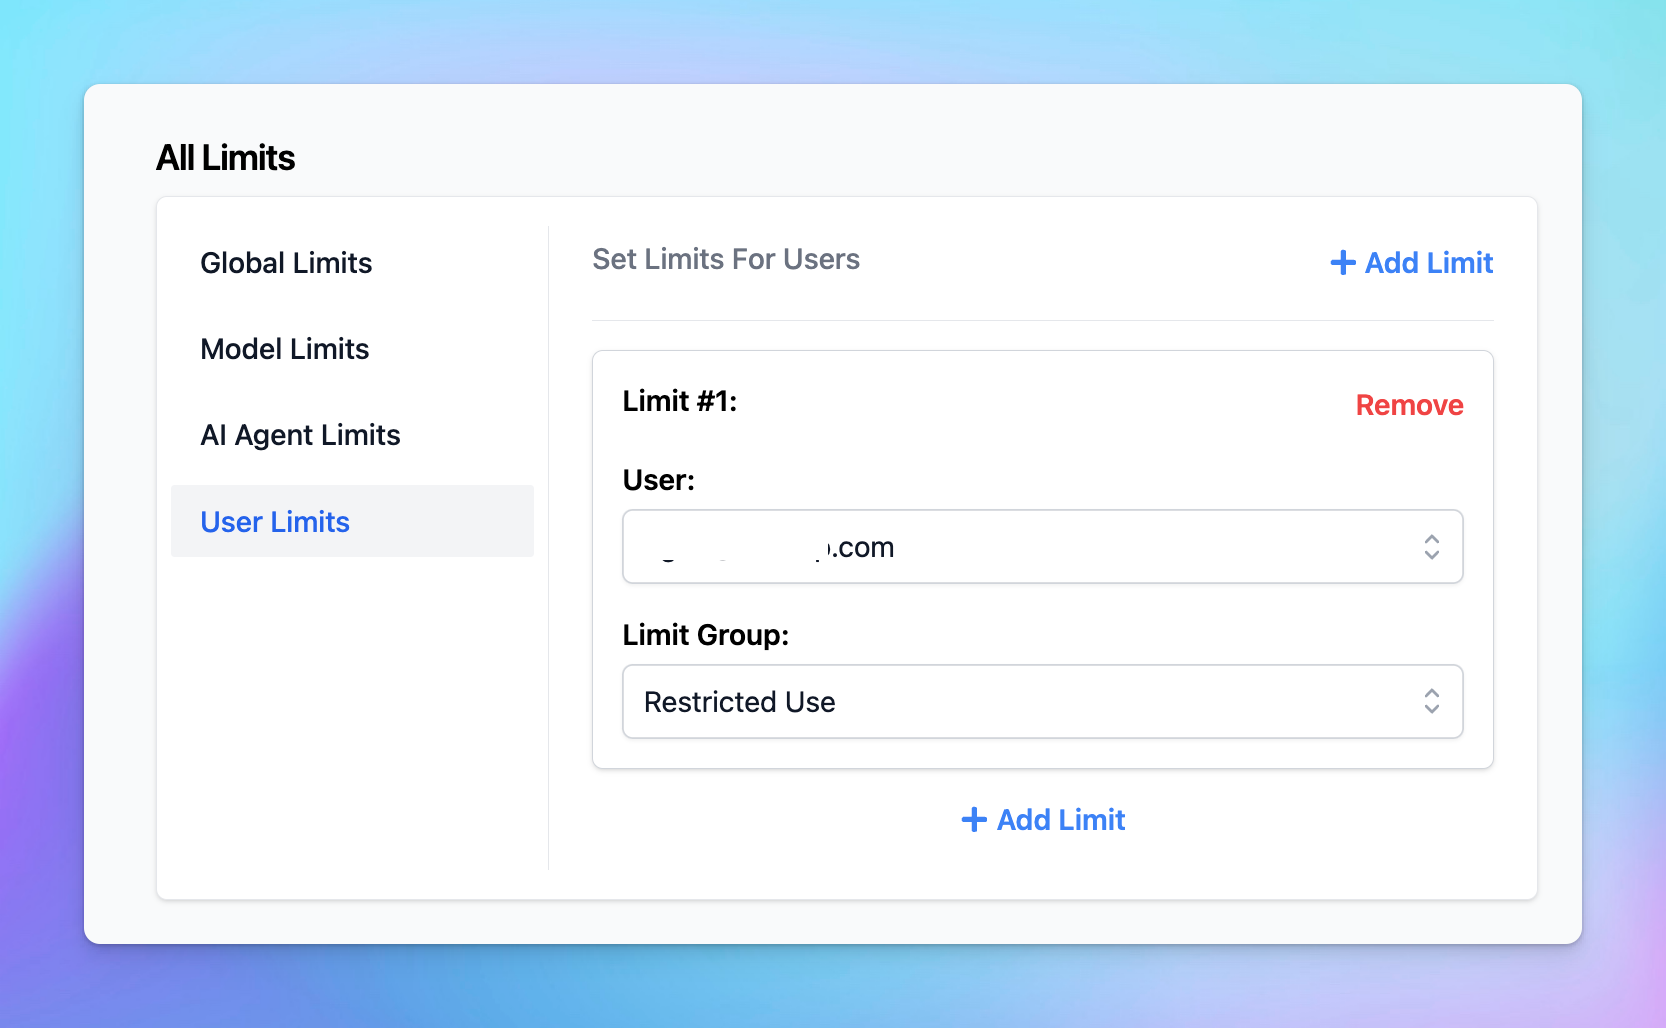
3. User Limits
To set limits for individual users:- Select the user you want to restrict.
- Choose a Limit Group from the list.
Step 4: Monitor Limits in the Chat Interface
Users who have restrictions applied will see a notification below the message area stating, “The current chat may come with limitations. See details.” You can hide this notification via the Chat Features section within the Portal settings if you want.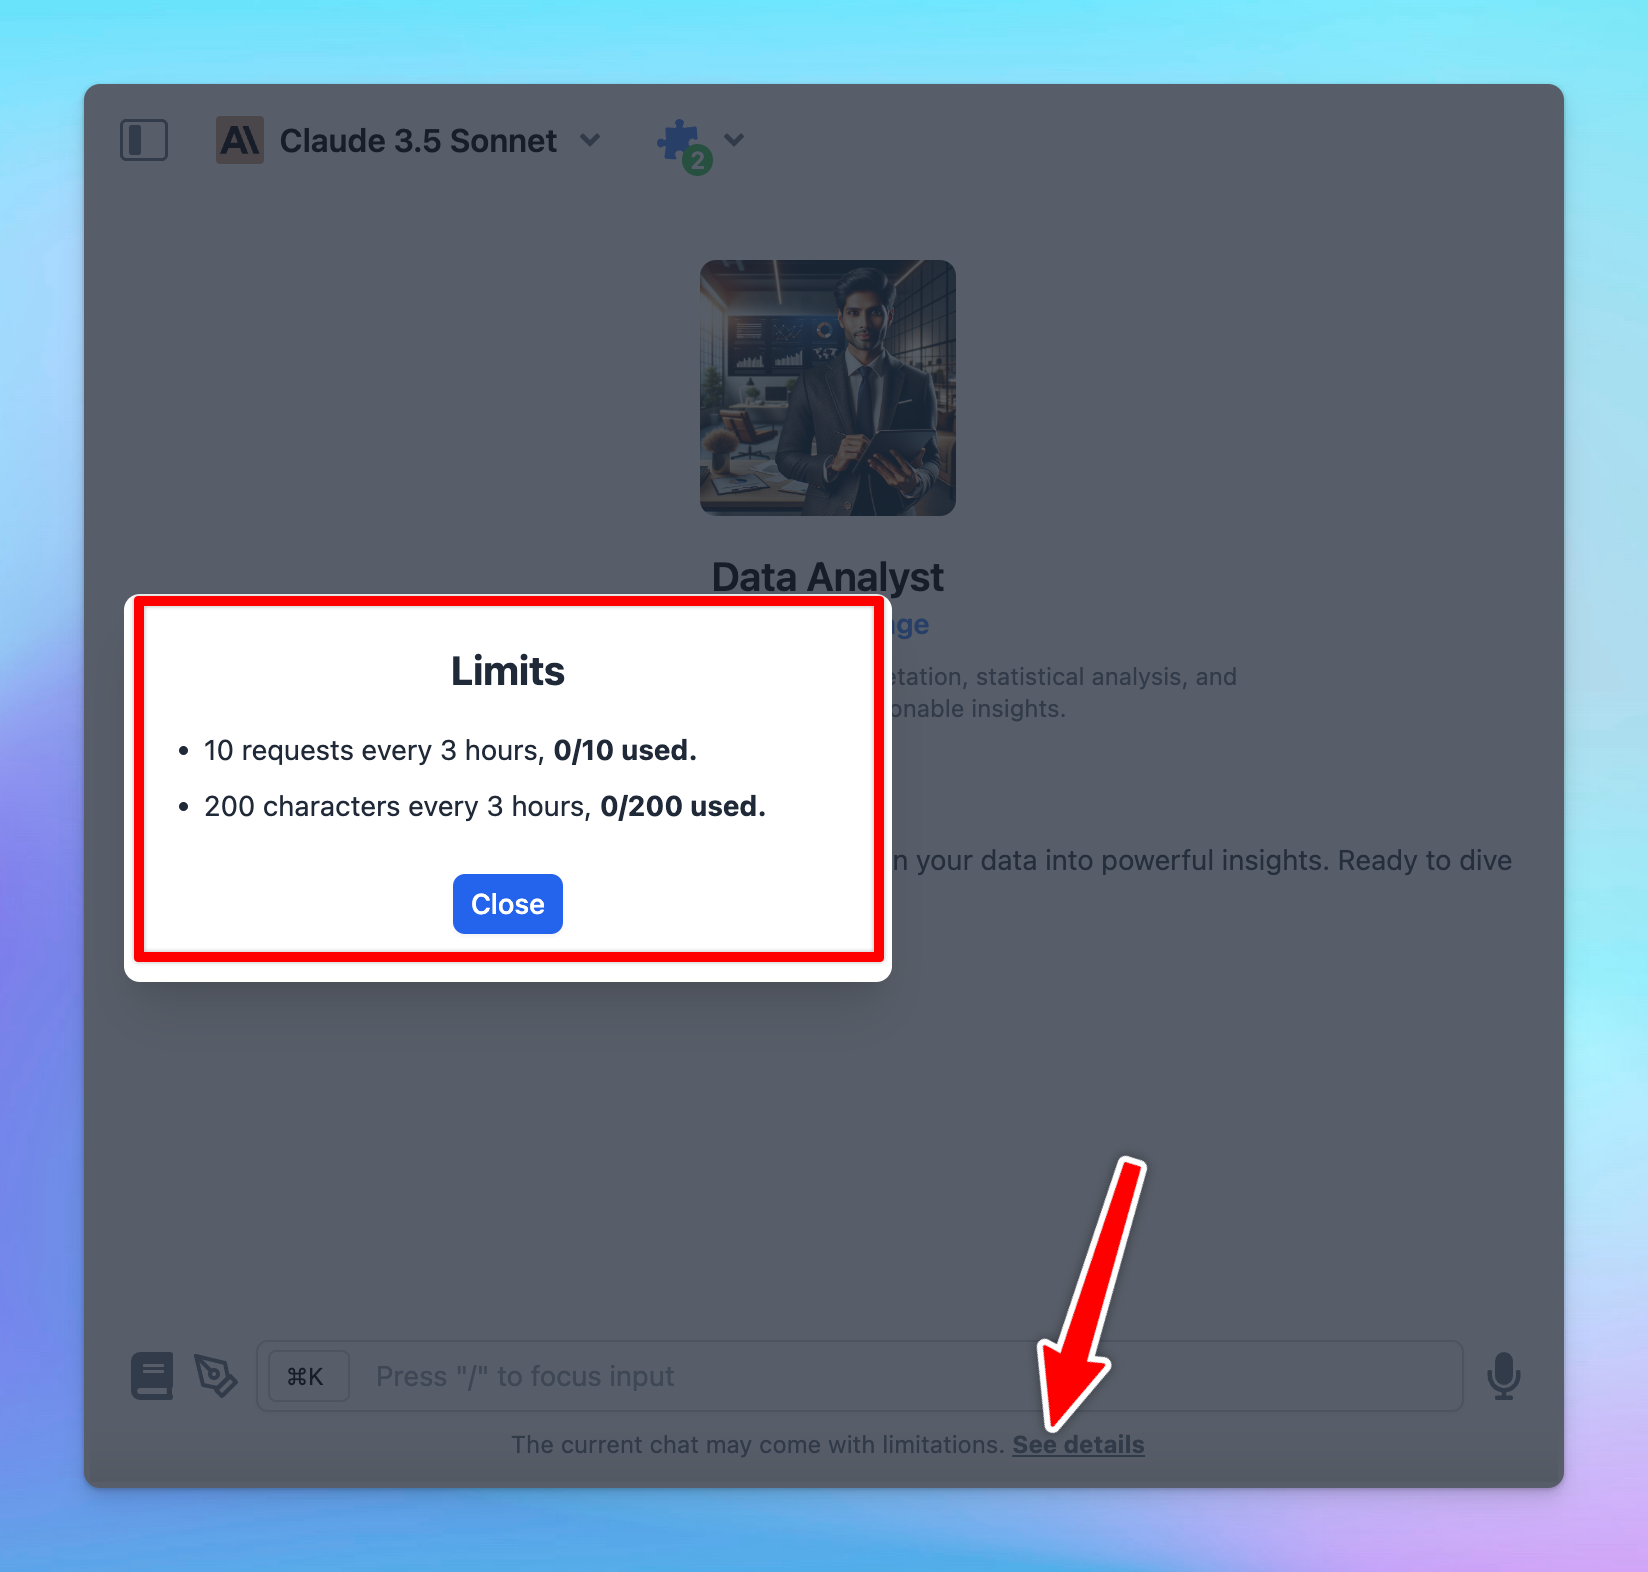
Best Practices
Some best practices so you can effectively manage AI usage:- Start conservatively: start with stricter limits and adjust them as you gather actual usage data through chat logs or the analytics dashboard.
- Review regularly: regularly review and update limits to align with changing needs and usage patterns.
- Adapt to new AI Models: test new AI models to evaluate their performance and cost-effectiveness, then adjust your usage limits accordingly if you think the new model is a better fit for your team.
Notes
- The old Model Usage Limits (Legacy) will still be available, but we recommend moving your limit settings to the new Usage Limits system for better control and management.
- Currently, if you want to set Model Availability for specific user groups without using limit groups, you can scroll down to Model Usage Limits (Legacy) to adjust availability. We will be updating this option within the new Usage Limits system soon!