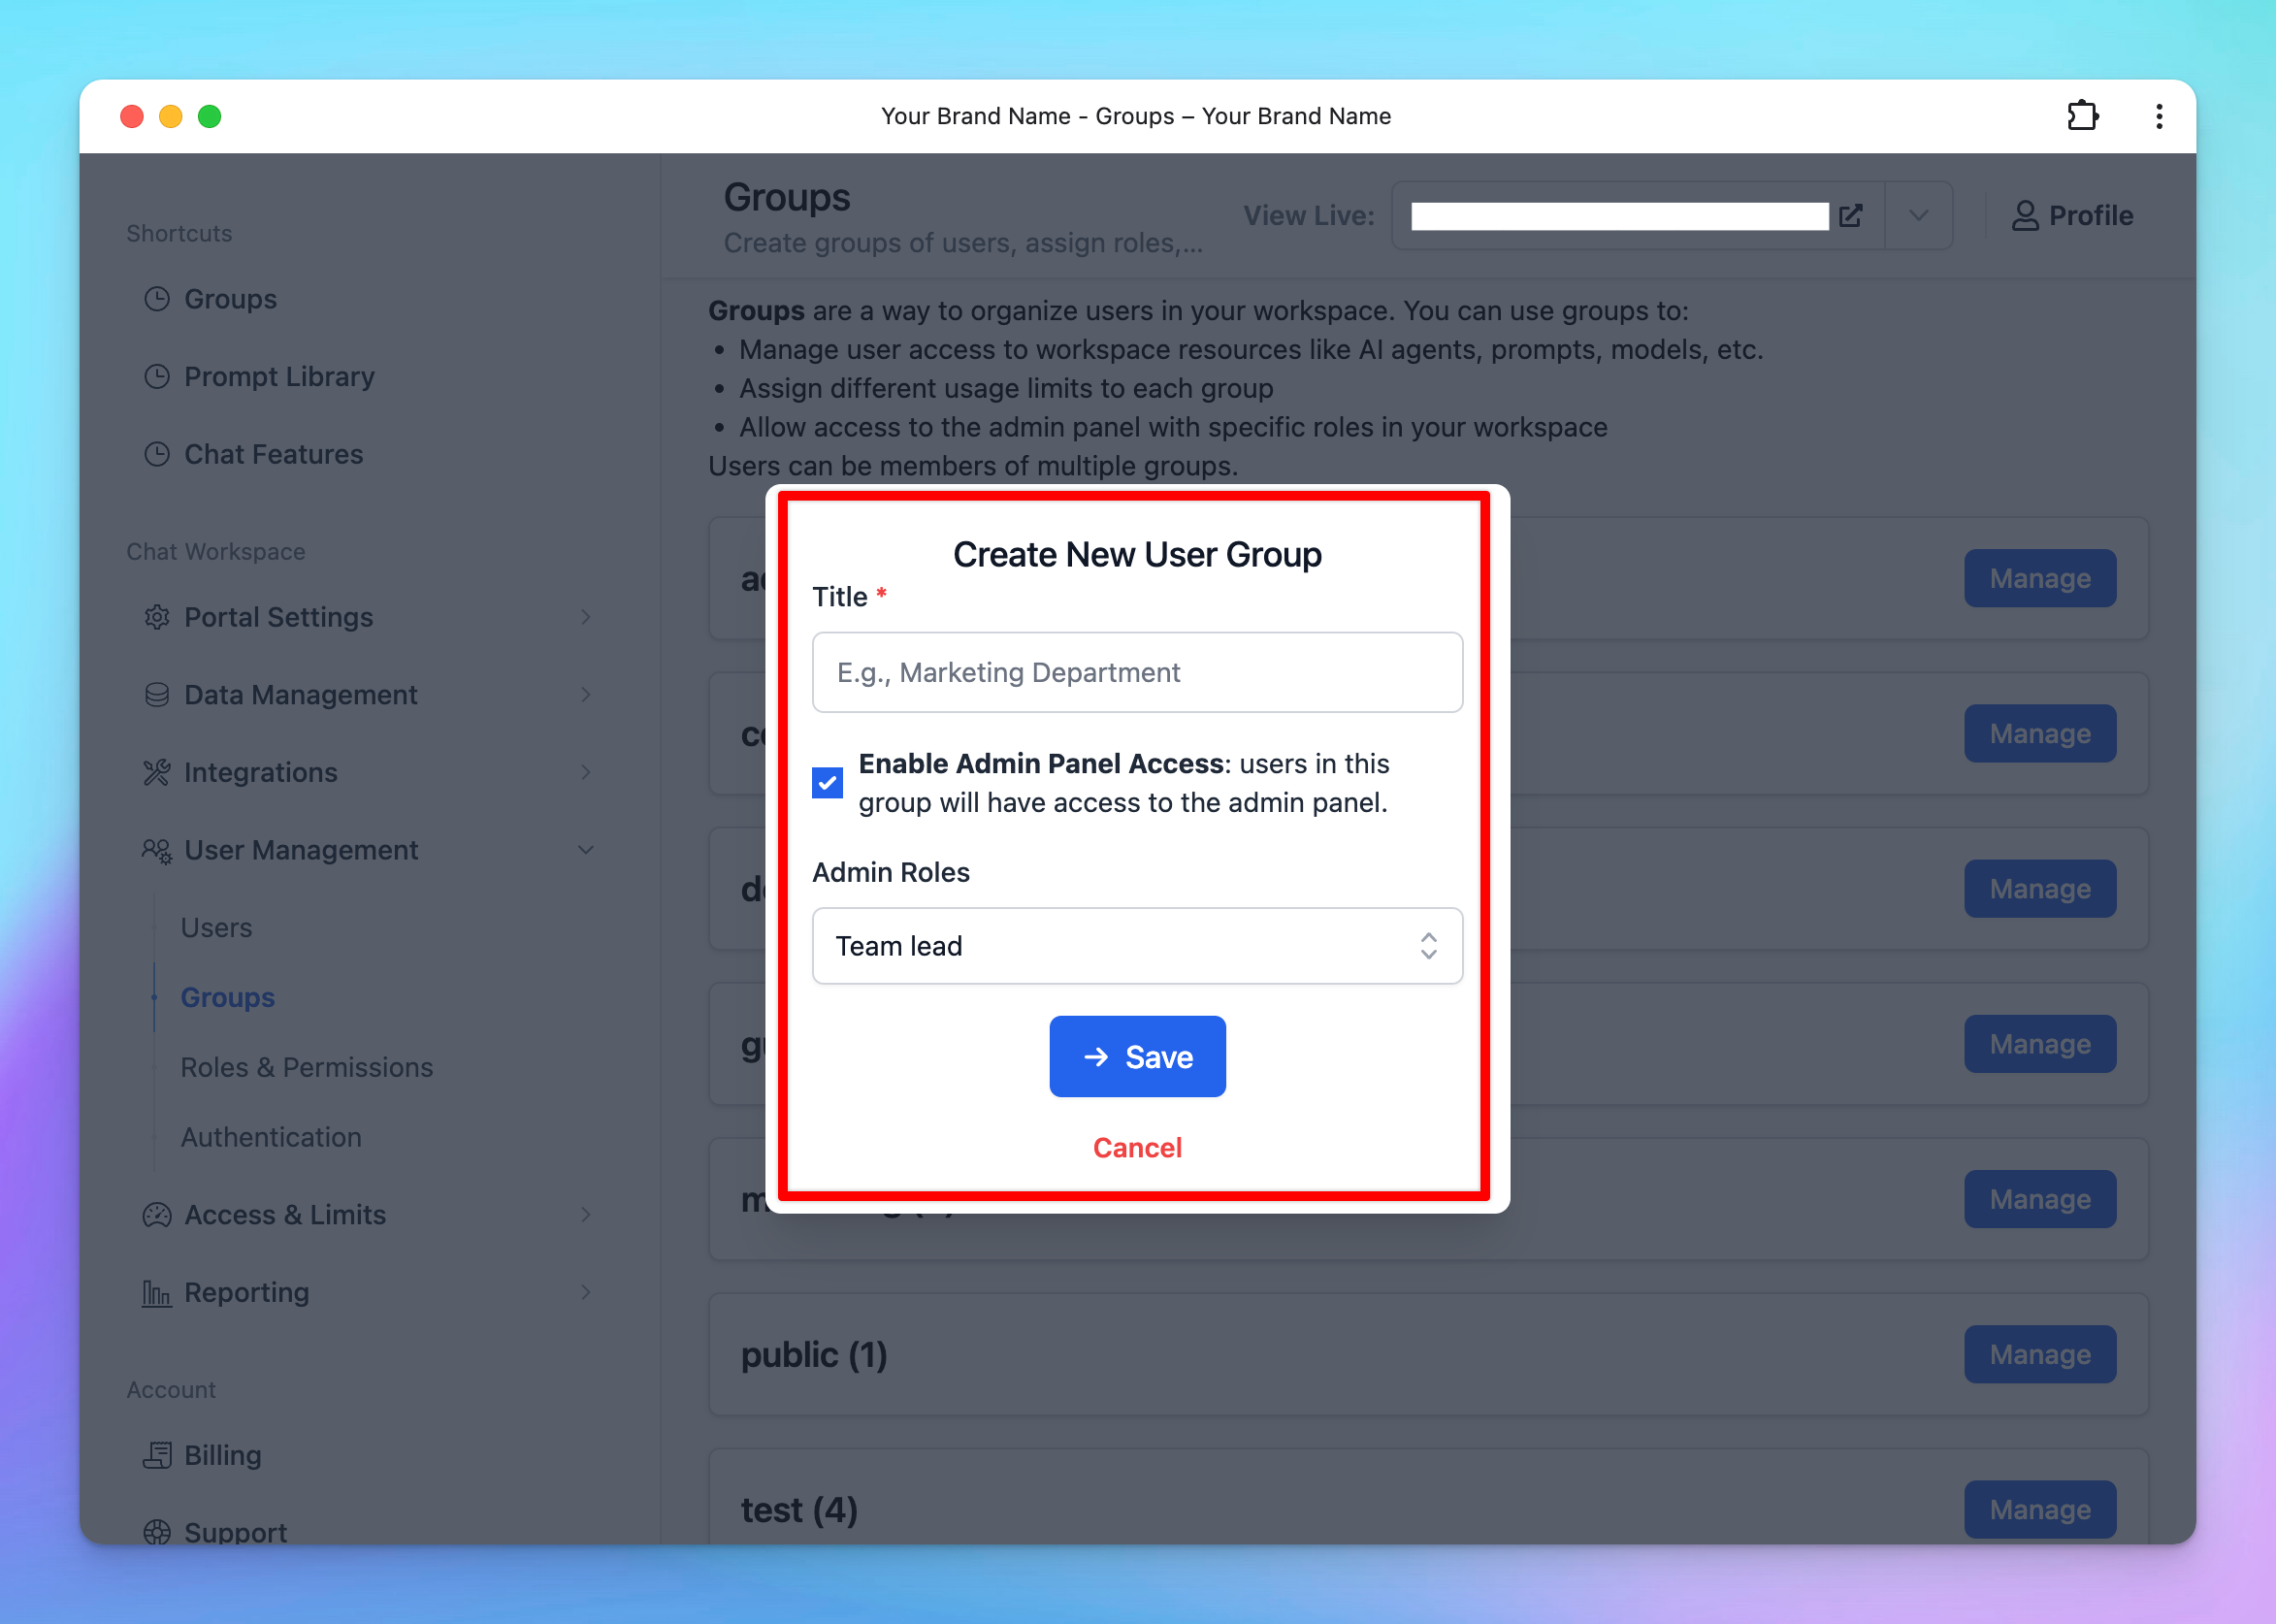
Step 1: Create user groups for your team members
Creating Groups for your team members allows you to categorize them into different groups of users, for example, Private group, Public group, BOD group, etc. Please follow these steps to create groups for your members:- Go to the Admin Panel in your workspace.
- Navigate to the Groups section under User Management.
- Click on Add New Group.
/image%2020.png)
- Enter a Group Name that reflects the purpose or role of the group.
- (Optional) Enable Admin Access for this group if they can have access to the admin panel.
- If you enable this option, ensure you assign appropriate Admin Roles to the group. These roles should align with the permissions you’ve defined in the Roles and Permissions settings.
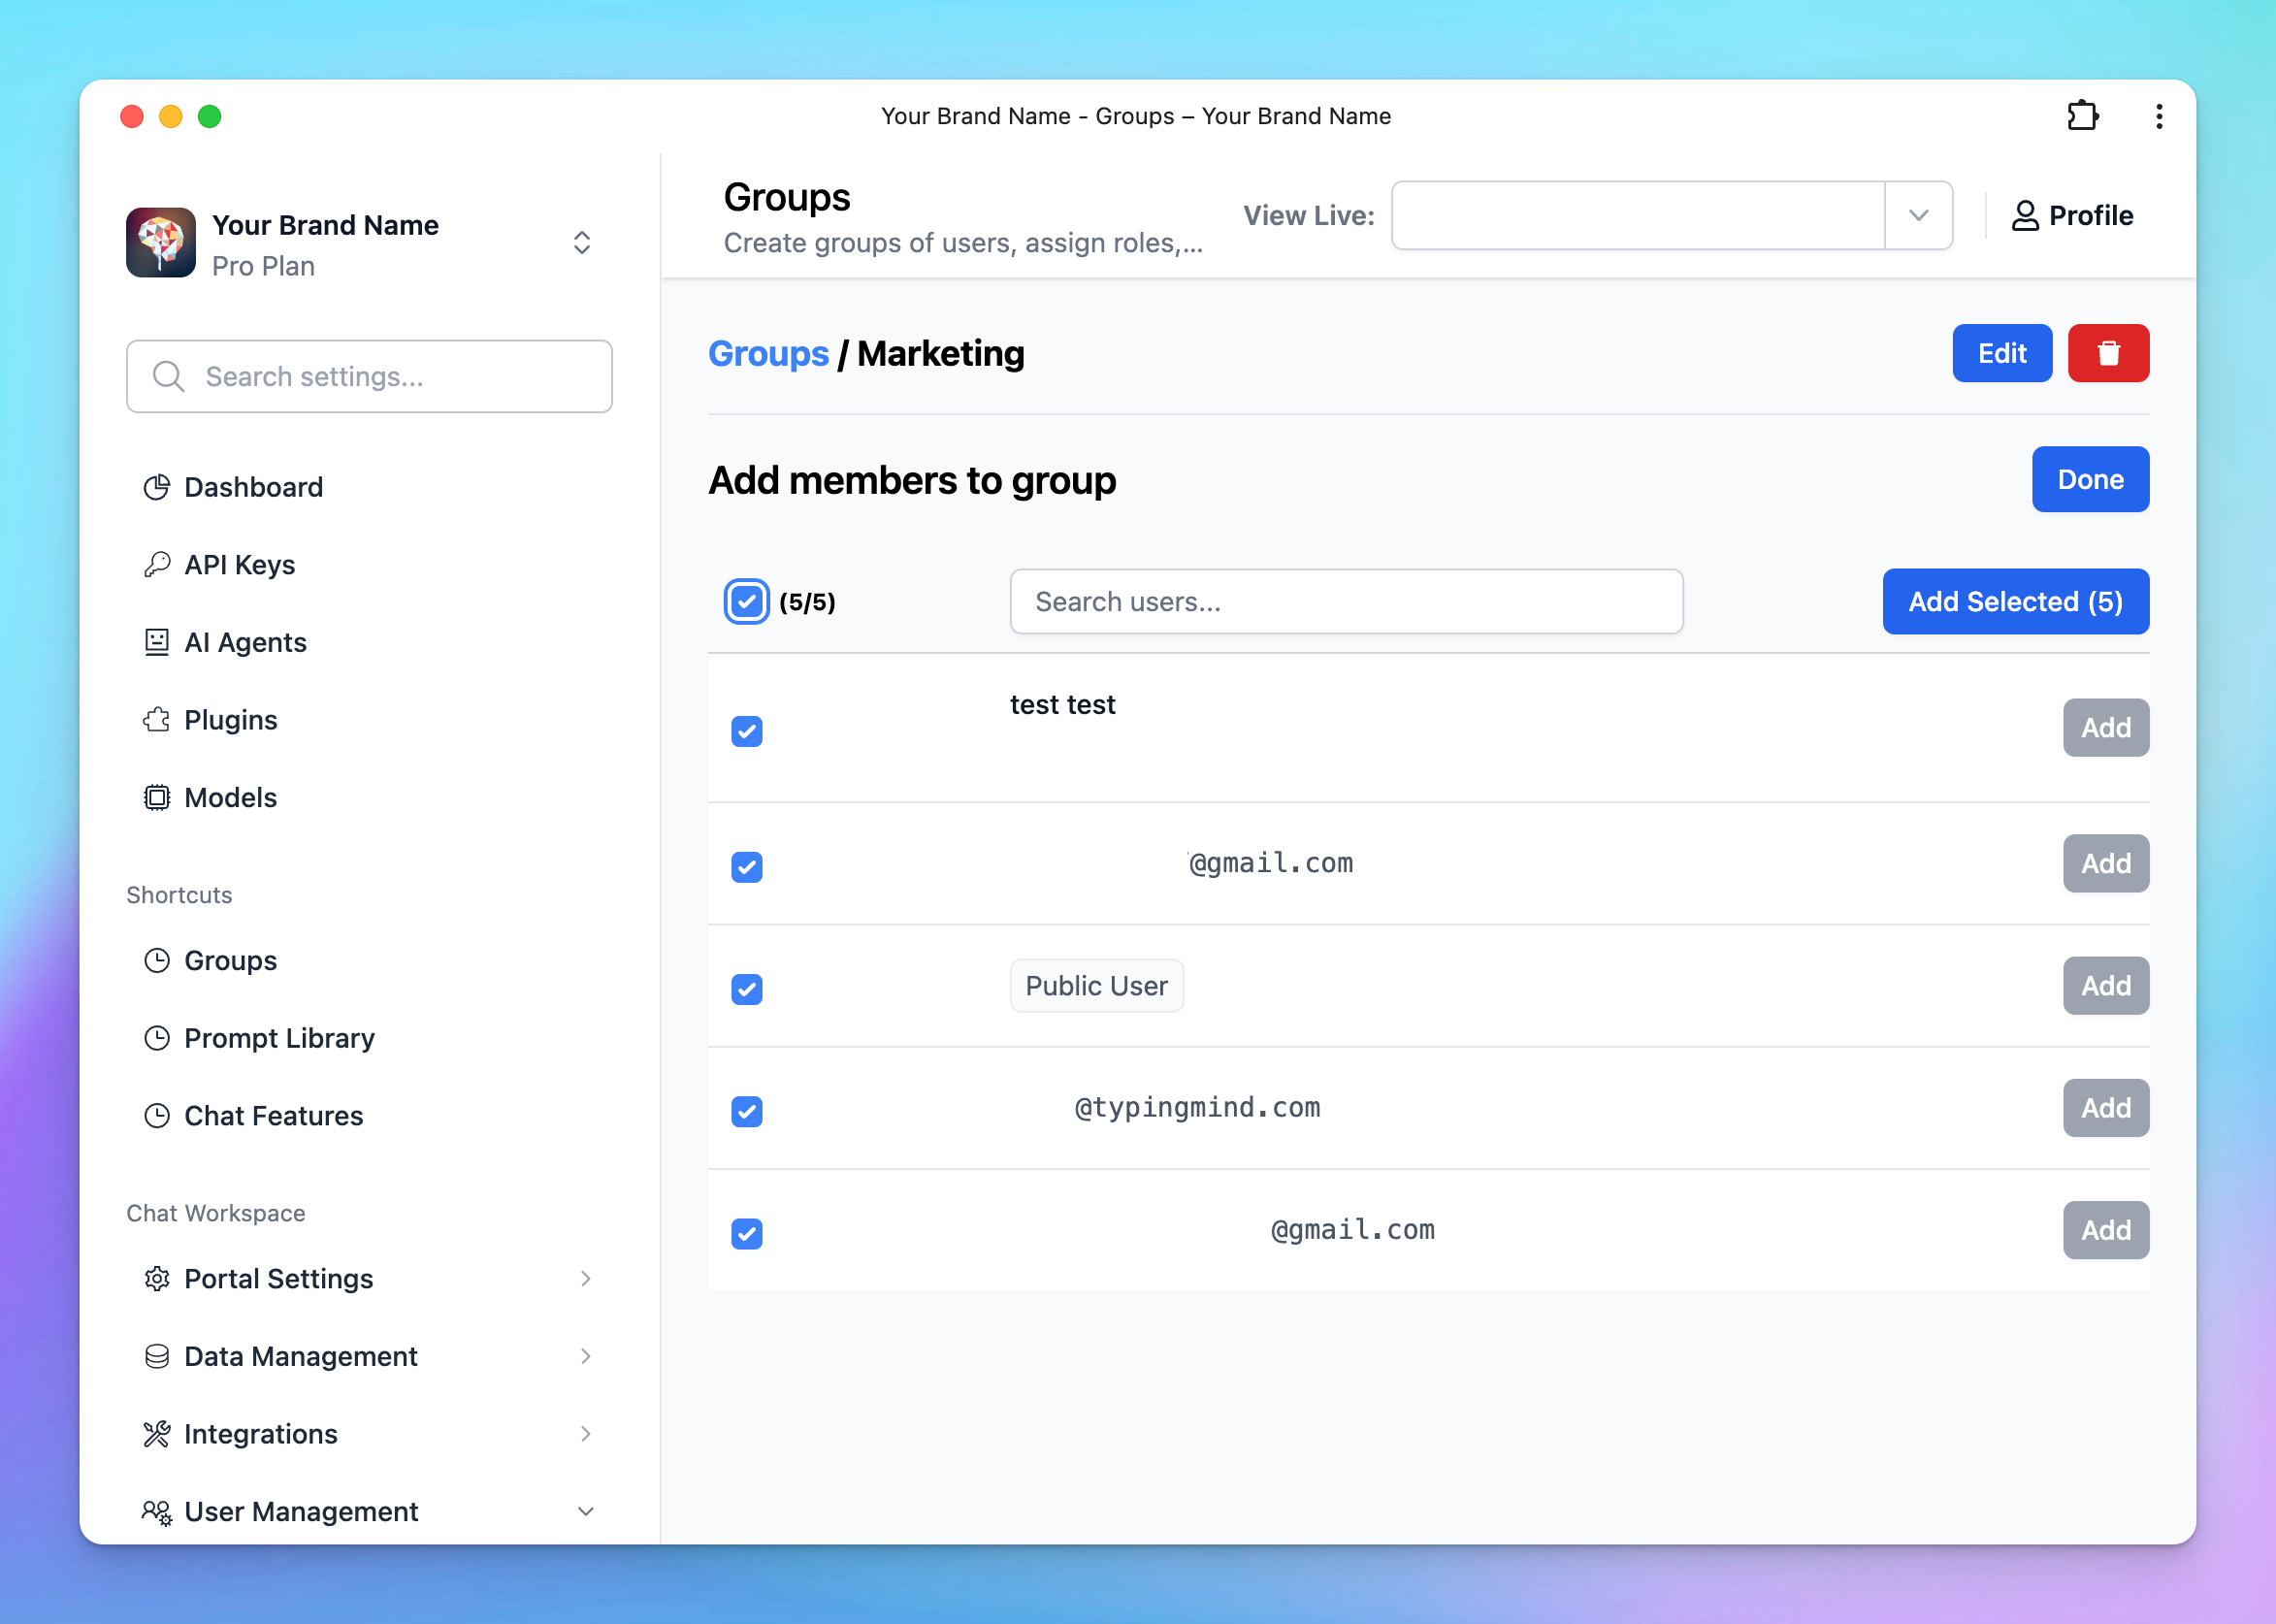
- Click Manage next to the created group
- Click Add Members
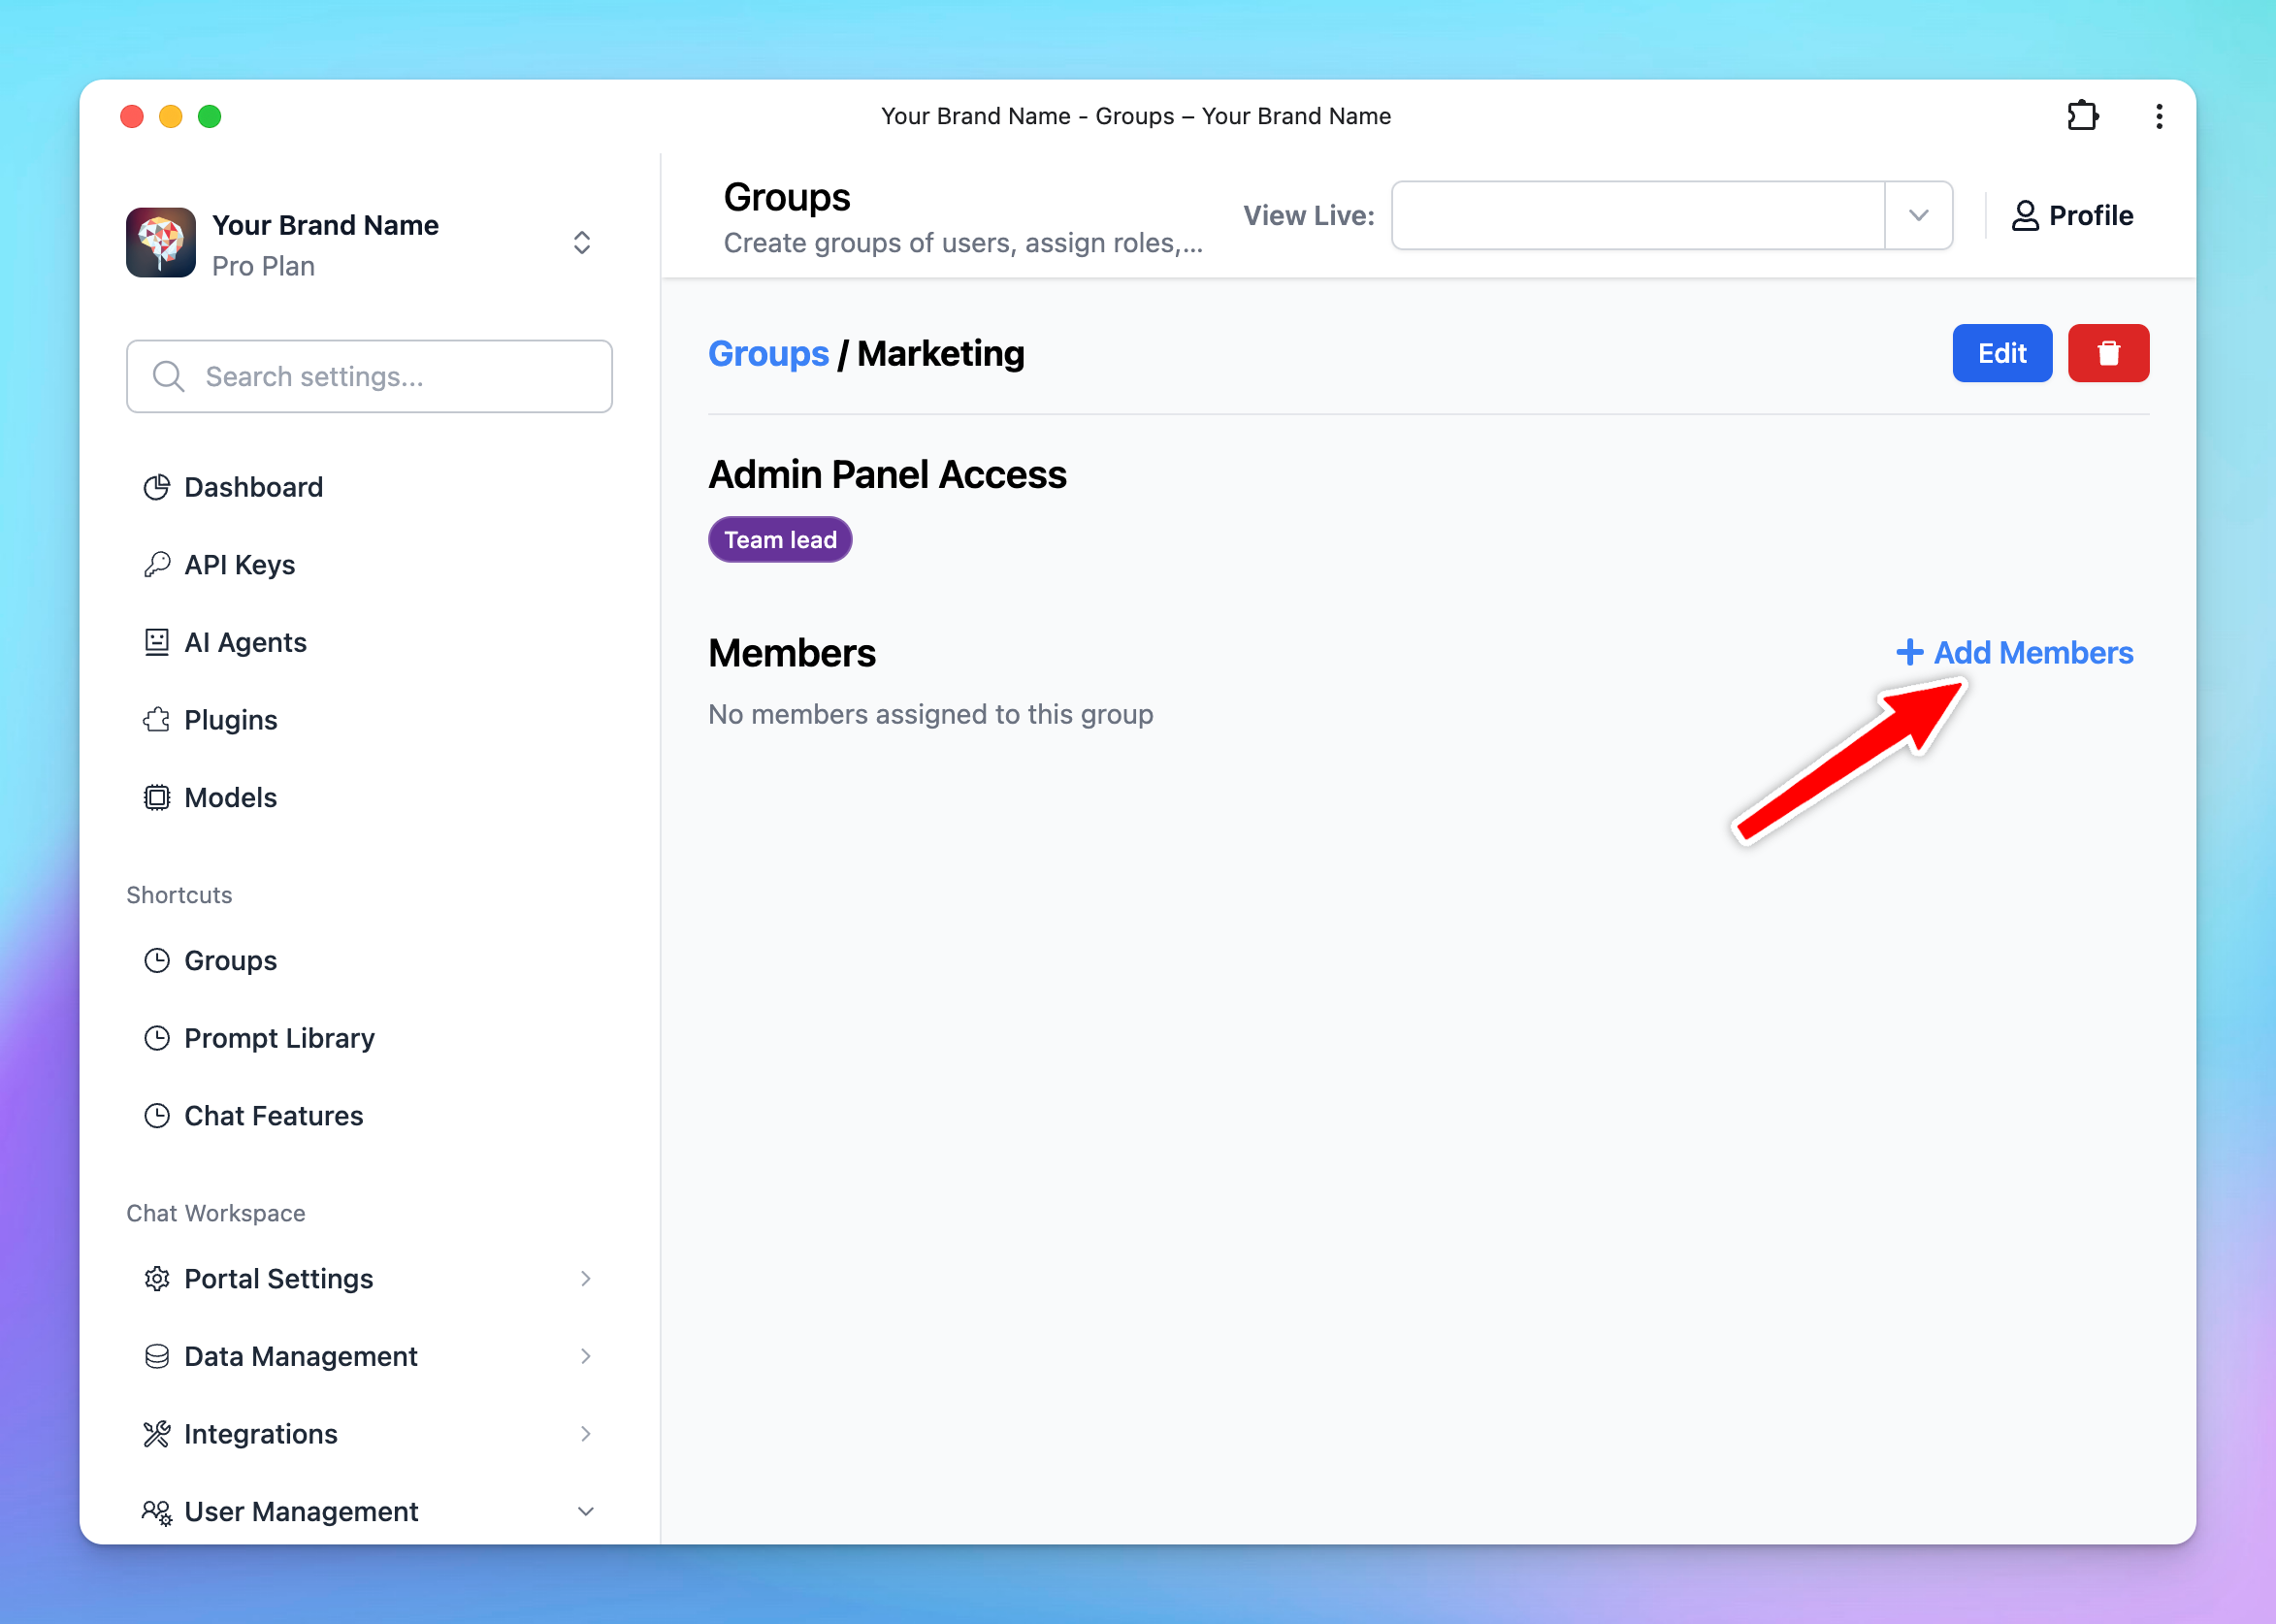
- Select the users you want to include in this group from the list.
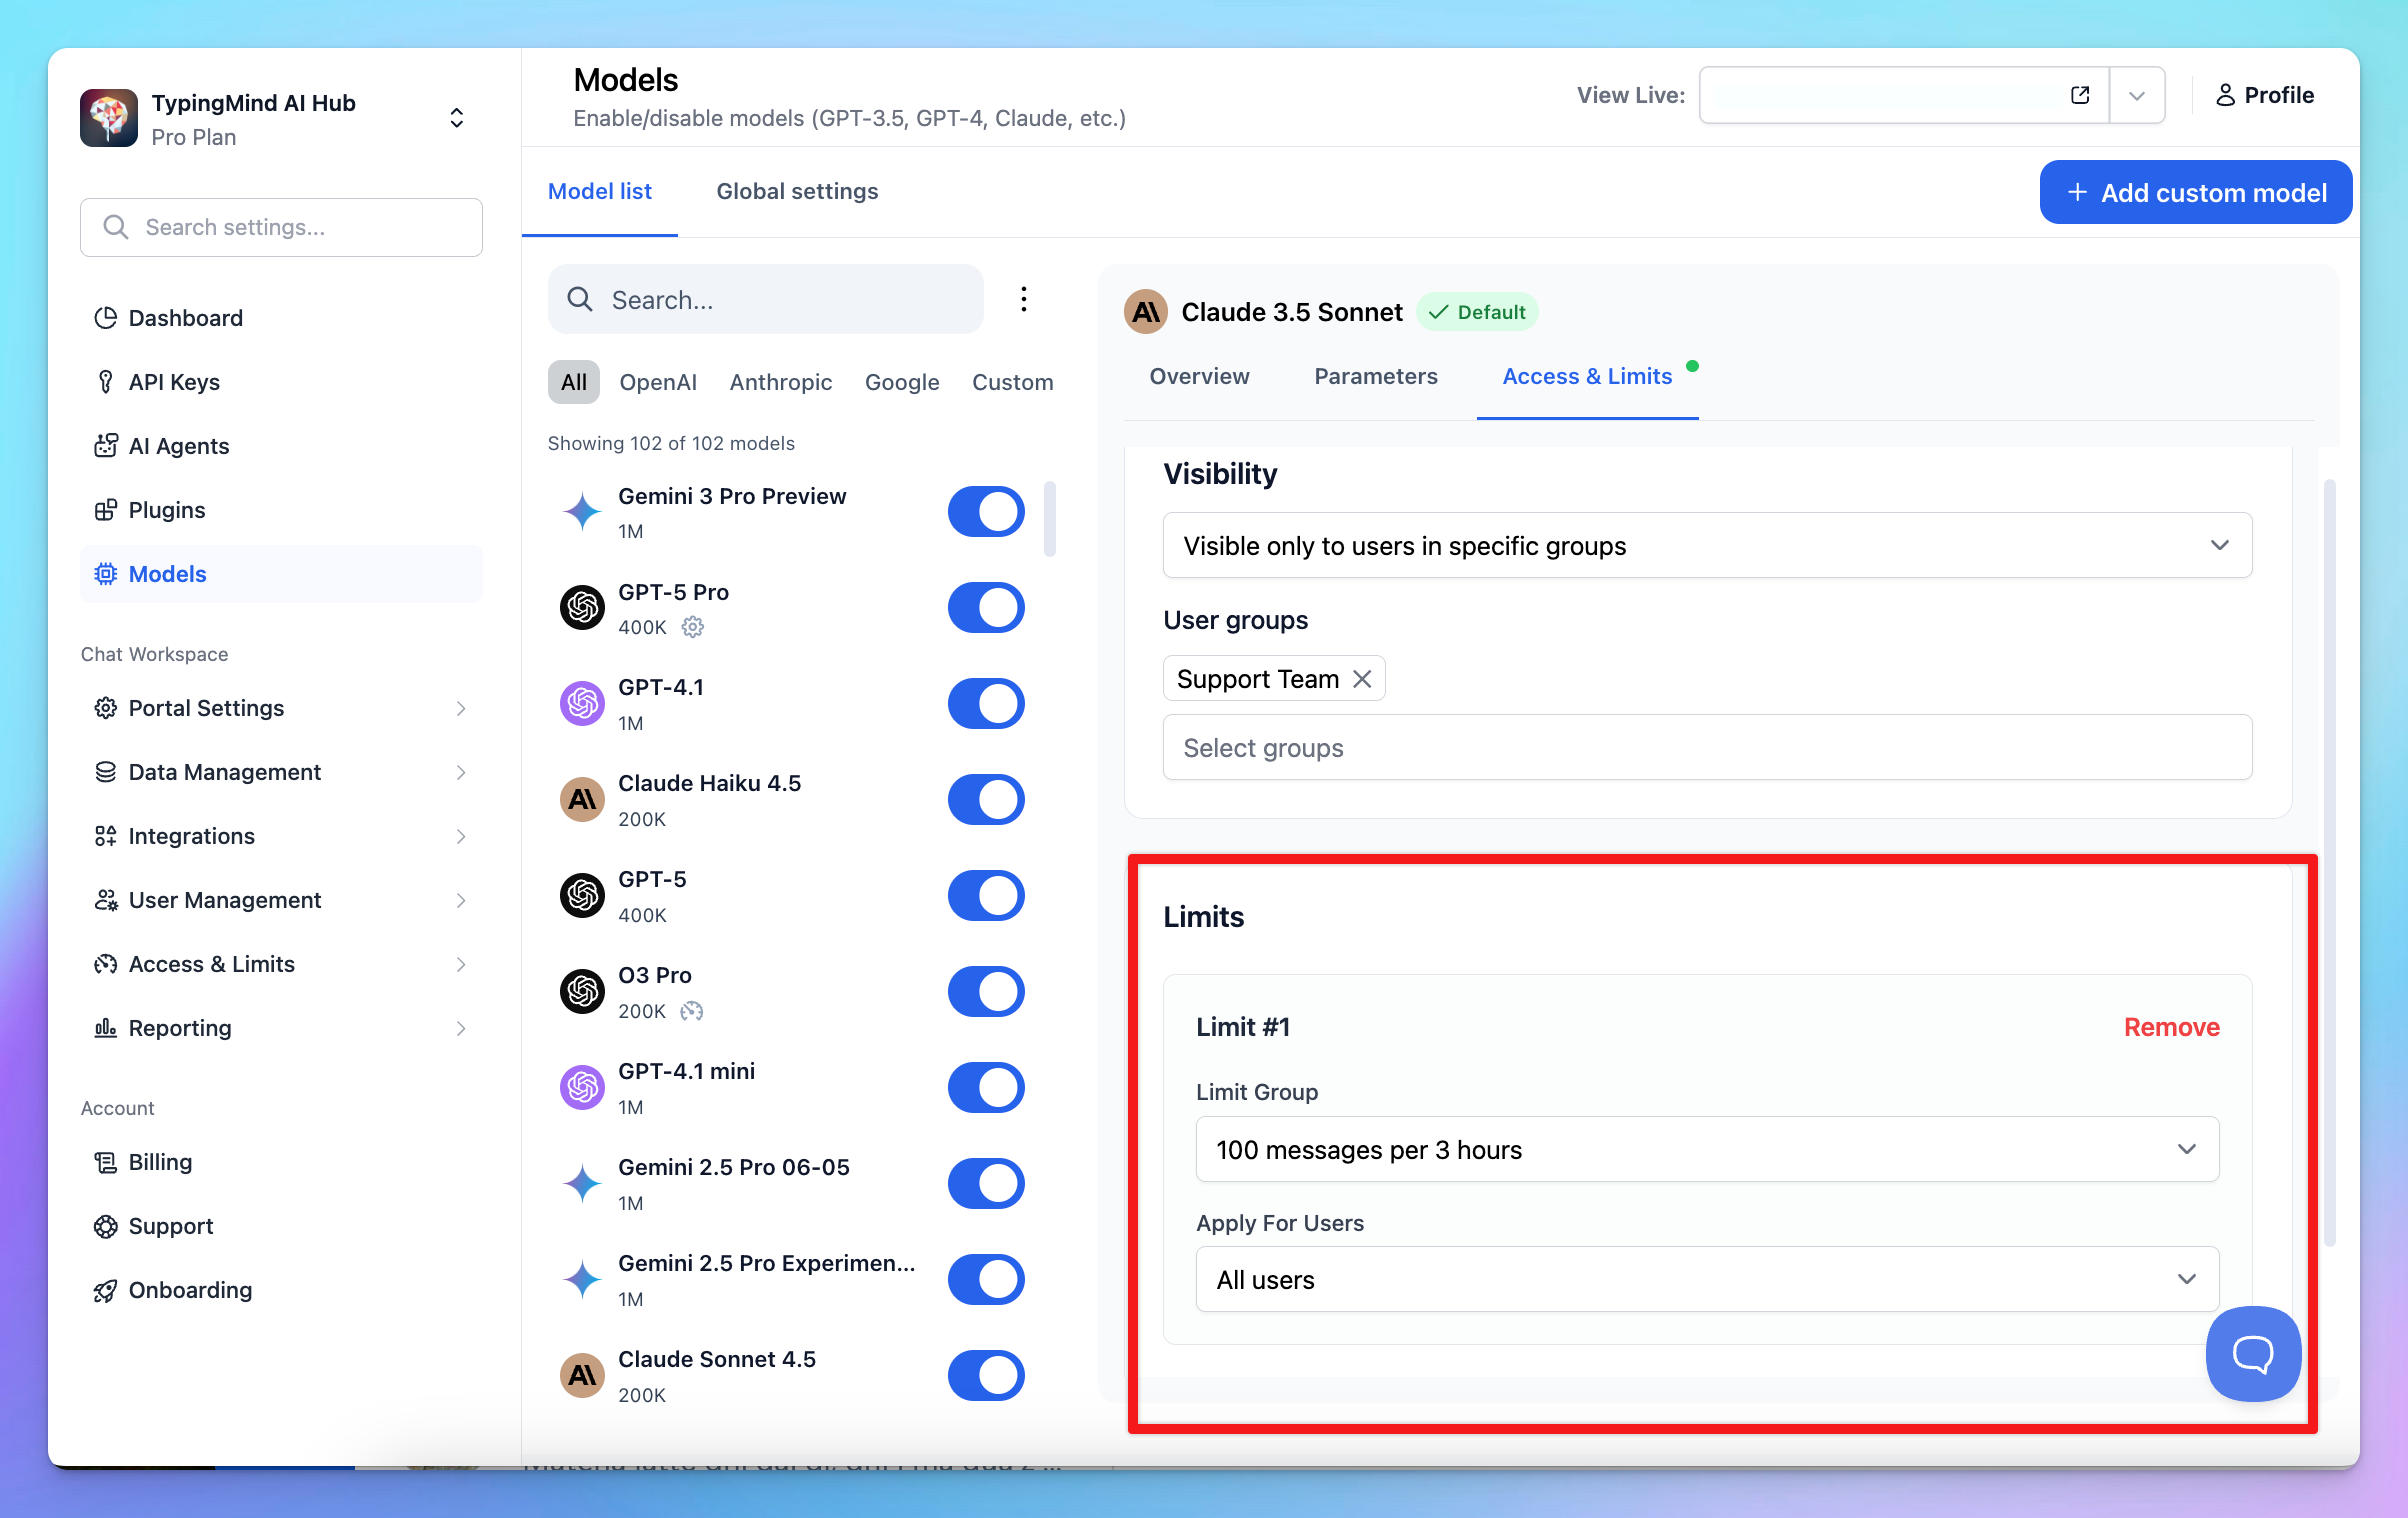
Step 2: Set up user group limit for specific AI Models
You can manage the AI model visibility and usage limit using User Groups following the below guidelines:1. Manage AI model visibility
- Go to Models section
- Select a model, switch to Access & Limits tab, and set up the visibility for specific user groups.
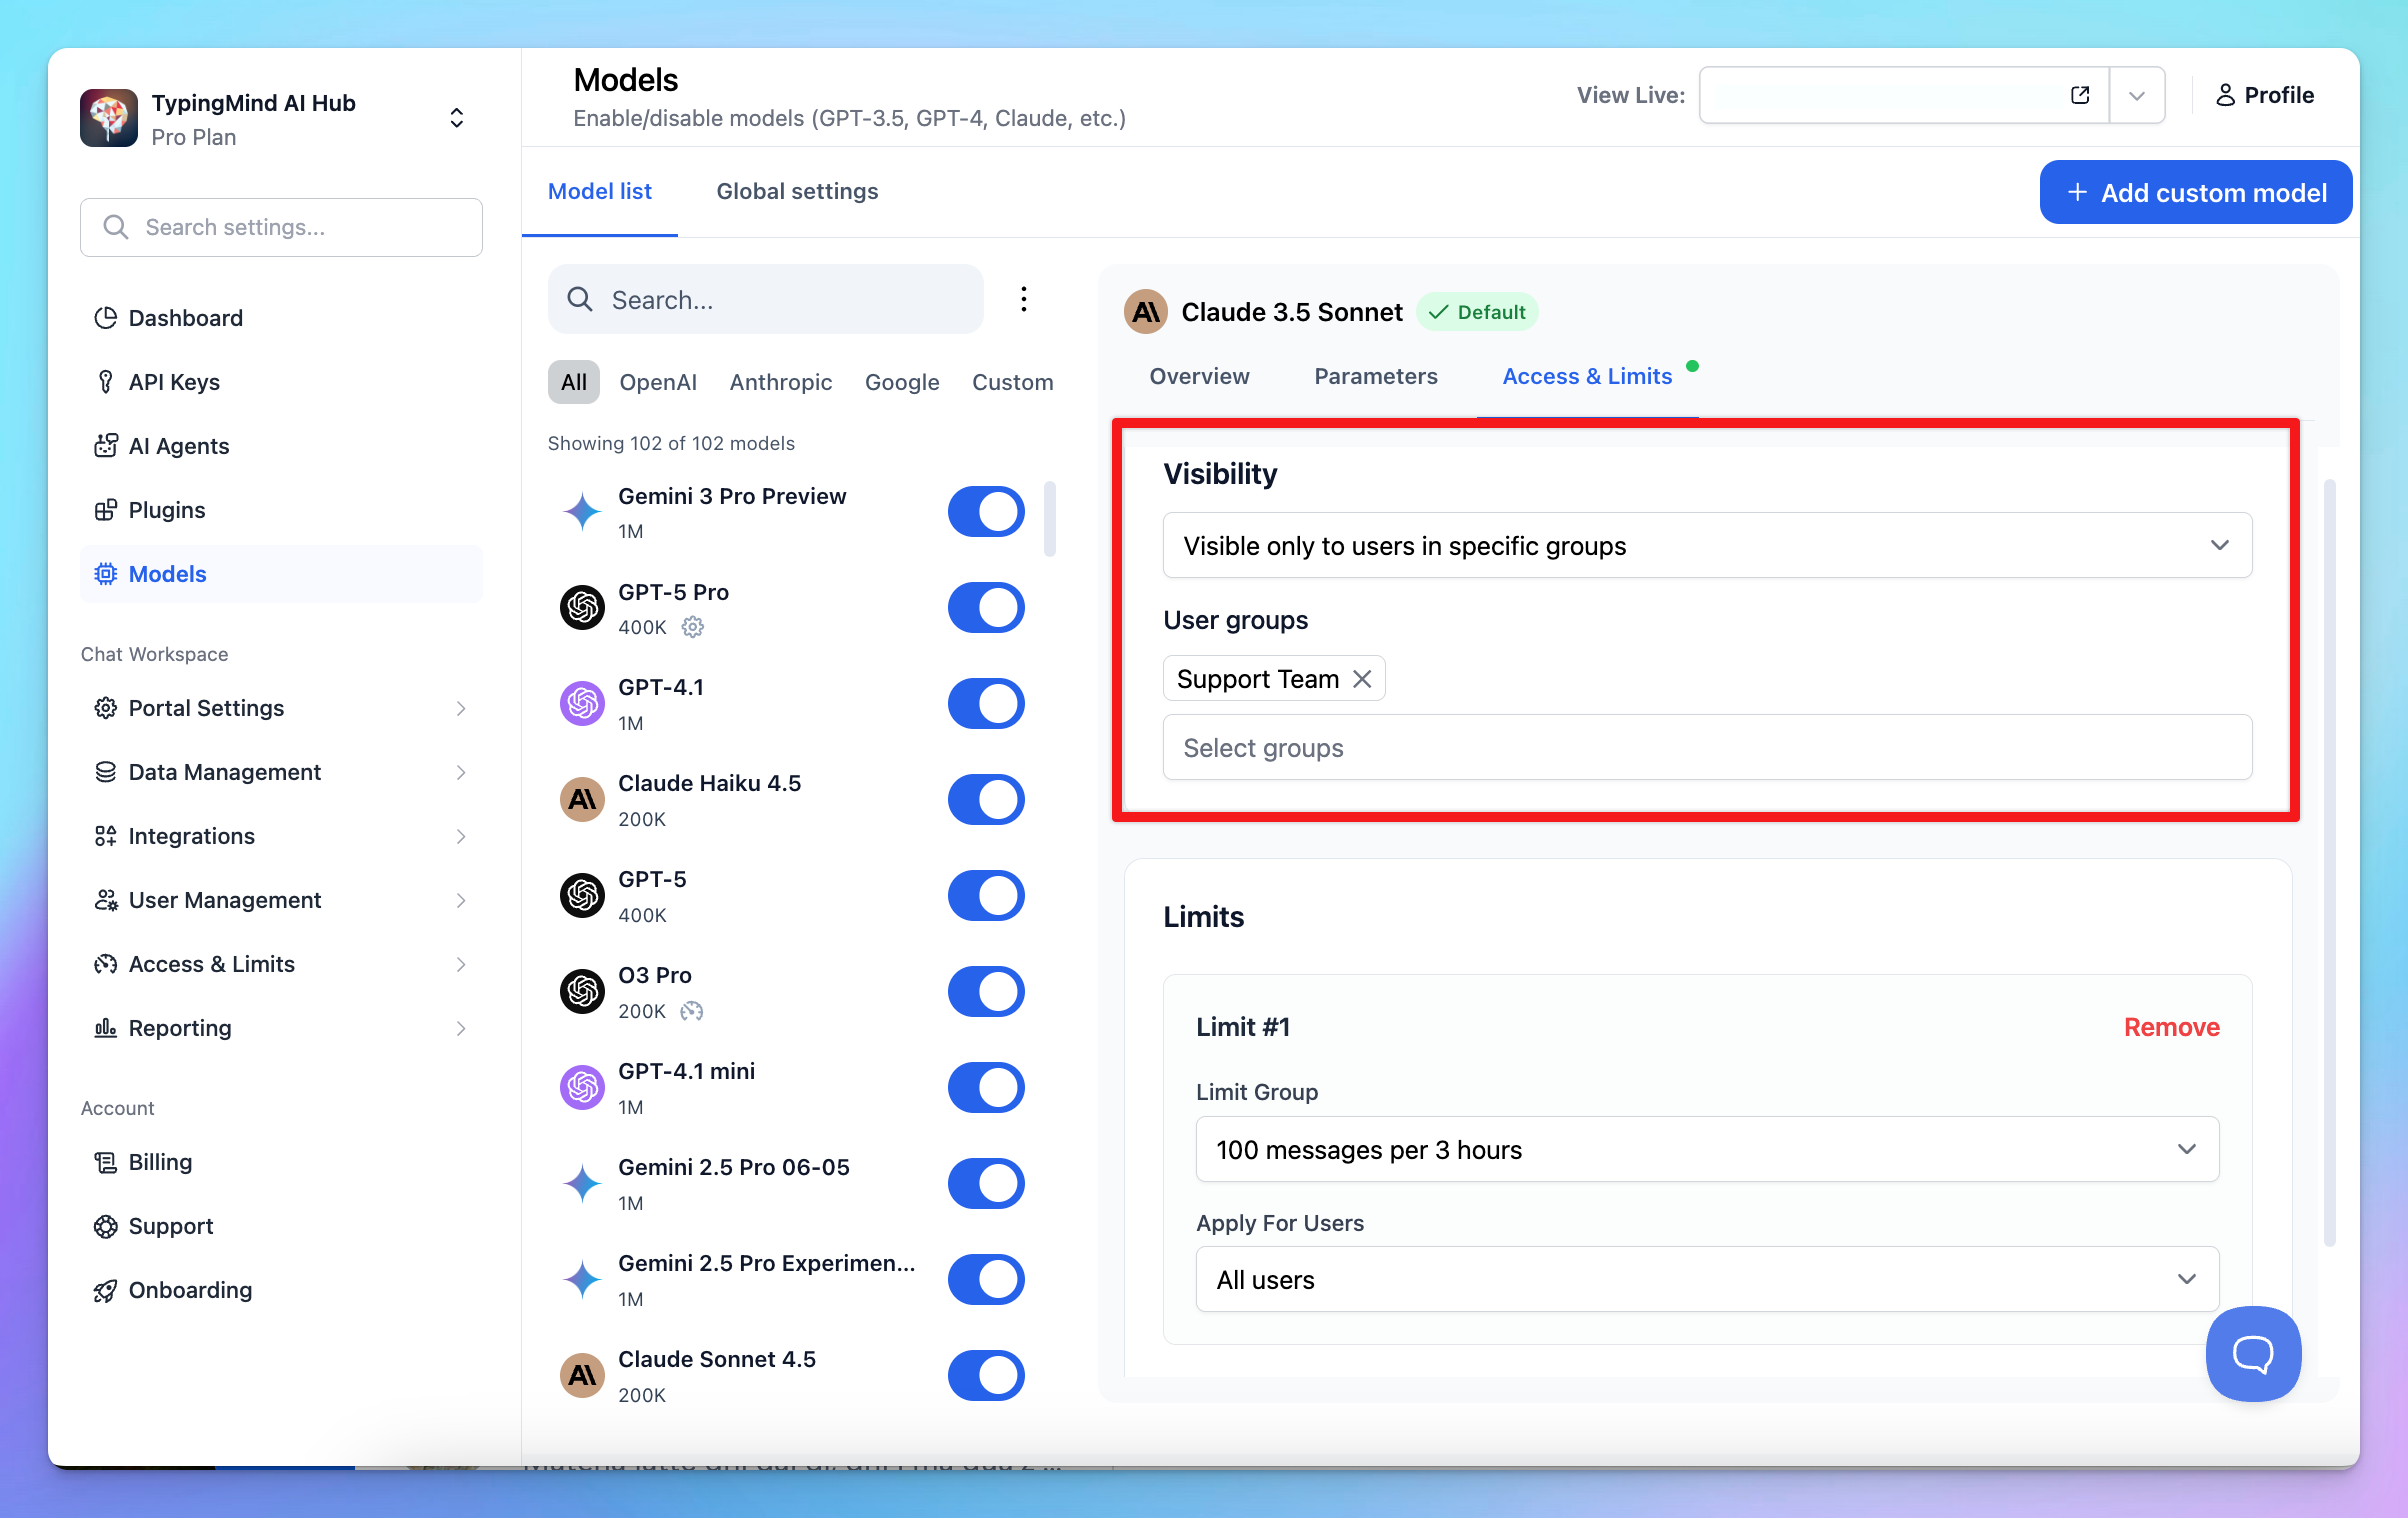
2. Manage AI Model Usage Limit
You can control:- How many messages are sent within a specific period
- How many characters are included in one message
- How many characters are sent within a specific period
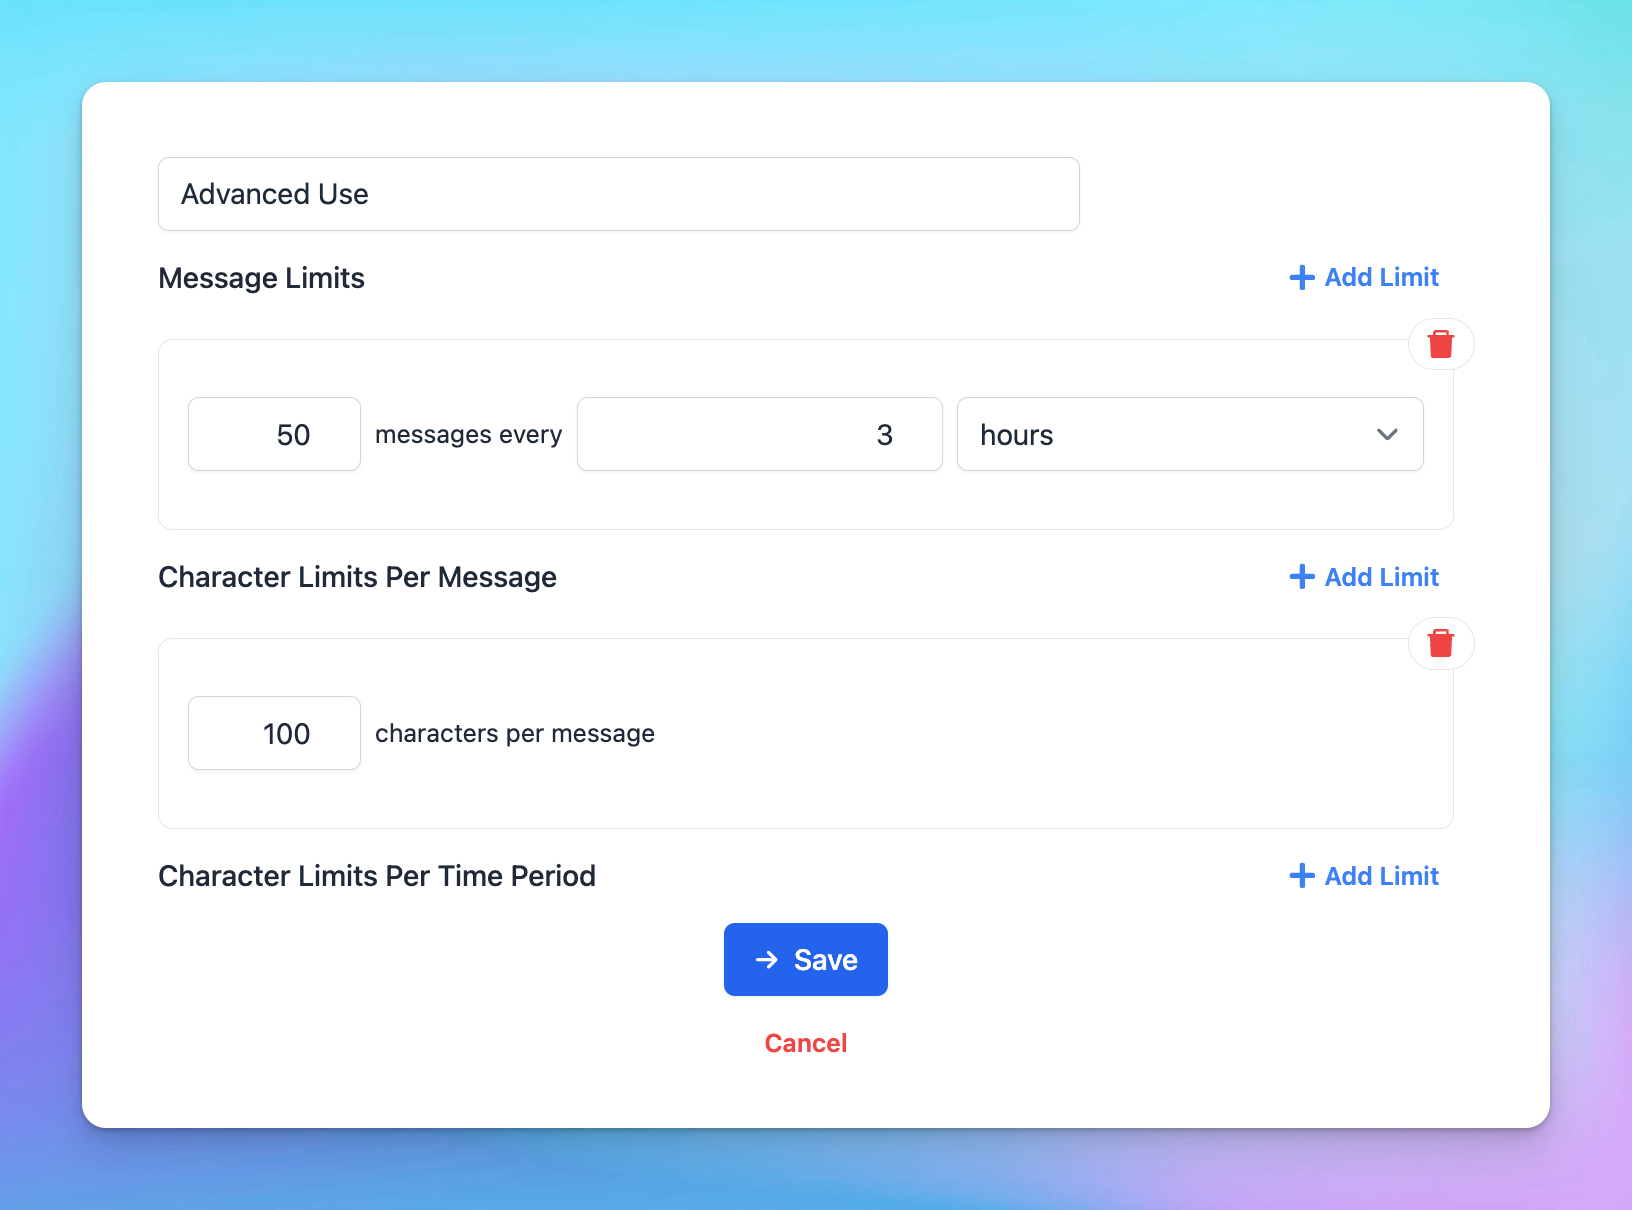
- Click to Limit Group —> Add New Limit Group —> Add limits for messages and characters