1. Basic customization
In addition to the default theme, you can customize your interface by:- Enabling dark mode
- Adjusting the sidebar color
- Choosing from built-in themes

2. Advanced customization
For more granular control over your chat interface’s appearance, you can add custom CSS code. This allows you to modify specific elements of the UI beyond the basic theme options.How to Add Custom CSS
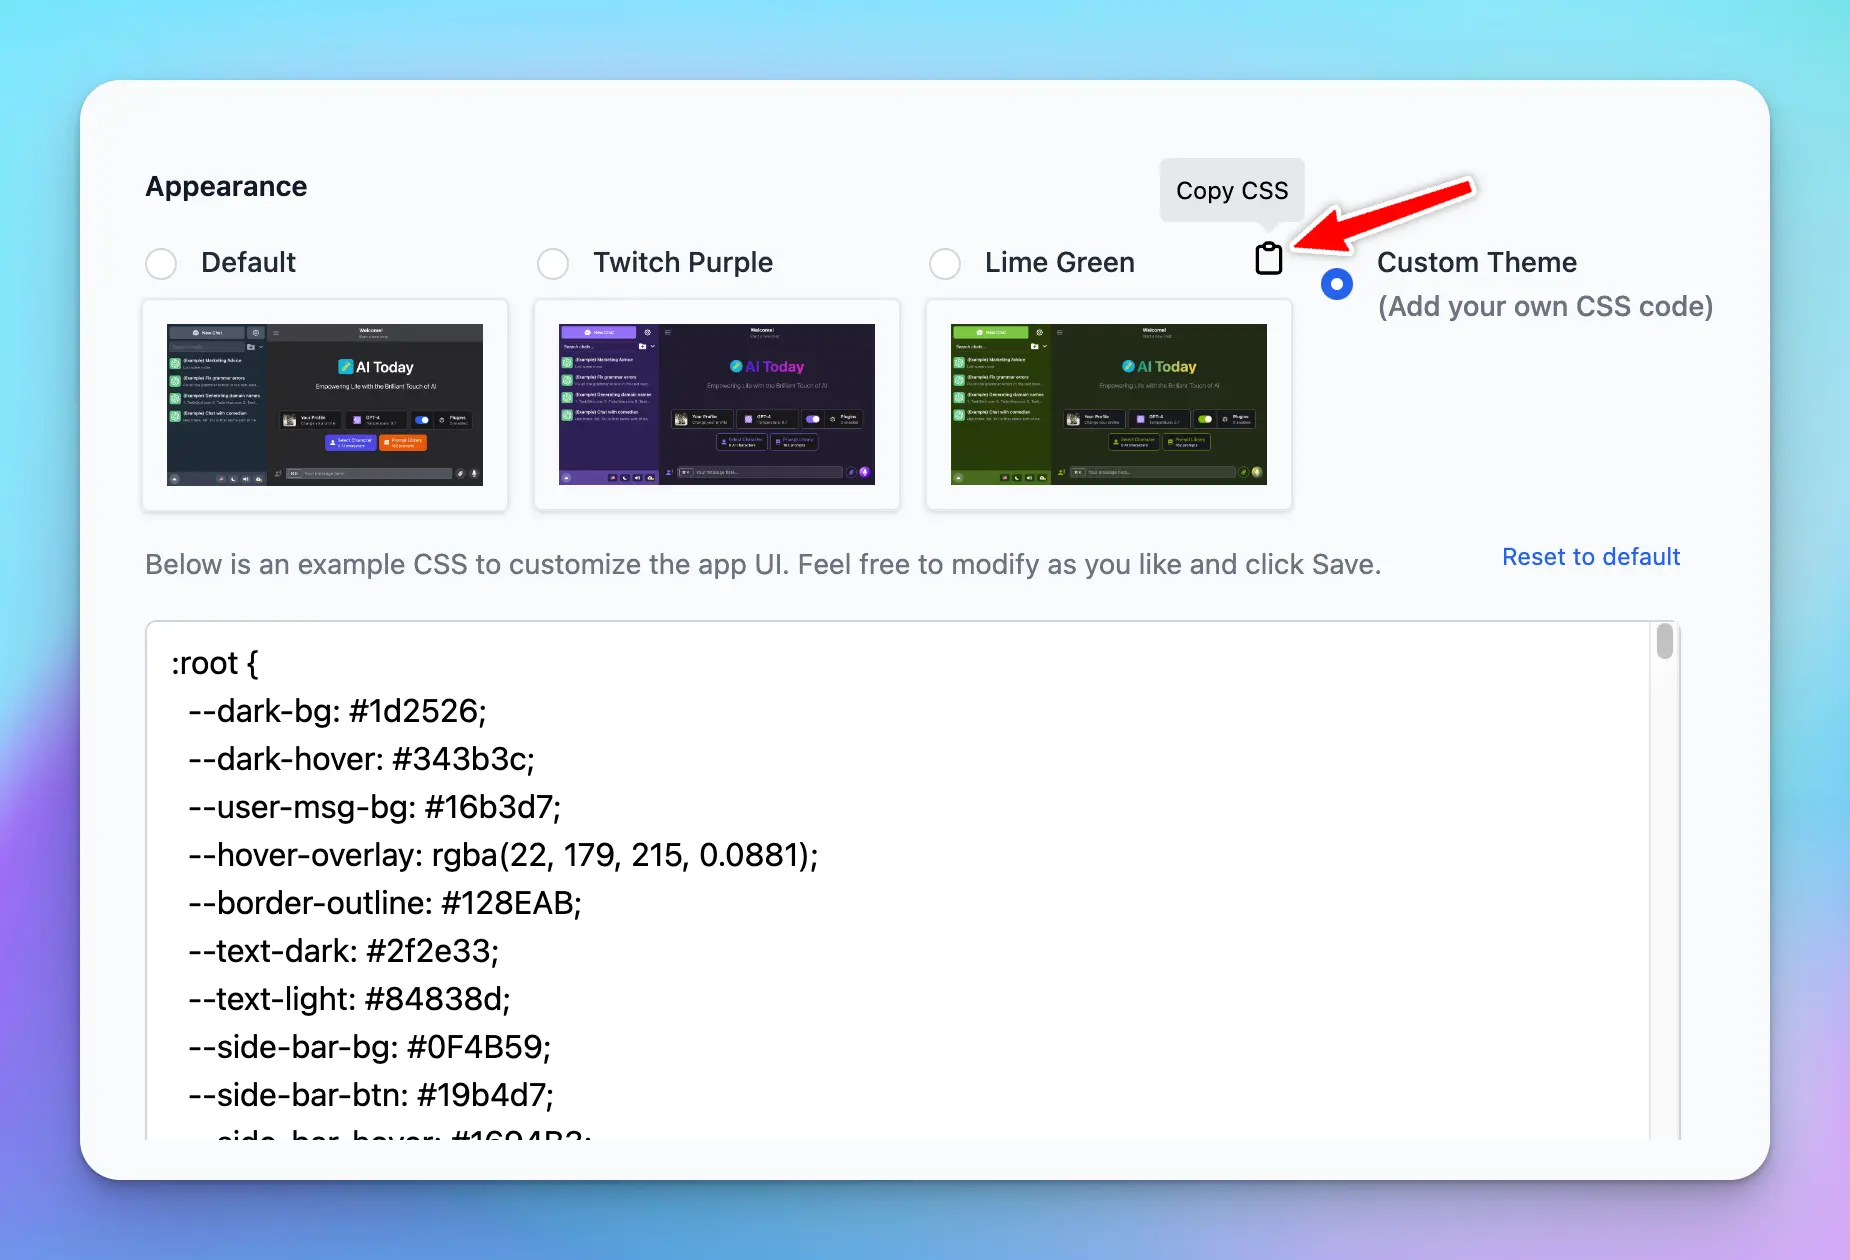
- Select the “Custom Theme” option in the Appearance section
- In the CSS editor that appears, you can add your own CSS code
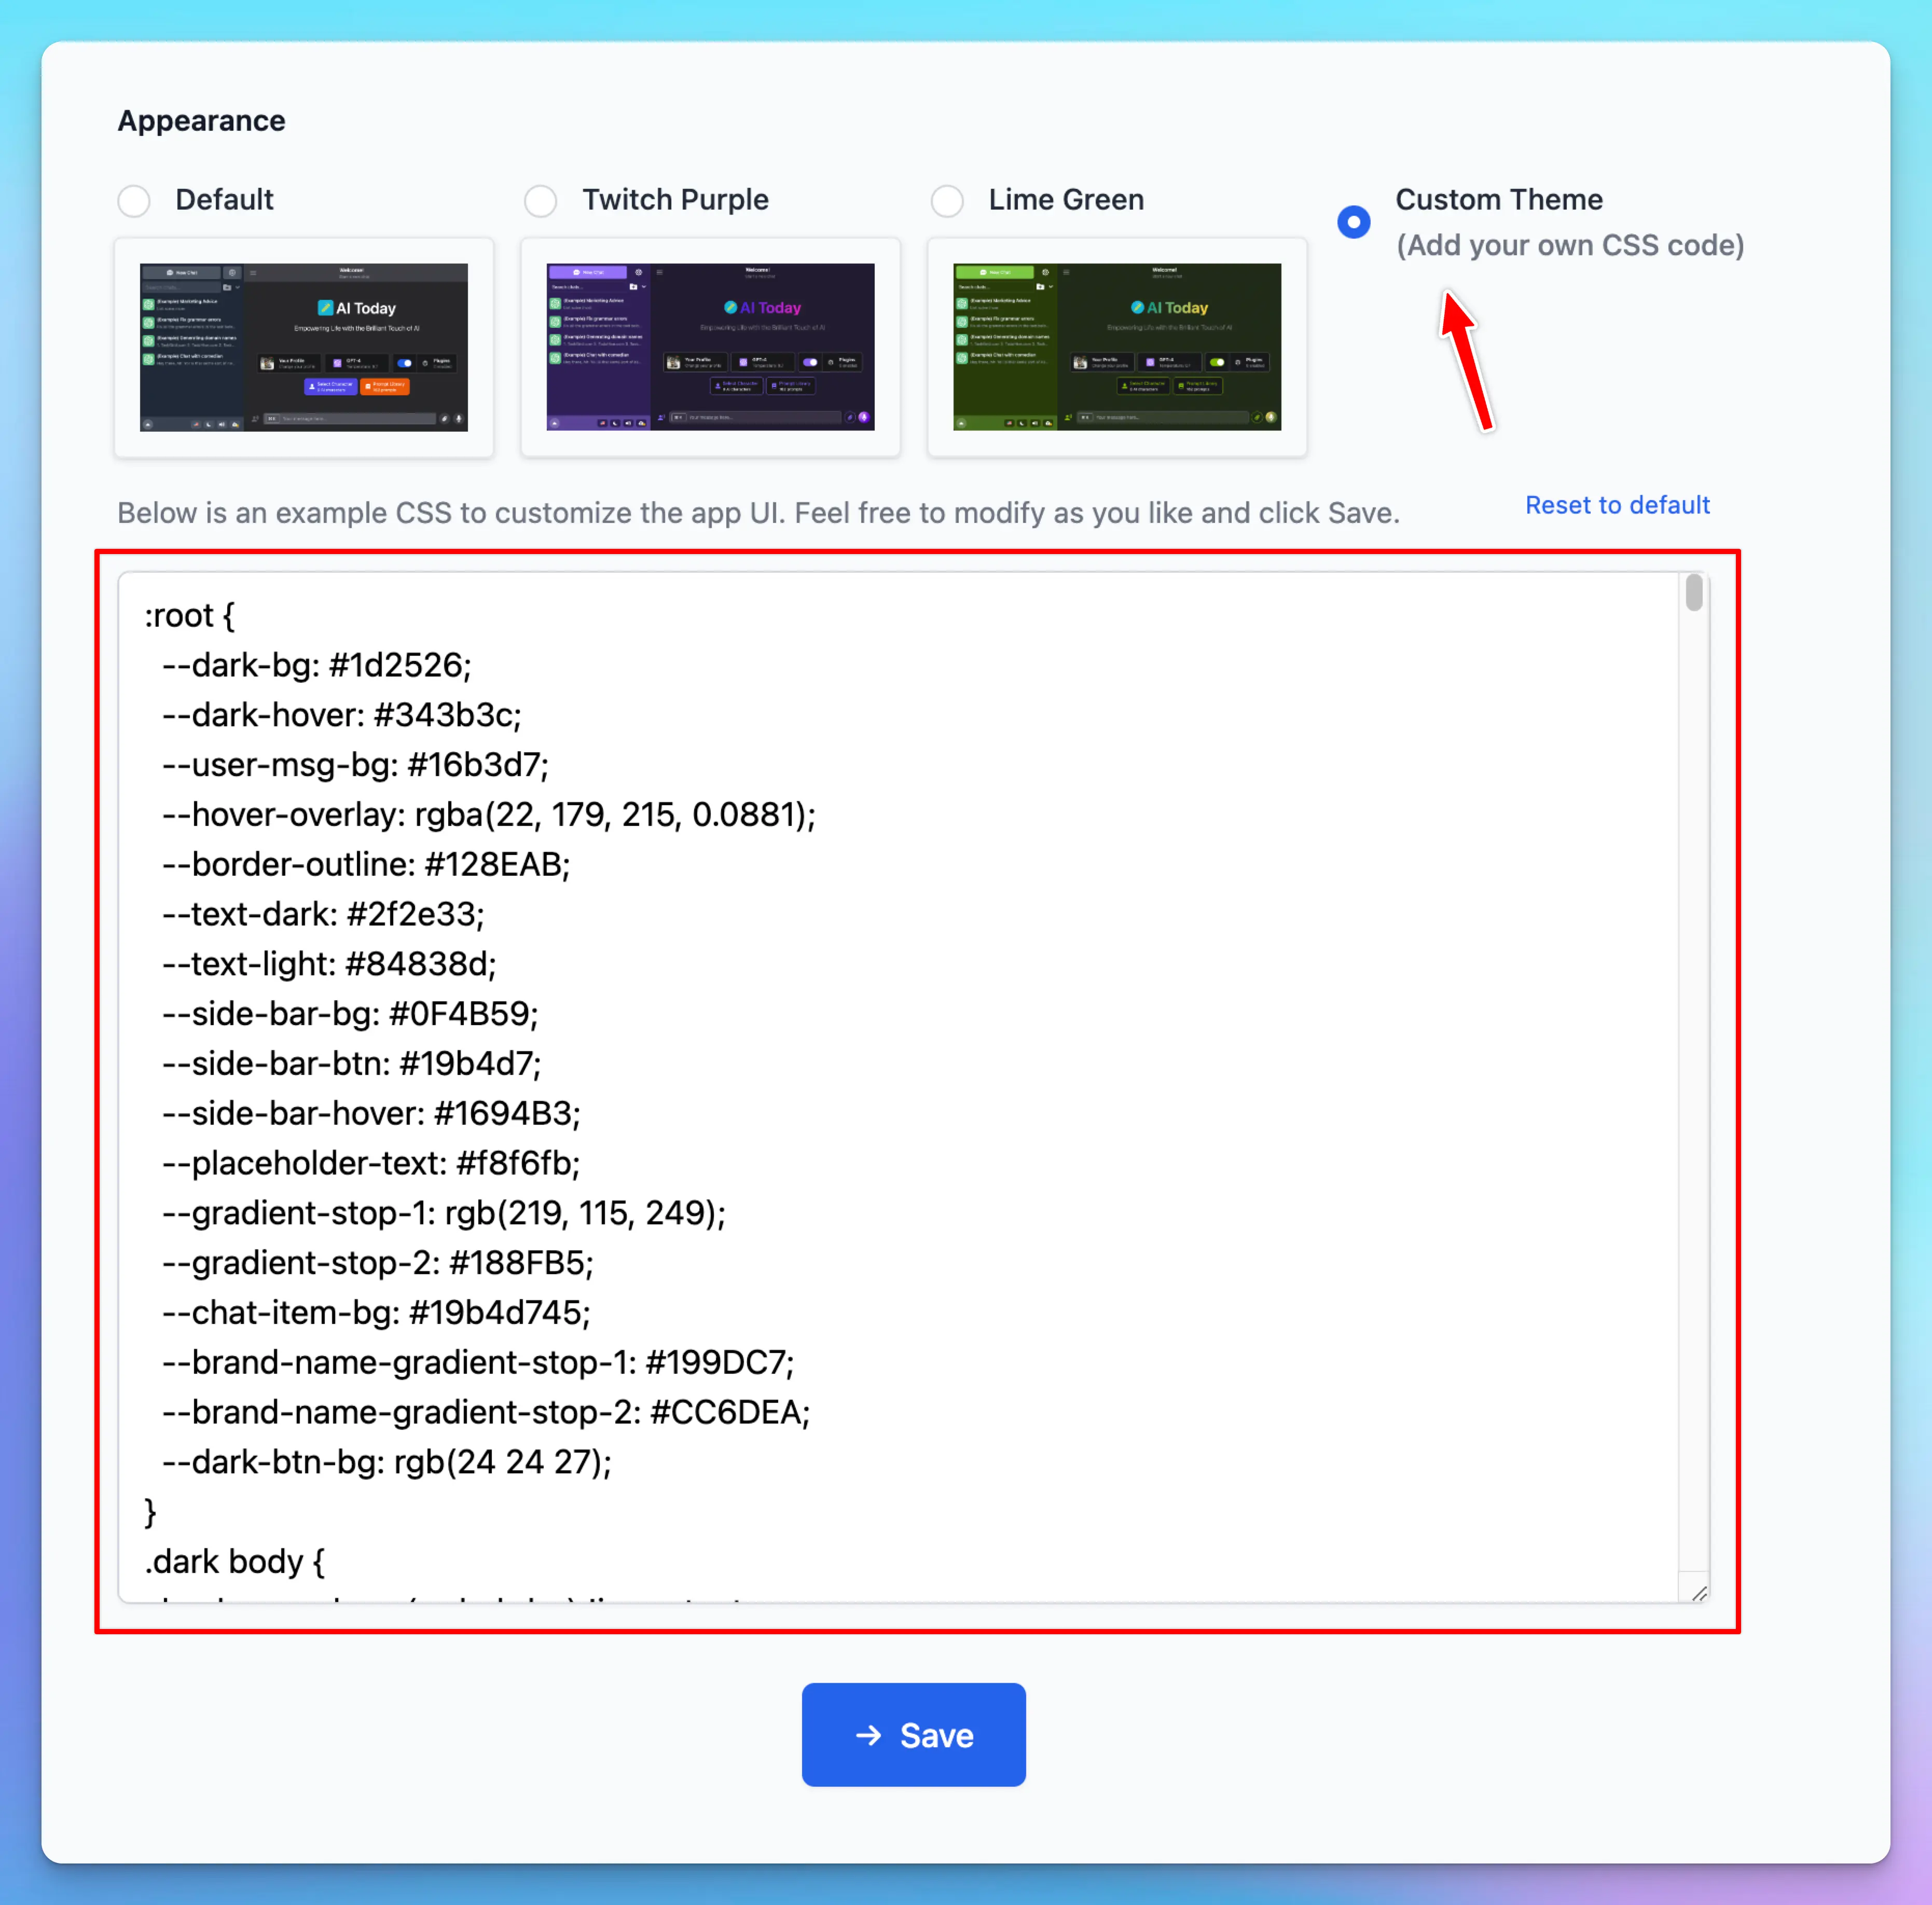 There is a default template for you to use as an example. You can modify it, save it, and test it on your user-facing app website until you get it right.
You can also take code from other built-in themes and modify only the parts you need.
There is a default template for you to use as an example. You can modify it, save it, and test it on your user-facing app website until you get it right.
You can also take code from other built-in themes and modify only the parts you need.
Tips for Custom CSS
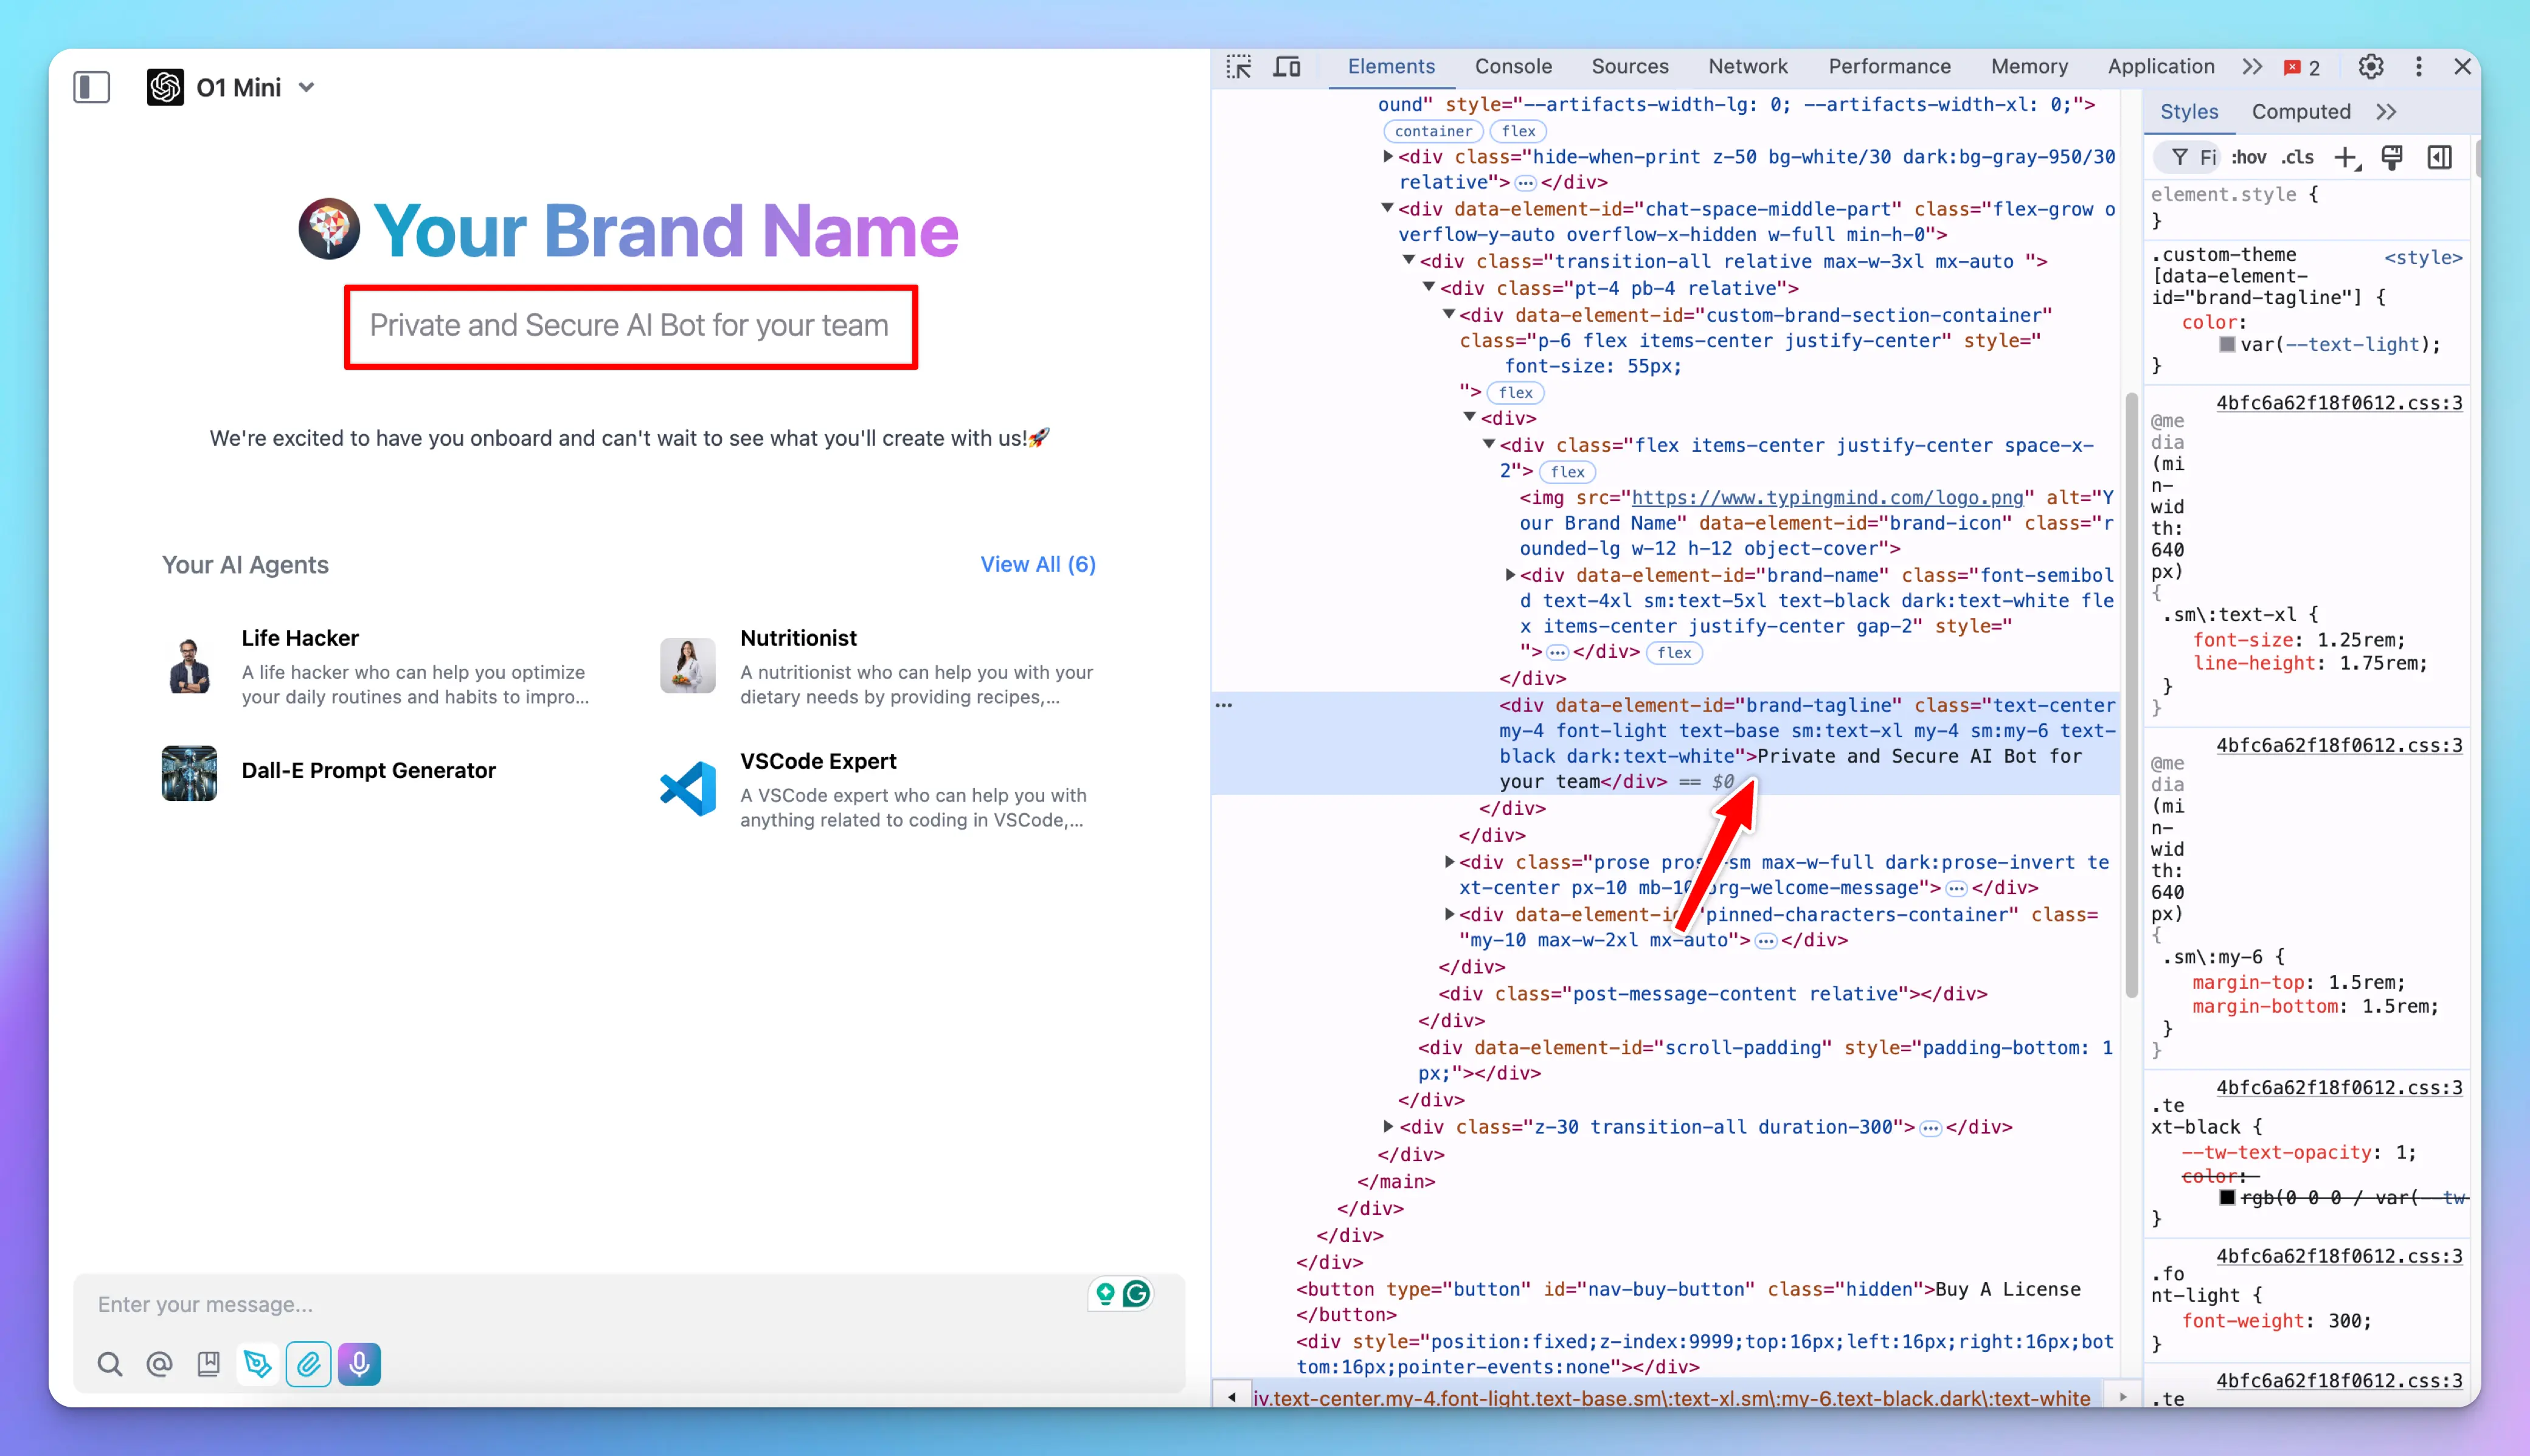
- Use browser developer tools (Right-click and select “Inspect”) to inspect elements and find the correct CSS selectors
- Consider using CSS variables for consistent theming

- Test your changes in small increments to avoid breaking the interface
- Keep a backup of your CSS code in case you need to revert changes
- Remember to follow your brand guidelines when customizing colors and styles
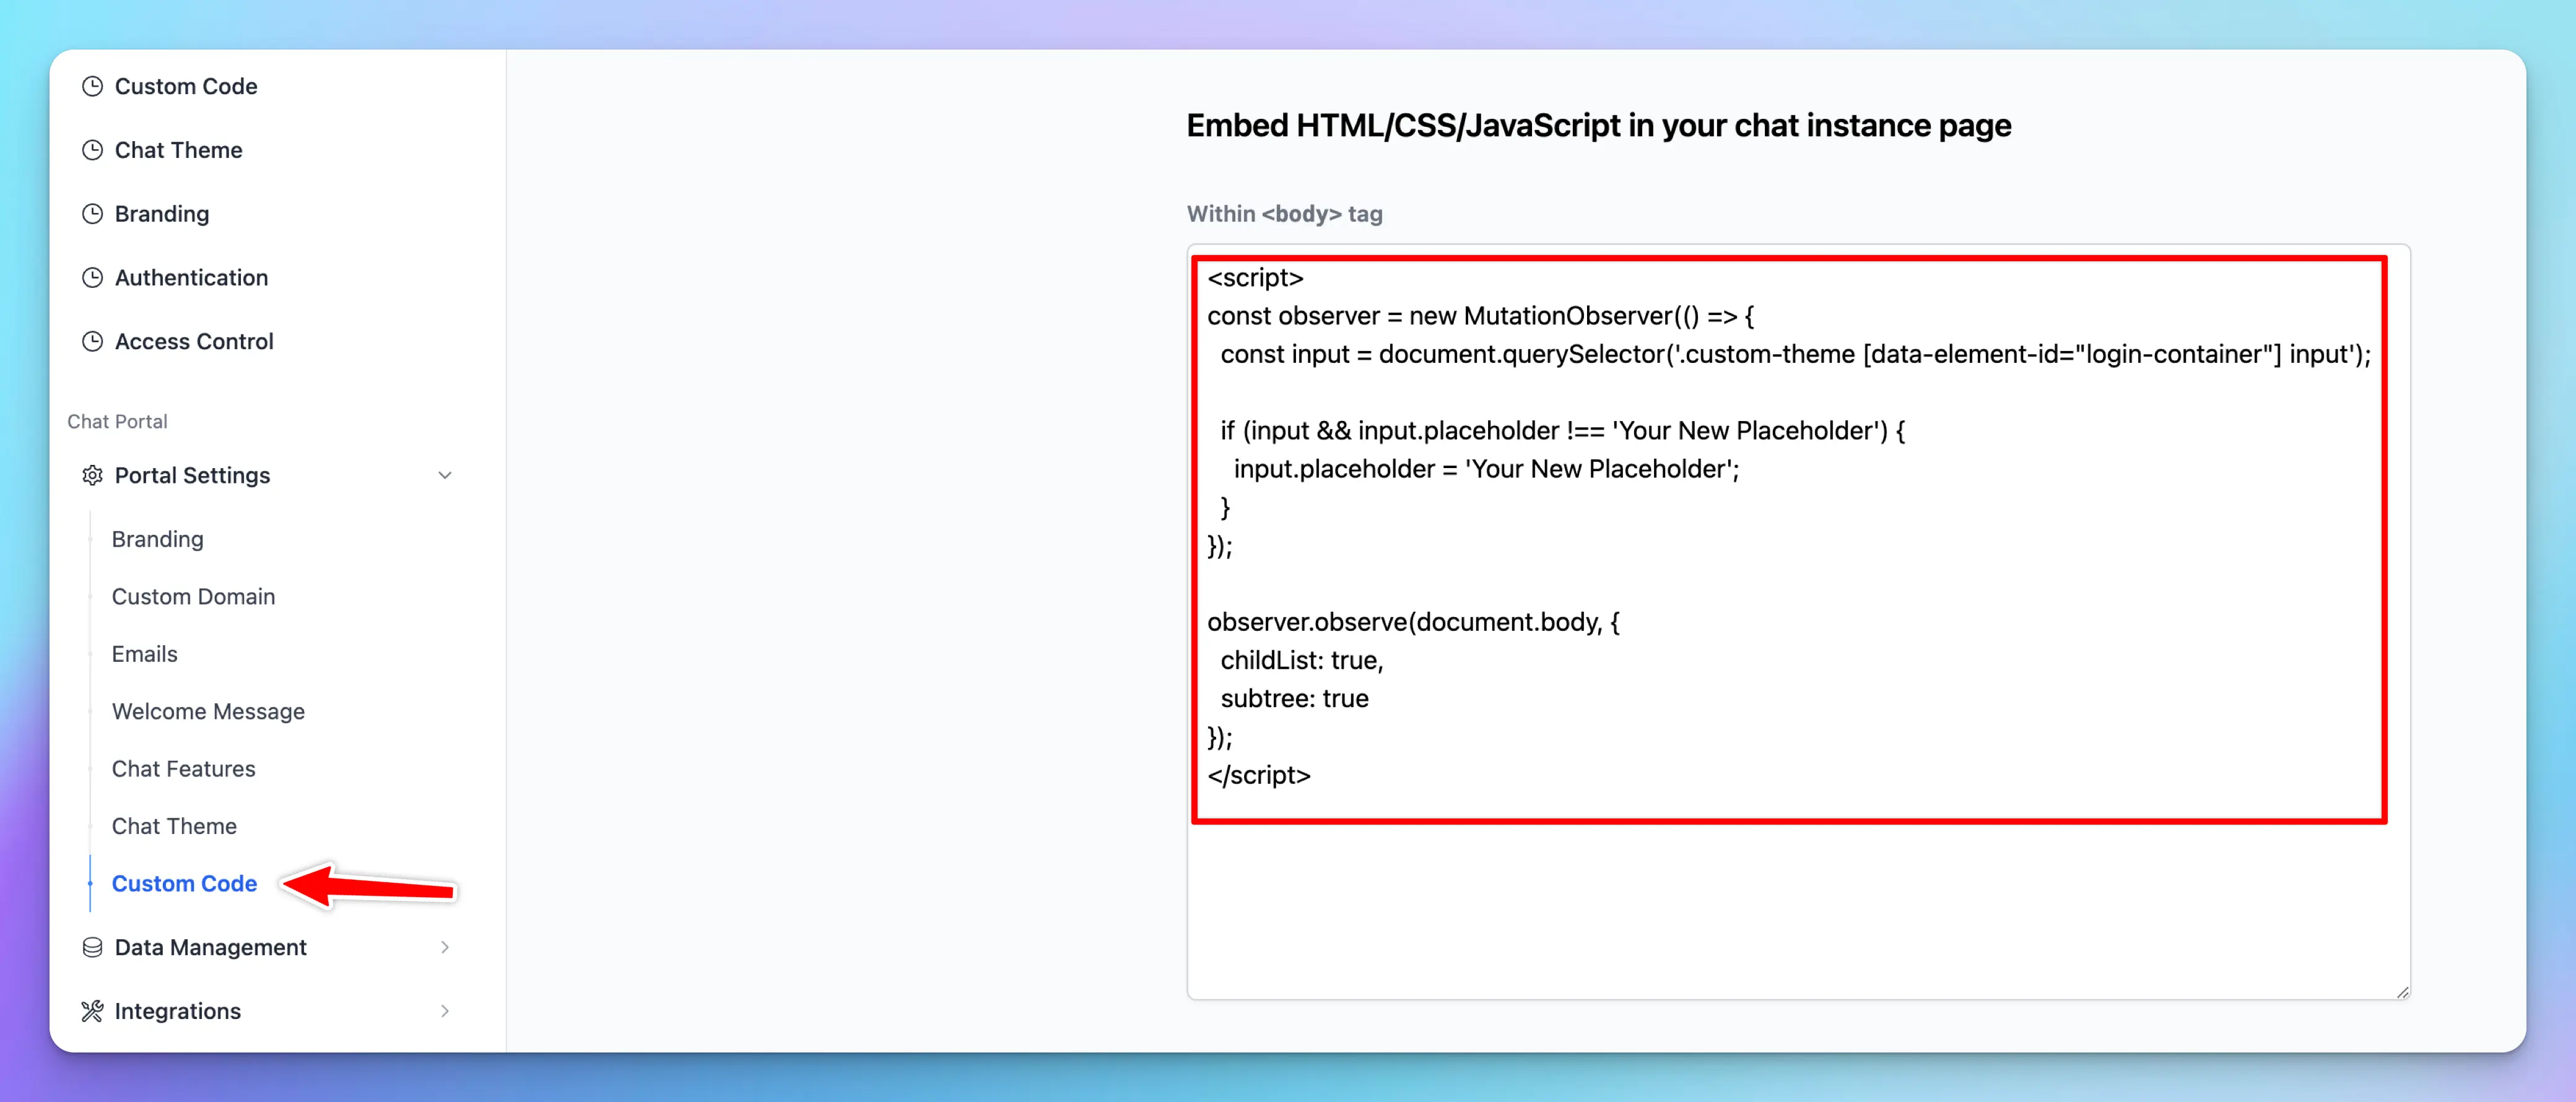
Custom JavaScript Code (Deprecated)
In addition to Custom CSS, you can also modify the interface using HTML, JavaScript, or any other elements you wish to include in your app.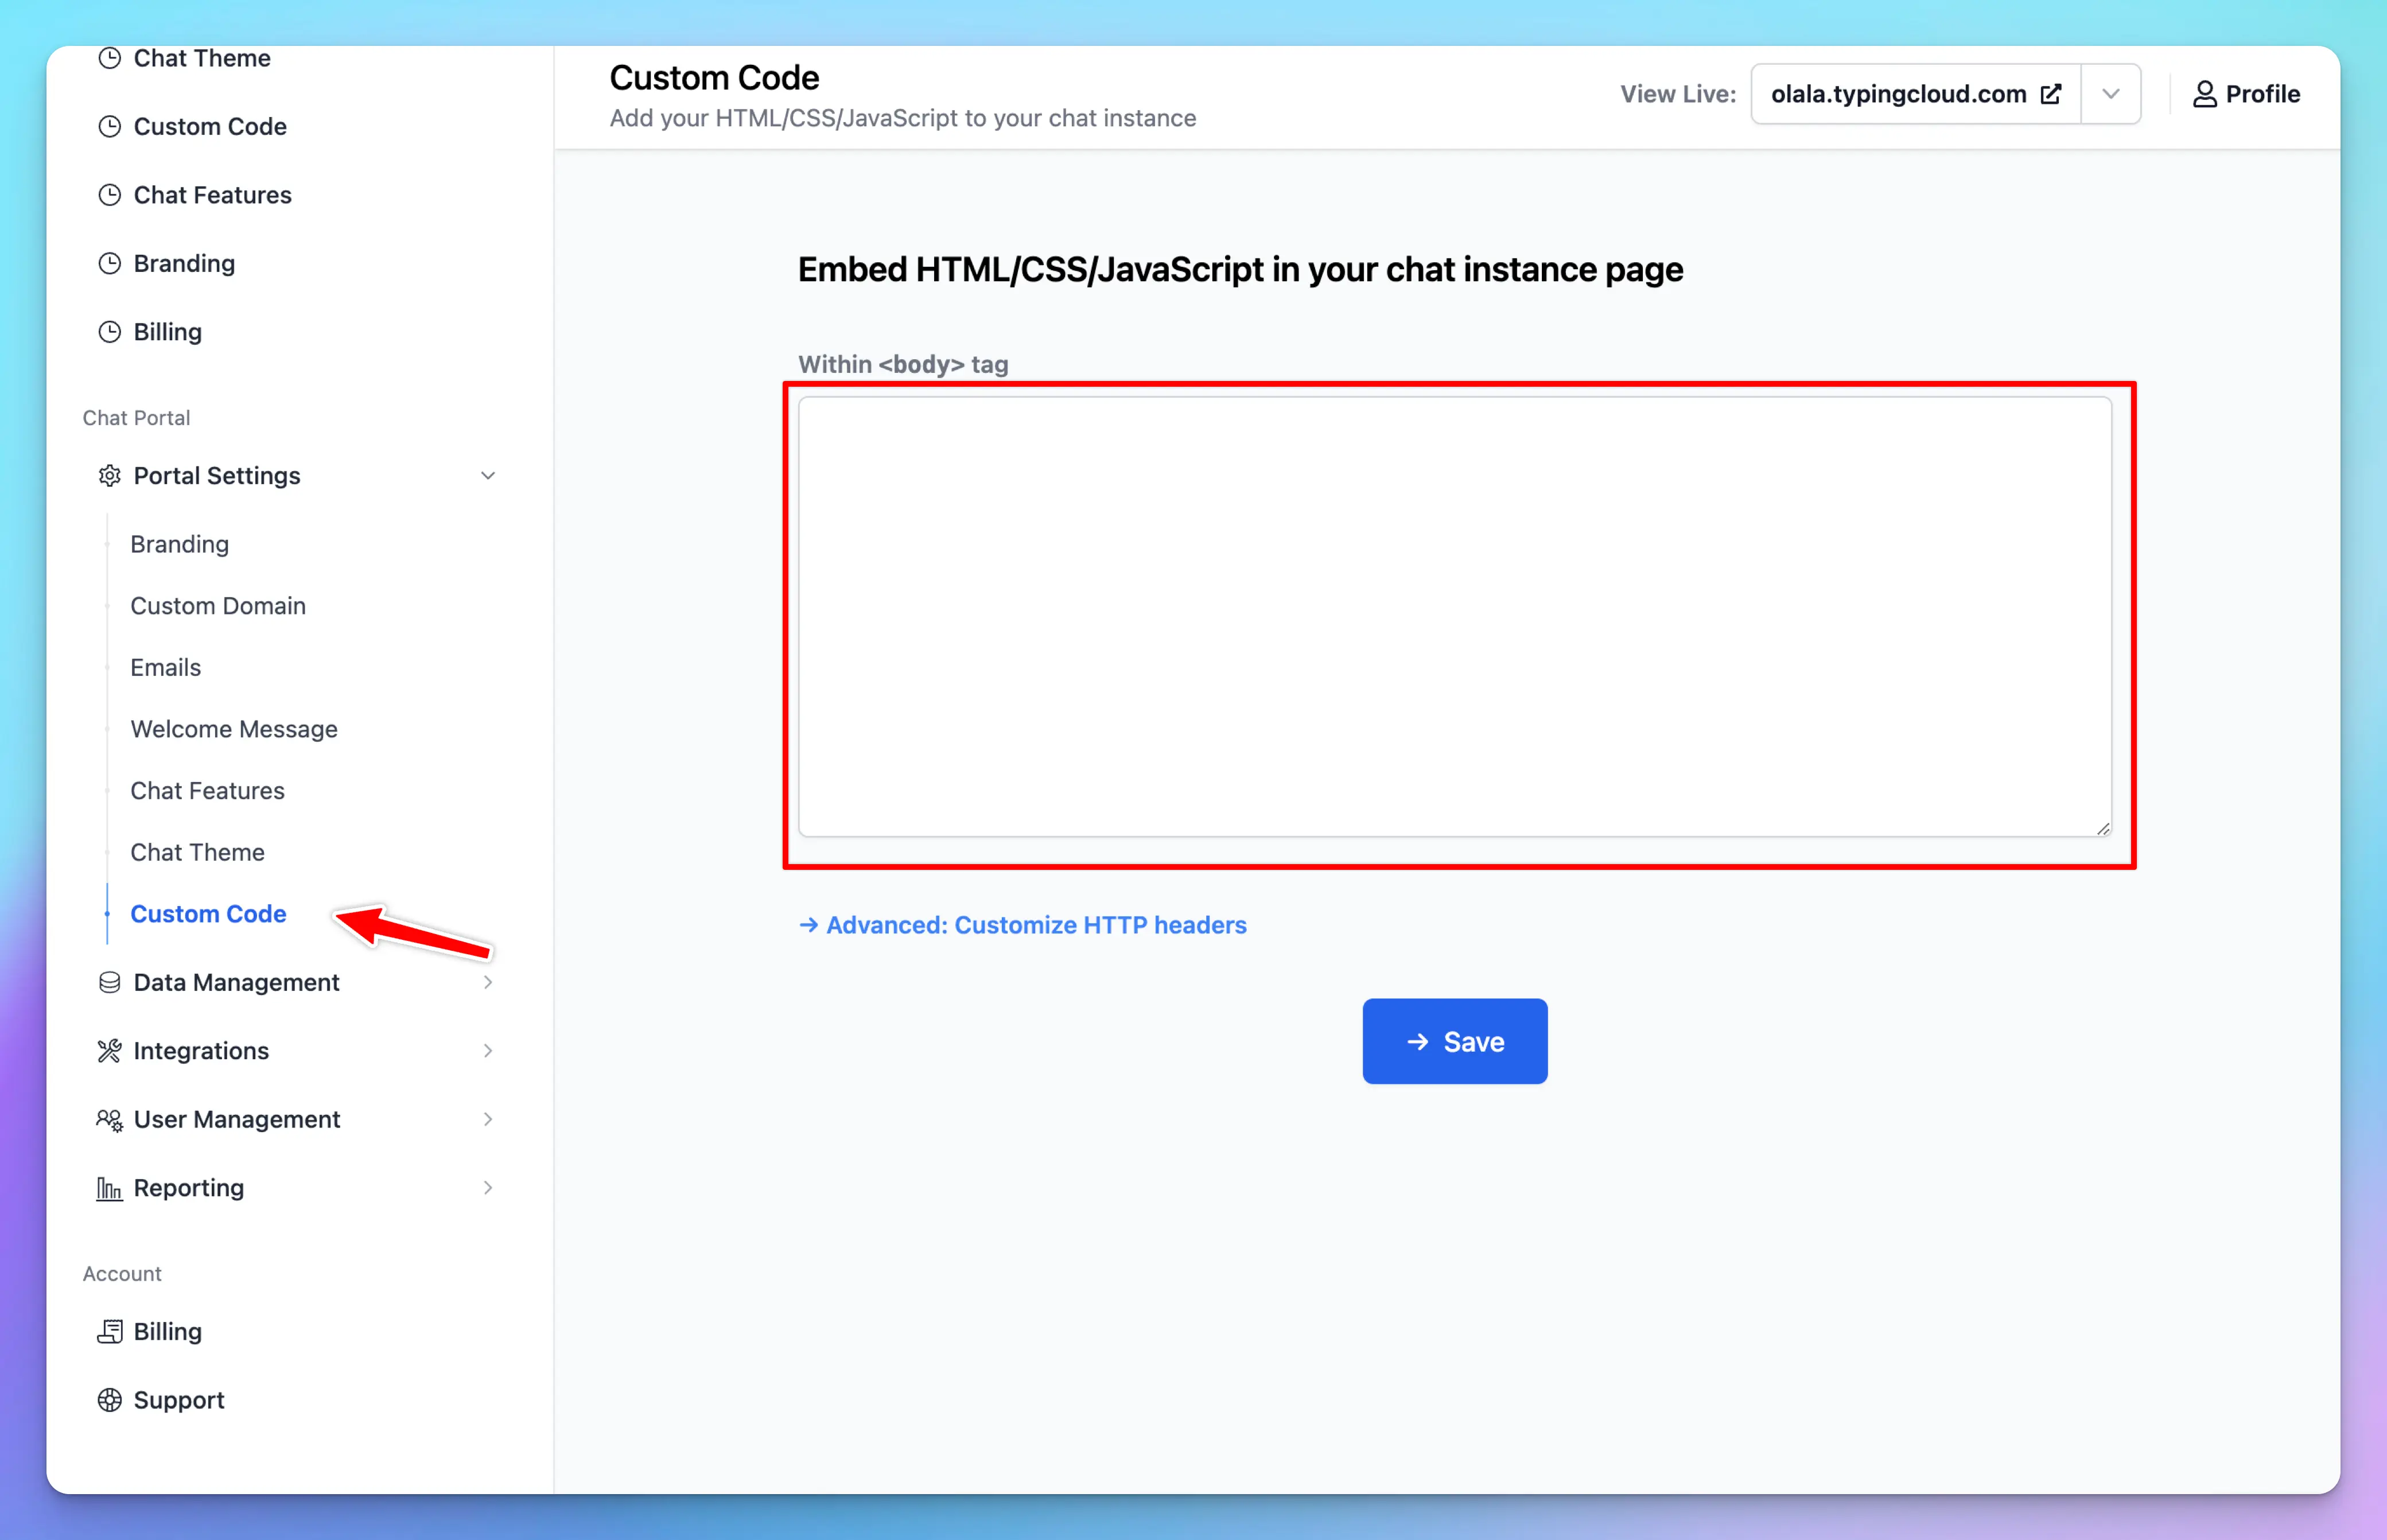
3. Examples
Modify font sizes
You can change the base font size for the entire page.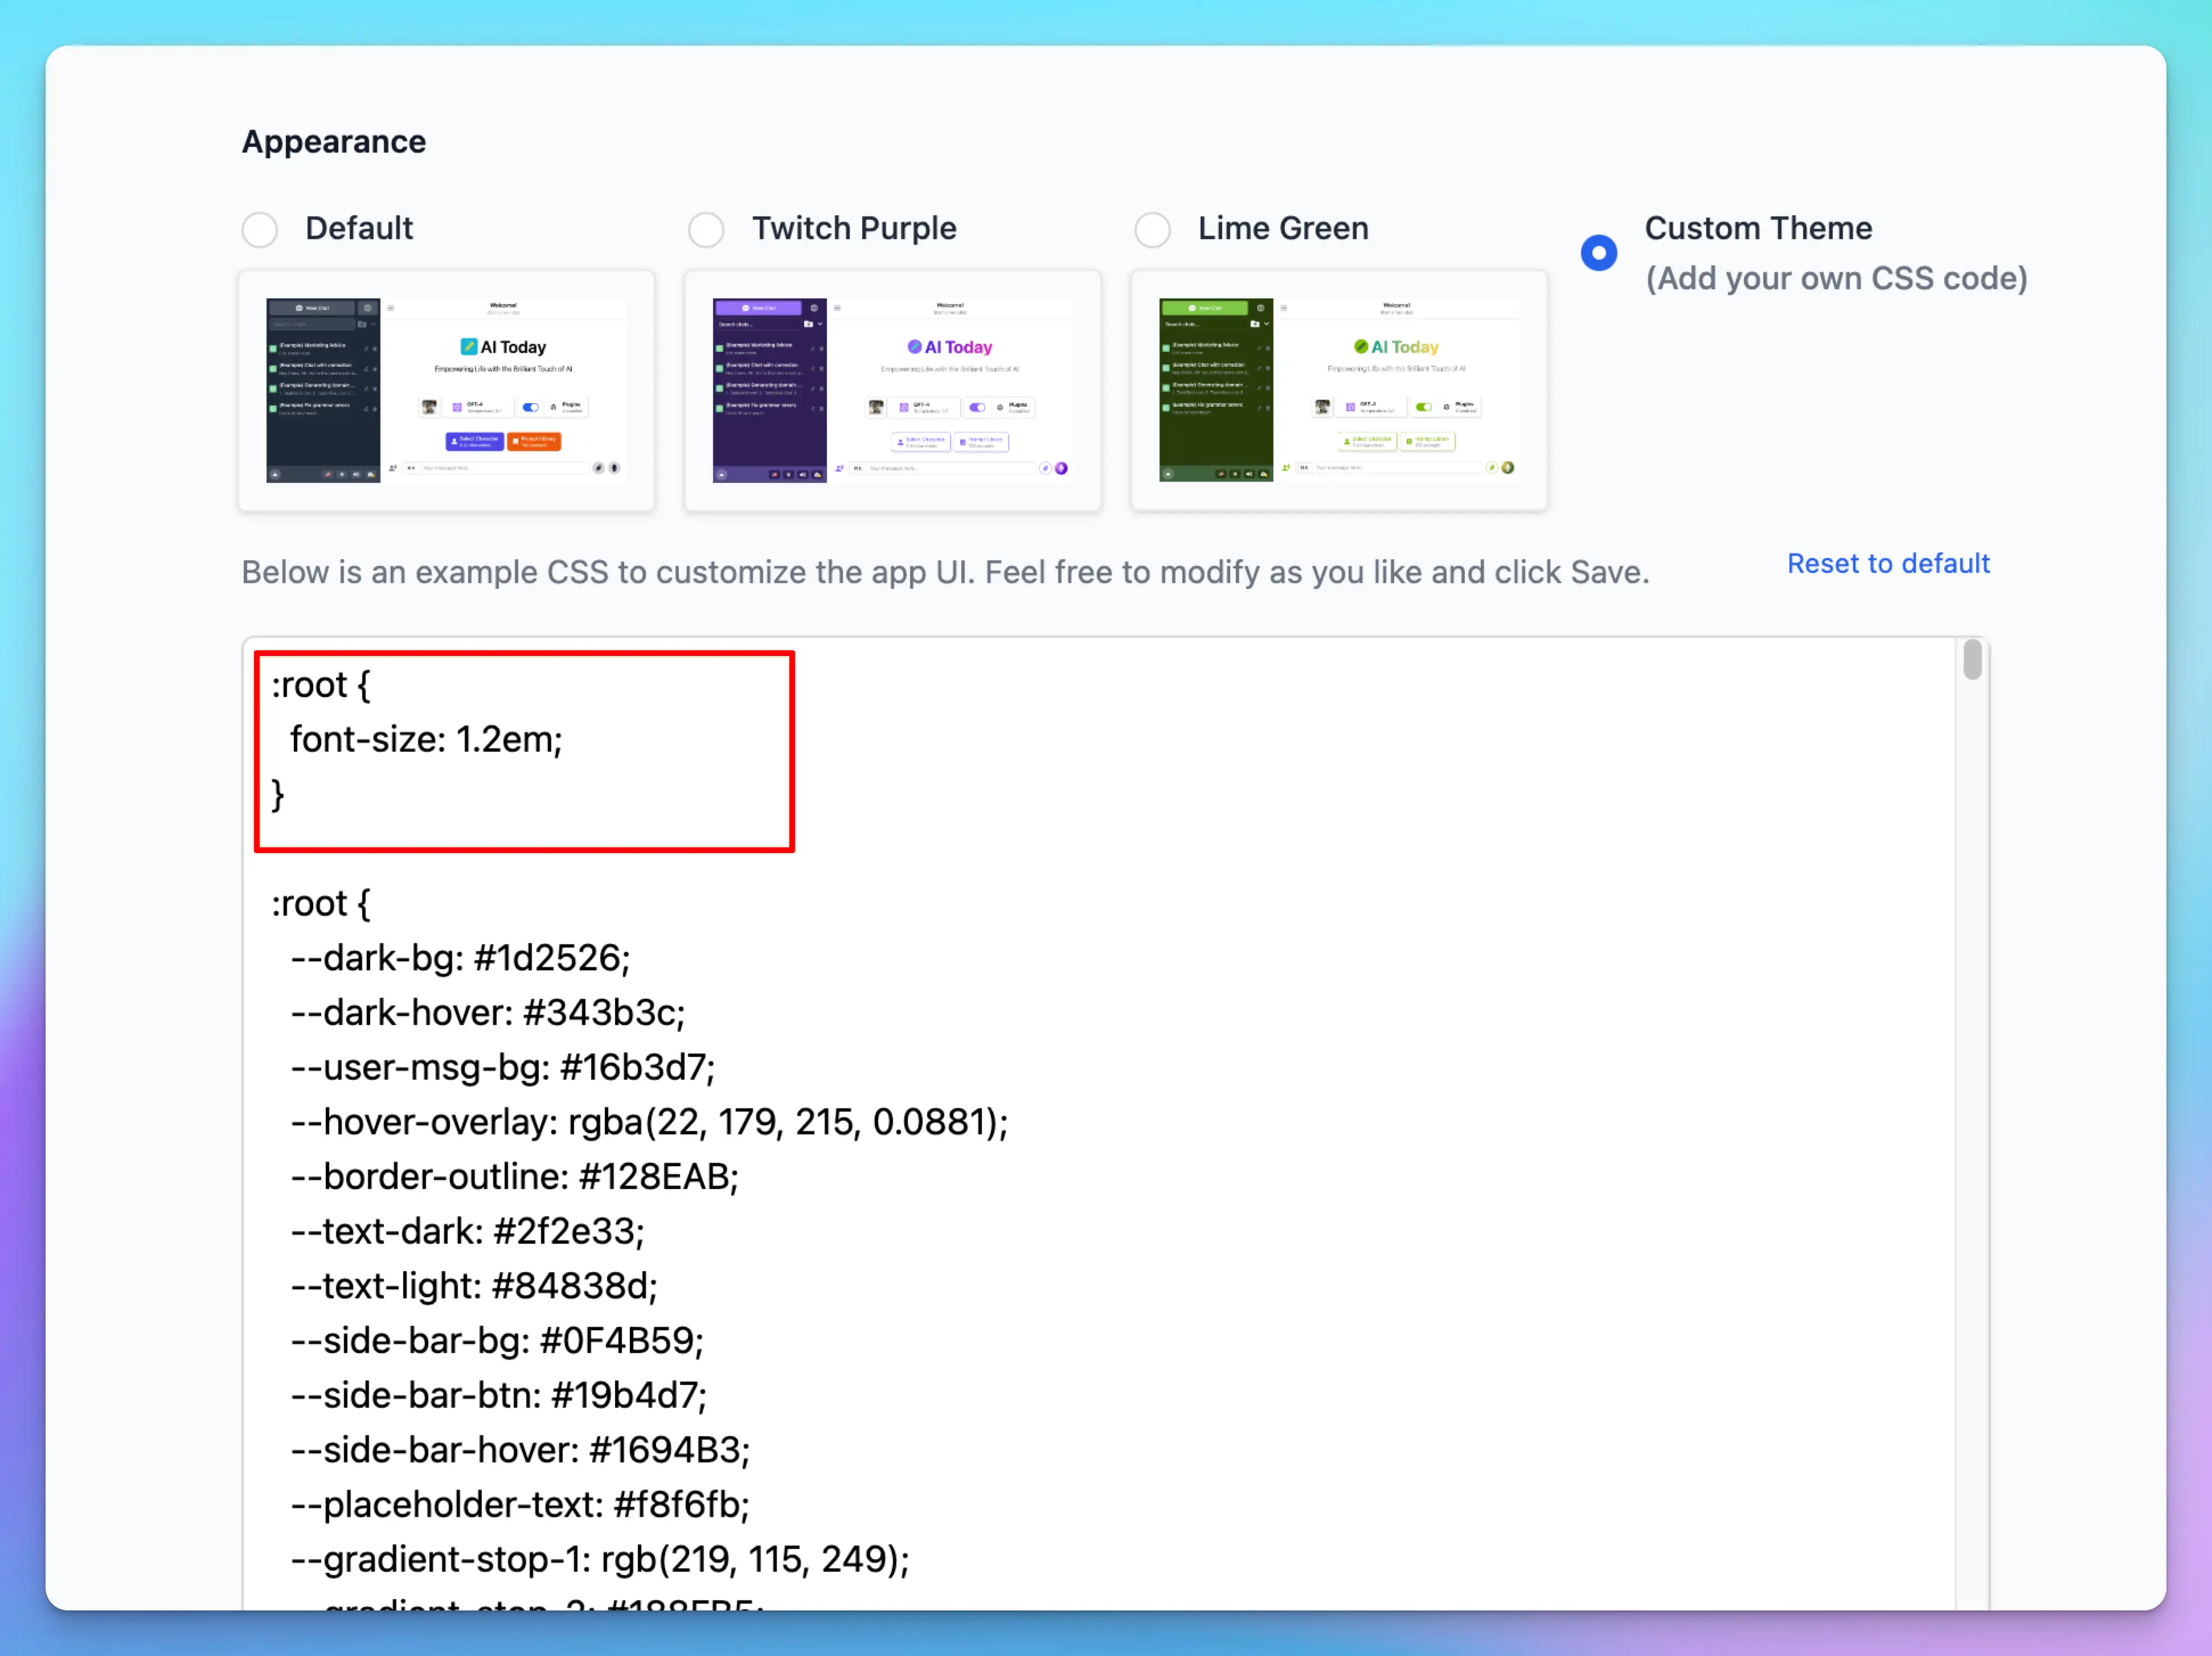 Or for only a specific element:
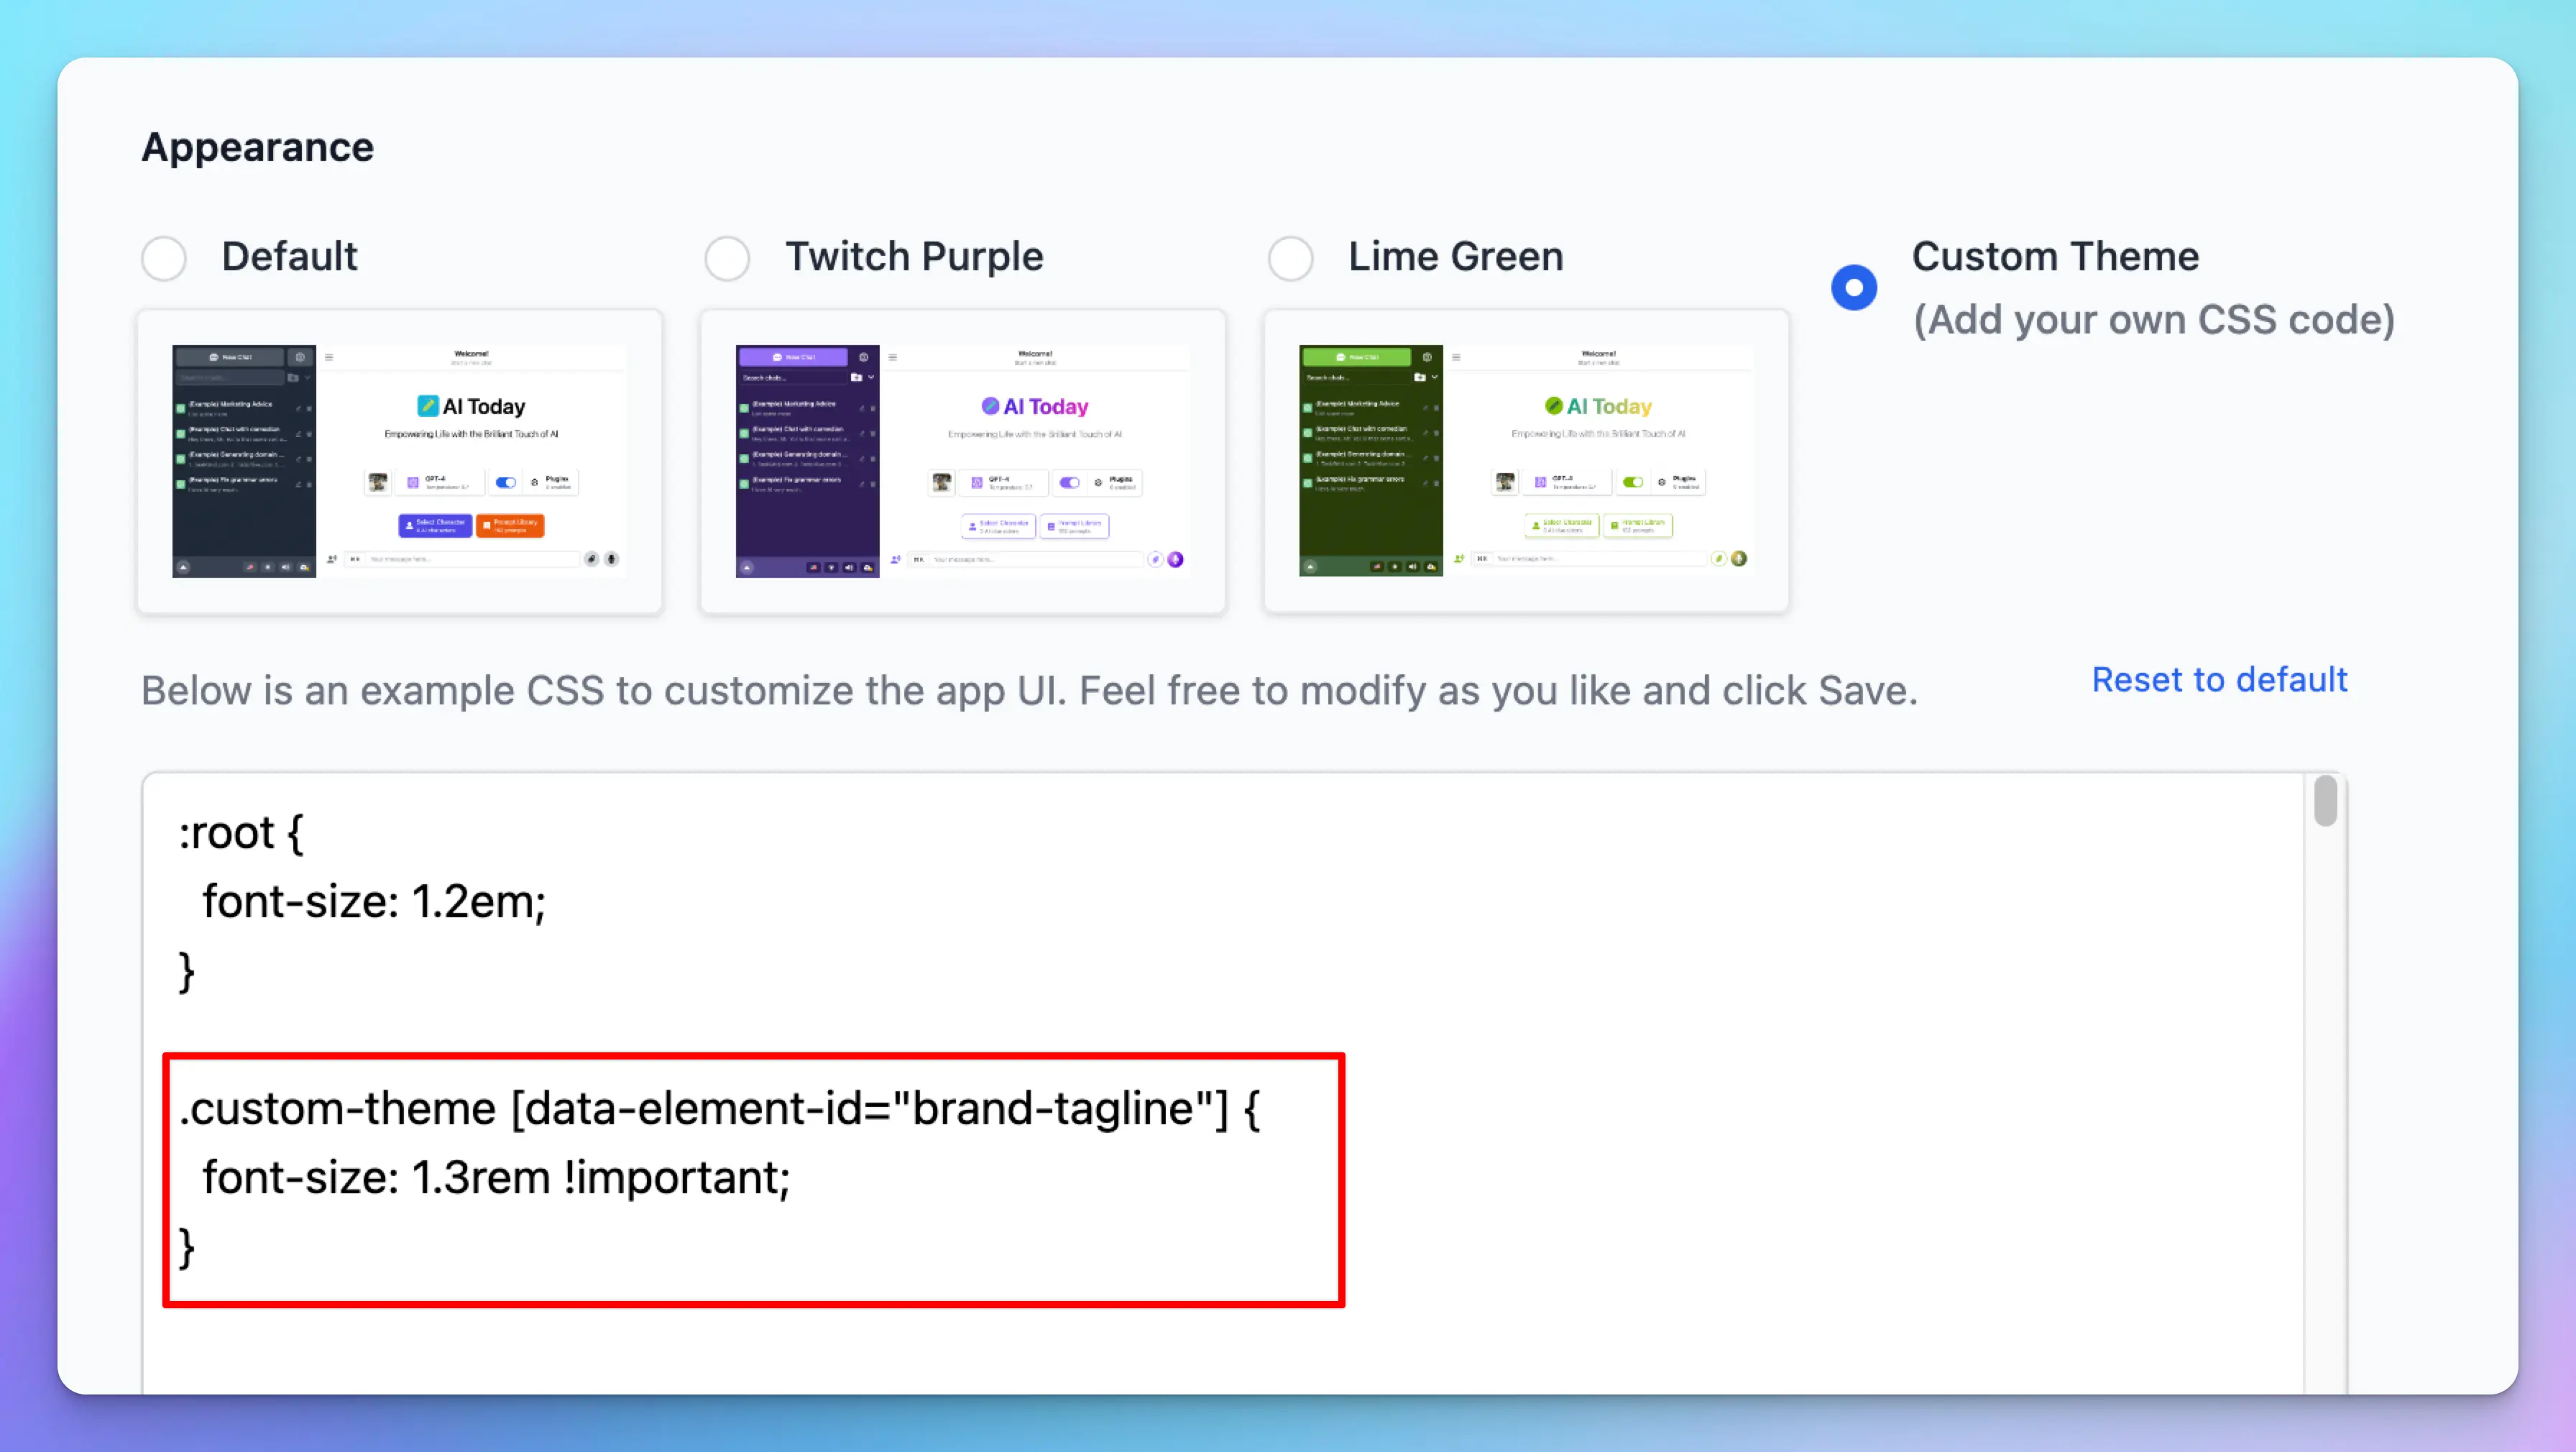
!important after the value.
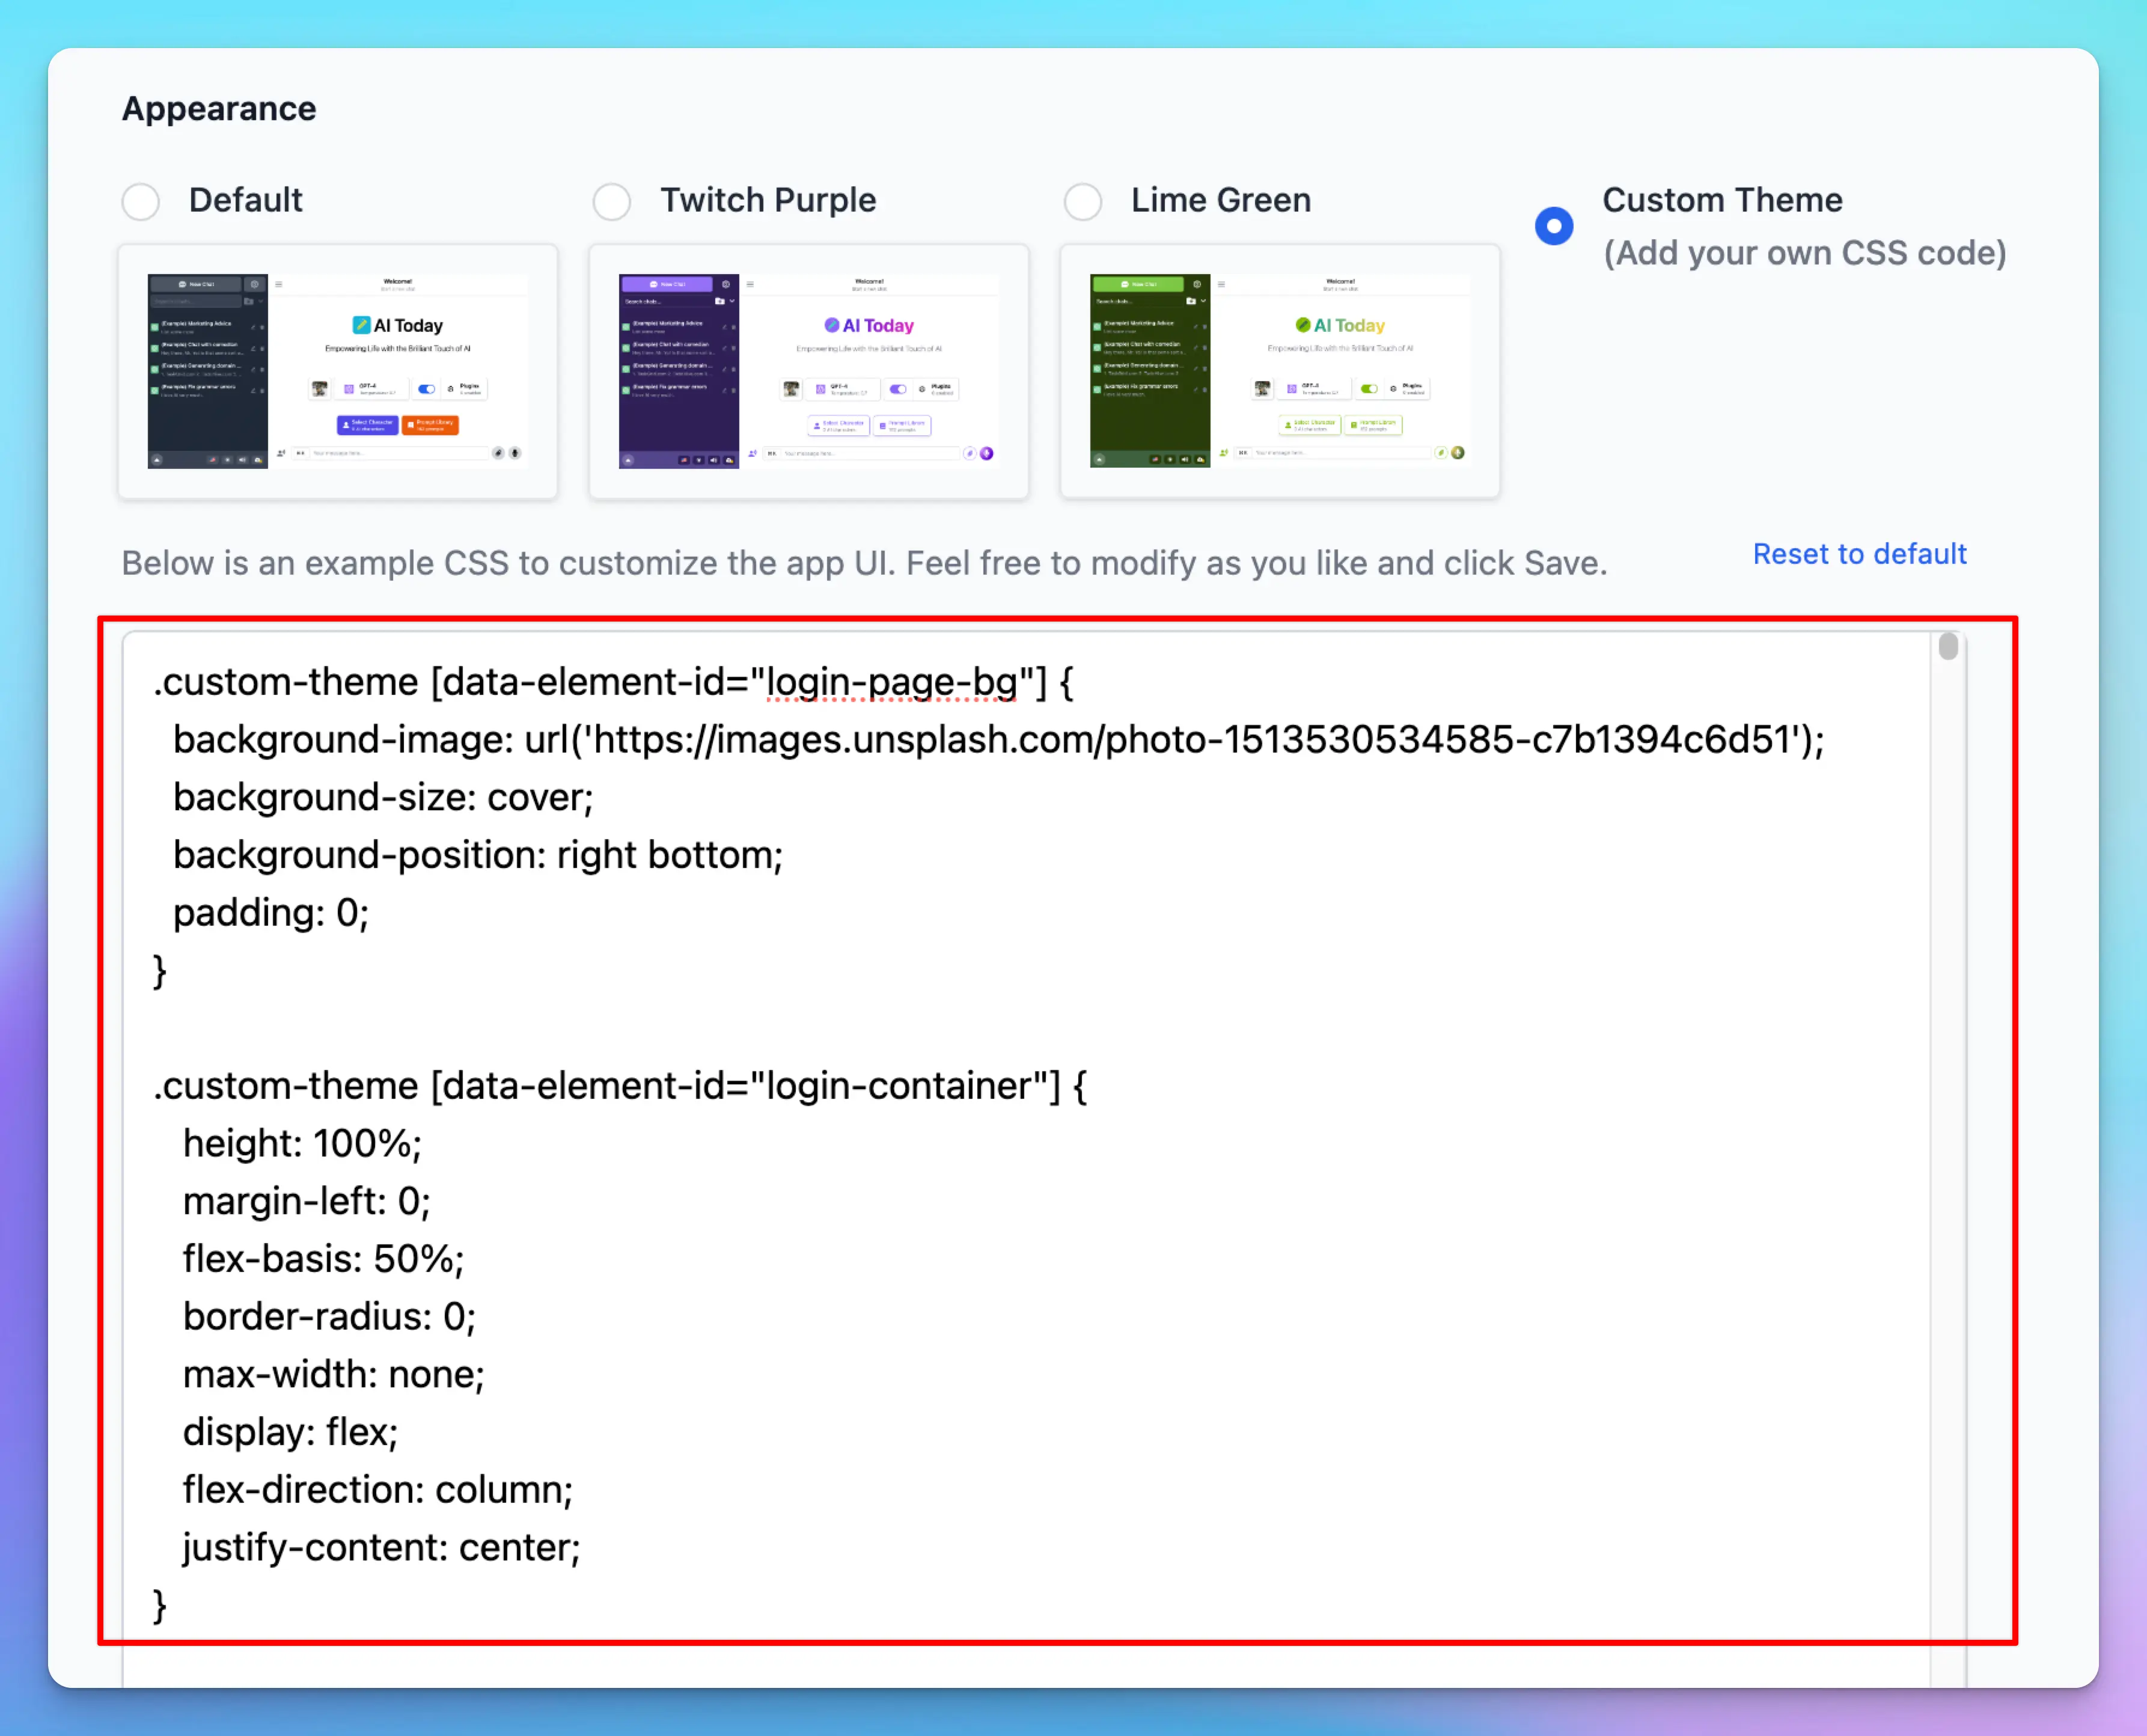
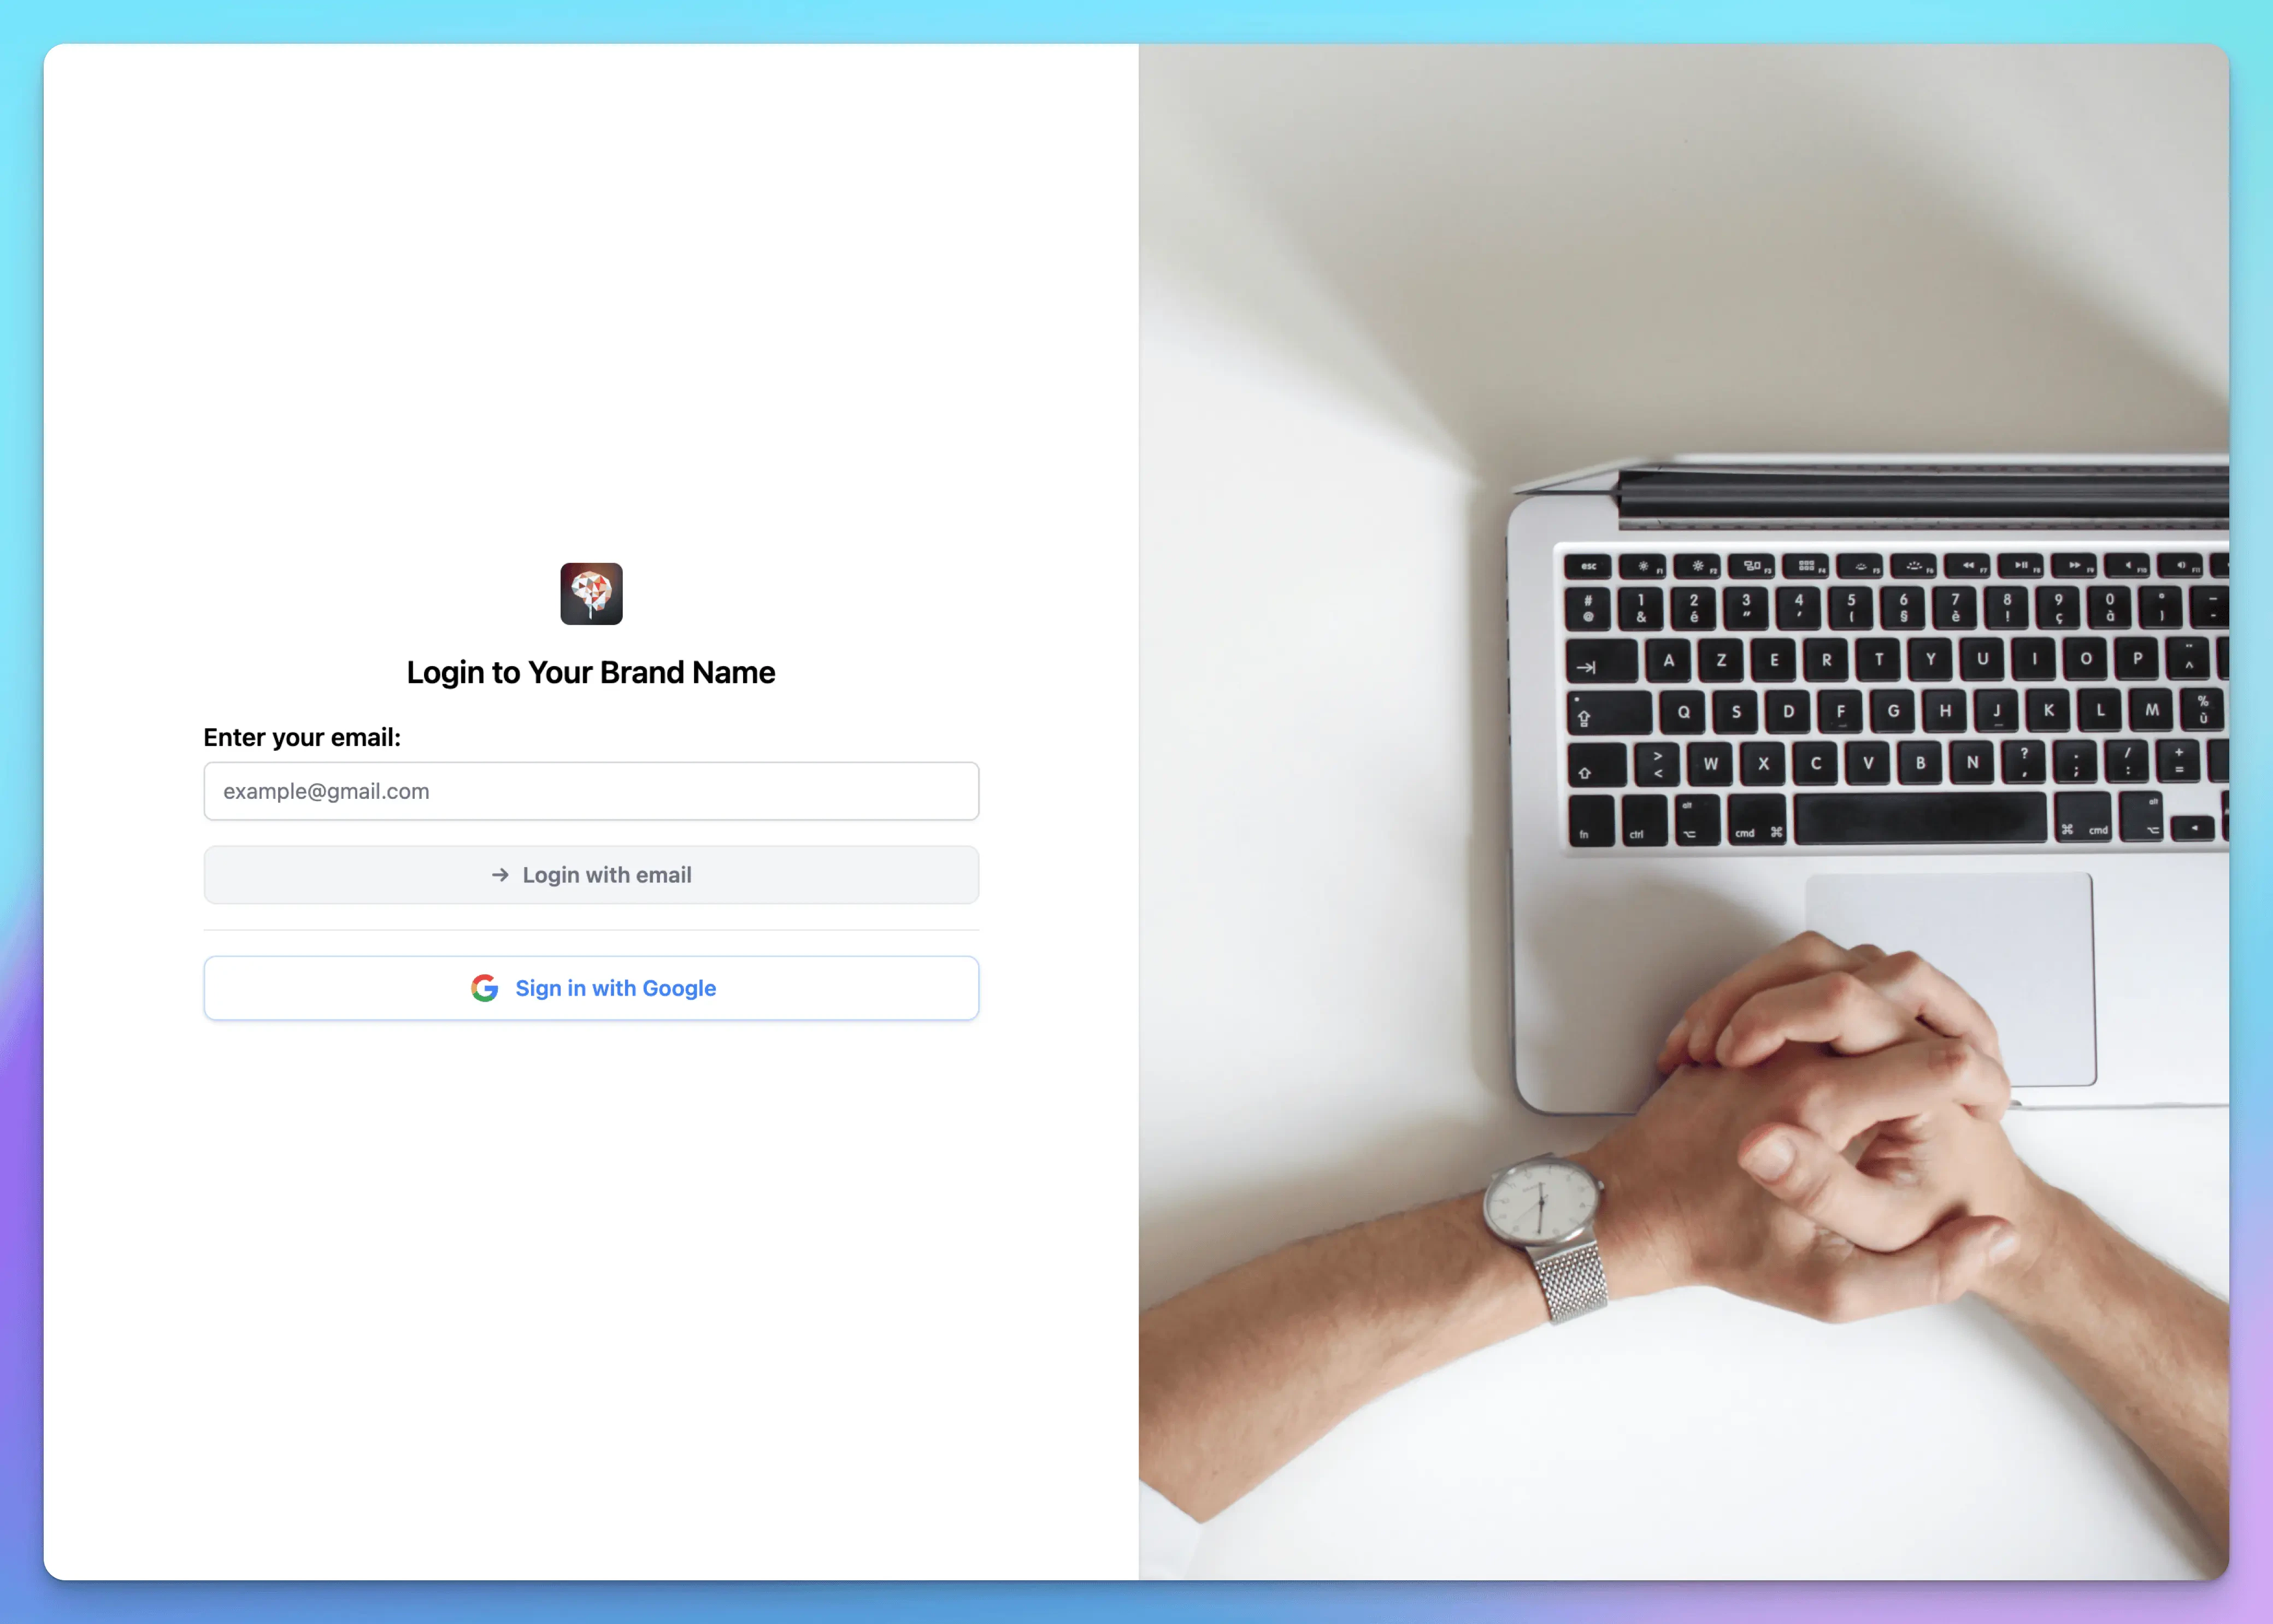
Adjust the background, size, etc., of the elements
You can change the background, size, and position of any elements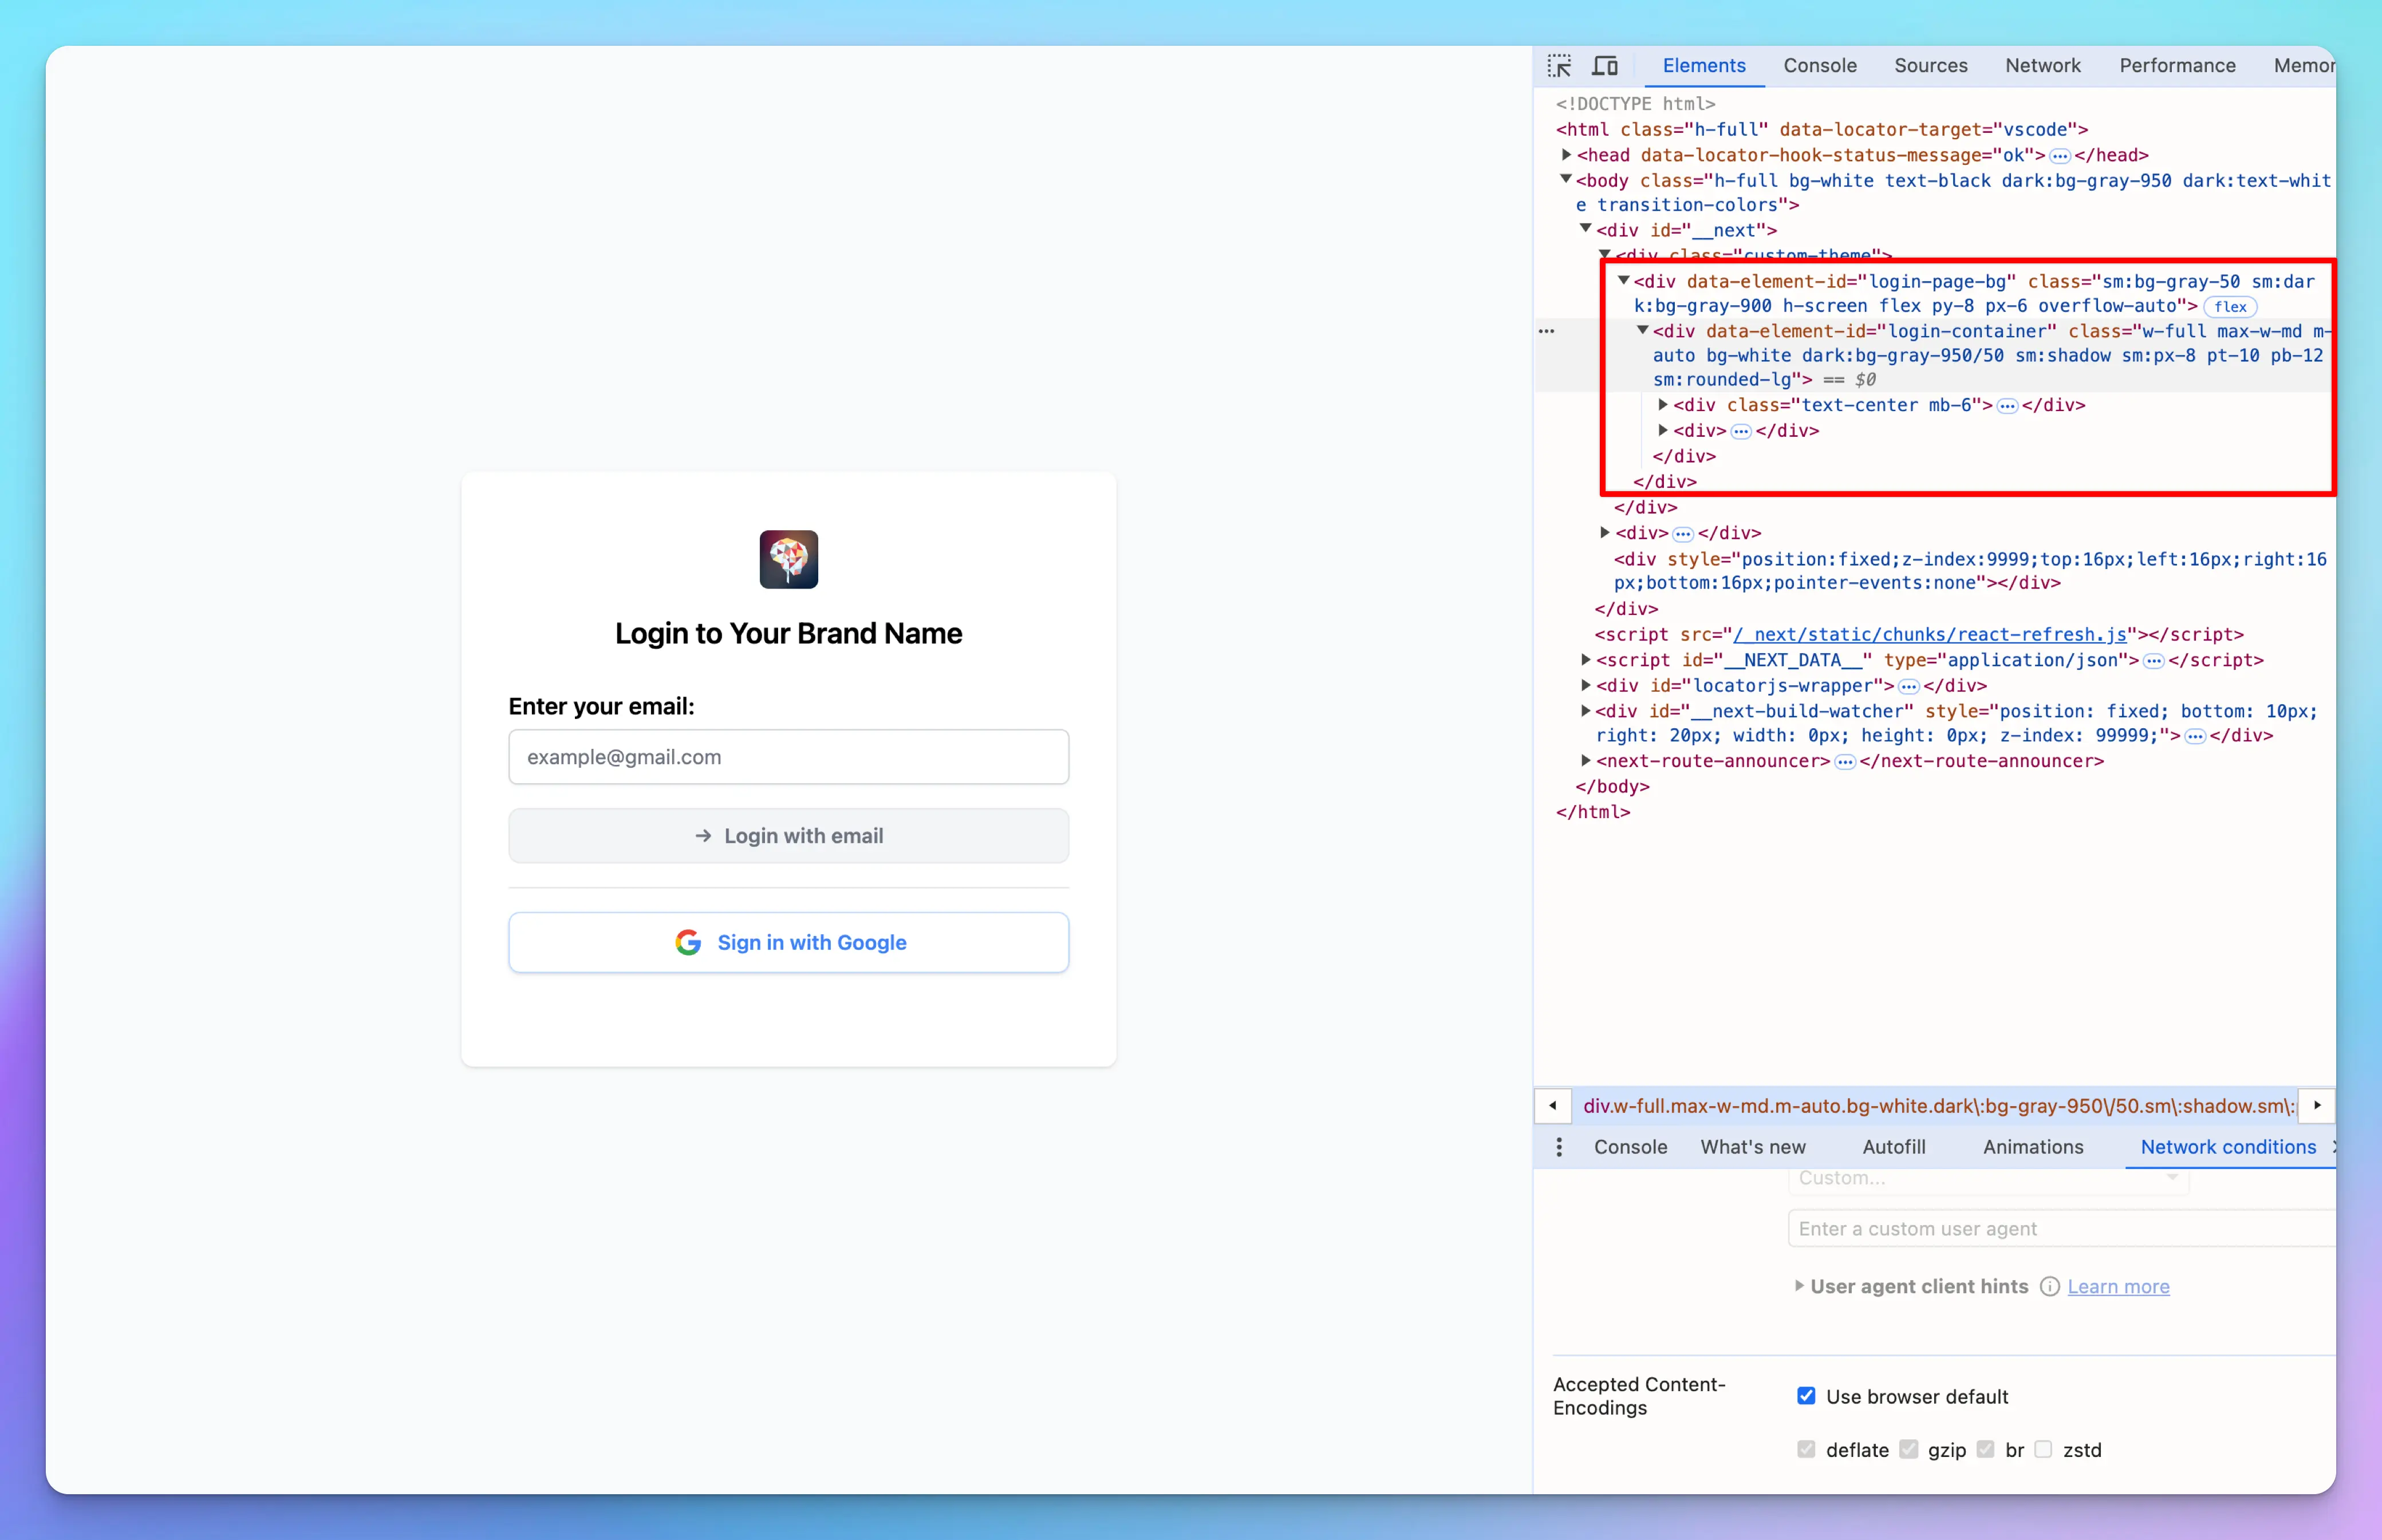
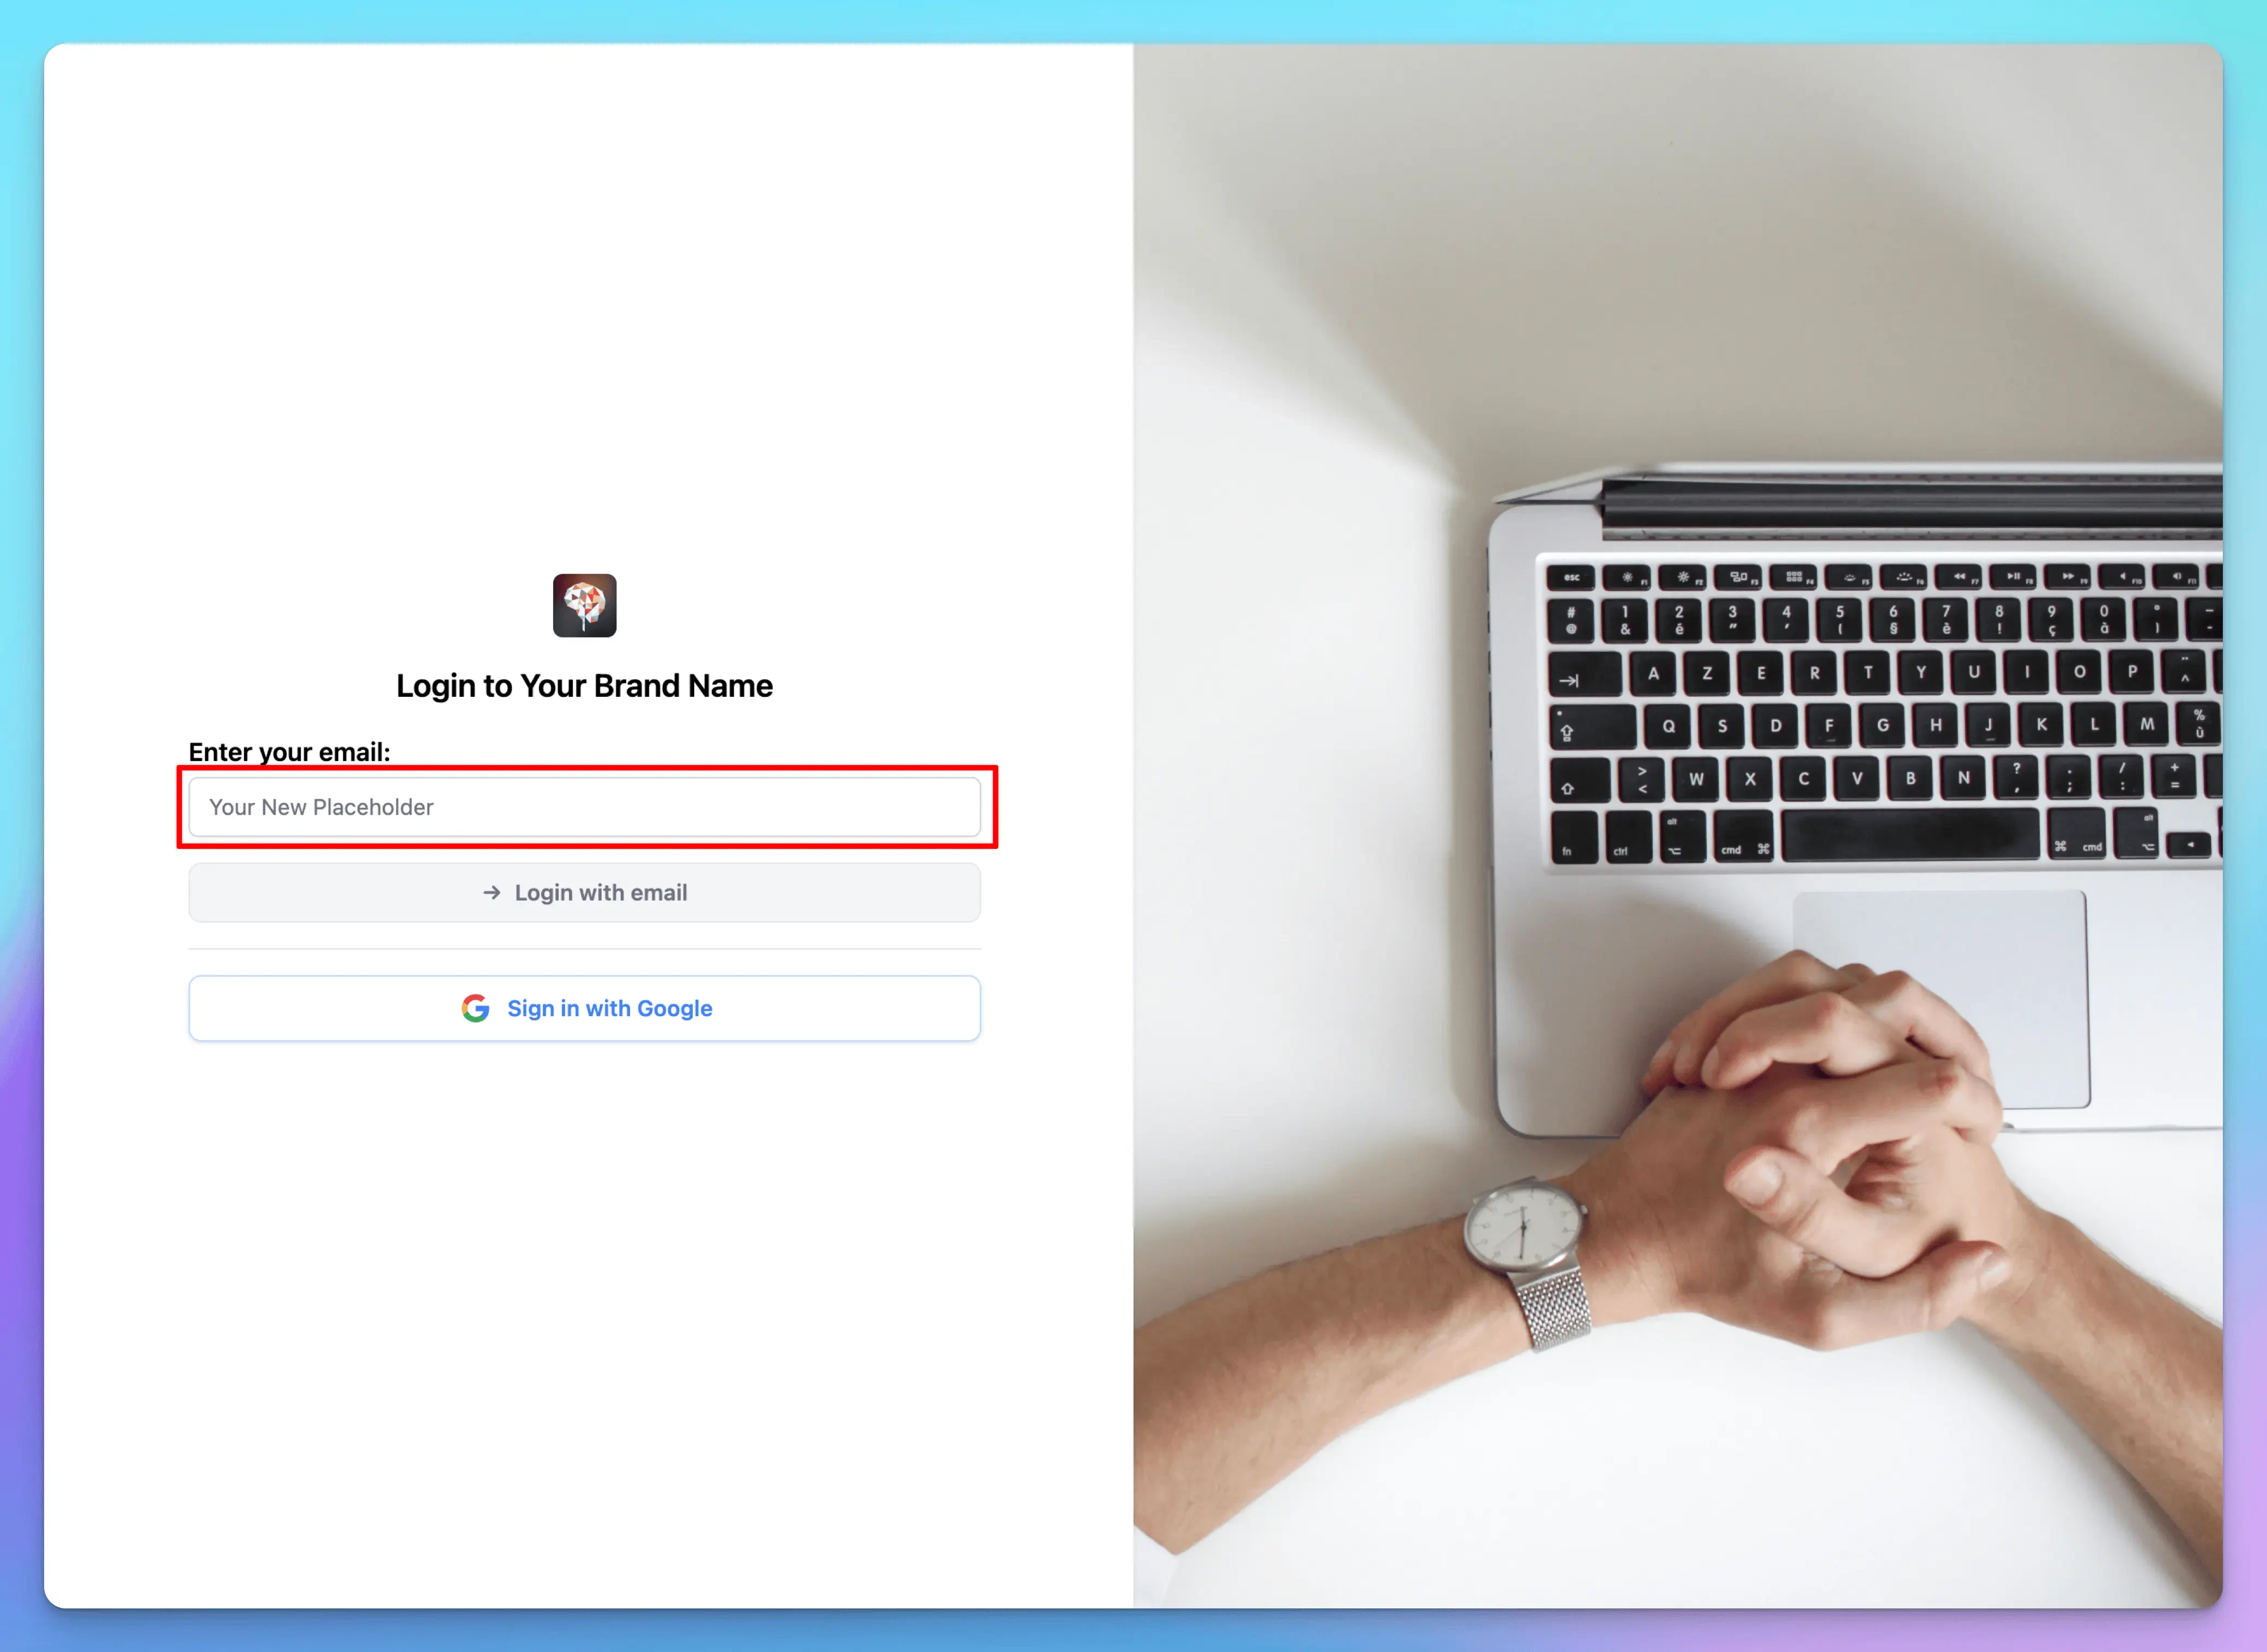
Change an element’s attribute
Suppose you want to update the email input placeholder on your login page to sayYour New Placeholder. You can accomplish this by adding a custom script to the Custom Code section.