
Directory Sync allows you to sync the user’s account from your identity providers (Okta, Azure, etc.) to TypingMind without having to manage the user account manually.
TypingMind supports the SCIM v2 protocol, which means you can connect TypingMind with any Identity providers that support SCIM v2.
Features:
- Provision new users
- Suspend users
- Update user profile (first name, last name, profile picture)
- Assign user to corresponding groups.
This article walks you through step by step on how to set up Directory Sync on Okta.
For other identity providers, the steps are mostly the same. Please check with your identity providers if you need help set up SCIM v2 for your account.
Enable Directory Sync on TypingMind
Go to your Admin Panel → User Management → User Authentication → Directory Sync
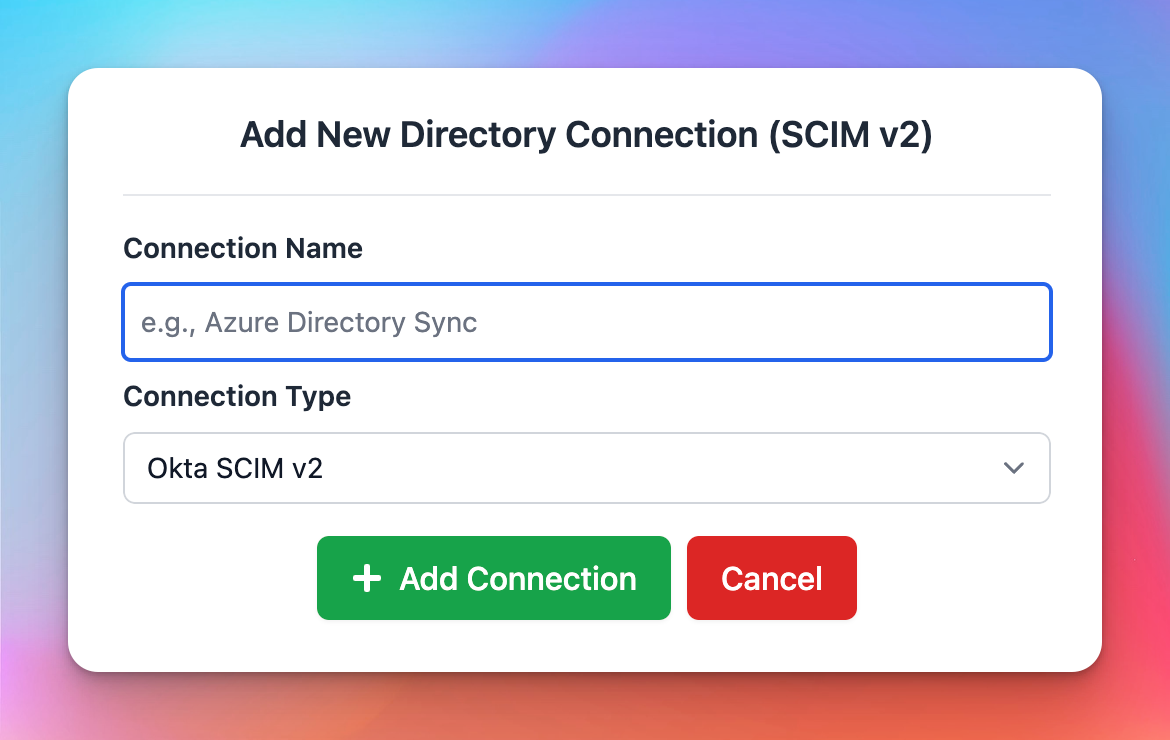
Enable Directory Sync, then click Add New Directory Connection.

Set a name and type for your connection. Currently we support the following types:
- Okta
- Azure
- OneLogin
- JumpCloud
- Generic SCIM v2 (this apply to all other identity providers with SCIM v2 support)
Then click “Add connection”
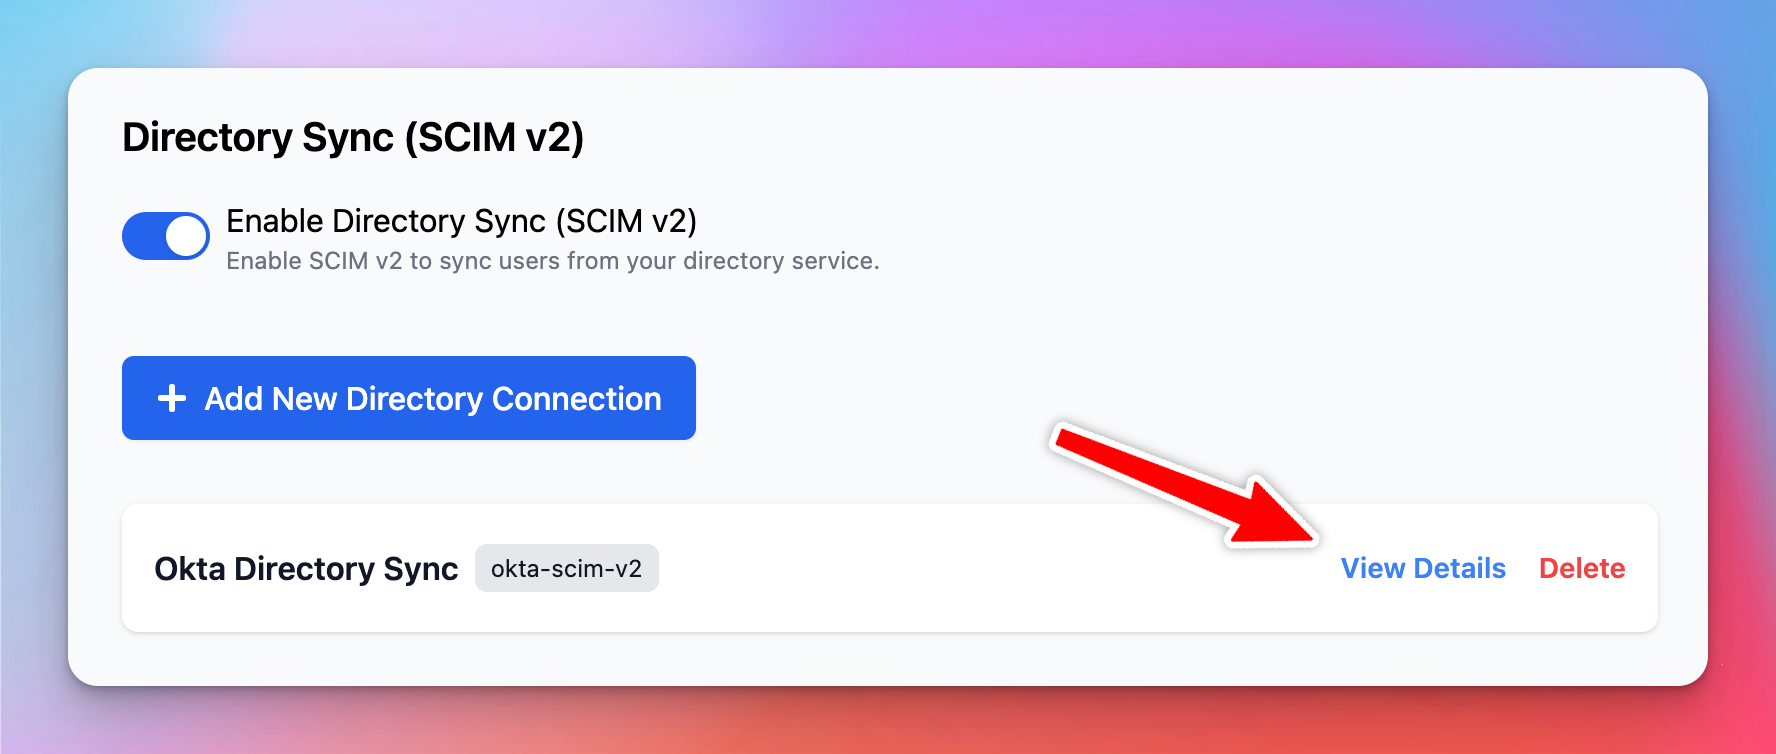
Once the connection is created, click “View Details”.
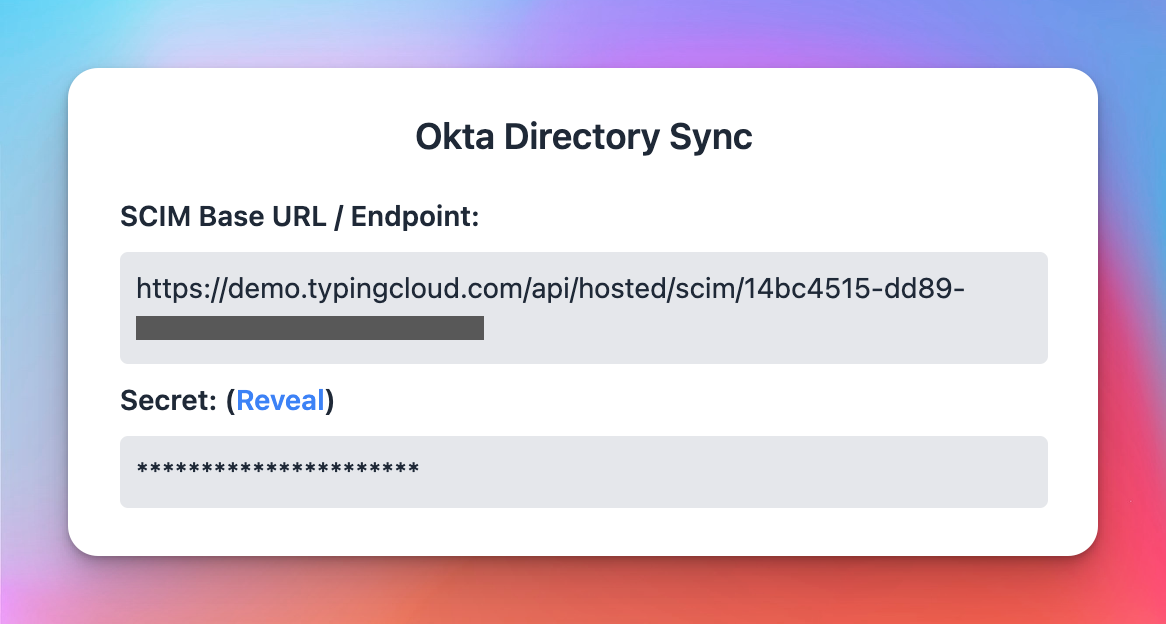
Then take note of the SCIM base URL and the Secret. You will need this at a later step.
Setup Directory Sync on Okta
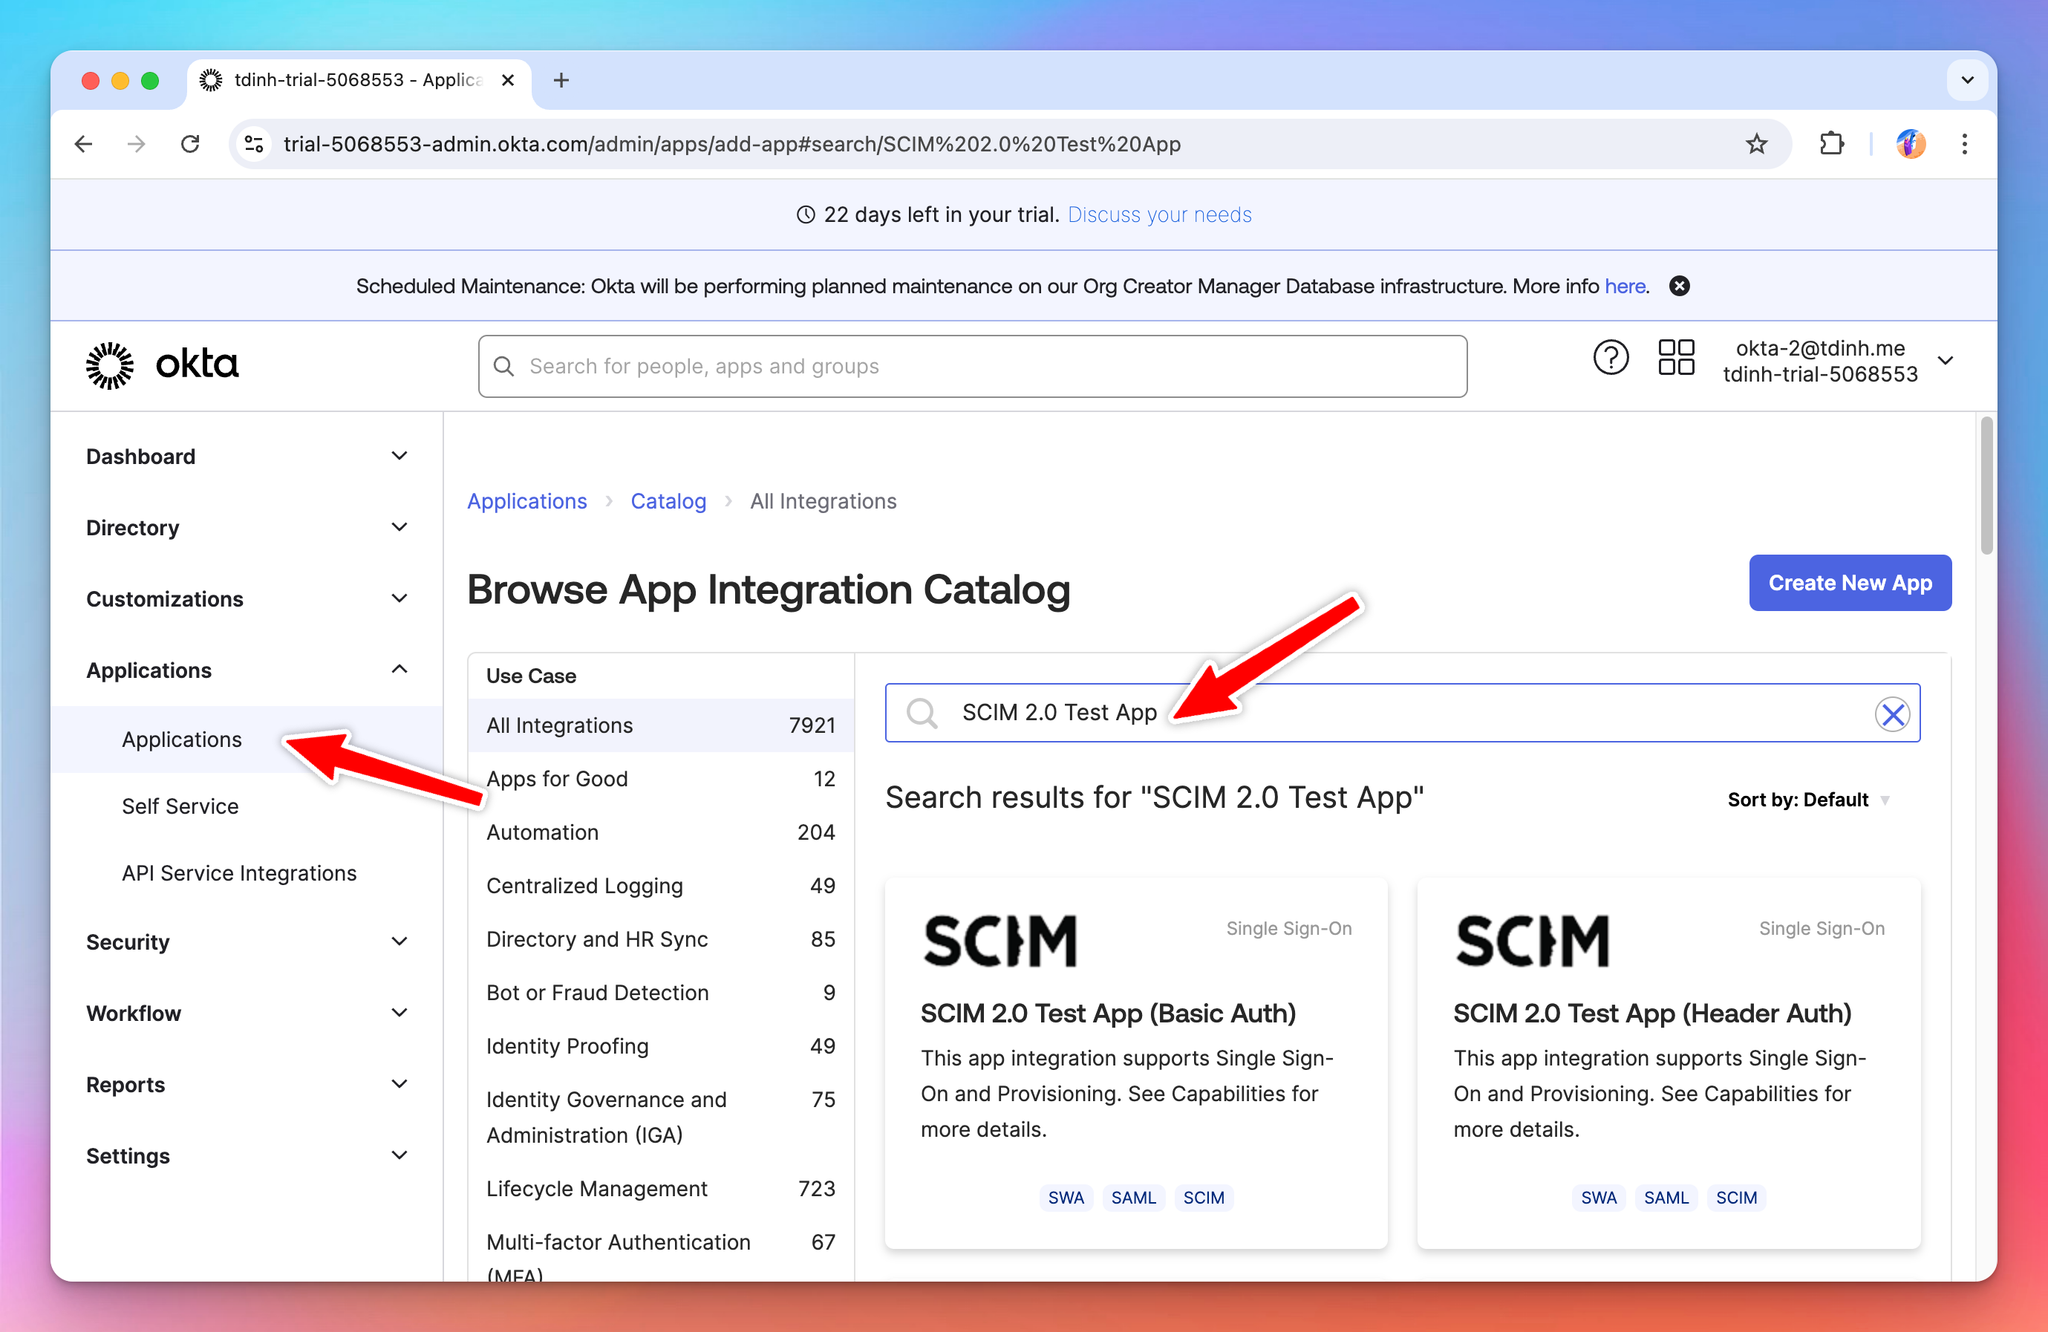
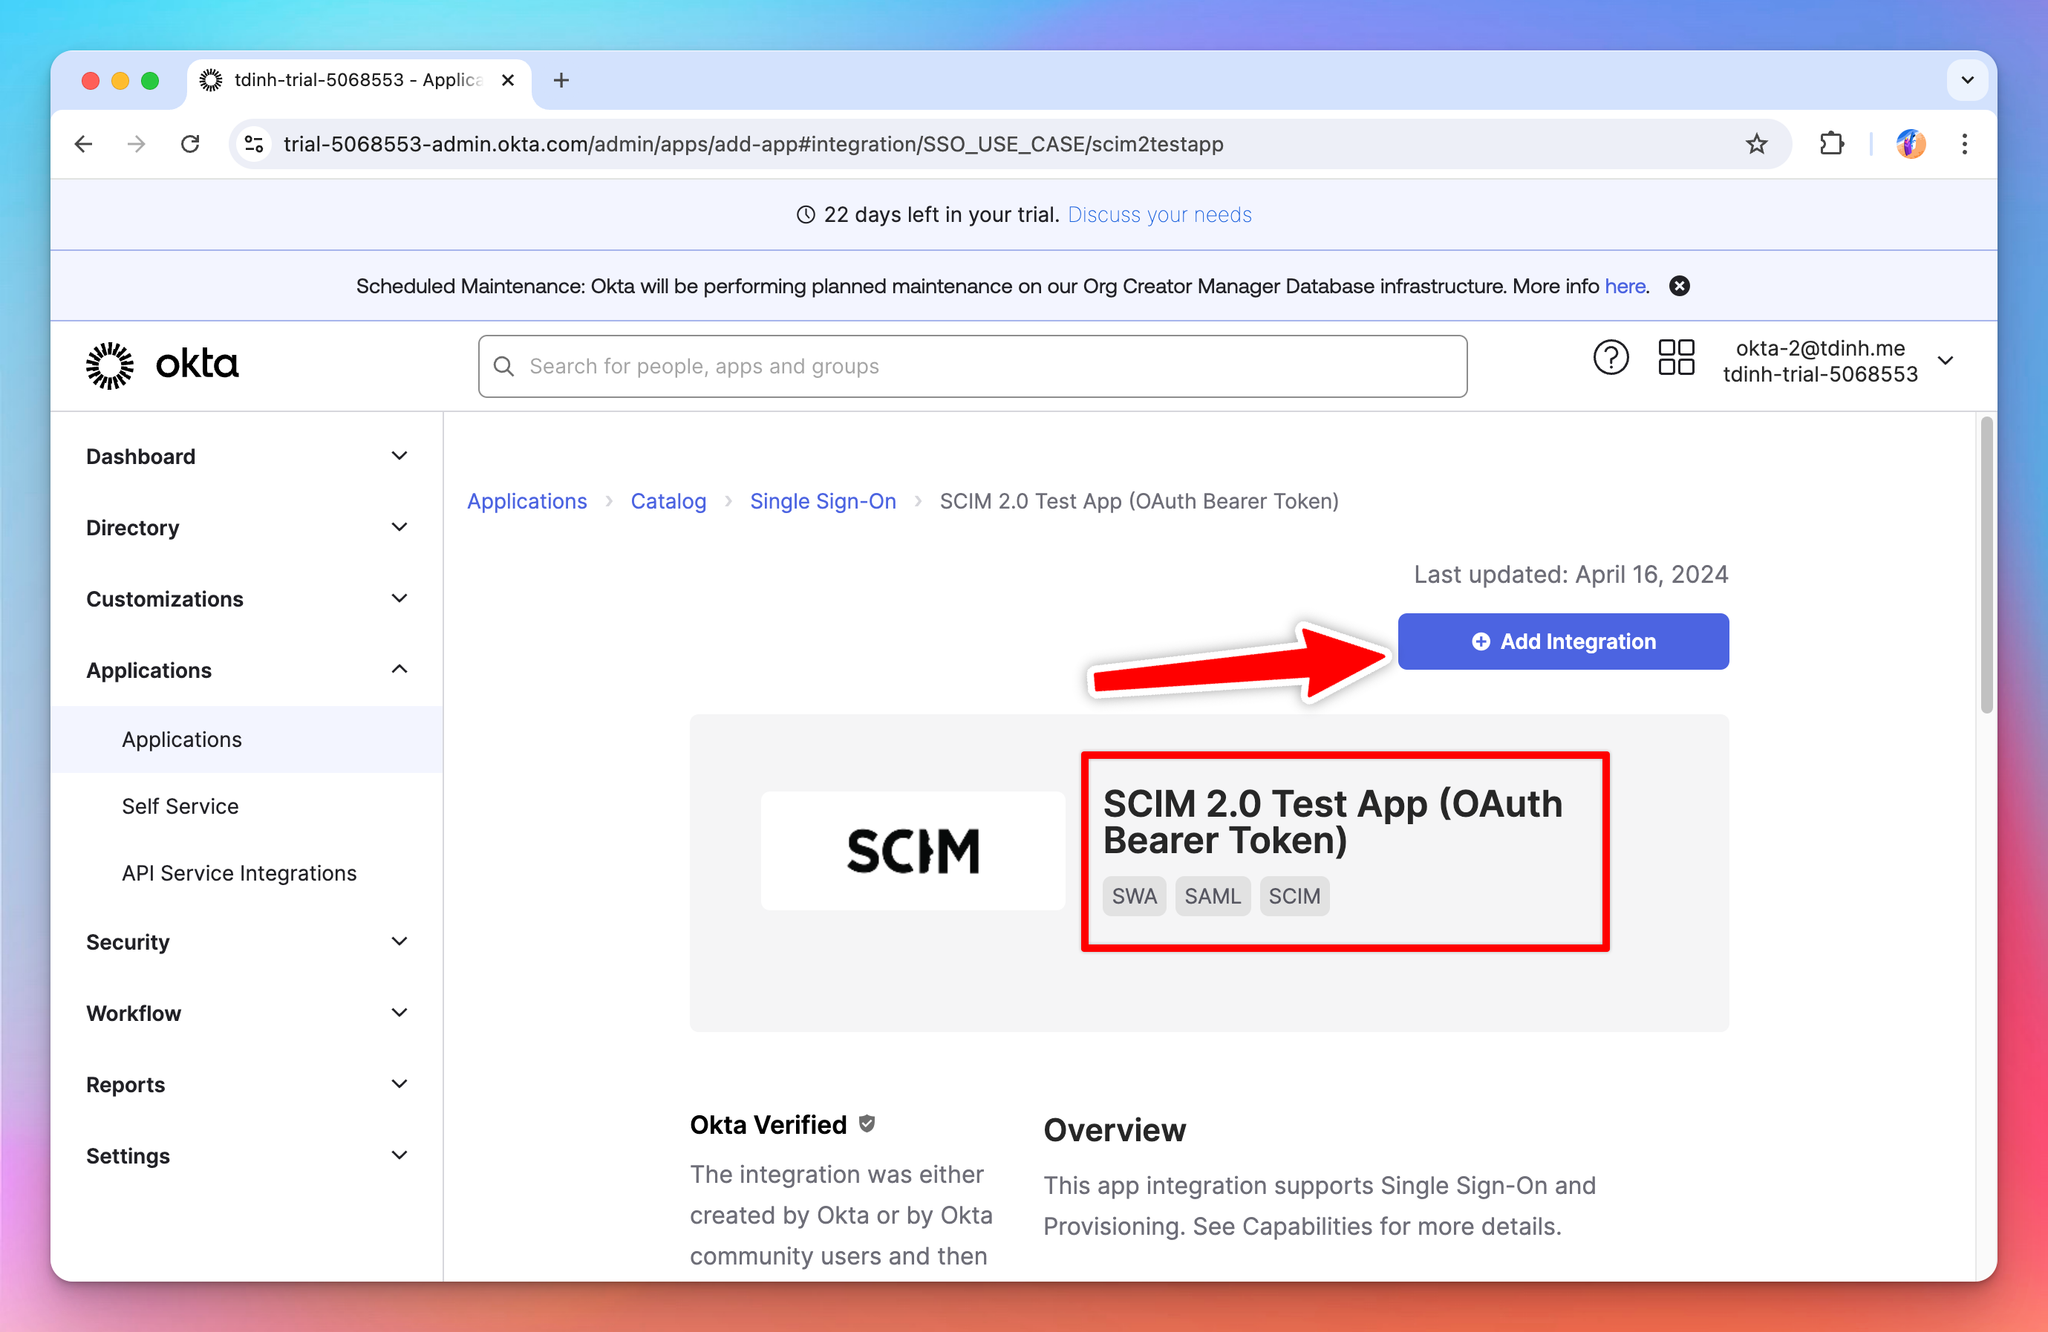
From your Okta admin panel, navigate to “Applications” page, then search for “SCIM 2.0 Test App”.
The “SCIM 2.0 Test App” on Okta is a template app that have some default config to make the setup process faster. If you already have set up TypingMind app in your Okta previously (for SSO), you can skip this step.
Select “SCIM 2.0 Test App (OAuth Bearer Token)” from the list, then click “Add integration”.
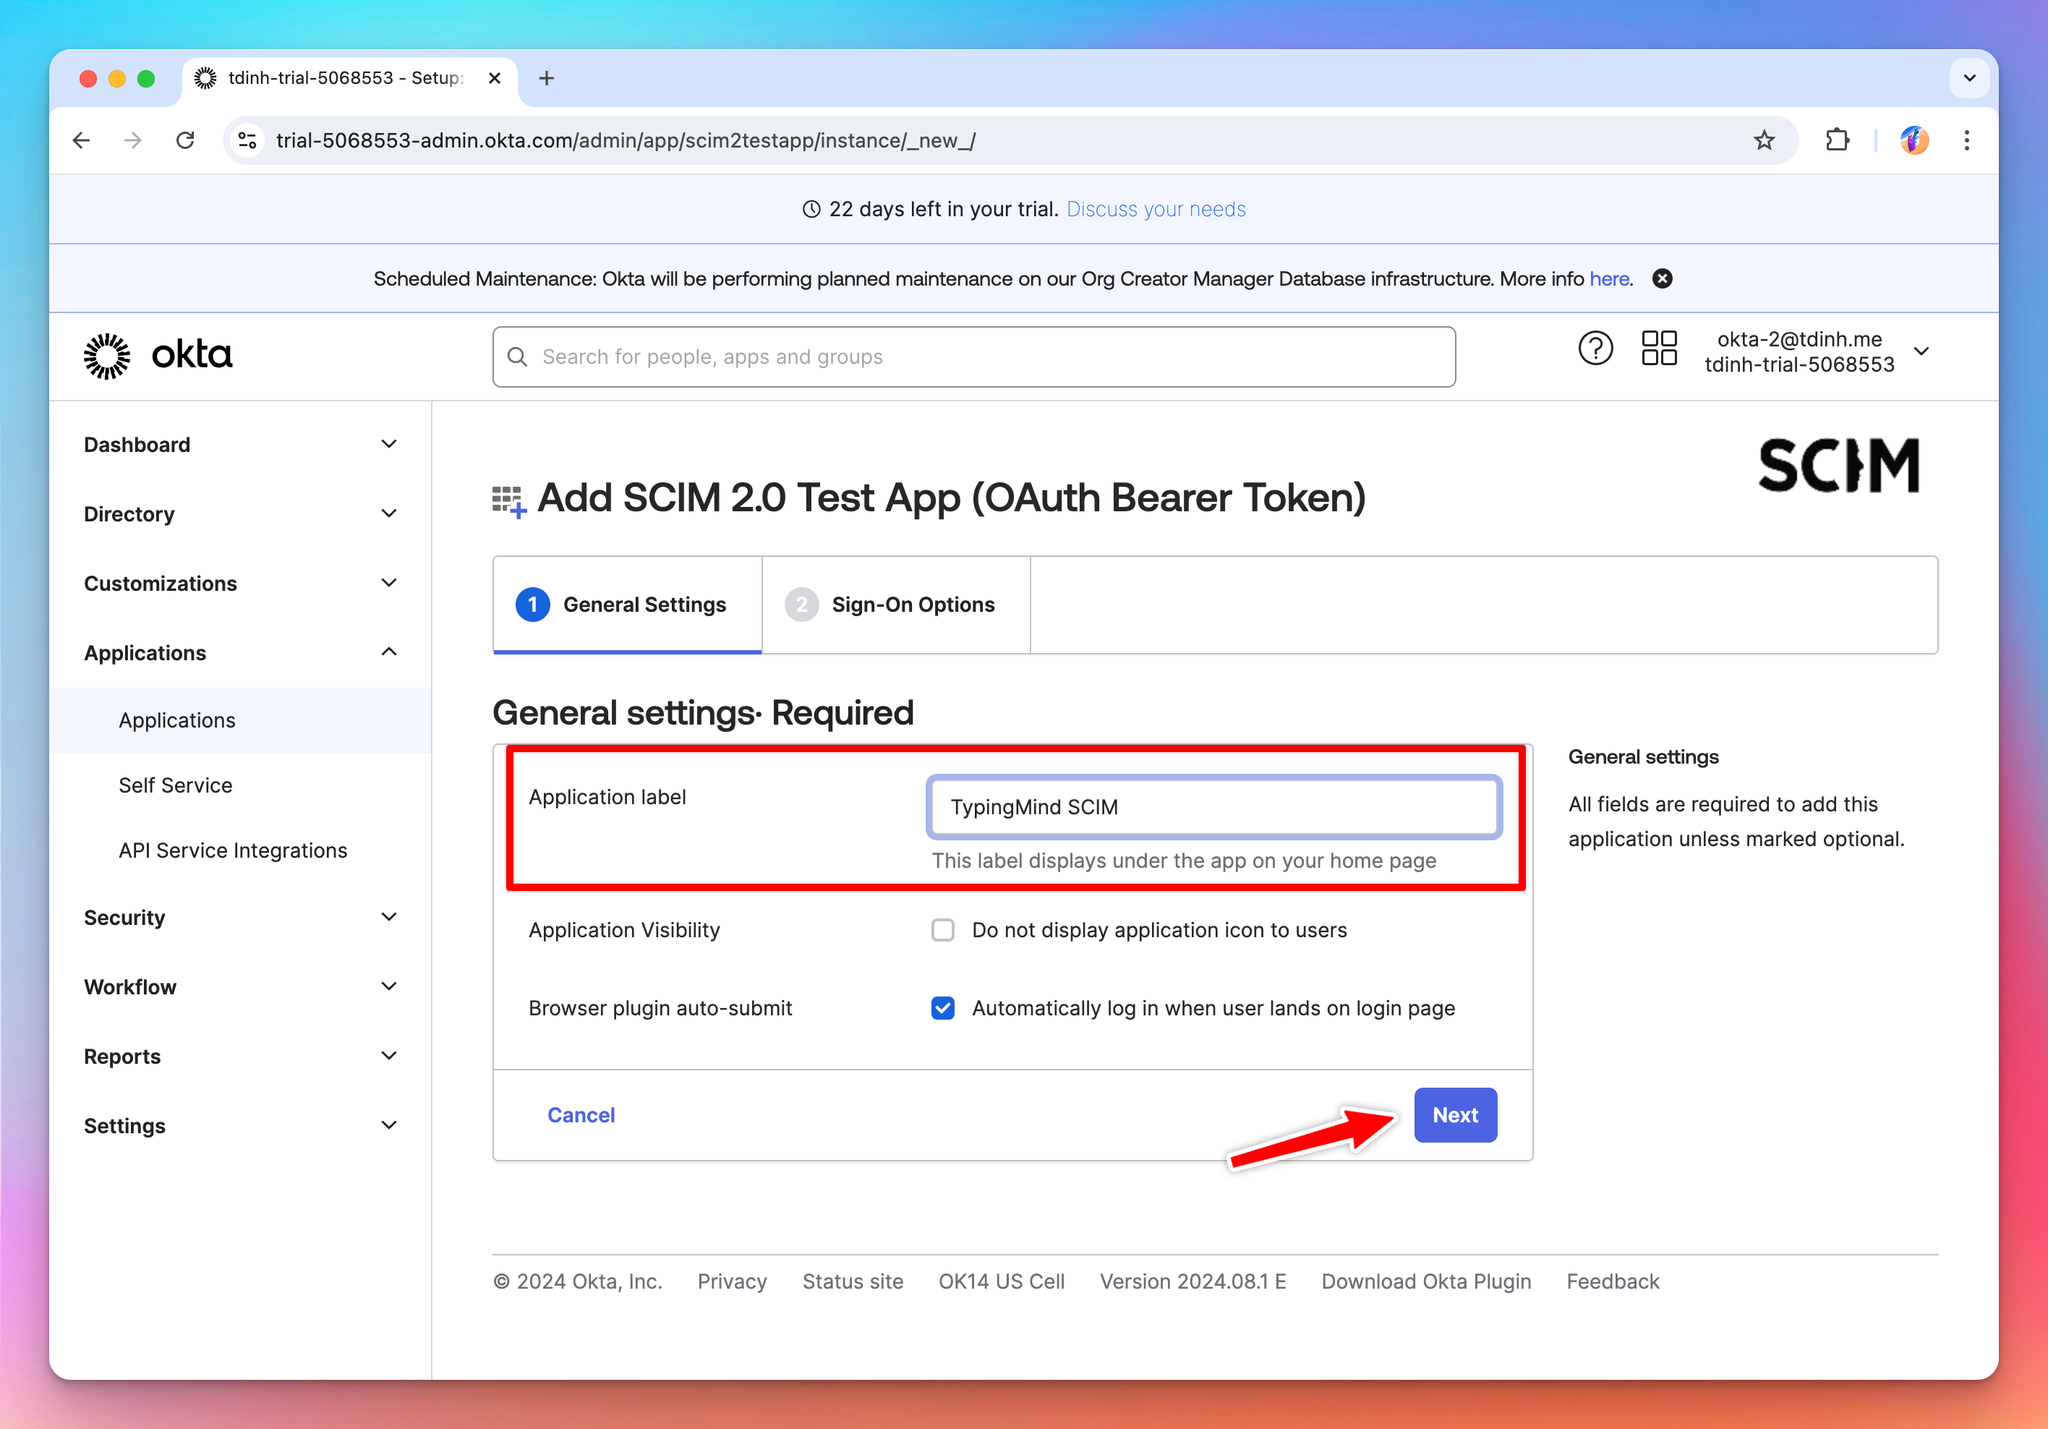
Set the application name to “TypingMind”, then click “Next”
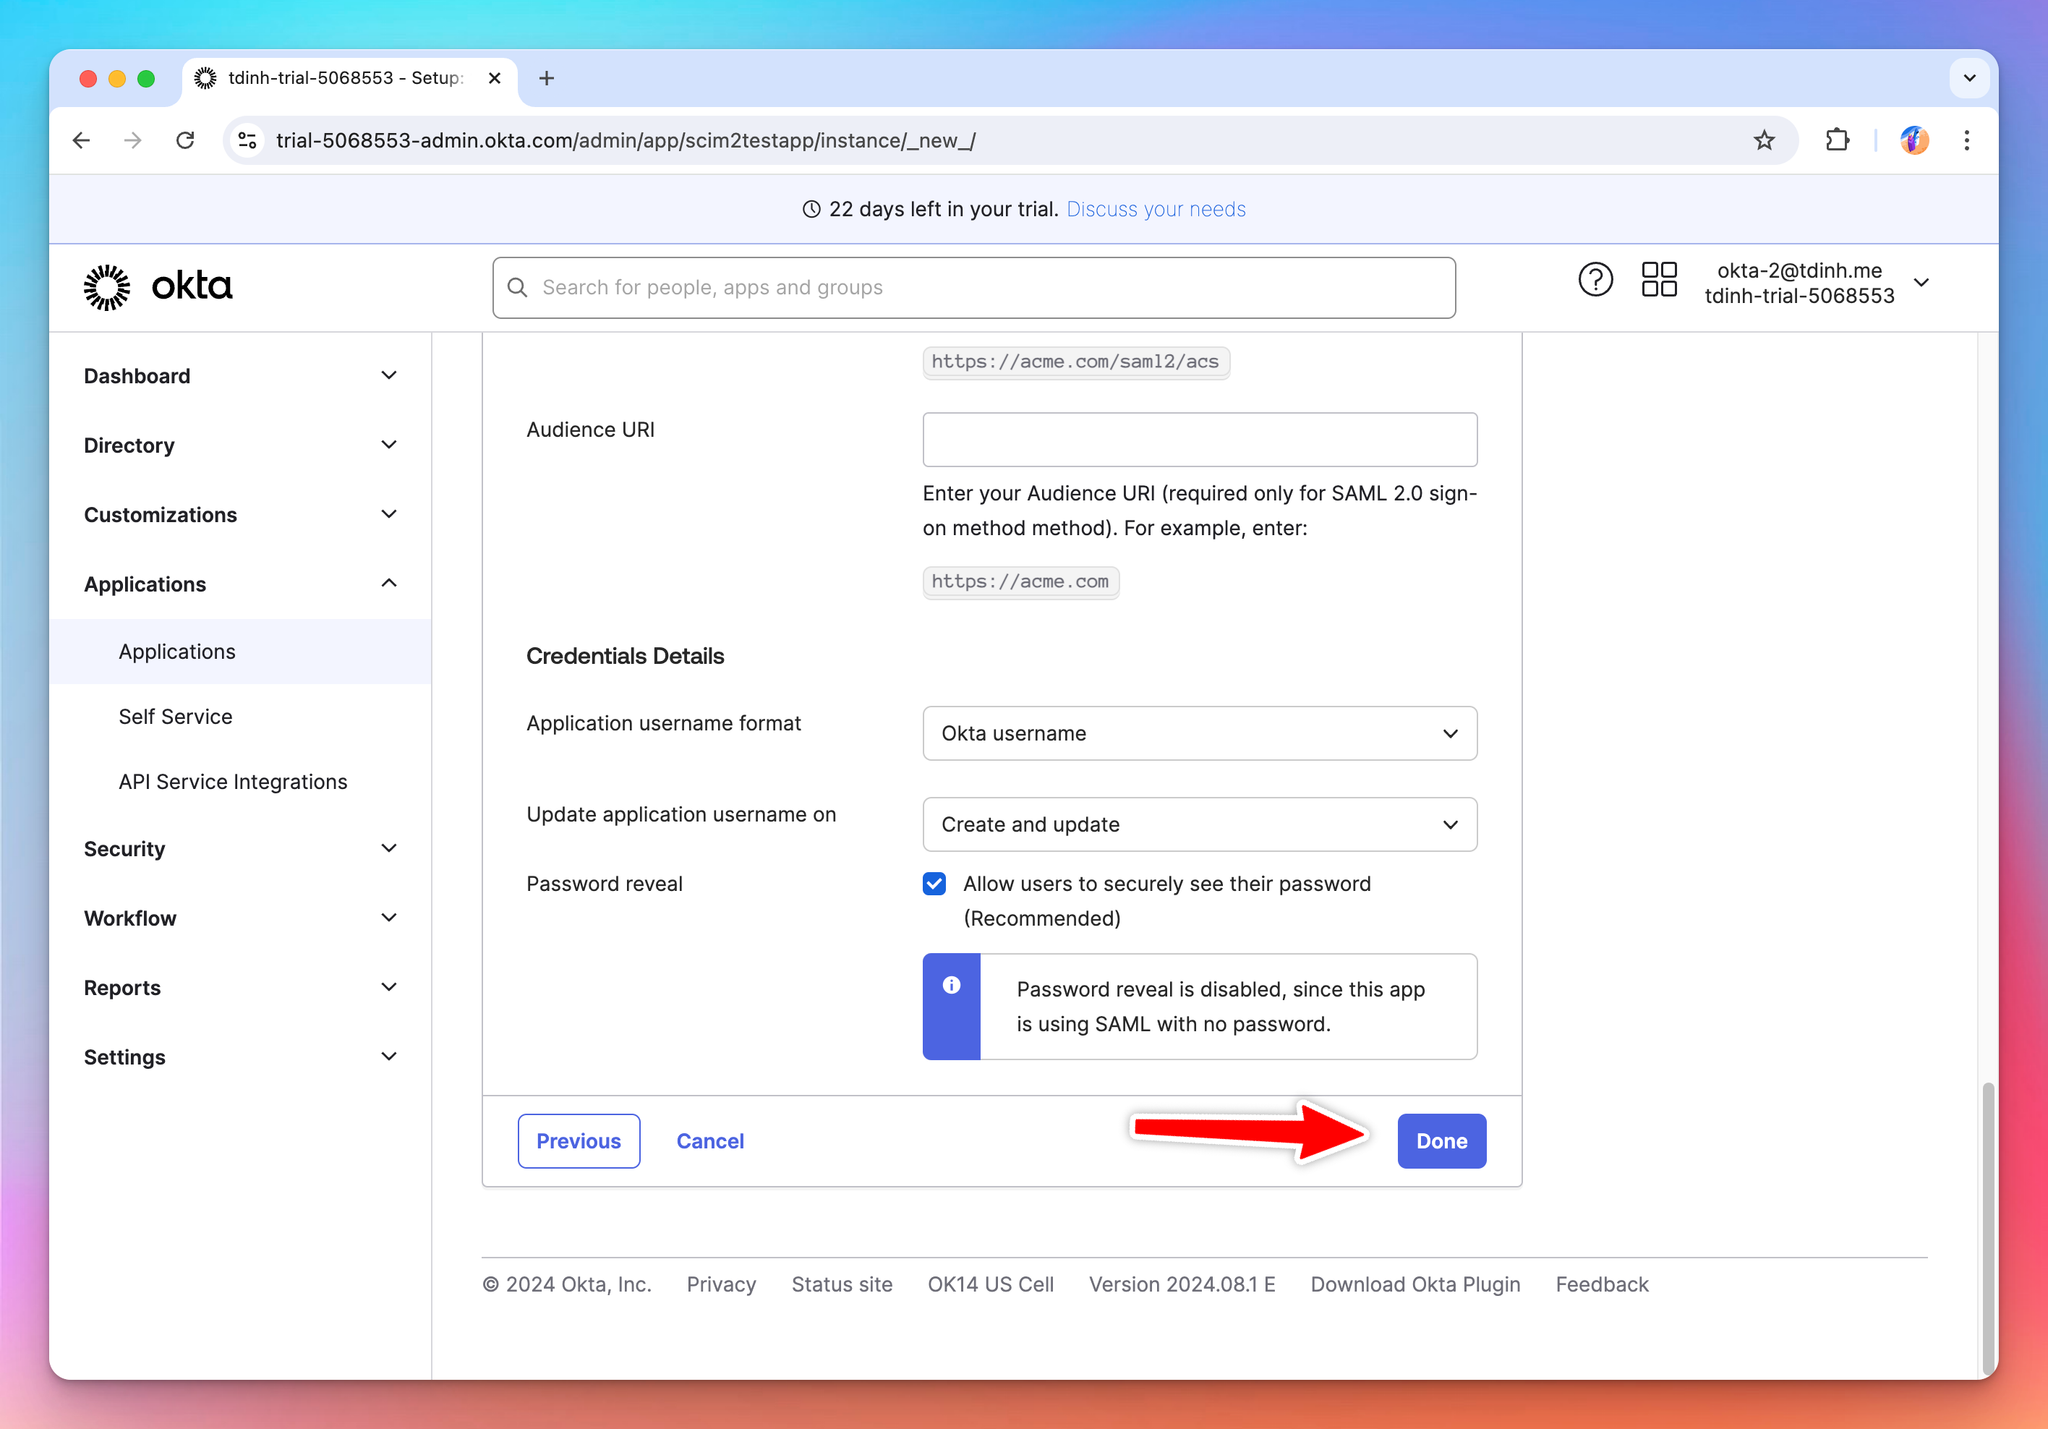
In the “Sign-on Options” screen, you can skip this for now and click “Done” at the end of the page.
Read our document on how to enable Single Sign-on (SSO)
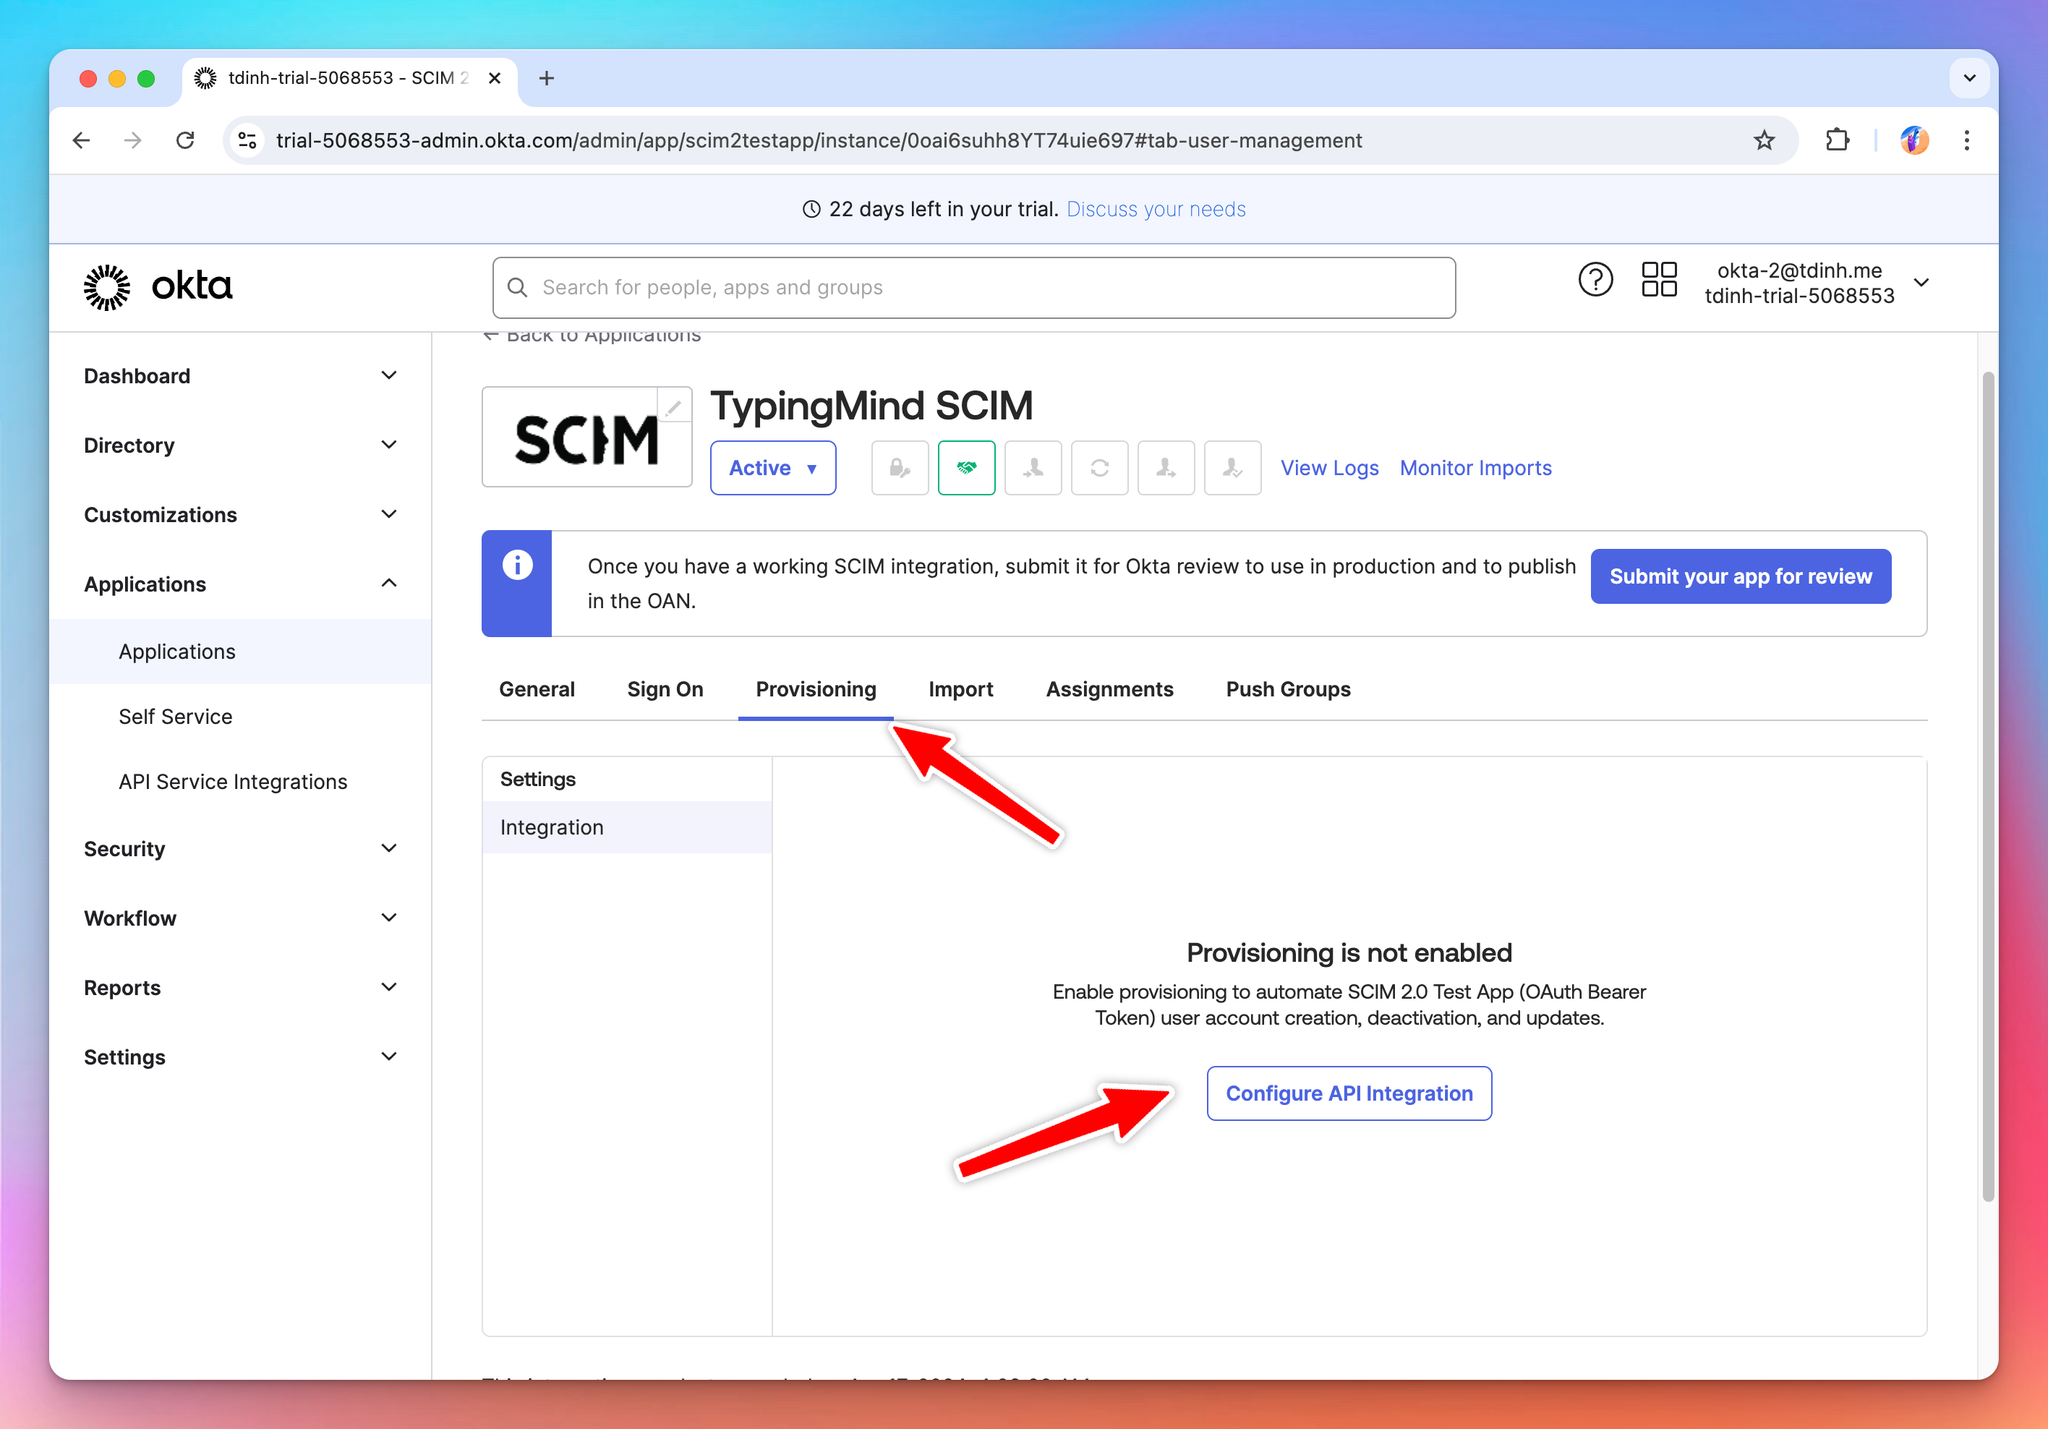
Within the application page, select the “Provision” tab, then click the config button.
In the next screen, enter the SCIM base URL and the OAuth Bearer Token (secret) you saved from the last step.
Click “Test API Credentials” to check if everything is working correctly.
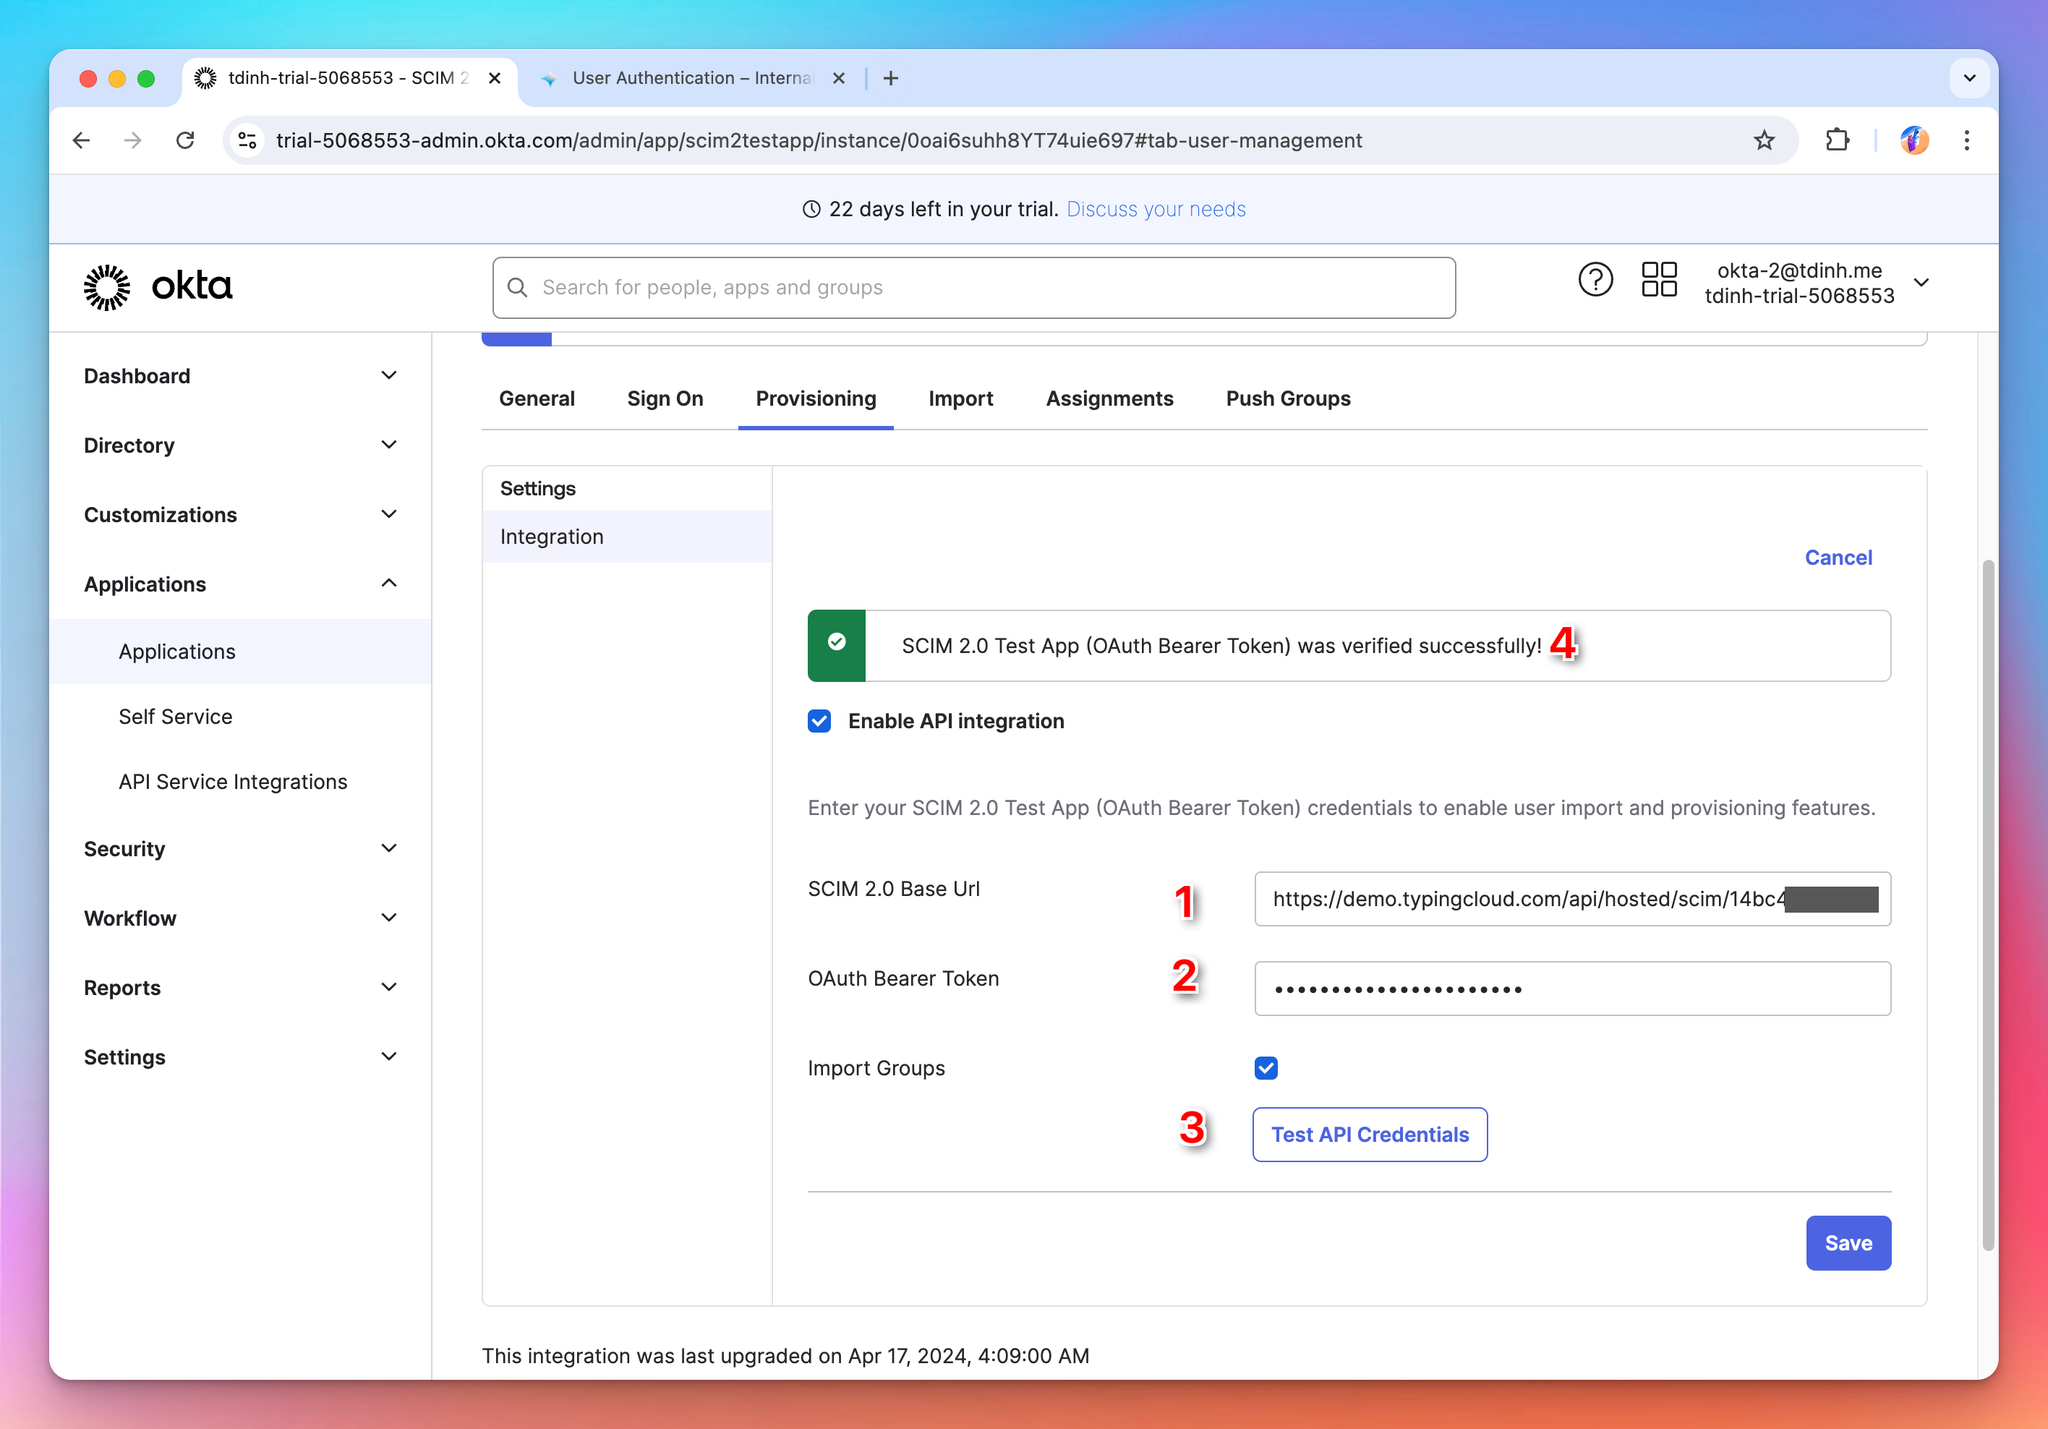
You should see a successful message if the test is successful. Then click Save.
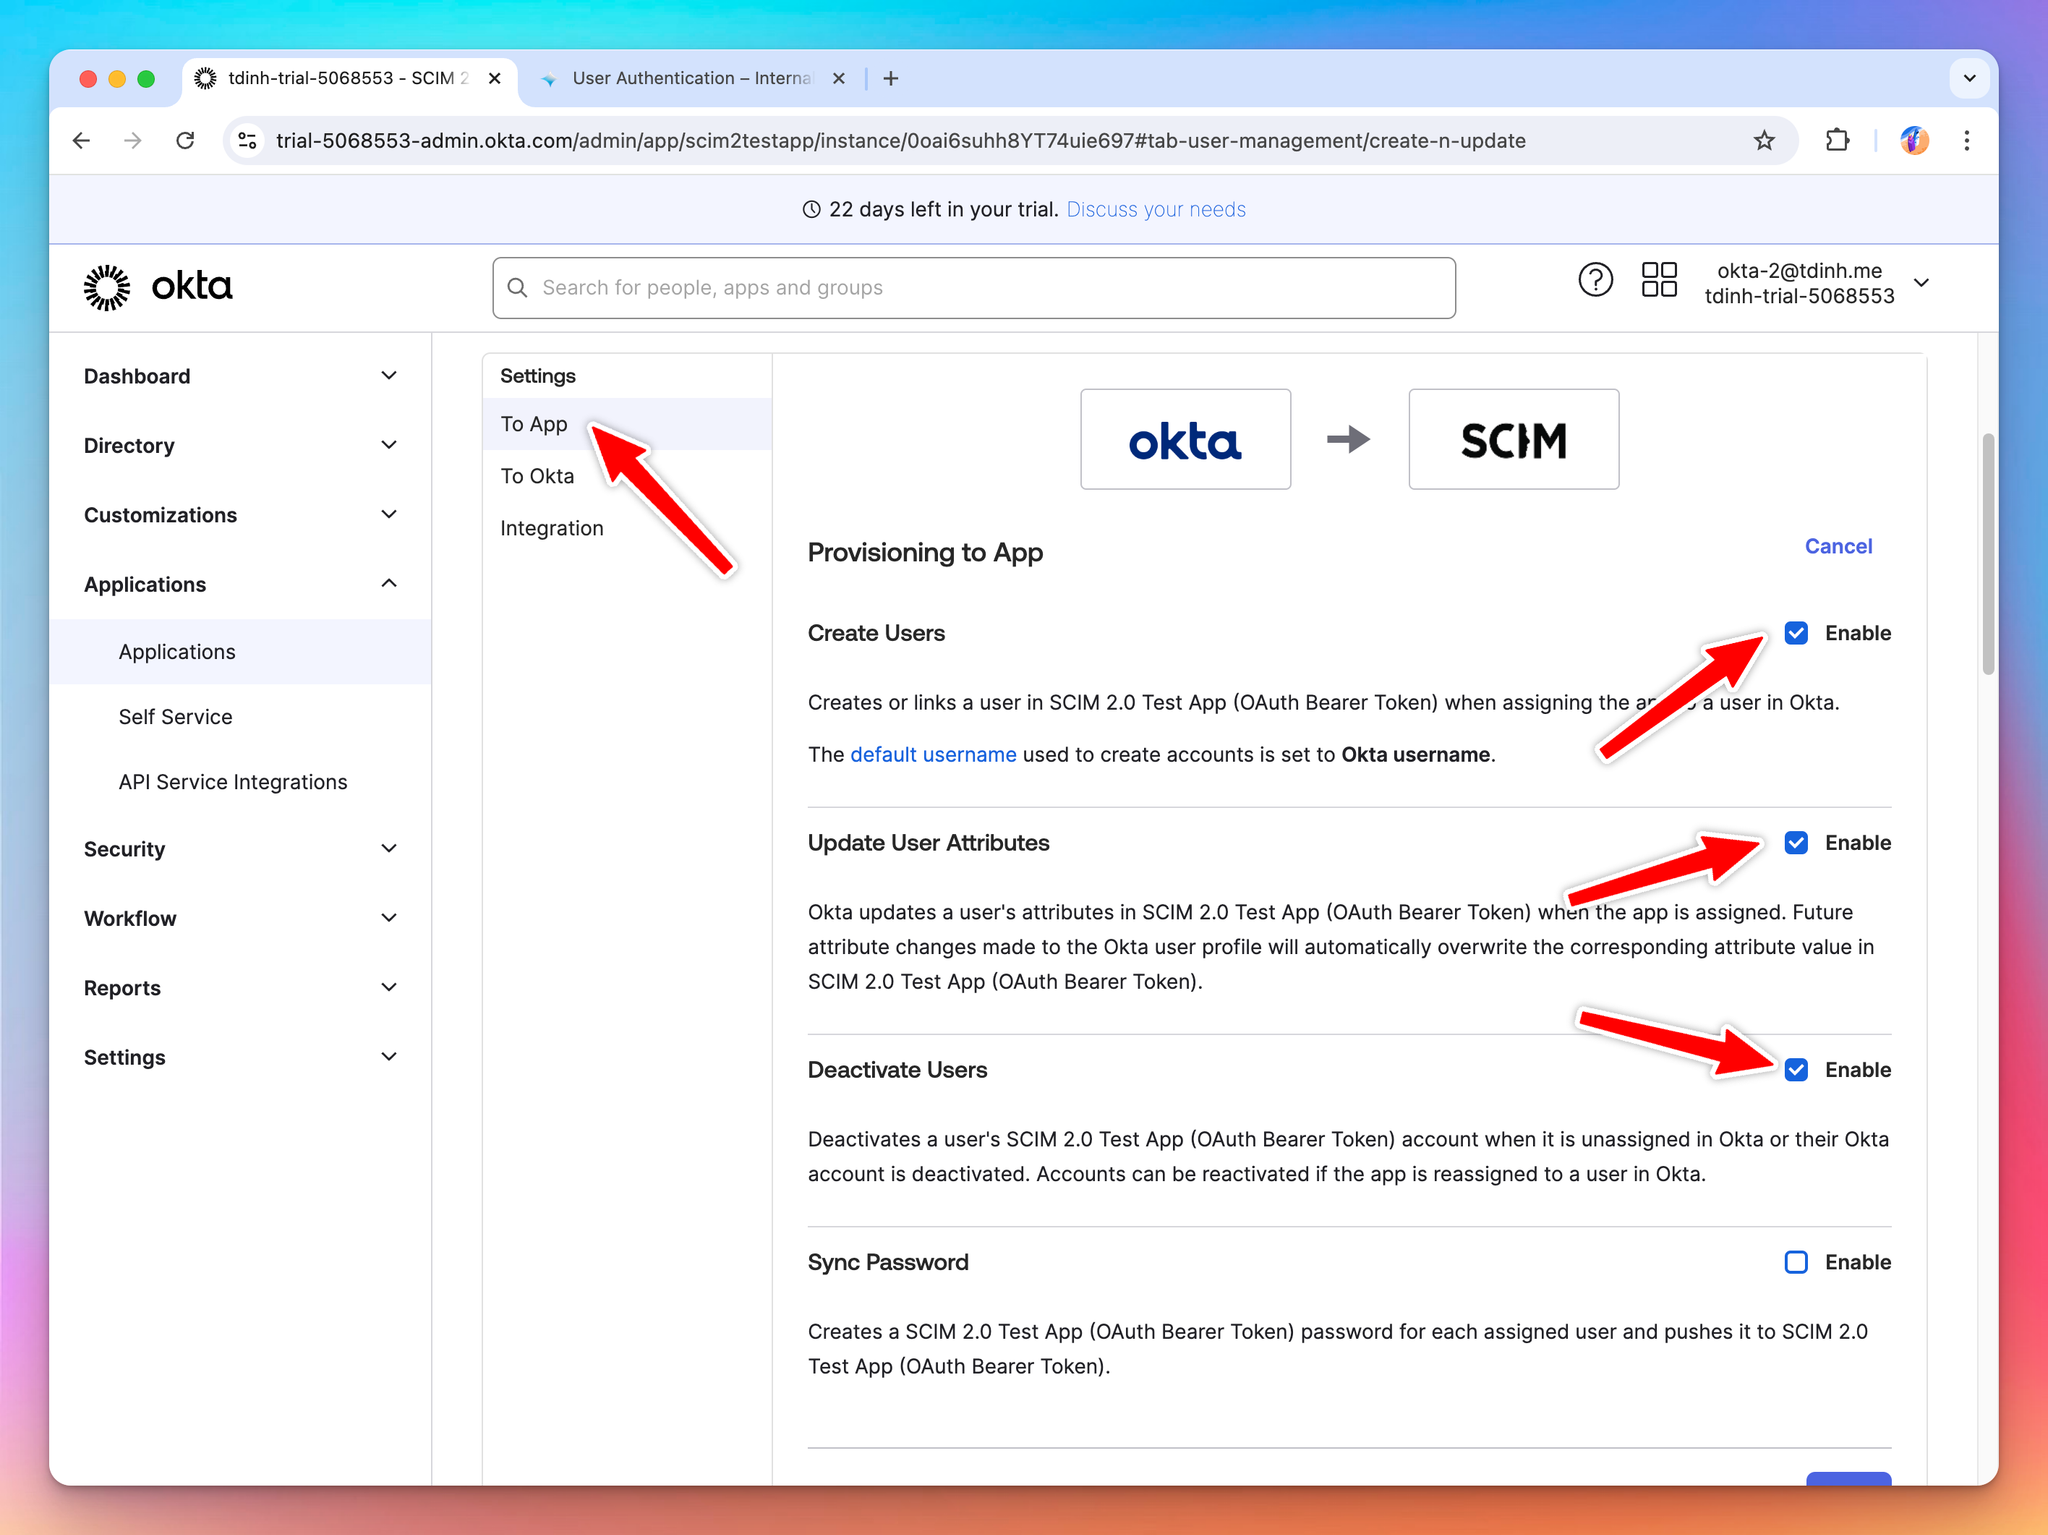
In the next screen, update the configuration to enable the following provisioning options:
- Create Users
- Update User Attributes
- Deactivate Users
Sync Users
Start assigning users/groups to the application. The sync process will kick start automatically by Okta.
Click the Assigments tab → Assign.

In this example, we assign two users
tonytest-two and tonytest-five to the application.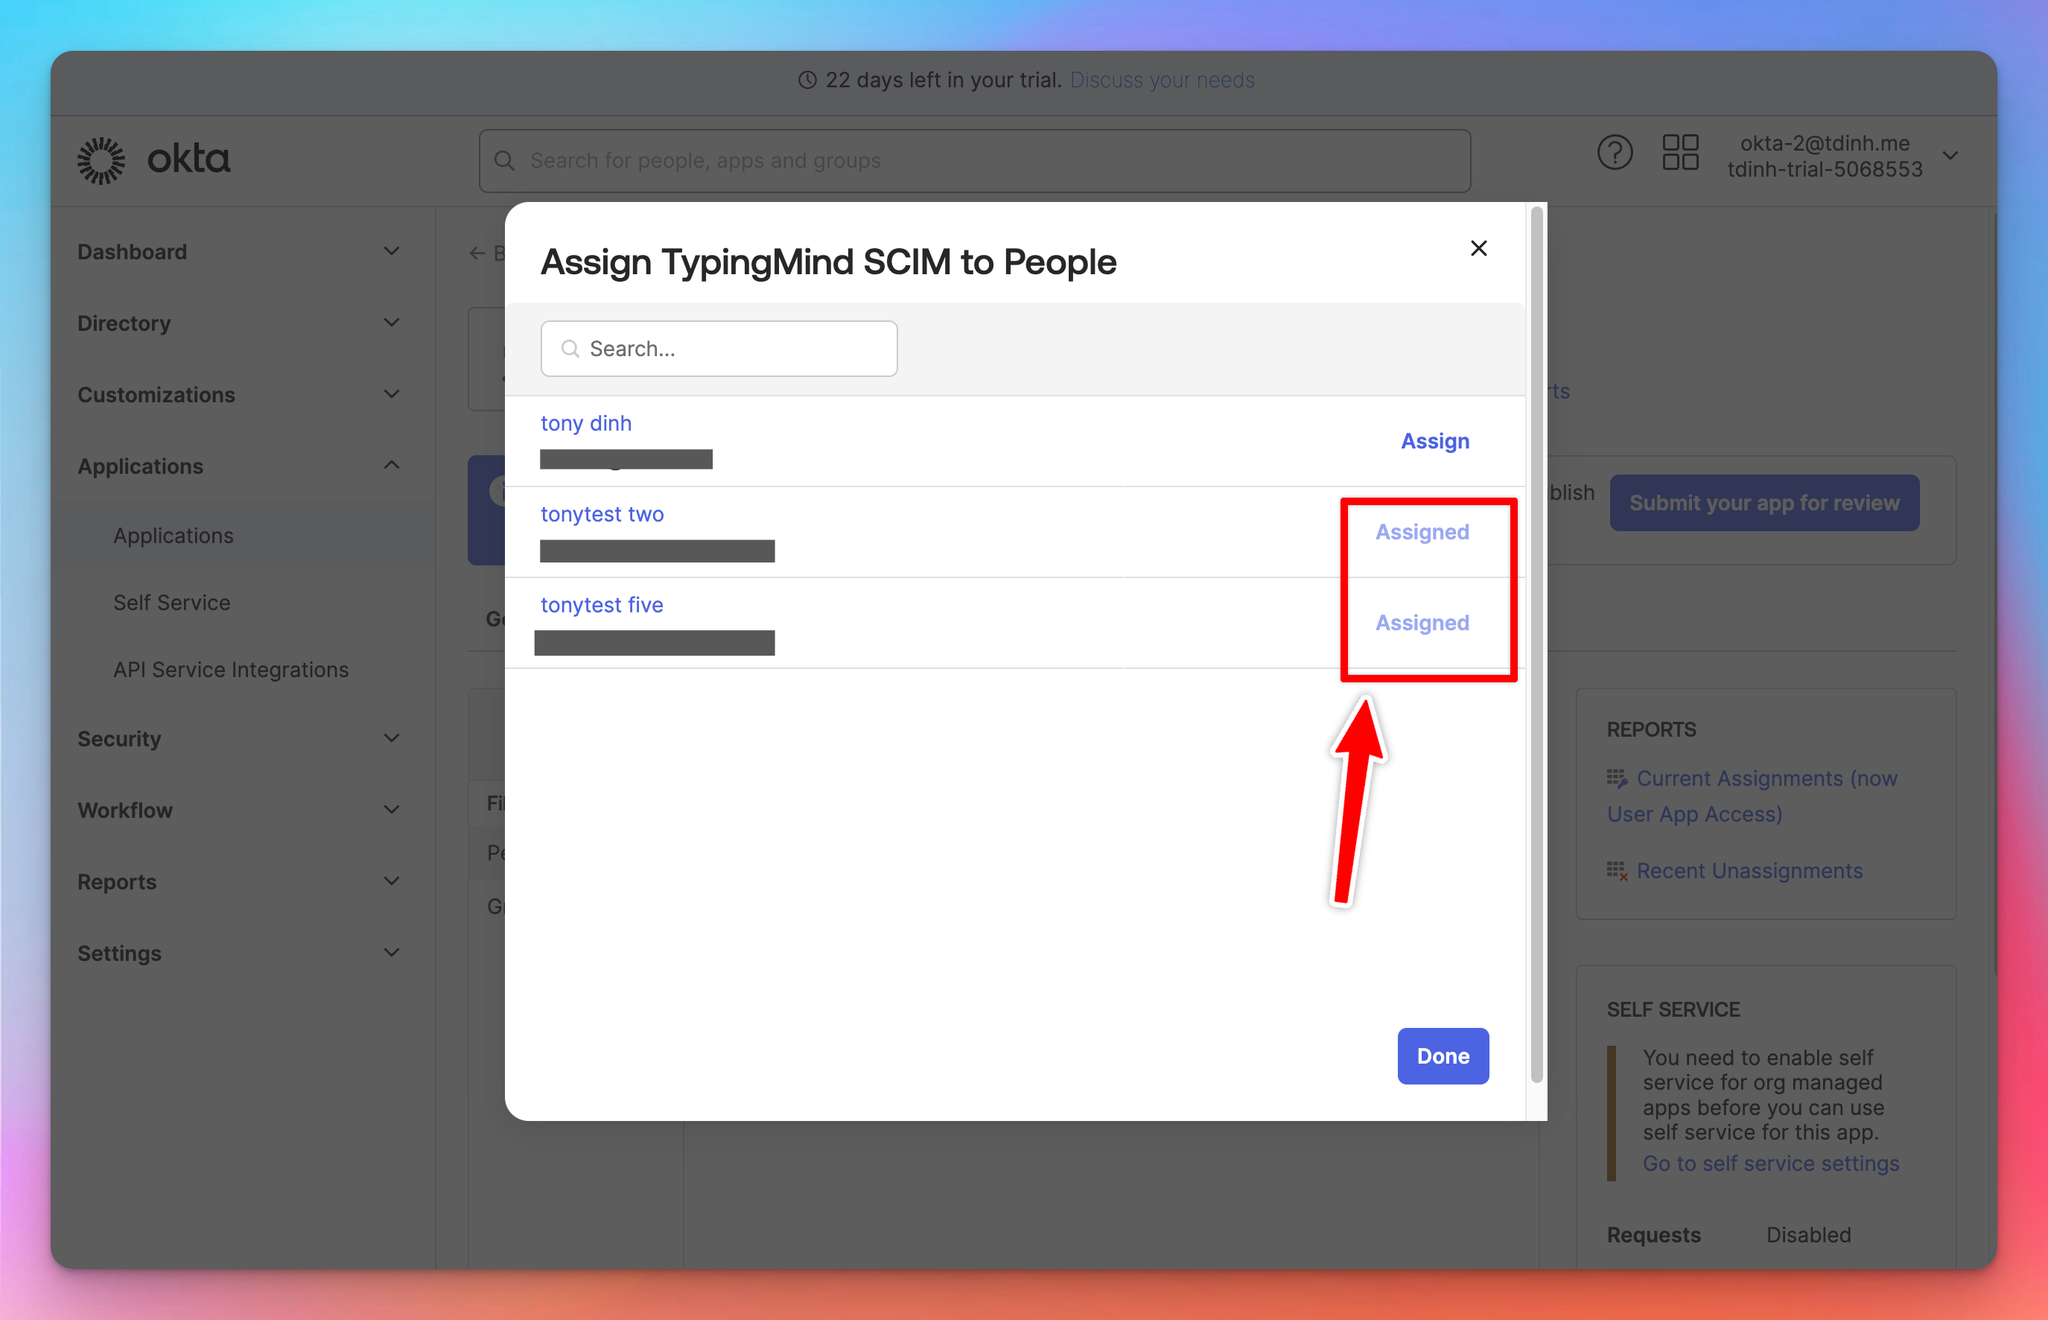
Go back to your TypingMind Admin panel, you should see the two new users are created with a
scim tag next to their name.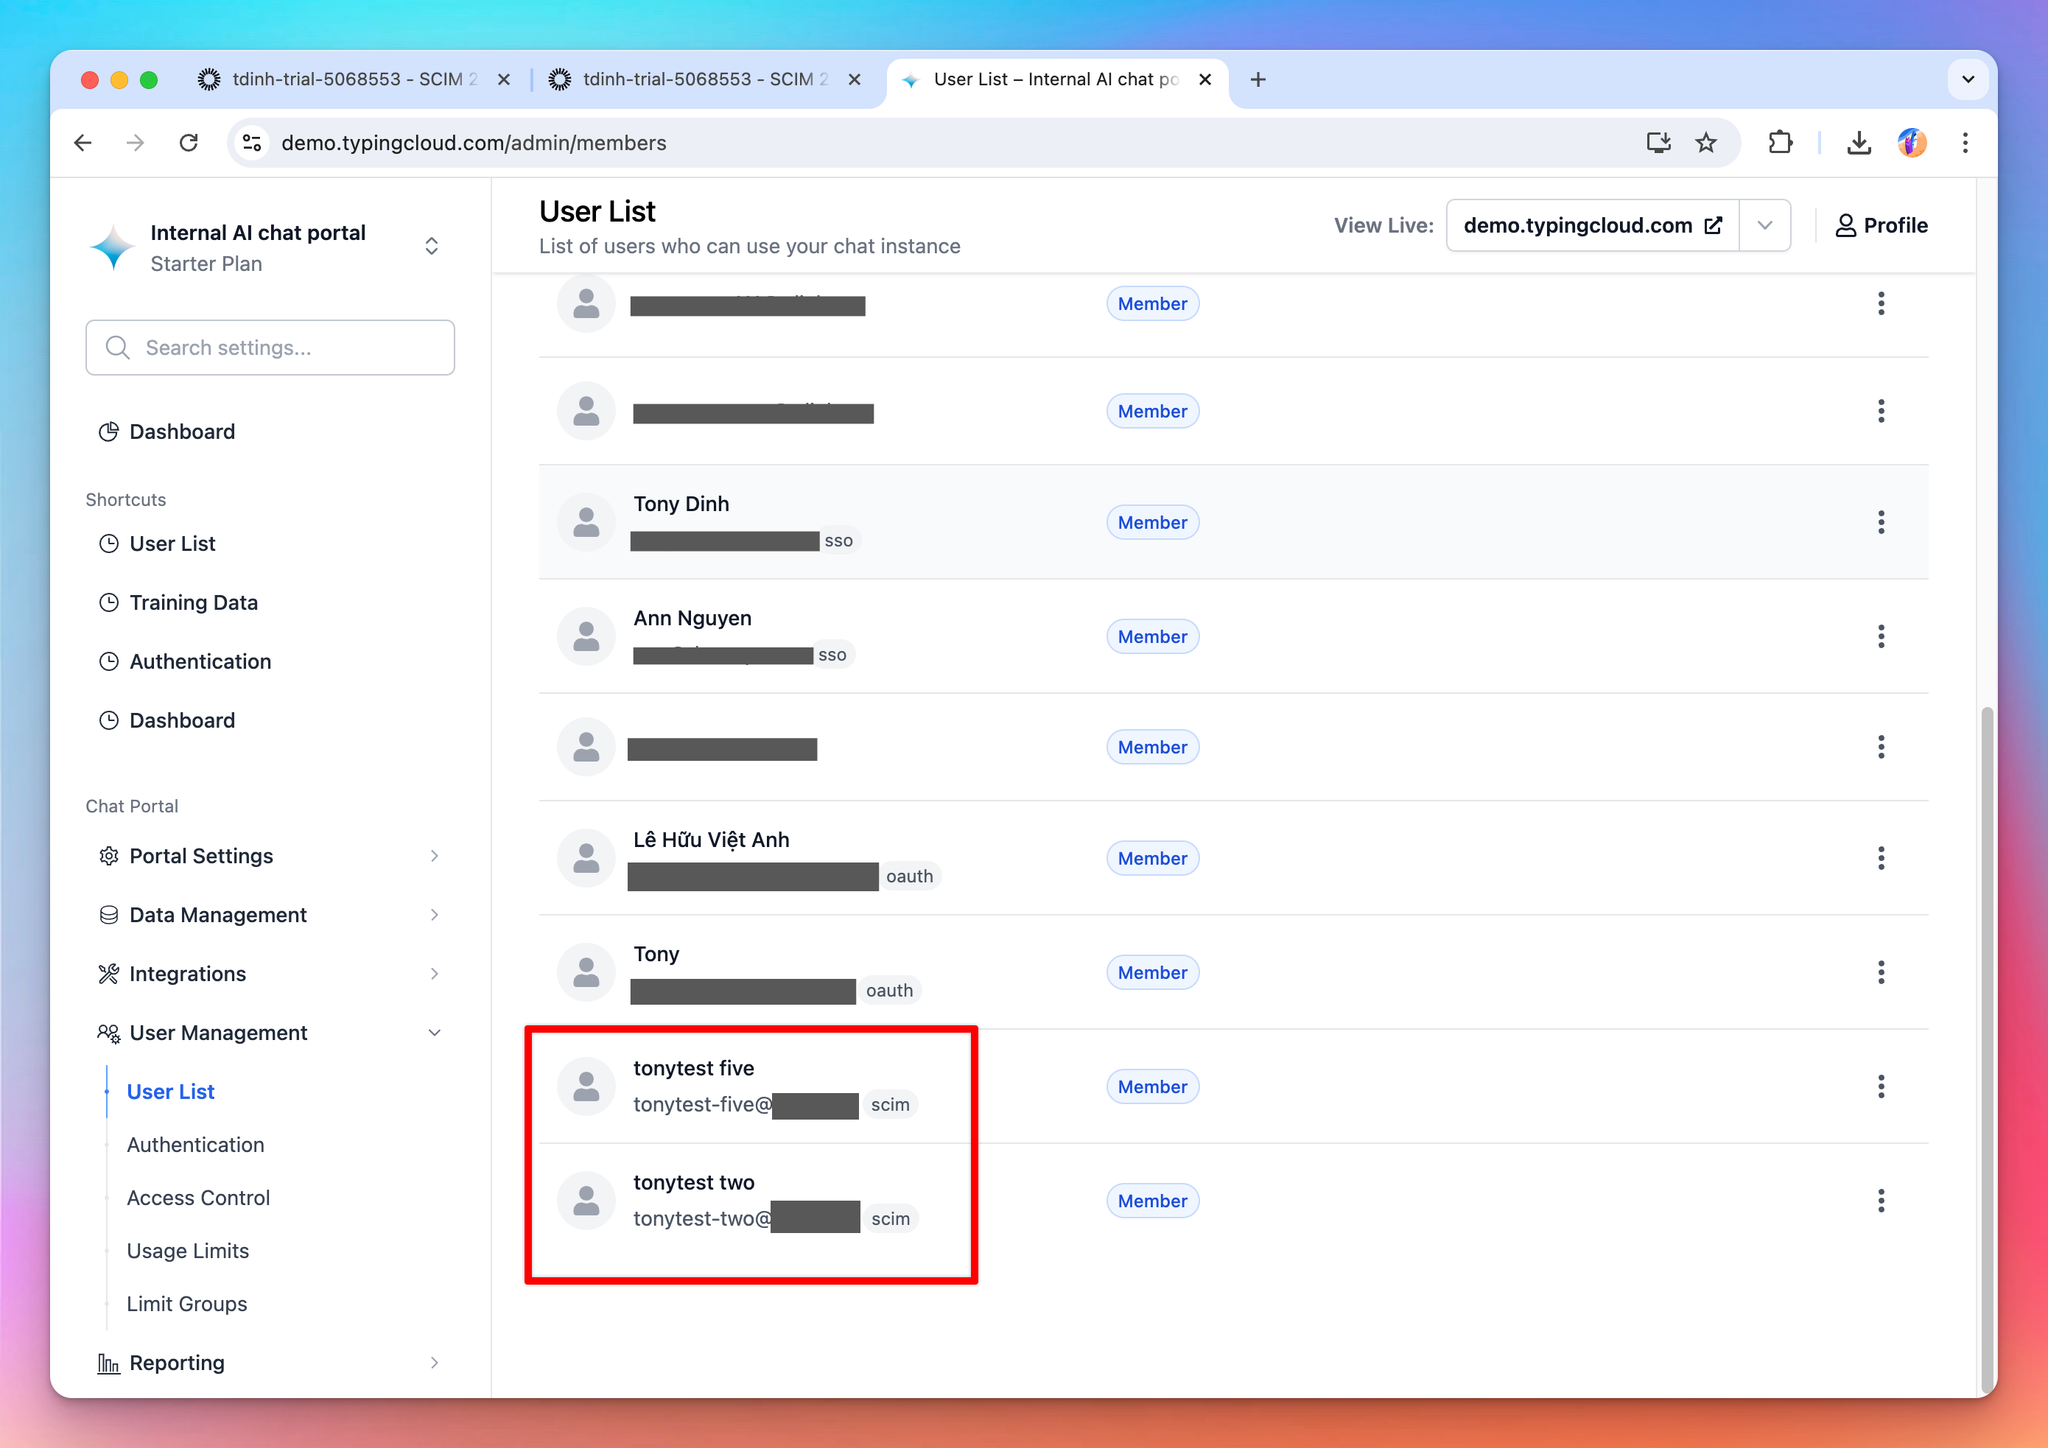
Sync Groups
Groups are synced to TypingMind system using the user groups system. A group will be created in the format
Group:{group_name} for each group the user belongs to.For example, if a user belongs to the group “Marketing Department” and “Intern”, the user will be added into two groups:
Group:Marketing Department
Group:Intern
You can use these two tags to manage the access control and authorized resources (AI agents, model, usage limits, etc.).
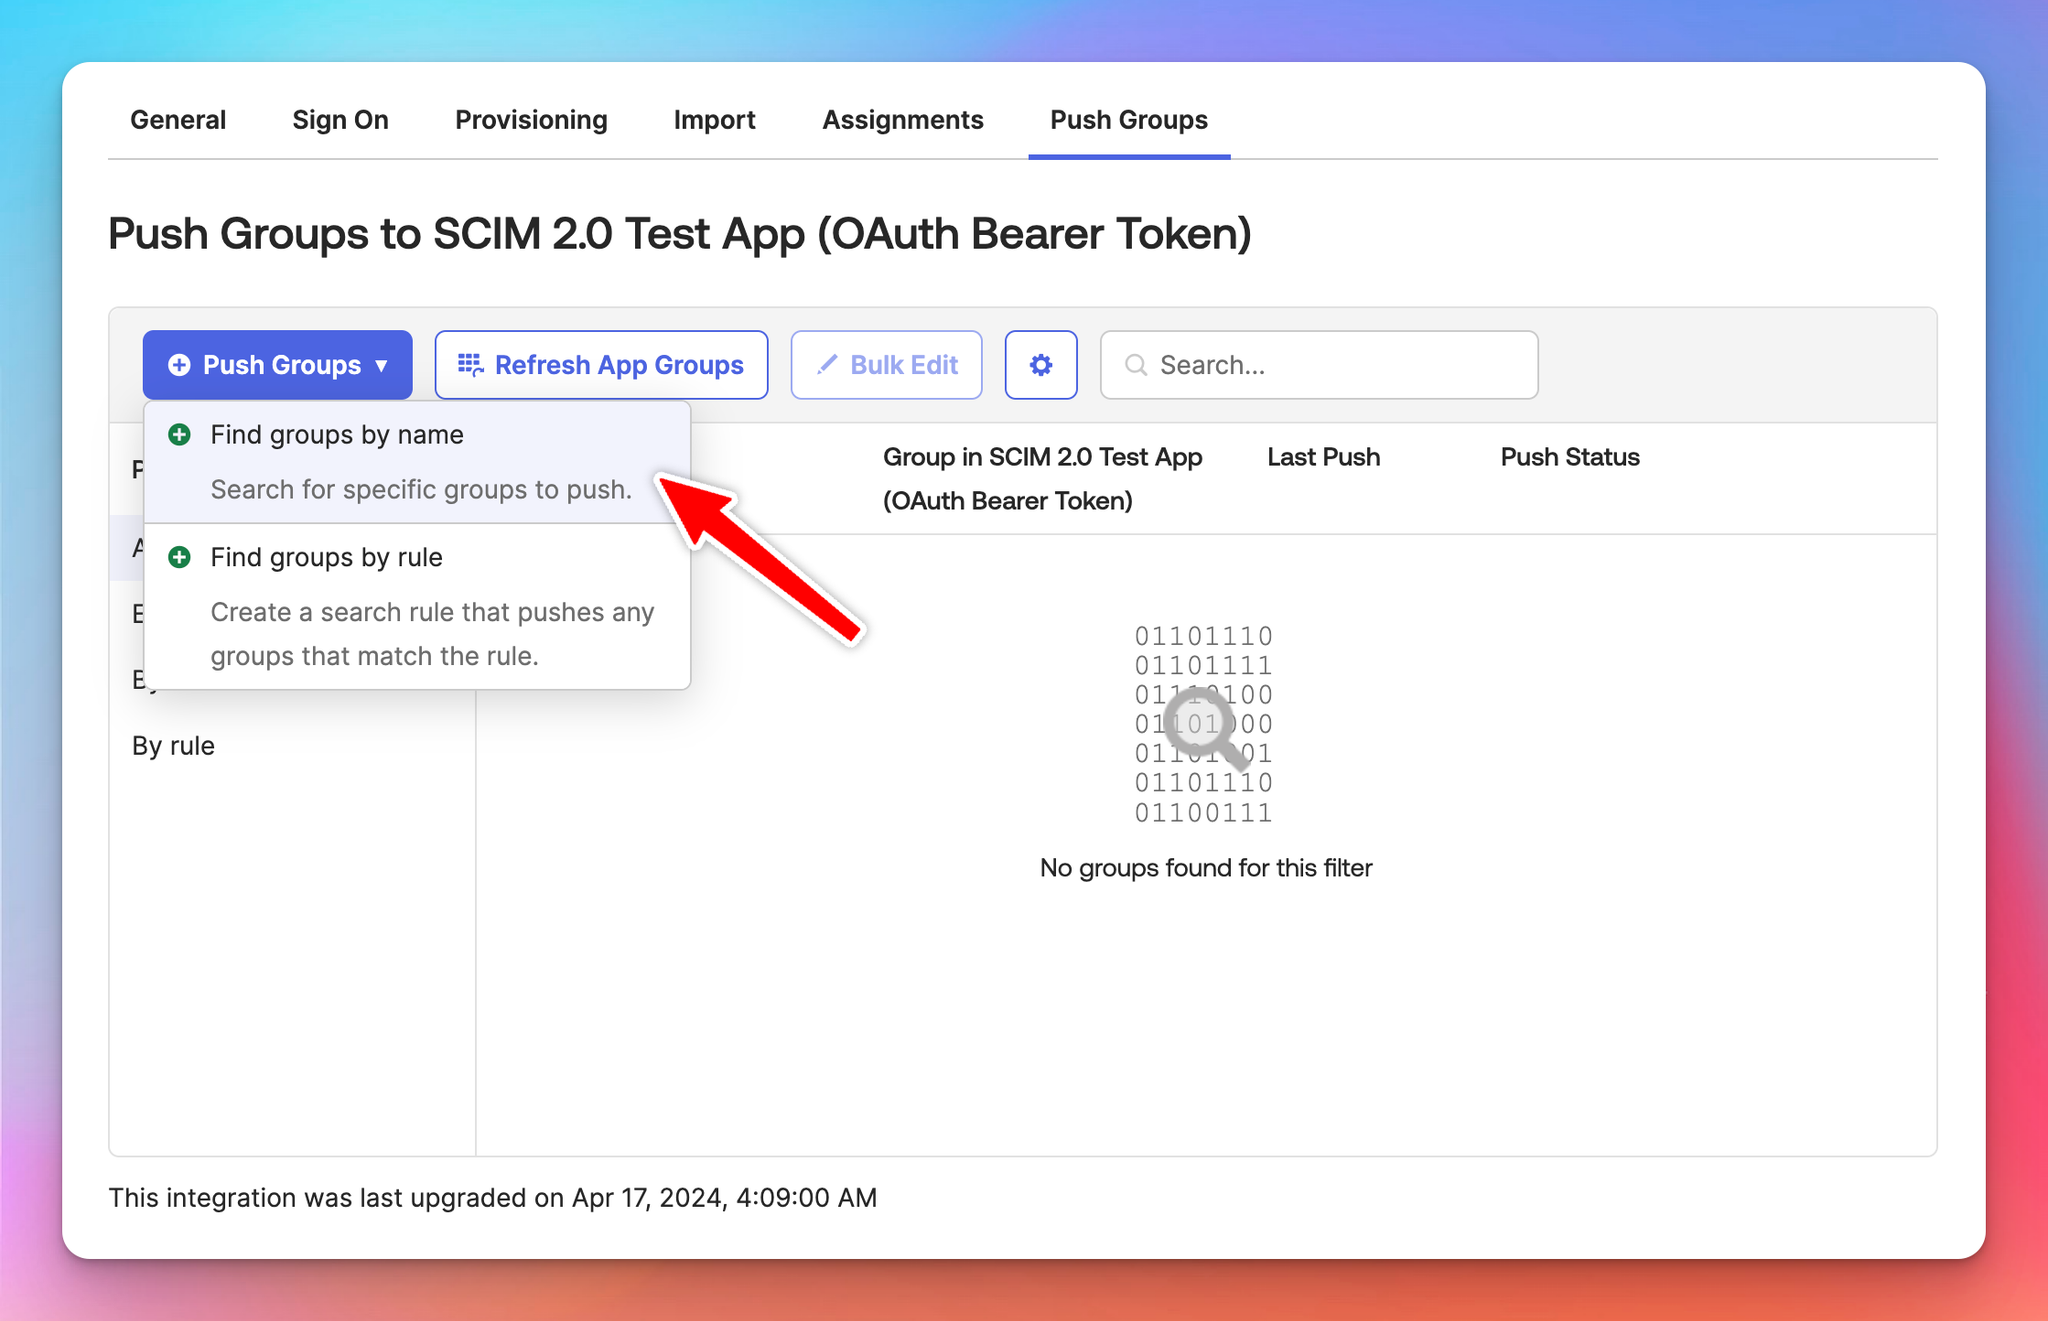
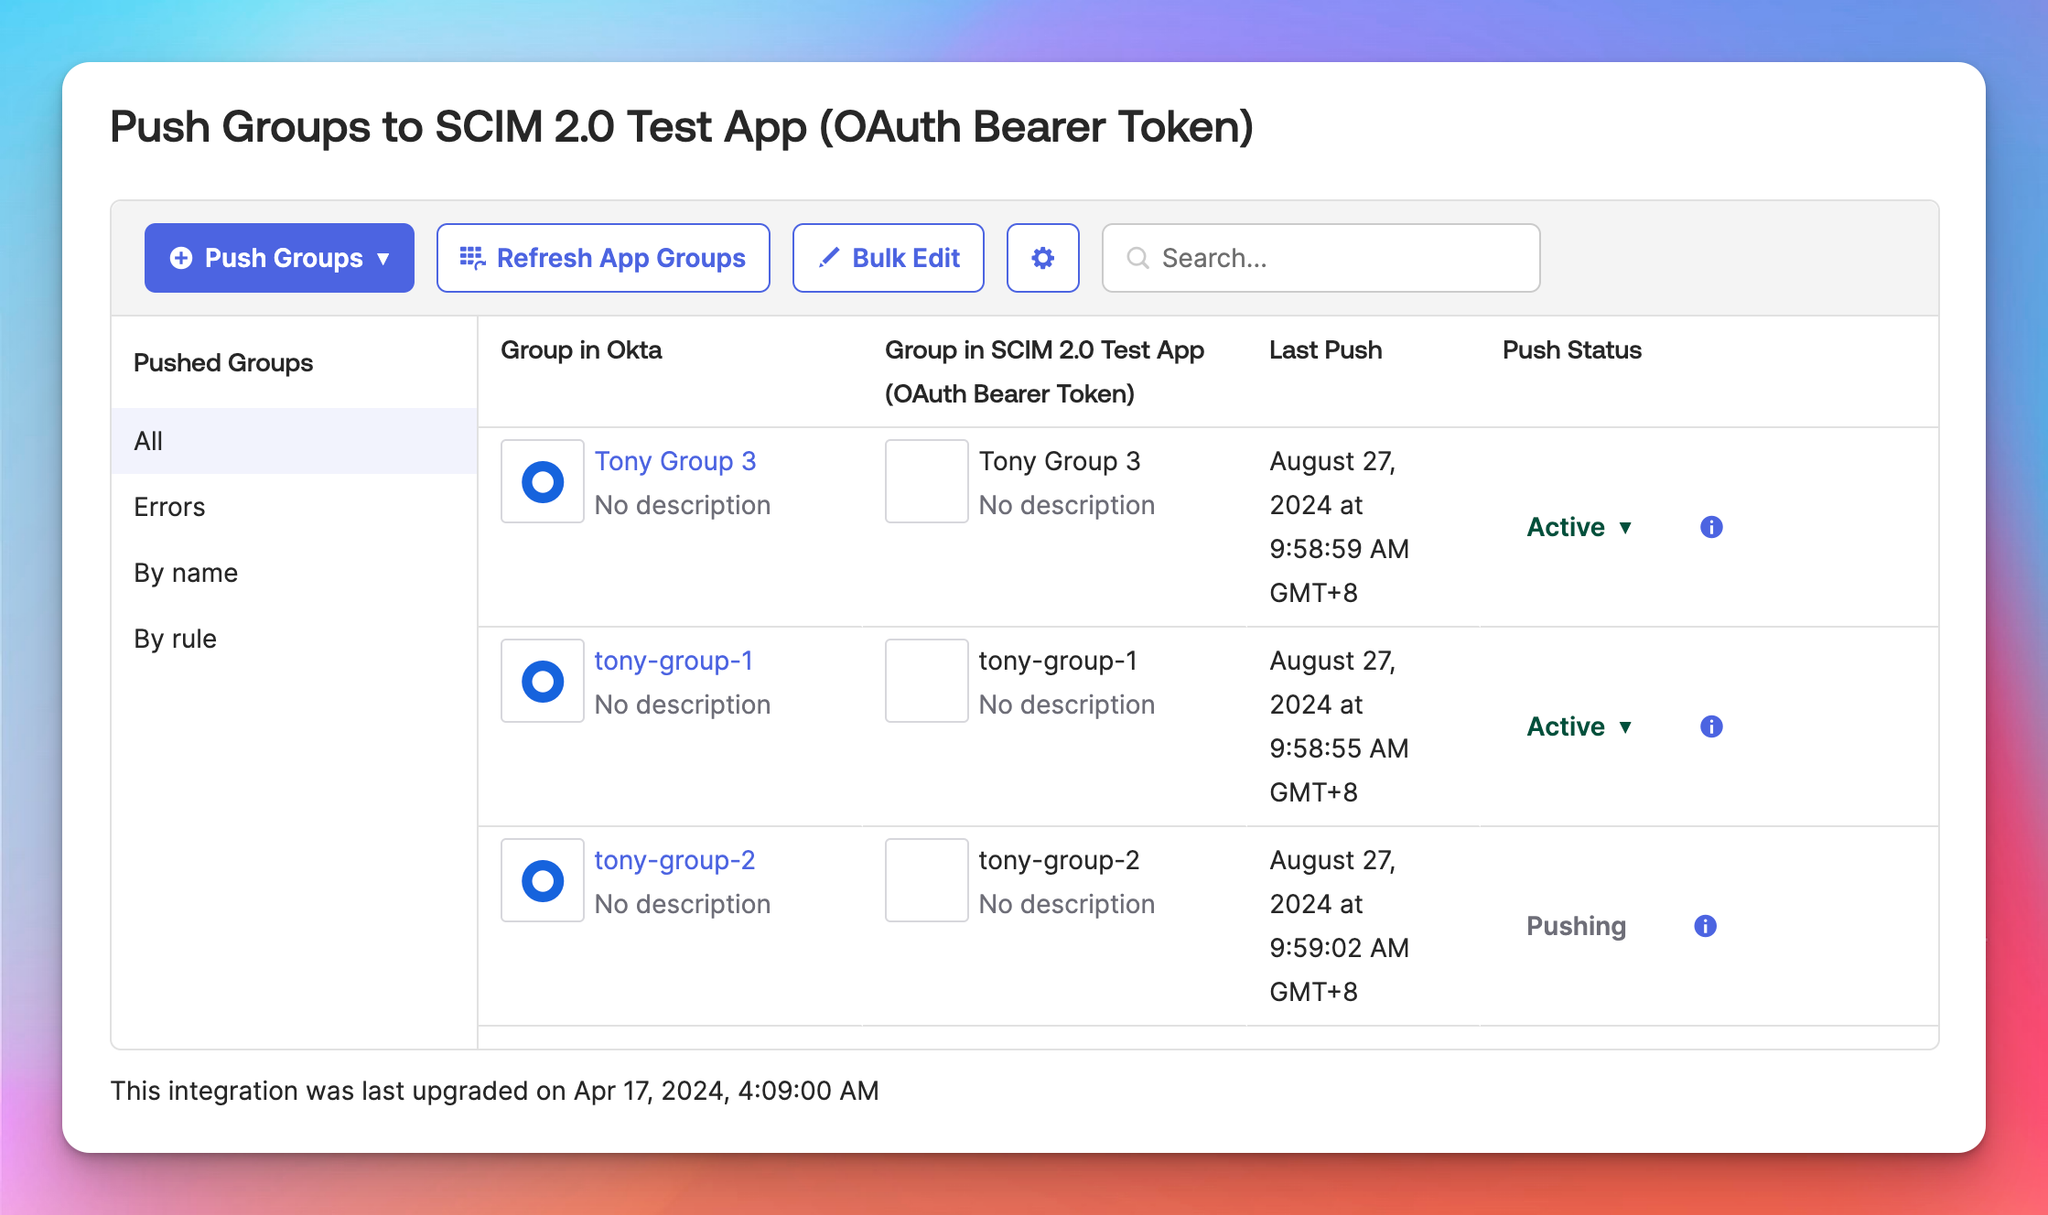
To sync groups, select the “Push Groups” tab. Then select the groups you want to sync.
Once synced successfully, the Push Status will be set to “Active”.
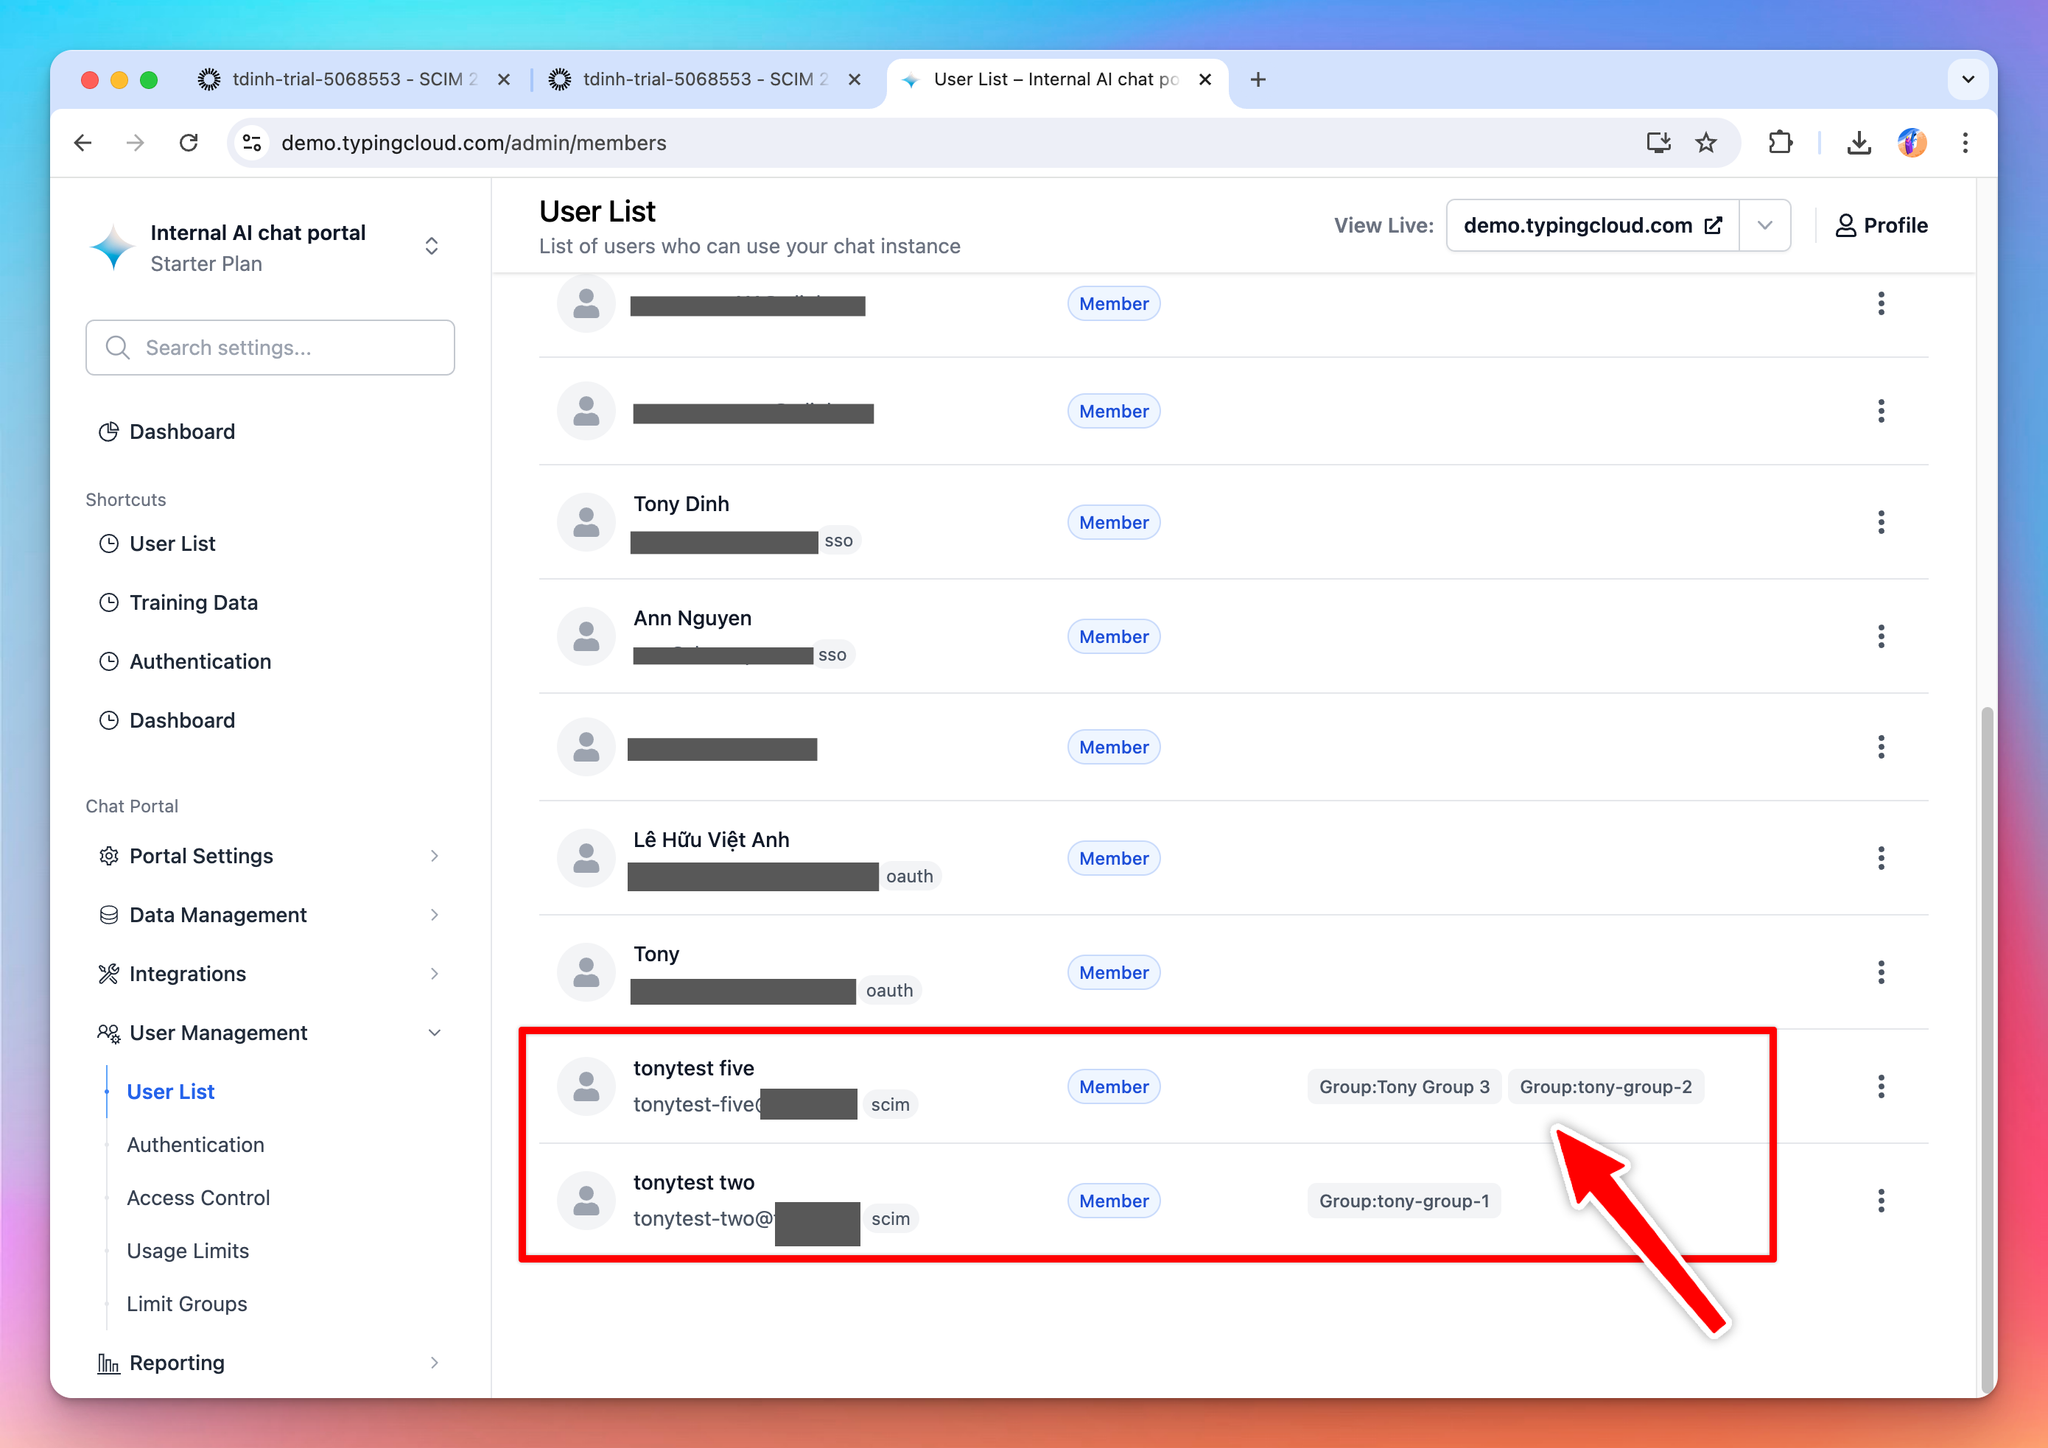
Go back to your TypingMind admin panel, you should see the users are not tagged correctly as per their assigned groups.
Notes and limitations
- If a user has previously logged in to your instance using SSO, when you enable Directory Sync, the system will try to deduplicate those user based on email. If the emails do not match, the system will create two separate account for each user.
- Users created via SCIMv2 will automatically take up a seat in your instance. Make sure you have enough seats for your TypingMind instance before enabling this feature.
- Users are synced automatically, however, the sync period are set up different on each identity provider. In most cases, you can trigger a manual sync from the identity provider’s admin panel.