What You Can Do
Chat & Organize
Folders, tags, forking, multi-tab, and full-text search across all conversations.
Any AI Model
OpenAI, Anthropic, Google, Mistral, Grok, Azure, and more — all in one place.
Prompts & Agents
Build a reusable prompt library and custom AI assistants with training data.
Knowledge Base
Upload files or connect Google Drive, Notion, GitHub, and more for RAG-powered answers.
Plugins & MCP
Web search, image generation, deep research, custom tools, and MCP server integrations.
Privacy First
All chats stored locally by default. Optional cloud sync across devices.
Setup Guide
Step 1 — Activate your license & API keys
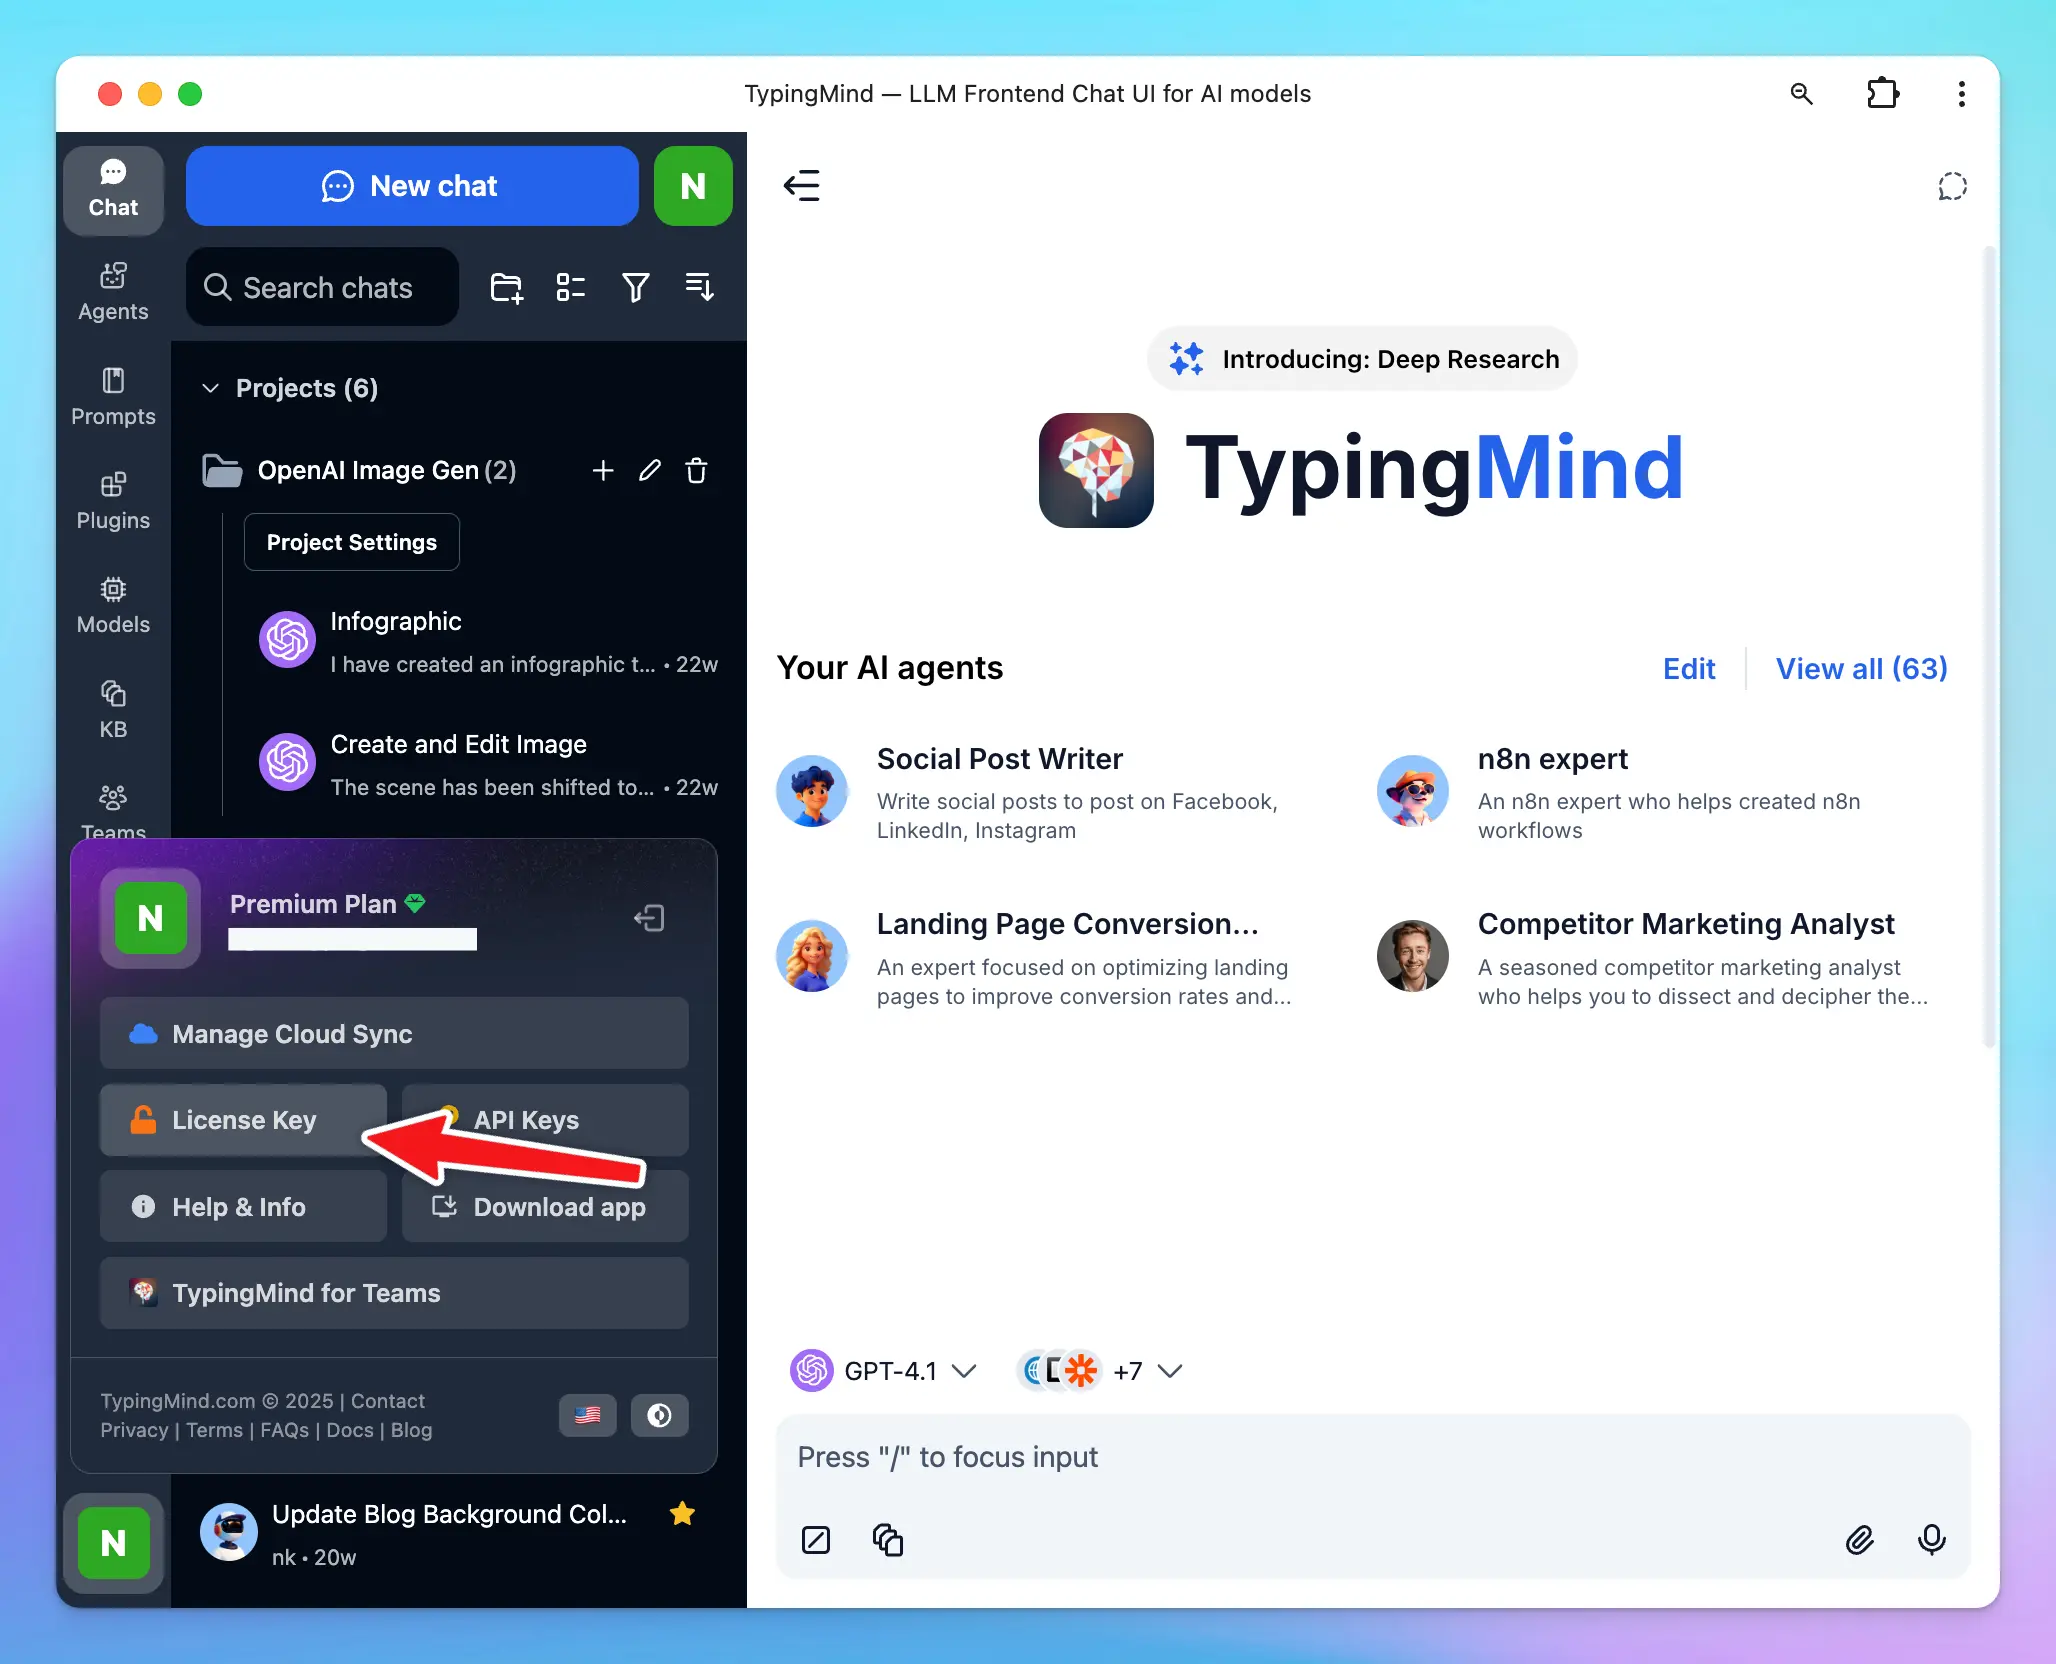
Activate your License Key
You can use TypingMind without a license key, but advanced features require one:- Multi-model parallel chats
- Plugins (Web Search, Image Generator, etc.)
- Projects and Artifacts
- And more
 To manage or retrieve your license key later, see Manage License & Devices.
Add your API Keys
TypingMind supports models from all major providers. You’ll need to obtain an API key directly from each provider you want to use:One API key per provider unlocks all models from that provider. You do not need a ChatGPT Plus or Claude AI subscription — the API is a separate product.
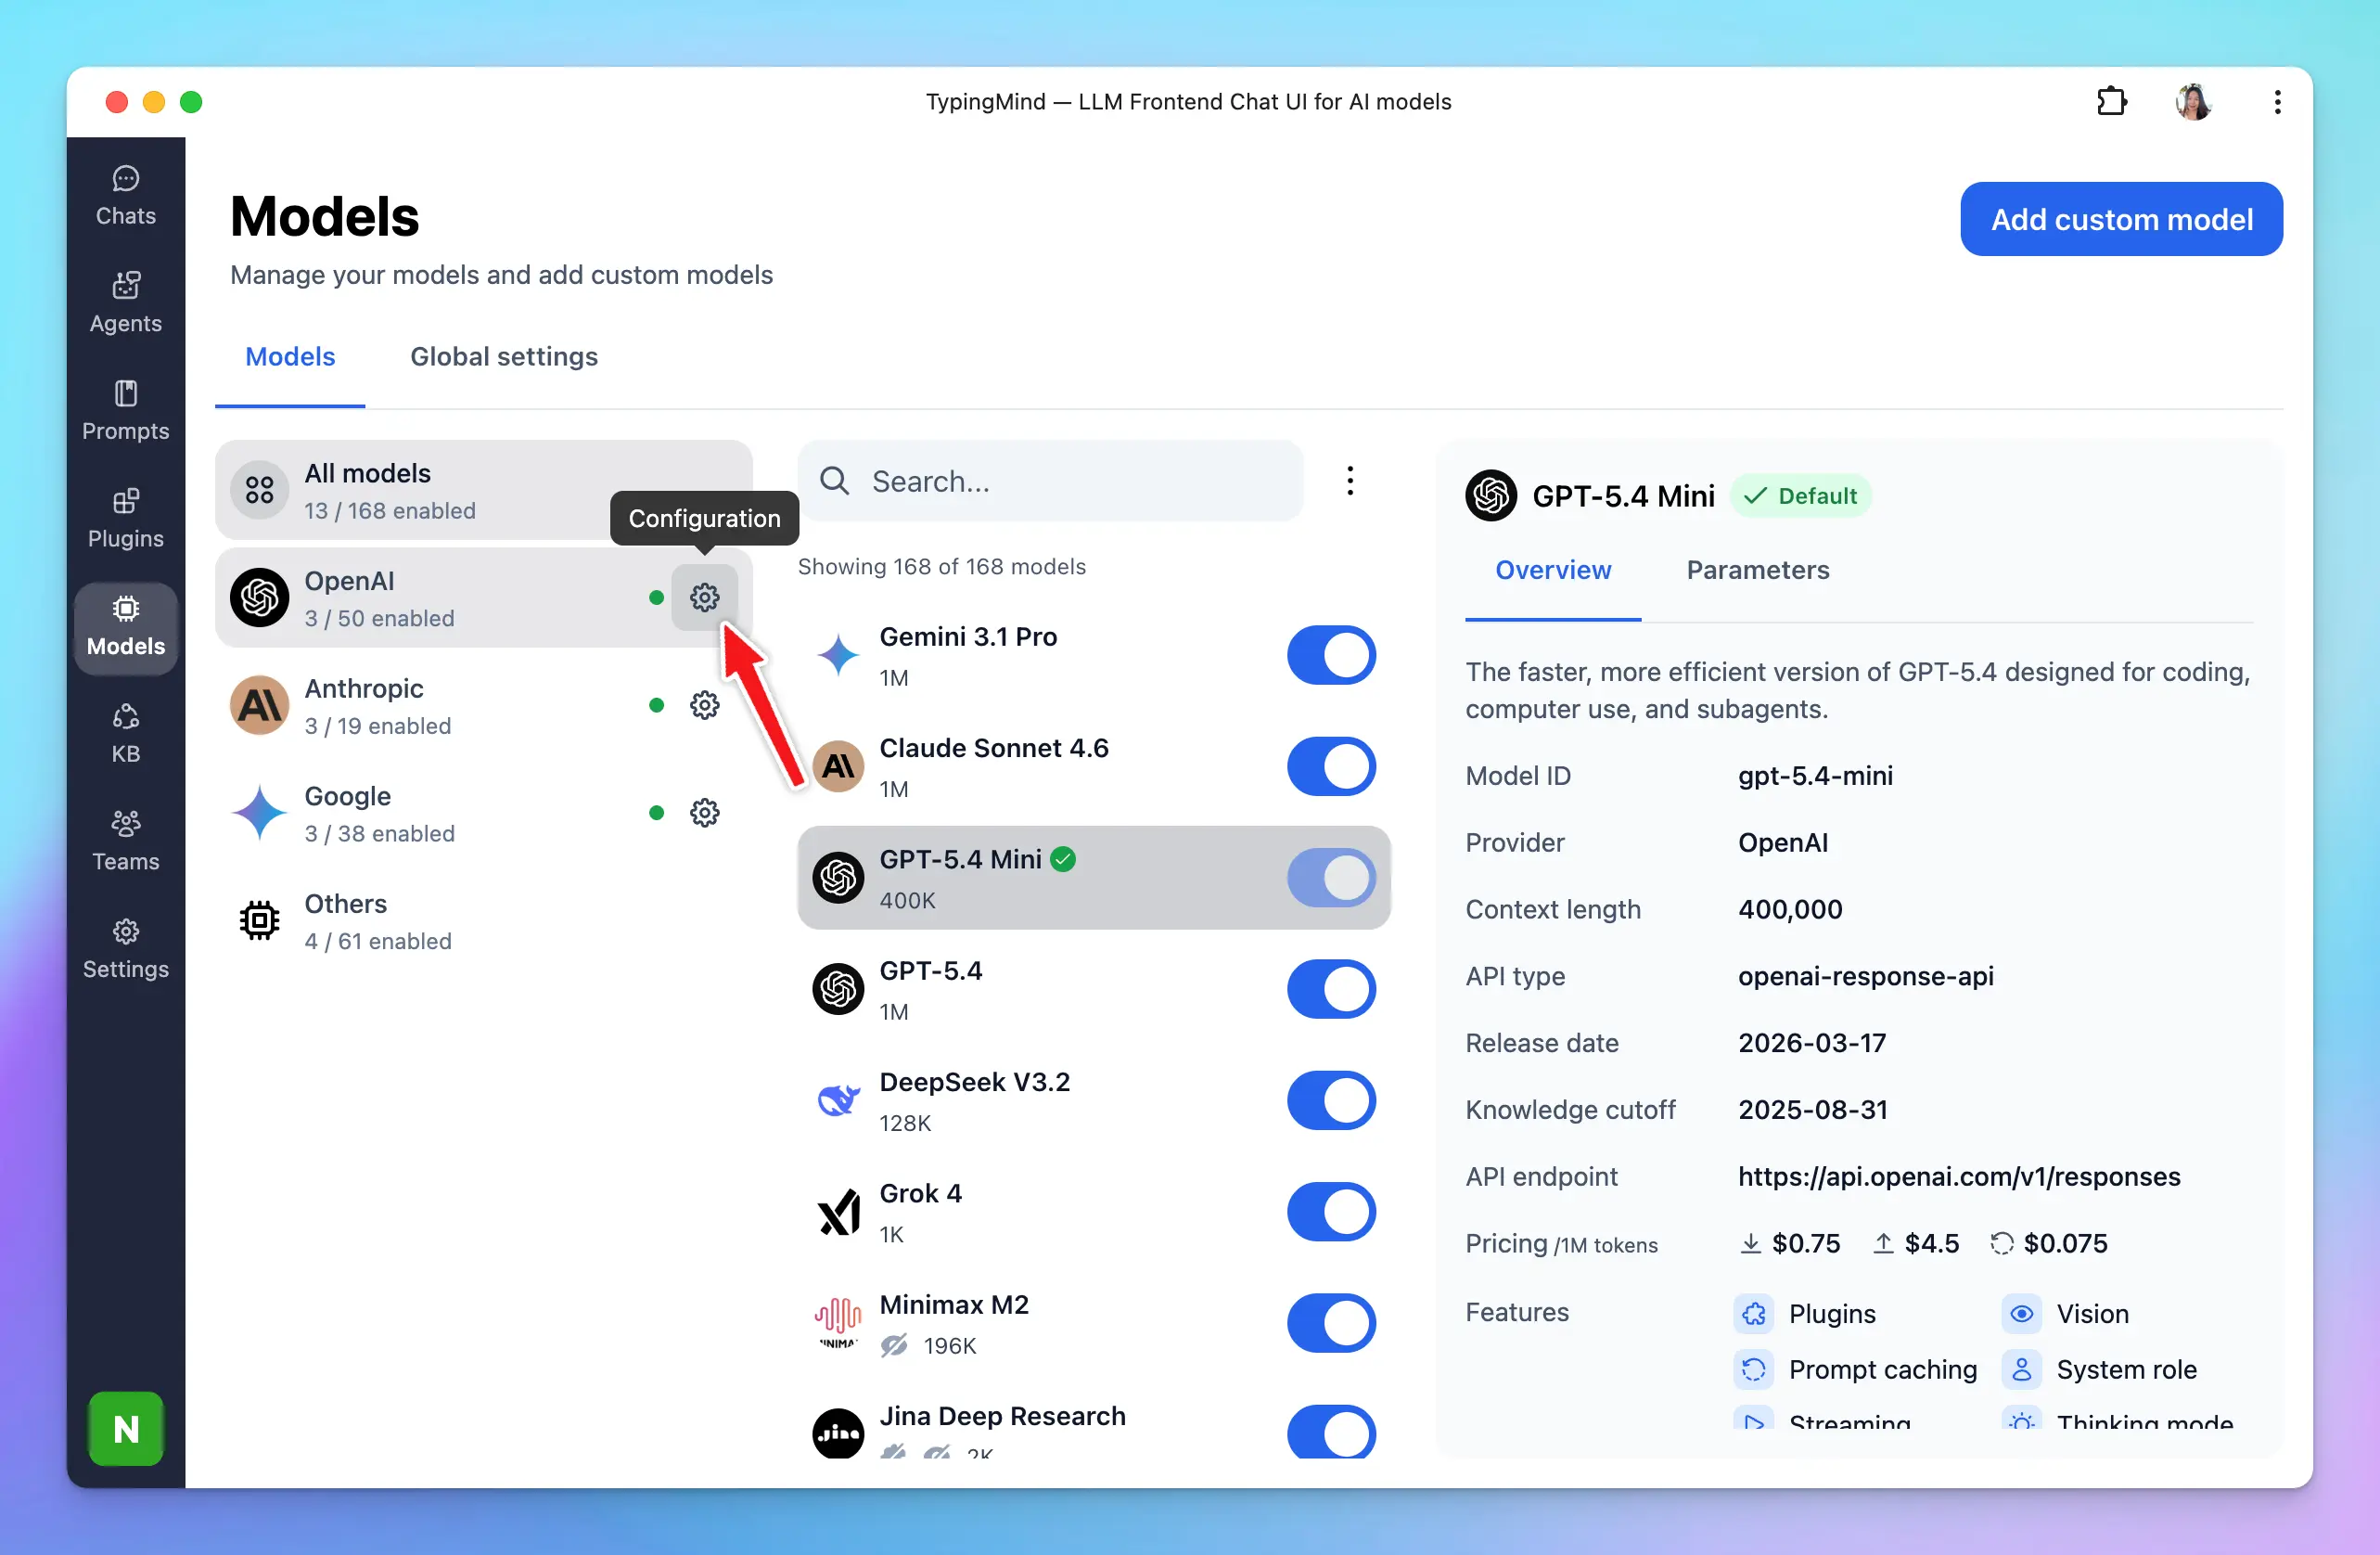
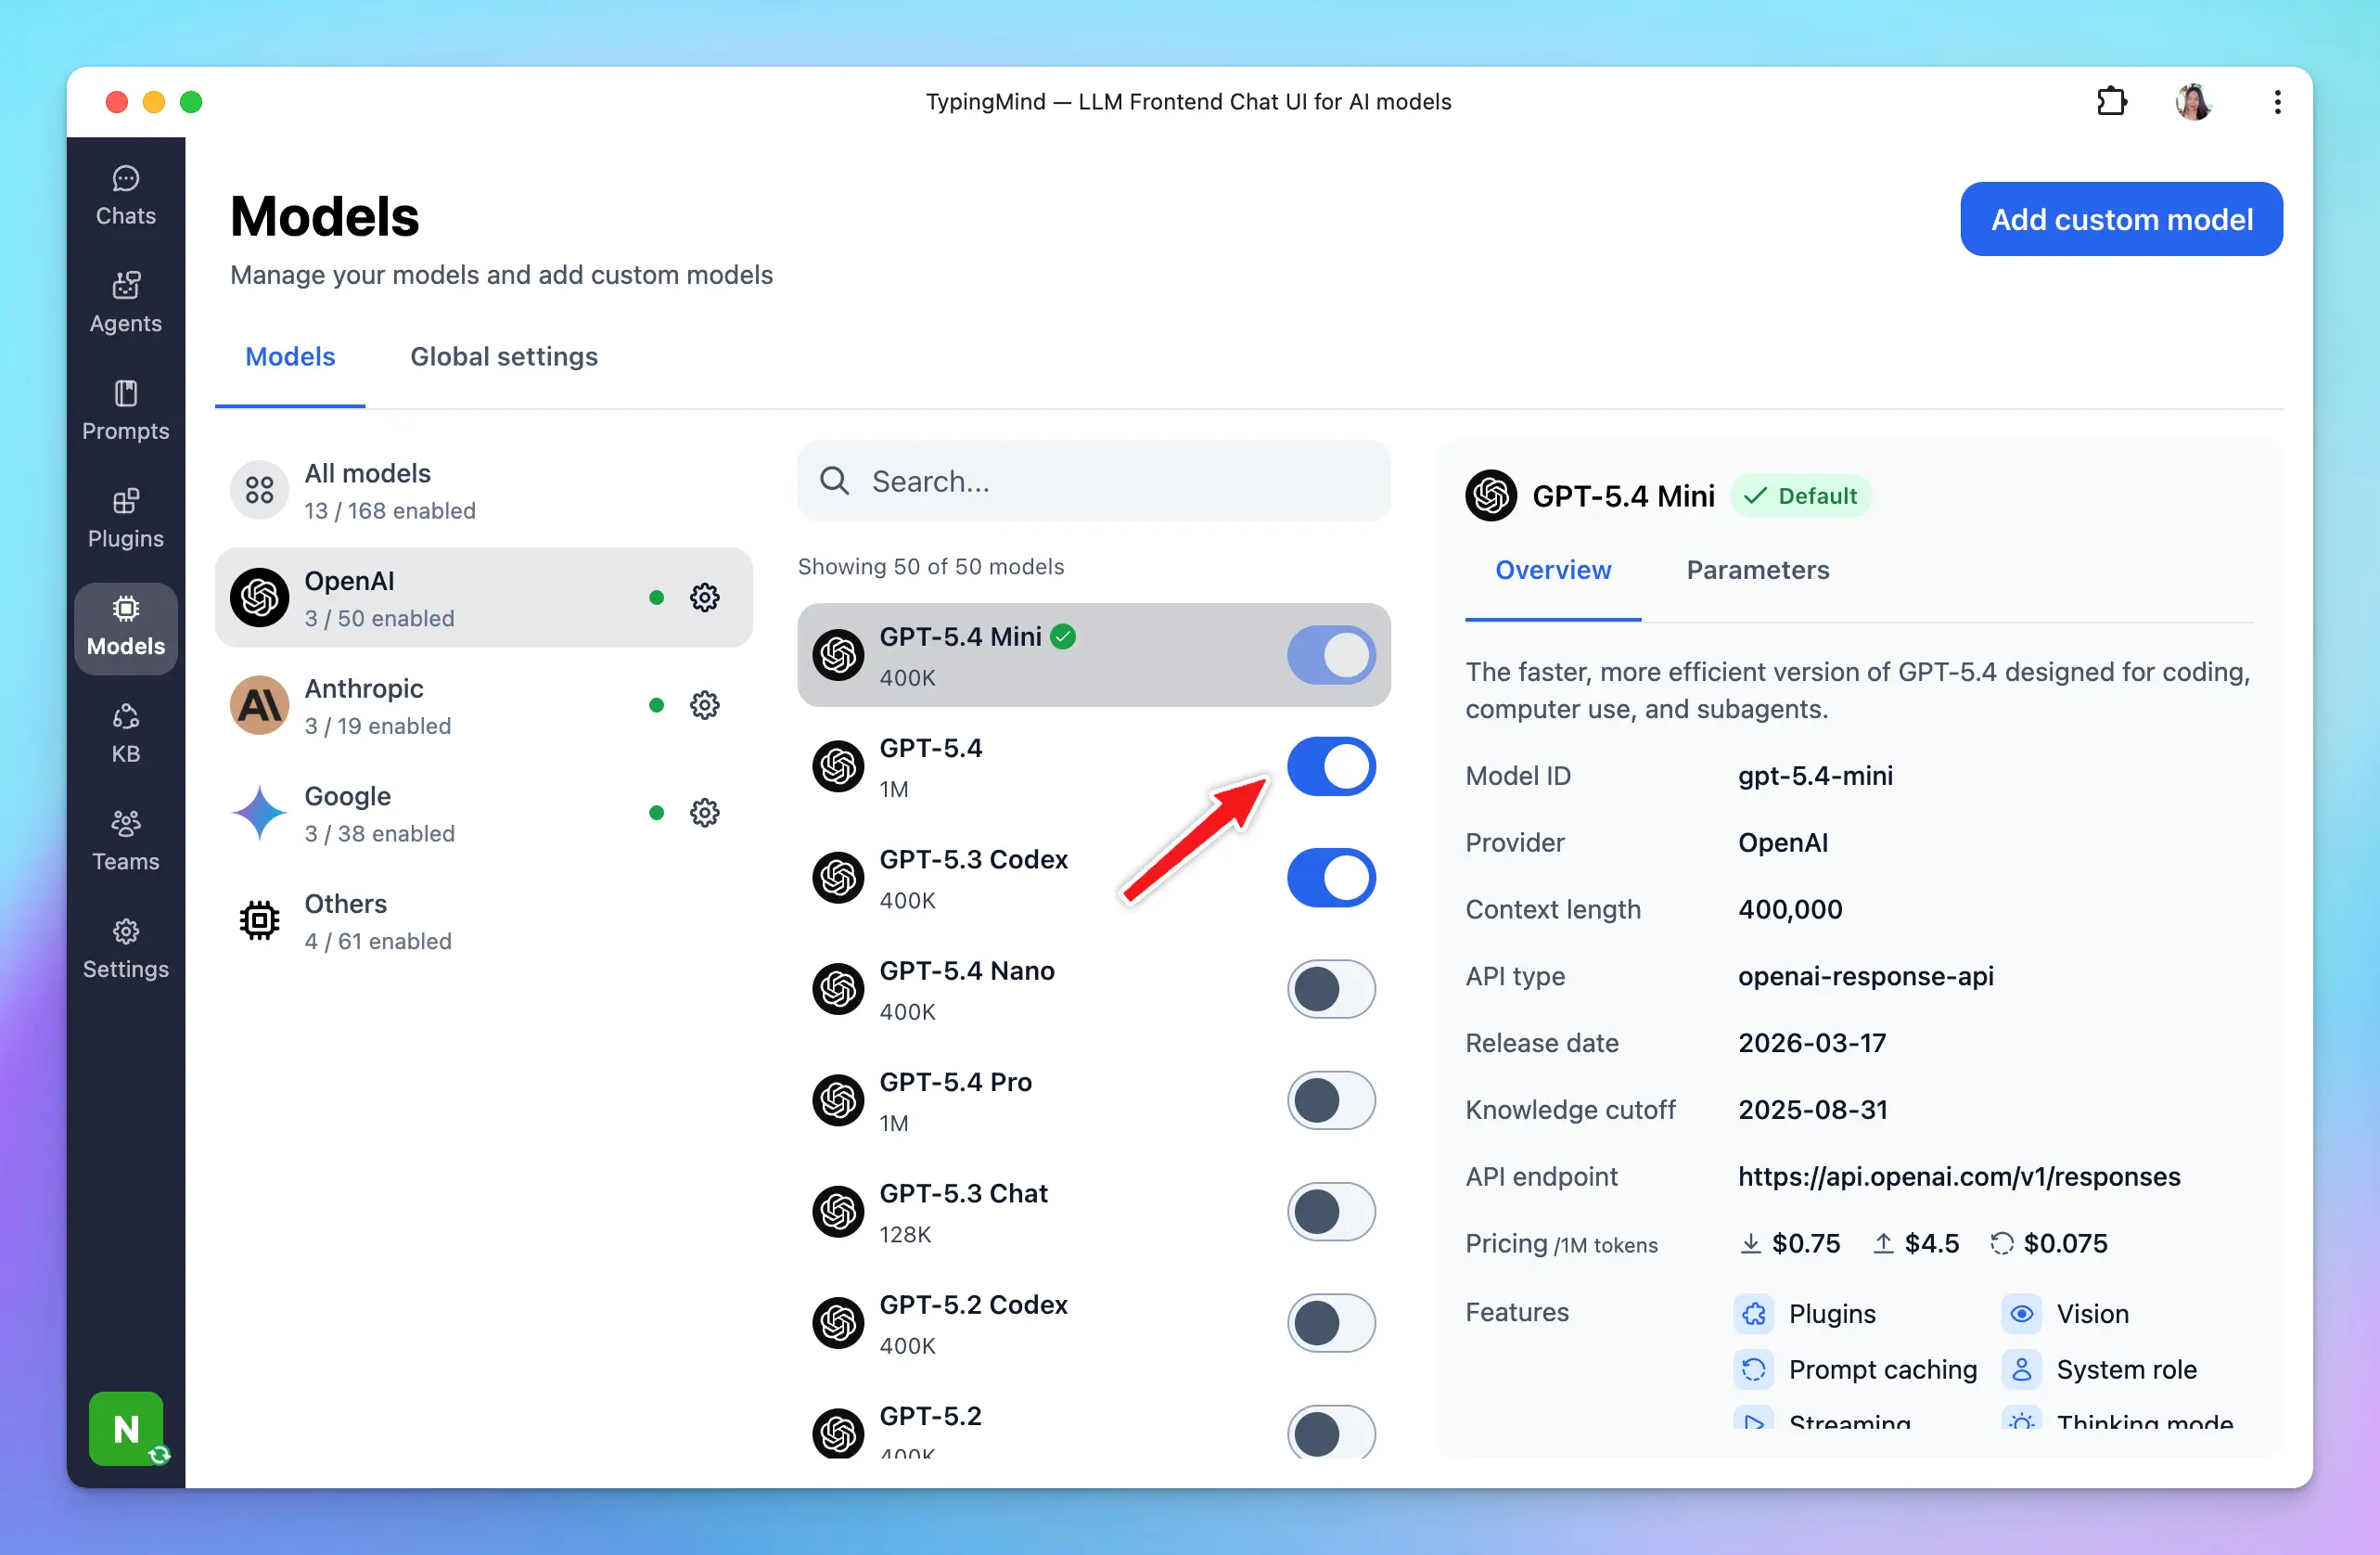 For a detailed walkthrough, see Manage & Connect AI Models.
Step 2 — Back up your data (optional)
Your chats are saved locally in your browser by default — nothing is sent to TypingMind’s servers unless you opt in. To protect against data loss and sync across devices, sign in with your email to enable TypingMind Cloud: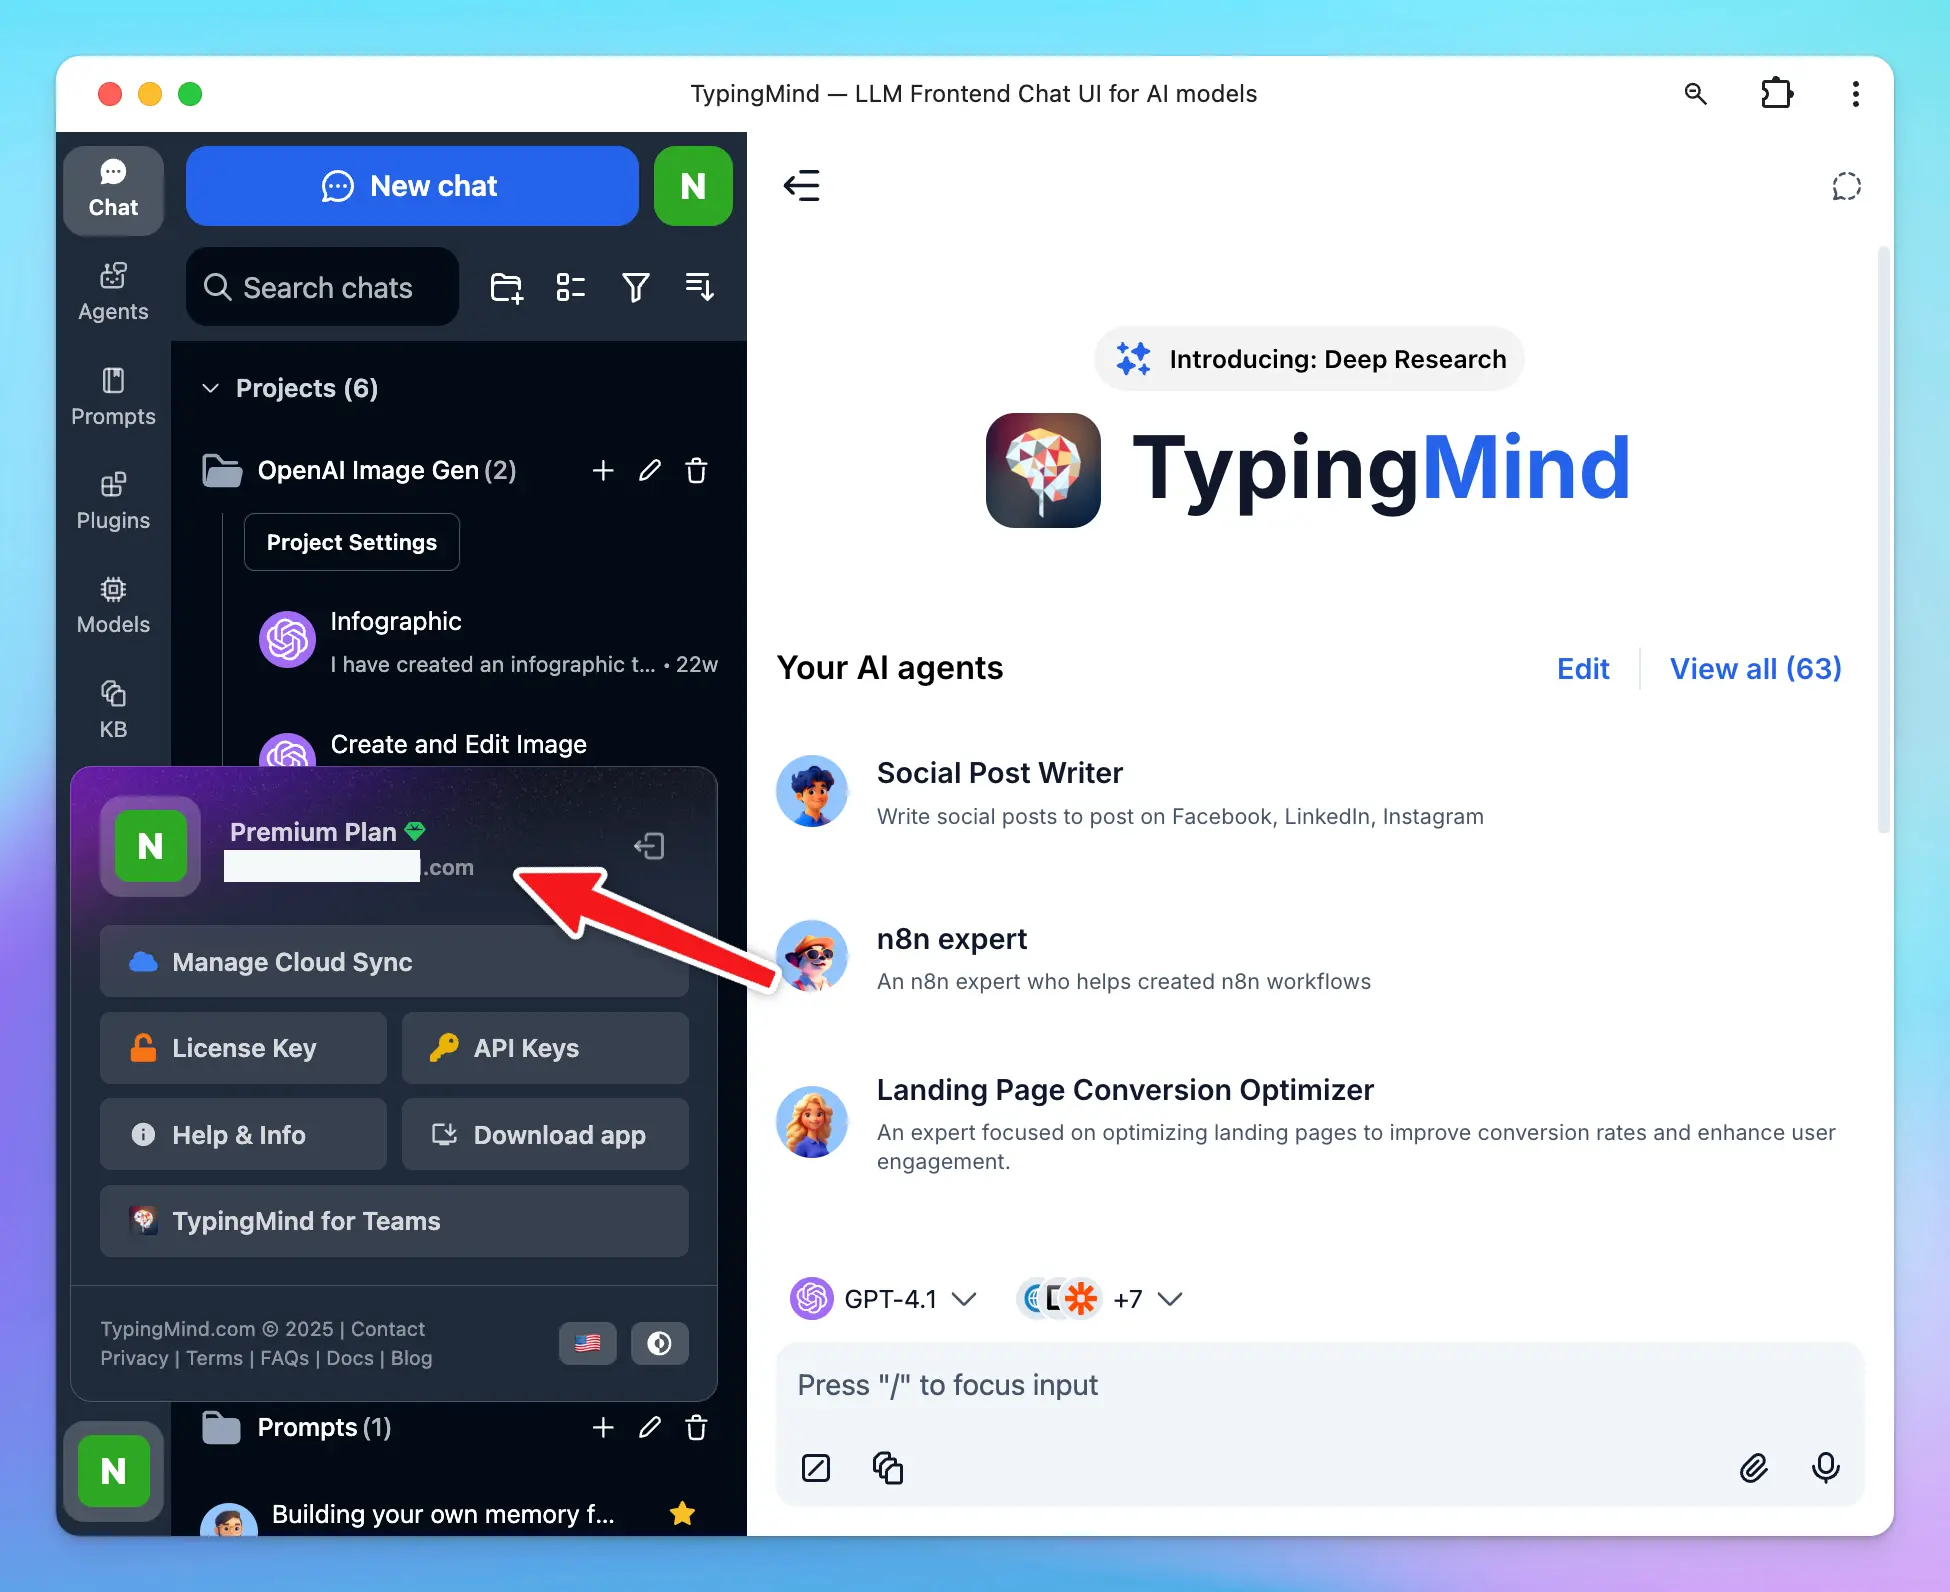 Cloud sync includes:
- Chats, prompts, agents, plugins, API keys, and settings
- Up to 50 MB free storage (expandable)
- Seamless sync across all your devices
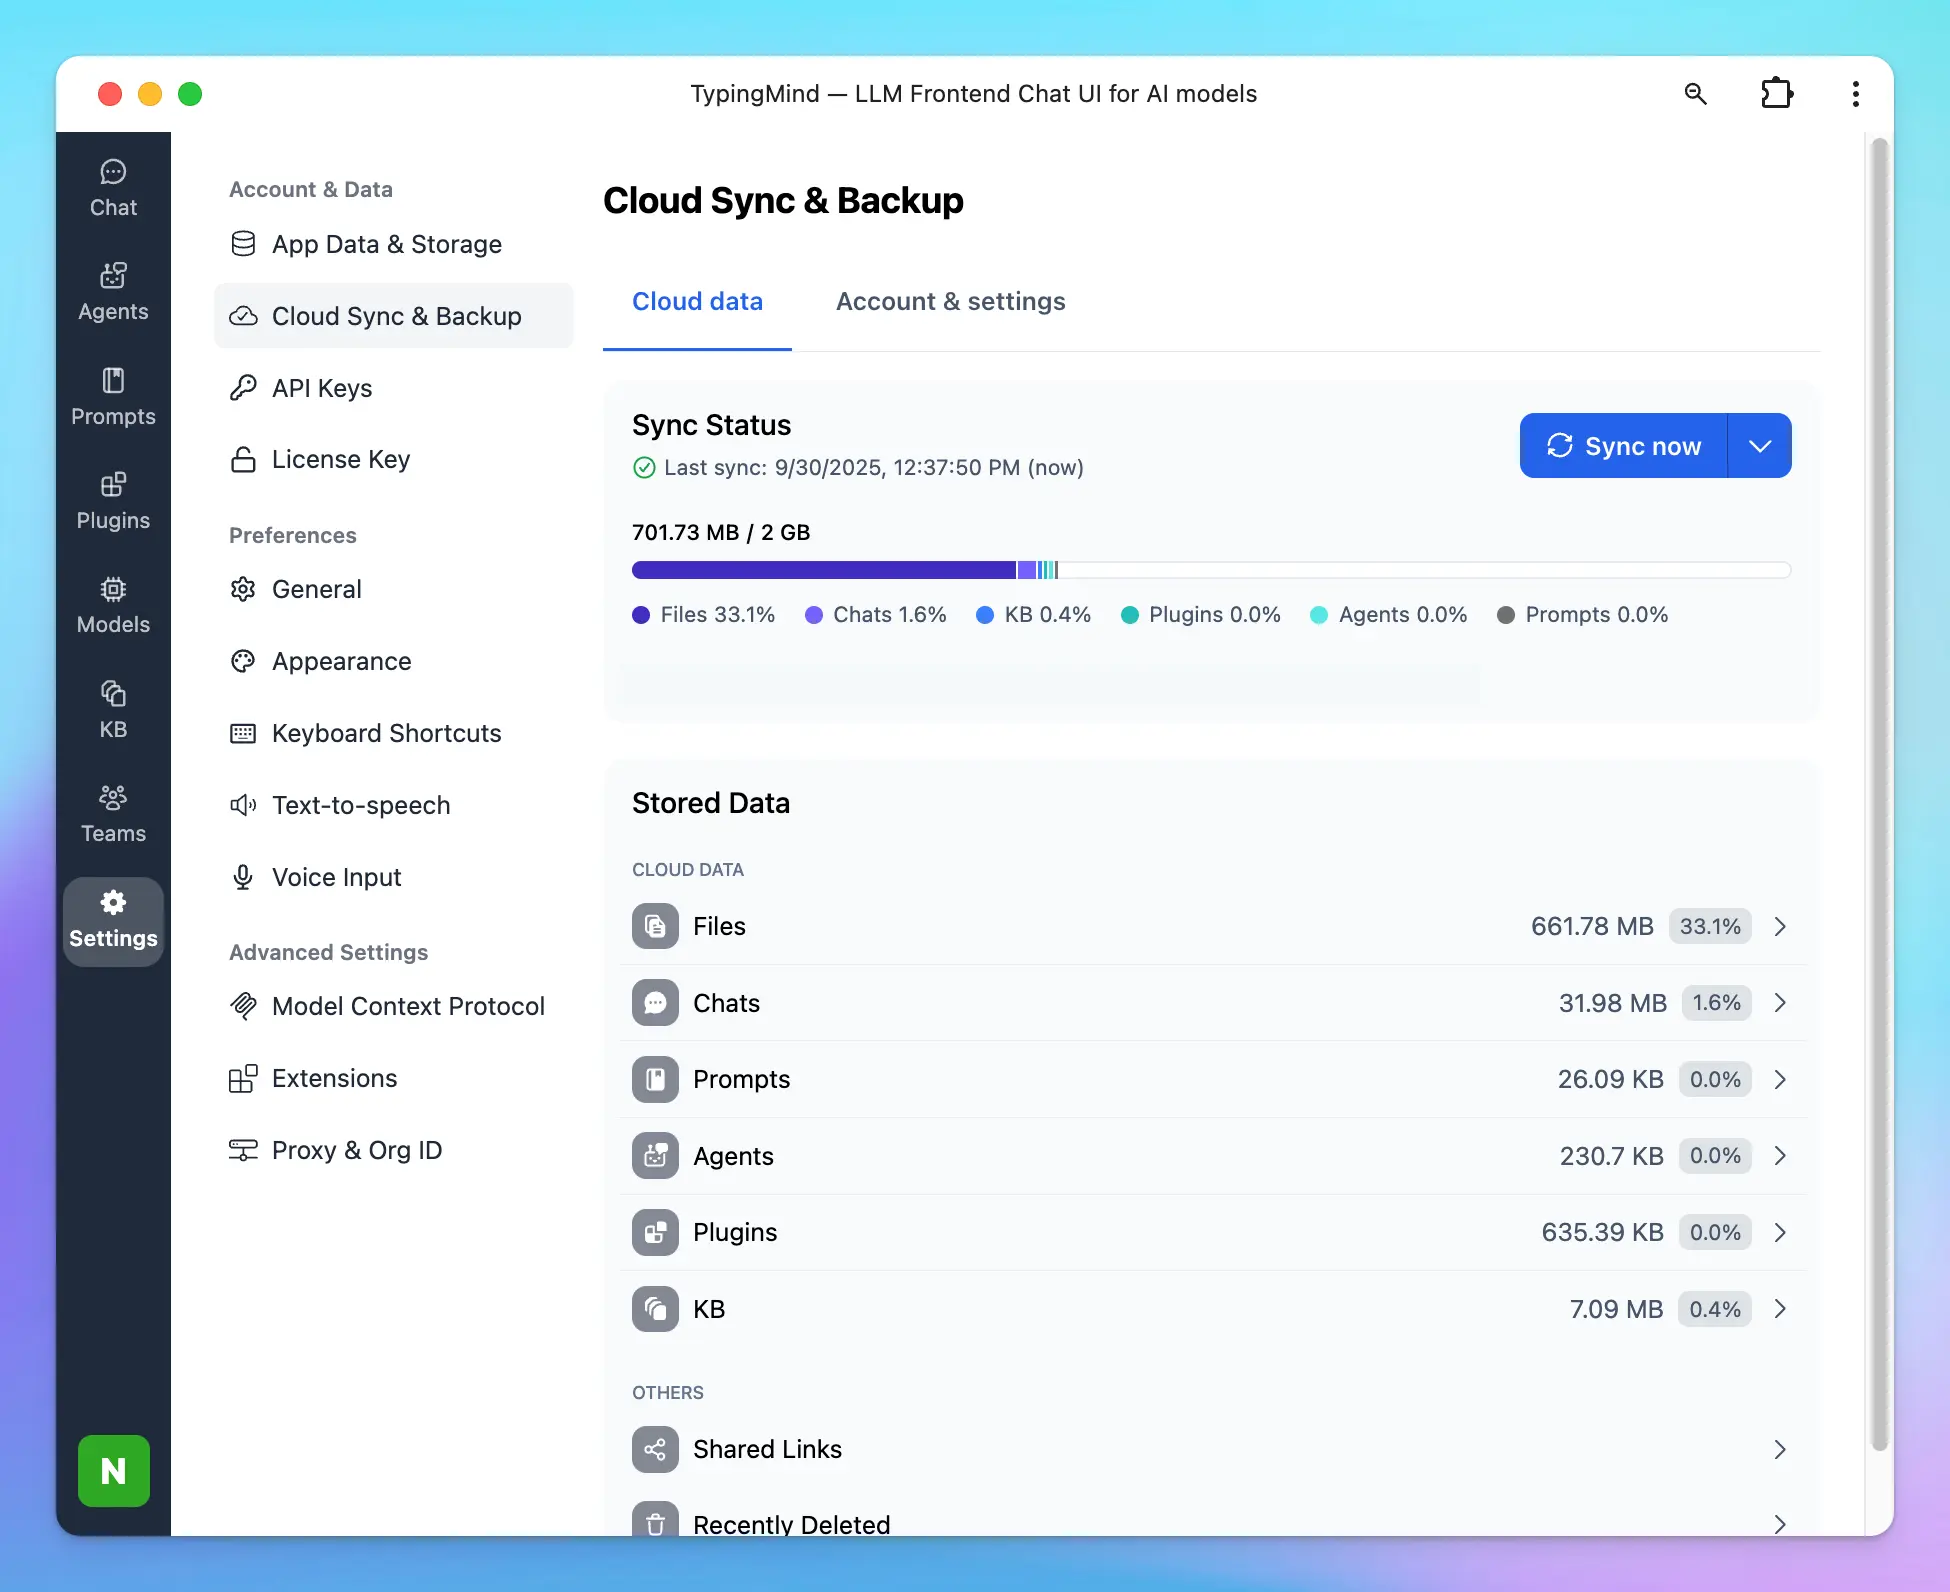 You can disable sync at any time by logging out, or connect your own cloud storage via TypingMind Extensions. Learn more in Cloud Sync & Backup.
Step 3 — Start your first conversation
Once your API keys are set up, select a model and start chatting. You can only use models for which you’ve added an API key.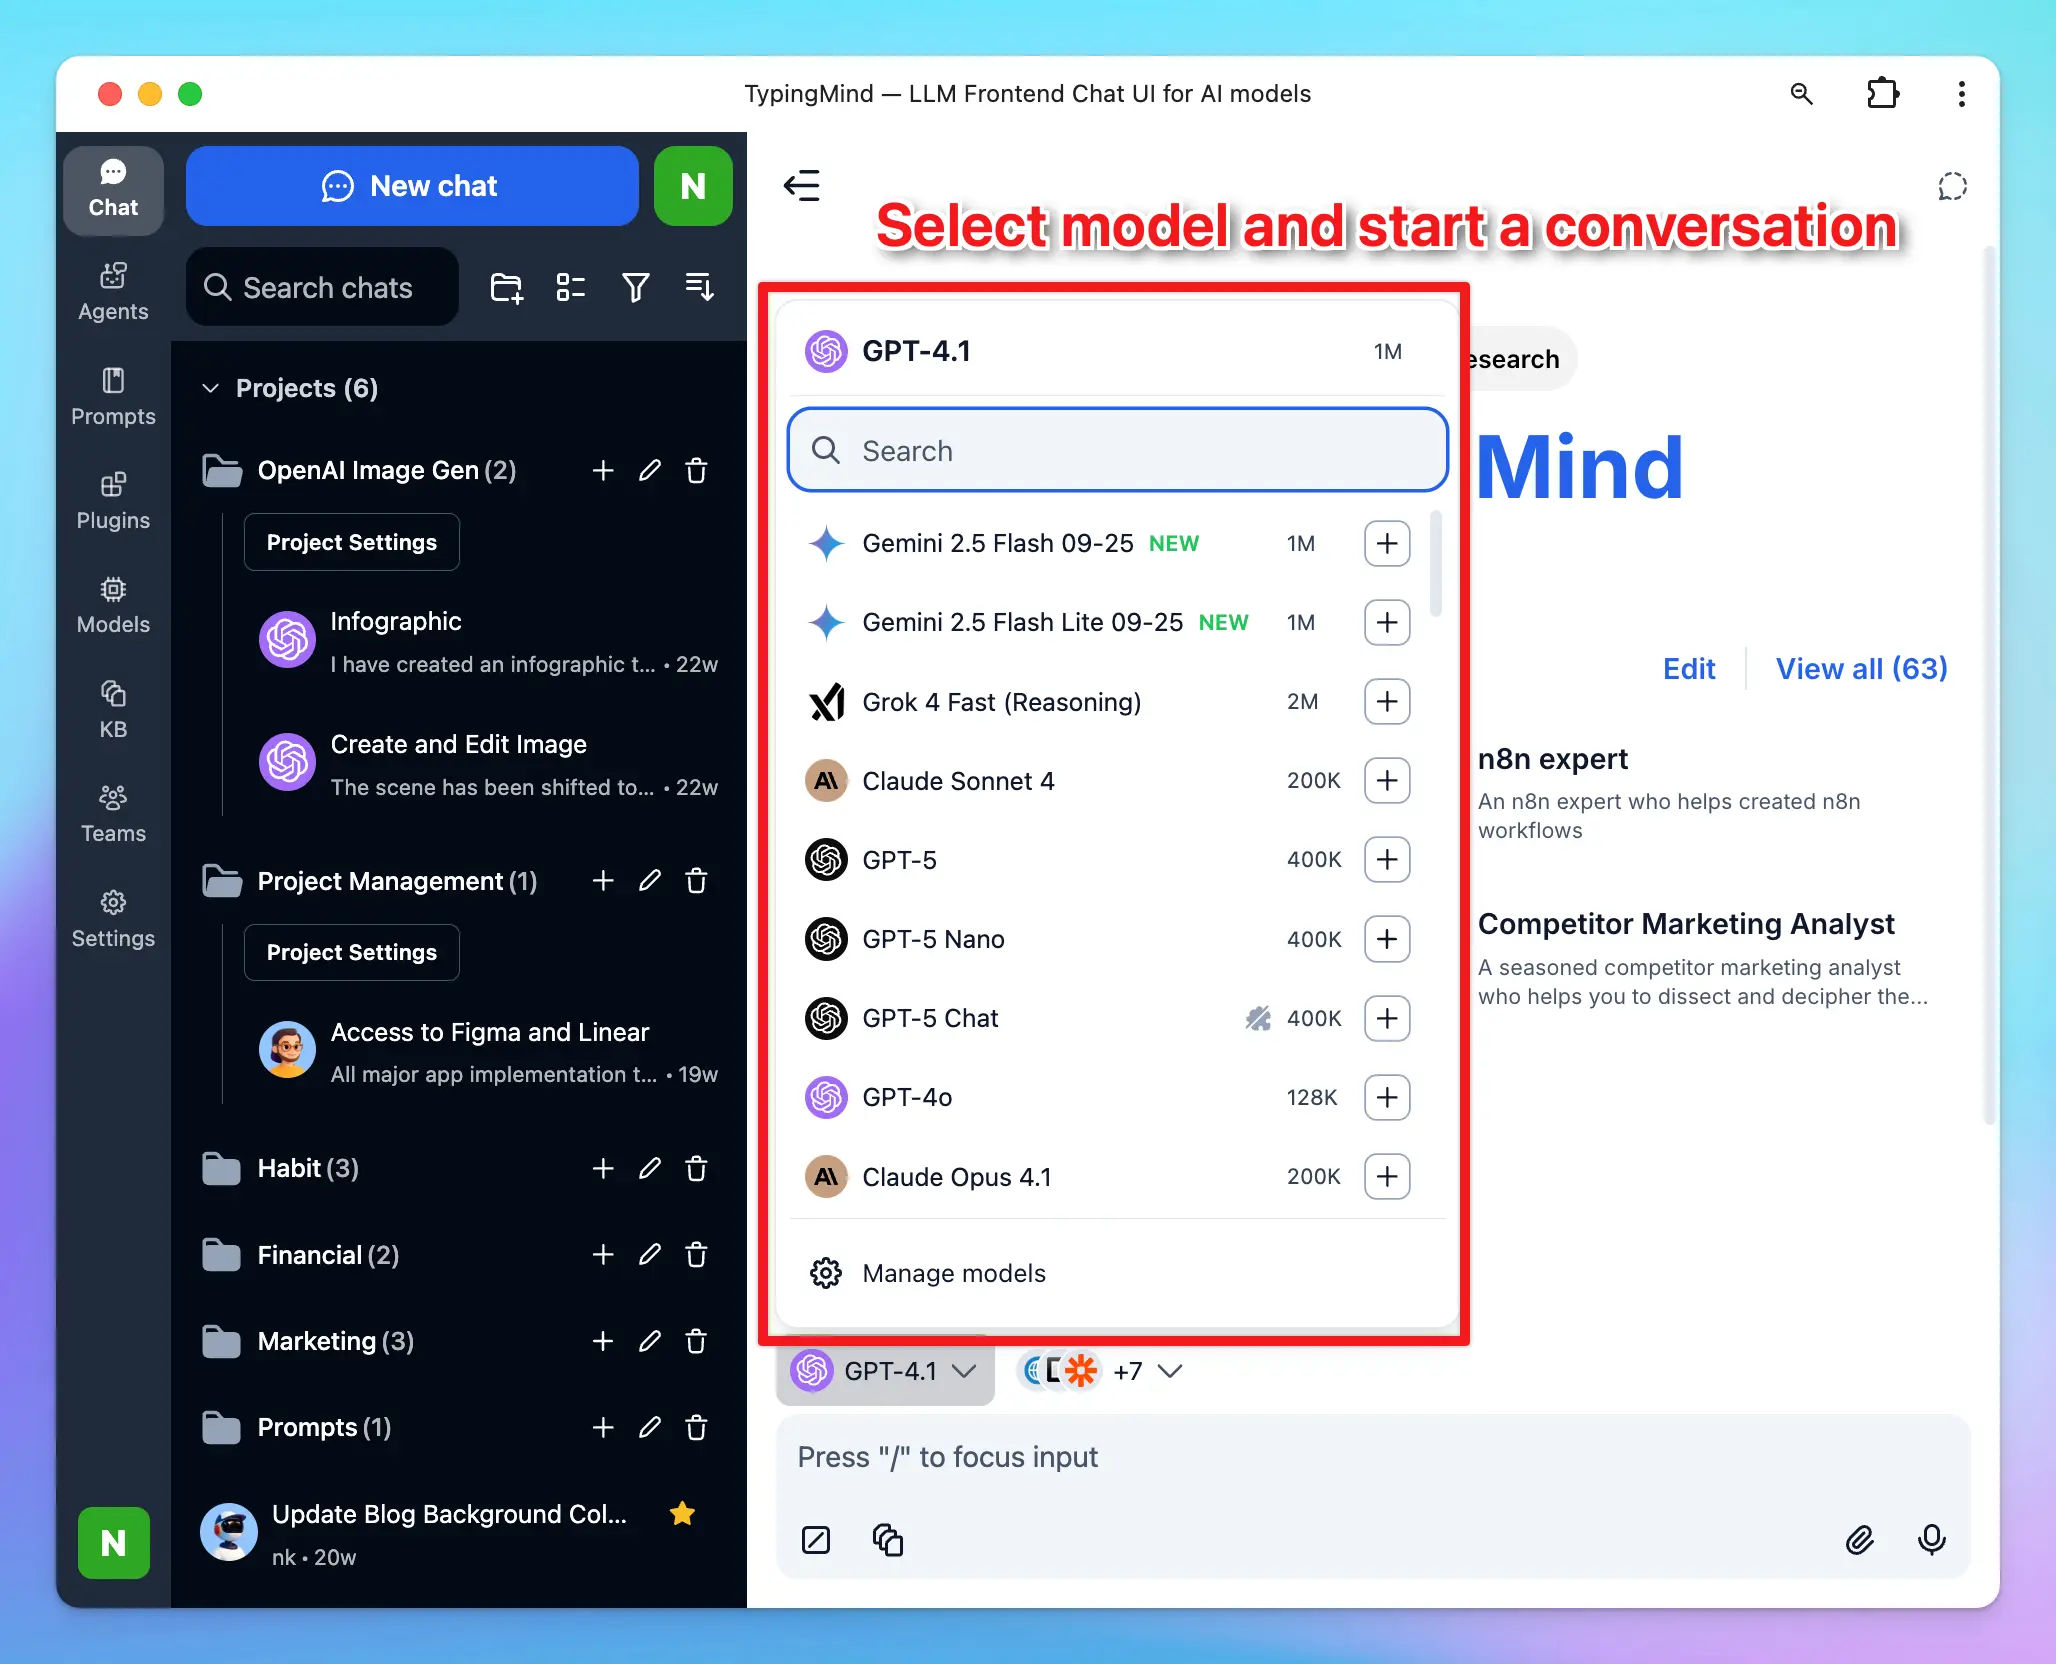
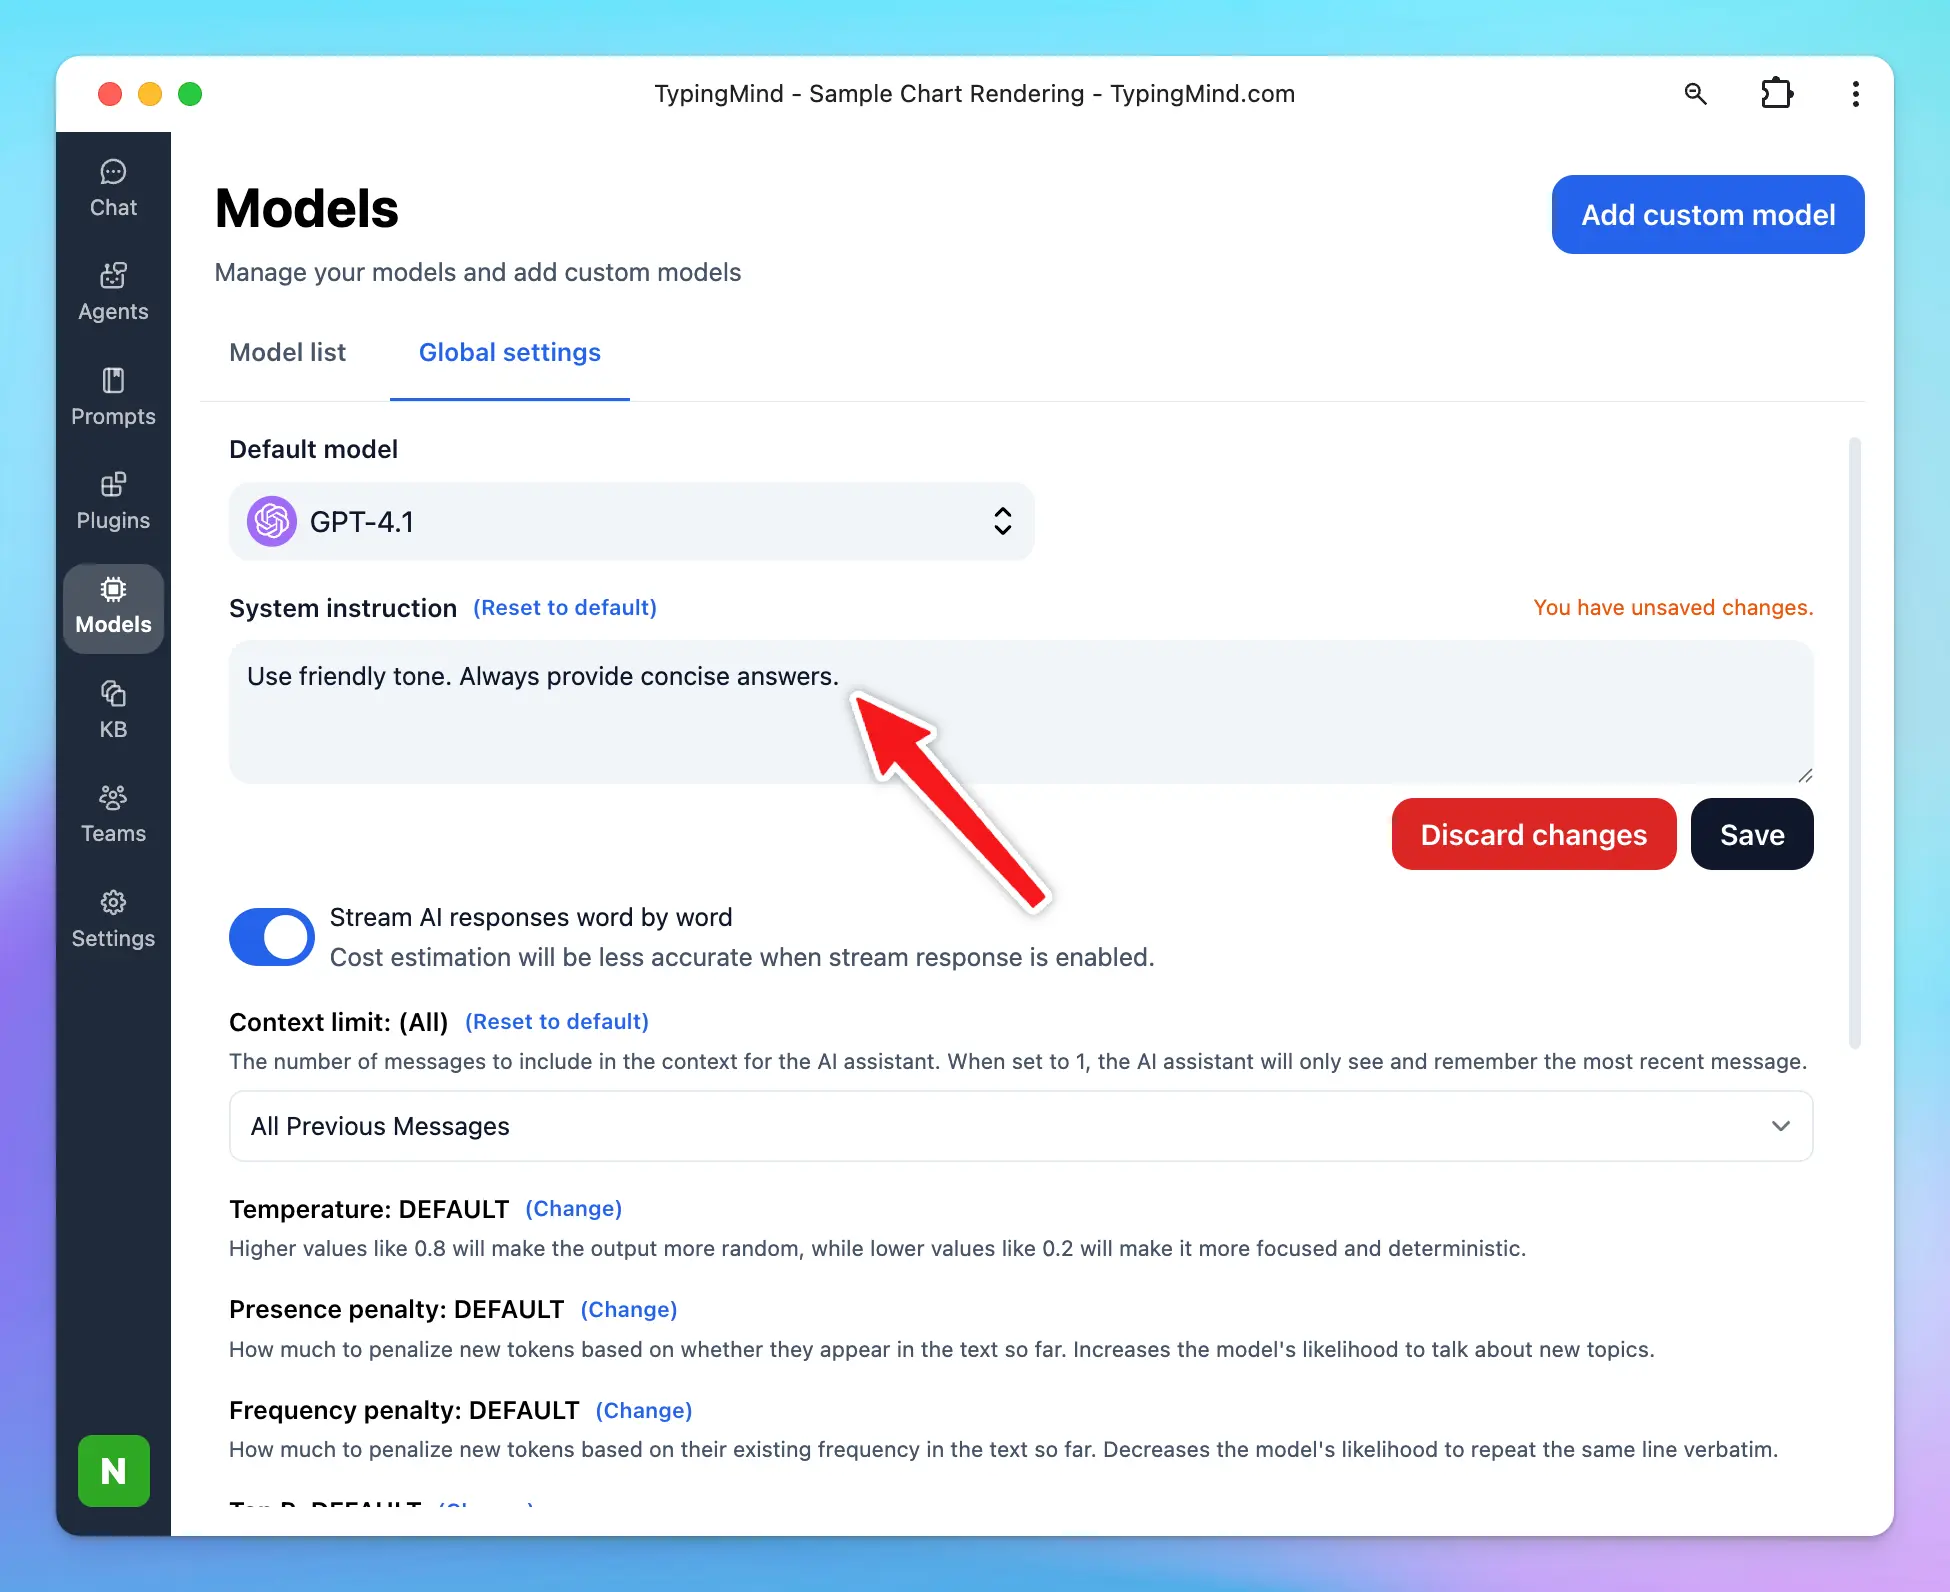
Step 4 — Set global AI behavior with System Instructions
System Instructions define how the AI behaves across your entire session — its tone, personality, and scope. Set them in Models → Global Settings.What is context length?
What is context length?
Context length is the maximum number of tokens (words/characters) an AI model can hold in memory during a conversation. Once the limit is reached, older messages are dropped.System Instructions are persistent — the model always follows them, even after earlier messages fall out of context. For reference, GPT-4o supports up to 128,000 tokens.
 Learn more: System Instruction
Step 5 — Get higher-quality responses
Build a Prompt Library
Build a Prompt Library
Save and reuse prompts for recurring workflows. Access your library from the Prompts menu in the left sidebar — use prebuilt prompts or create your own.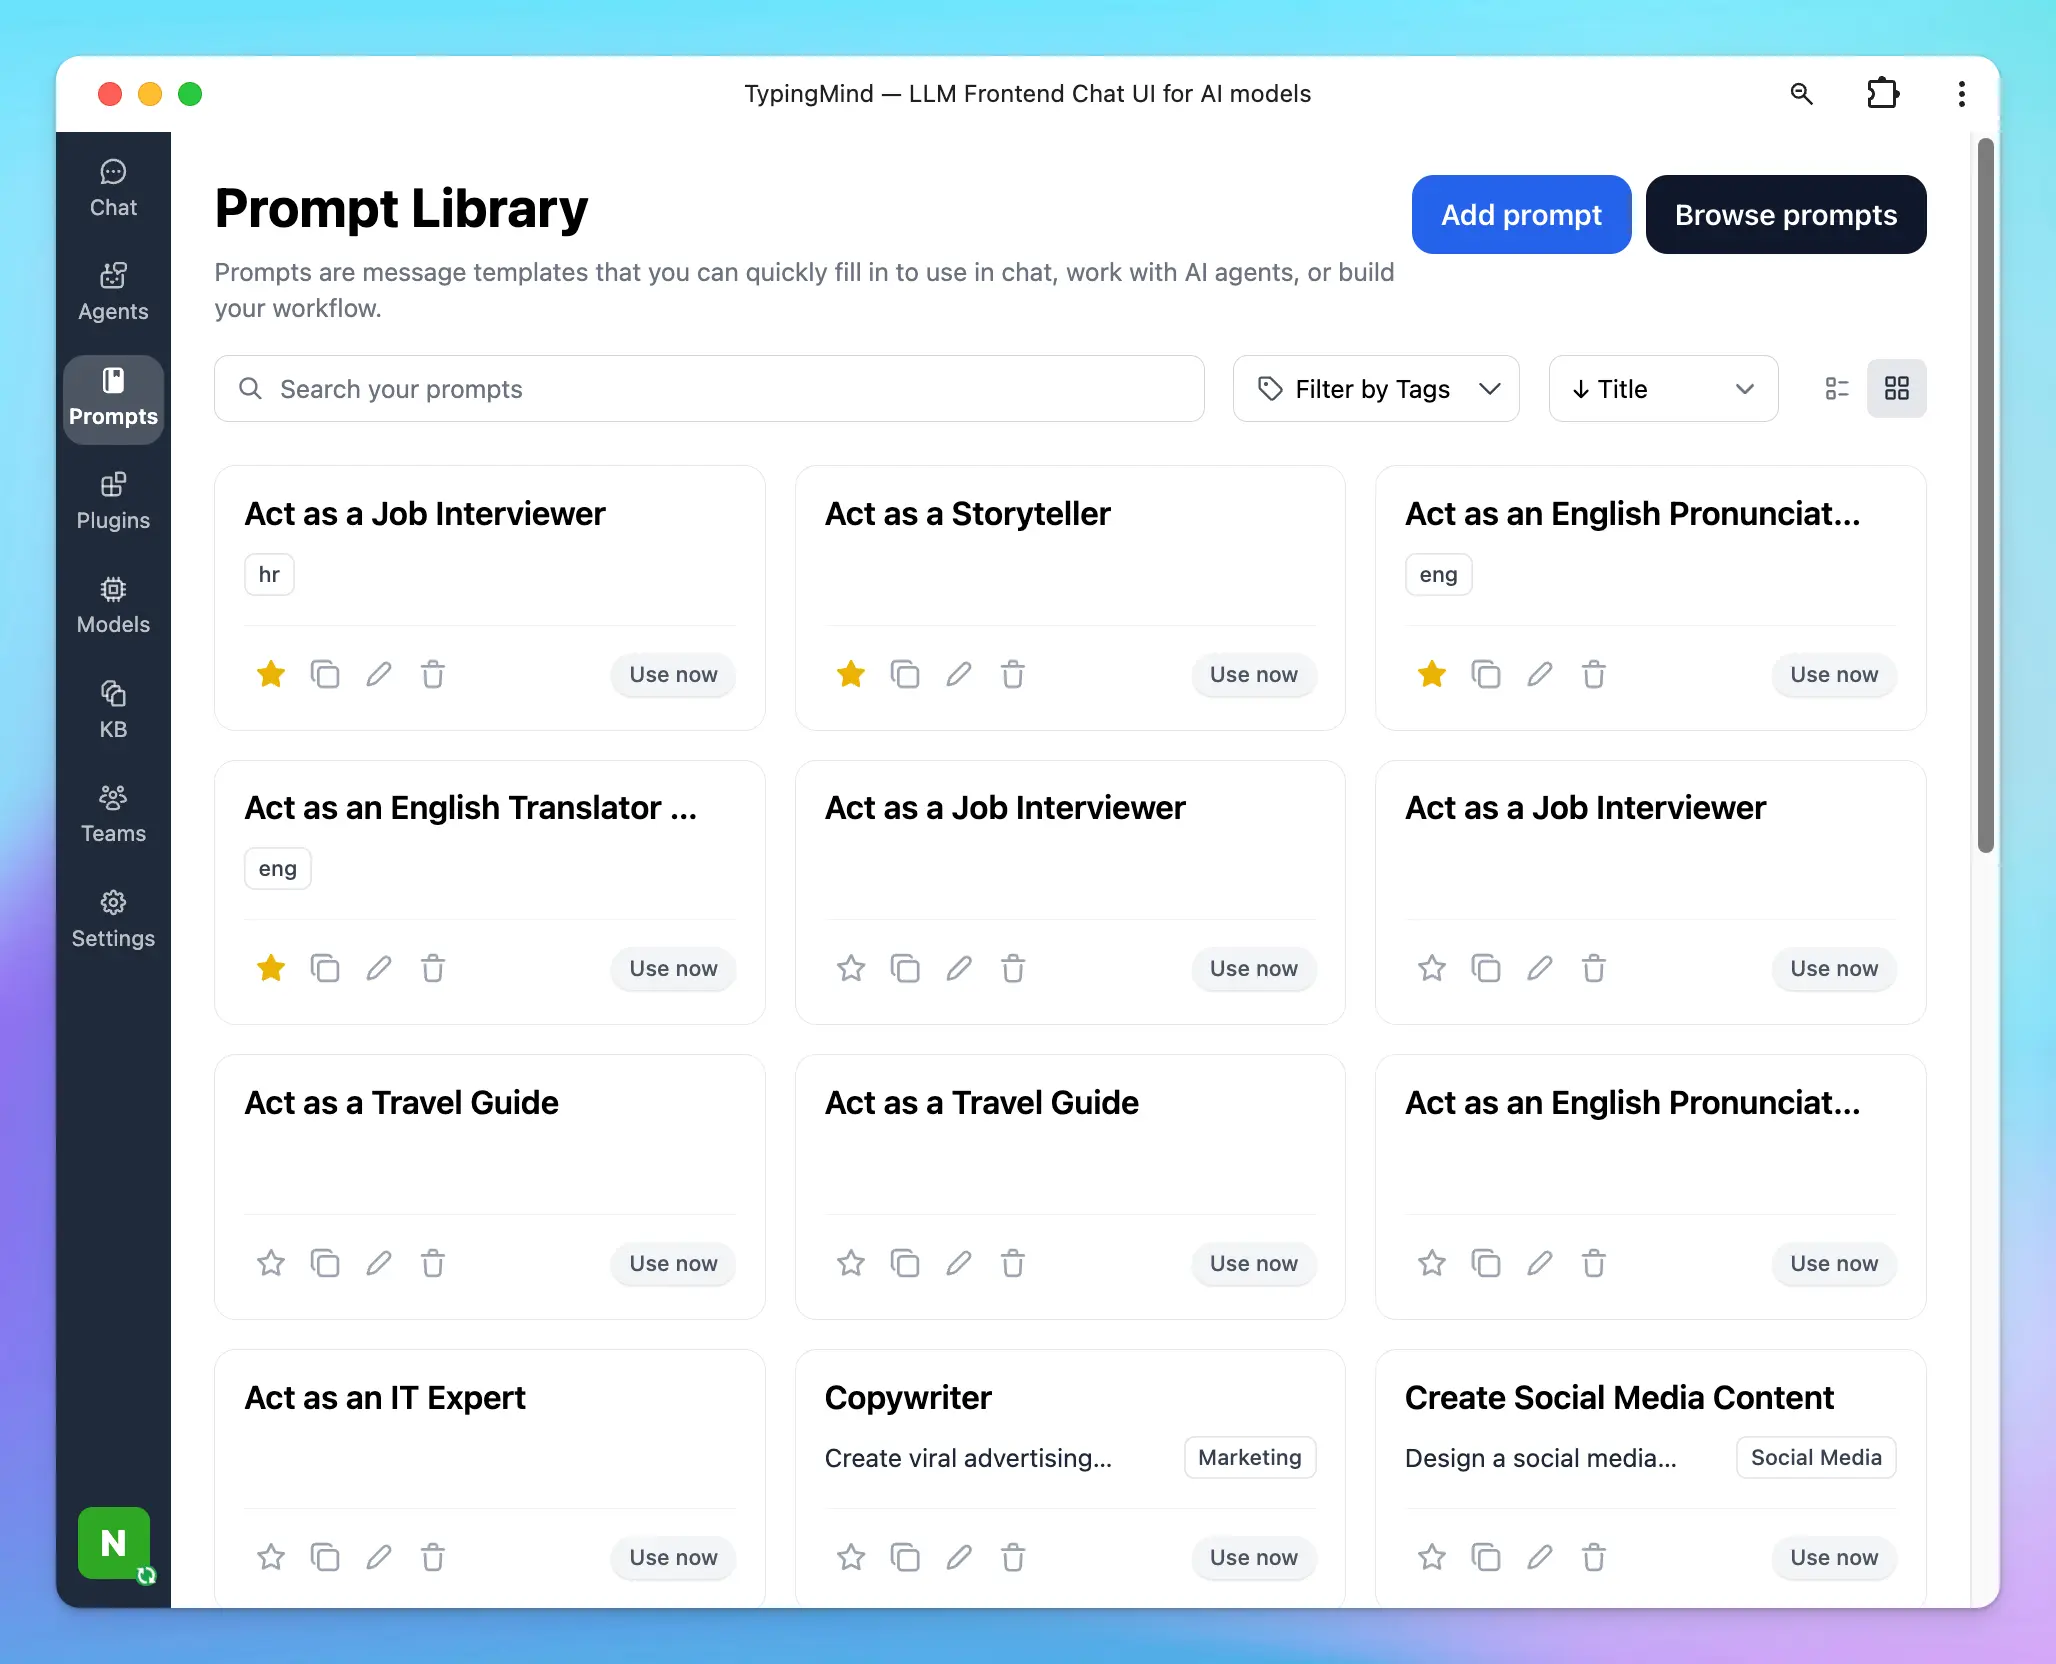 Tip: Be specific. “Explain machine learning basics with examples of supervised and unsupervised learning” will outperform “Explain machine learning” every time.Learn more: Use Prompt Library
Tip: Be specific. “Explain machine learning basics with examples of supervised and unsupervised learning” will outperform “Explain machine learning” every time.Learn more: Use Prompt LibraryUpload documents & videos
Upload documents & videos
Attach files directly to a conversation using the attach icon or drag-and-drop. The AI reads the content and can summarize, explain, or answer questions based on it.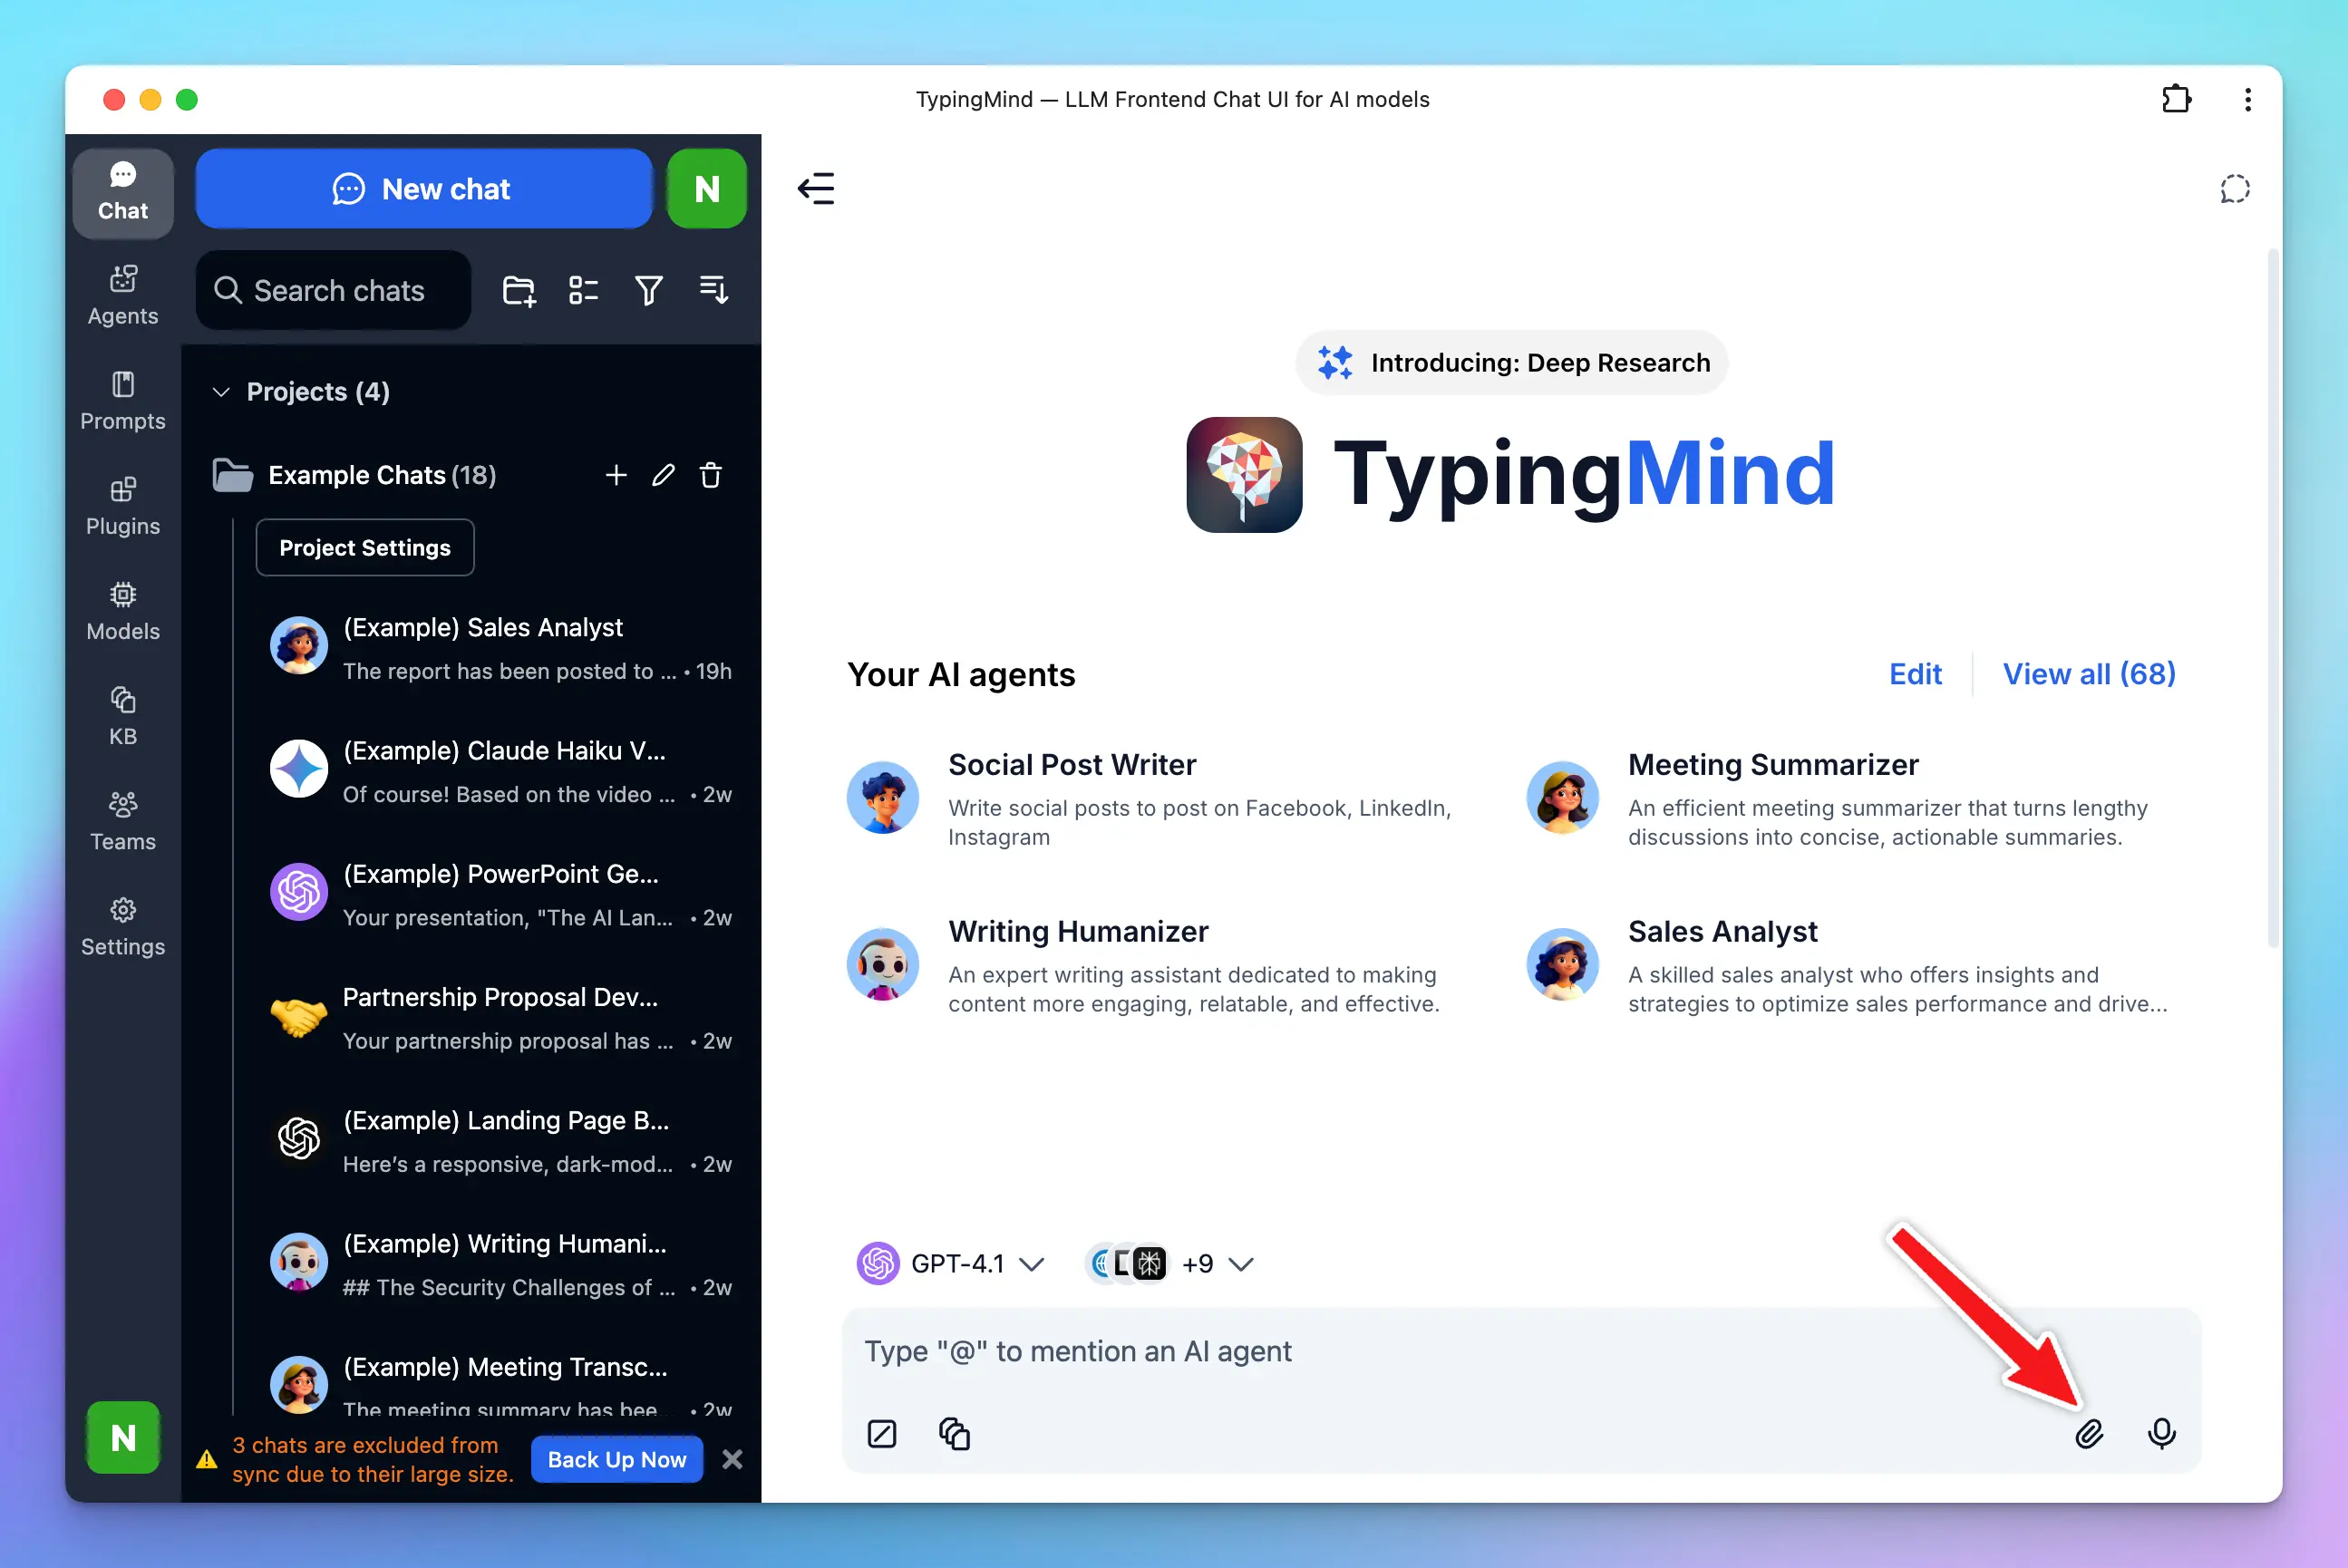 Tip: Well-structured, relevant documents yield the most accurate results — ideal for analyzing reports or summarizing long texts.Learn more: Chat with Files or Videos
Tip: Well-structured, relevant documents yield the most accurate results — ideal for analyzing reports or summarizing long texts.Learn more: Chat with Files or VideosExtend with Plugins
Extend with Plugins
Plugins give the AI access to the internet, image generation, code rendering, and more. Find them in the Plugins section of the left panel.Popular plugins include: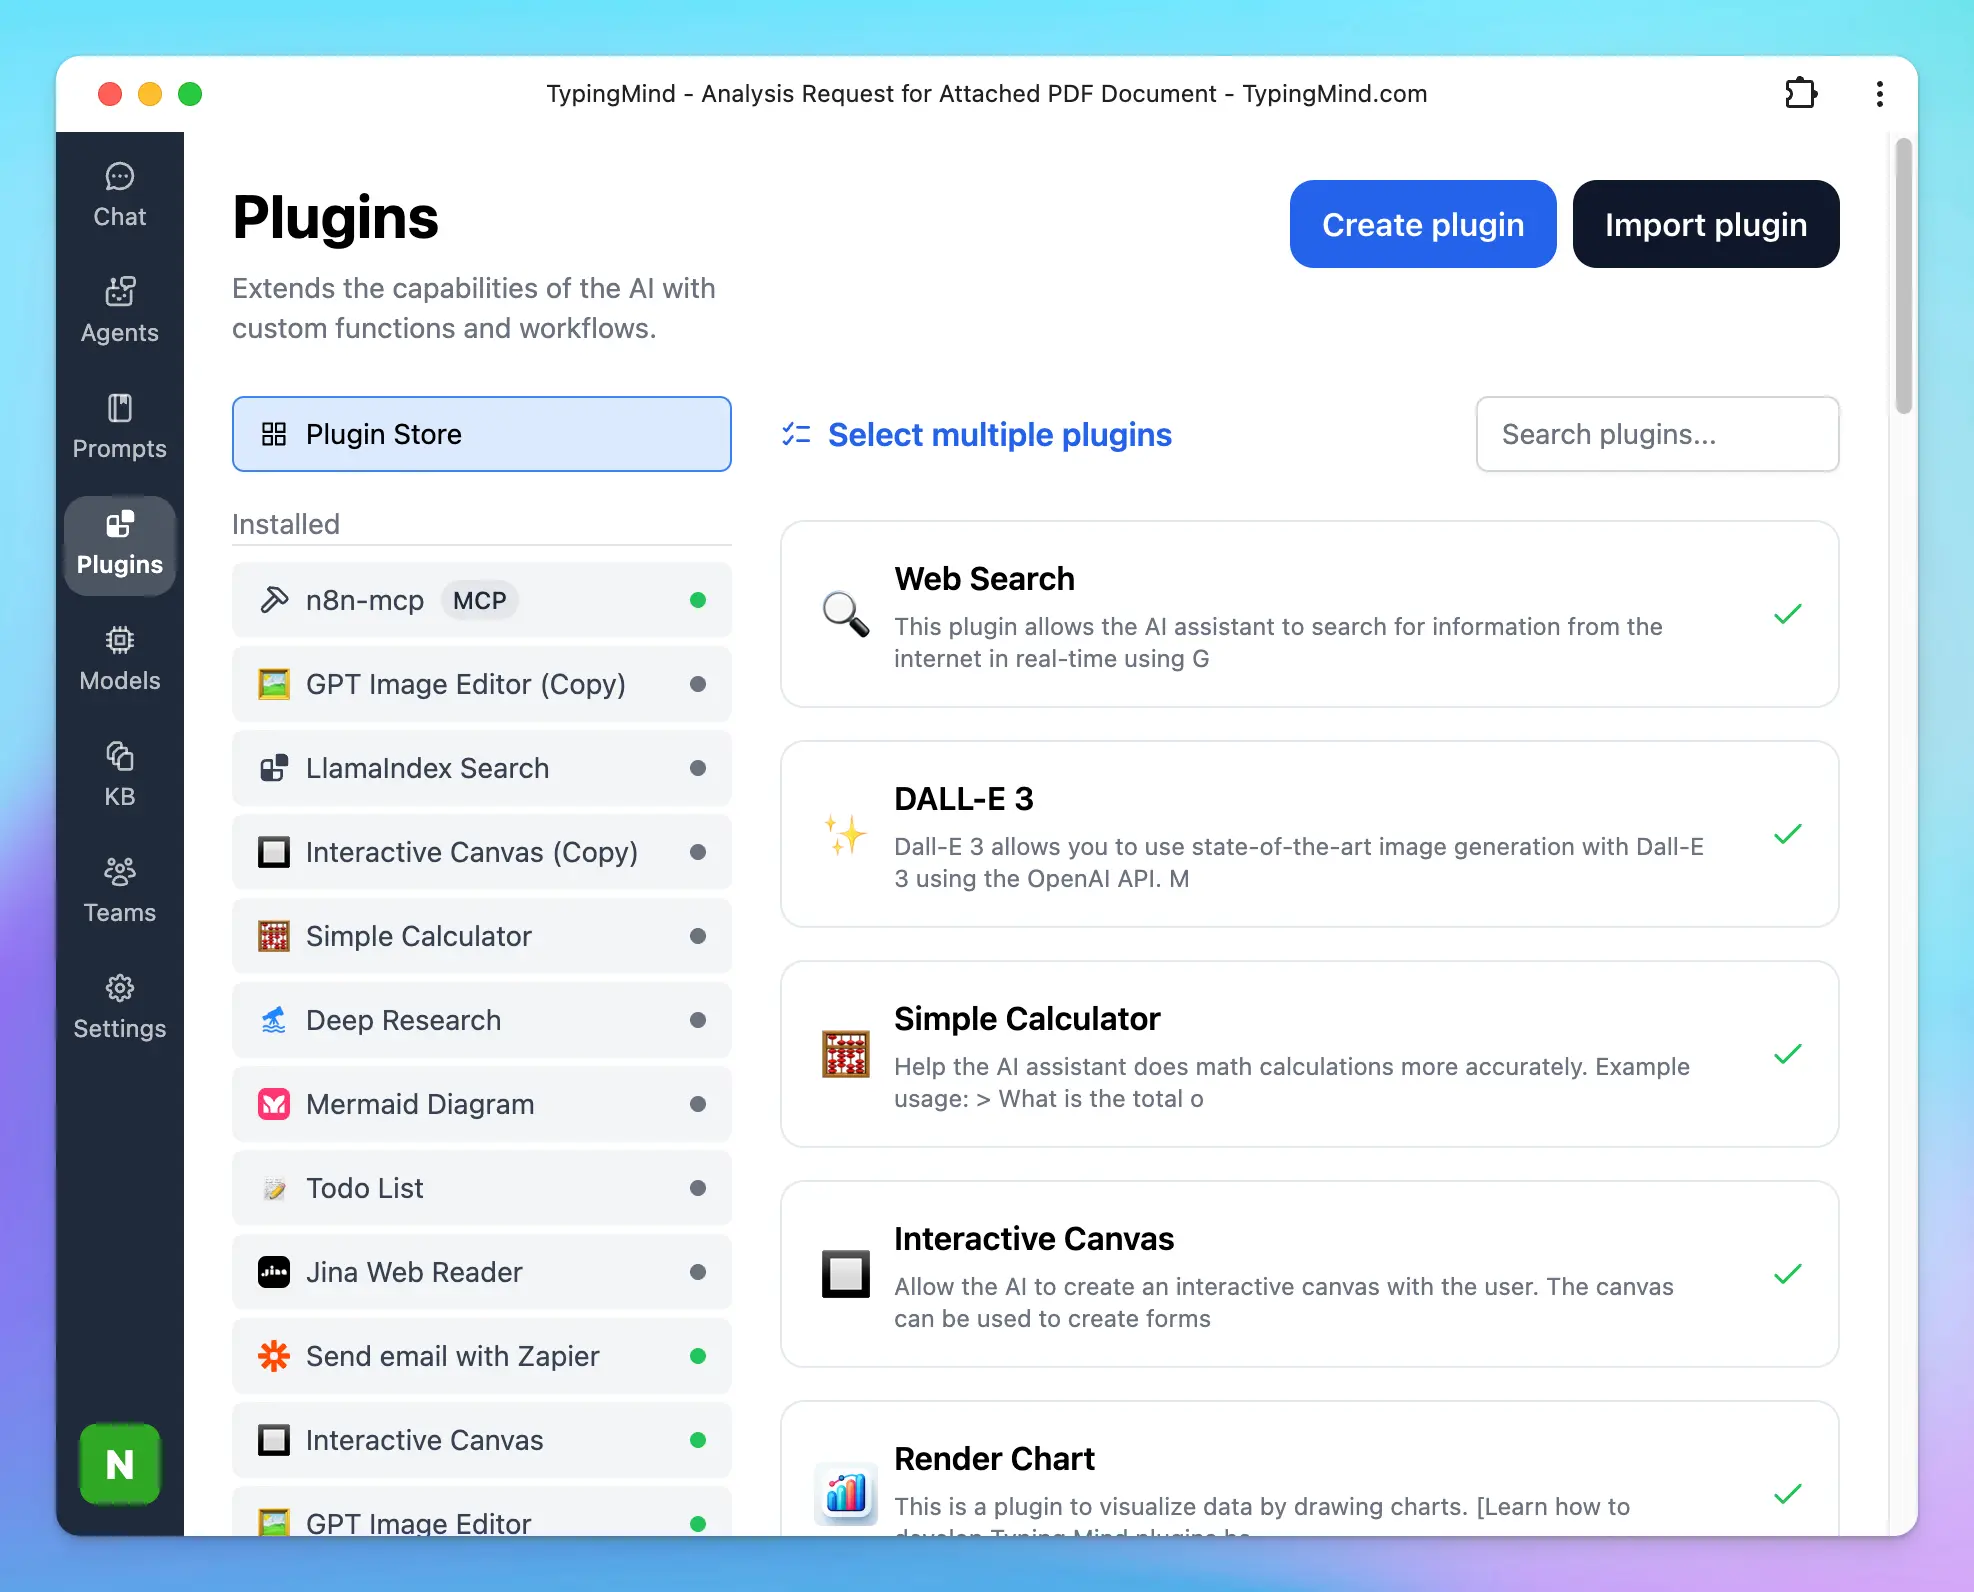
- Web Search (Model Tool) — real-time internet access
- GPT Image Editor — generate and edit images
- Deep Research — multi-step research on complex topics
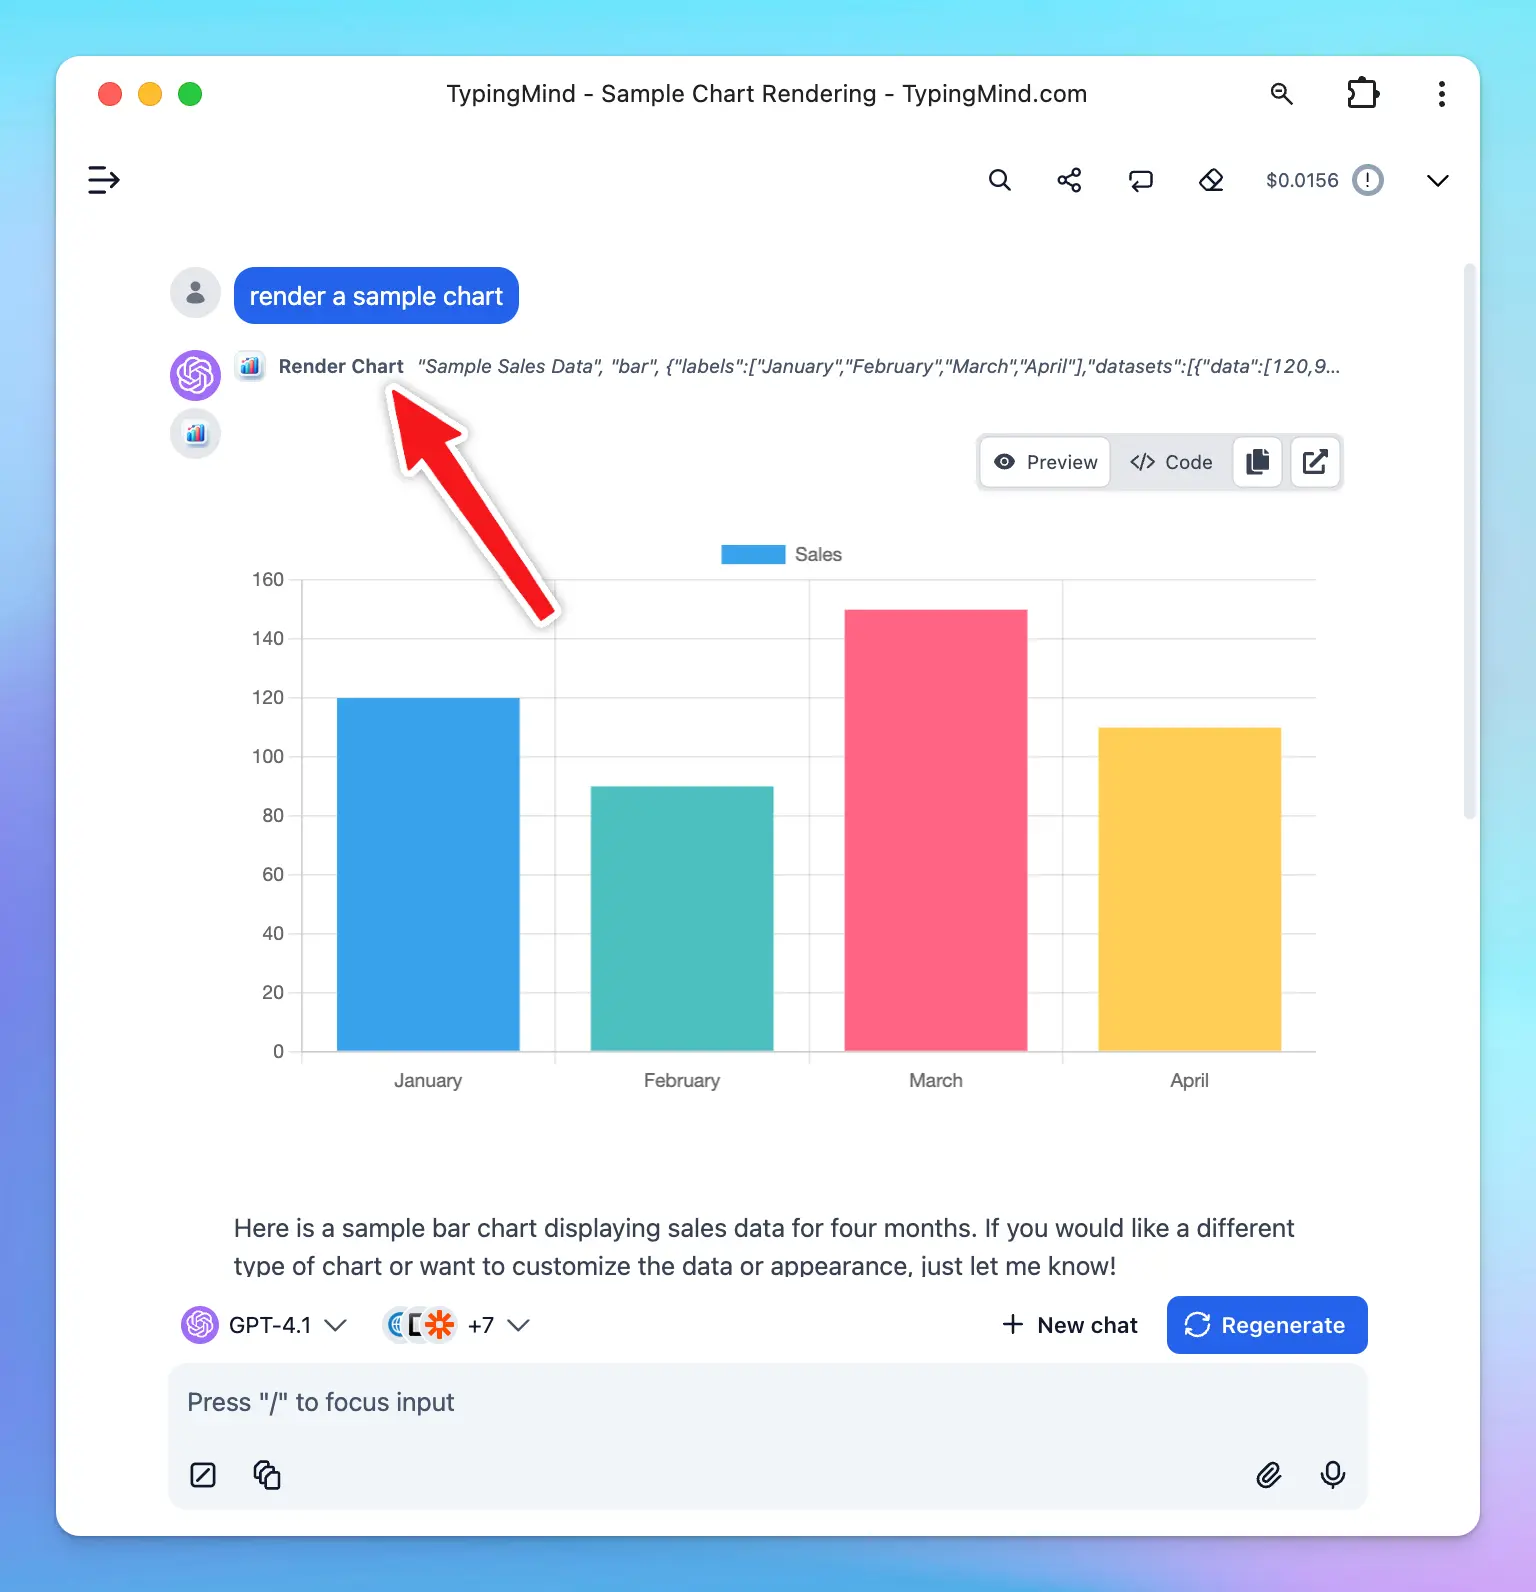
- Interactive Canvas — render charts and code
Connect a Knowledge Base (RAG)
Connect a Knowledge Base (RAG)
The Knowledge Base feature lets you upload files or connect external sources (Google Drive, GitHub, Notion, websites) so the AI can retrieve relevant context when answering your questions.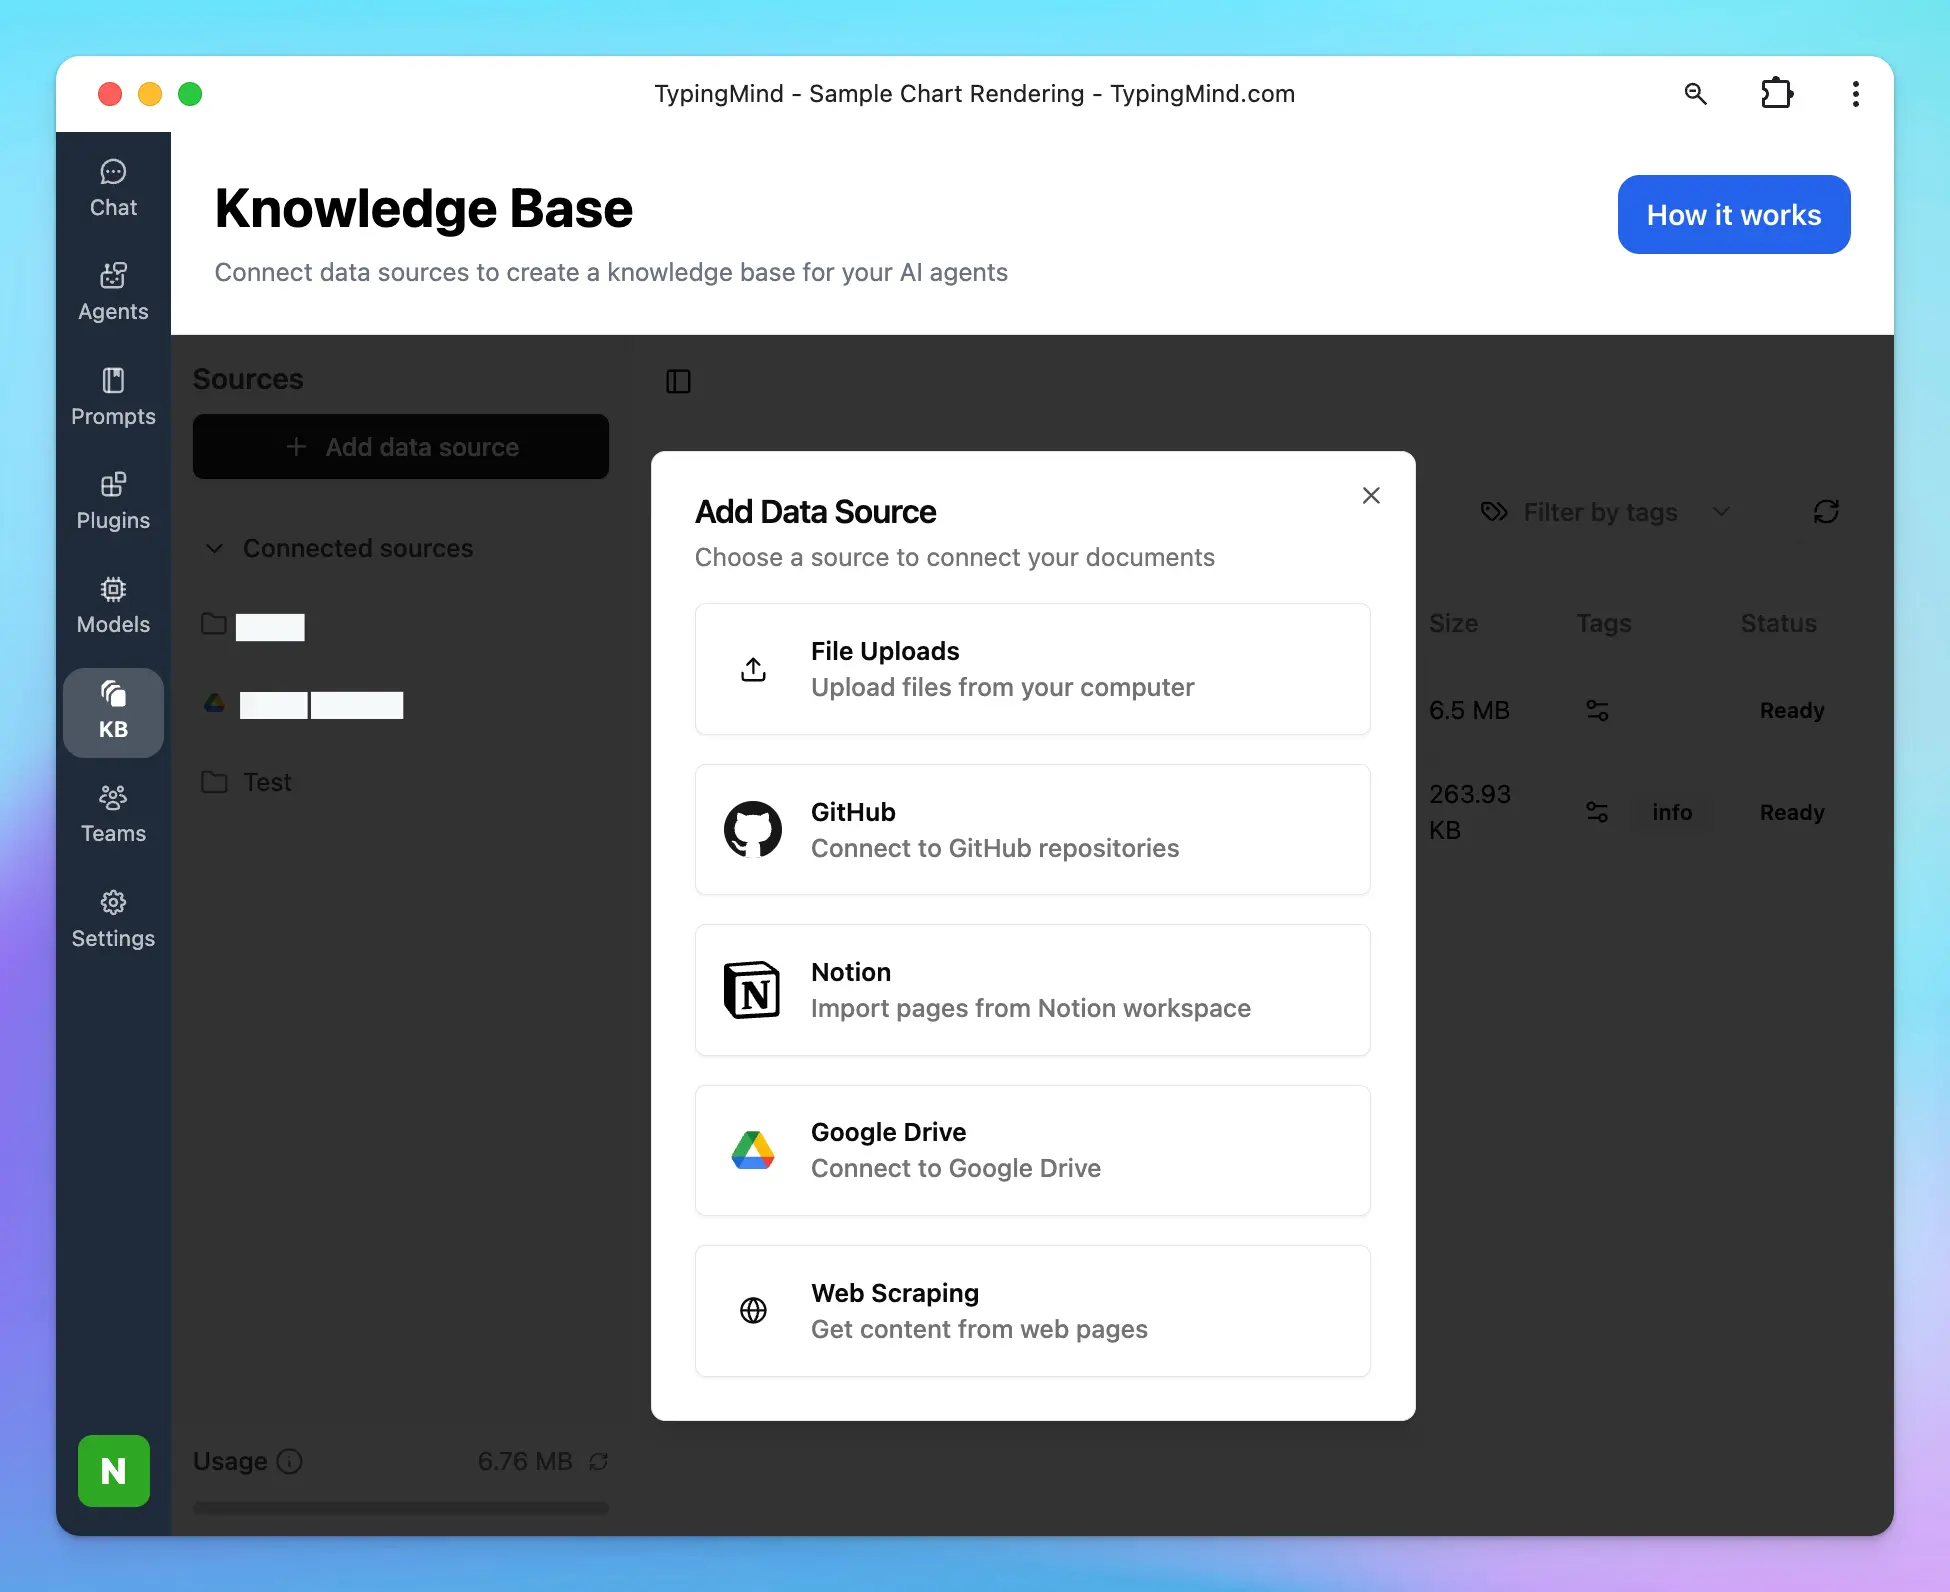 To get started: click the KB tab → Add Data Source → upload files or connect a source.Learn more at RAG Knowledge Base
To get started: click the KB tab → Add Data Source → upload files or connect a source.Learn more at RAG Knowledge BaseBuild Custom AI Agents
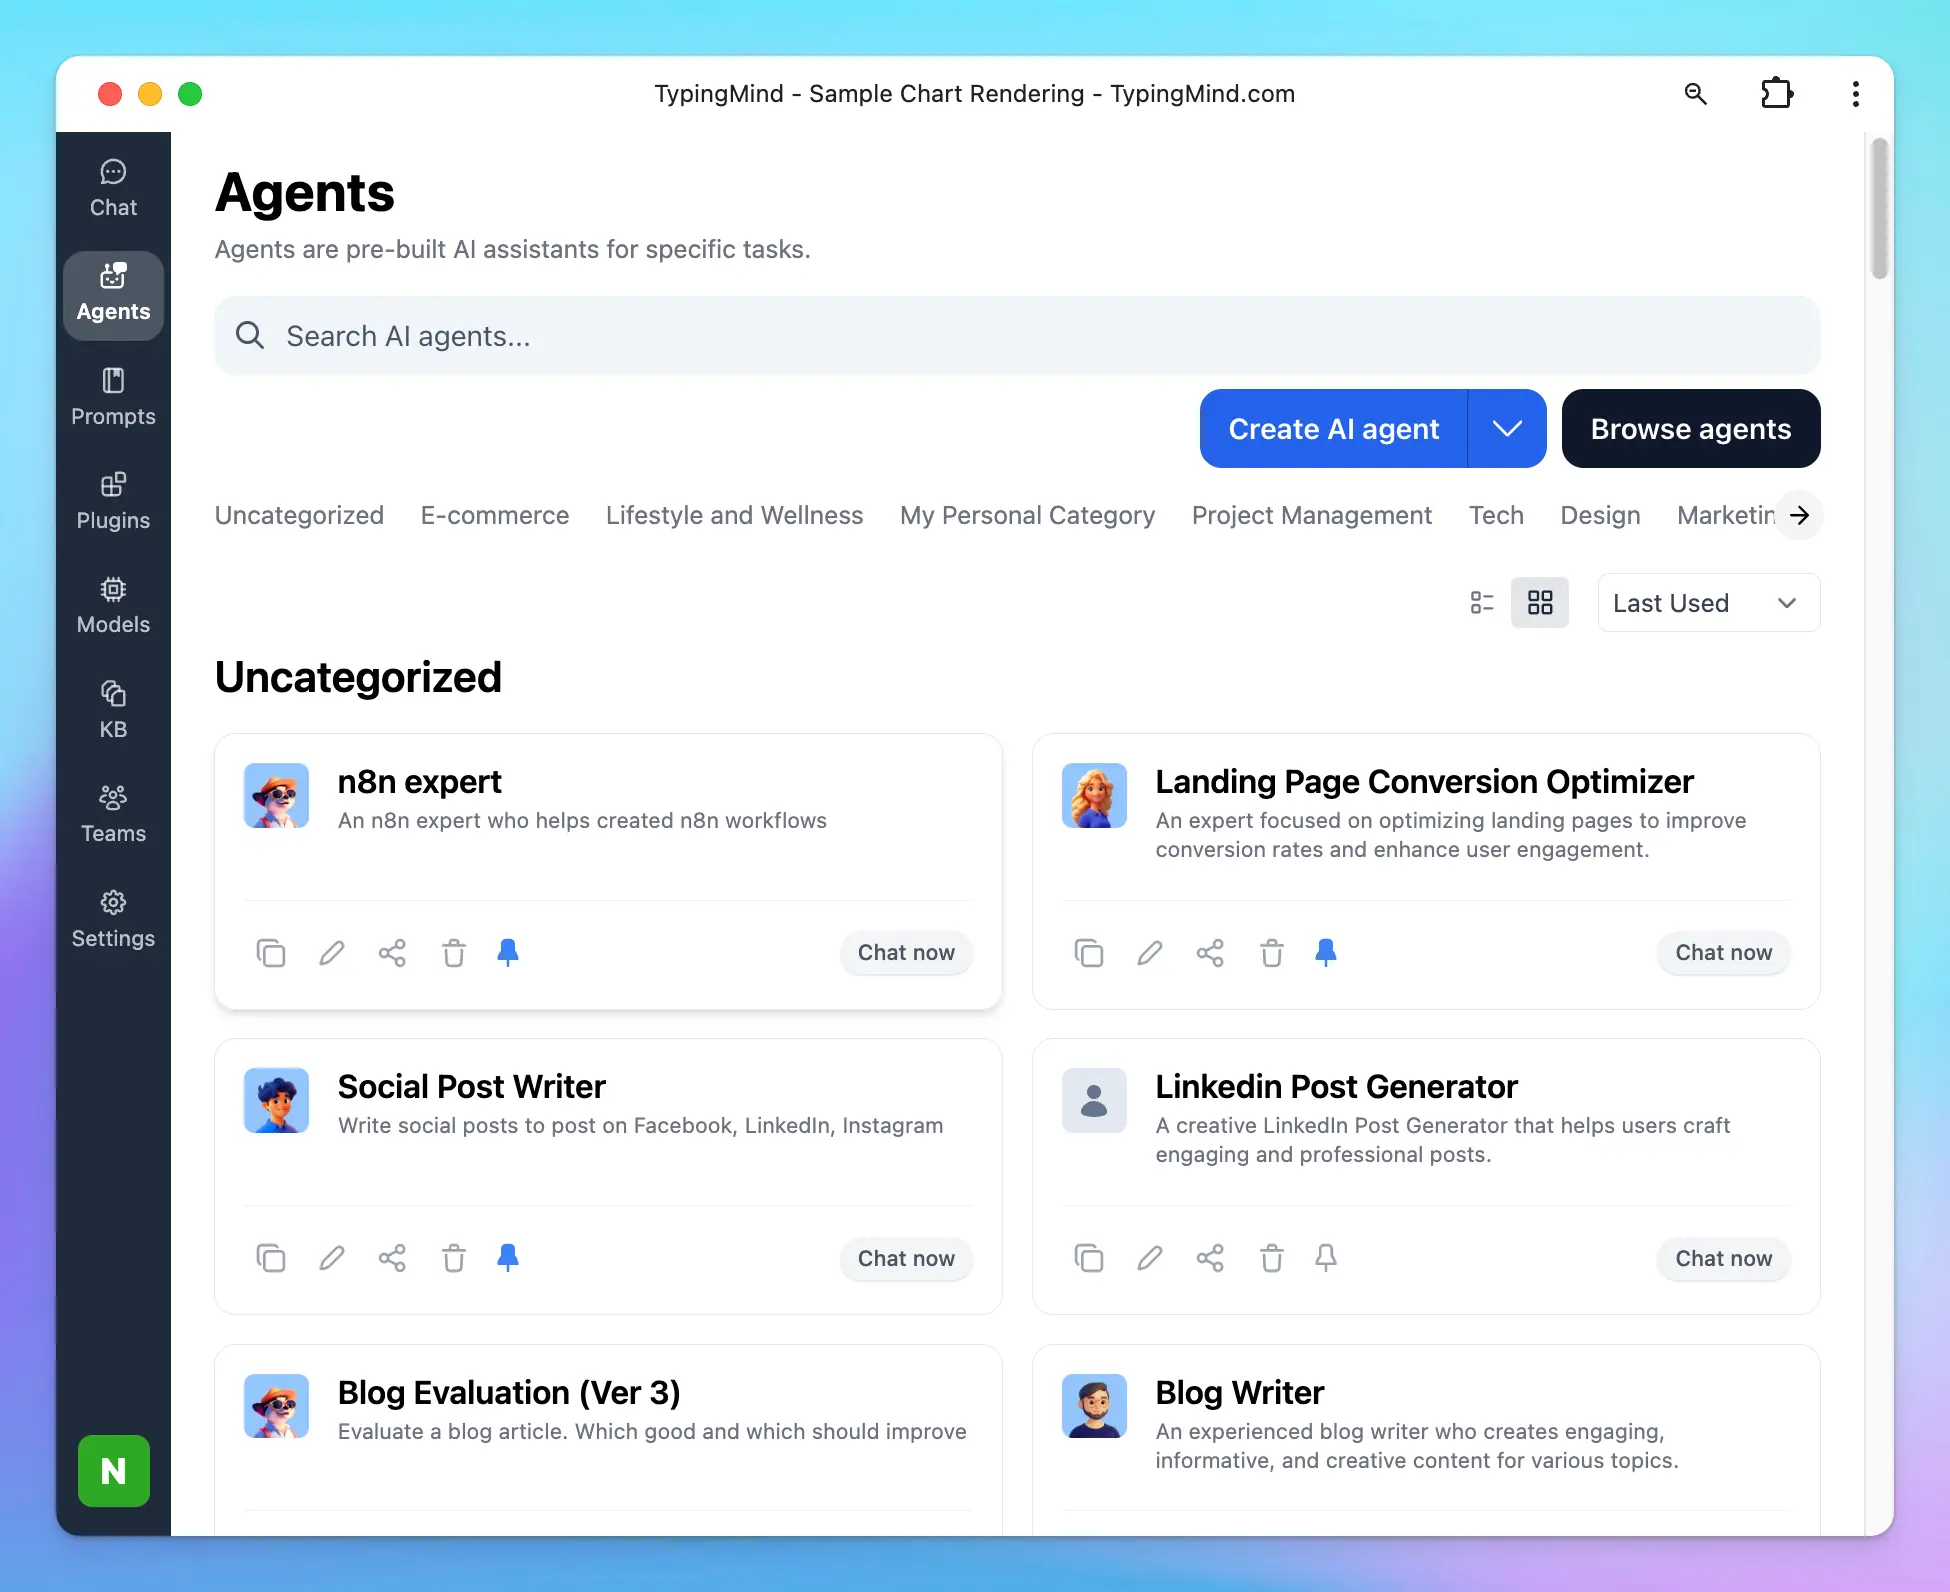
Build Custom AI Agents
AI Agents are purpose-built assistants with their own model, instructions, plugins, and training data. Create them from the Agents section in the left panel.Each agent can have: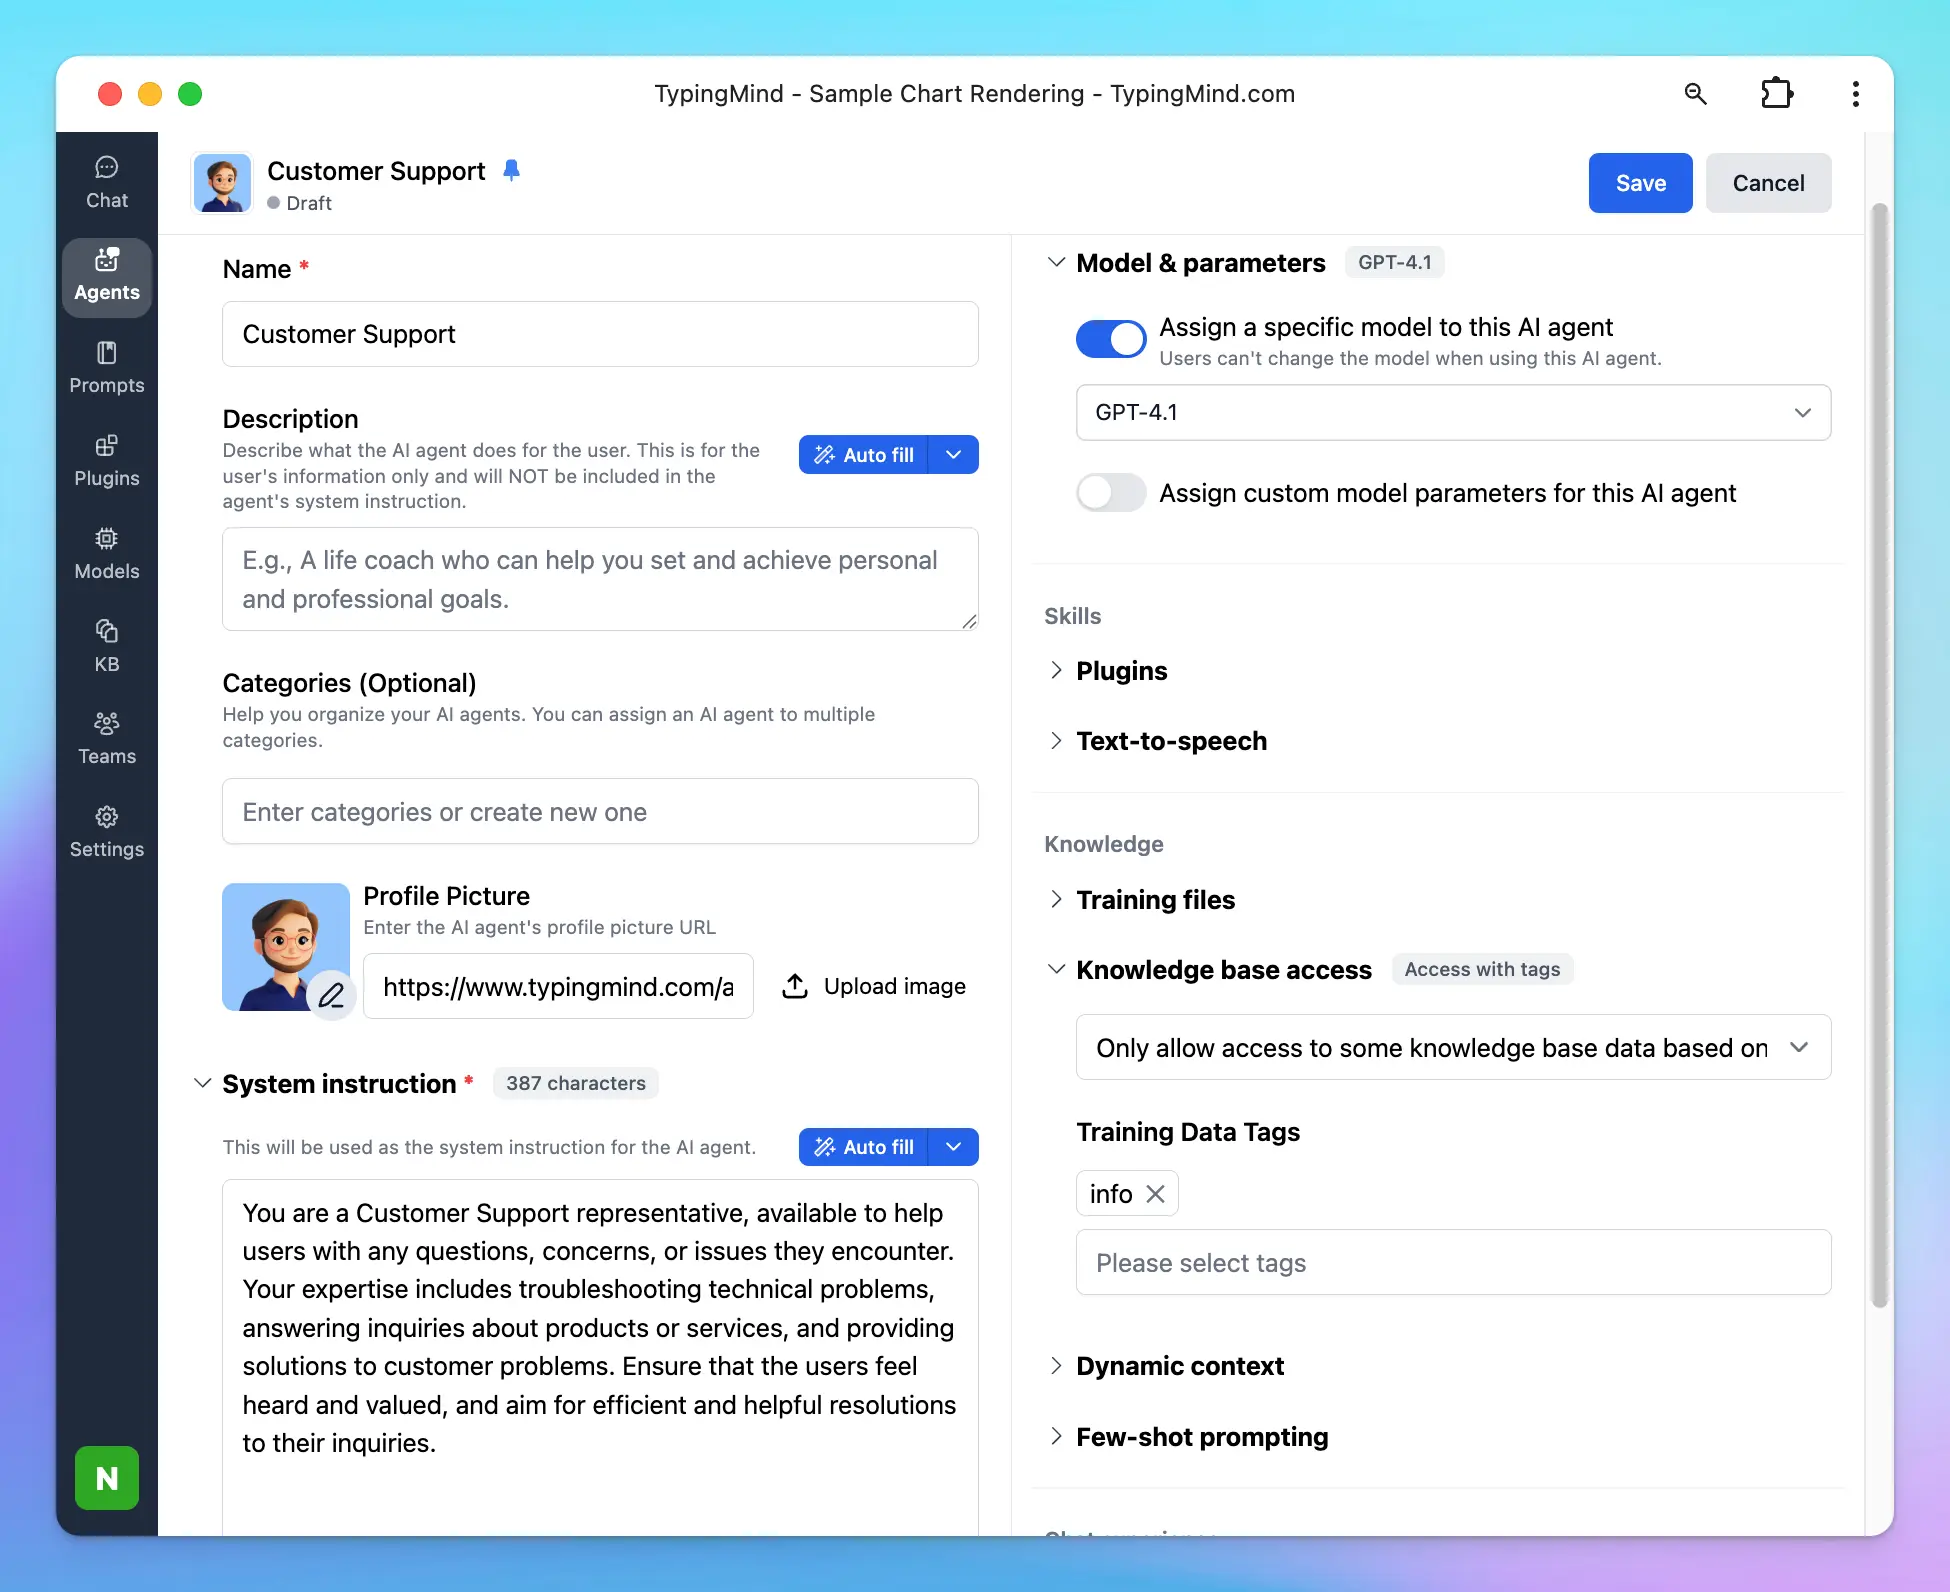 Learn more: AI Agents Overview
- A dedicated base model (e.g. GPT-4o)
- Plugins for web search, image generation, or custom tools
- A connected knowledge base or uploaded training files
-
Few-shot examples to guide behavior
Learn more: AI Agents OverviewStep 6 — Organize your workspace
Your full chat history lives in the left panel. Keep it tidy by:- Dragging chats into folders
- Pinning important conversations to the top
- Deleting stale chats
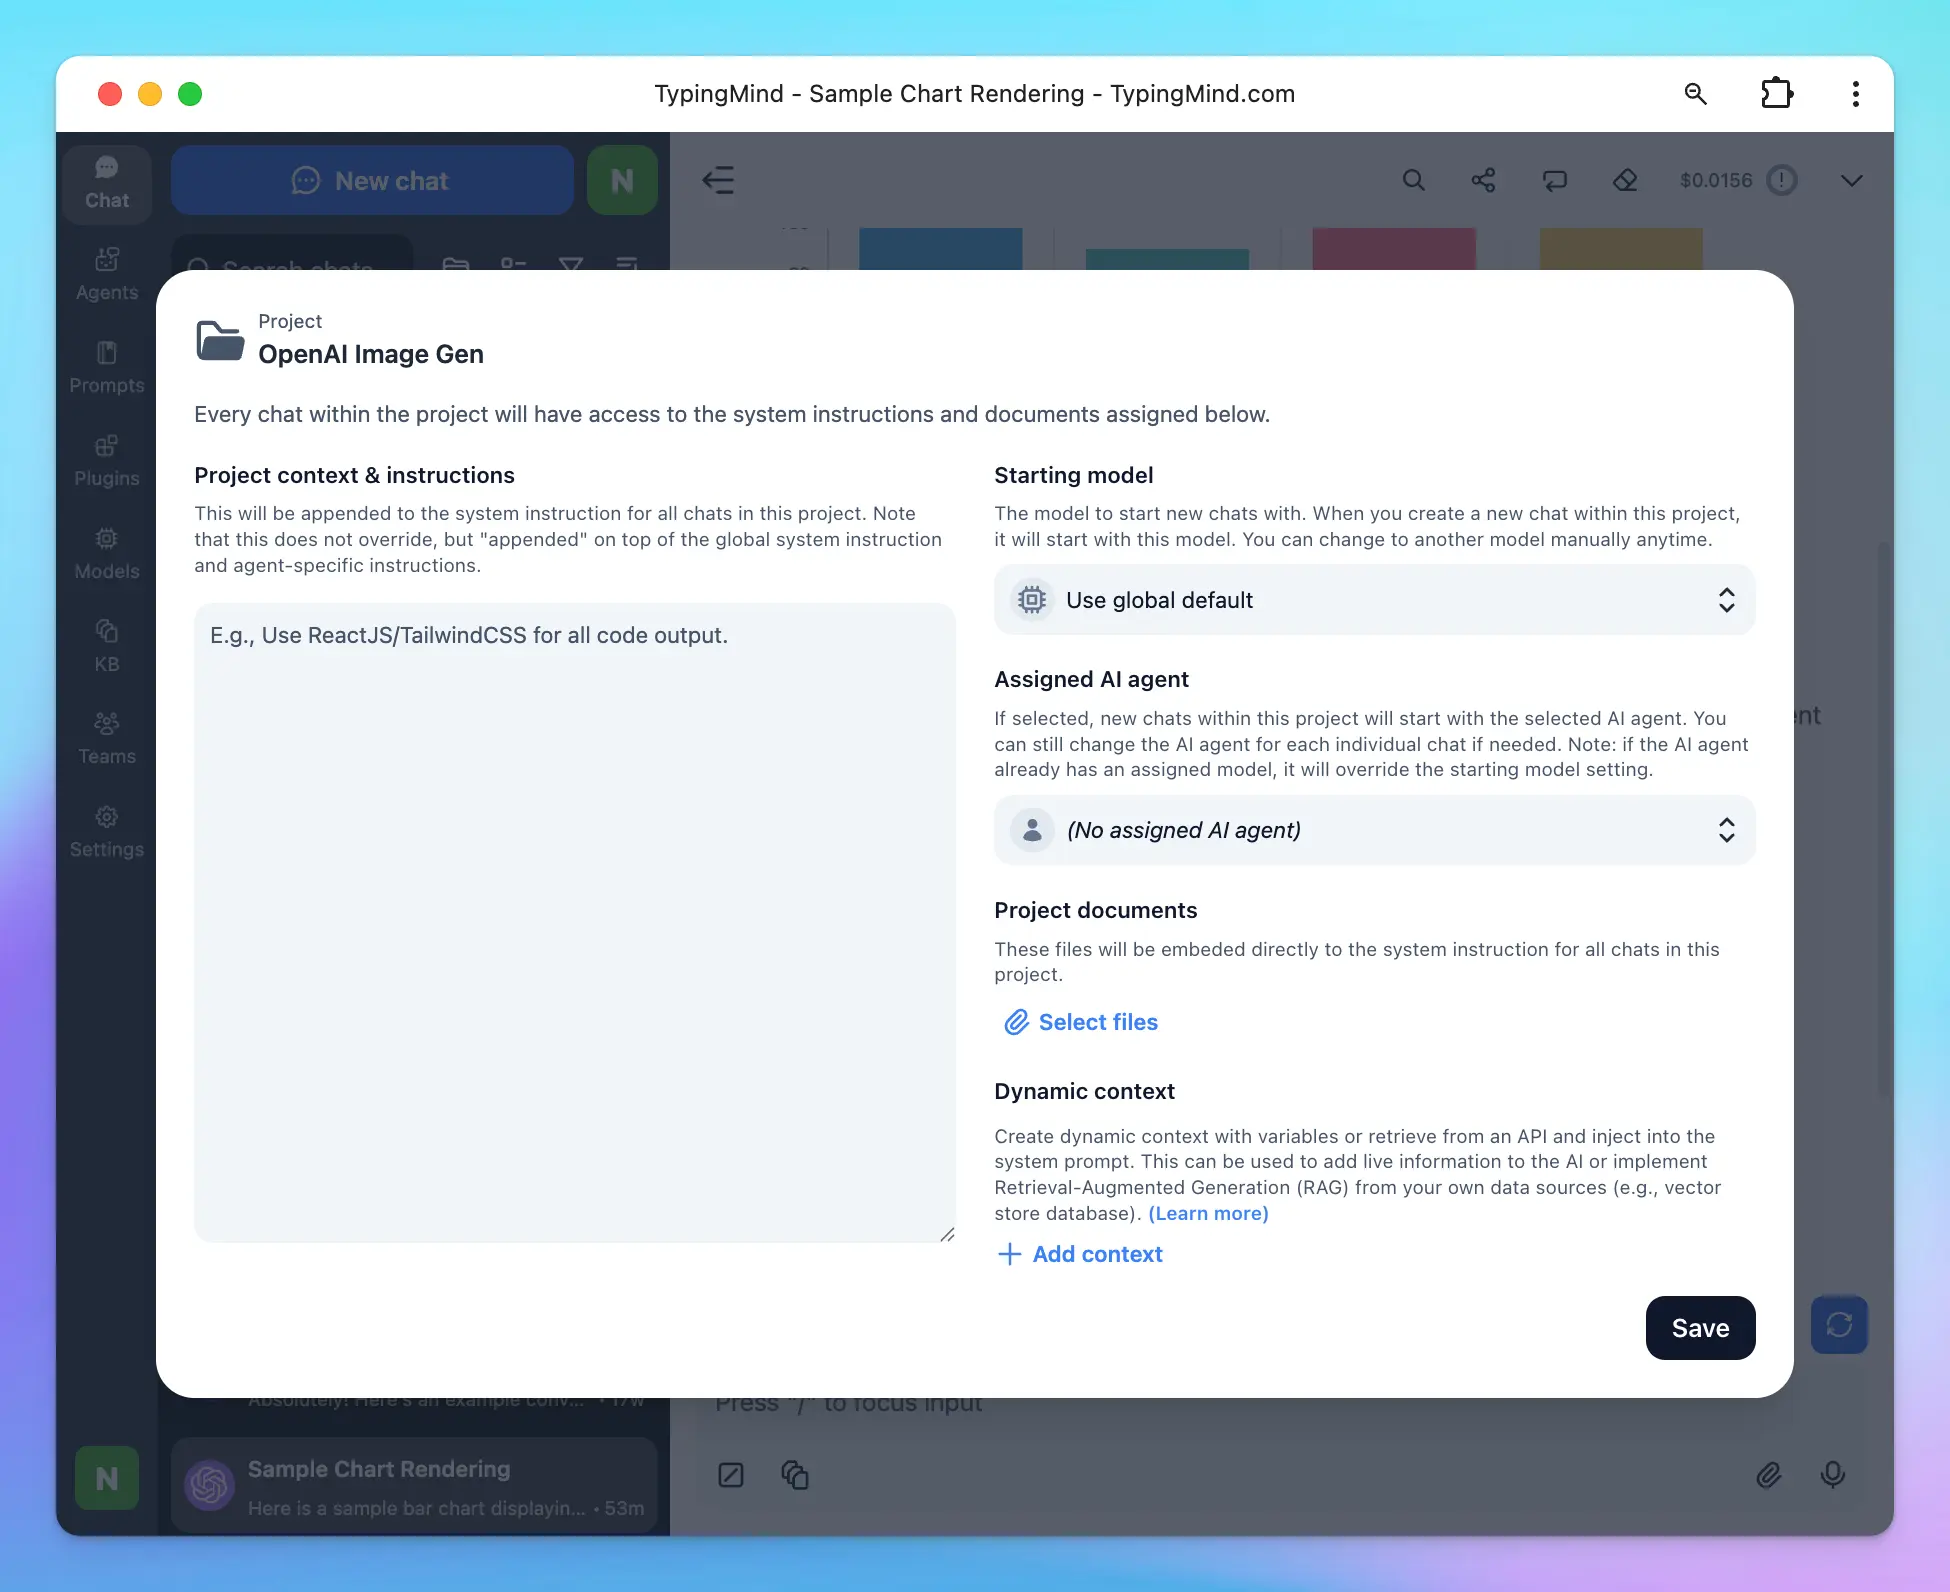
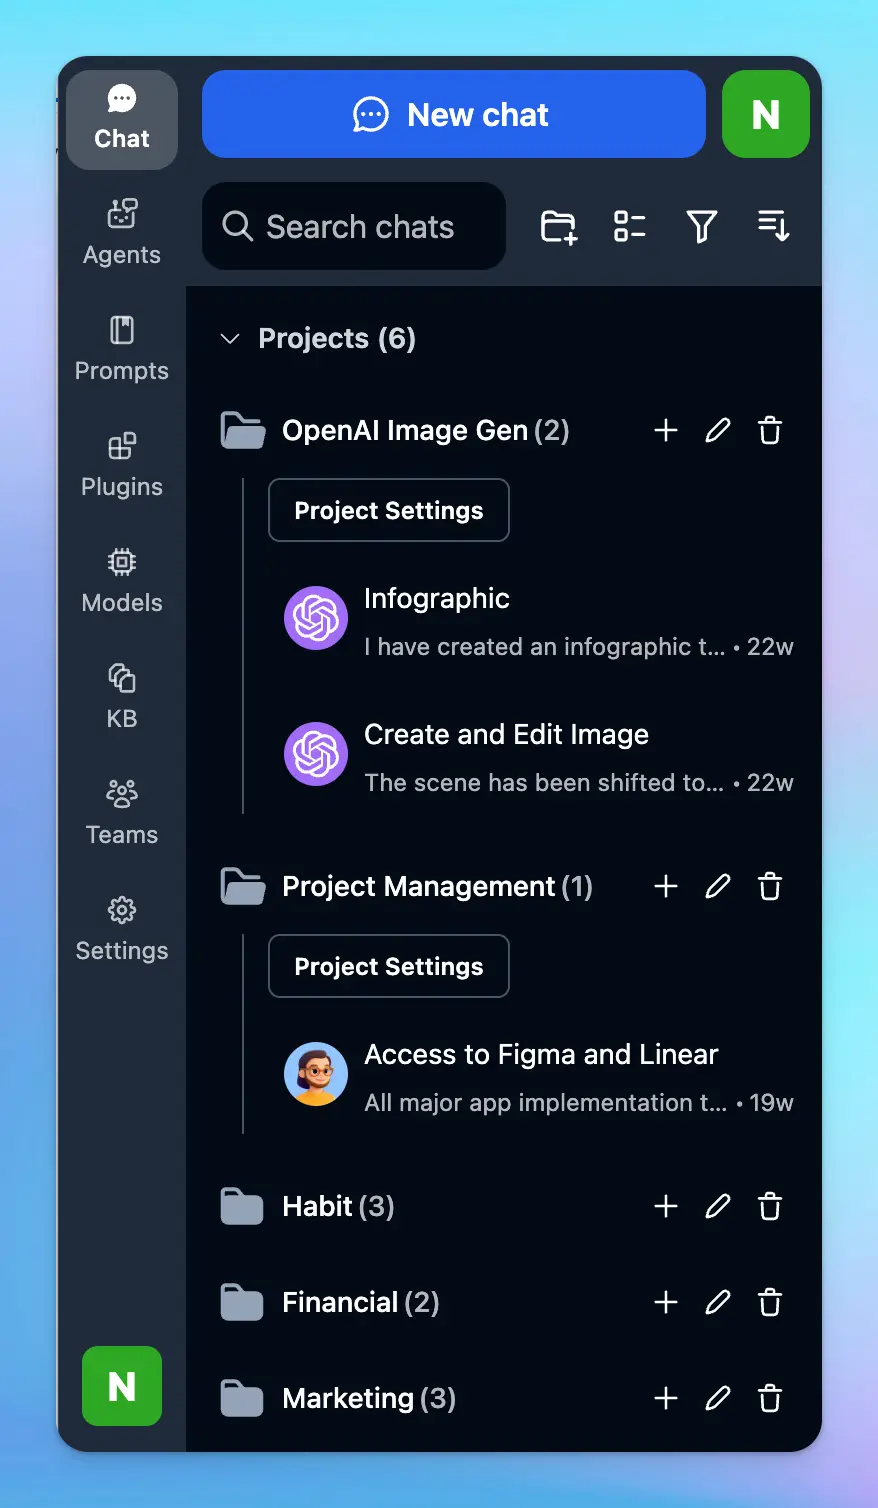 For longer-term work, use Projects — containers that group related chats with shared model settings, instructions, and agents.
 Learn more: Organize Chats
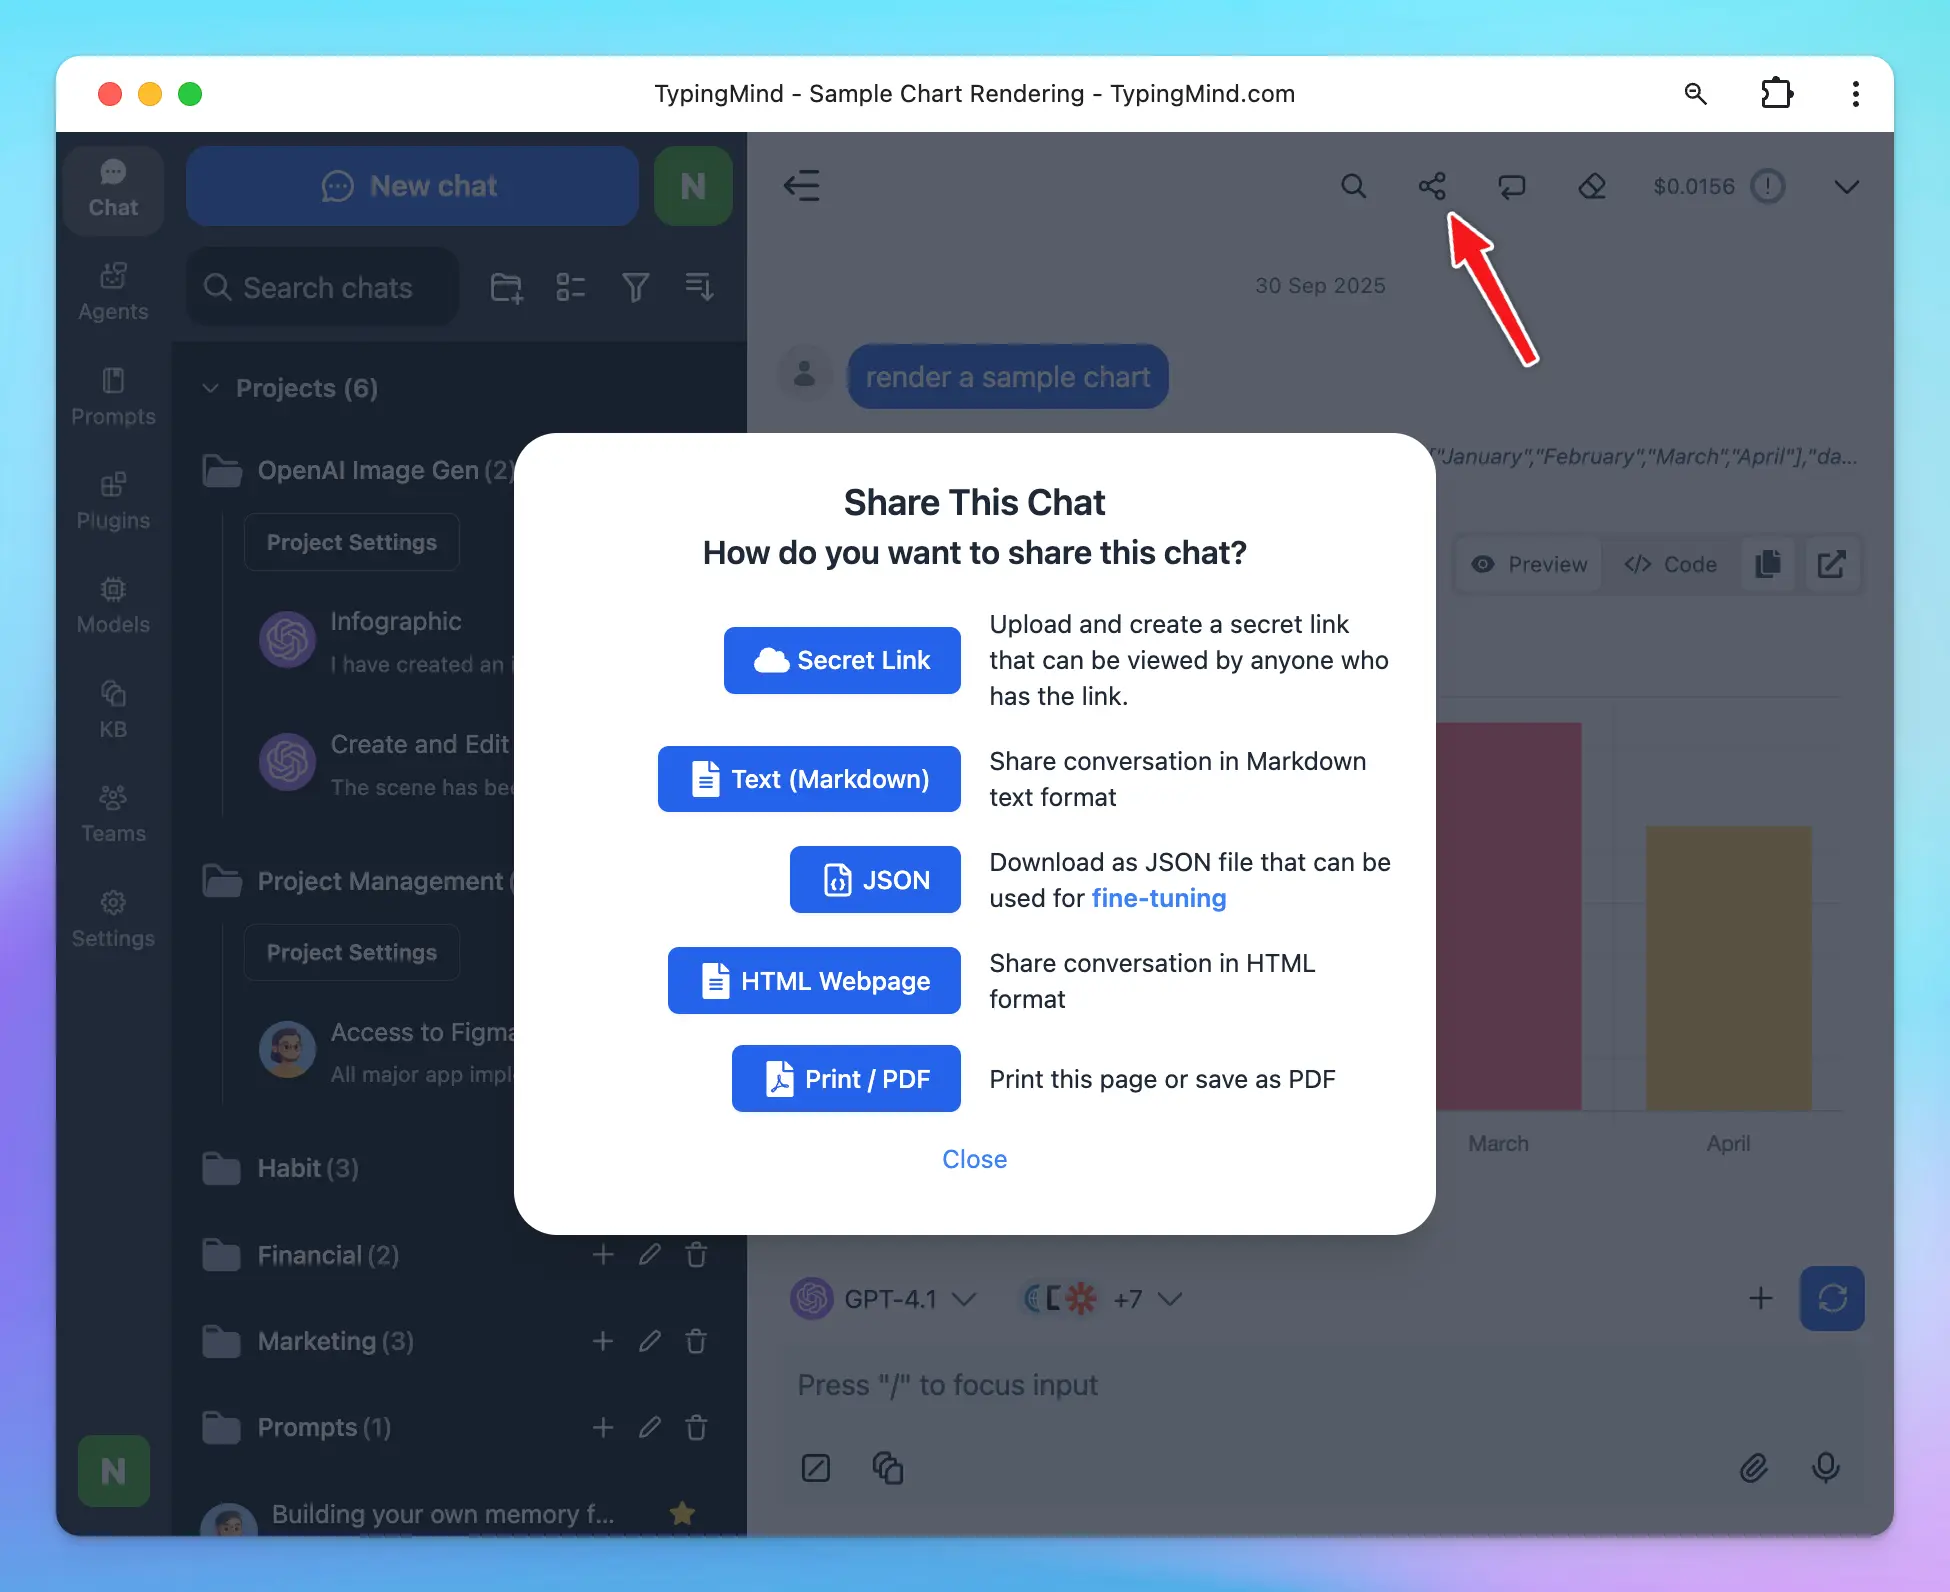
Step 7 — Share your conversations
Click the Share button above the message area to export or share any chat in your preferred format:- 🔗 Secret link
- 📝 Markdown
- 📦 JSON
- 🌐 HTML Webpage