

NVIDIA’s API only works in TypingMind when Route requests via TypingMind Cloud is on. Step 4 shows how to turn it on.
Step 1: Get an NVIDIA API key
- Sign in at build.nvidia.com.
- Create an API key and copy it.
- Open the page of the model you want to use and copy its model ID.
Step 2: Open the custom model form
- In TypingMind, click Models on the left sidebar.
- Click Add custom model at the top right.
- Keep the Create Manually tab open.
Step 3: Enter the model details
- Name: a name you will recognize in the model list.
- Model ID: the model ID you copied from NVIDIA.
- Context Length: the context length that NVIDIA lists for the model.
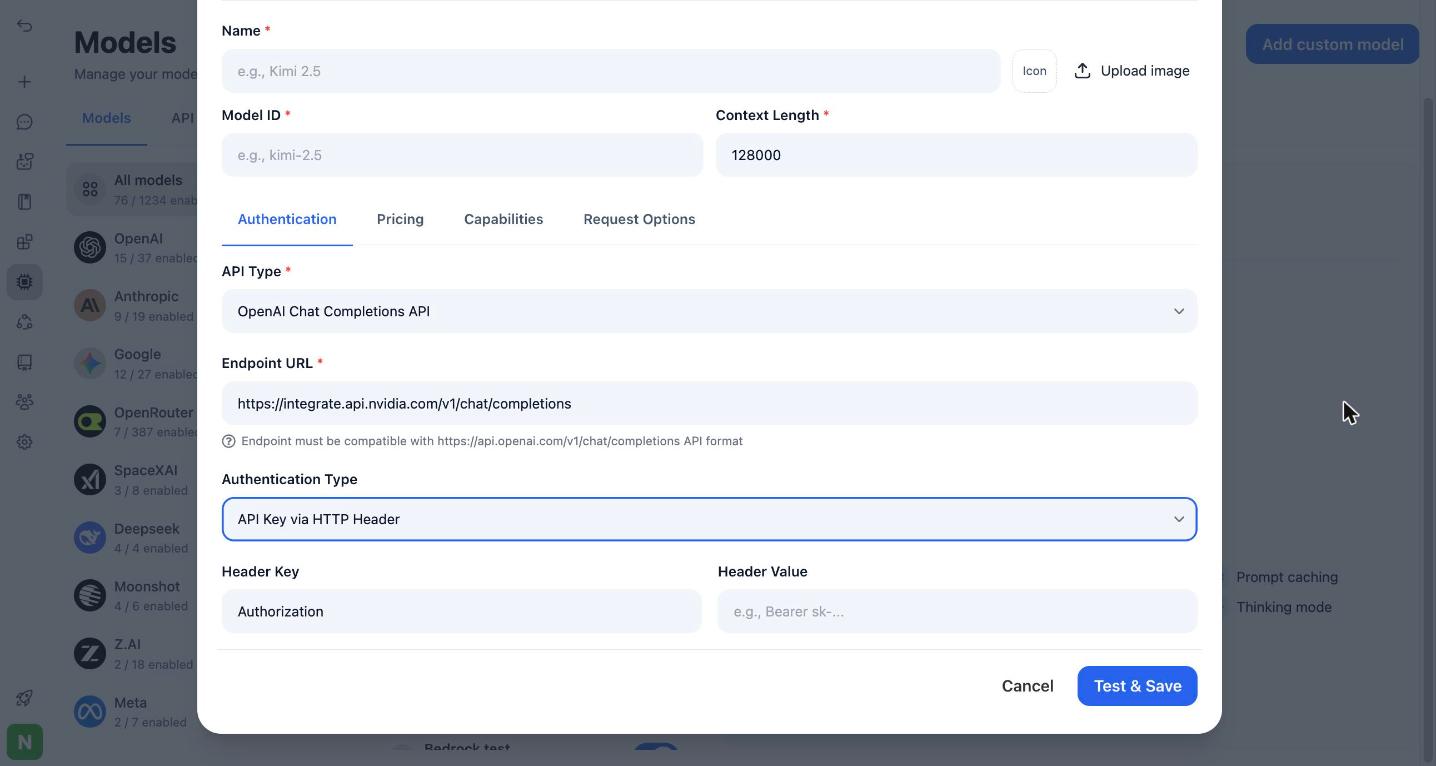
- On the Authentication tab, set:
- API Type: OpenAI Chat Completions API
- Endpoint URL:
- Authentication Type: API Key via HTTP Header
- Header Key:
Authorization - Header Value:
Bearerfollowed by a space and your NVIDIA API key
Step 4: Route requests via TypingMind Cloud
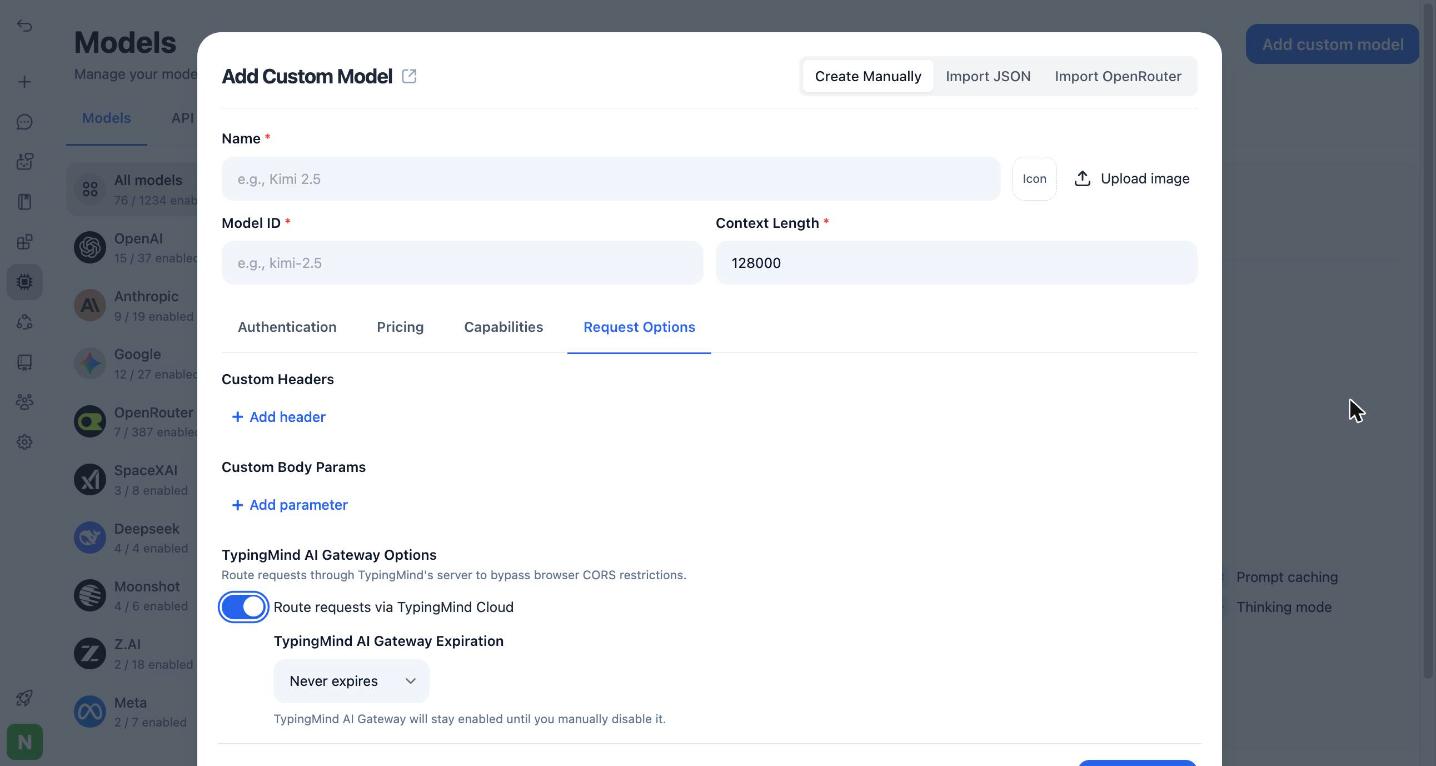
- Open the Request Options tab.
- Under TypingMind AI Gateway Options, turn on Route requests via TypingMind Cloud.
- Under TypingMind AI Gateway Expiration, keep Never expires. If you choose Custom duration, routing turns off when the time ends and the model stops working.
Step 5: Test and save
Click Test & Save. When the test passes, the model appears in your model list. Select it in the model selector above the chat input to start chatting.FAQ
Why does the test fail with a network or CORS error?
Why does the test fail with a network or CORS error?
Check that Route requests via TypingMind Cloud is on in the Request Options tab. NVIDIA’s API doesn’t work without it.
Why does the test fail with an authentication error?
Why does the test fail with an authentication error?
Check the Header Value. It must start with
Bearer and a space, followed by your full NVIDIA API key.Can I add more than one NVIDIA model?
Can I add more than one NVIDIA model?
Yes. Add each model as its own custom model with its own model ID.