SKILL.md file (instructions plus optional reference files), following the open Agent Skills standard.
Skills are supported in the Personal version of TypingMind only. The Team version does not support Skills at the moment.

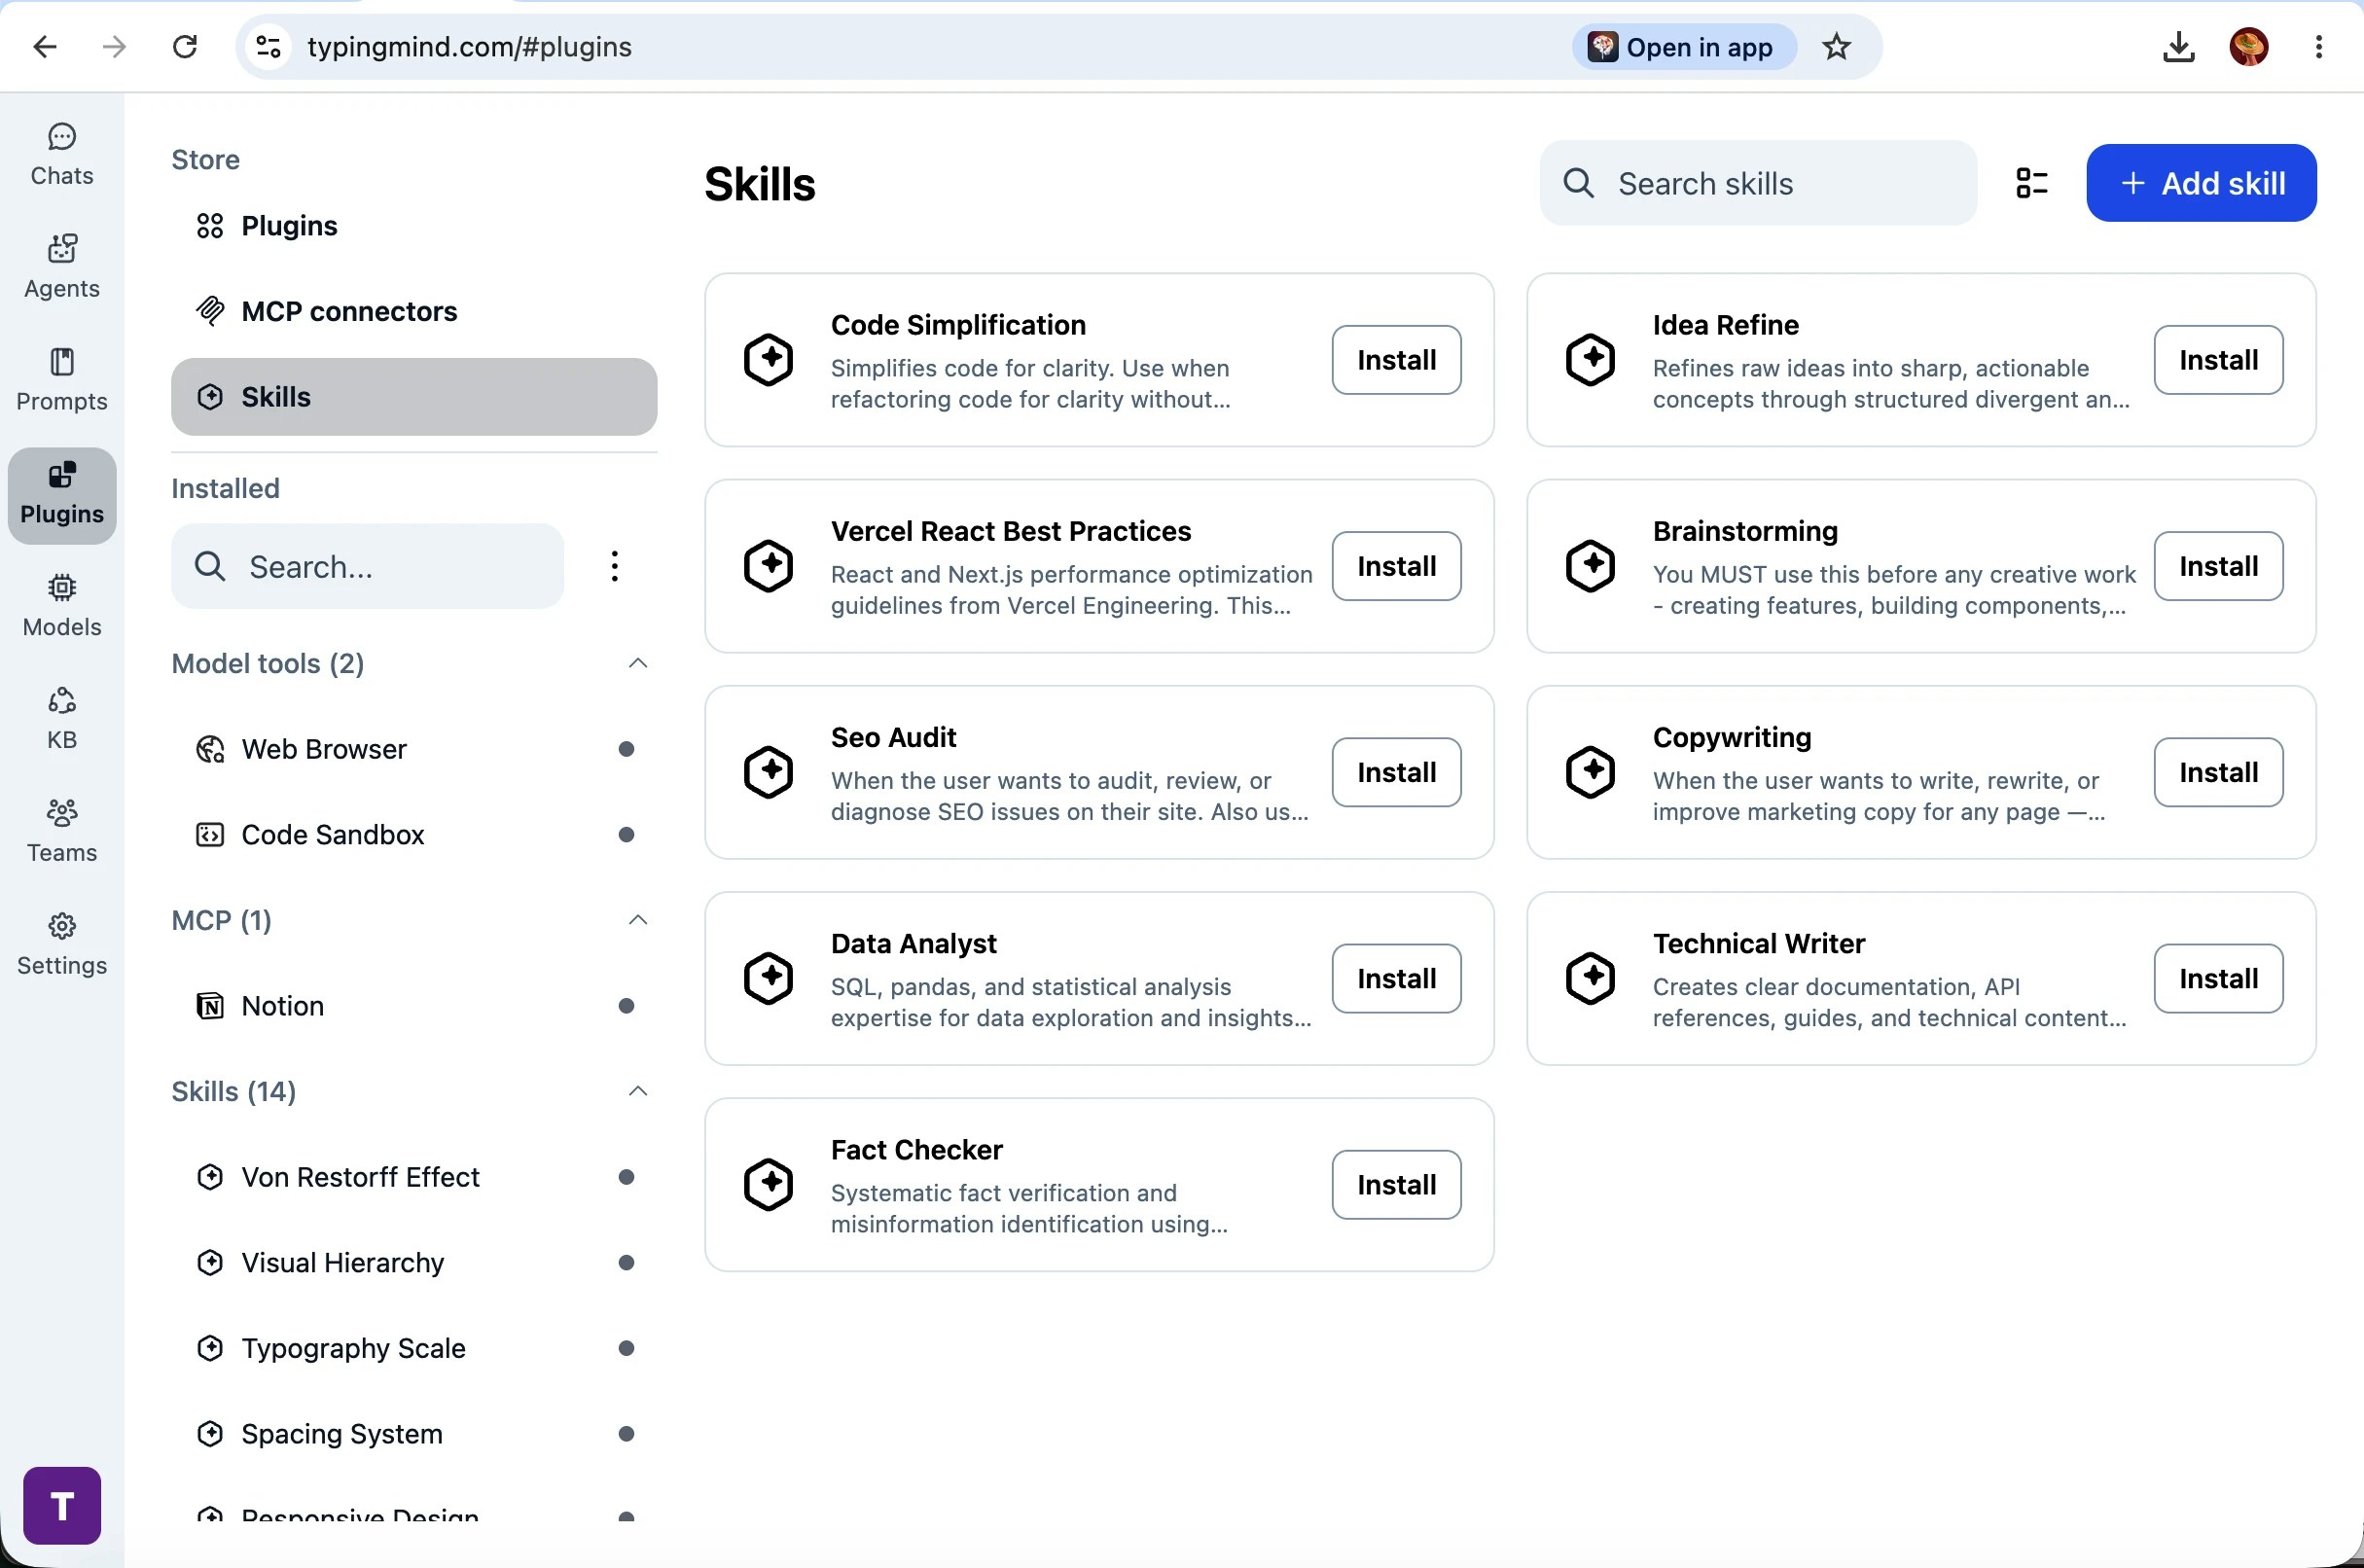
Browse and install from the Skills store
TypingMind includes a Skills store with curated skills you can install in one click. To open it:- In the left sidebar, click Plugins
- Under Store, select Skills
- Search or scroll the grid, then click Install on any skill
Add skills from GitHub or a .zip file
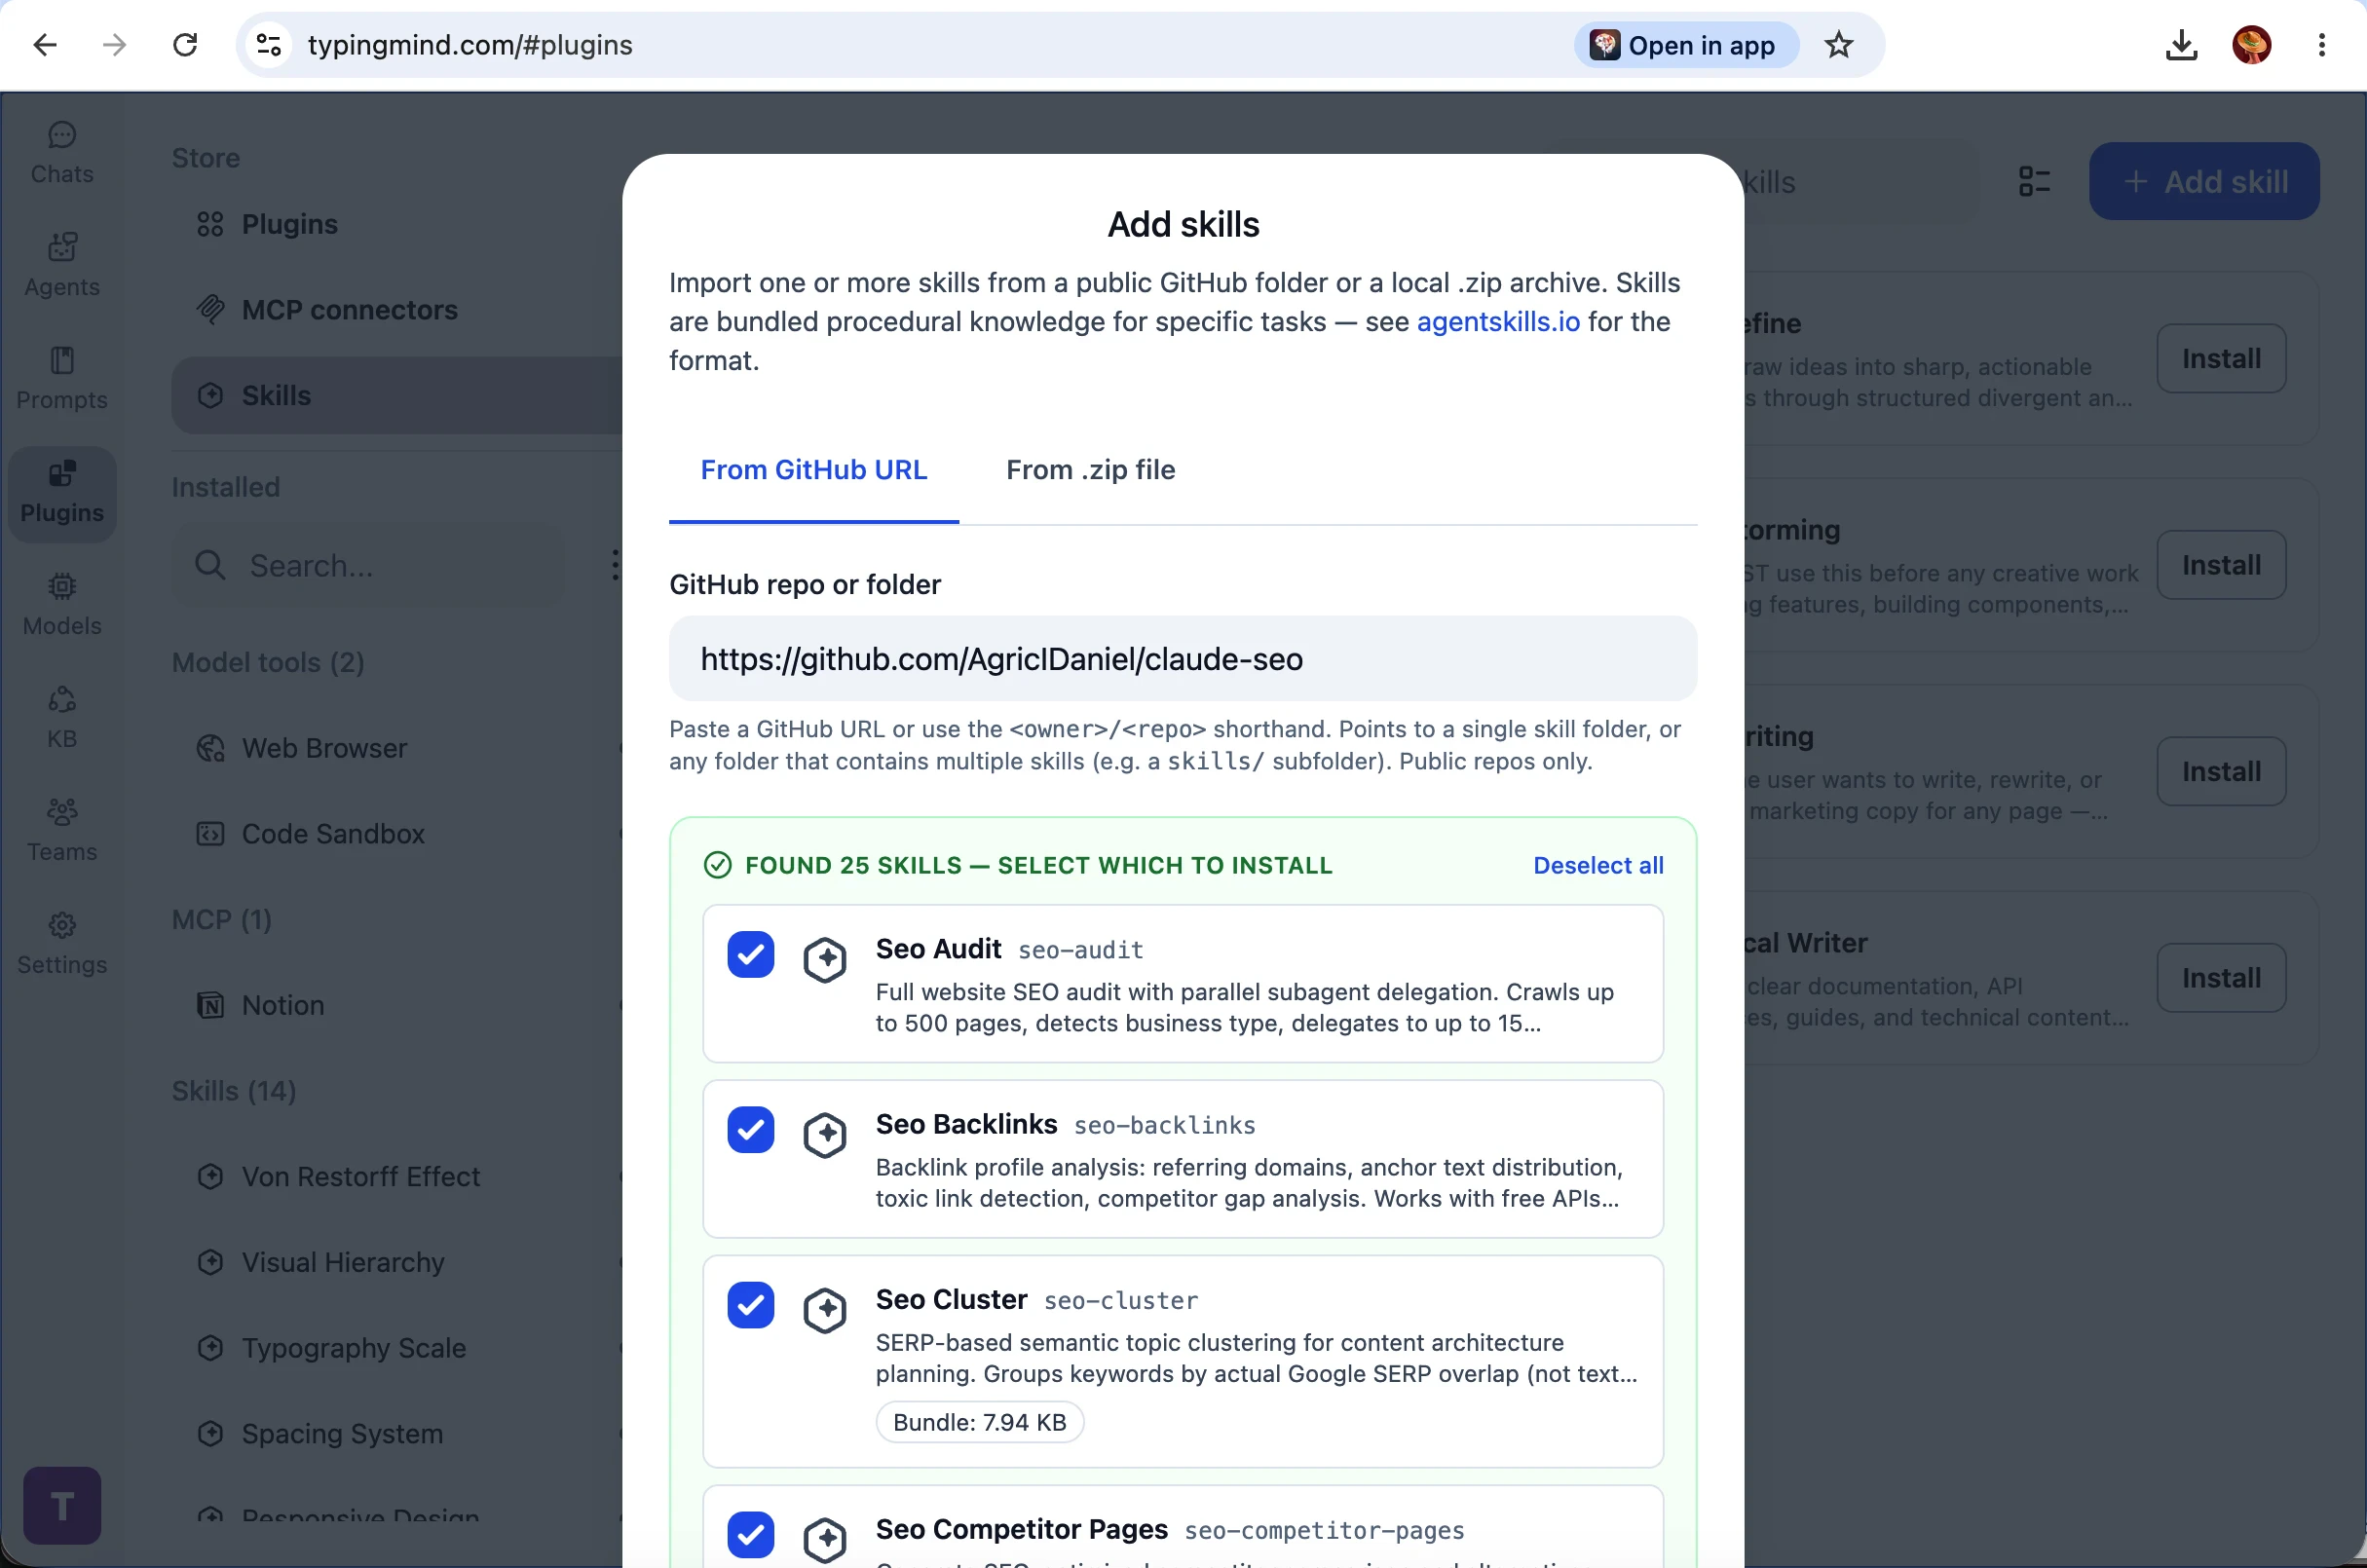
You can import community skill packs or your own private skills.- On the Skills store page, click + Add skill
- Choose From GitHub URL or From .zip file
- For GitHub: paste a public repo URL, folder URL, or shorthand like
owner/repo(single skill folder or a folder with many skills, e.g.skills/) - Click Continue, select which skills to install, then Install skill or Install N skills
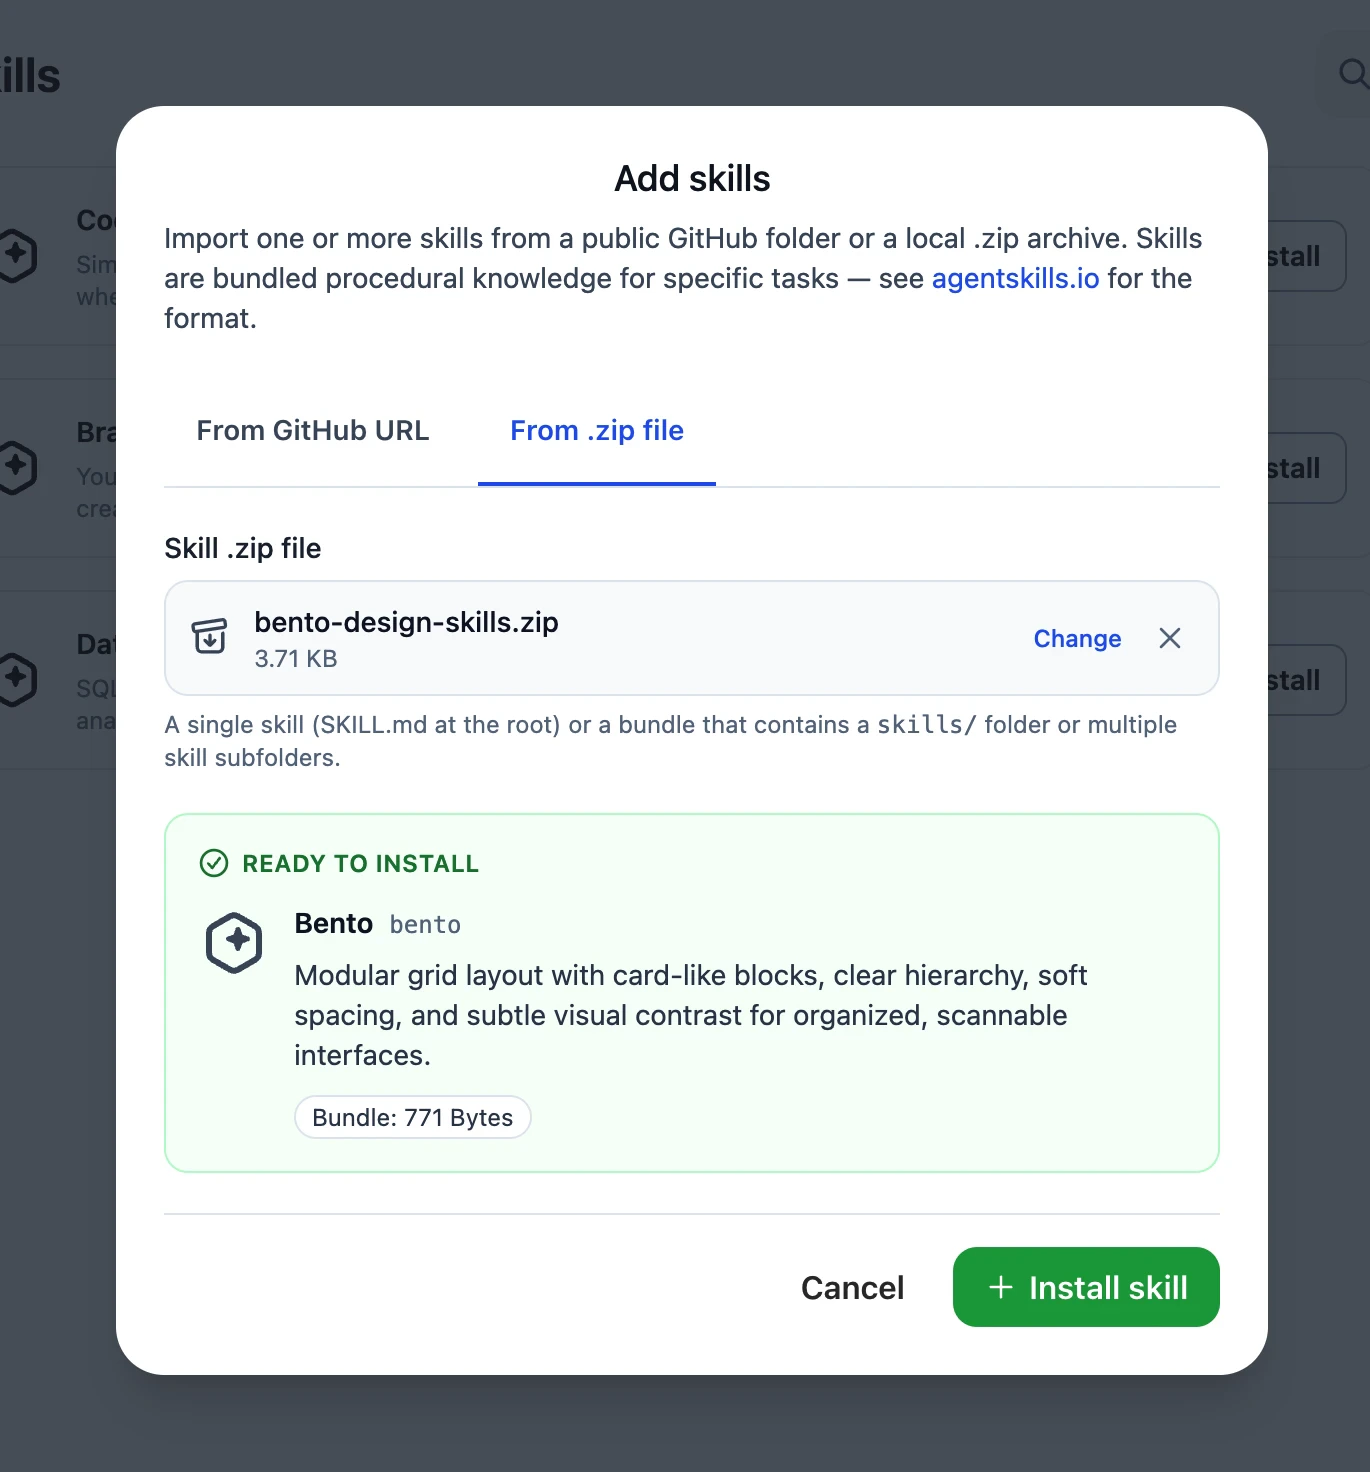
Installing from GitHub requires you to be signed in to TypingMind Cloud Sync (free account). If you are not signed in, use the From .zip file tab instead. Only public GitHub repositories are supported.
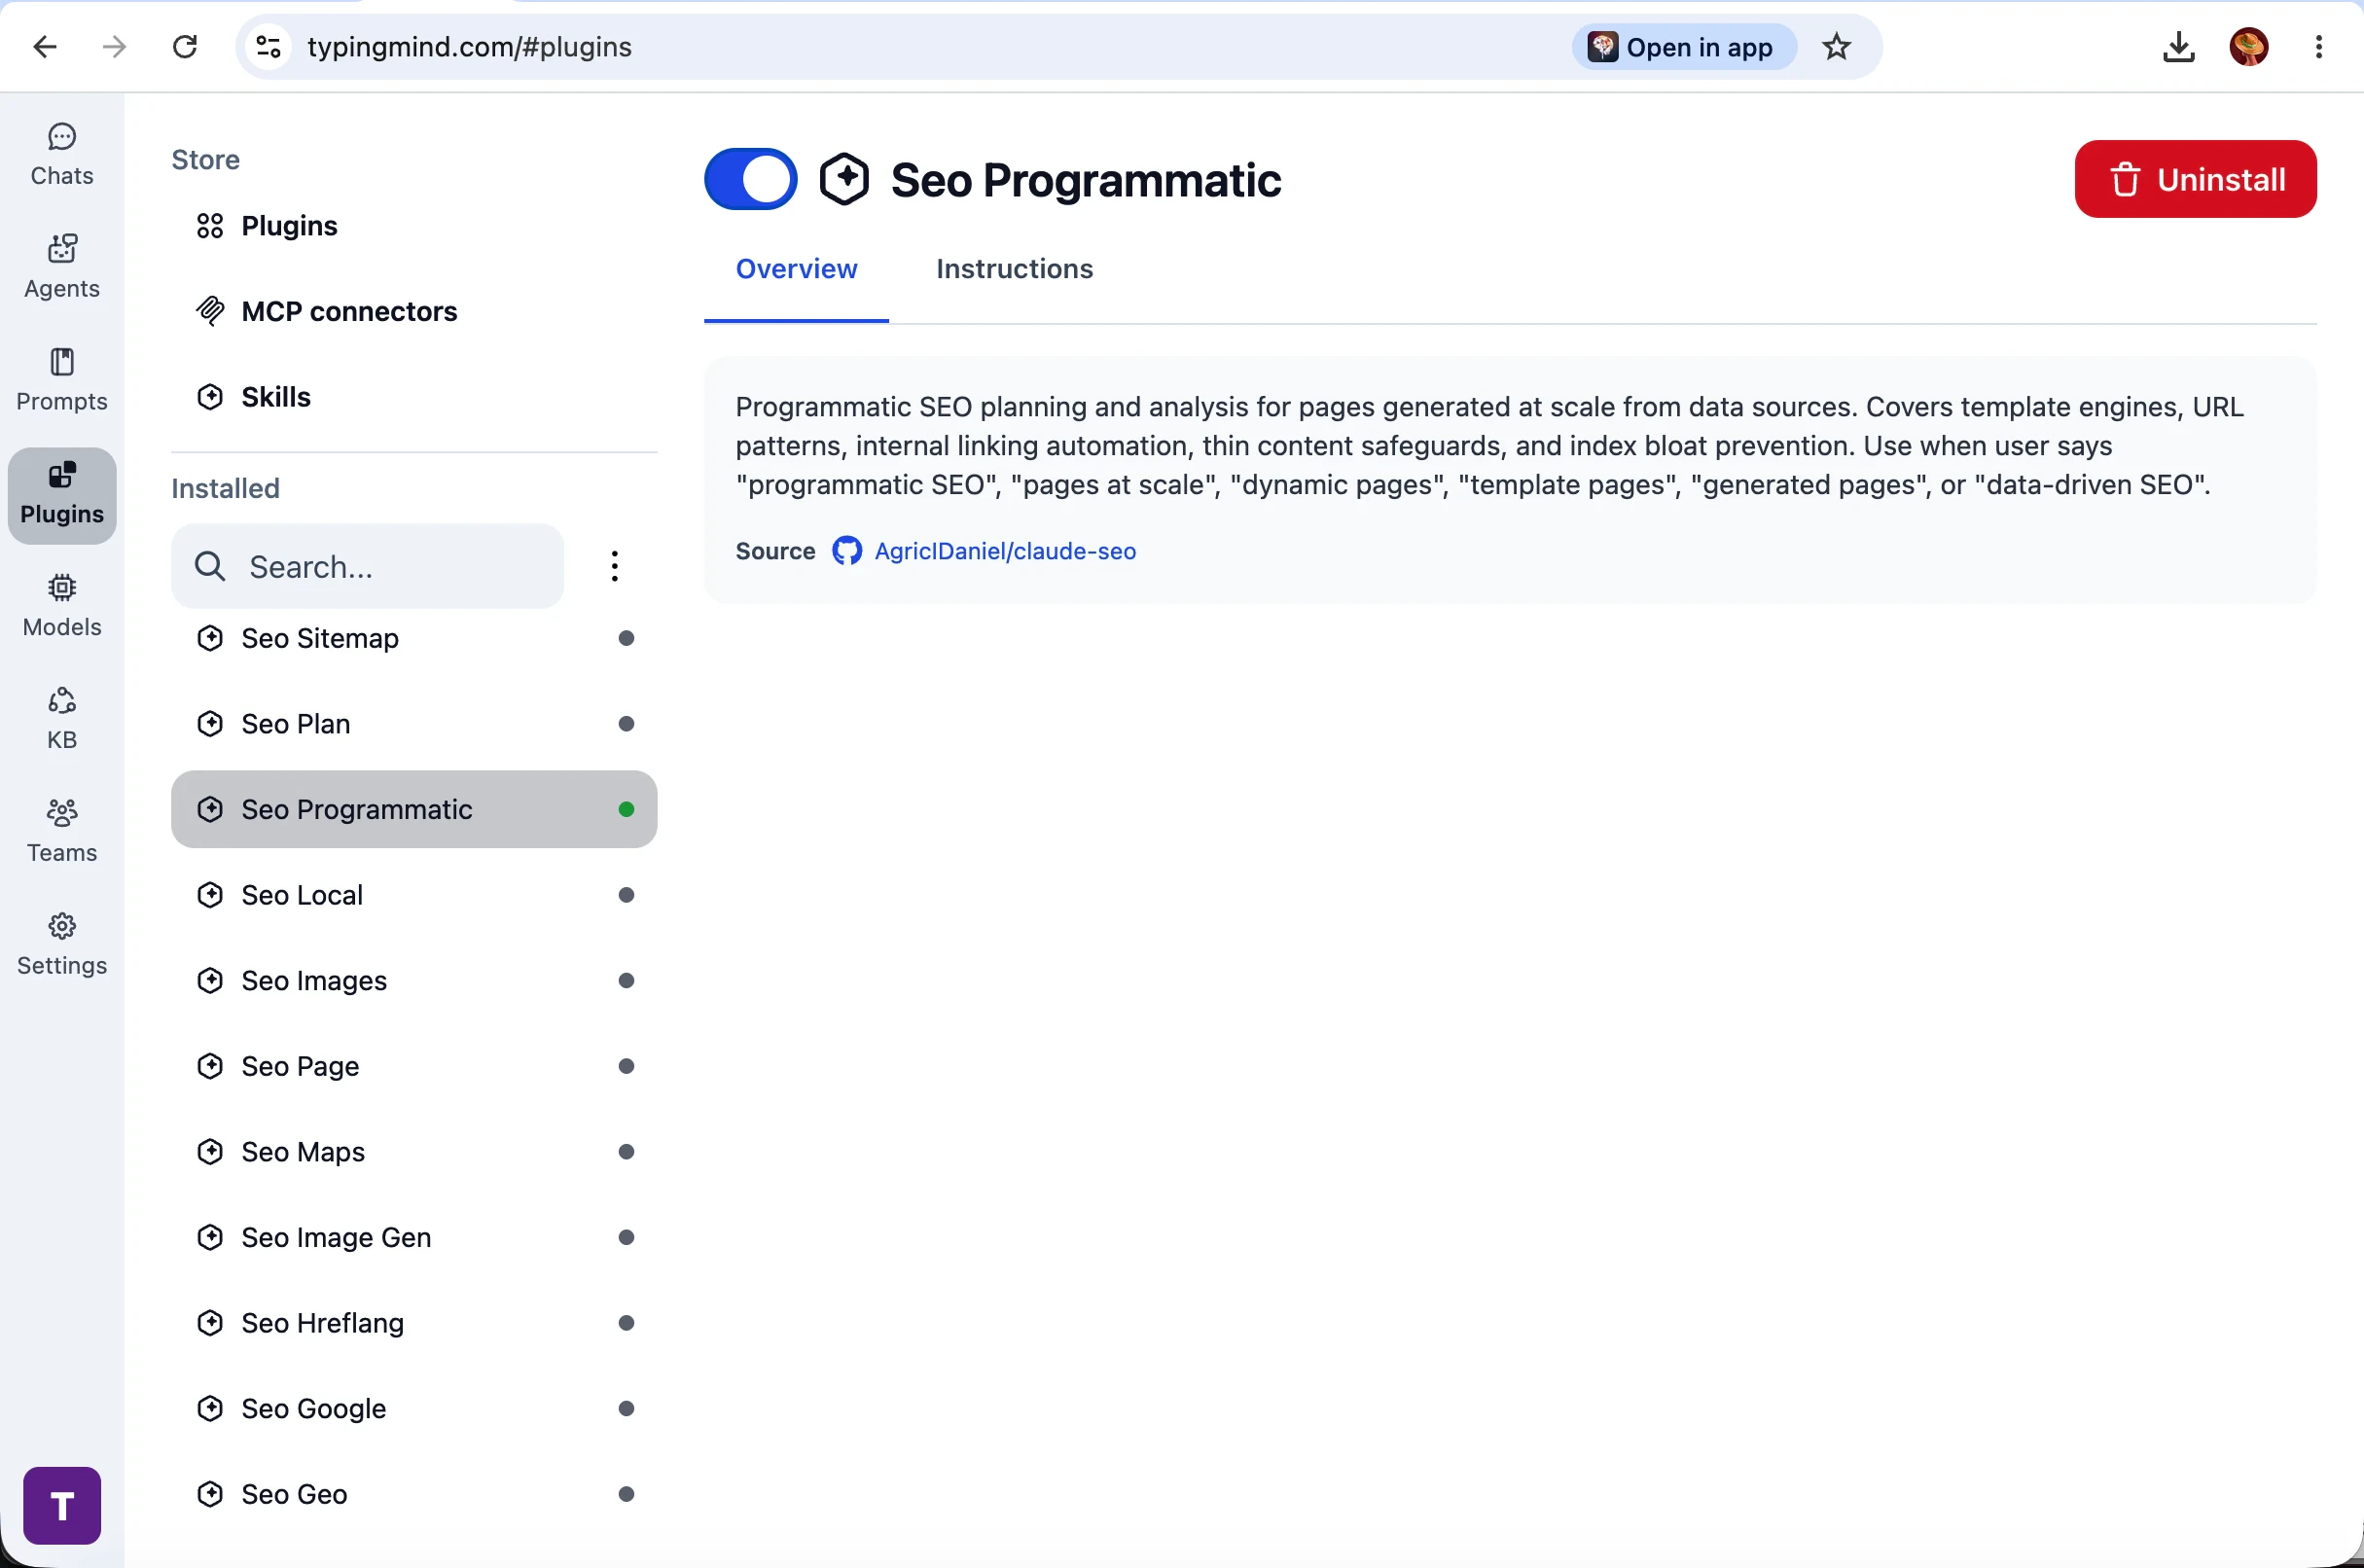
Manage an installed skill
Select any skill under Installed → Skills to open its detail page:- Use the toggle at the top to enable or disable the skill in your plugin list
- Overview — what the skill does, when to use it, and source link (often GitHub)
- Instructions — the full text the model receives when the skill loads
- Resources — bundled files included with the skill (if any)
Use skills in a chat
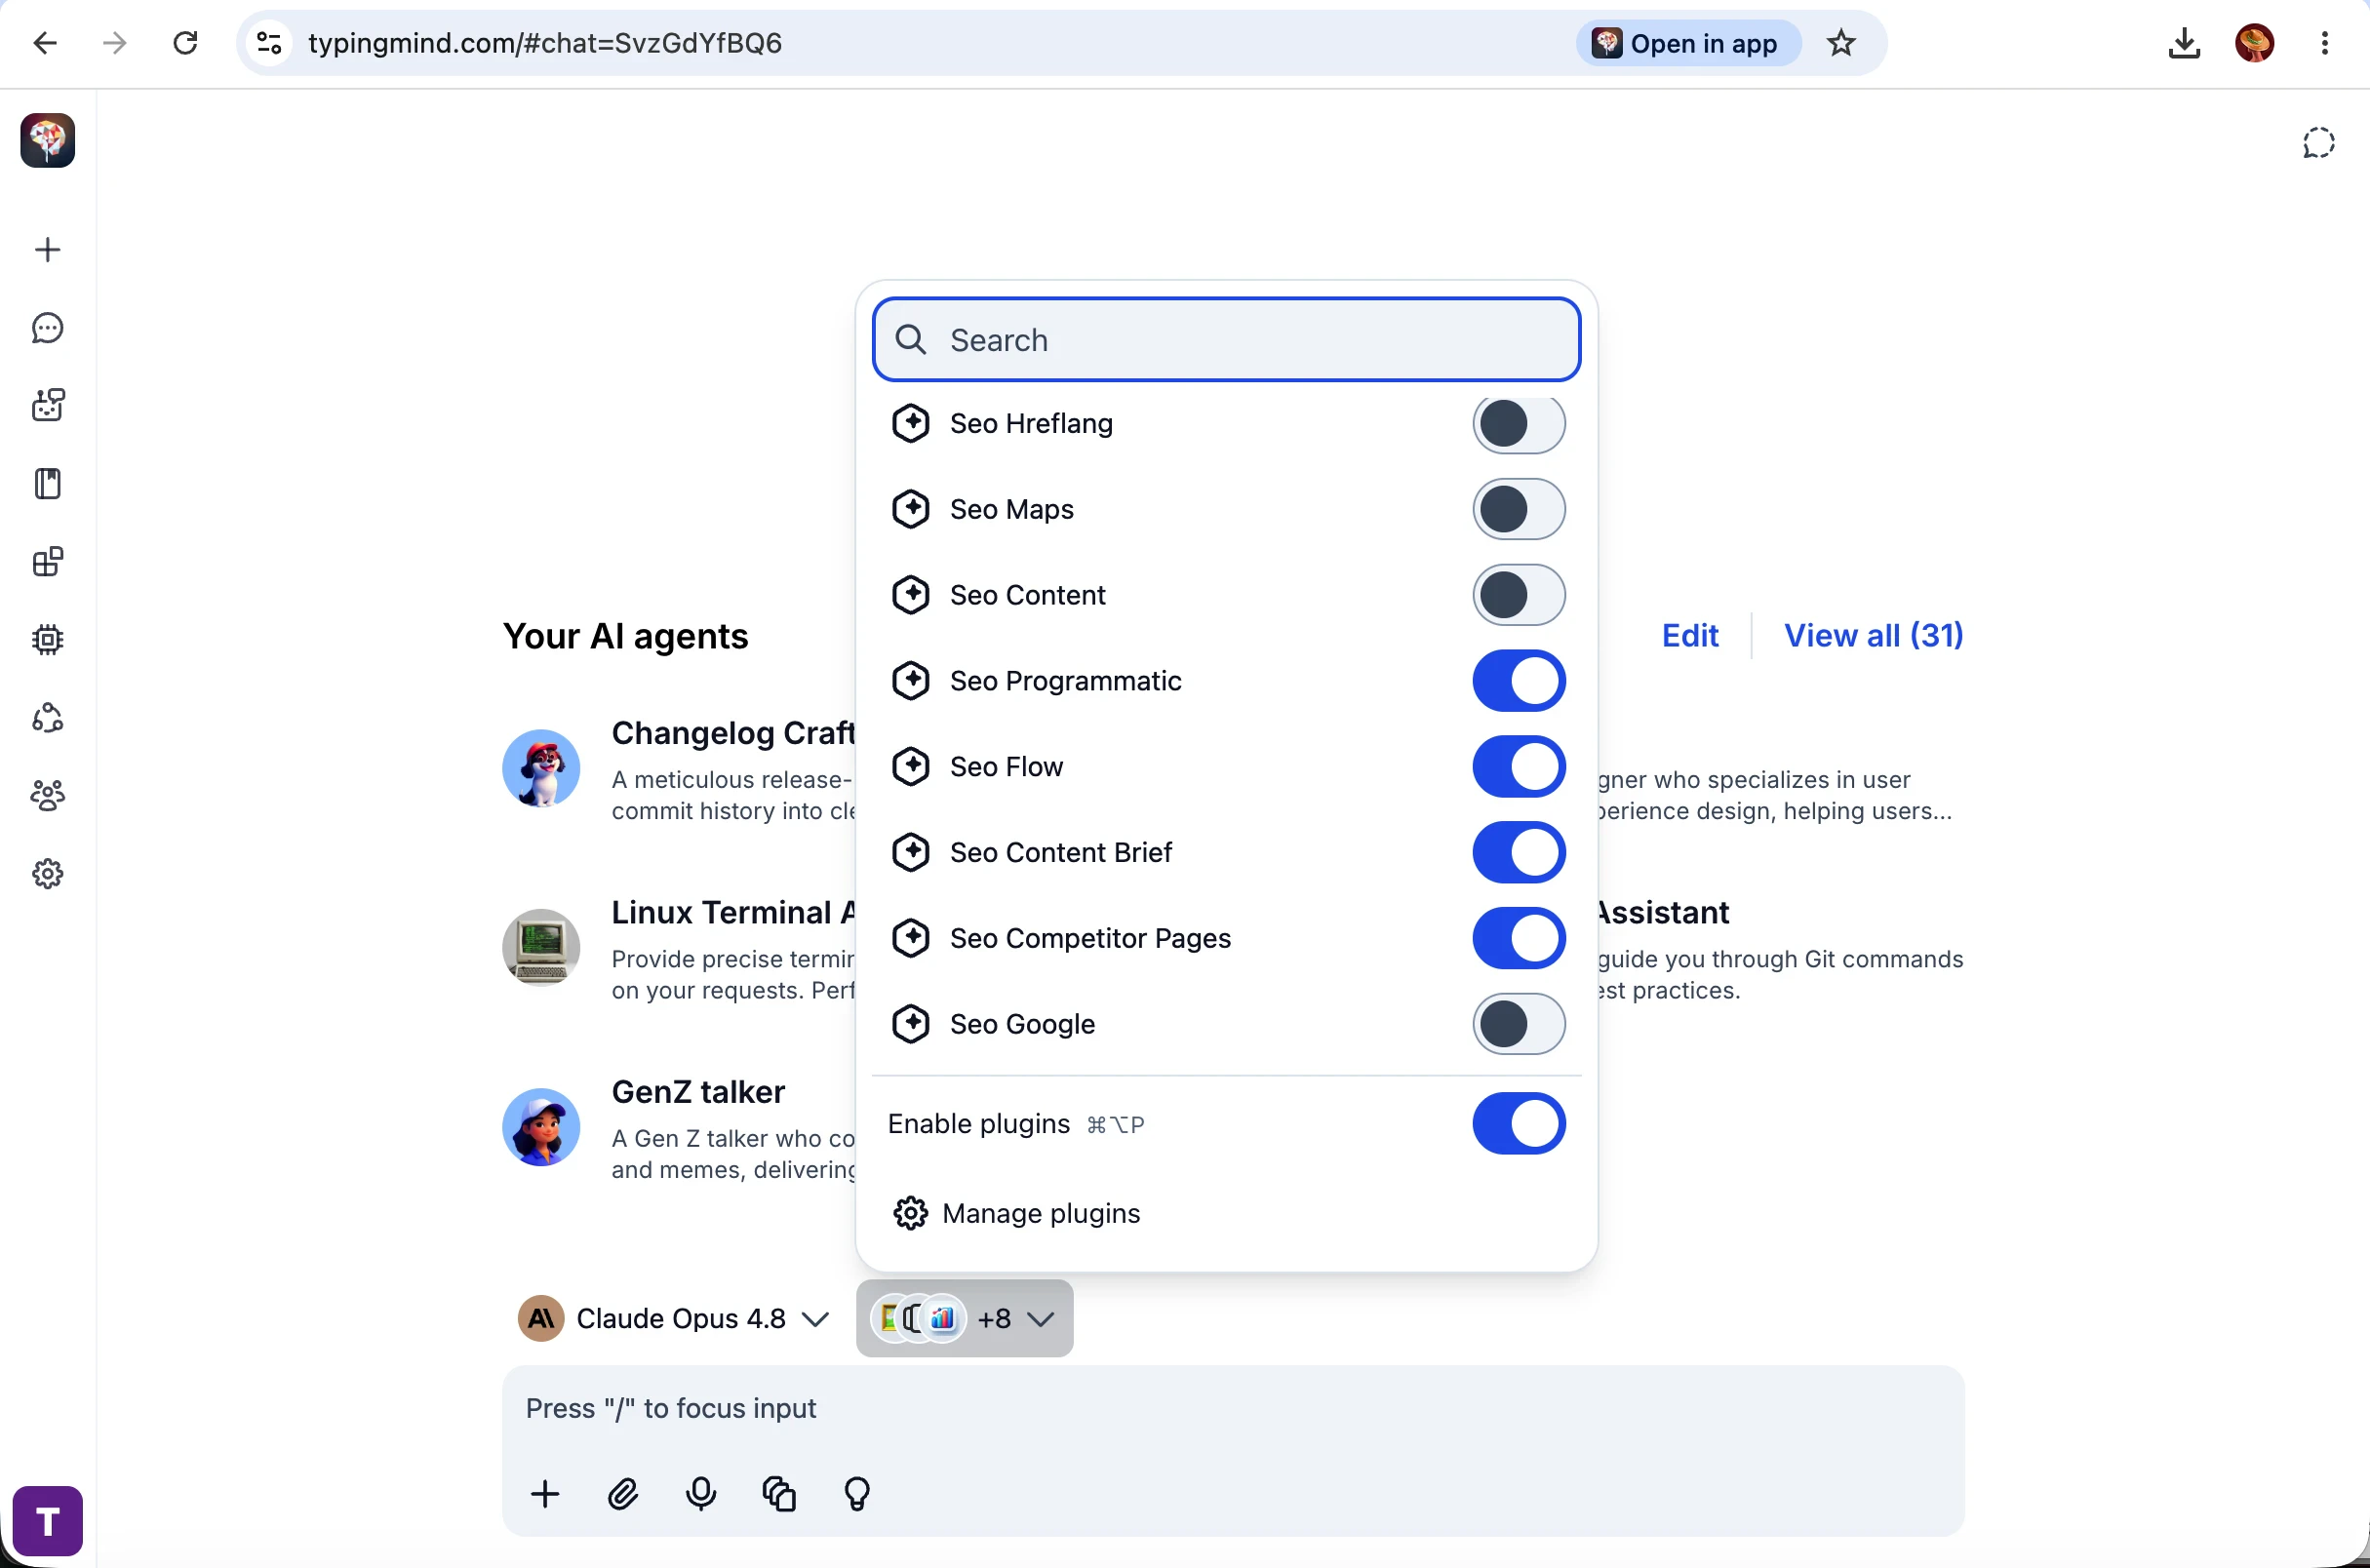
Skills only run when plugins are enabled for the current chat.- At the bottom of the chat, open the plugins menu (next to the model selector)
- Make sure Enable plugins is on (default shortcut ⌥⌘P on Mac — check Settings → Keyboard shortcuts to customize)
- Expand Skills and toggle on the skills you want for this conversation
- Send your message — you do not need to type the skill name
seo-programmatic before the detailed answer:

How loading works
Skills use progressive disclosure — TypingMind does not inject every skill’s full instructions into every message.- Catalog (always on when skills are enabled) — For each skill you turned on in the current chat, TypingMind adds a short entry (name + when to use it) to the system context.
- Load on demand — When your request matches a skill, the model calls Load skill (for example
seo-programmatic). You see a Skills → Load skill line in the conversation. - Follow instructions — The model receives the full
SKILL.mdbody and follows it for the rest of the reply. - Optional files — If the skill bundles templates, examples, or data files, the model can read them via Read skill resource (you do not open these files yourself).
Limits worth knowing
- You can enable at most 50 skills per chat. If you exceed that, send a message only after disabling some skills in the plugins menu.
- Enable only skills relevant to the current task — smaller sets work better and use less context.
- Skills with large file bundles count toward your usual local and cloud storage limits.
Sync across devices
When TypingMind Cloud Sync is enabled, skill metadata (name, description, instructions) syncs with your other plugin data. Skills that include bundled files also sync their resource archive so another device can download it on first use. Sign in to Cloud Sync before installing from GitHub on any device.Troubleshooting
The model never loads a skill- Confirm Enable plugins and the specific skill are toggled on in the chat plugins menu
- Read the skill Overview for example phrases that trigger it
- Enable fewer skills and try a more capable model
- Disable skills in the plugins menu until no more than 50 are on for that chat
- Sign in to TypingMind Cloud Sync, or download the repo as a .zip and use From .zip file
- Check that the URL points to a folder containing valid
SKILL.mdfiles and that the repo is public
- Stay signed in to sync, open Plugins or send a chat once so resources can download, or reinstall the skill