.svg?fit=max&auto=format&n=RaTUOQa09vPhW7_D&q=85&s=368f39de7ecc6605f73c43c2017546a3)
.svg?fit=max&auto=format&n=RaTUOQa09vPhW7_D&q=85&s=01a6eb27b4db3af8a1d5557525c579d3)
Step-by-step to install Slack MCP on TypingMind
Step 1: Configure Slack Bot
To use this MCP server, you need to create a Slack app and configure it with the necessary permissions: 1. Create a Slack App- Visit the Slack Apps page
- Click “Create New App”
- Choose “From scratch”
- Name your app and select your workspace
-in-typingmind/typingmind-mcp-slack/image.png) 2. Configure Bot Token Scopes
Navigate to “OAuth & Permissions” > Bot token scopes and add these scopes:
2. Configure Bot Token Scopes
Navigate to “OAuth & Permissions” > Bot token scopes and add these scopes:
channels:history- View messages and other content in public channelschannels:read- View basic channel informationchat:write- Send messages as the appreactions:write- Add emoji reactions to messagesusers:read- View users and their basic informationusers.profile:read- View detailed profiles about users
-in-typingmind/typingmind-mcp-slack/image%201.png) 3. Install App to Workspace
3. Install App to Workspace
- Click “Install to Workspace” and authorize the app
-in-typingmind/typingmind-mcp-slack/image%202.png)
- Save the “Bot User OAuth Token” that starts with
xoxb-
-in-typingmind/typingmind-mcp-slack/image%203.png) 4. Get Your Team ID
Get your Team ID (starts with a
4. Get Your Team ID
Get your Team ID (starts with a T) by following this guidance
5. Add Bot to Channels (Optional)
For the bot to access private channels or to post messages, you may need to invite it to specific channels using /invite @your-bot-name
Step 2: Set up TypingMind MCP Connectors
In TypingMind, go to Settings → Advanced Settings → Model Context Protocol to start setup your MCP connector. The MCP Connector acts as the bridge between TypingMind and the MCP servers. MCP servers require a server to run on. TypingMind allows you to connect to the MCP servers via:- Your own local device
- Or a private remote server.
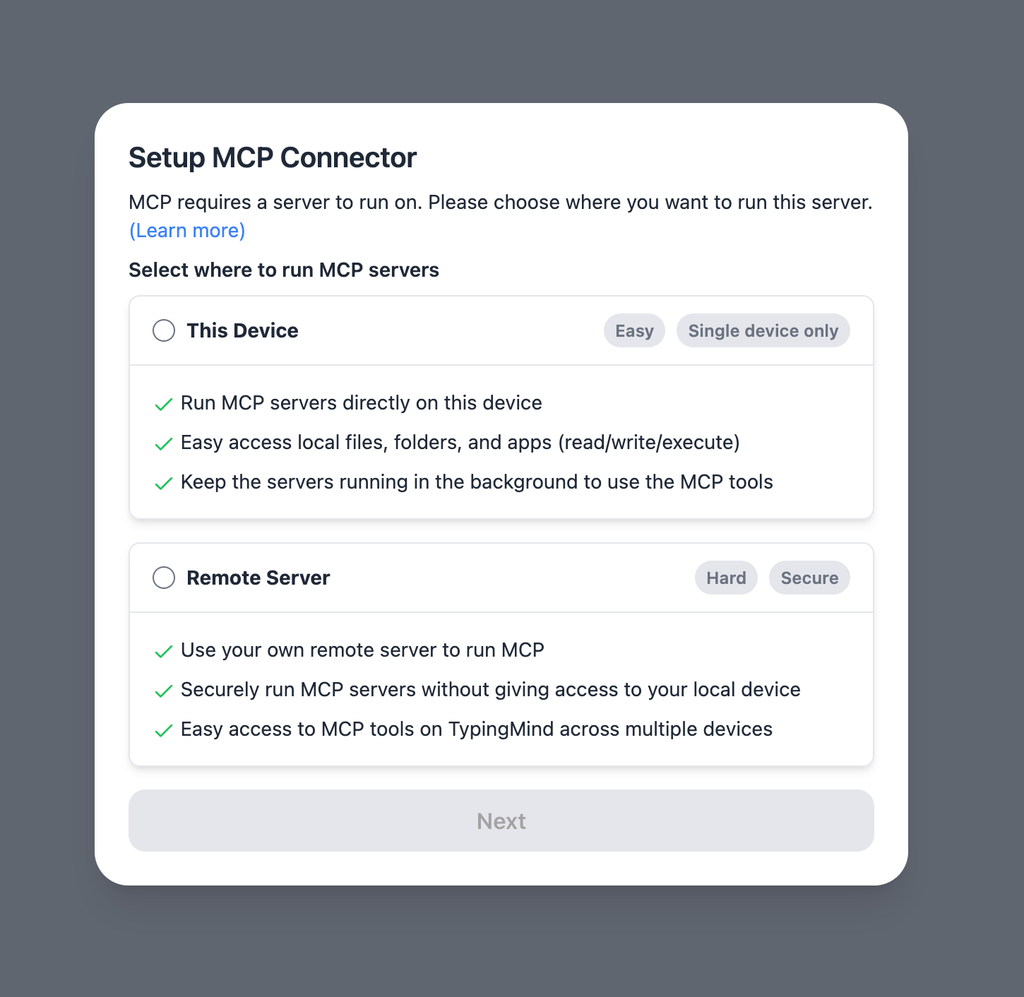 If you choose to run the MCP servers on your device, run the command displayed on the screen.
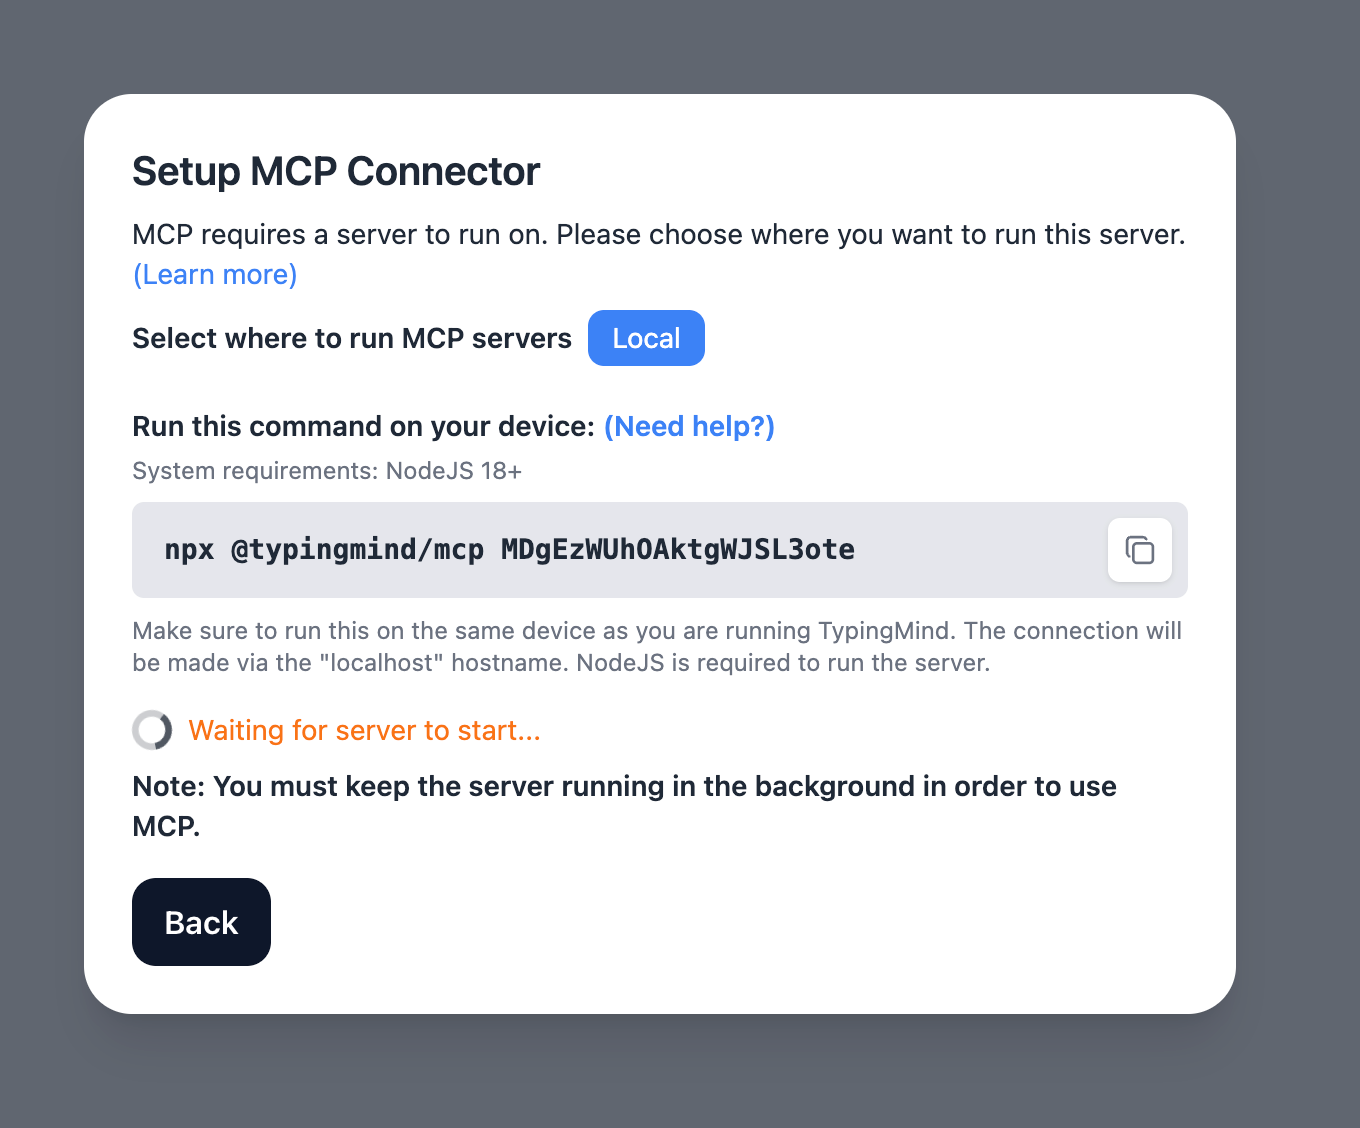
Step 2: Add the Slack MCP Server to TypingMind
- Click on Edit Servers to add MCP server
- Add the following JSON to configure the Slack MCP server:
-in-typingmind/typingmind-mcp-slack/image%204.png)
Step 3: Enable Slack via Plugin section
After the MCP servers are added successfully, it will show up in your Plugins page to be used like plugin. You can use the MCP tools directly or assign them to AI agent like other plugins.- Go to the Plugins section in TypingMind.
- You should see a new plugin called “slack”.
- Enable the plugin
-in-typingmind/typingmind-mcp-slack/image%205.png)
Step 4: Start chatting
You’re all set! Now you can view, manage and send messages to Slack effortlessly from TypingMind!-in-typingmind/typingmind-mcp-slack/image%206.png)