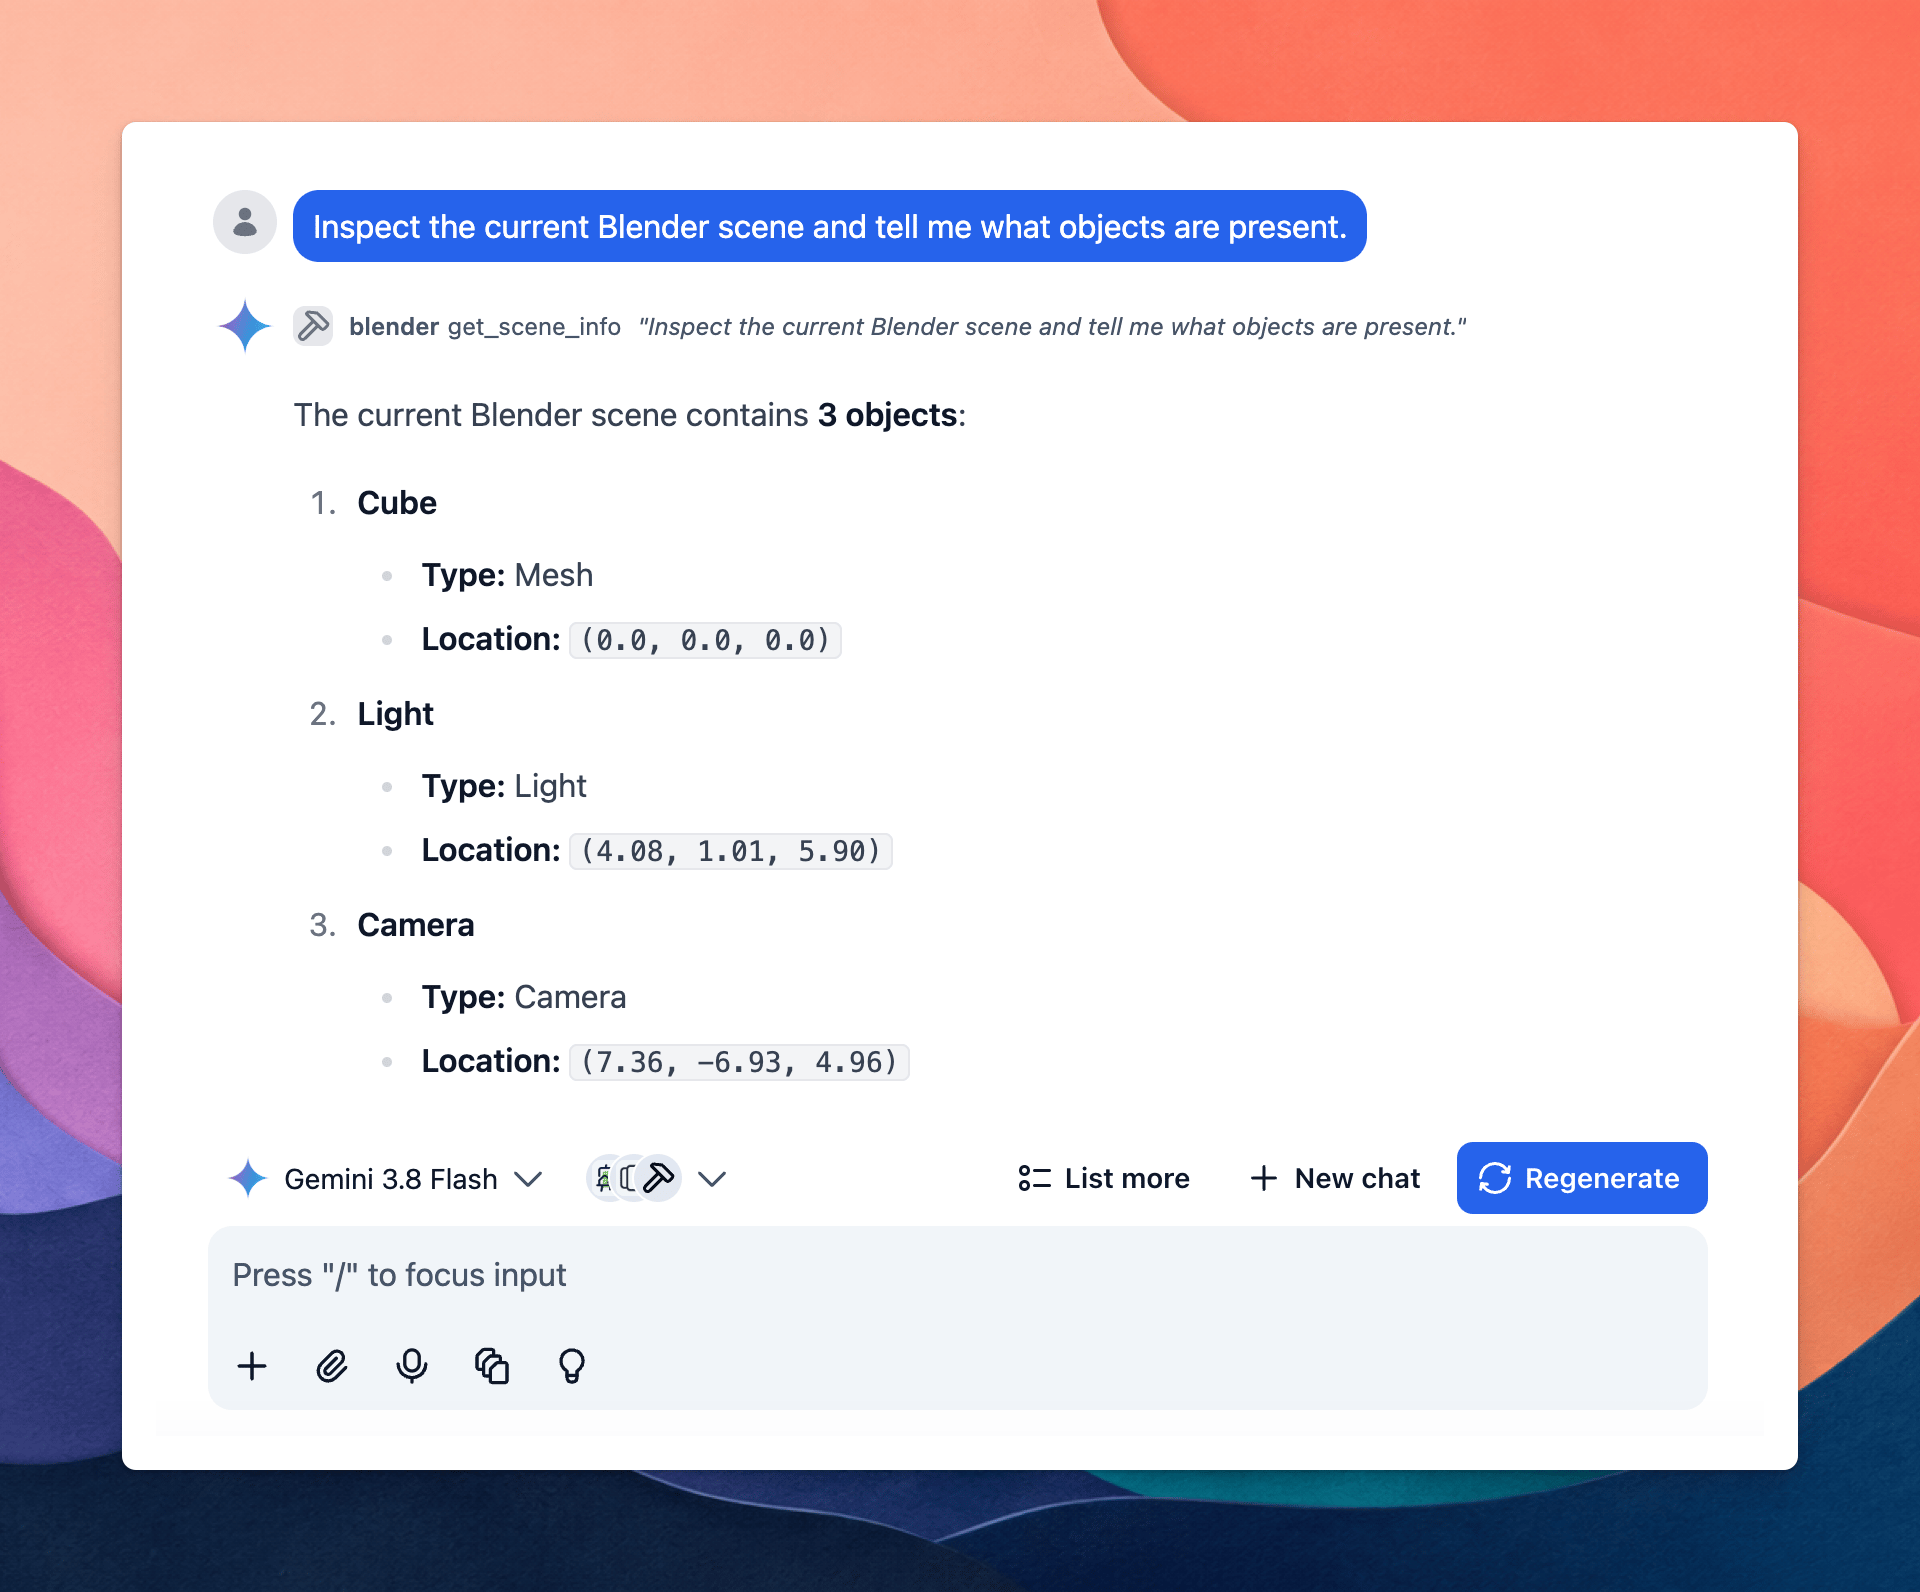
.svg?fit=max&auto=format&n=RaTUOQa09vPhW7_D&q=85&s=368f39de7ecc6605f73c43c2017546a3)
.svg?fit=max&auto=format&n=RaTUOQa09vPhW7_D&q=85&s=01a6eb27b4db3af8a1d5557525c579d3)
Why connect your AI to Blender MCP?
- Create 3D objects: Add cubes, spheres, meshes, cameras, lights, and other objects directly in Blender.
- Modify objects: Move, rotate, scale, duplicate, or delete existing objects.
- Create materials: Apply colors, textures, and material properties to objects.
- Inspect Blender scenes: Let the AI understand the objects and structure of your current scene.
- Control cameras and lighting: Set up cameras, lights, and scene composition.
- Run Blender Python: Use Blender’s Python API to perform more advanced operations.
- Build scenes with natural language: Describe what you want and let the AI perform the work directly inside Blender.
Step-by-step to install
Step 1: Set up MCP Connectors
In TypingMind, go to Settings → Advanced Settings → Model Context Protocol to start setup your MCP connector. The MCP Connector acts as the bridge between TypingMind and the MCP servers. MCP servers require a server to run on. TypingMind allows you to connect to the MCP servers via:- Your own local device
- Or a private remote server.
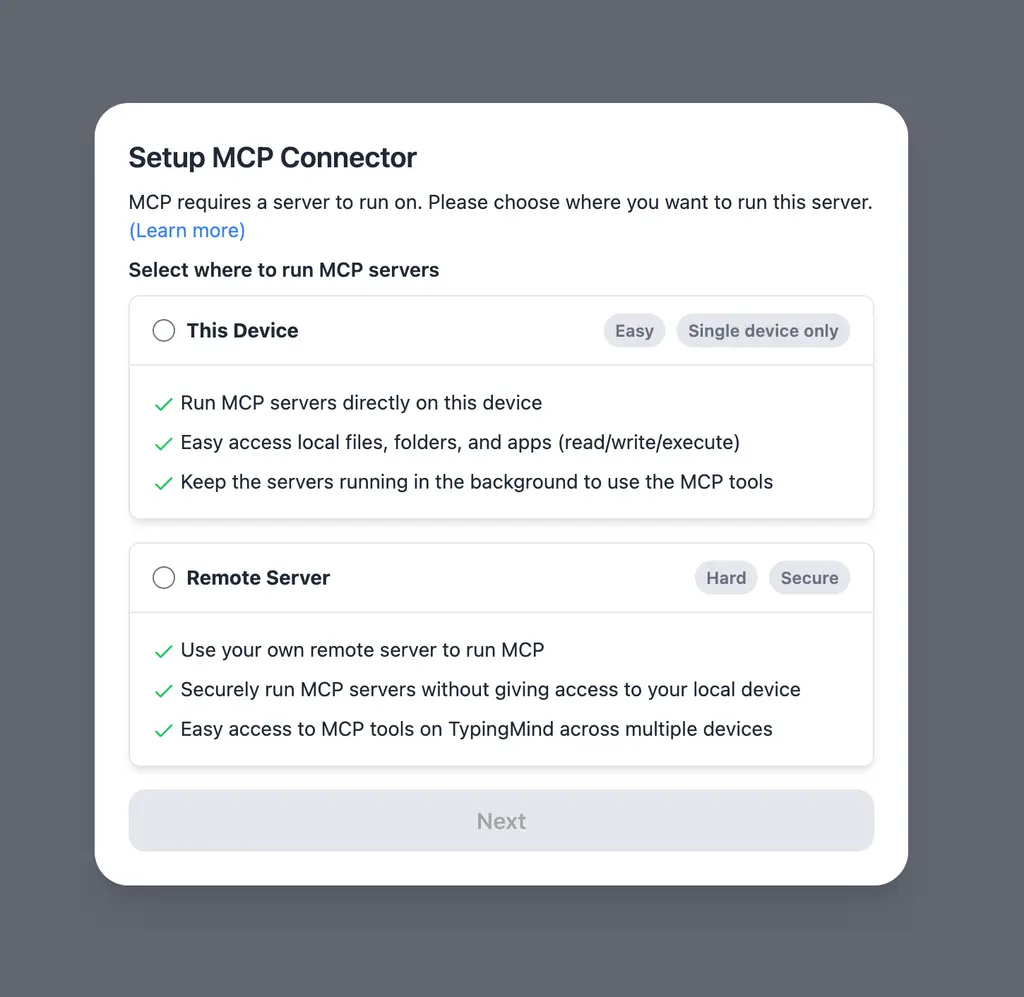 If you choose to run the MCP servers on your device, run the command displayed on the screen.
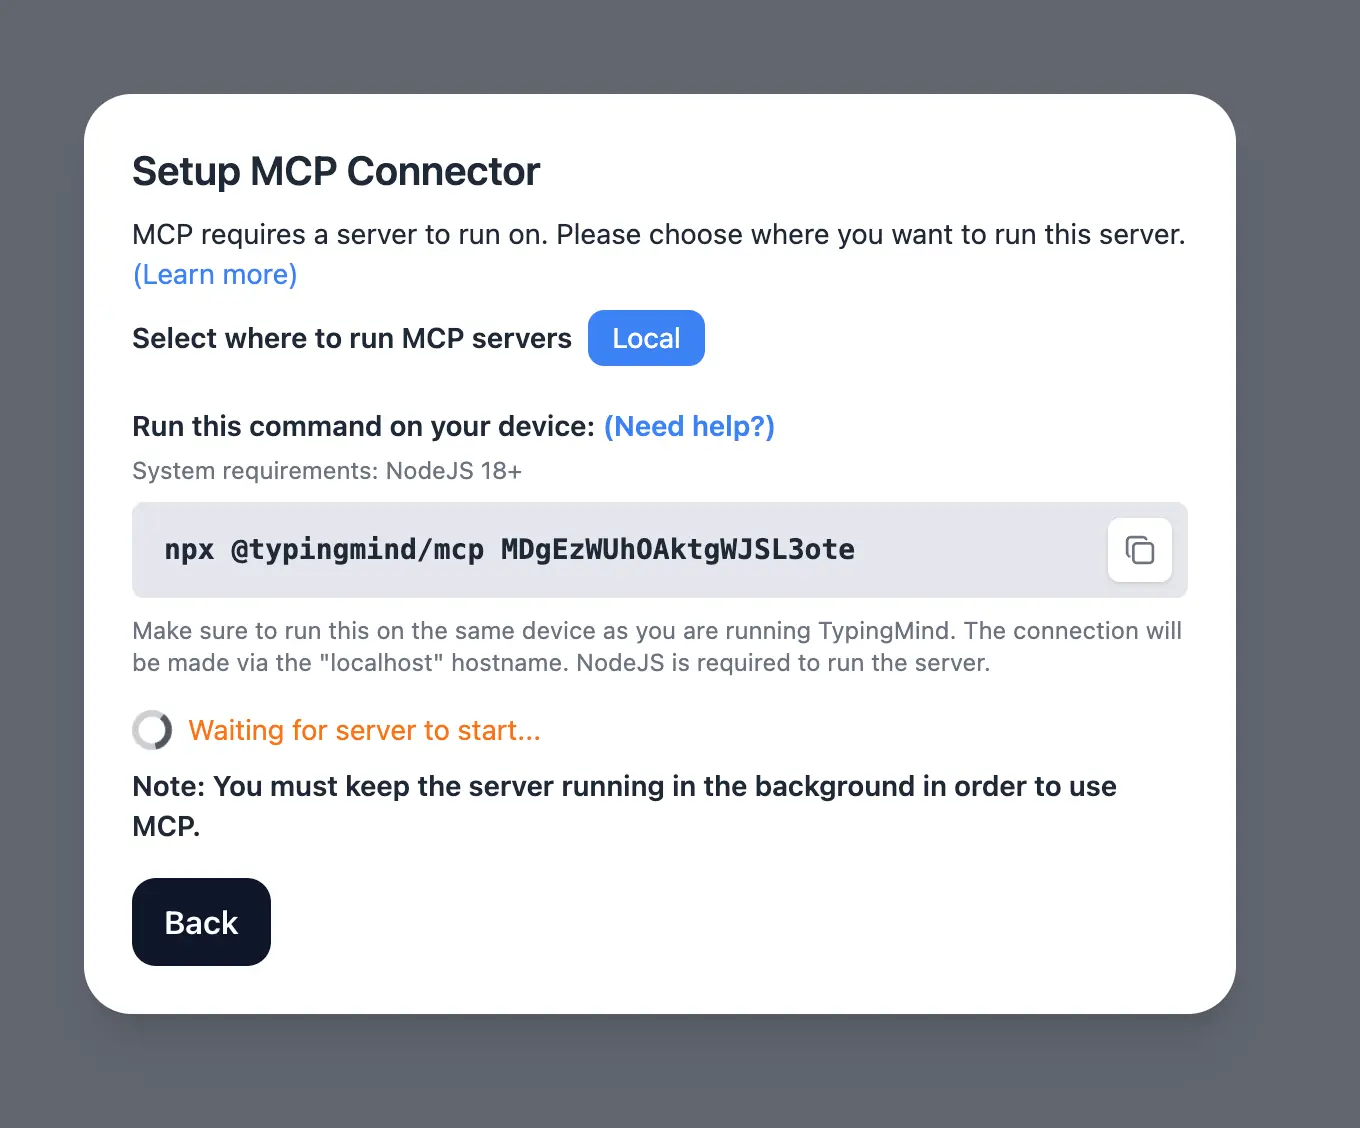 Detail setup can be found at https://docs.typingmind.com/model-context-protocol-(mcp)-in-typingmind
Step 2: Install Blender MCP
Blender MCP usesuv to run the MCP server.
macOS
Installuv:
Windows
Run:Linux
Run:uvx is available:
Step 3: Enable the Blender MCP Add-on
Open Blender and go to: Edit → Preferences → Add-ons Search for: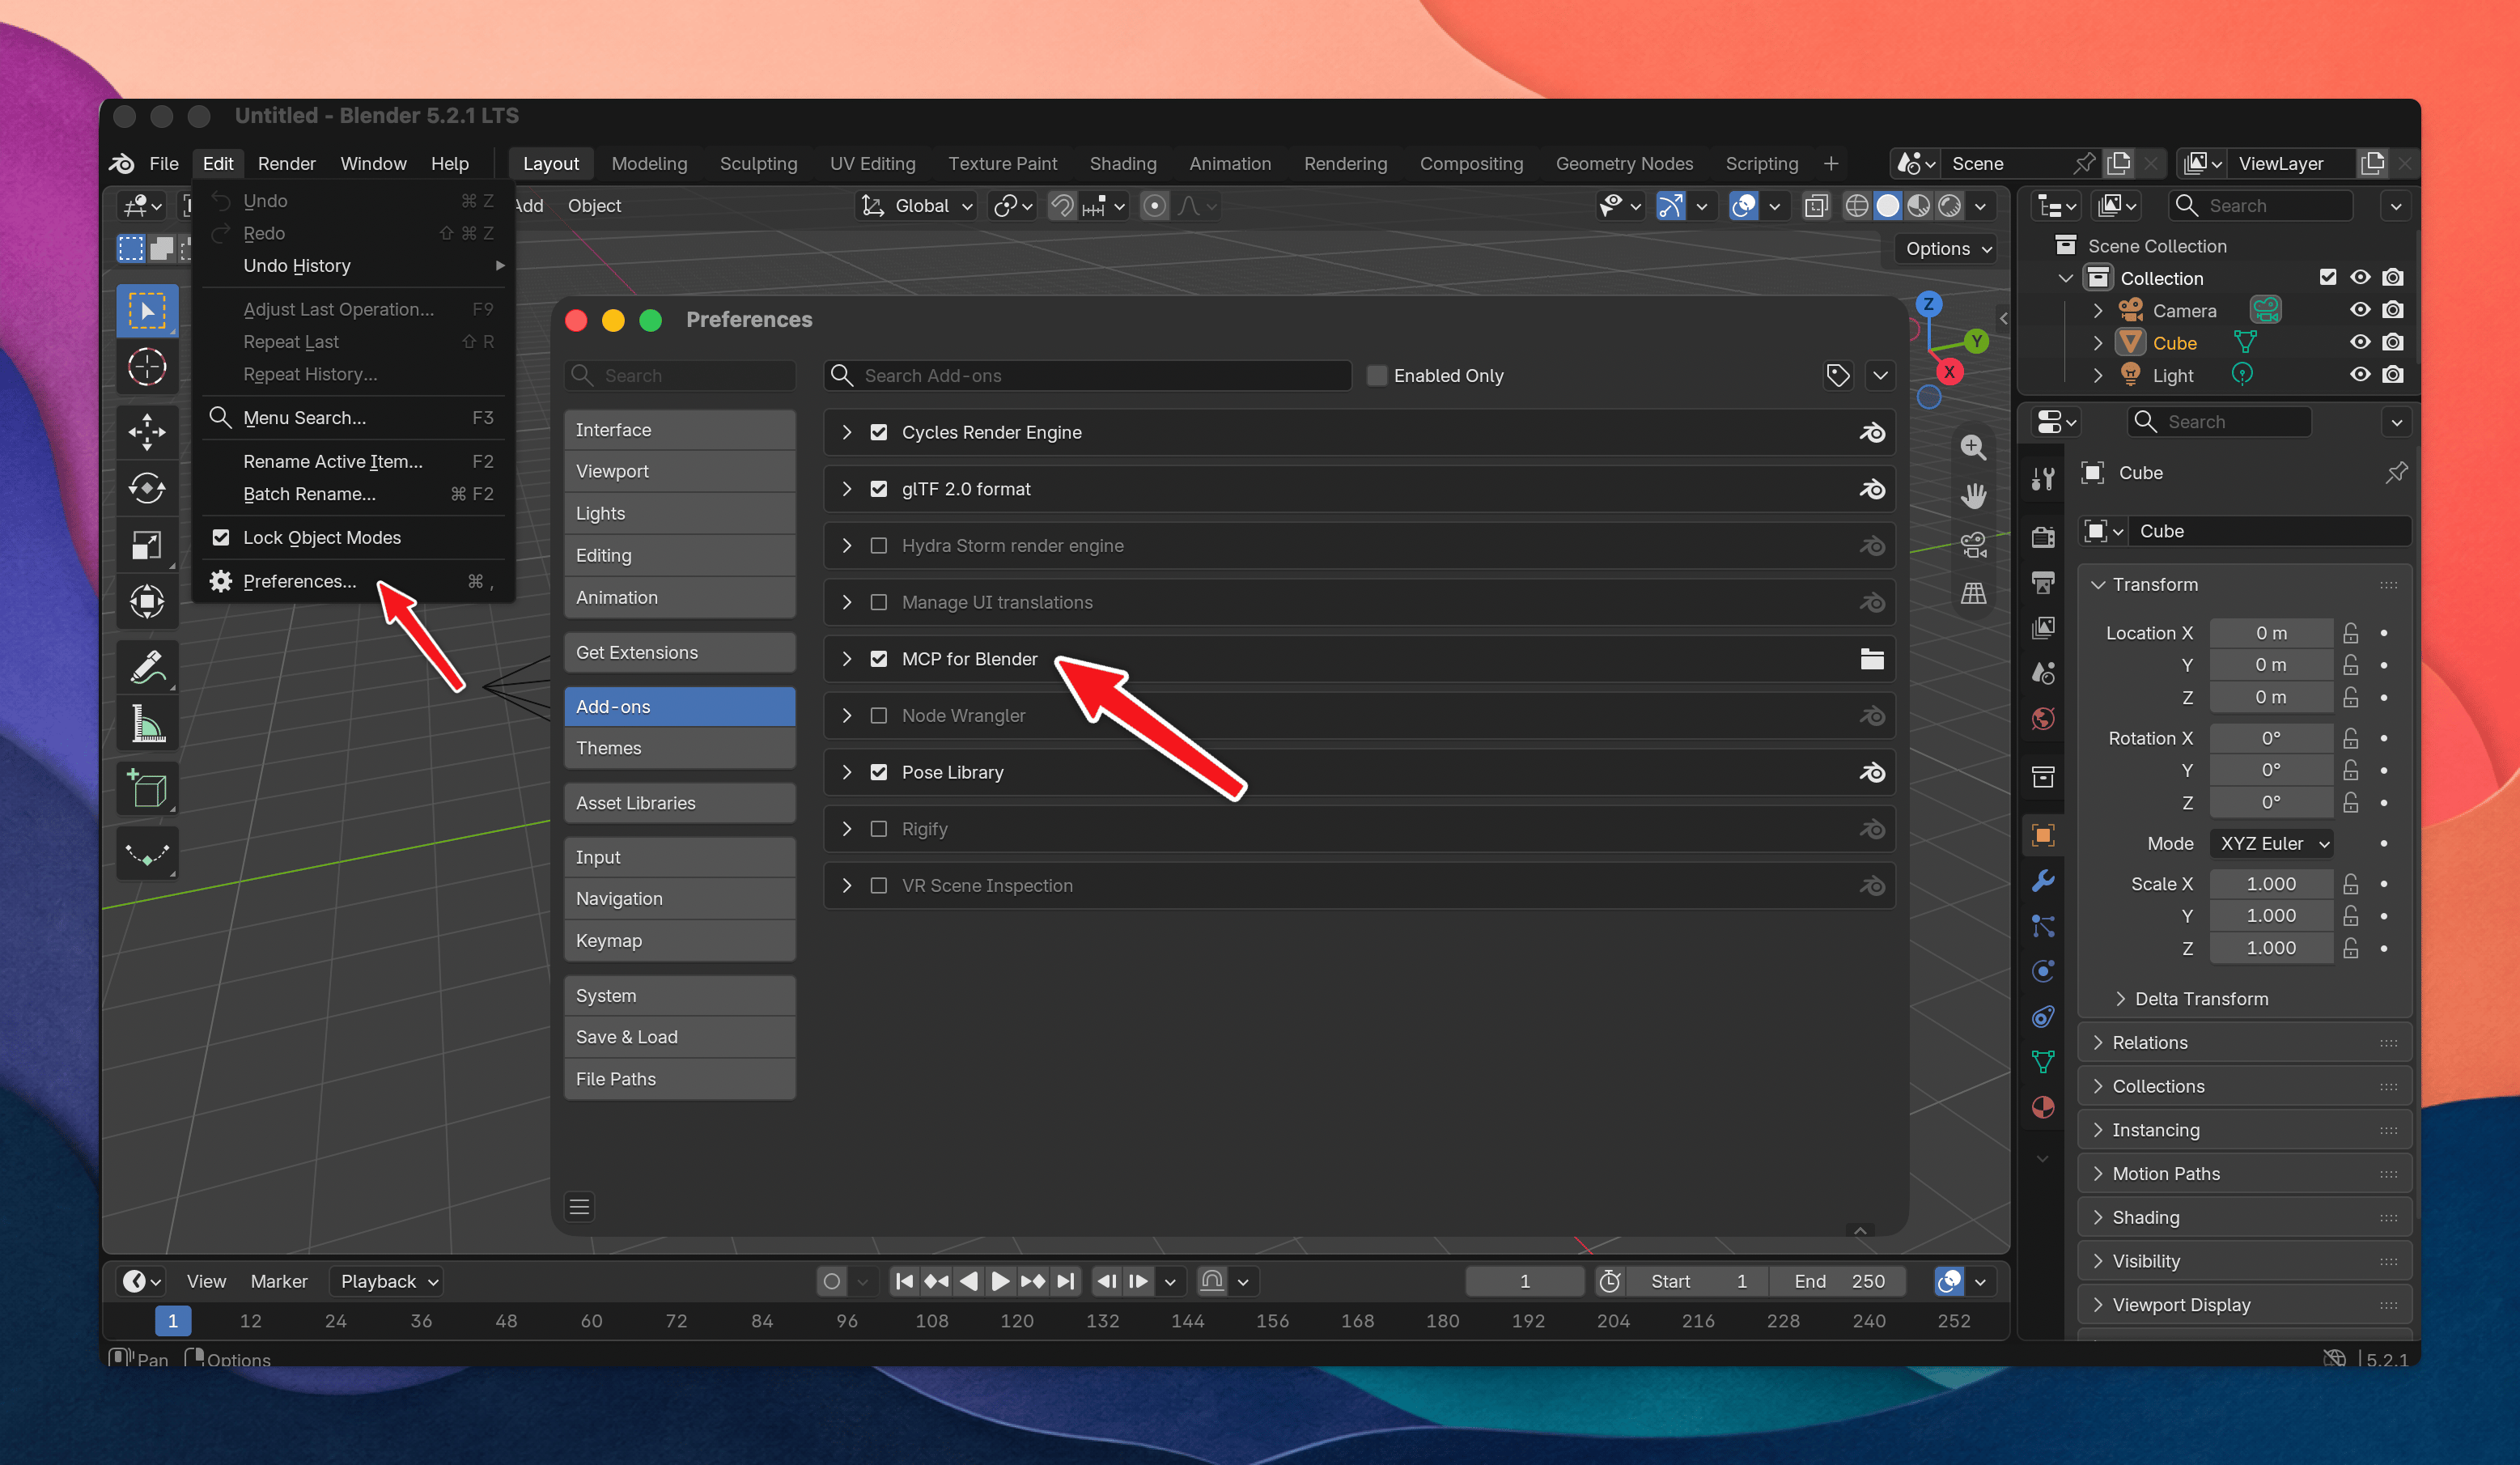
Step 4: Add the Blender MCP Server to TypingMind
In TypingMind:- Go to Settings → Advanced Settings → Model Context Protocol
- Click Edit Servers
- Add the following JSON configuration:
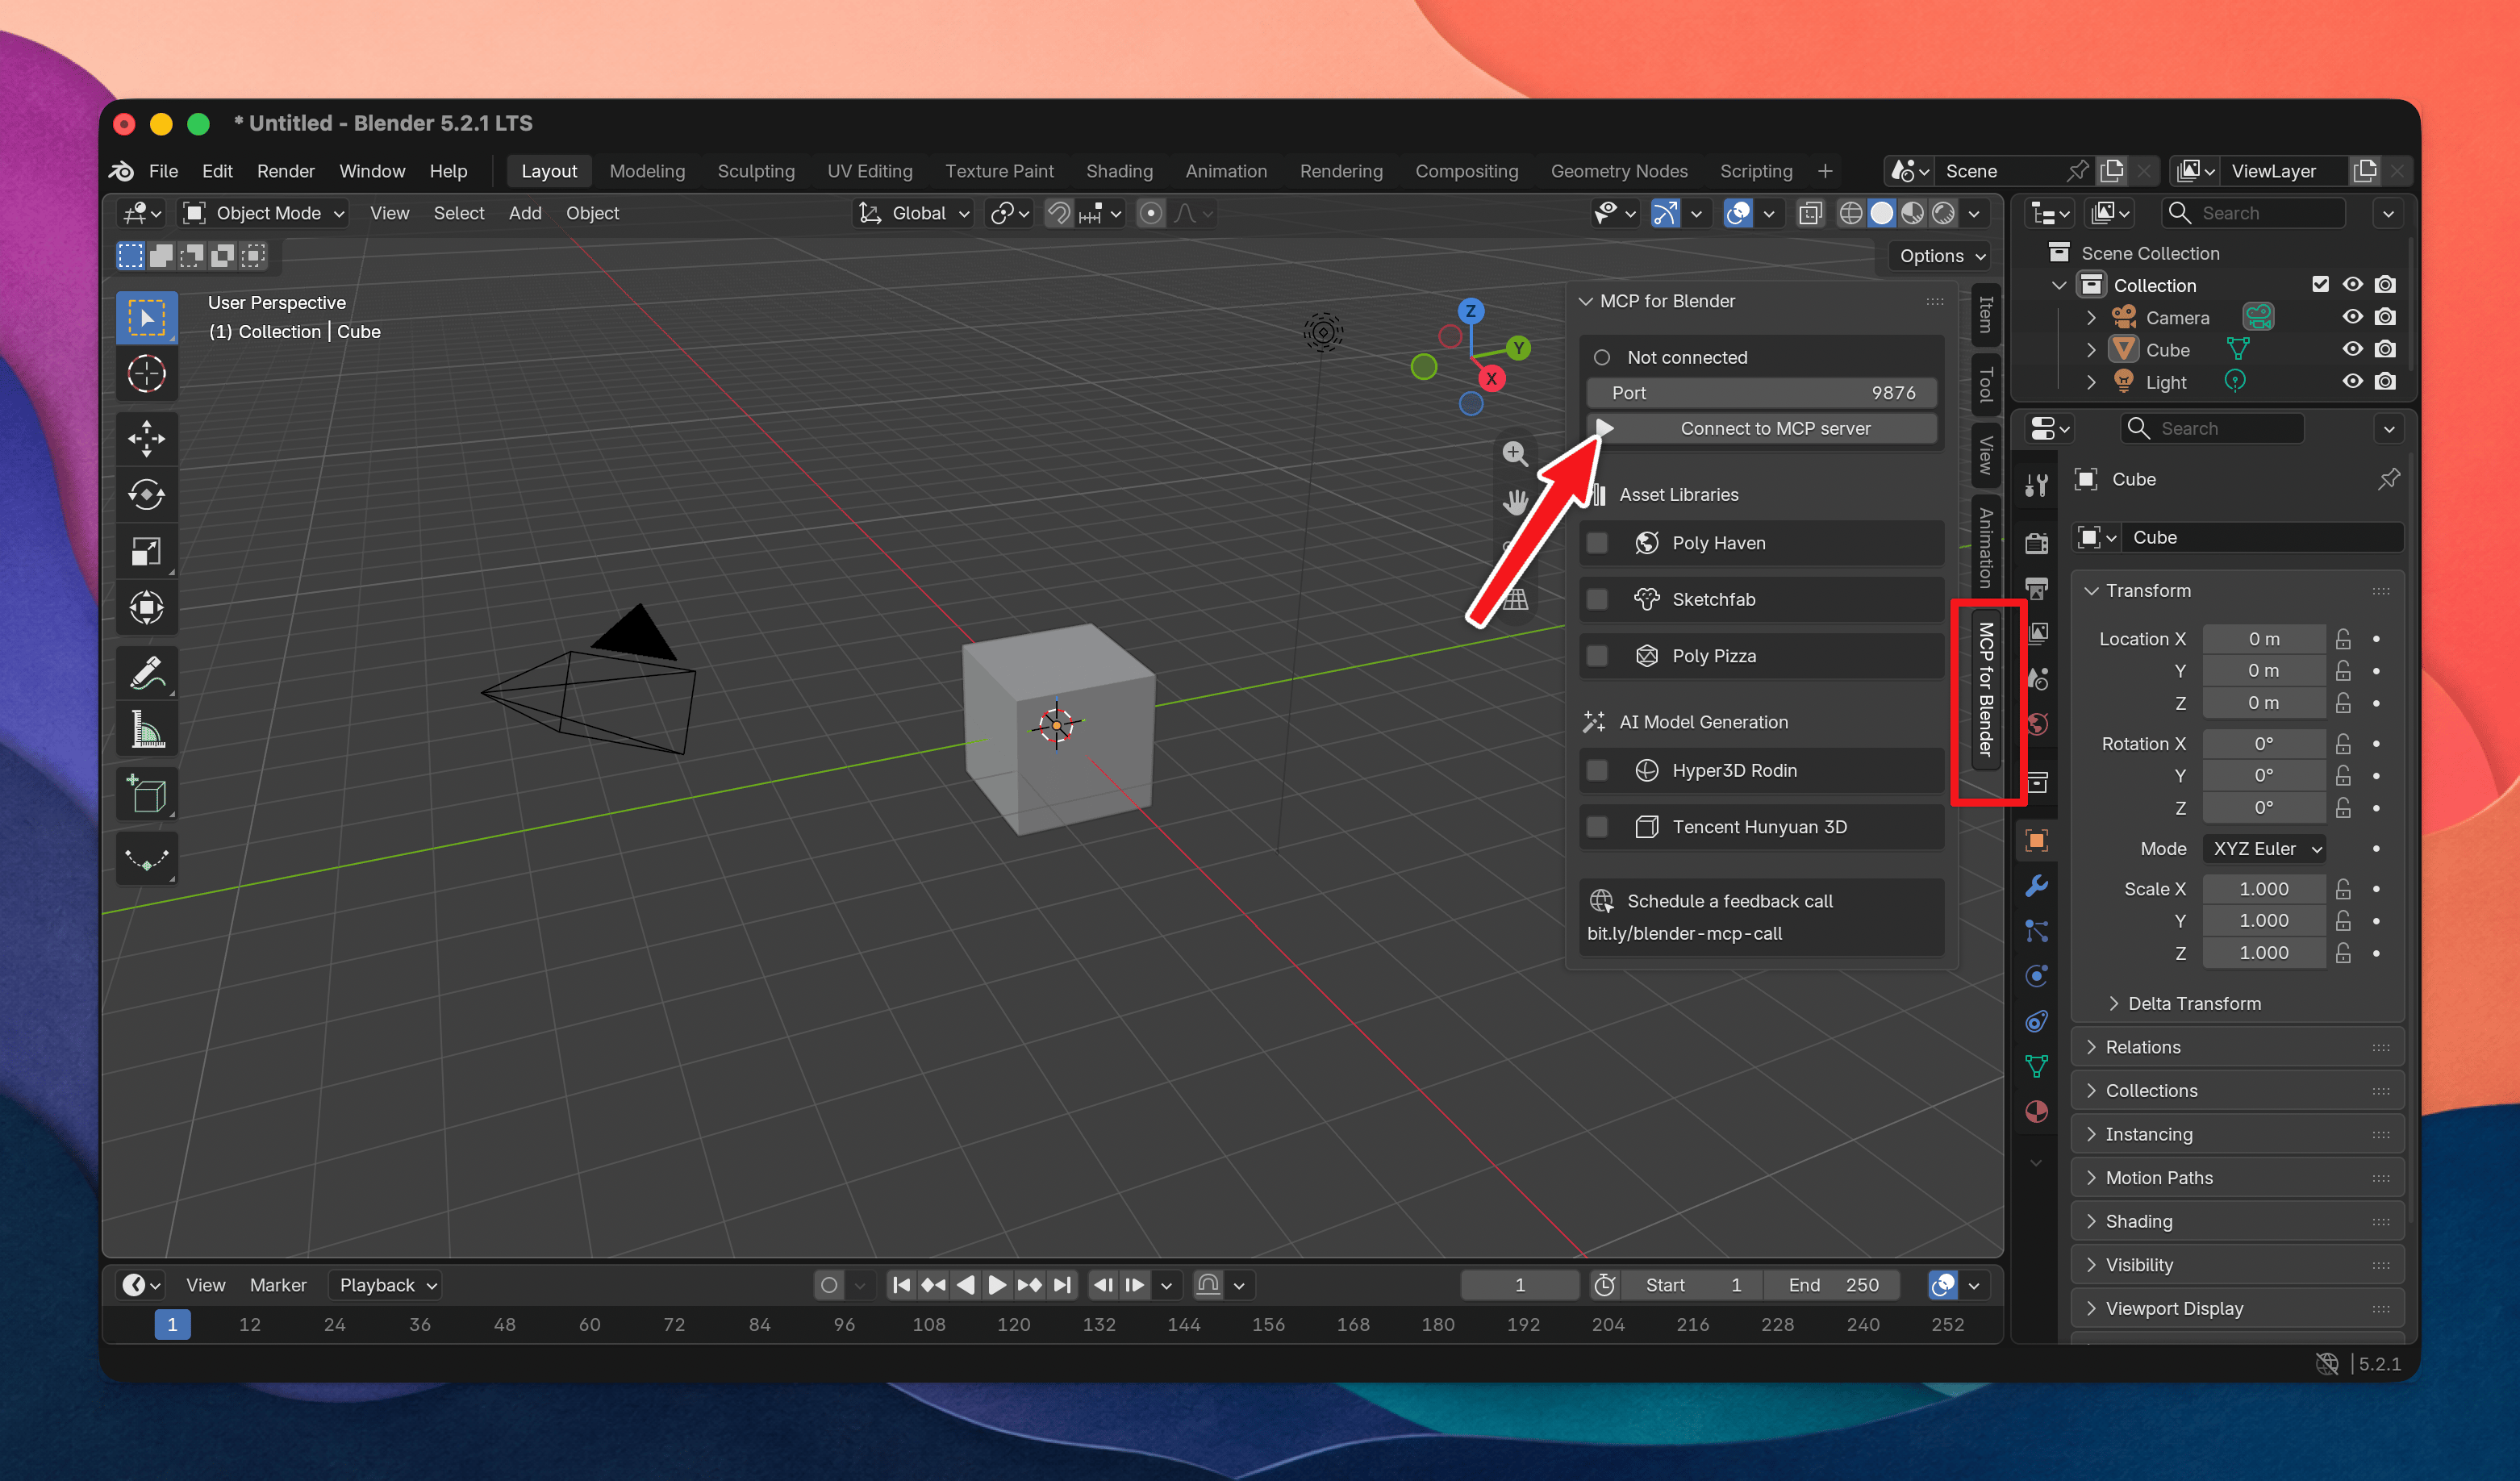
Step 5: Start the MCP Server in Blender
- Open Blender.
- From the 3D Viewport, press N to open the sidebar.
- Open the MCP for Blender tab and click: Start MCP Server
- Keep Blender open while using the MCP tools.
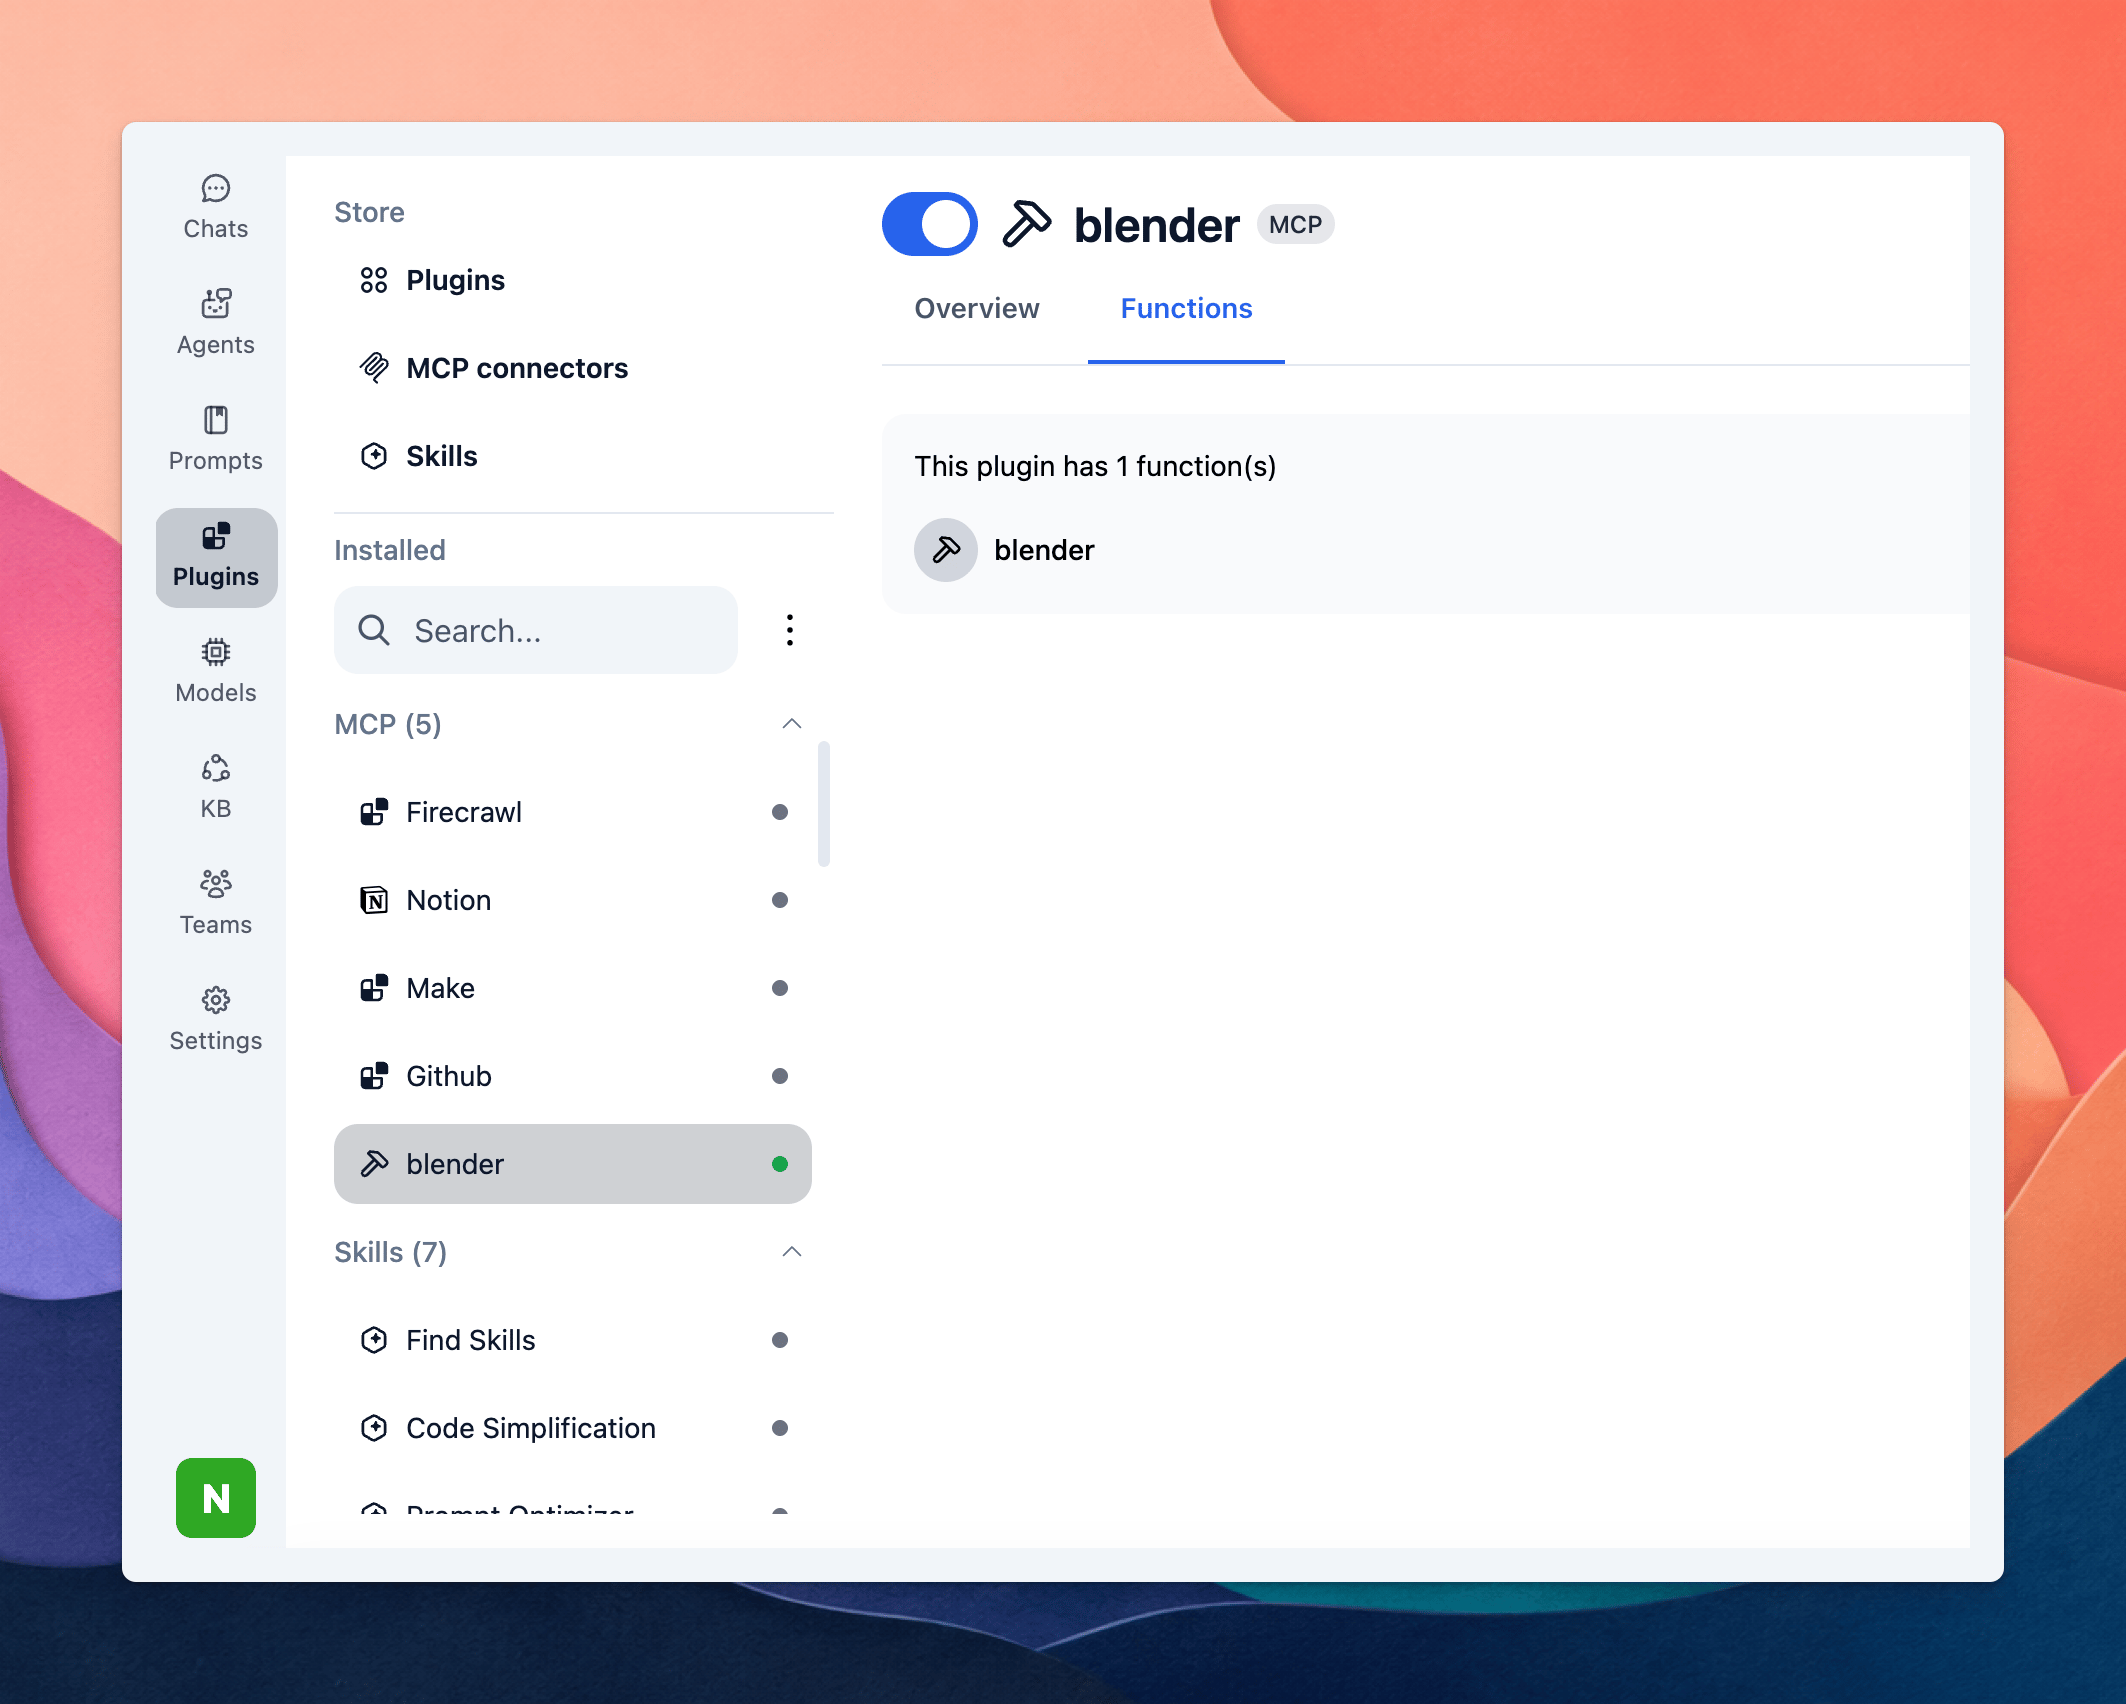
Step 6: Enable Blender via Plugin section
After the MCP server is added successfully, it will show up on your Plugins page and can be used like other TypingMind plugins.- Go to the Plugins section in TypingMind.
- You should see a new plugin called blender.
- Enable the plugin.
Step 7: Start chatting
You can now ask the AI to interact with Blender.