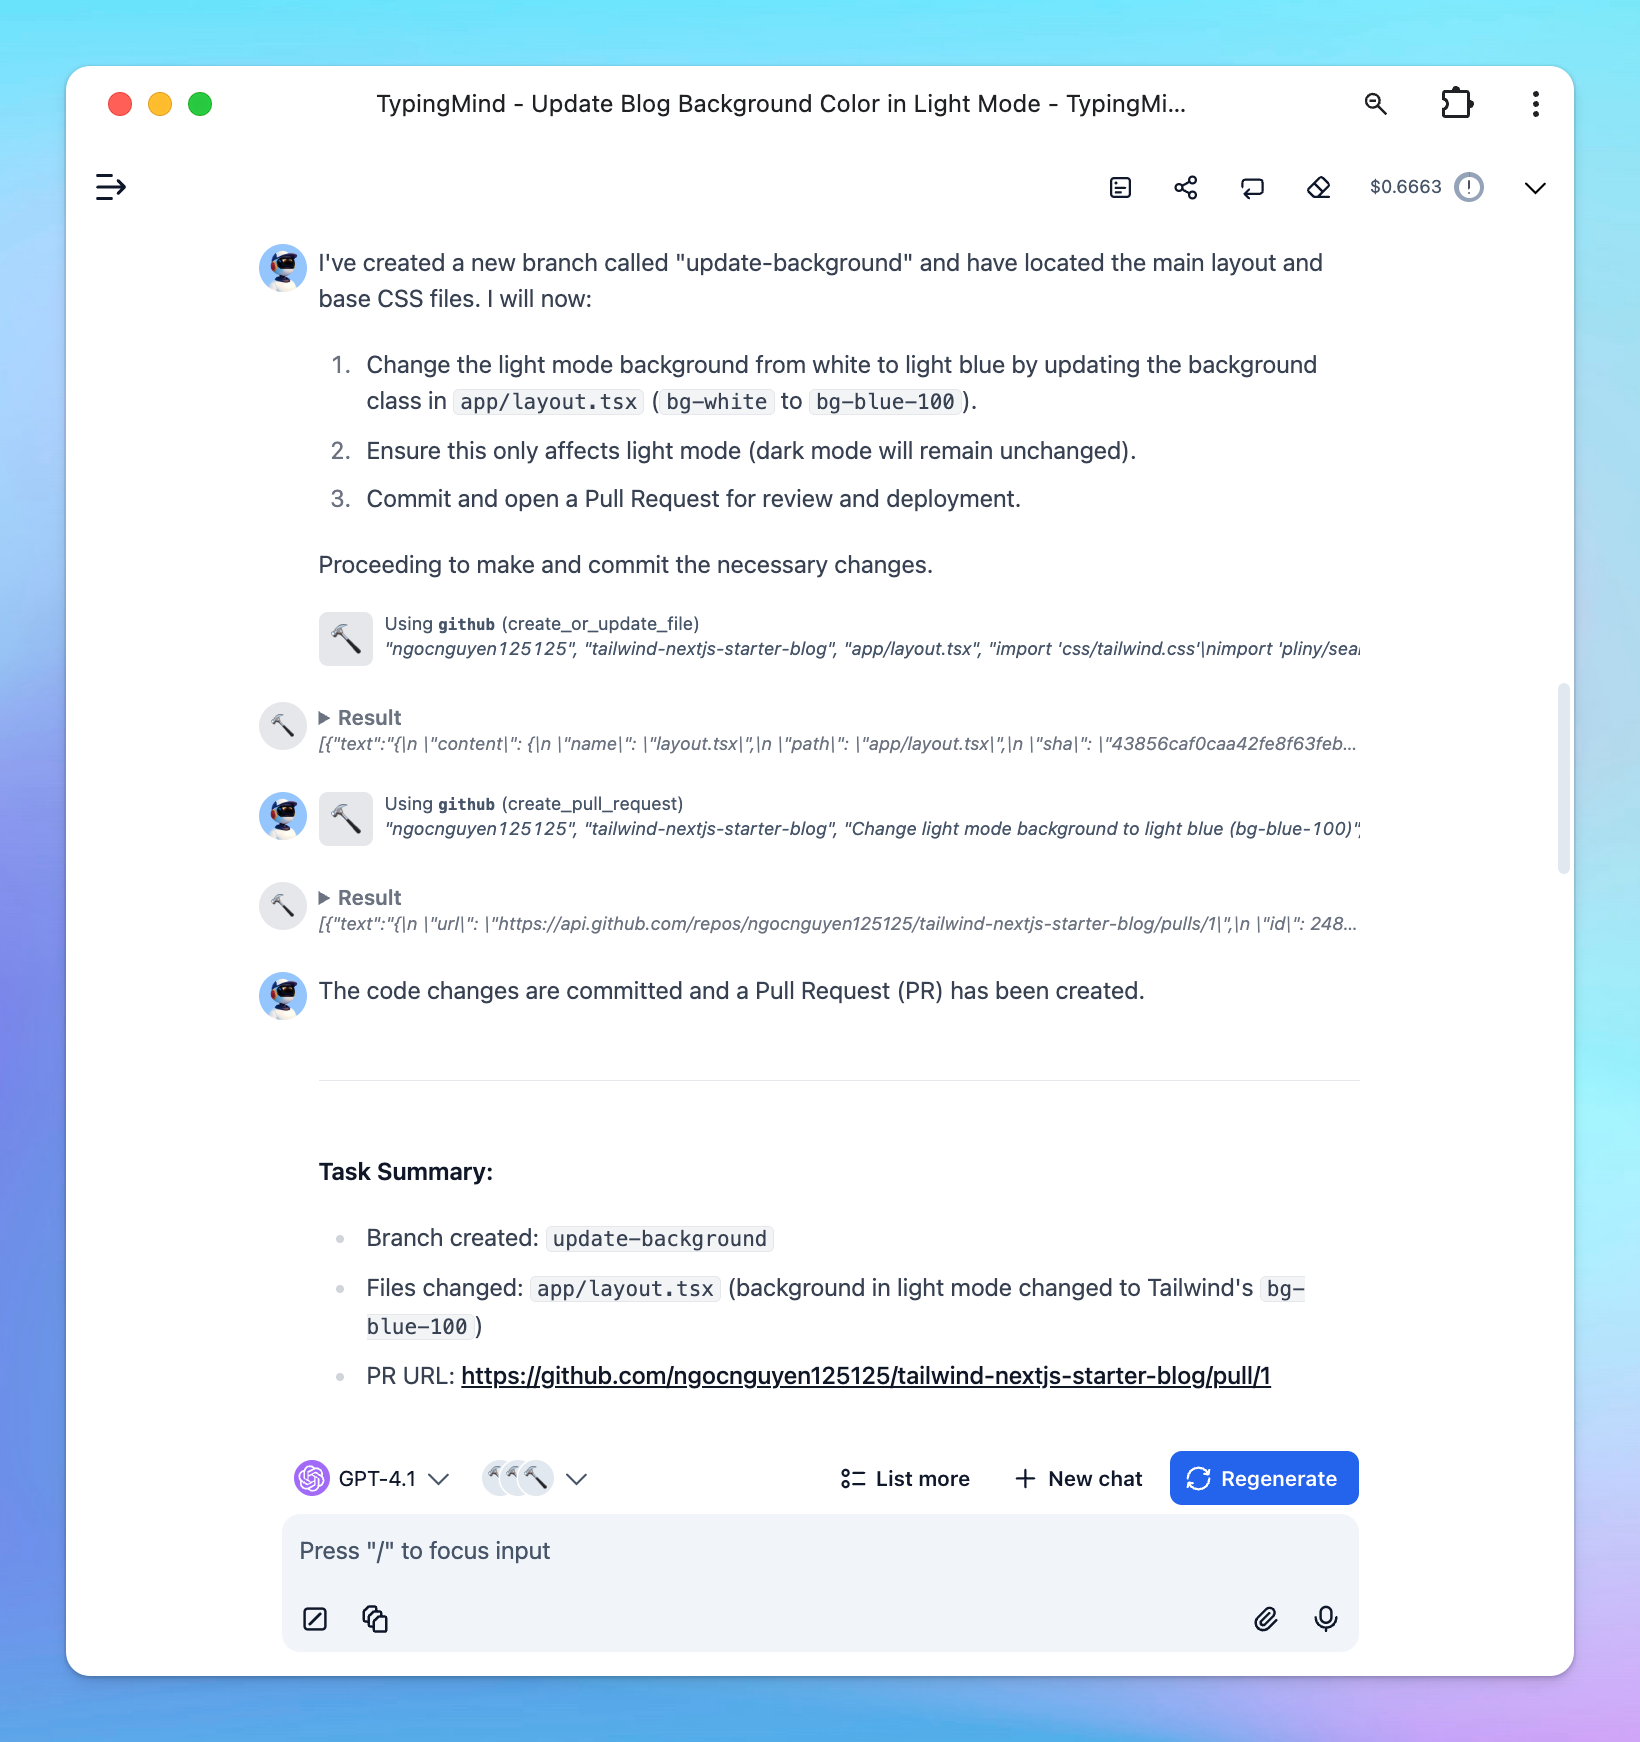
Using TypingMind with GitHub via MCP gives you developer-grade GitHub control with conversational AI simplicity. Whether you’re maintaining docs, managing issues, or coding collaboratively, this integration unlocks a smoother, more productive workflow.
Let’s see how to do that on TypingMind!
Why use TypingMind MCP + Github?
Connecting TypingMind’s Model Context Protocol (MCP) to GitHub provides powerful automation and streamlined workflows:
- Automatic branch creation – no need to manually create branches when updating or adding files
- Clear error messages – easy to understand feedback when something goes wrong
- Preserved Git history – Keeps commit history clean without force-pushing
- Single and multi-file operations – update just one file or many files at the same time, which is helpful for larger projects.
- Advanced search – search code, issues, pull requests, and users directly from TypingMind
Step-by-step to install GitHub MCP
Step 1: Get Github Access Tokens
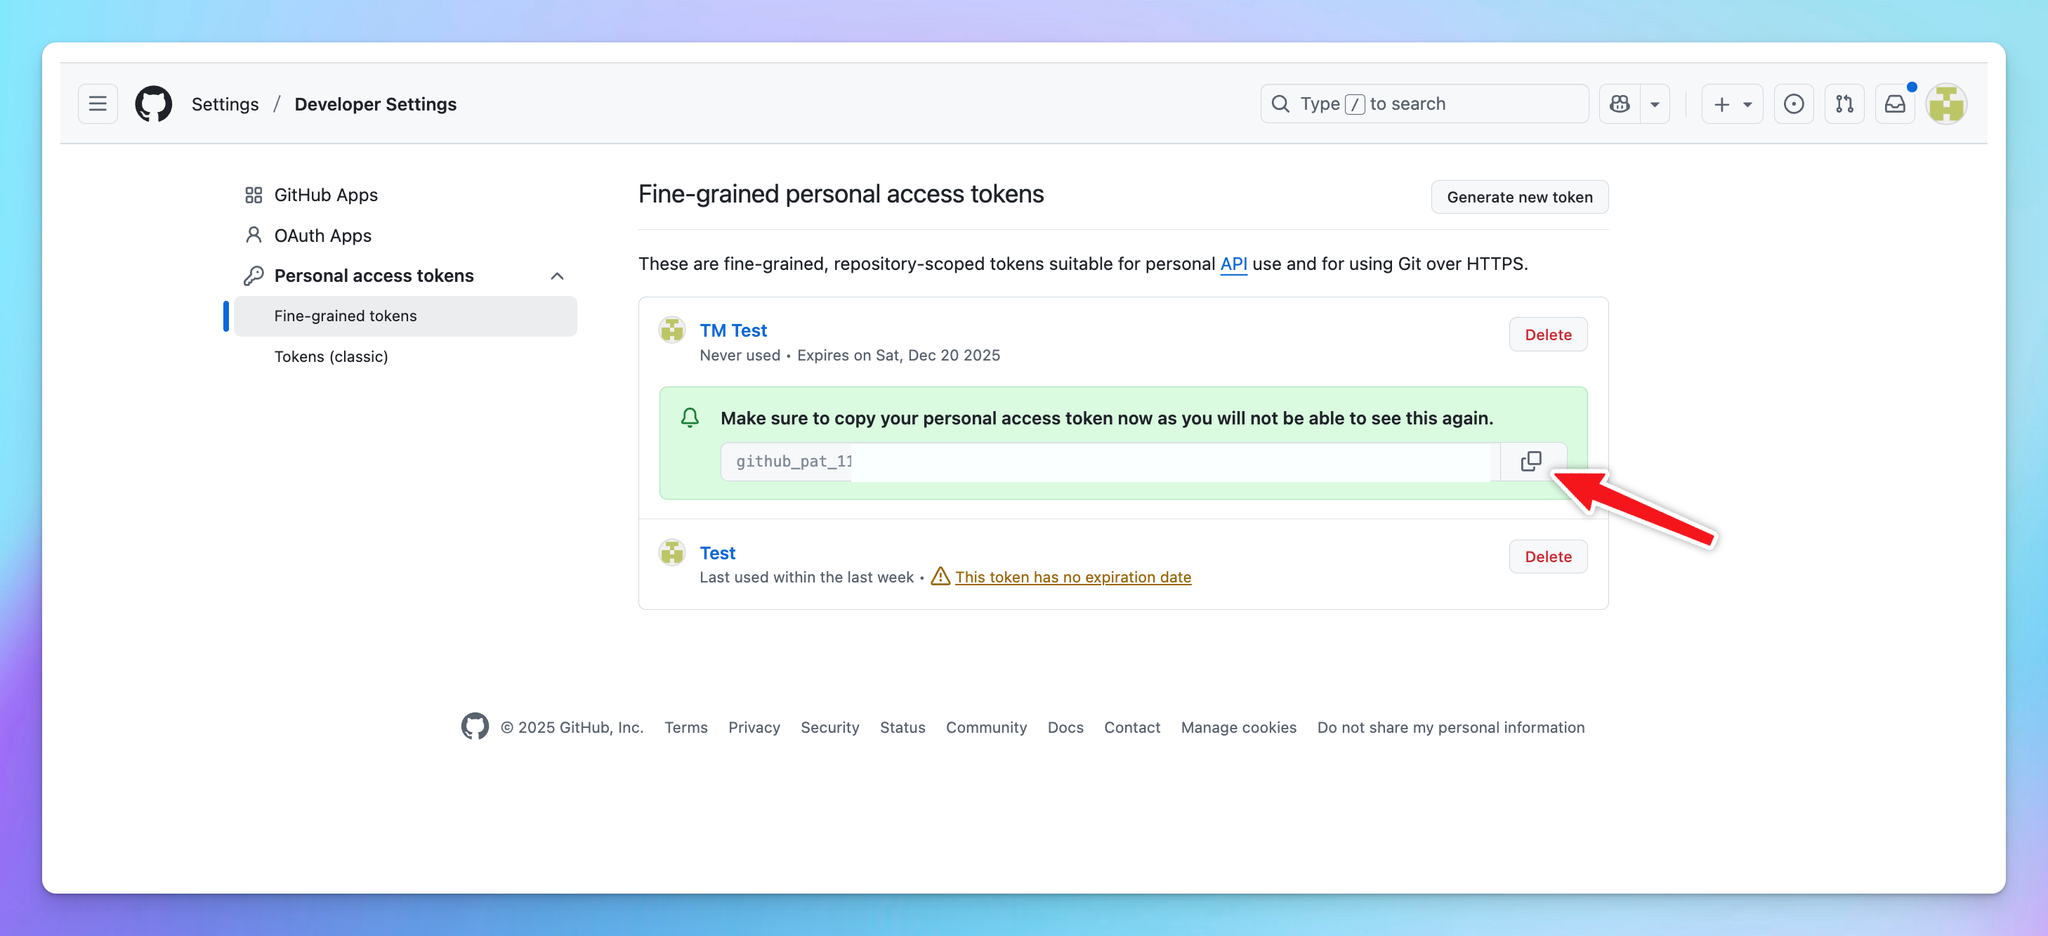
- Go to Personal access tokens (in GitHub Settings > Developer settings)
- Select which repositories you'd like this token to have access to (Public, All, or Select)
- Create a token with the
reposcope ("Full control of private repositories") - Alternatively, if working only with public repositories, select only the
public_reposcope
- Copy the generated token
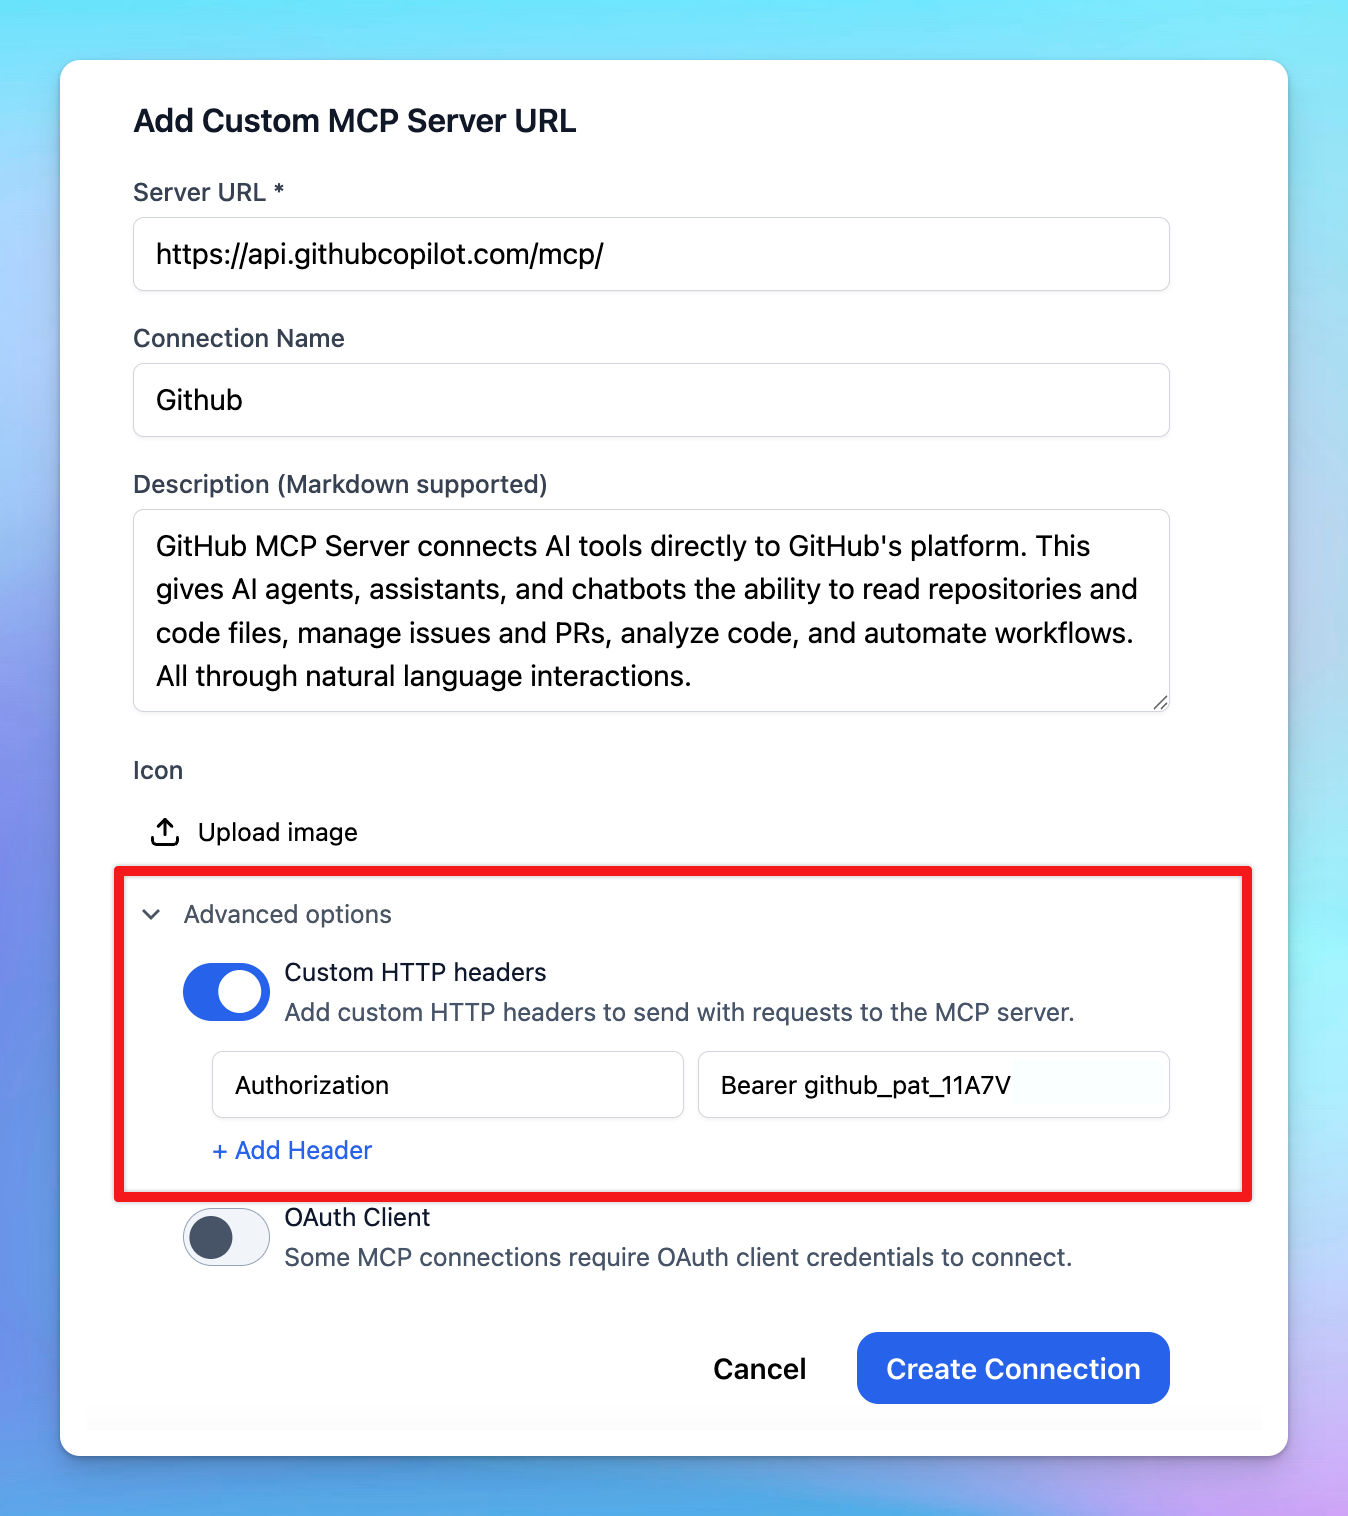
Step 2: Add Github as custom MCP connection
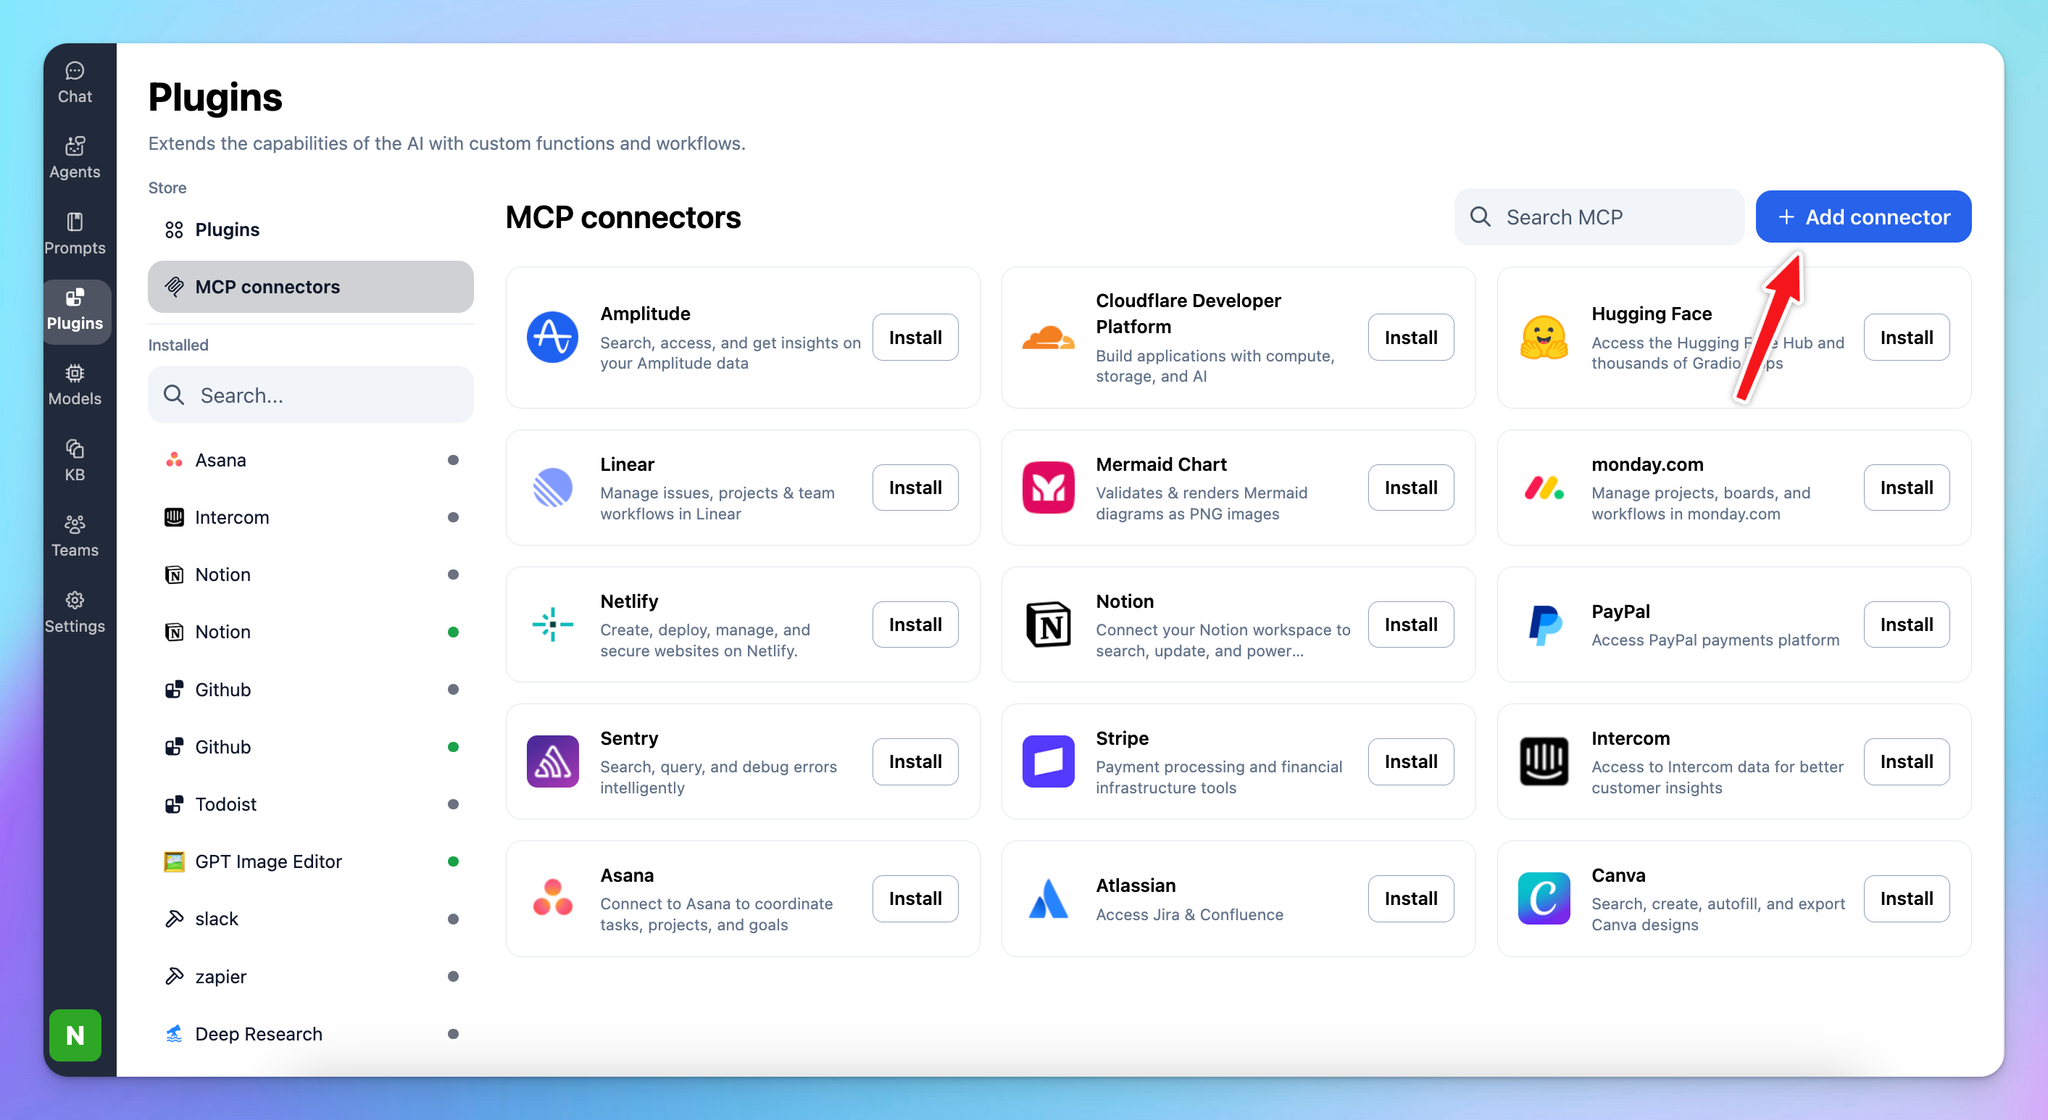
Go to Plugin → MCP Connectors → Add Connector
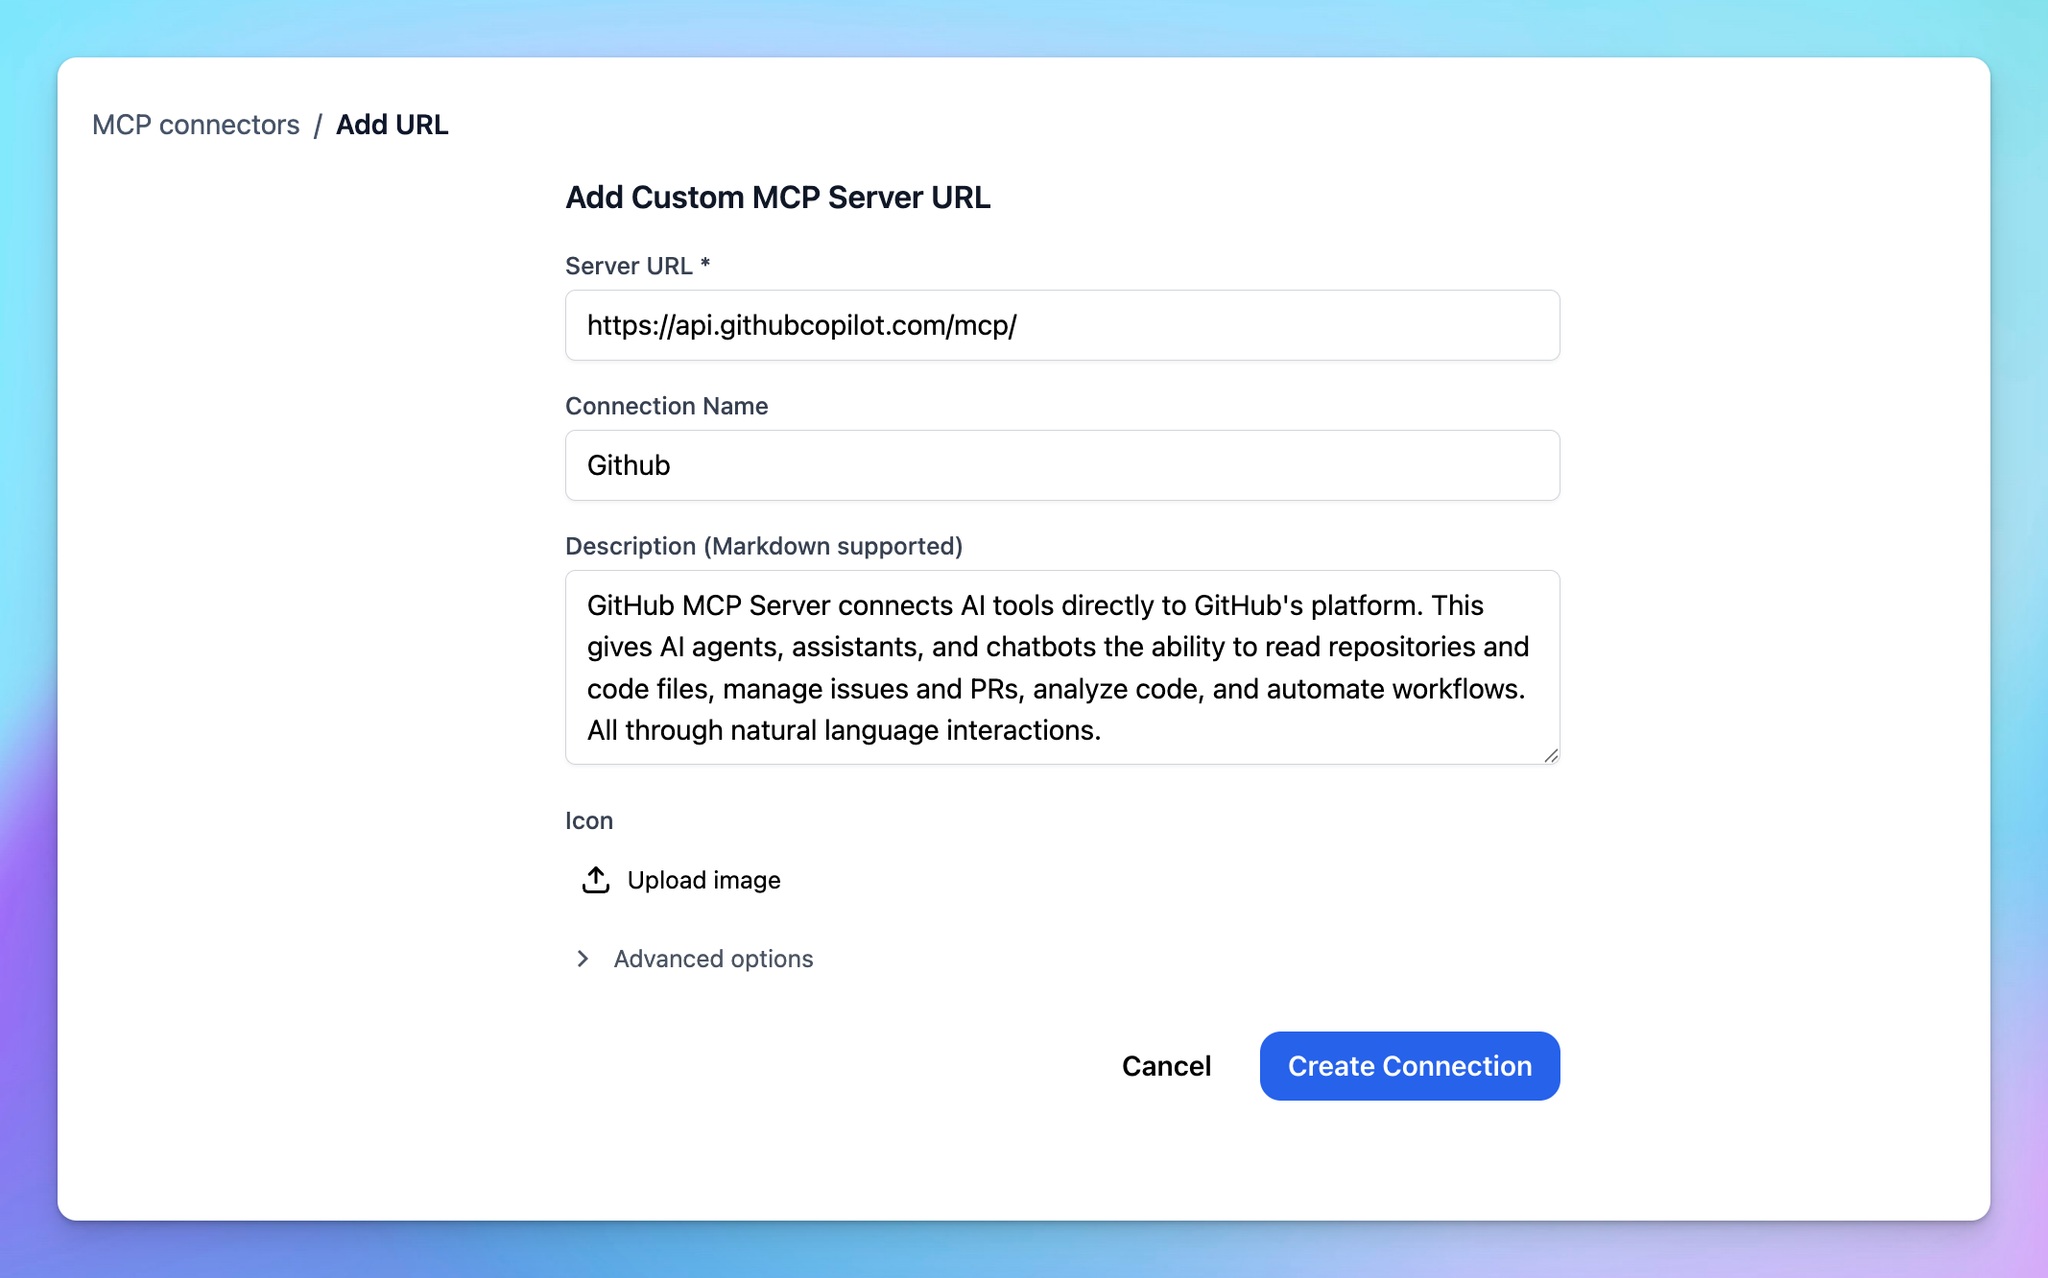
- Add Server URL:
https://api.githubcopilot.com/mcp/
- Connection name: Github
- Toggle the Advanced option and enable Custom HTTP headers
- Add
Authorization:Bearer your-github-access-token(copy your Github access token in step 1)
- Click Create Connection
Step 3: Set up MCP Connectors
After creating the connection with Github MCP, you will see Github appear in the plugin list, click on that to start setup your MCP connector with TypingMind:
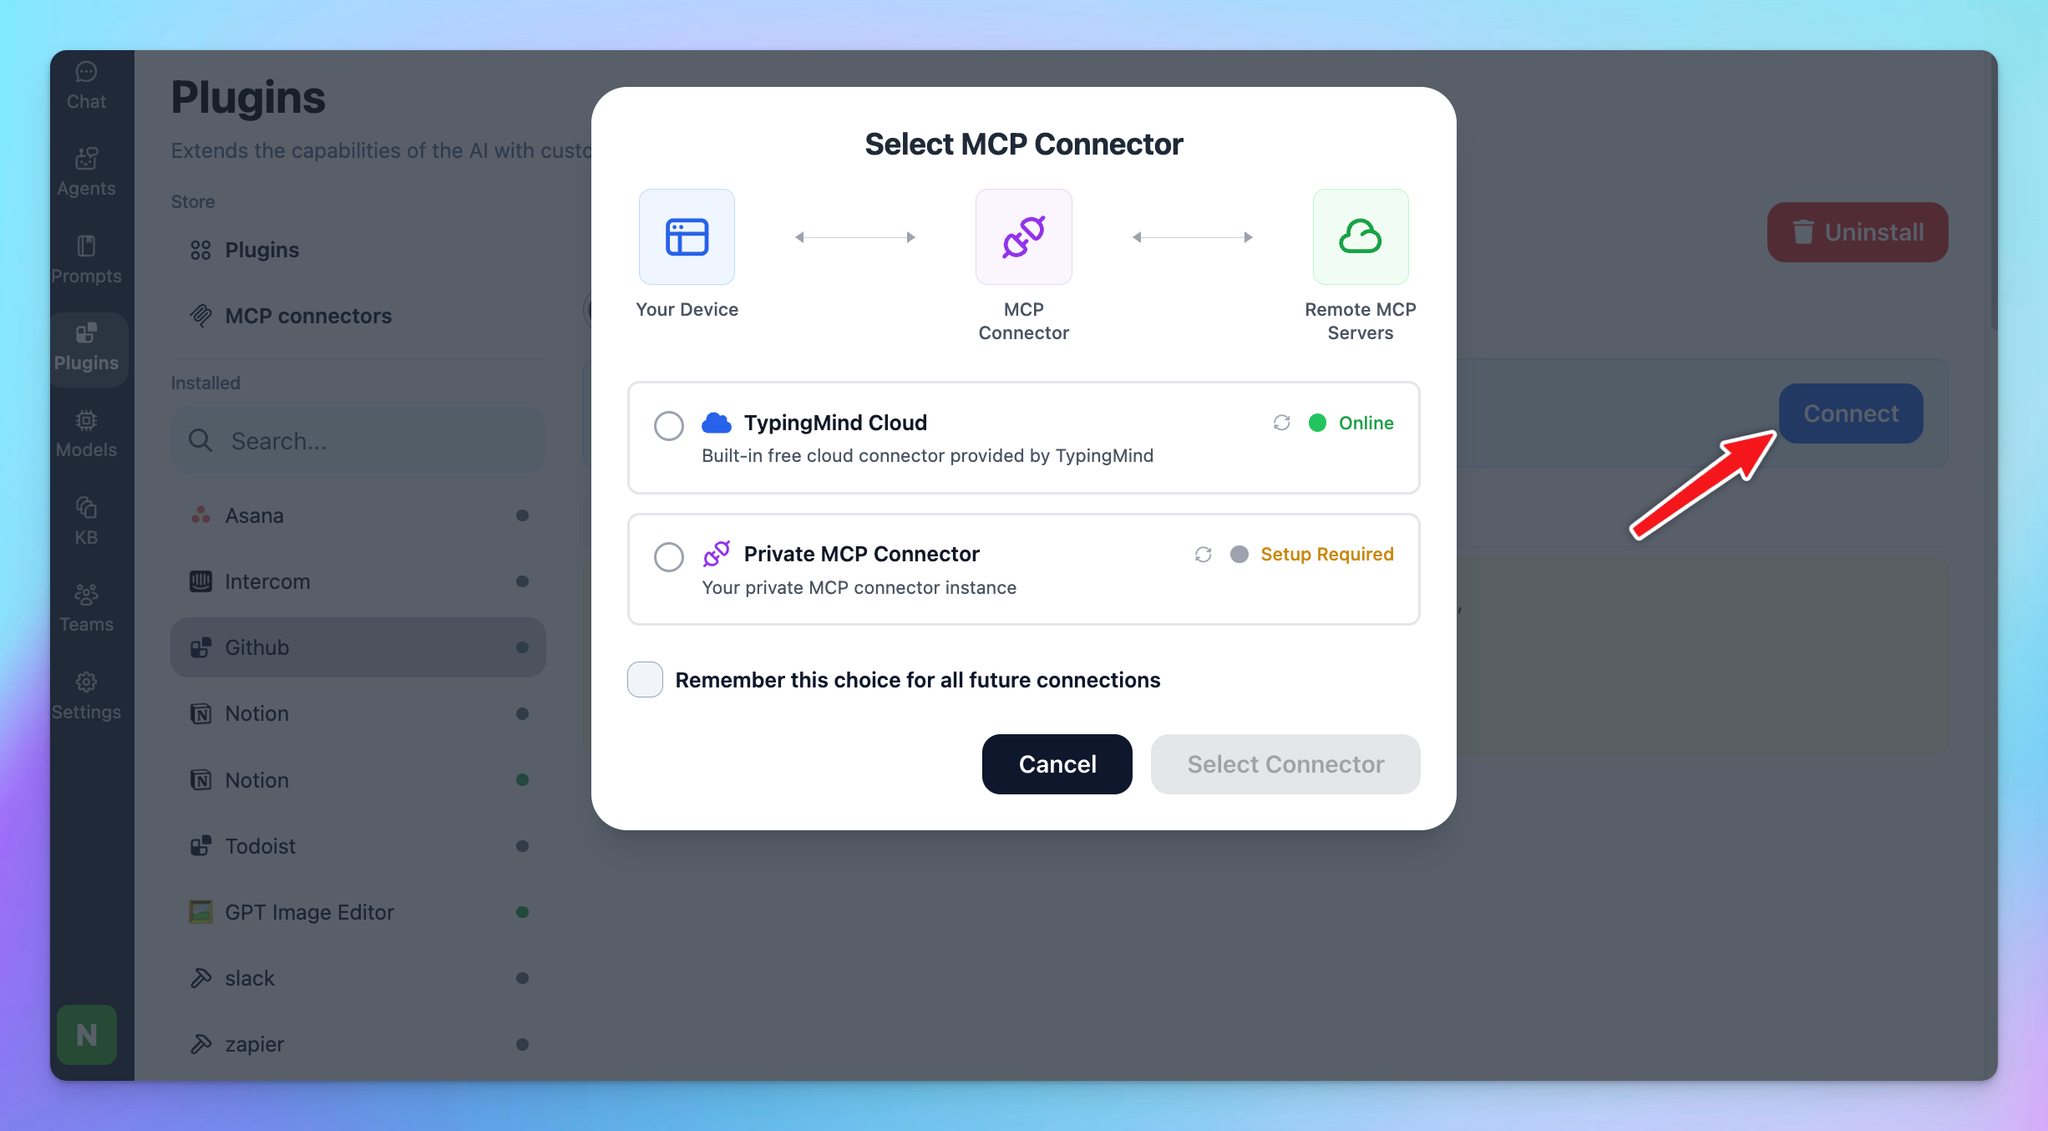
- If you select TypingMind Cloud, you can connect to our remote MCP server in one-click without any further setup
- If you choose to set up Private MCP Connector, then follow the steps here: Use MCP with Private MCP Connector
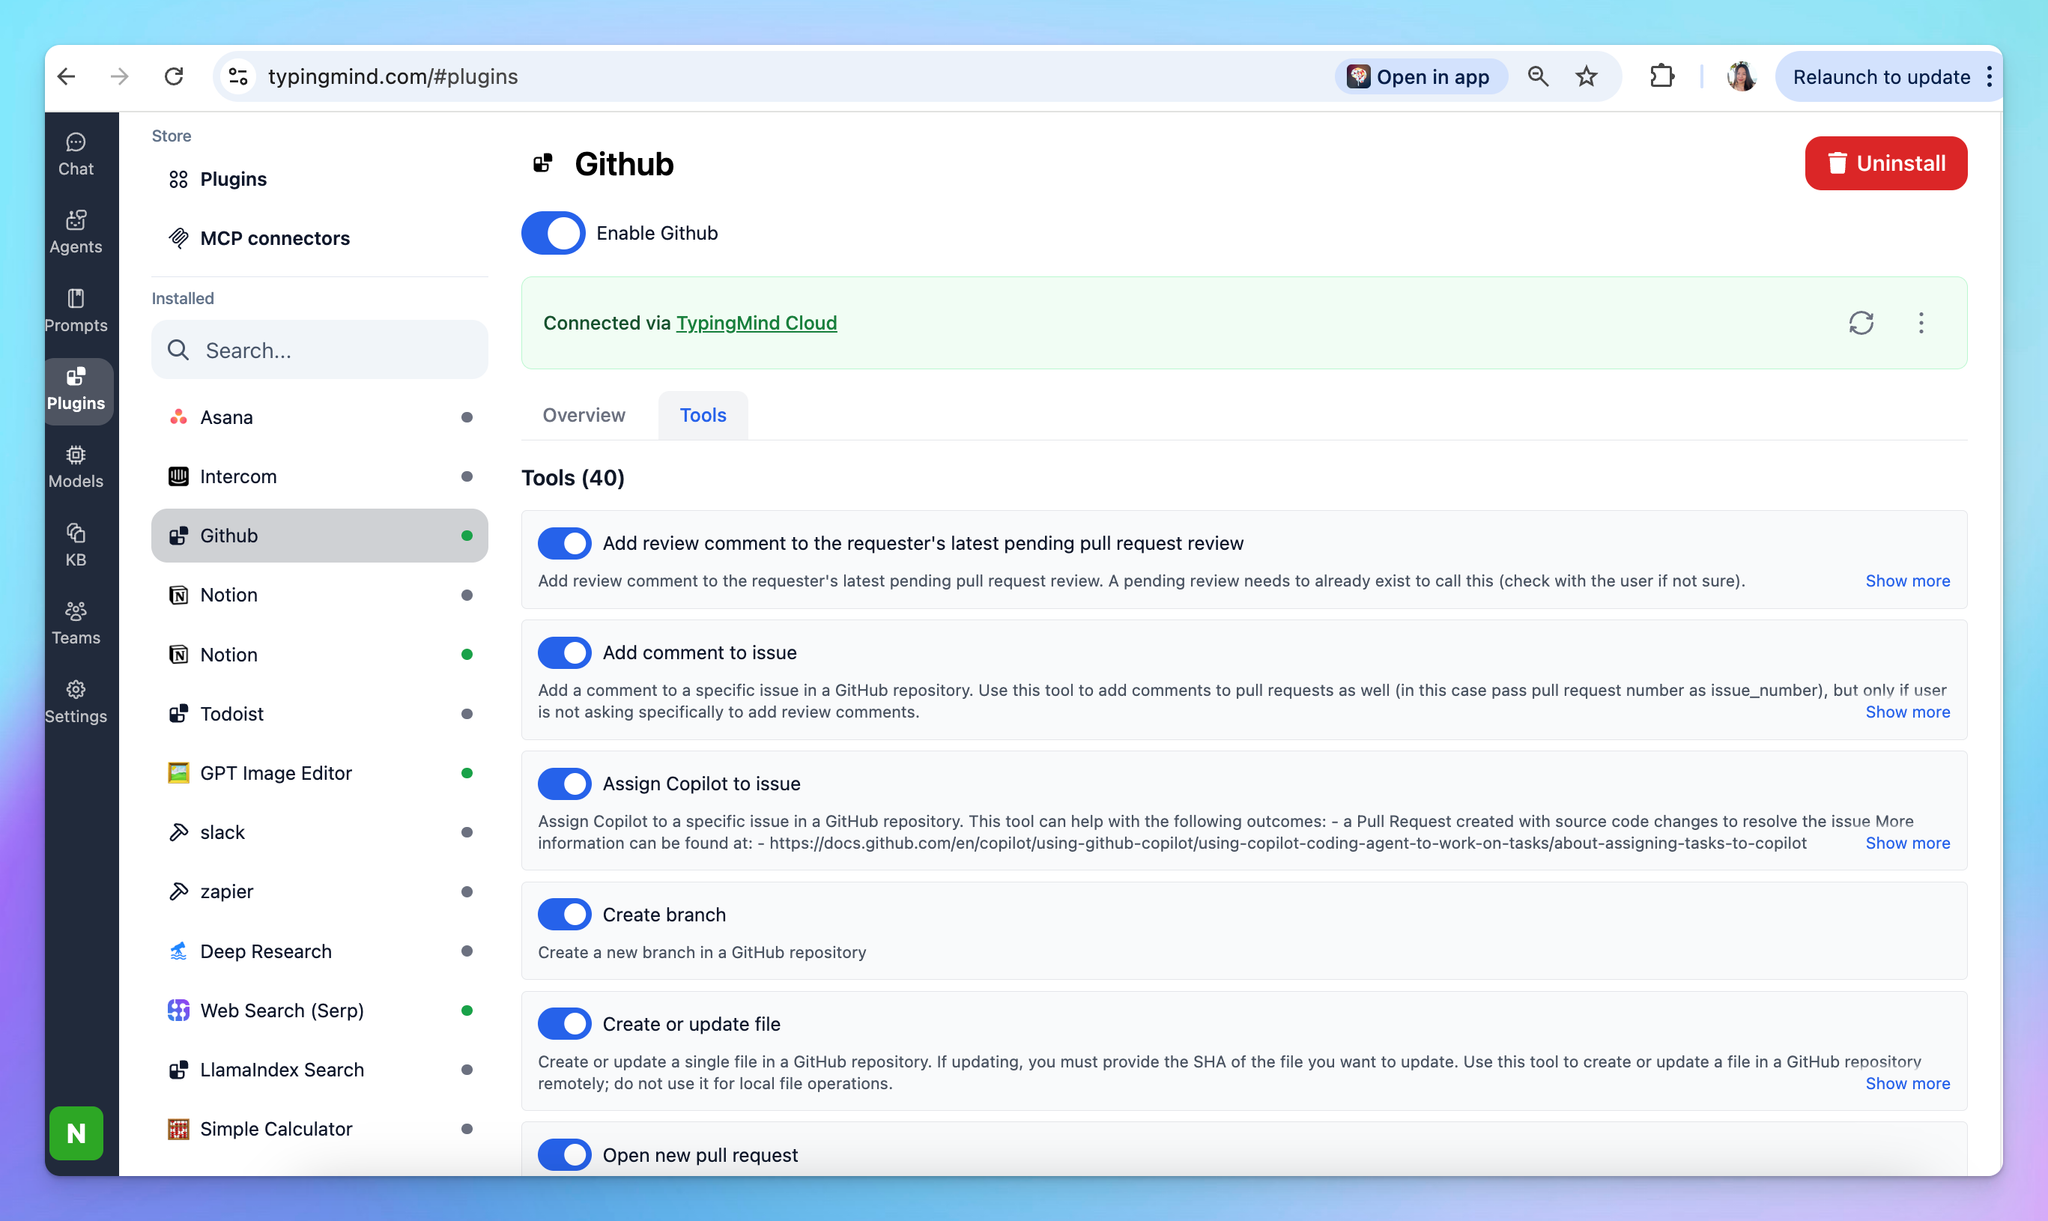
Step 4: Enable Github plugin and control tool use
You can control which tools your Github MCP should access within TypingMind by switching to Tools tab → Enable/disable specific tools.
Step 5: Start chatting
You can now interact with github through natural language. For example:
- Update the
README.mdfile in themainbranch with the latest project description.
- Add a new
CONTRIBUTING.mdfile with standard contribution guidelines.
- Find all open issues labeled
bug.
- Create a new branch called
feature/loginfrommain.
- Create a pull request for the
feature/loginbranch tomain, with title ‘Add login feature’.
