.svg?fit=max&auto=format&n=RaTUOQa09vPhW7_D&q=85&s=368f39de7ecc6605f73c43c2017546a3)
.svg?fit=max&auto=format&n=RaTUOQa09vPhW7_D&q=85&s=01a6eb27b4db3af8a1d5557525c579d3)
Why setting up n8n MCP on TypingMind?
n8n-MCP serves as a bridge between n8n’s workflow automation platform and TypingMind, enabling the AI assistants on TypingMind to understand and work with n8n nodes effectively. With this integration, you can:- Explore and learn about available n8n nodes, their properties, and supported operations directly through the assistant.
- Validate and refine workflows by letting the AI check configurations, catch missing fields, and suggest improvements.
- Generate and update workflows via AI-driven assistance, using the n8n API to create or modify workflows more efficiently.
- Apply diff-based changes where only the edited parts of a workflow are updated, making interactions faster and more precise.
- Monitor and manage executions by querying workflow statuses, inspecting runs, and guiding operational tasks through the assistant.
Step-by-step to install n8n MCP on TypingMind
Option 1. Set up n8n MCP via their hosted service
Step 1: Add your instance to n8n mcp
- Log in to dashboard.n8n-mcp.com
- In the top navigation bar, click Instance to connect your n8n instance.
-in-typingmind/typingmind-mcp-n8n/image.png)
- Provide your instance URL and API key (find this in your n8n instance: Settings → API → Create new API key.)
Step 2: Get n8n mcp API key
- Go to: https://dashboard.n8n-mcp.com/dashboard/settings
- Select Connect Clients → Other Clients → Generate API Key
-in-typingmind/typingmind-mcp-n8n/image%201.png)
-in-typingmind/typingmind-mcp-n8n/image%202.png)
- The n8n mcp API key format is:
nmcp_5734725*********************************************************
Step 3: Set up n8n MCP as custom connection on TypingMind
Go to Plugin → MCP Connectors → Add Connector-in-typingmind/typingmind-mcp-github/image%201.png)
- Fill in the connection details:
- Server URL:
https://api.n8n-mcp.com - Connection Name:
n8n
- Server URL:
- Toggle Advanced Options → enable Custom HTTP Headers
- Add the following header:
(Replace
your_n8n_mcp_keywith the key generated in Step 2)
-in-typingmind/typingmind-mcp-n8n/image%203.png)
- Click Create Connection
Step 4: Set up MCP Connectors
After creating the connection with n8nMCP, you will see n8n appear in the plugin list, click on that to start setup your MCP connector with TypingMind:-in-typingmind/typingmind-mcp-github/image%204.png)
- If you select TypingMind Cloud, you can connect to our remote MCP server in one-click without any further setup
- If you choose to set up Private MCP Connector, then follow the steps here: Use MCP with Private MCP Connector
Step 5: Enable n8n and control tool use
You can control which actions your n8n MCP should trigger within TypingMind by switching to Tools tab → Enable/disable specific tools.-in-typingmind/typingmind-mcp-n8n/image%204.png)
Option 2: Self-host n8n MCP
Step 1: Set up MCP connector
In TypingMind, go to Settings → Advanced Settings → Model Context Protocol to start setup your MCP connector. The MCP Connector acts as the bridge between TypingMind and the MCP servers. MCP servers require a server to run on. TypingMind allows you to connect to the MCP servers via:- Your own local device
- Or a private remote server.
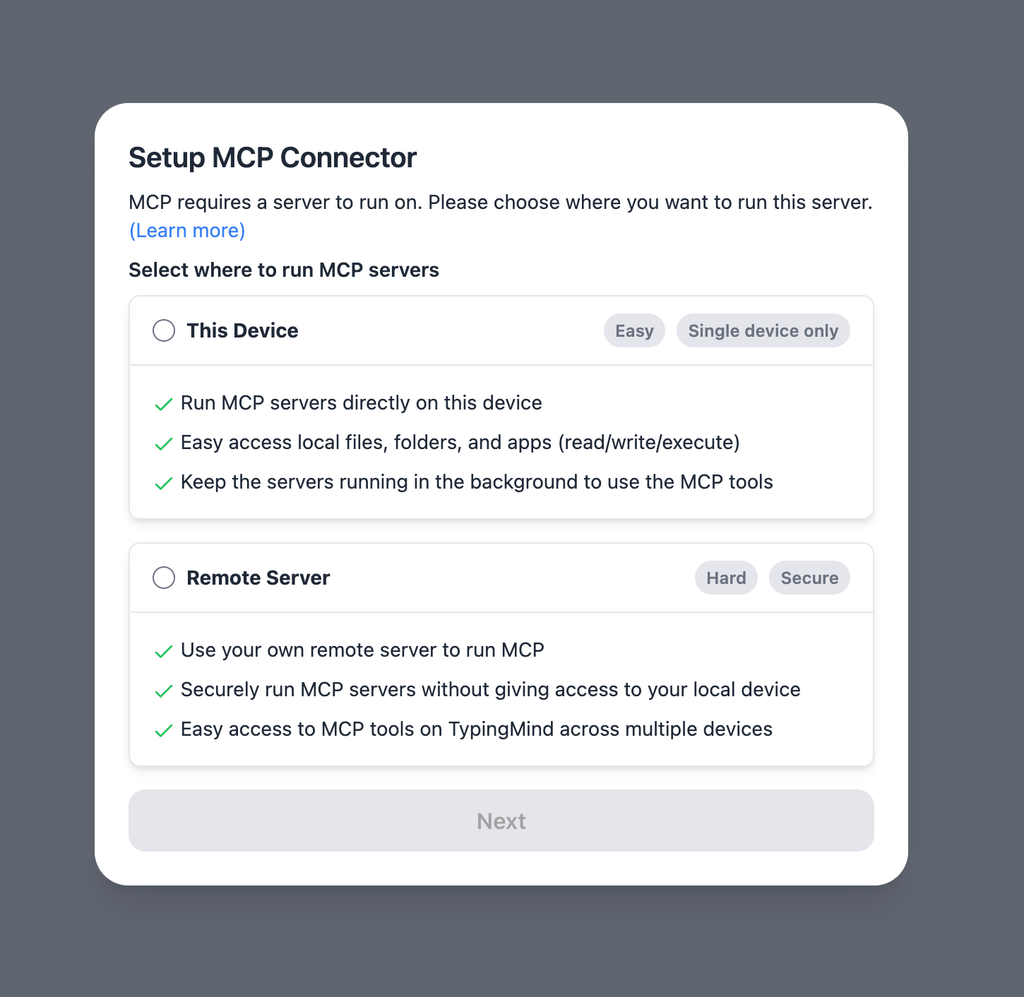
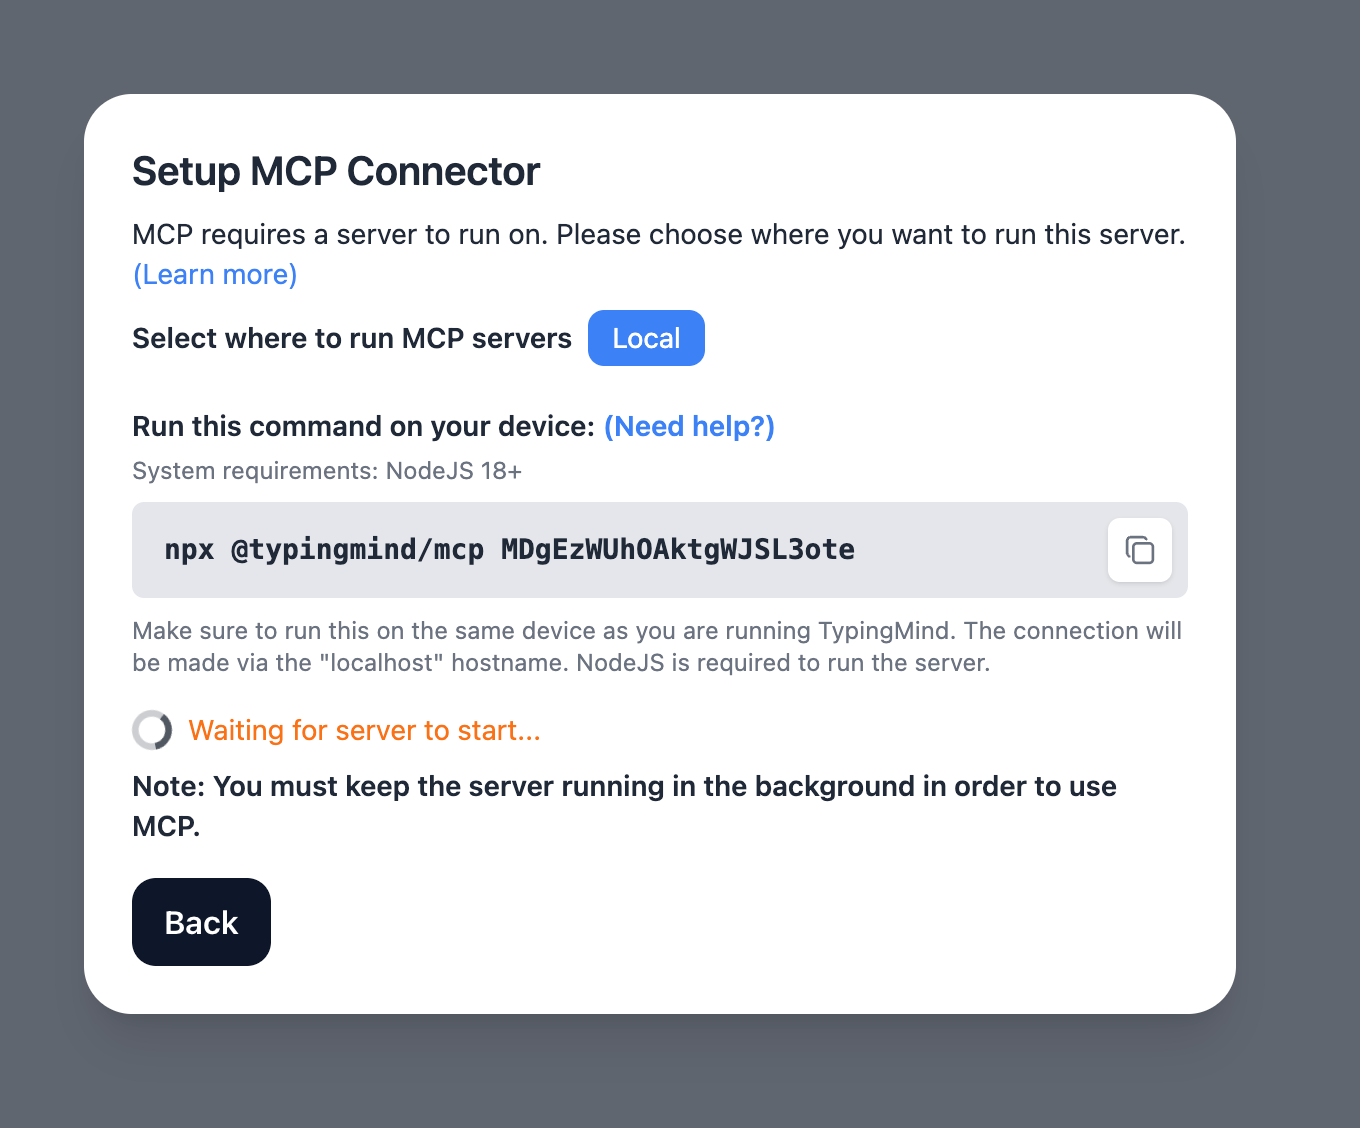
Step 2: Obtain n8n instance URL and API key
First you need to log in to your n8n instance - this could be your self-hosted instance or your n8n Cloud account.- Copy the n8n instance URL as follows:
-in-typingmind/typingmind-mcp-n8n/image%205.png)
- Get n8n API key:
- Navigate to your Profile —> Settings
- Select “n8n API”
- Click “Create an API key”.
- Provide a Label and set an Expiration time for the key.
- Copy the created API key
-in-typingmind/typingmind-mcp-n8n/image%206.png)
Step 3: Add the n8n MCP Server to TypingMind
- Click on Edit Servers to add MCP server
- Add the following JSON to configure the n8n MCP server:
-in-typingmind/typingmind-mcp-n8n/image%207.png) More information about n8n mcp: https://github.com/czlonkowski/n8n-mcp
More information about n8n mcp: https://github.com/czlonkowski/n8n-mcp
Step 4: Enable n8n via Plugin section
After the MCP servers are added successfully, it will show up in your Plugins page to be used like plugin. You can use the MCP tools directly or assign them to AI agent like other plugins.- Go to the Plugins section in TypingMind.
- You should see a new plugin called “n8n-mcp”.
- Enable the plugin
Please note that you can not control which tools n8n MCP should trigger like the Option 1.
-in-typingmind/typingmind-mcp-n8n/image%208.png) This allows you to manage and create n8n workflows directly on TypingMind.
This allows you to manage and create n8n workflows directly on TypingMind.
Step 5: Start chatting
You’re all set! Now you can access, update, manage and create n8n workflows on TypingMind interface:-in-typingmind/typingmind-mcp-n8n/image%209.png)
Best practices
According the n8n MCP server builder, for the best results when using n8n-MCP, use the following system instruction to improve the response quality:-in-typingmind/typingmind-mcp-n8n/image%2010.png)