This guide will help you set up the Asana MCP server, enabling your AI assistant in TypingMind to read, create, update, and search tasks, projects, and comments on Asana.
Step 1: Add Asana as custom MCP connectionStep 2: Set up MCP ConnectorsStep 3: Authenticate your Asana accountStep 4: Enable Asana and control tool useStep 5: Start chatting
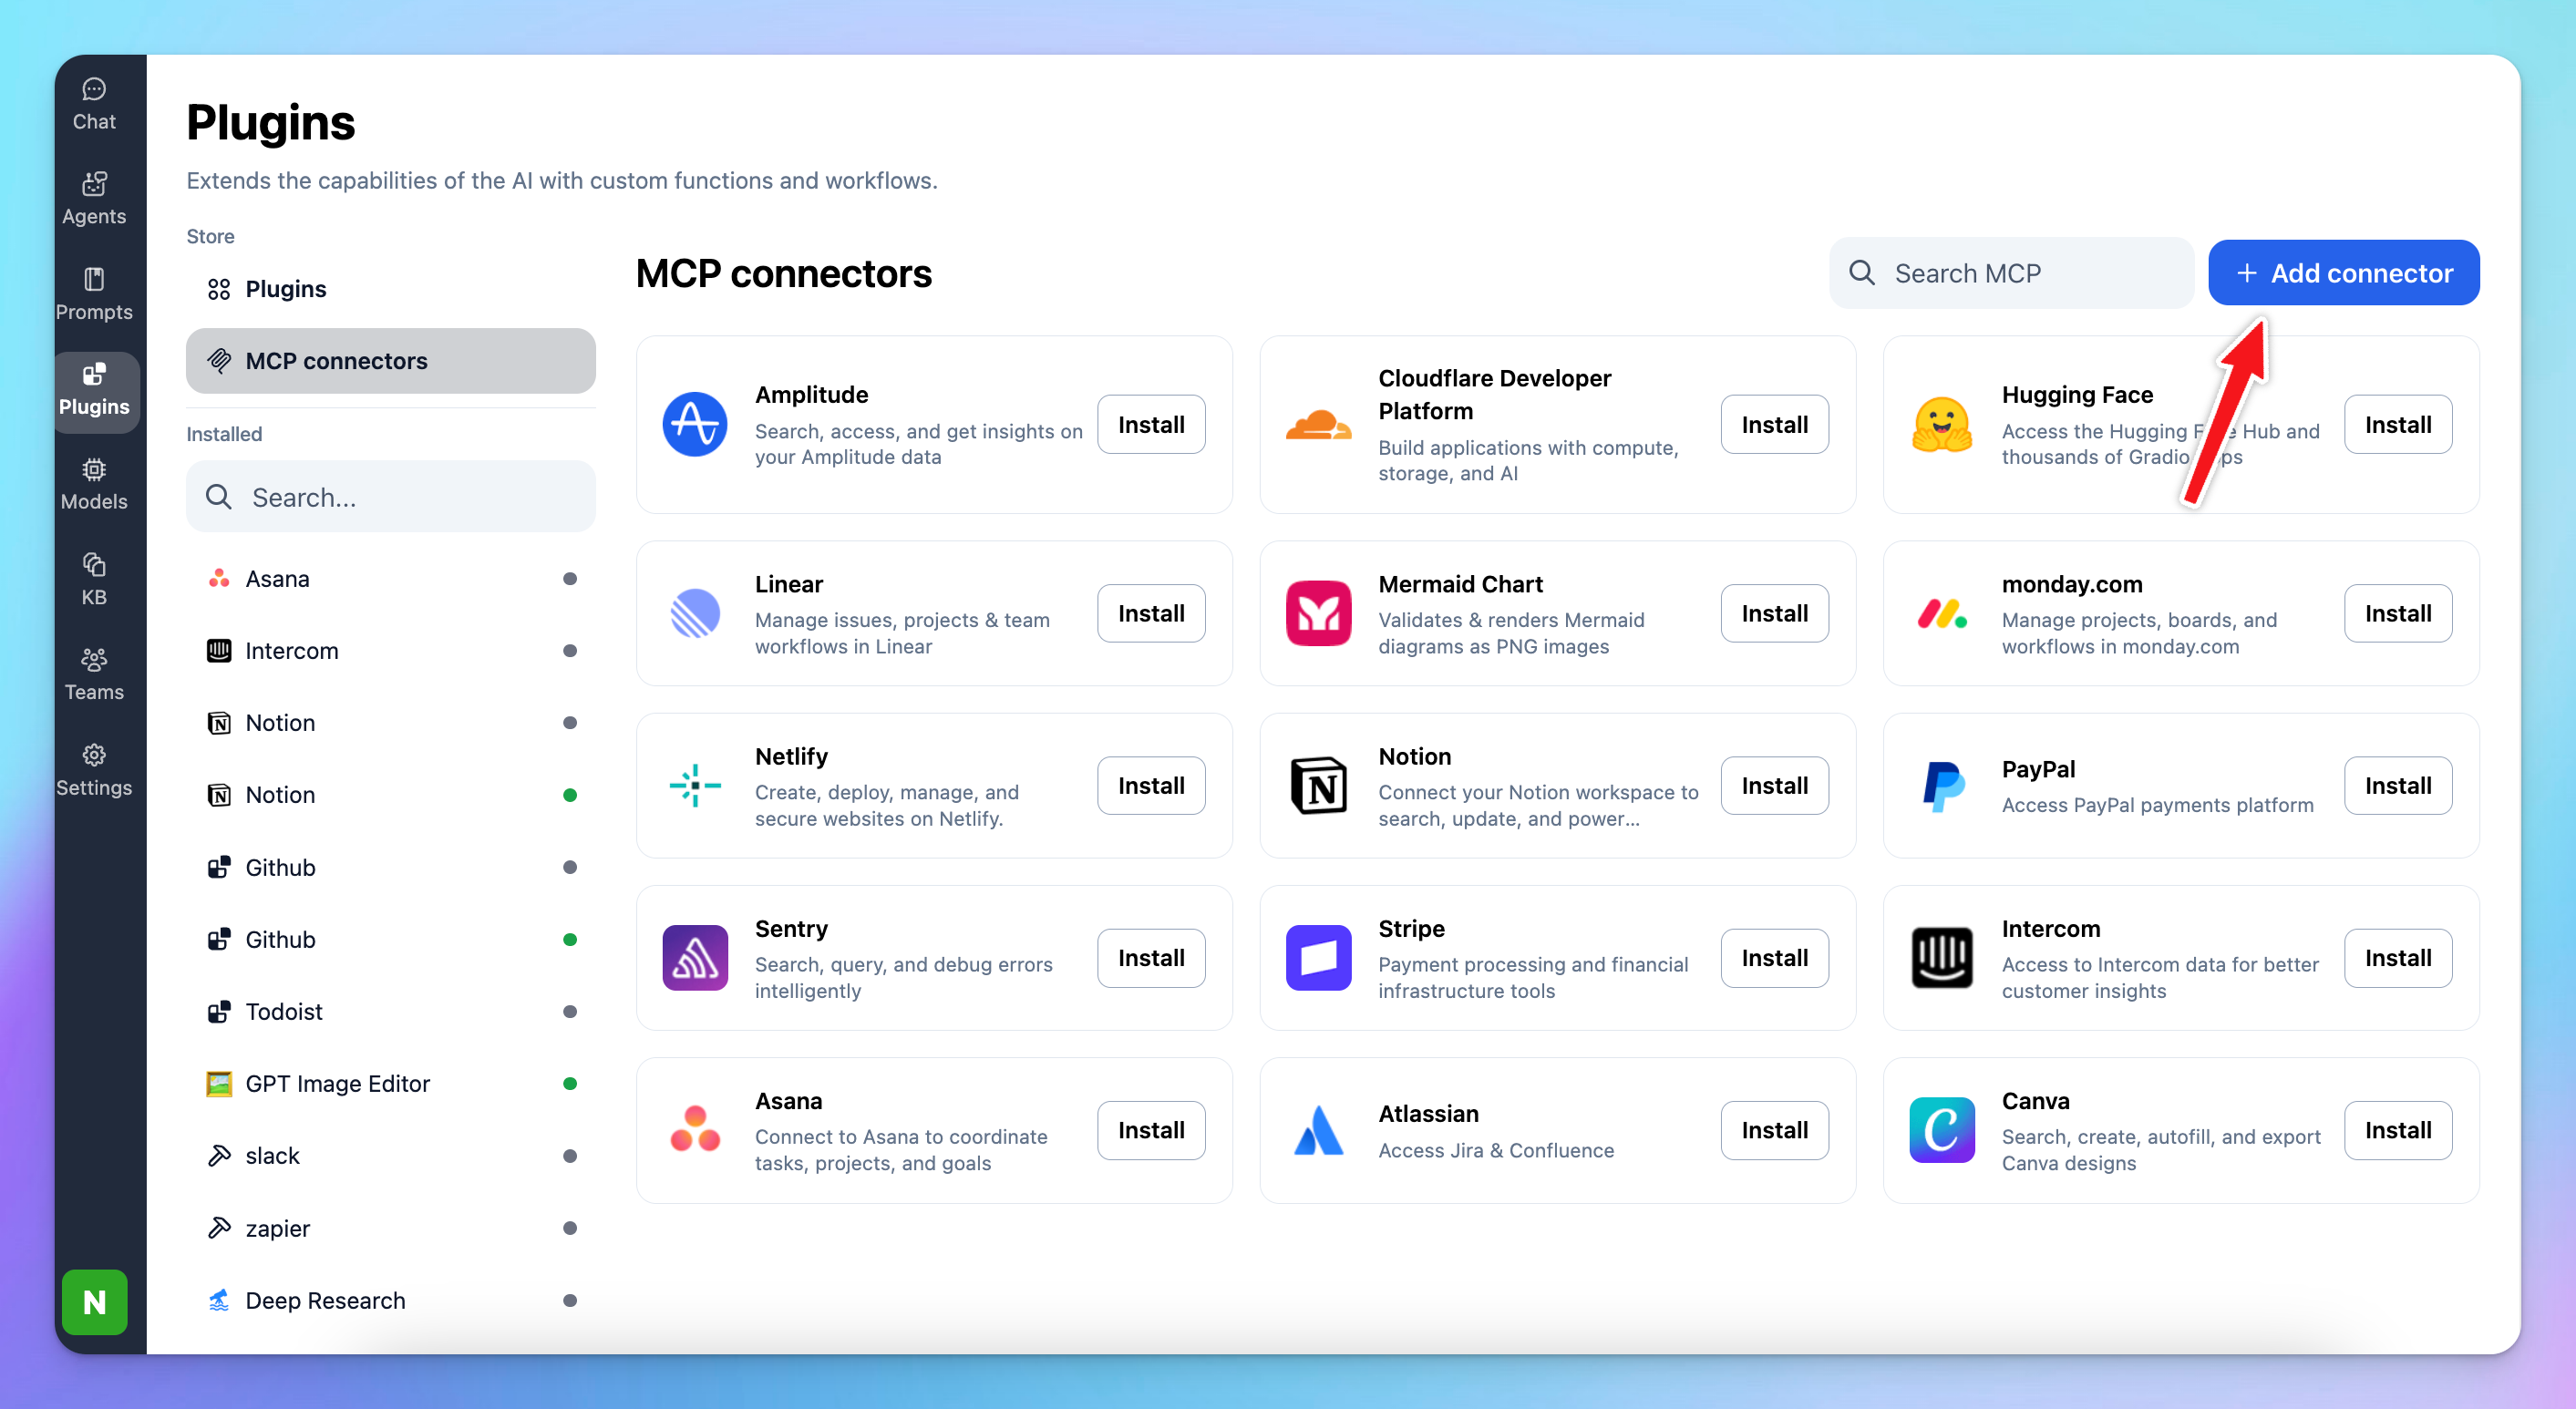
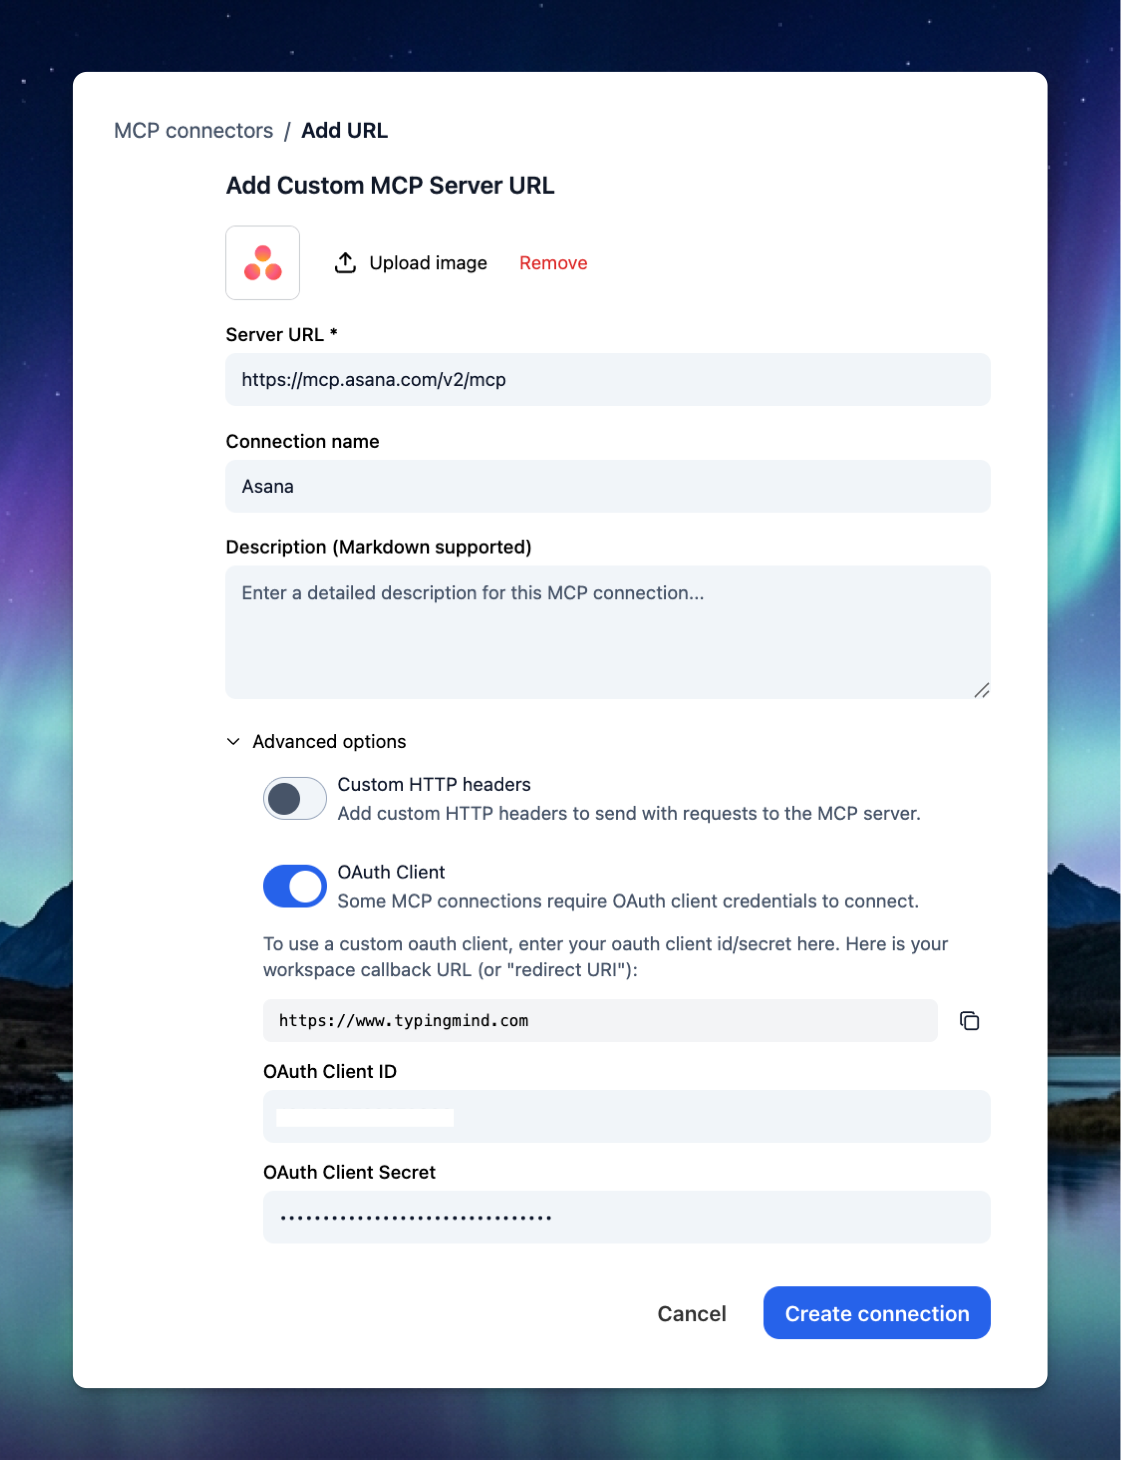
Step 1: Add Asana as custom MCP connection
Go to Plugin → MCP Connectors → Add Connector
- Add Server URL:
https://mcp.asana.com/v2/mcp
- Connection name: Asana
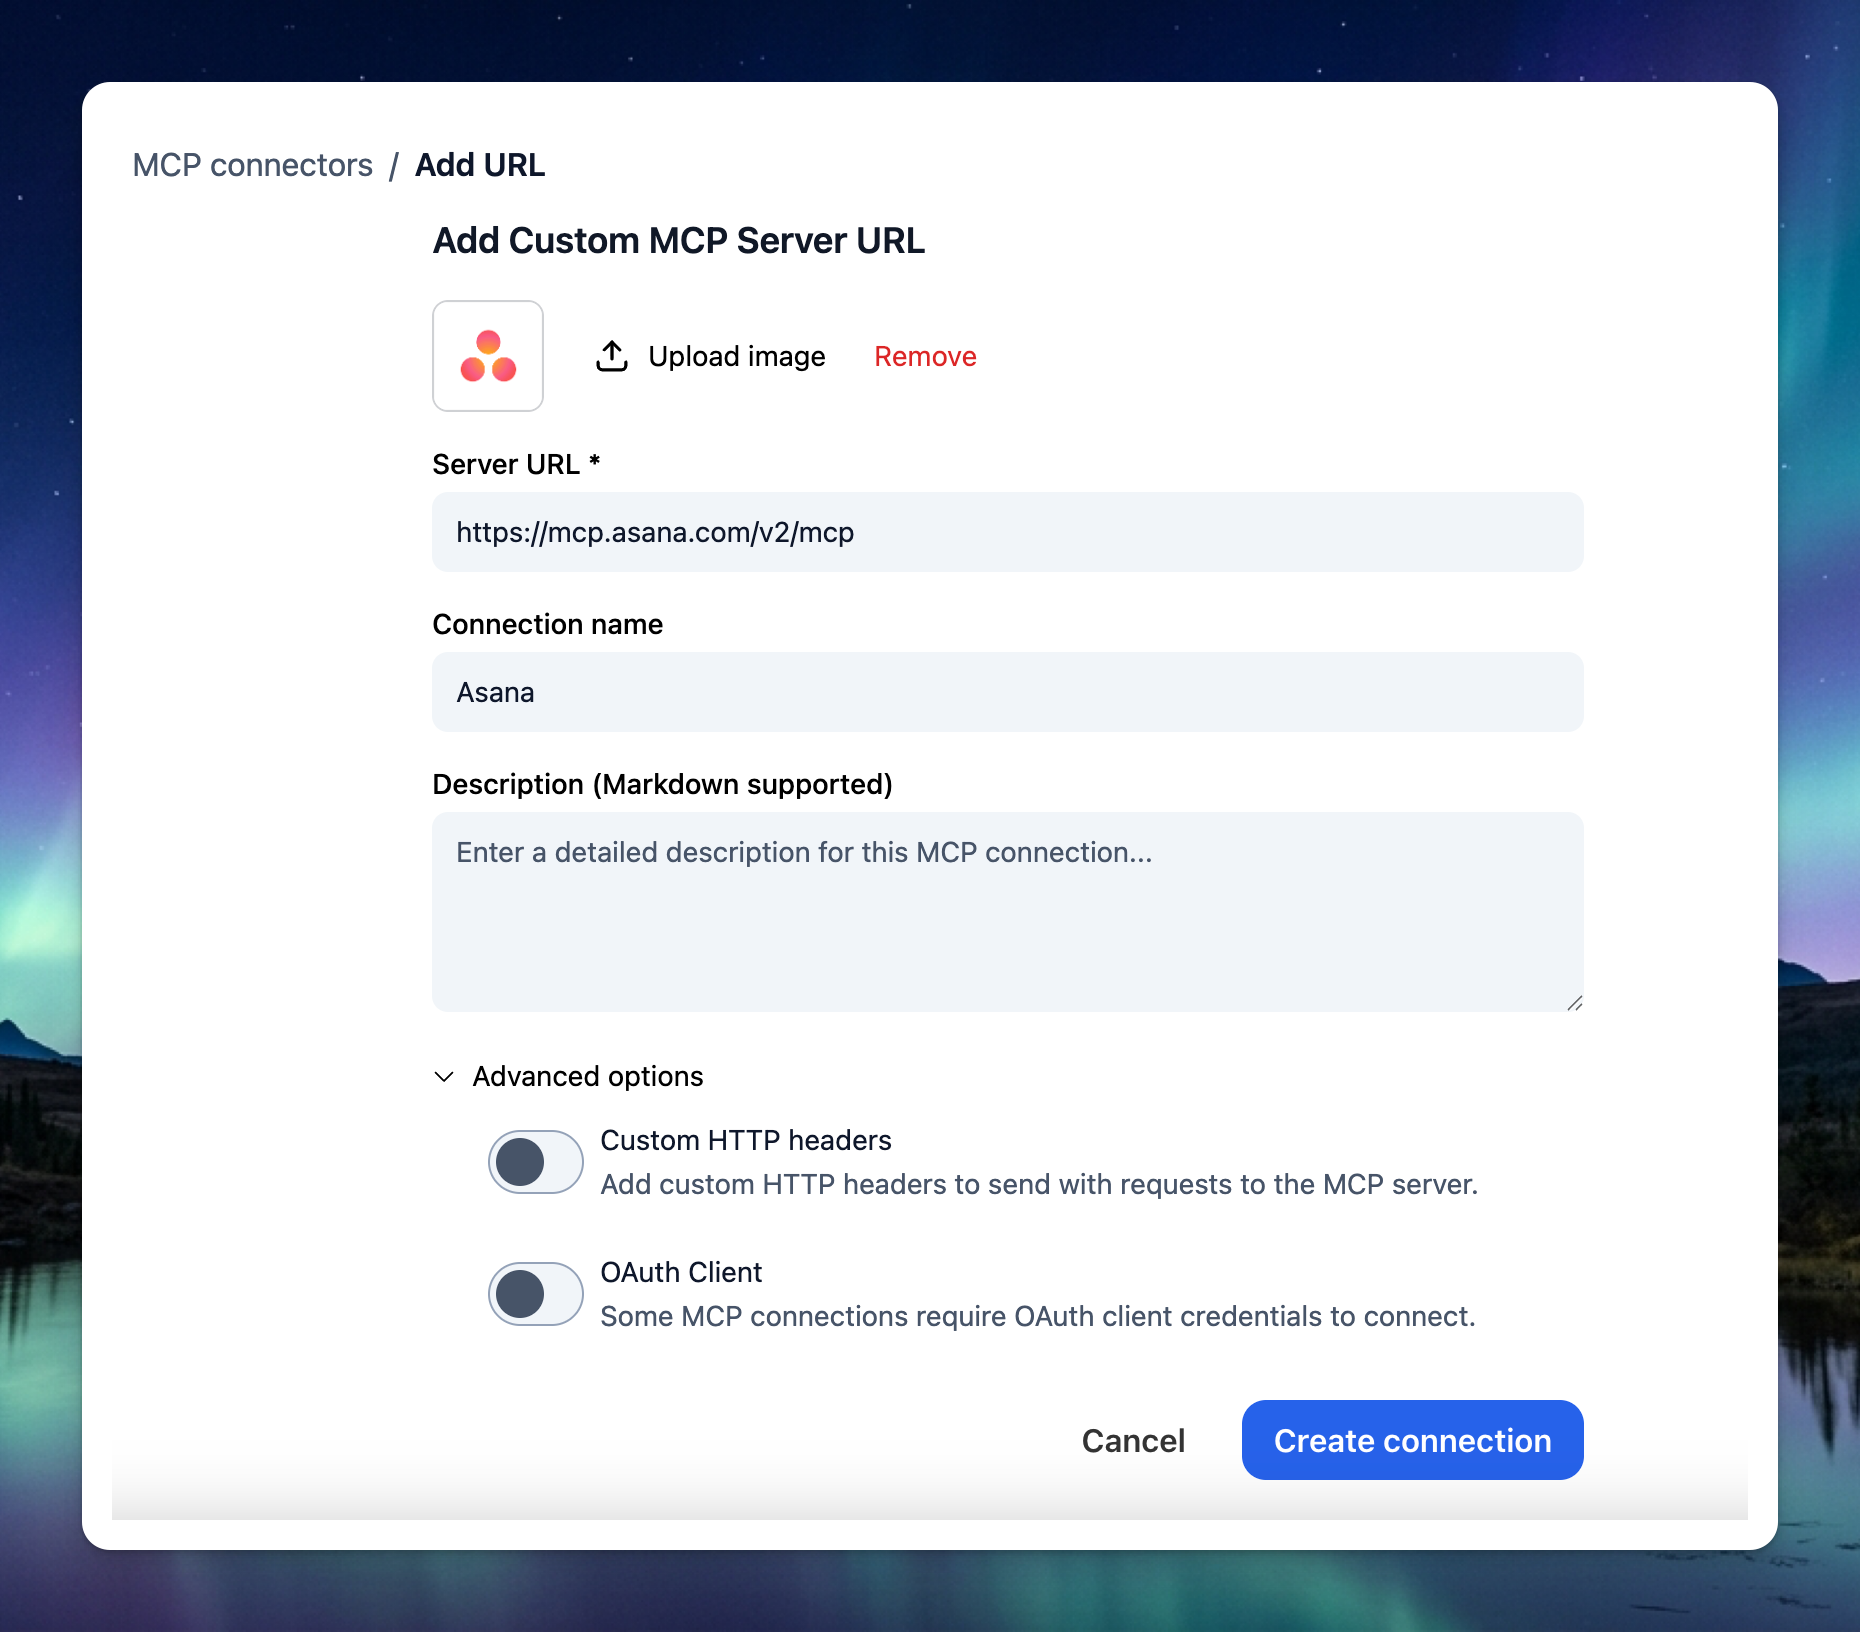
- Toggle Advanced Options → OAuth Client:
- Go to the Asana developer console and sign in
- Click "Create new app"
- Enter your app name (e.g., "My MCP Client")
- Select "MCP app" as the app type
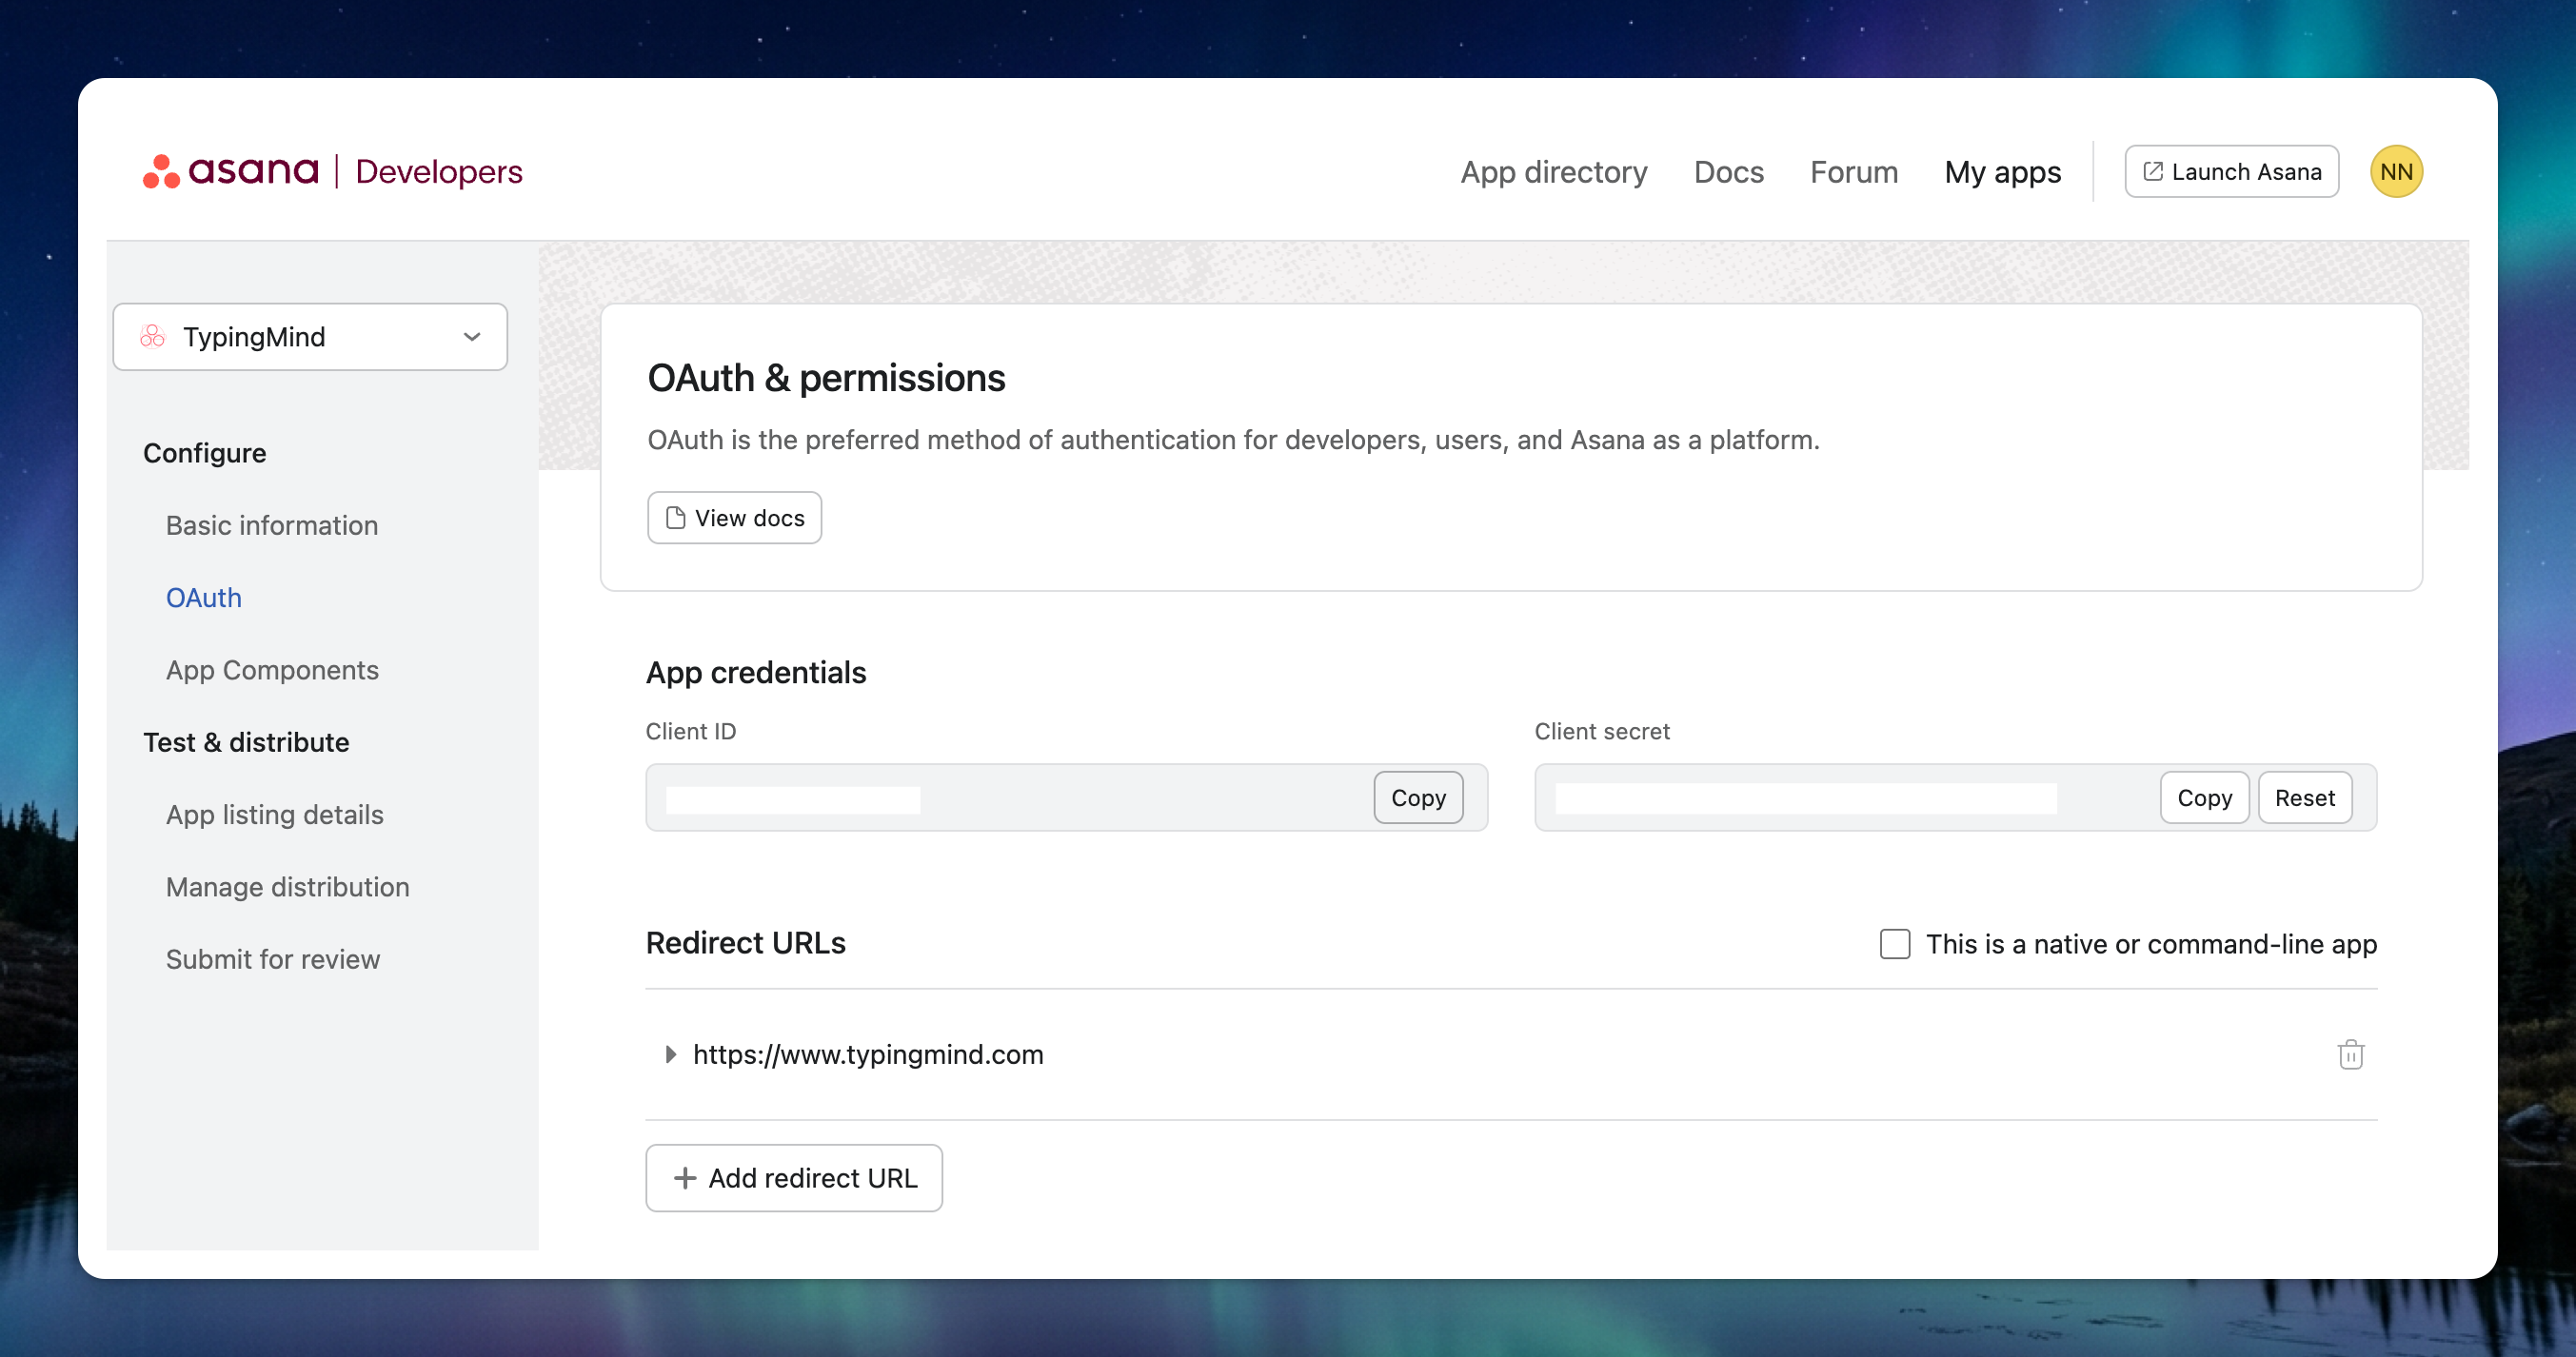
- Click "Create app". You'll see your app's Client ID and Client secret. Keep these handy—you'll need them for authentication.
- Go to Configure → OAuth → Add redirect URL: https://www.typingmind.com
- Go back to TypingMind, enter the Client ID and Client Secret → Click Create Connection
Step 2: Set up MCP Connectors
After creating the connection with Asana MCP, you will see Asana appear in the plugin list, click on that to start setup your MCP connector with TypingMind:
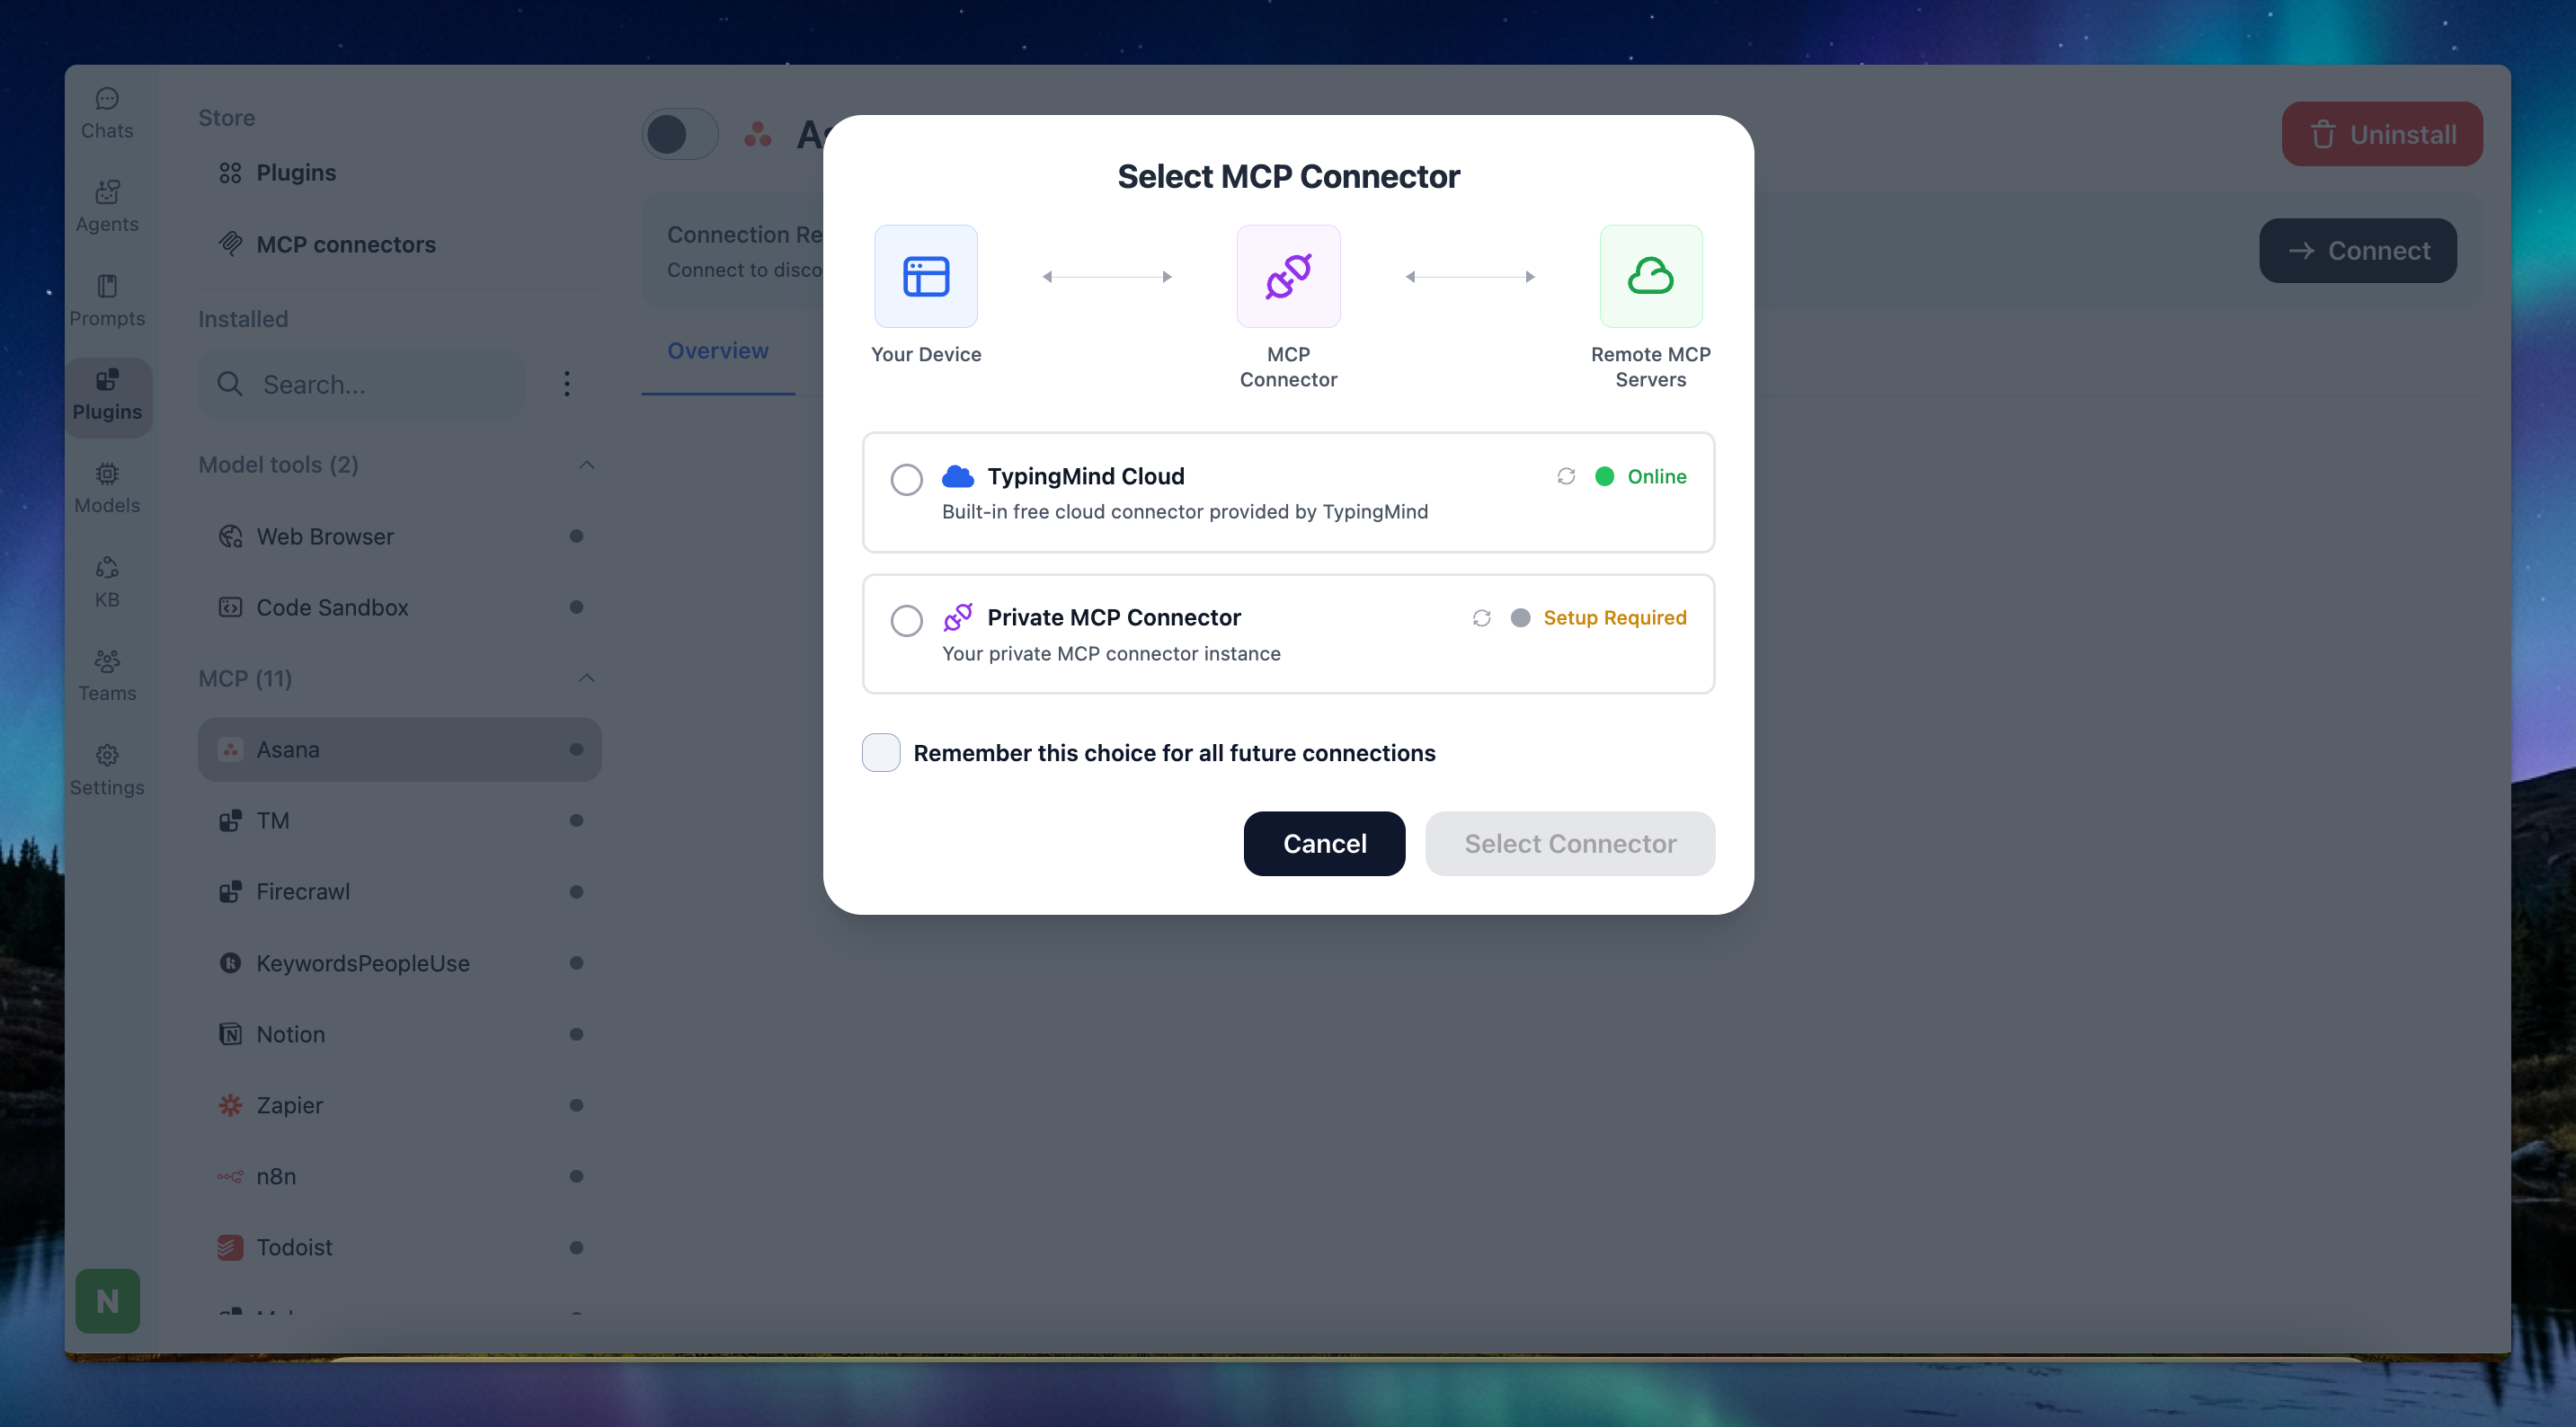
- If you select TypingMind Cloud, you can connect to our remote MCP server in one-click without any further setup
- If you choose to set up Private MCP Connector, then follow the steps here: Use MCP with Private MCP Connector
Step 3: Authenticate your Asana account
- Click Authenticate
- You’ll be redirected to Asana’s official authorization page. Review the permissions that TypingMind is requesting, then click Allow access to connect your account.
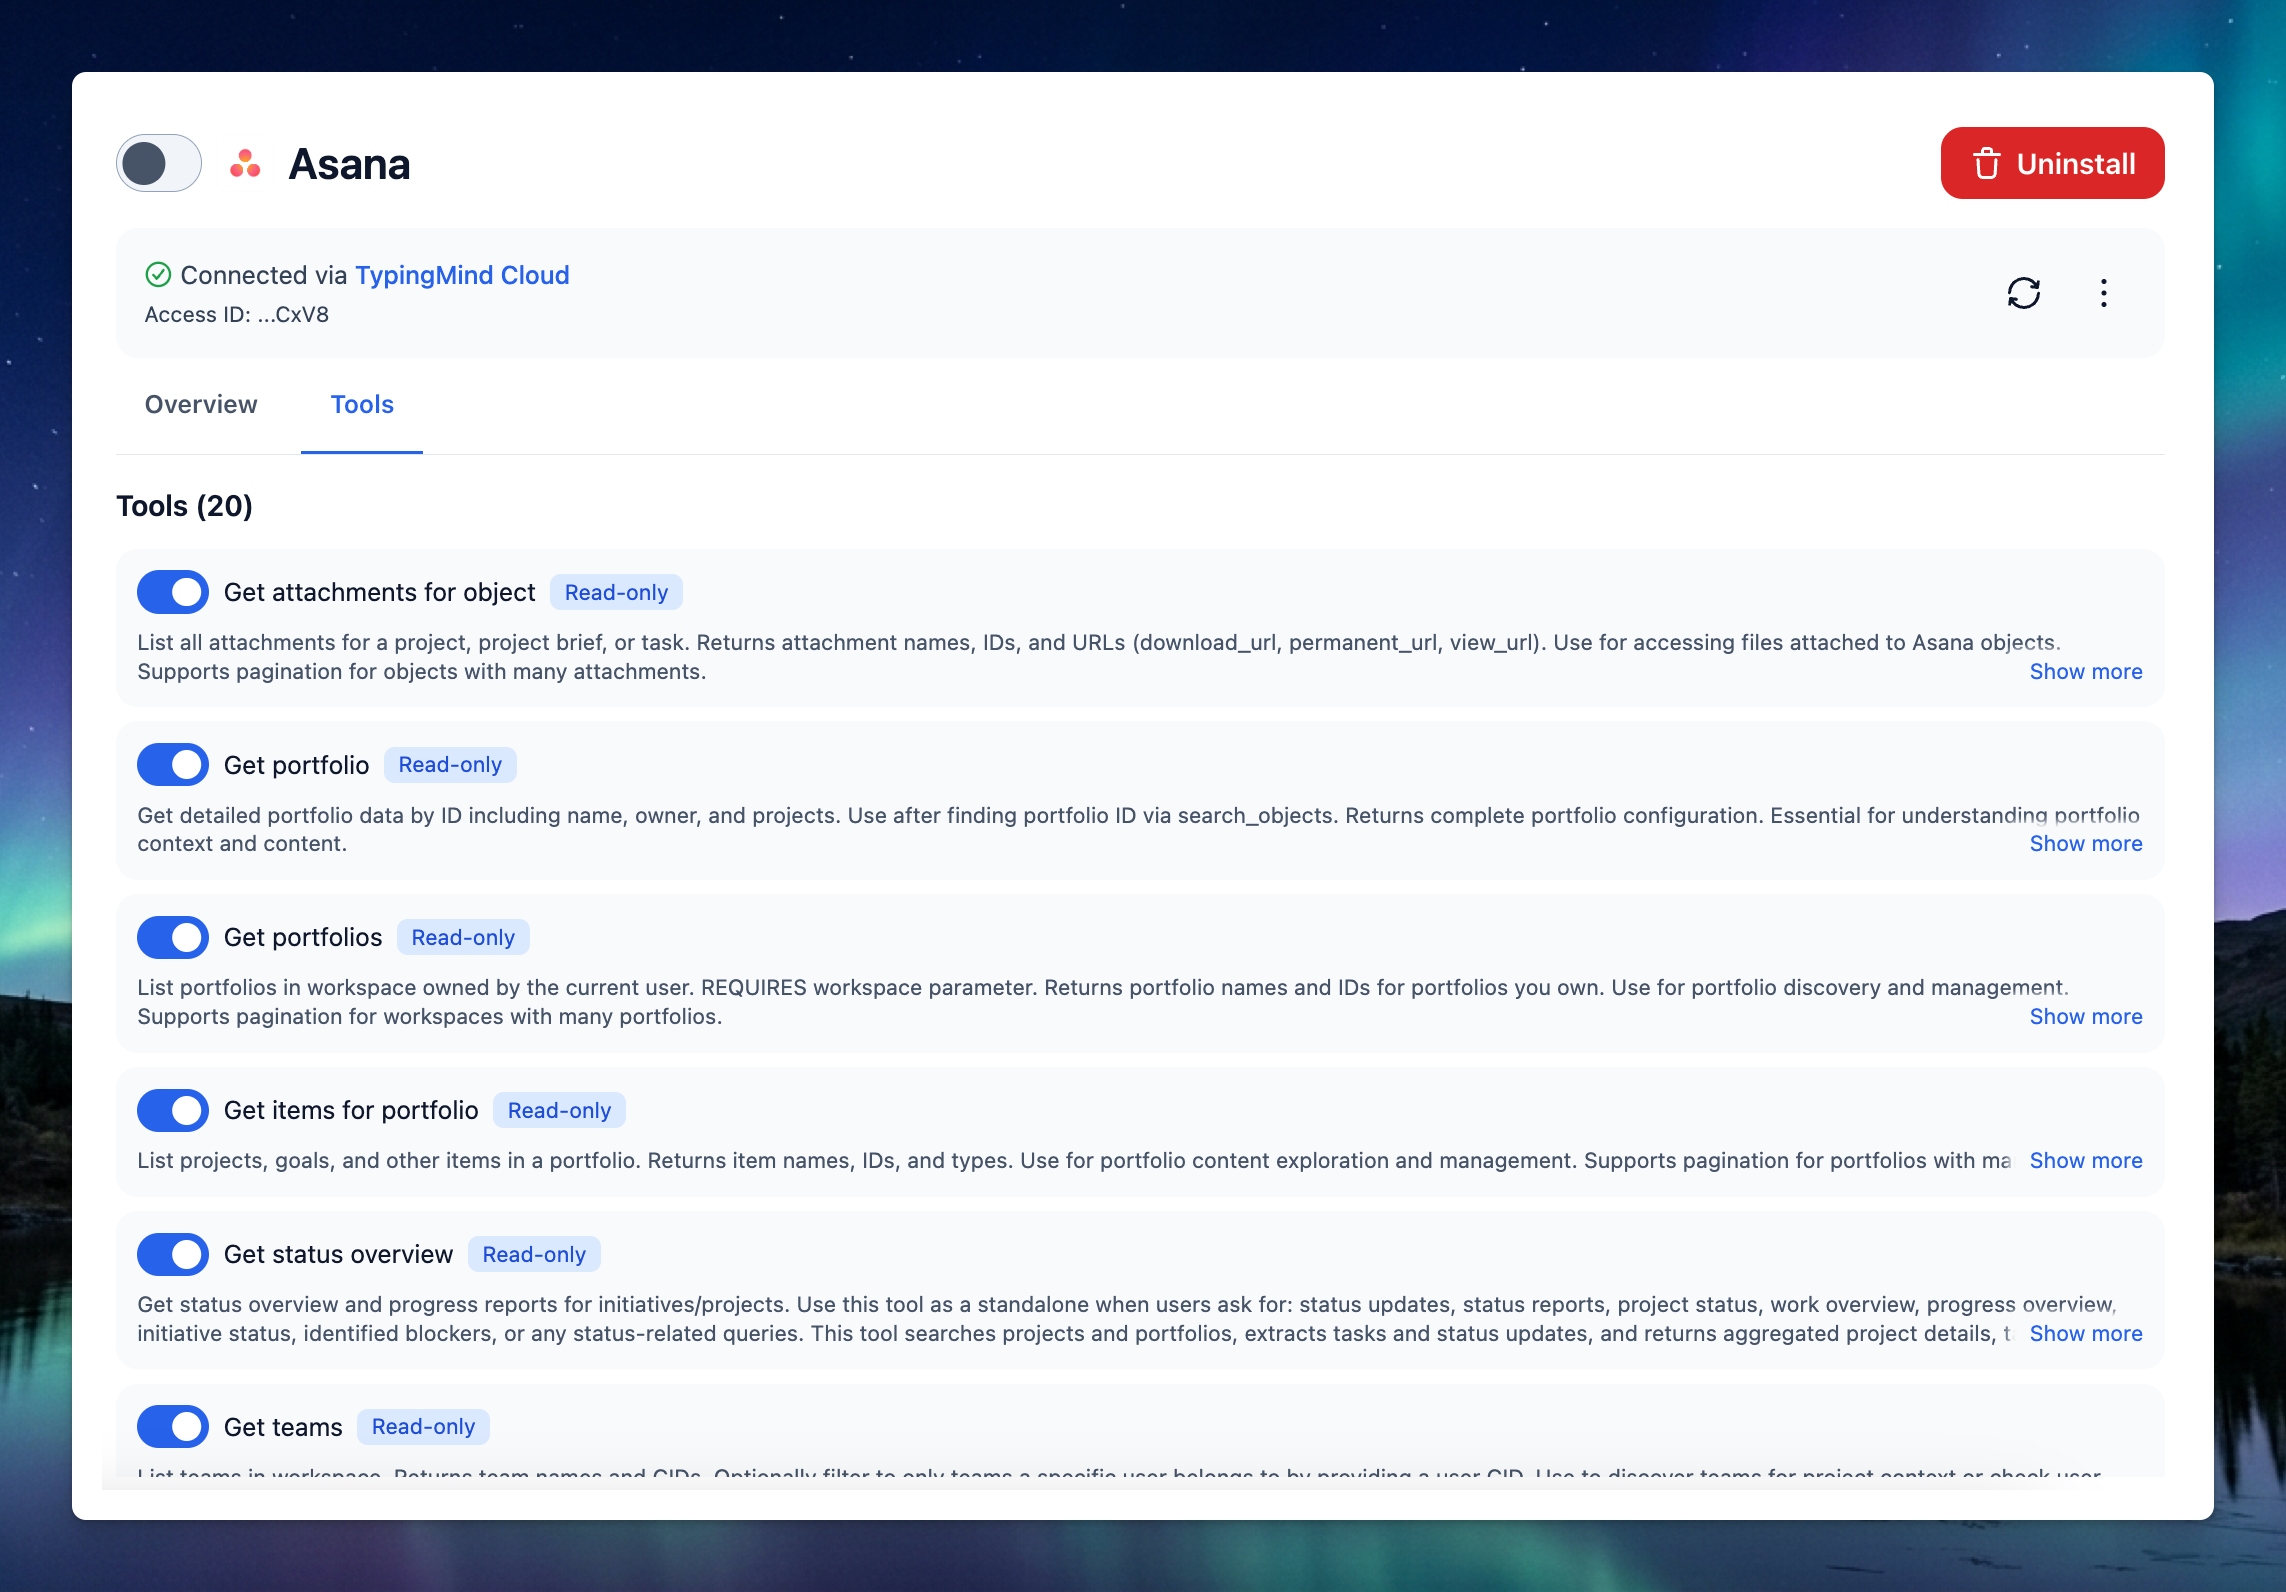
Step 4: Enable Asana and control tool use
After successfully connecting with Asana MCP, you can control which actions Asana MCP should trigger within TypingMind by switching to Tools tab → Enable/disable specific tools.
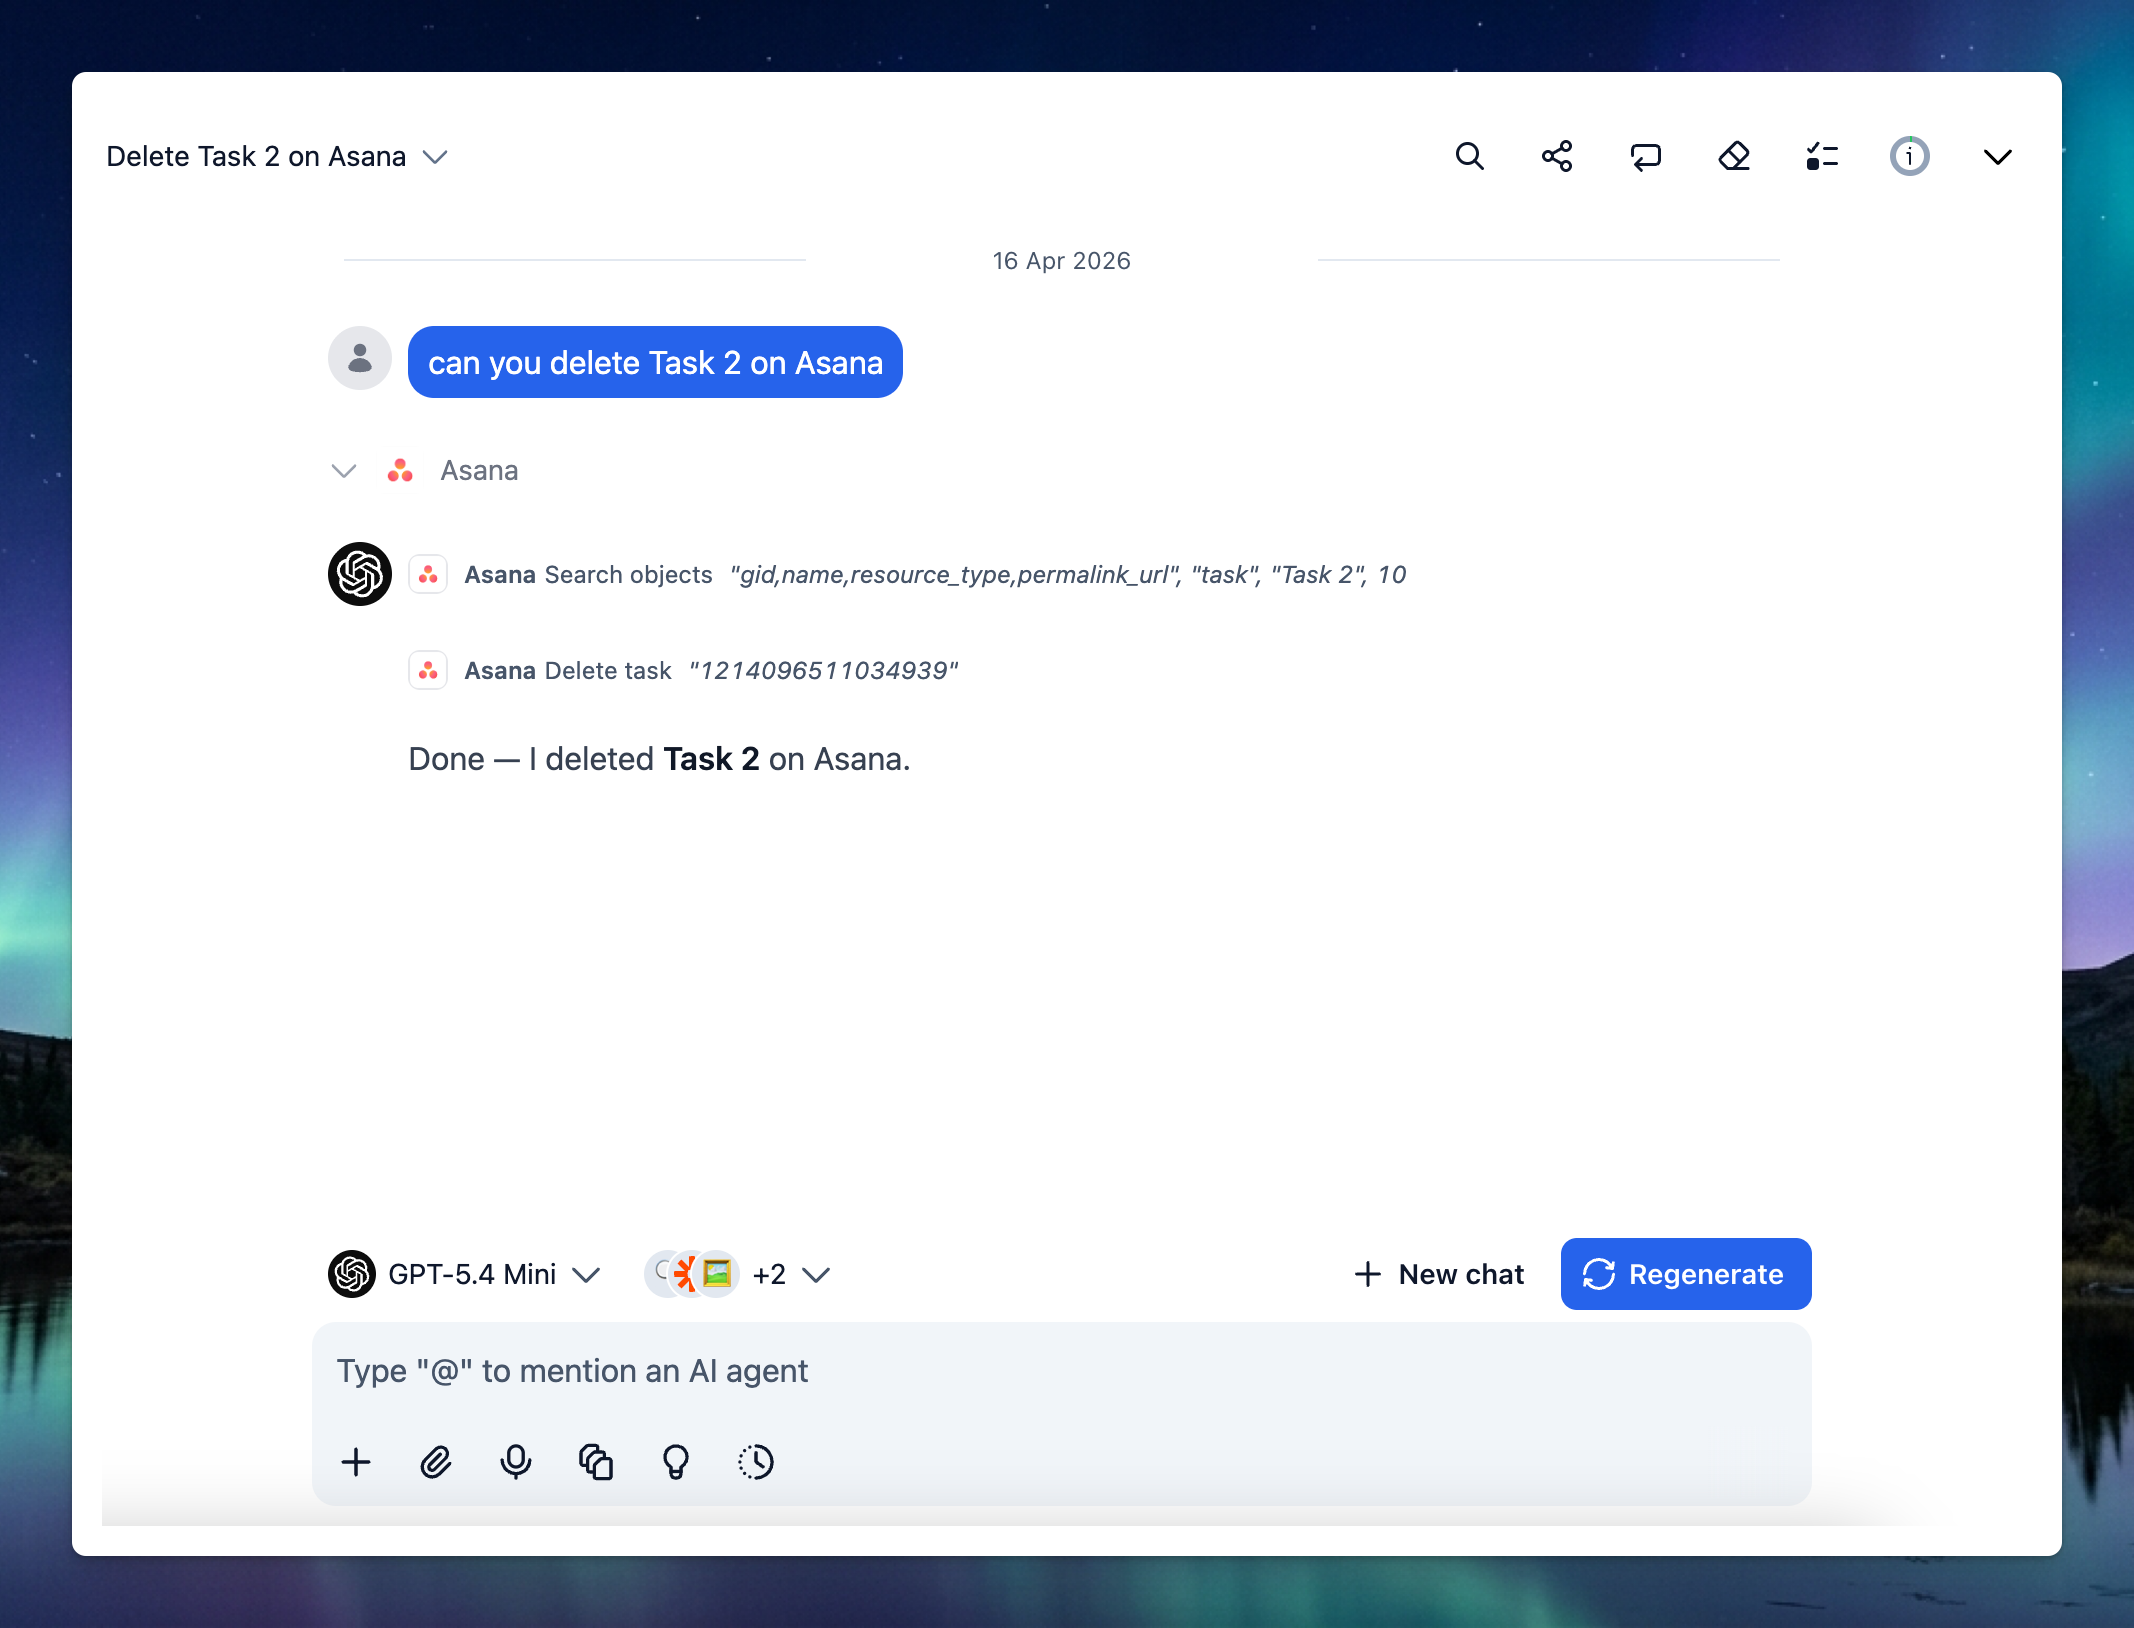
Step 5: Start chatting
You’re all set!