Once you have finished setting up MCP connectors, you can connect multiple MCP servers to TypingMind.
Step 1: Edit the server configuration
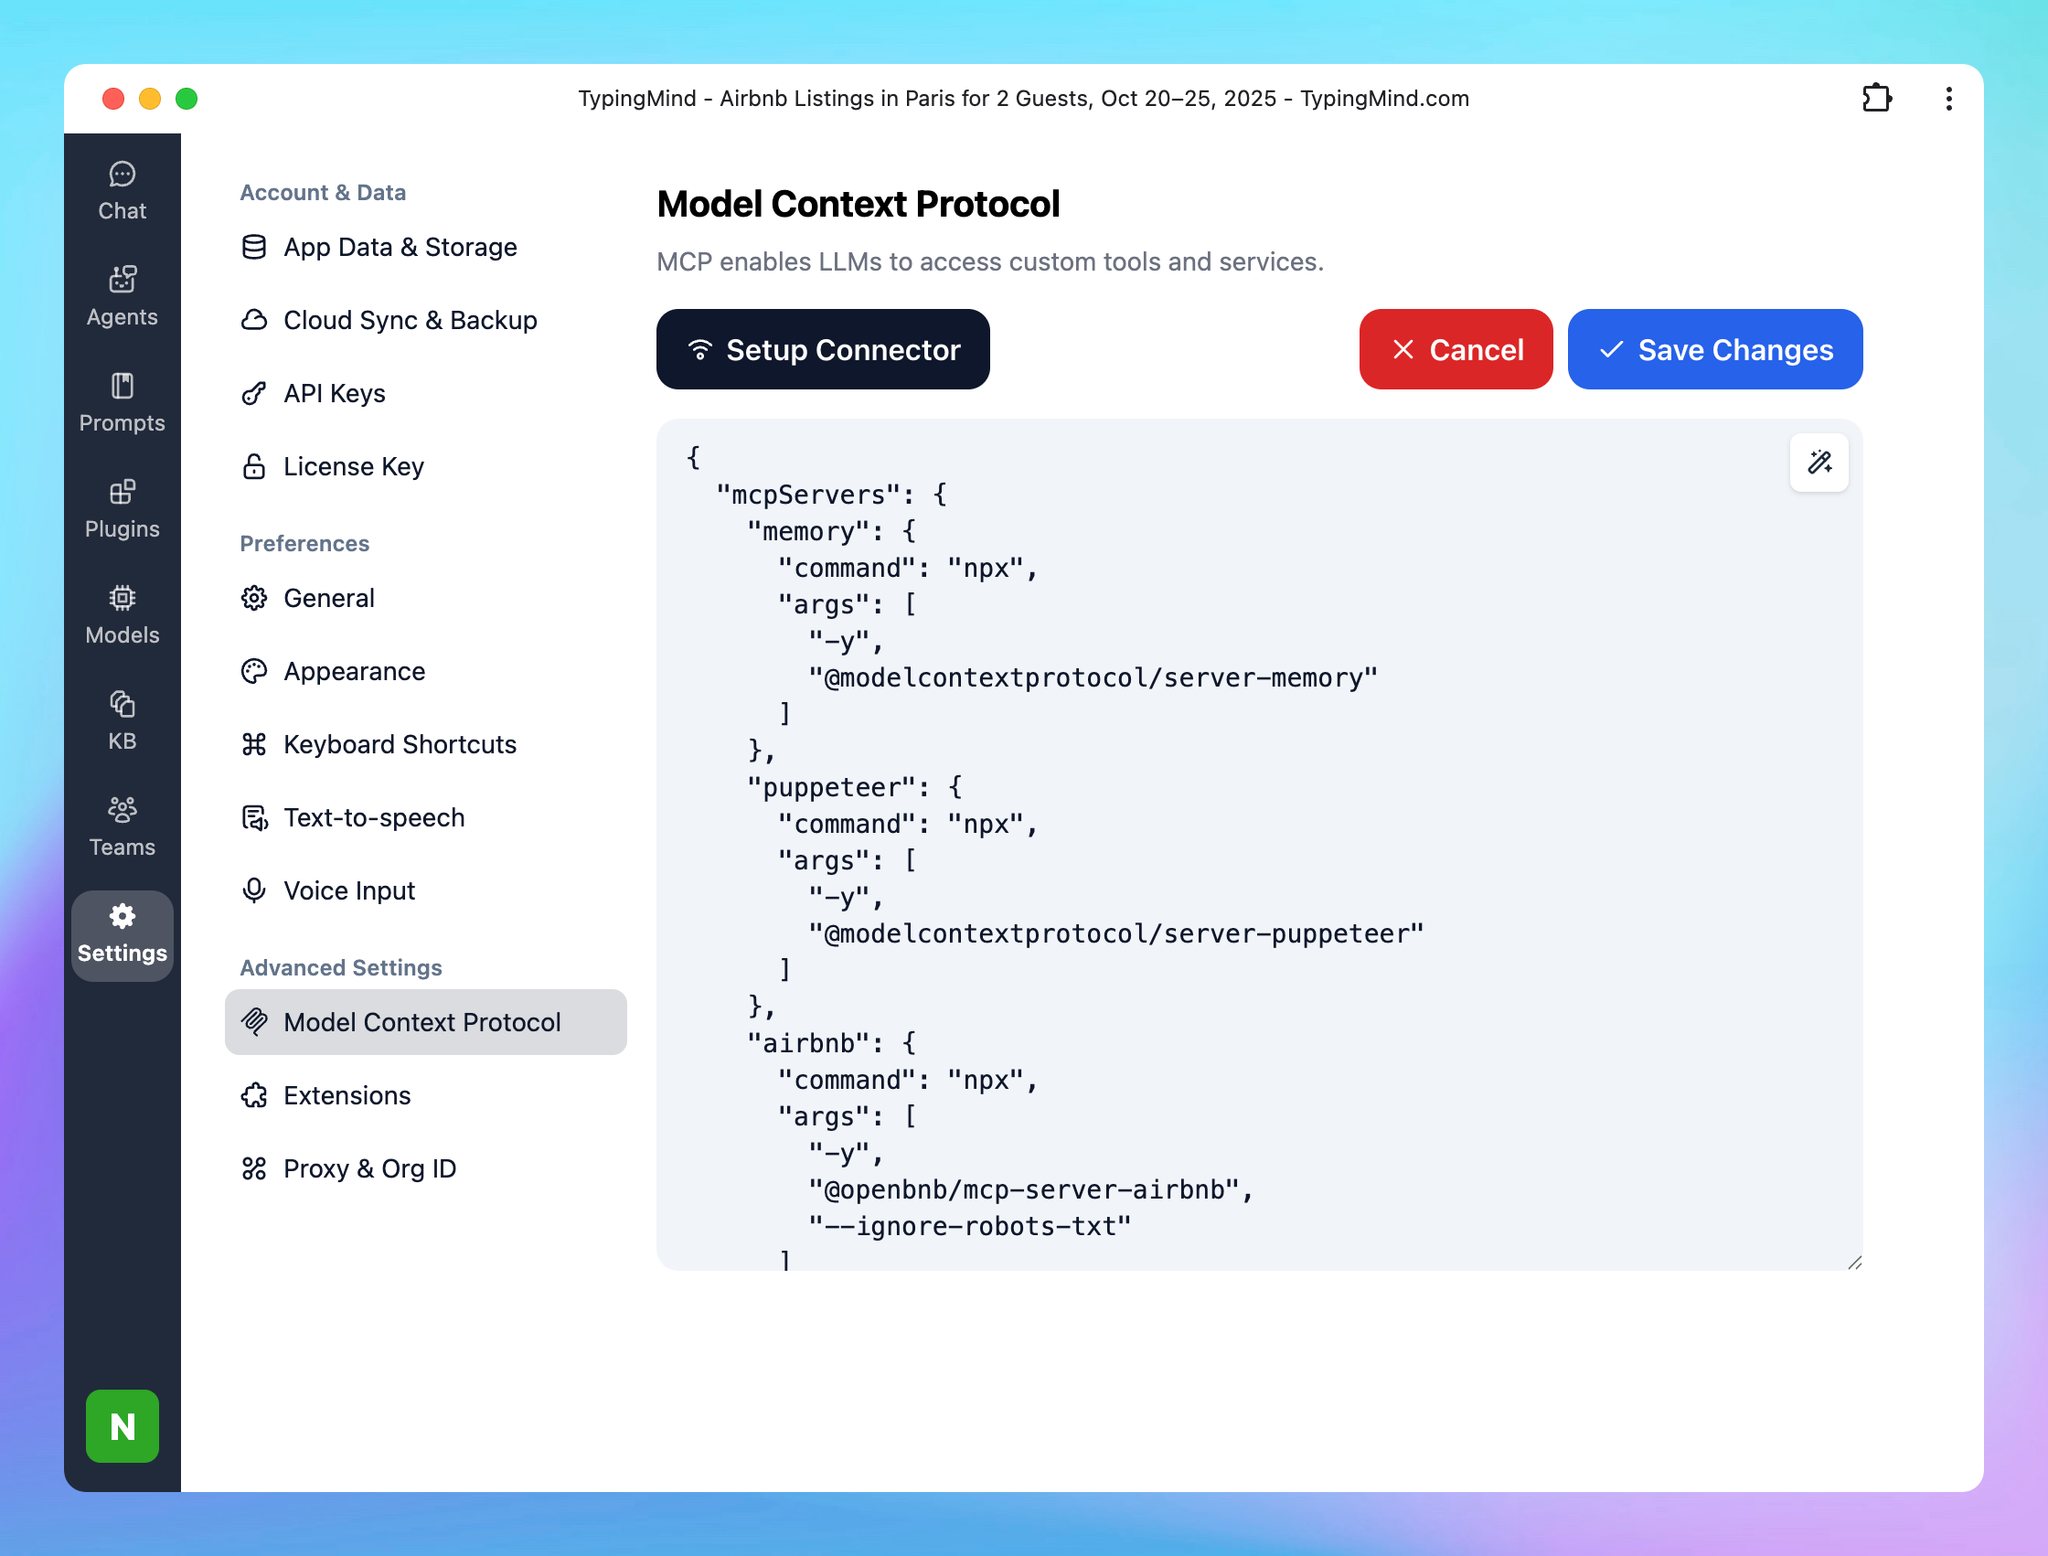
Click on Edit Servers to configure your MCP servers:
json{
  "mcpServers": {
    "memory": {
      "command": "npx",
      "args": [
        "-y",
        "@modelcontextprotocol/server-memory"
      ]
    },
    "puppeteer": {
      "command": "npx",
      "args": [
        "-y",
        "@modelcontextprotocol/server-puppeteer"
      ]
    },
    "airbnb": {
      "command": "npx",
      "args": [
        "-y",
        "@openbnb/mcp-server-airbnb",
        "--ignore-robots-txt"
      ]
    },
    "notion": {
      "command": "npx",
      "args": [
        "-y",
        "@suekou/mcp-notion-server"
      ],
      "env": {
        "NOTION_API_TOKEN": "your_notion_auth_token"
      }
    }
  }
}

Each server entry includes:
command: the executable used to start the server (usuallynpx)
-
args: the arguments passed to that command
env(optional): environment variables required for authentication or configuration
You can add as many servers as you like using the same structure.
Step 2: Save the configuration
Save your changes after editing the file. TypingMind will use this configuration to recognize and launch your MCP servers.
Step 3: Enable each server
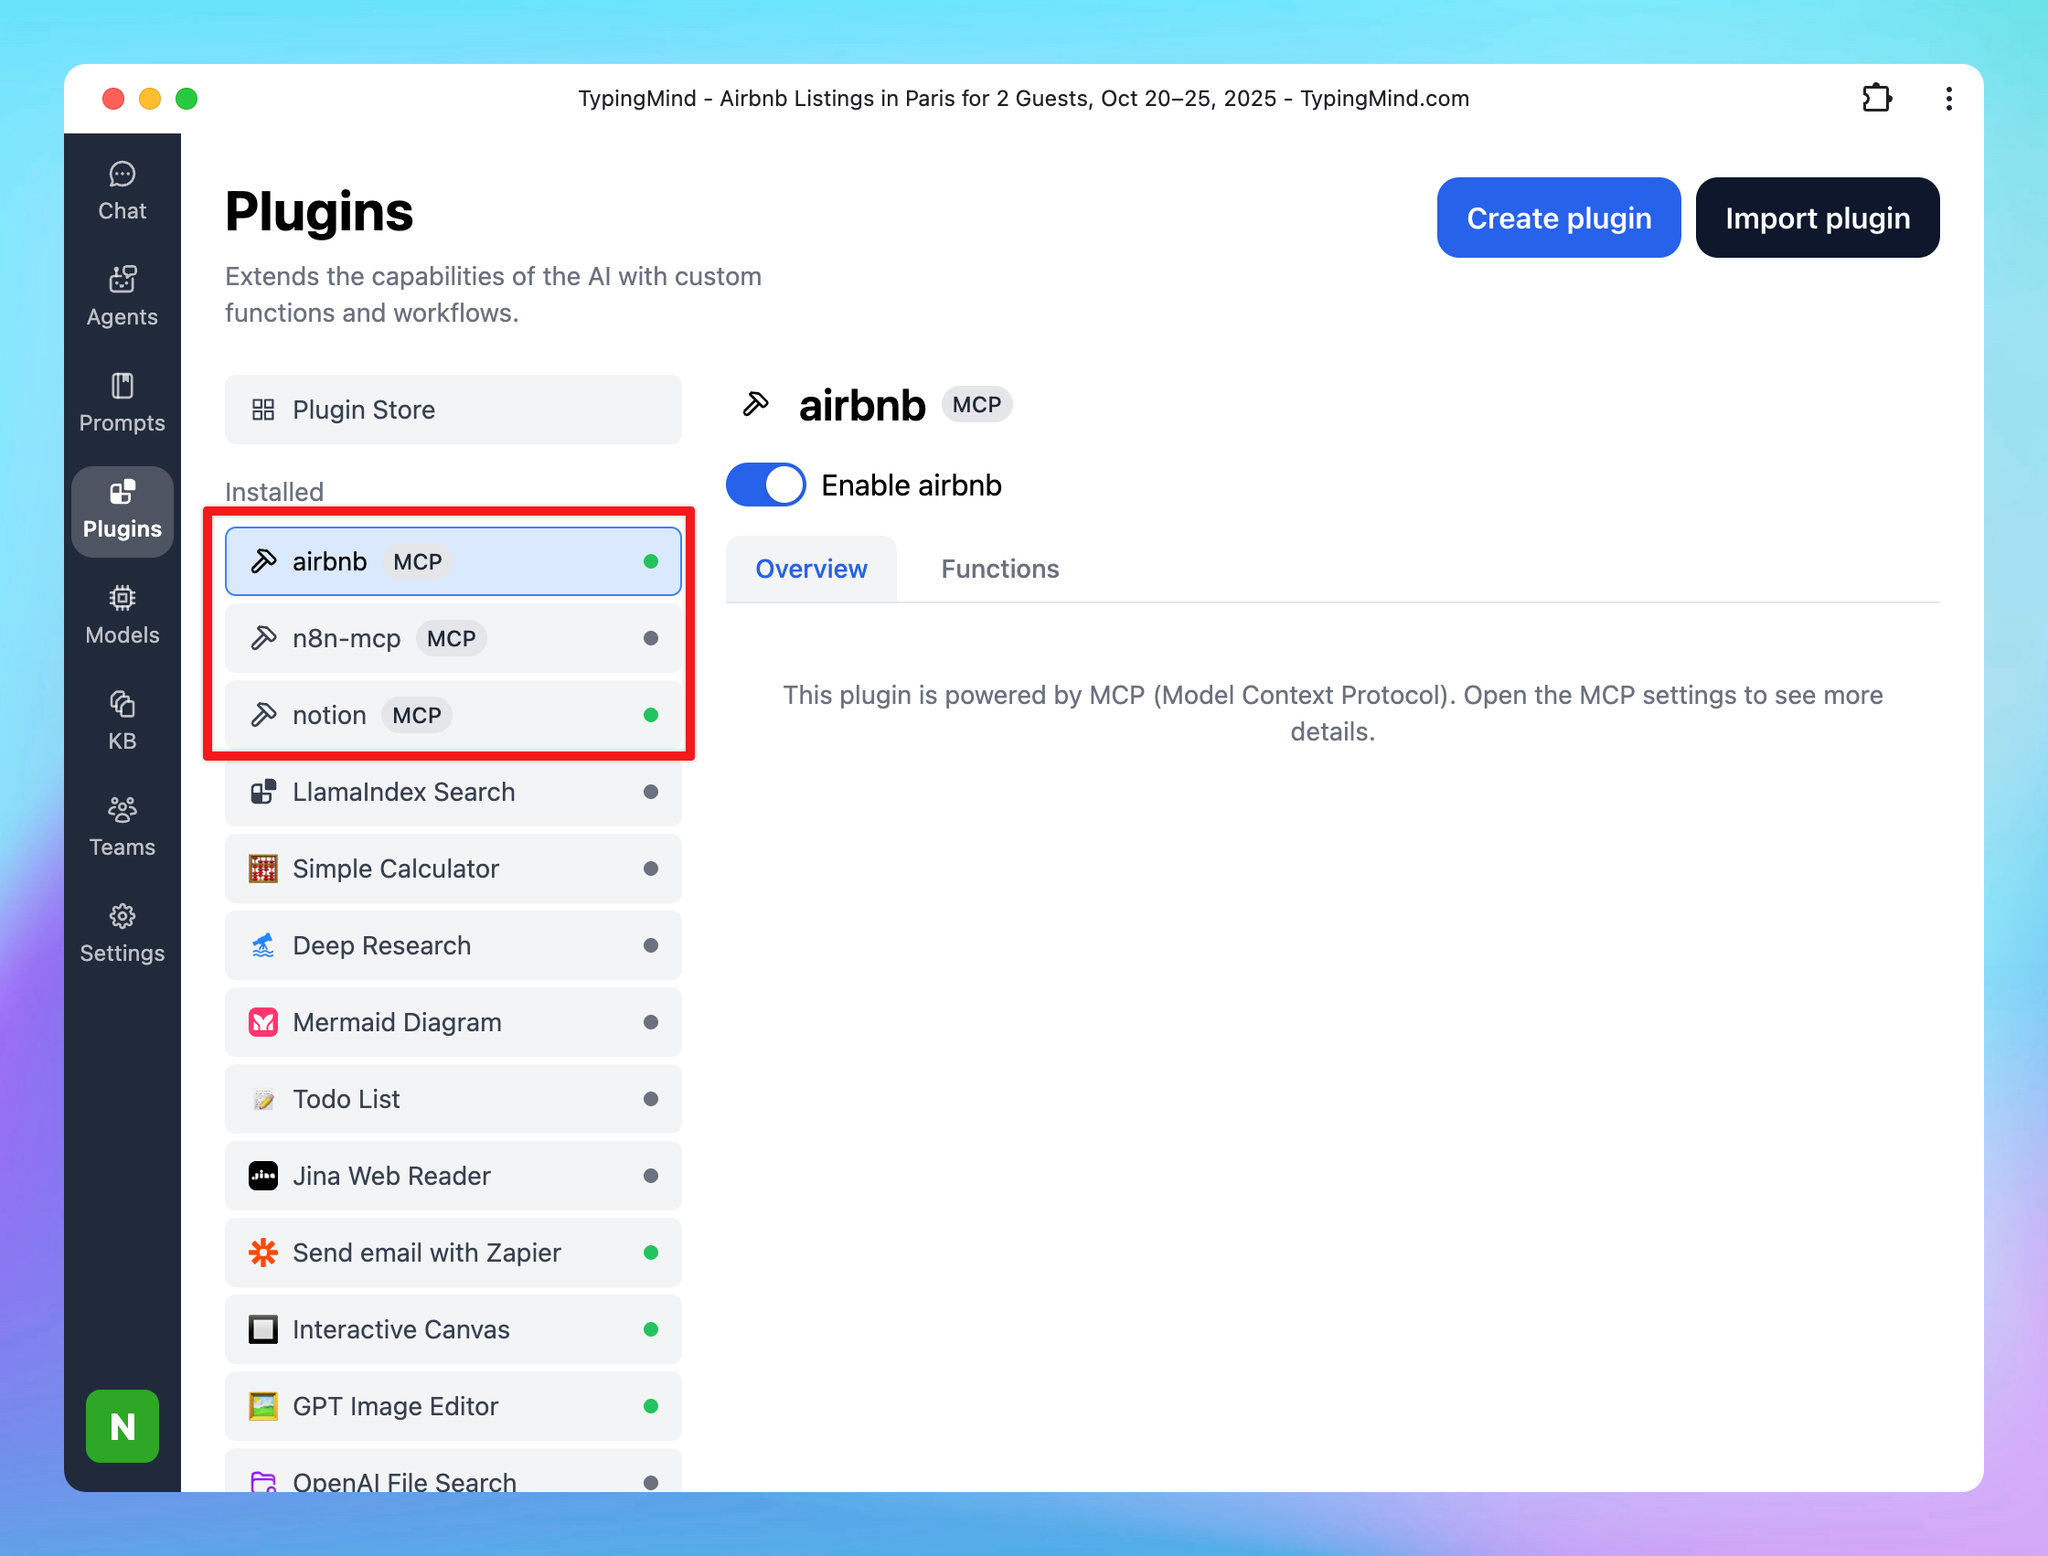
In TypingMind, enable each MCP server as a separate plugin. Go Plugins —> Enable the connected MCP servers:

Once enabled, TypingMind will automatically connect to all configured servers at startup.
