With TypingMind Custom, you can restrict the visibility and usage of specific AI Agents for certain groups of users.
Here's how to do that:
Step 1: Create user groups for your team membersStep 2: Assign user groups to a specific AI AgentOption 1: Manage via Usage Limits Option 2: Manage limit directly within AI Agent SettingsUse CasesBuild a Personalized Chatbot for Each Role / Department in a CompanyRestrict AI Agents Access for Different User Levels
Step 1: Create user groups for your team members
Creating Groups for your team members allows you to categorize them into different groups of users, for example, Private group, Public group, BOD group, etc.
Please follow these steps to create groups for your members:
- Go to the Admin Panel in your workspace.
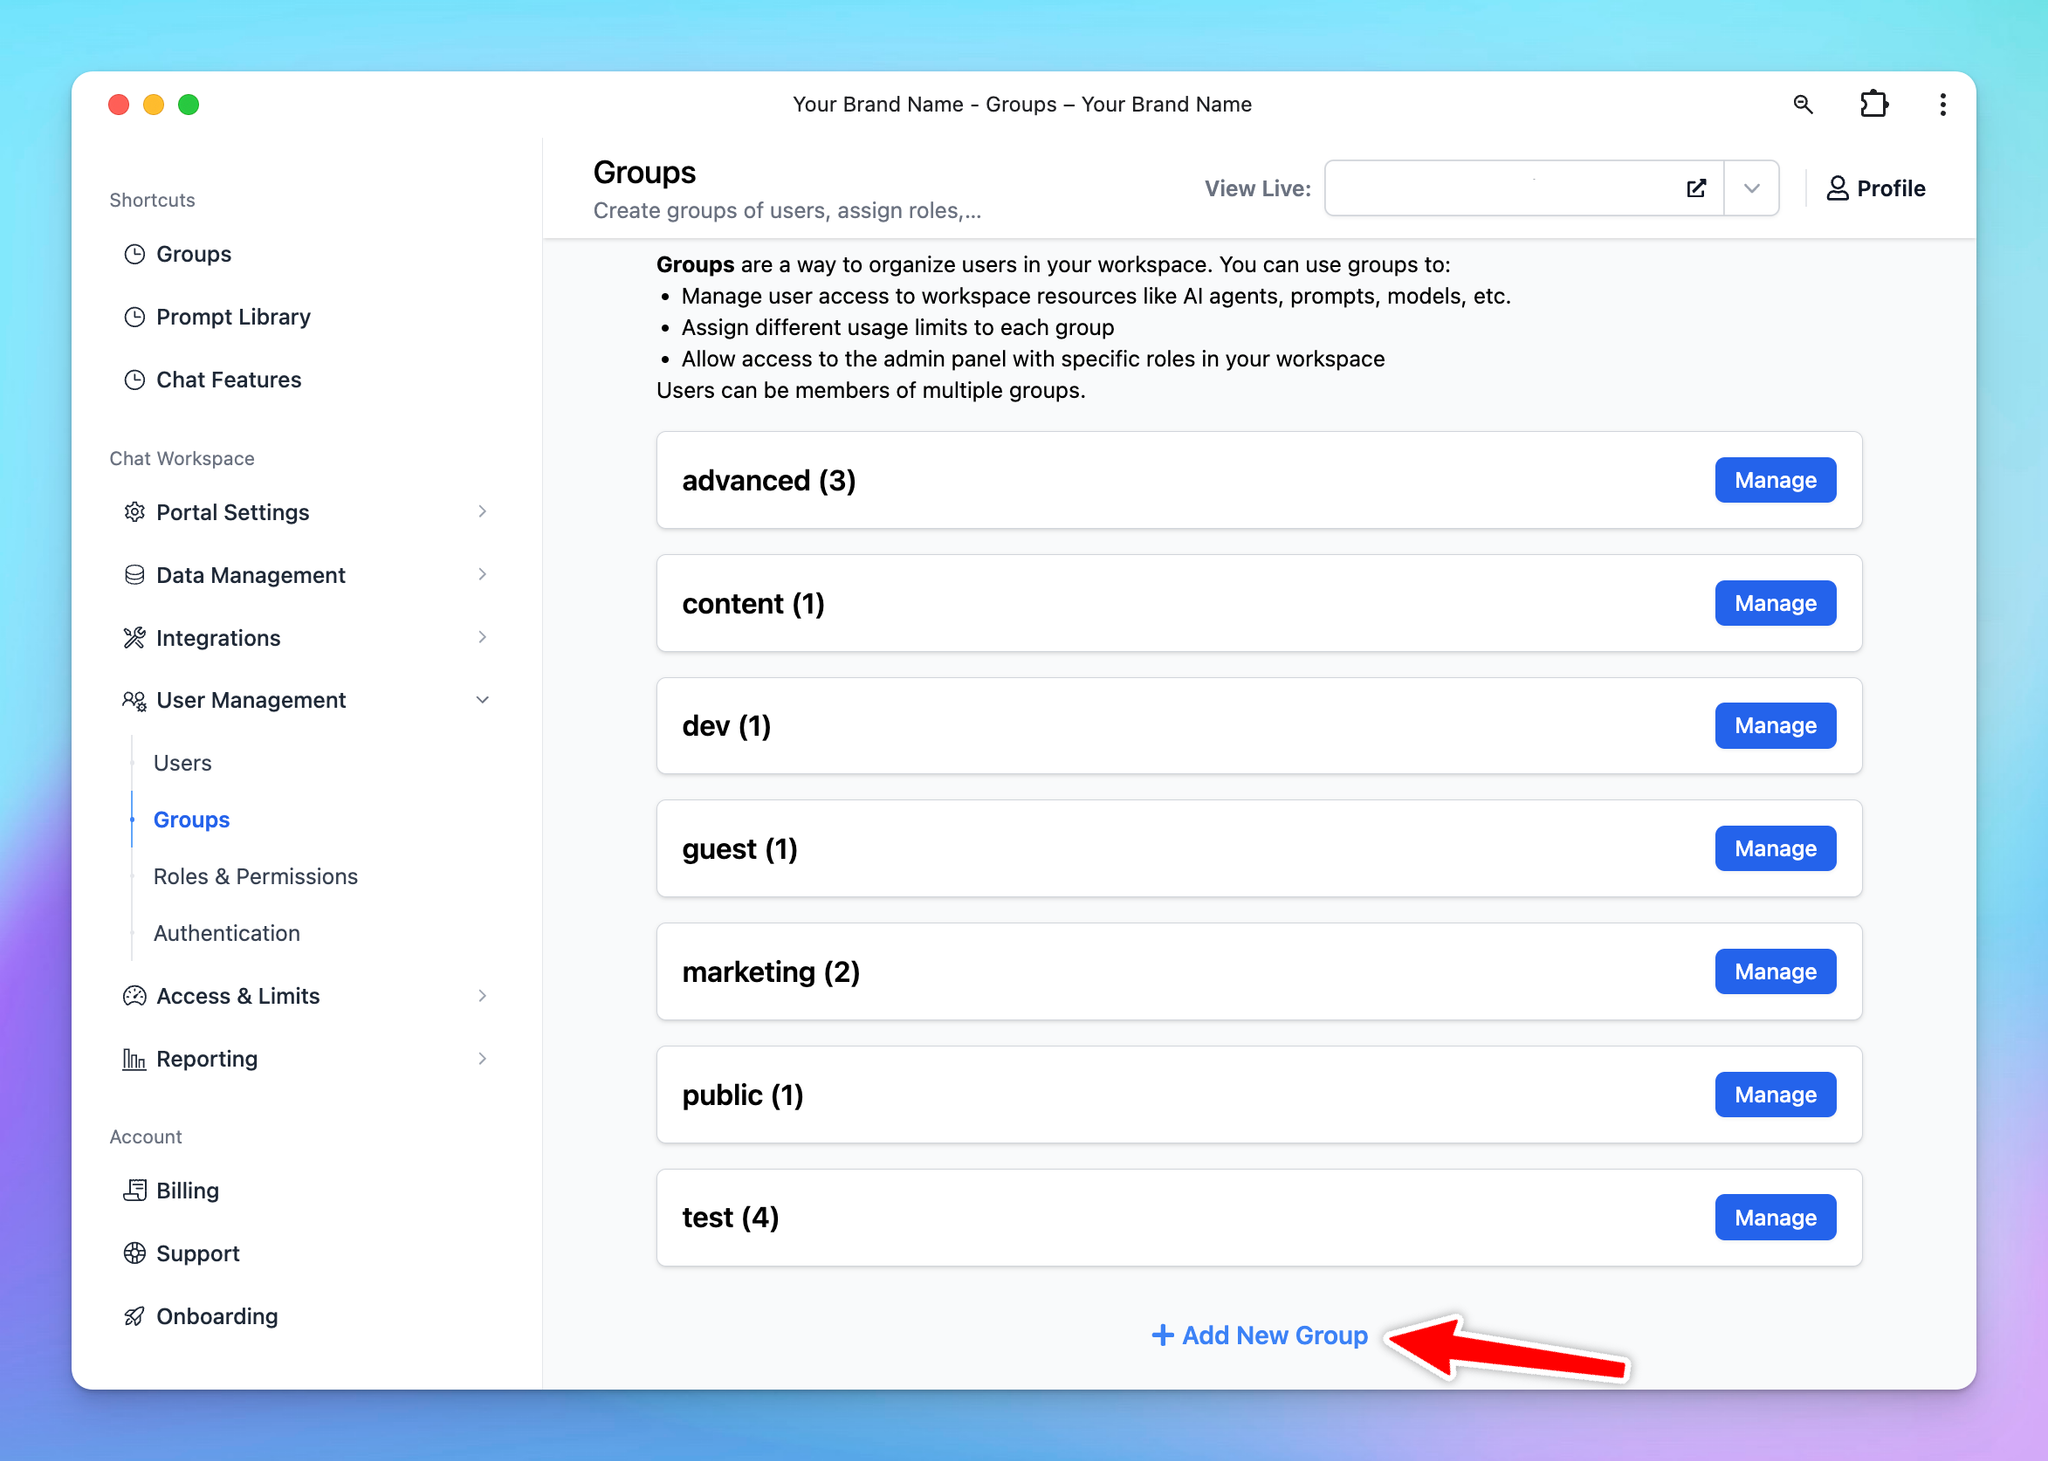
- Navigate to the Groups section under User Management.
- Click on Add New Group.
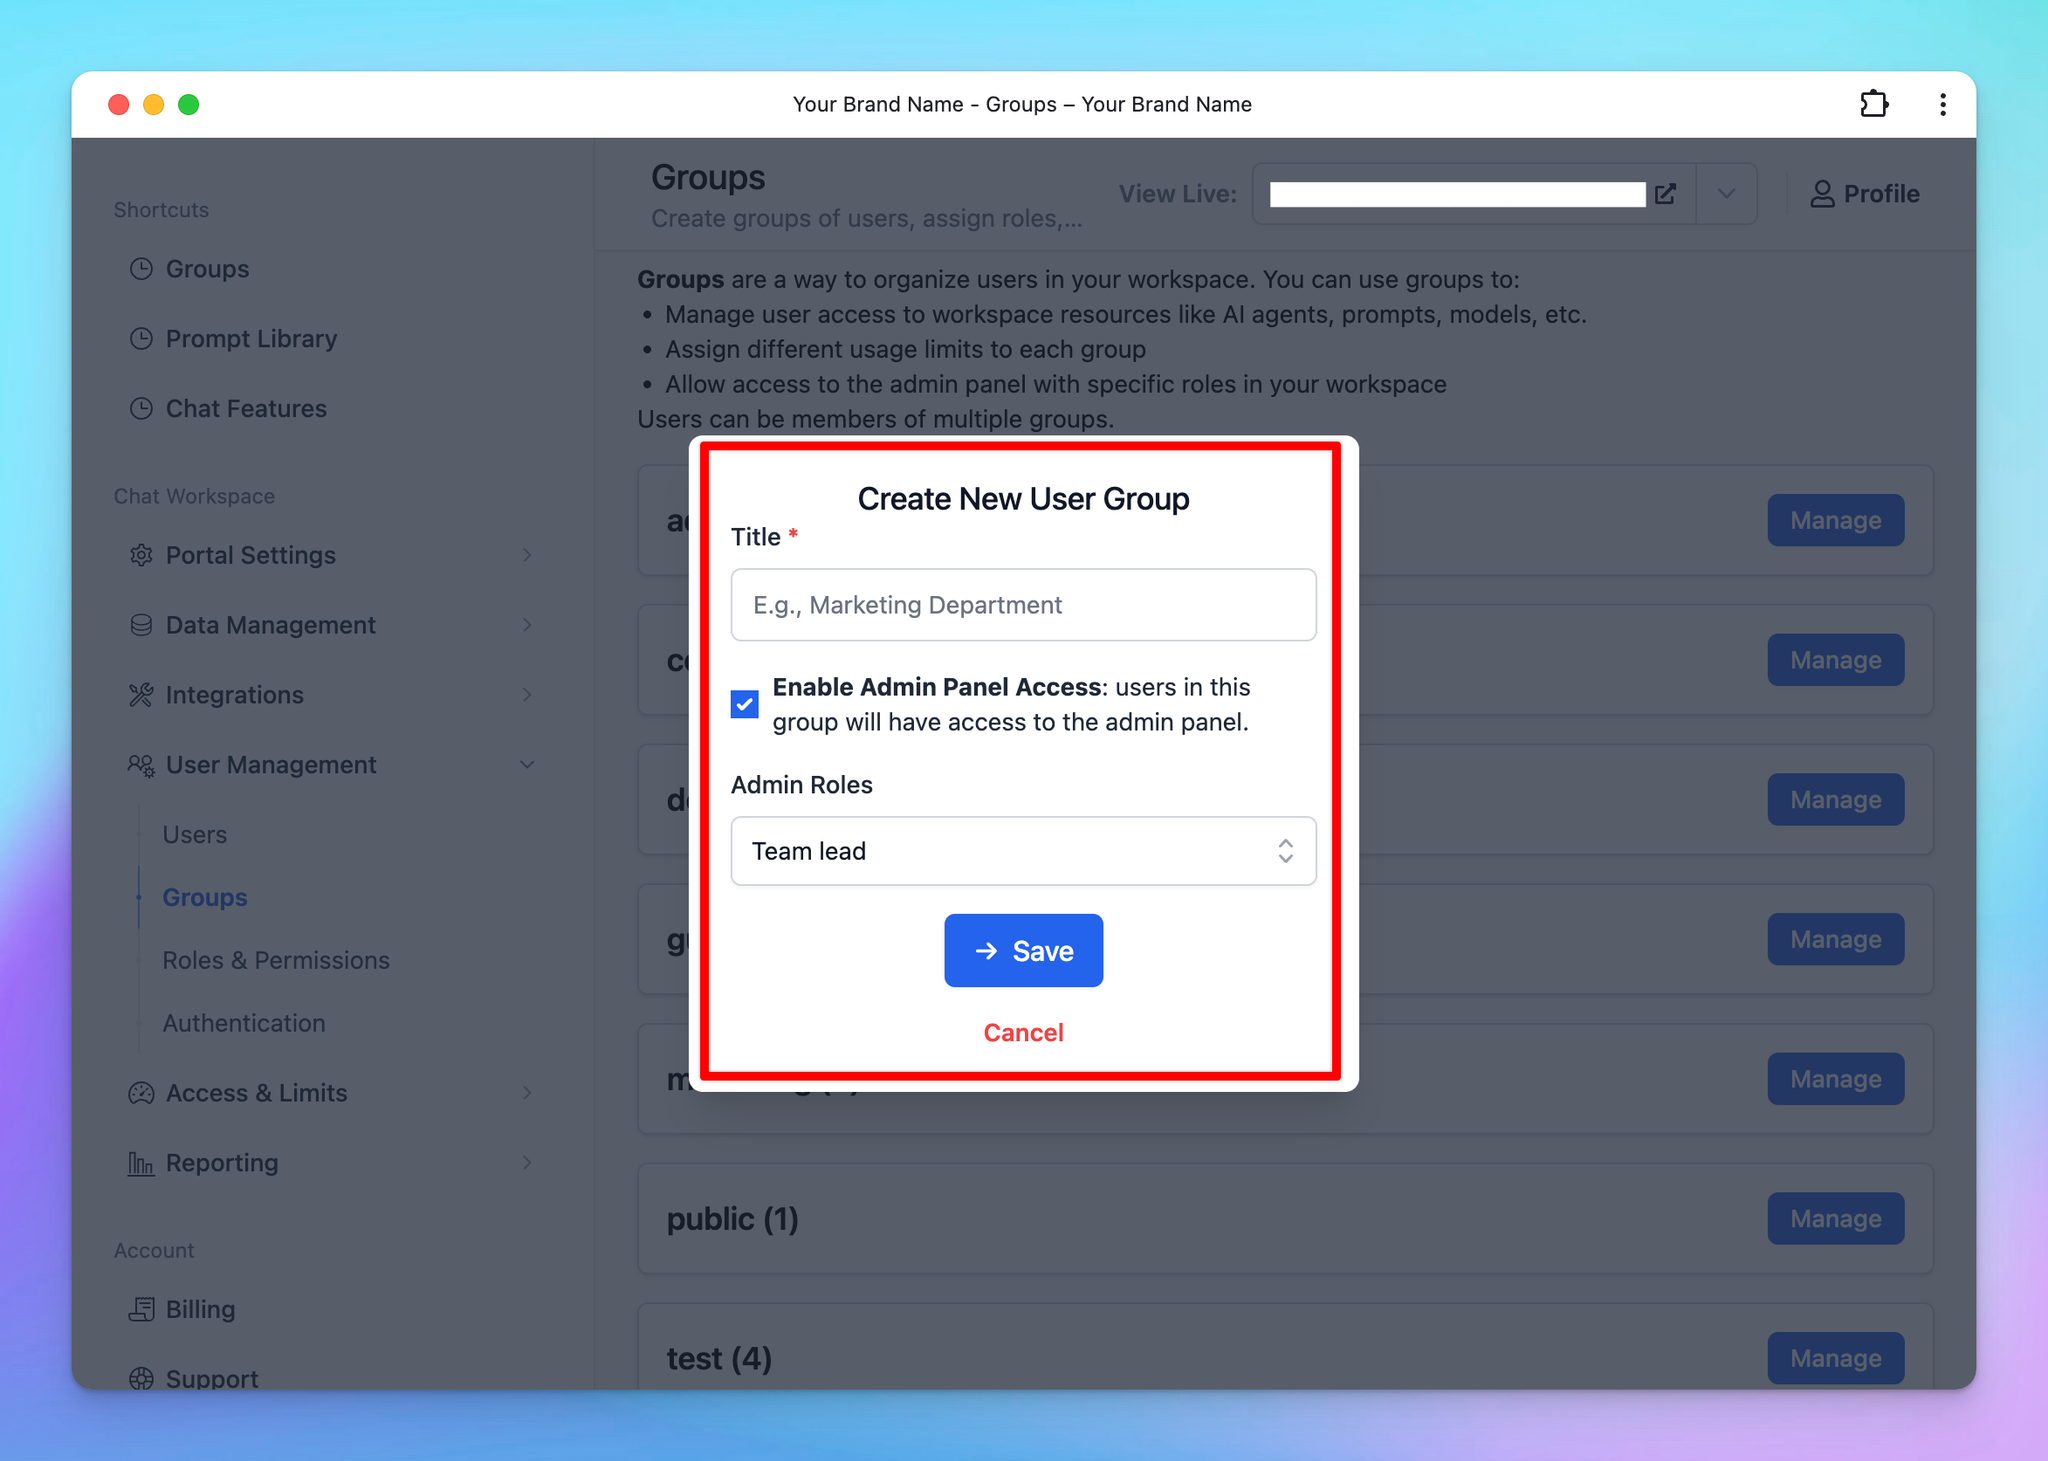
- Enter a Group Name that reflects the purpose or role of the group.
- (Optional) Enable Admin Access for this group if they can have access to the admin panel.
- If you enable this option, ensure you assign appropriate Admin Roles to the group. These roles should align with the permissions you’ve defined in the Roles and Permissions settings.
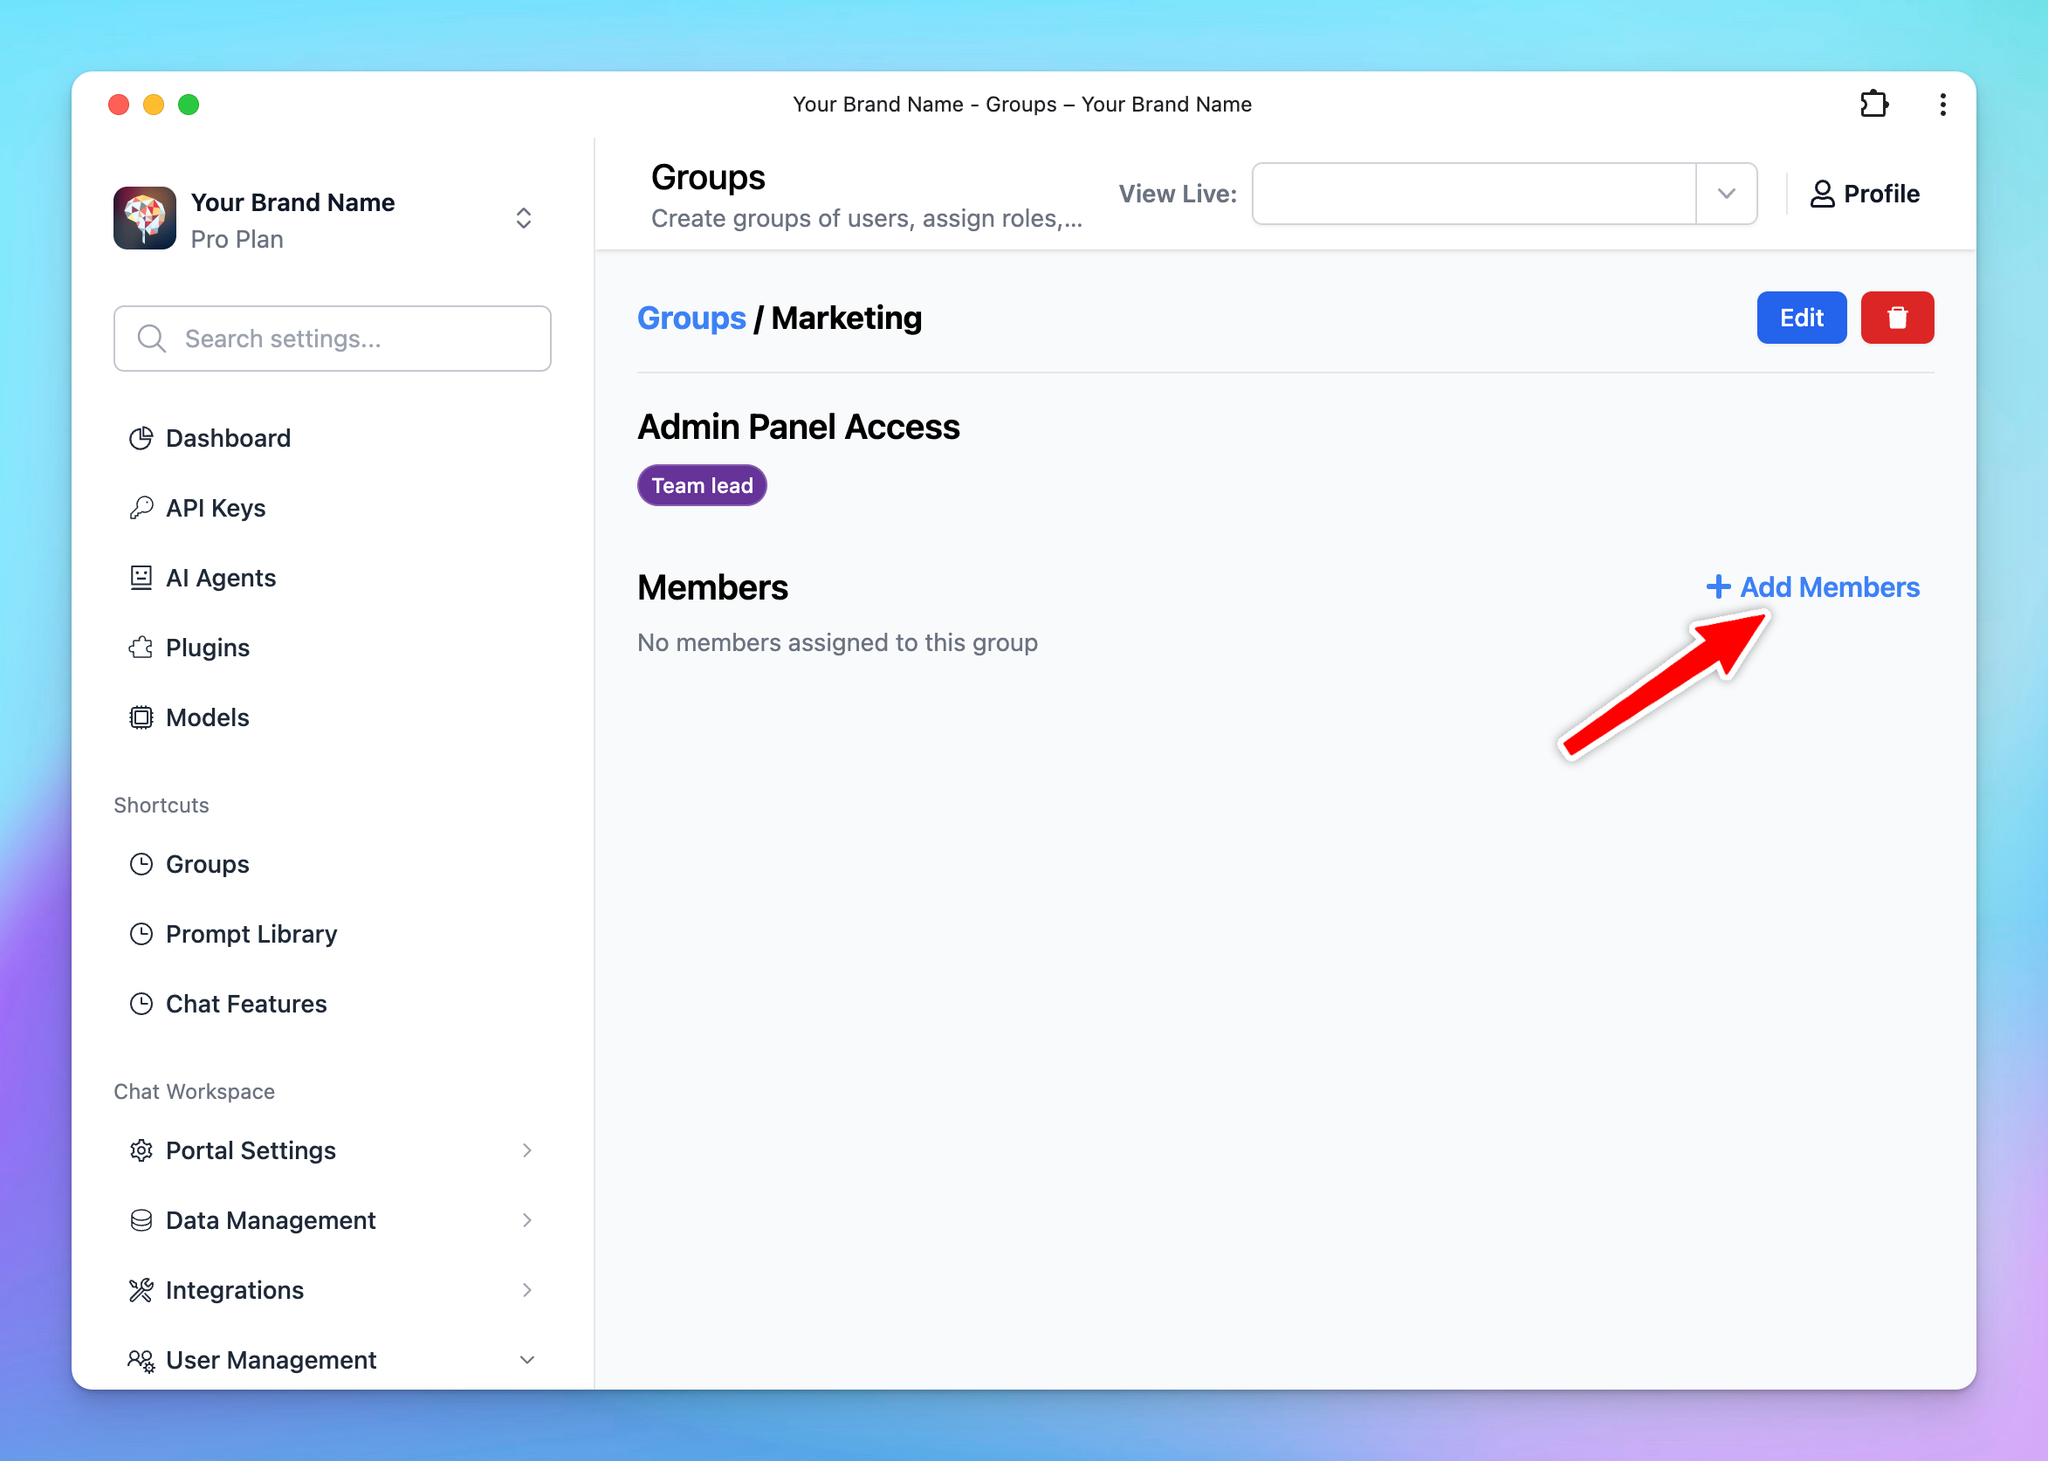
- Click Manage next to the created group
- Click Add Members
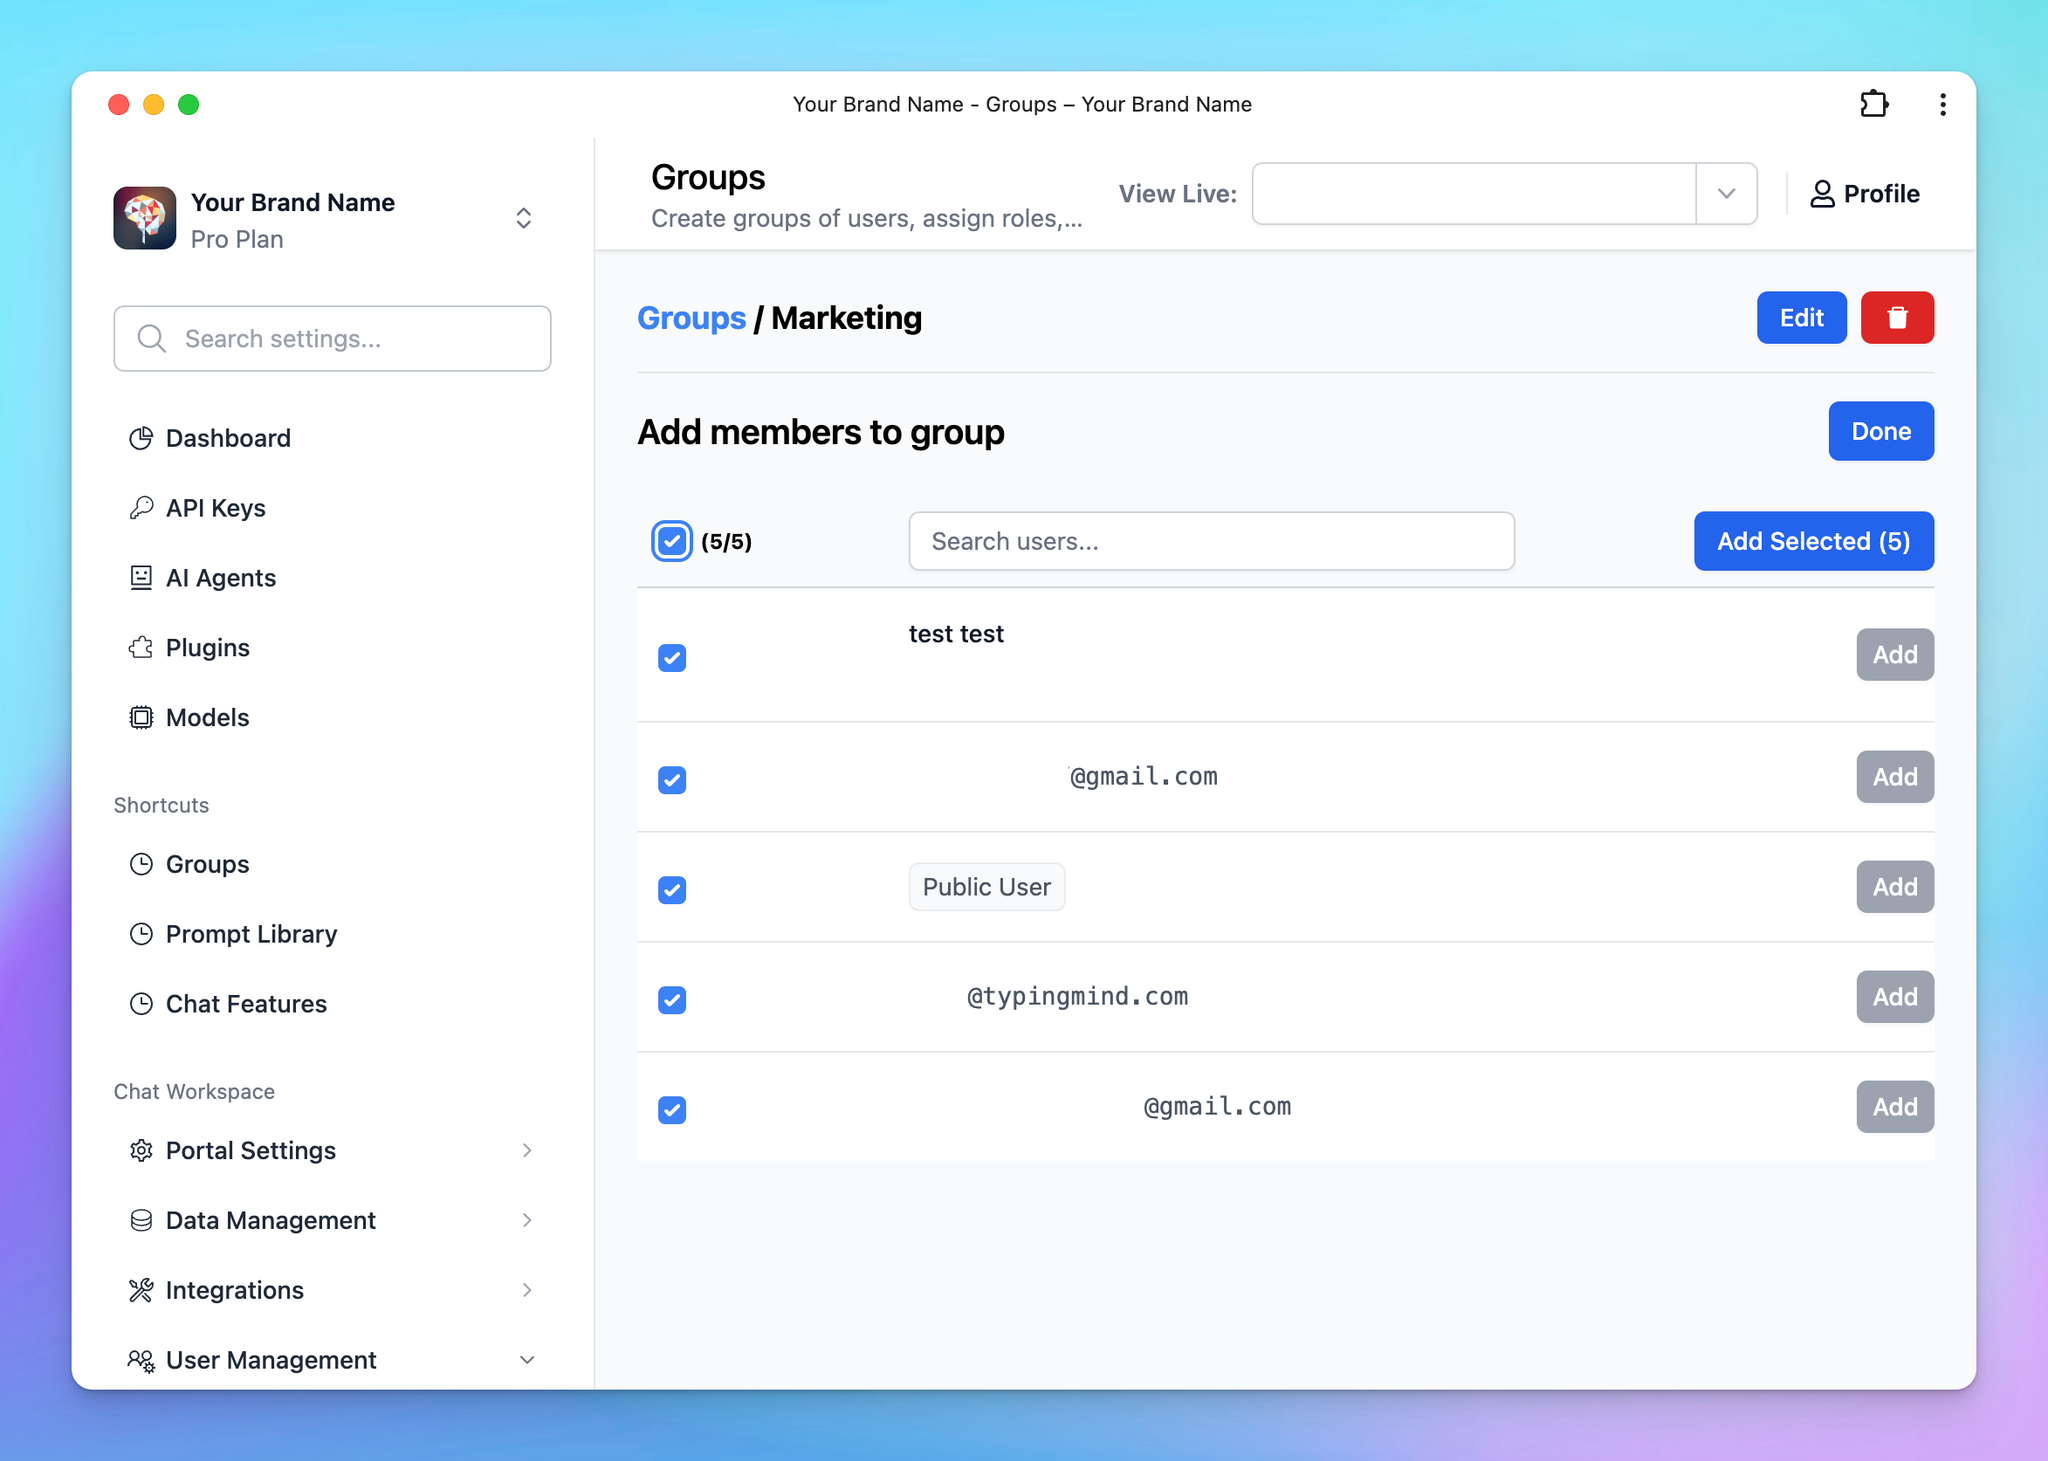
- Select the users you want to include in this group from the list.
Learn more on User Groups
Step 2: Assign user groups to a specific AI Agent
You can manage the AI Agents visibility and usage limit using User Groups following the below guidelines:
Option 1: Manage via Usage Limits
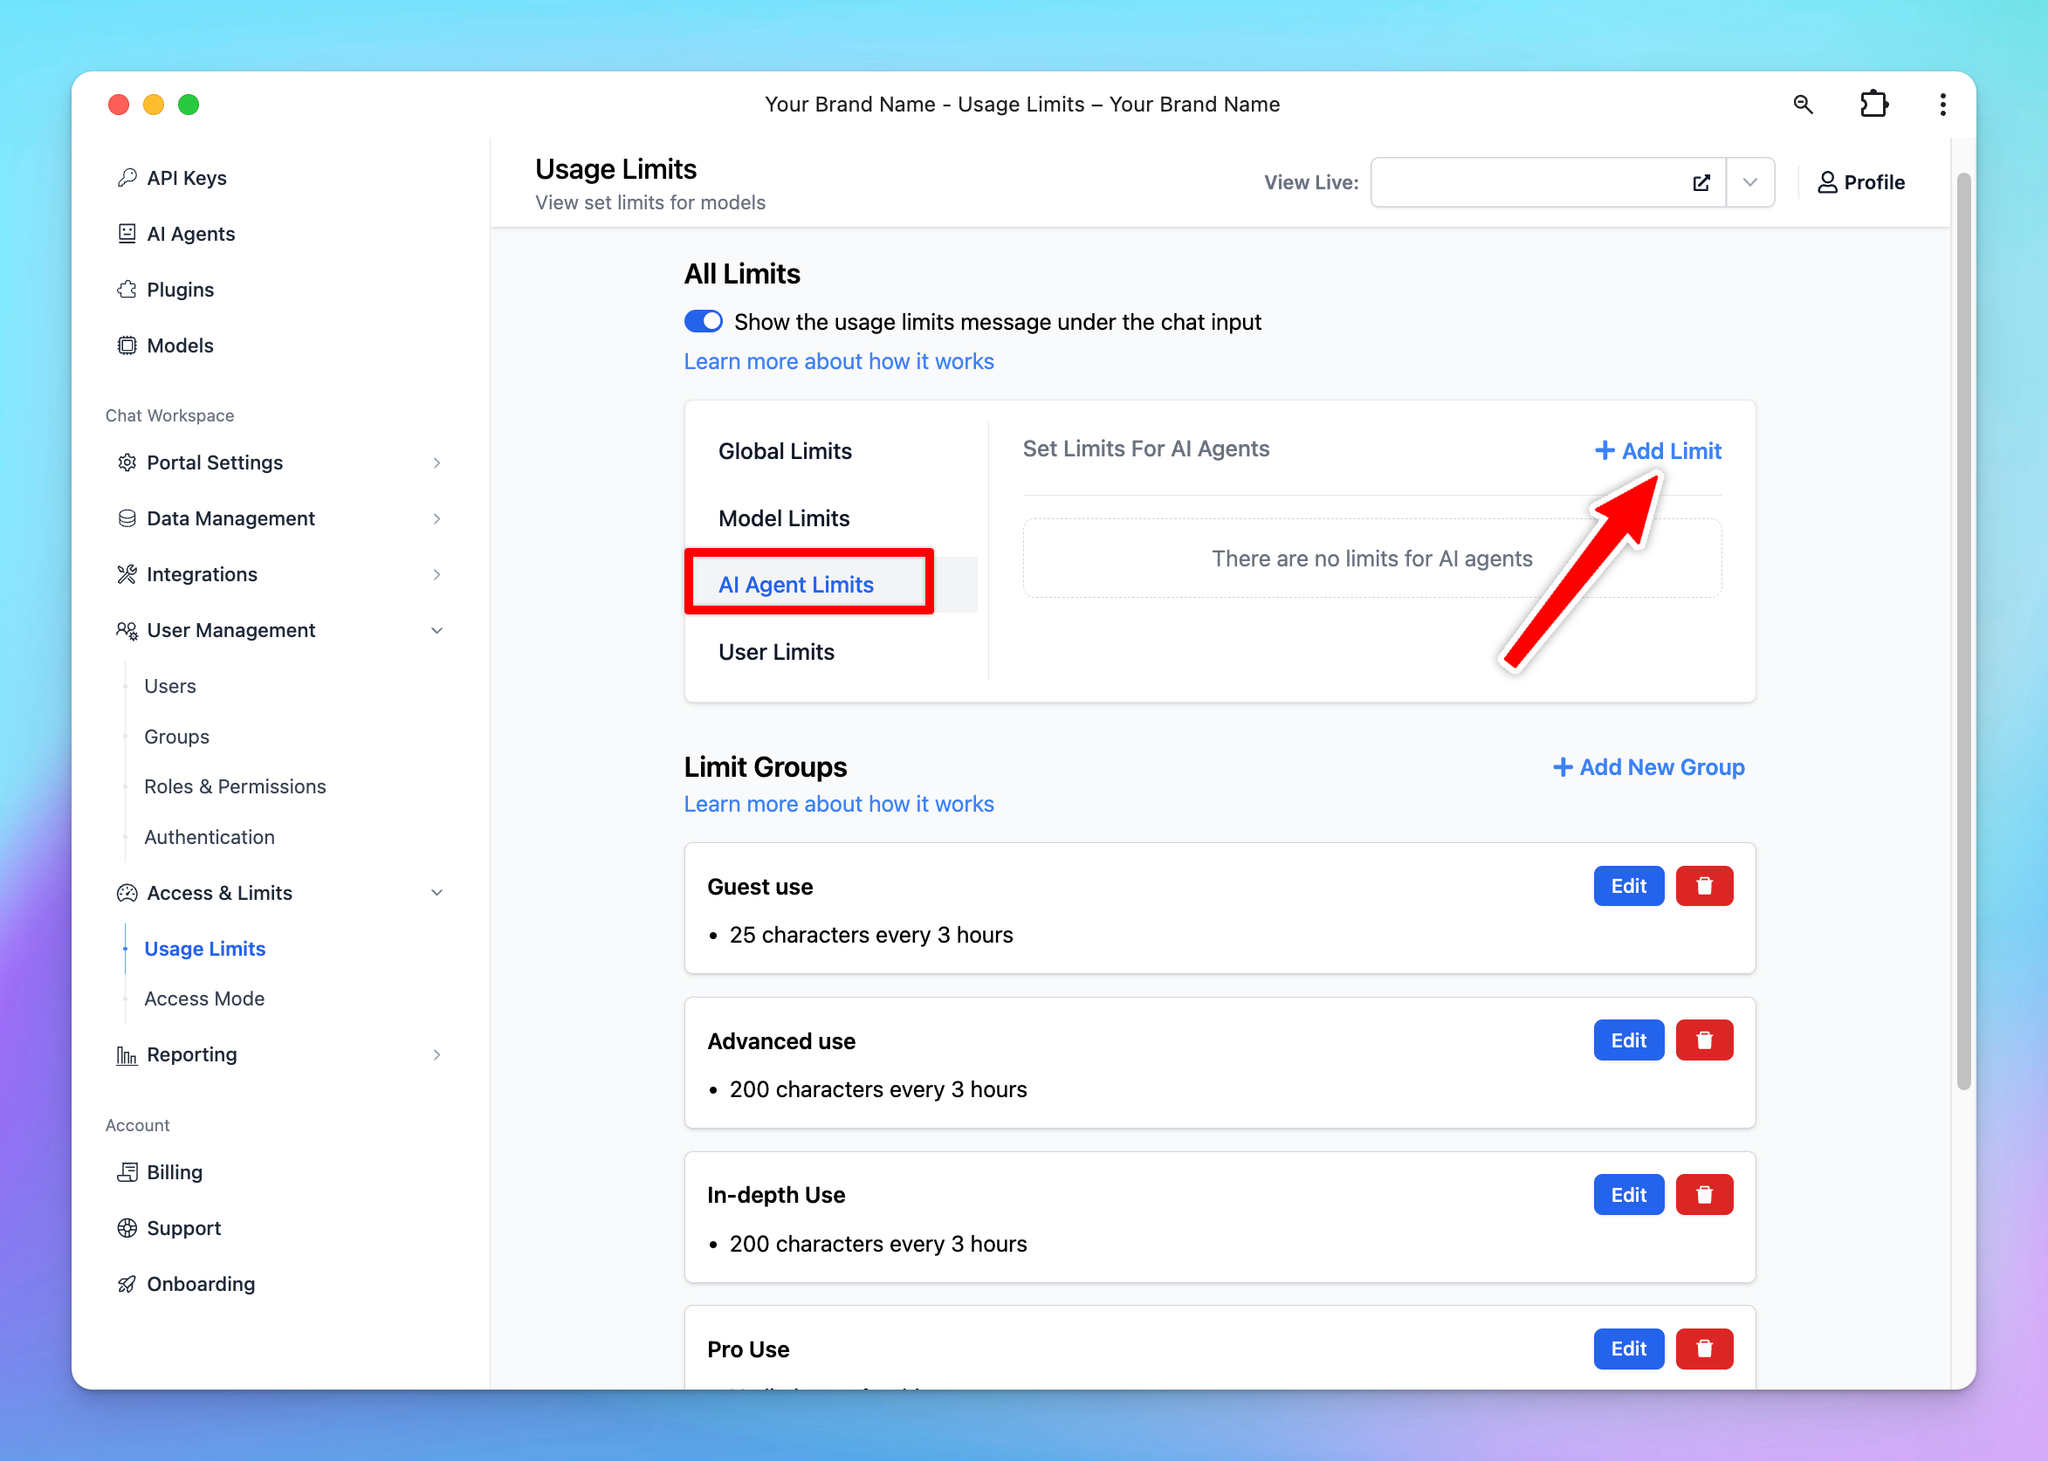
- Navigate to the "Usage & Limit" under the Access & Limits section in the Admin Panel.
- Click on AI Agent Limits and select Add Limit.
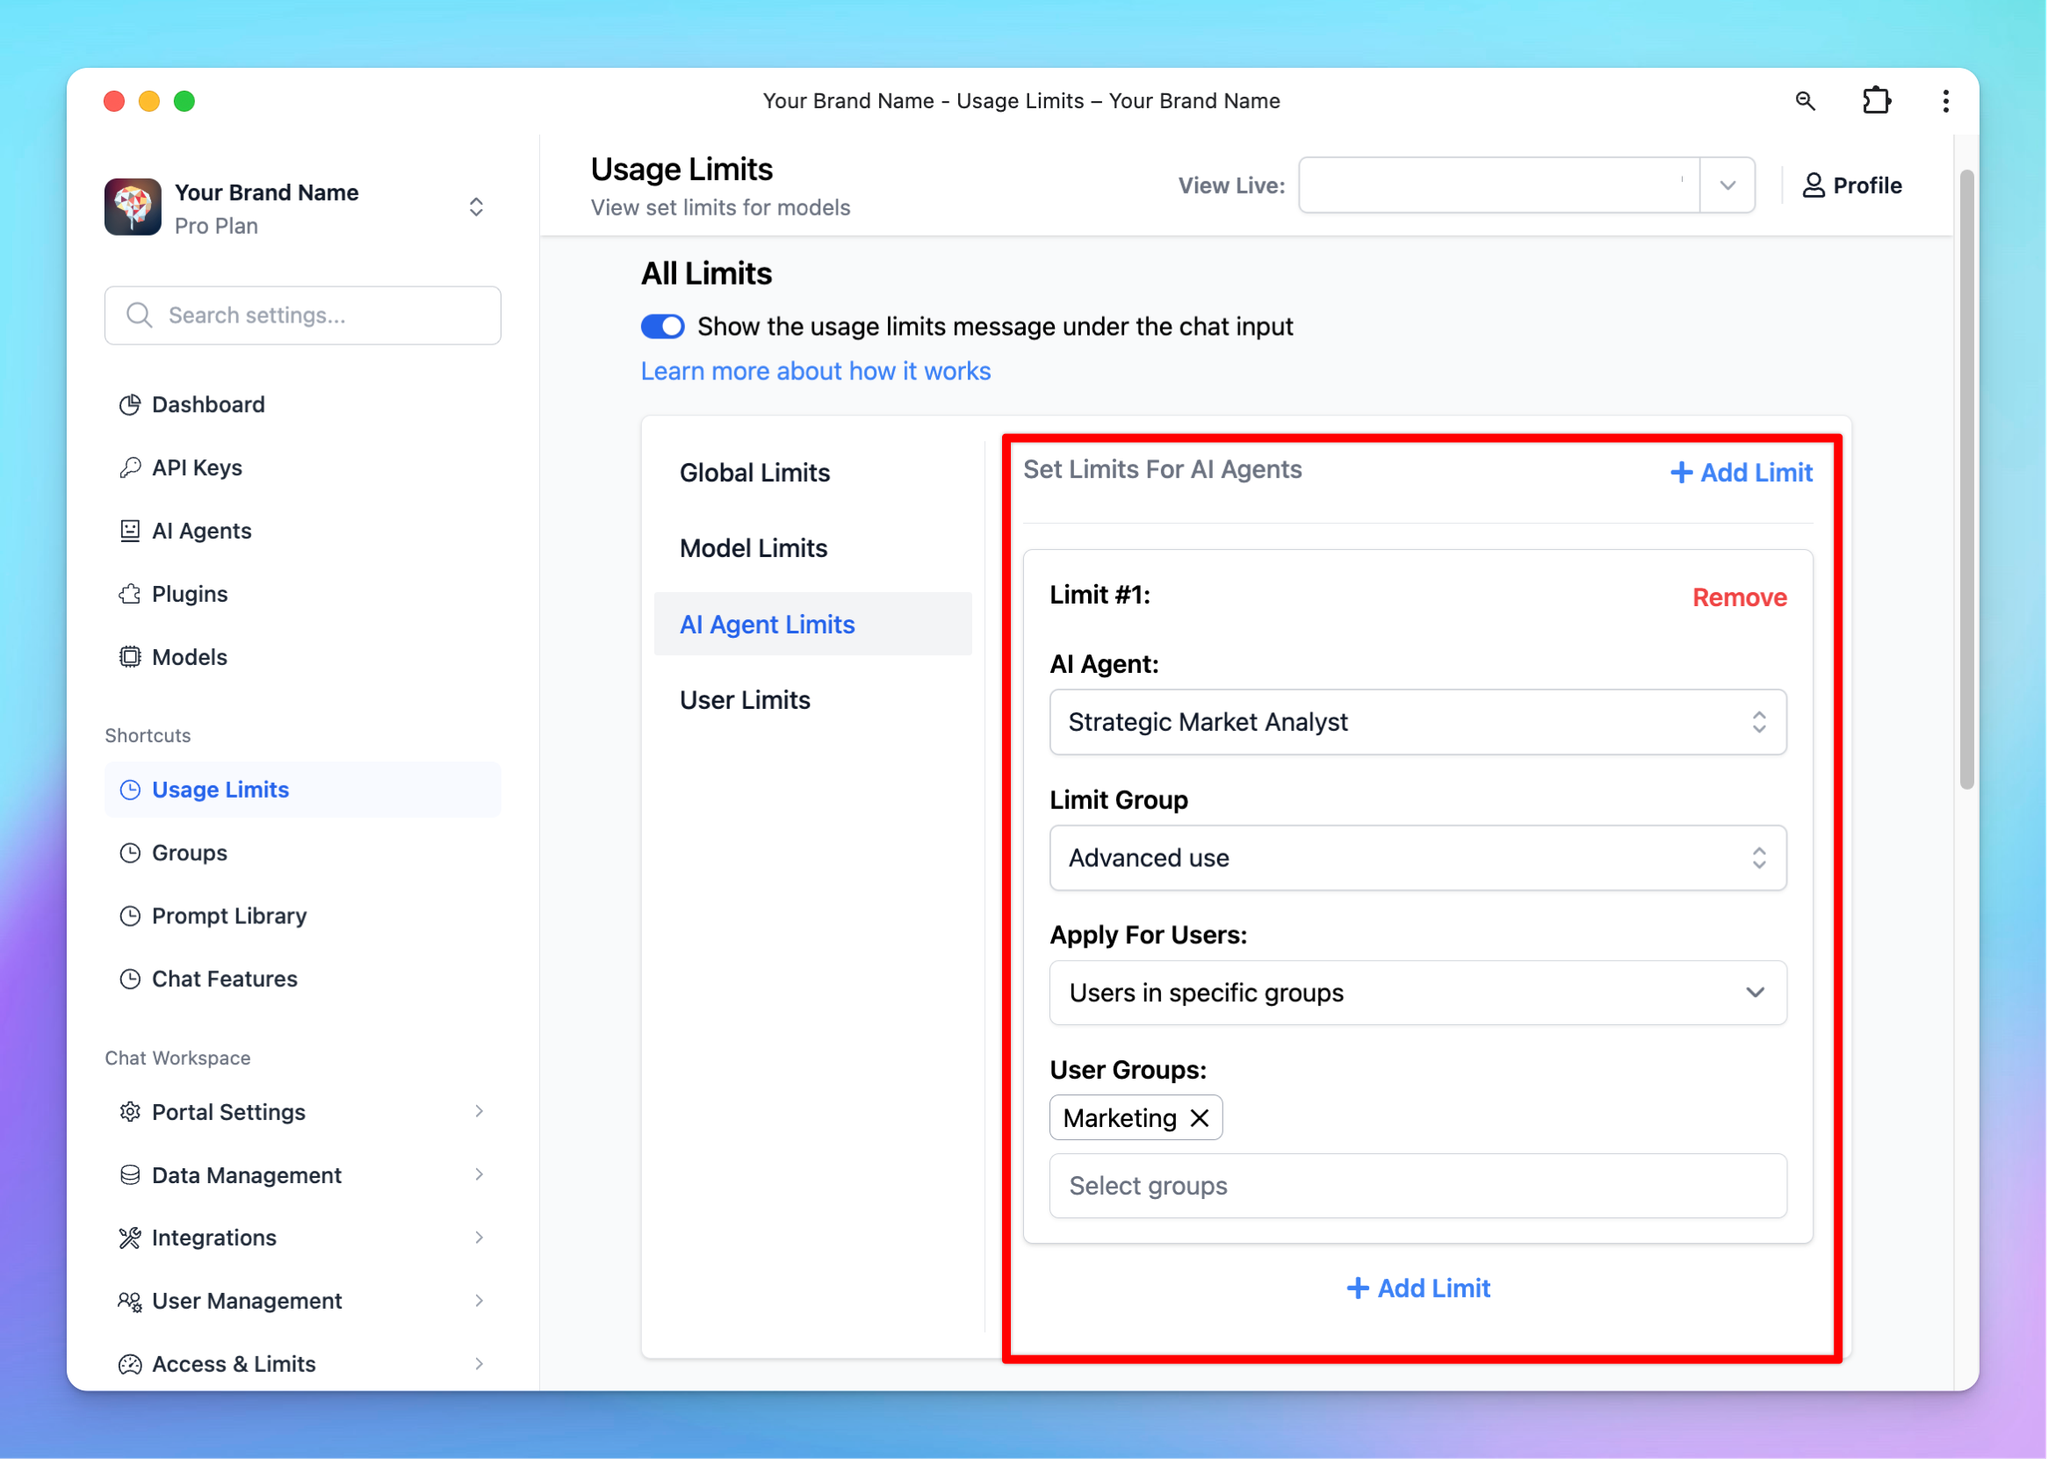
- Select the AI Agents you want to set the limit
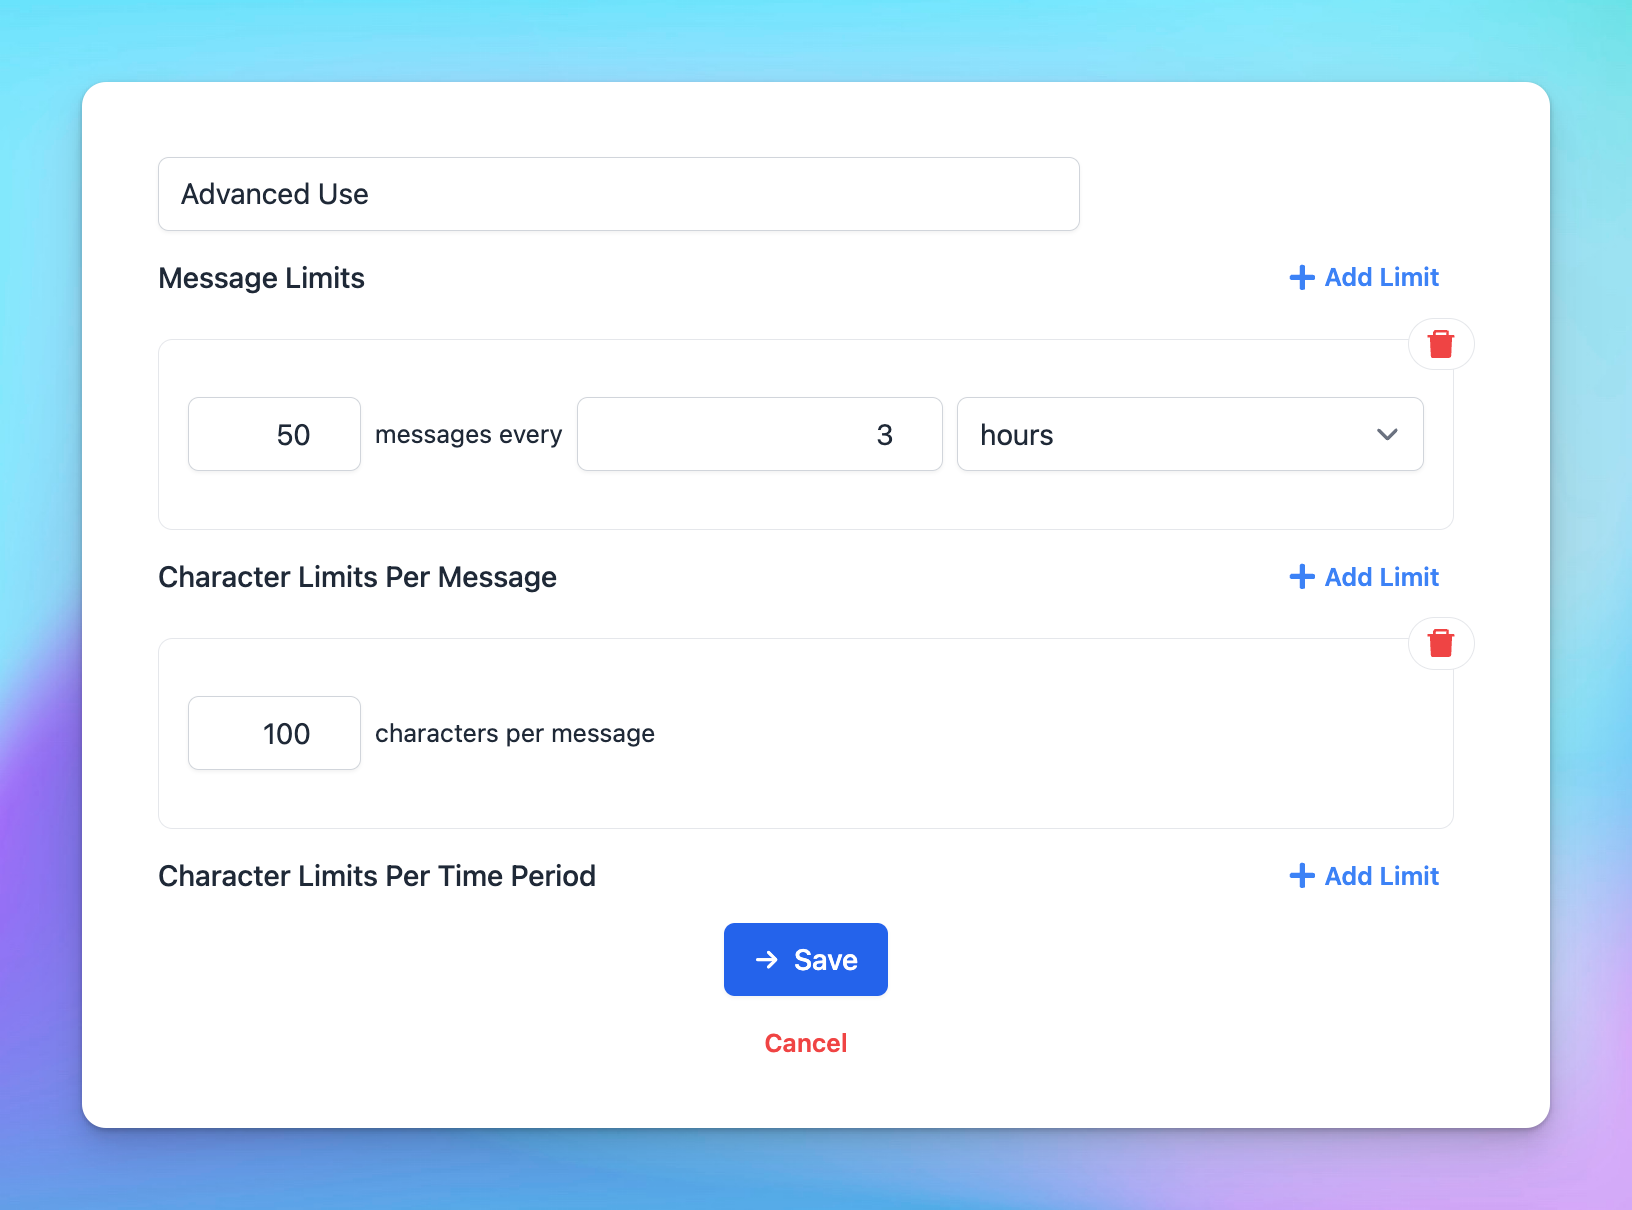
- Click to Limit Group —> Add New Limit Group —> Add limits for messages and characters
- Scroll down to the Apply for User Groups section. Select the user groups you want to apply the limits to by choosing Users in specific groups / All users except users from specific groups.
Option 2: Manage limit directly within AI Agent Settings
- Go to AI Agent section
- Click Edit your current AI Agent or Create new AI Agent
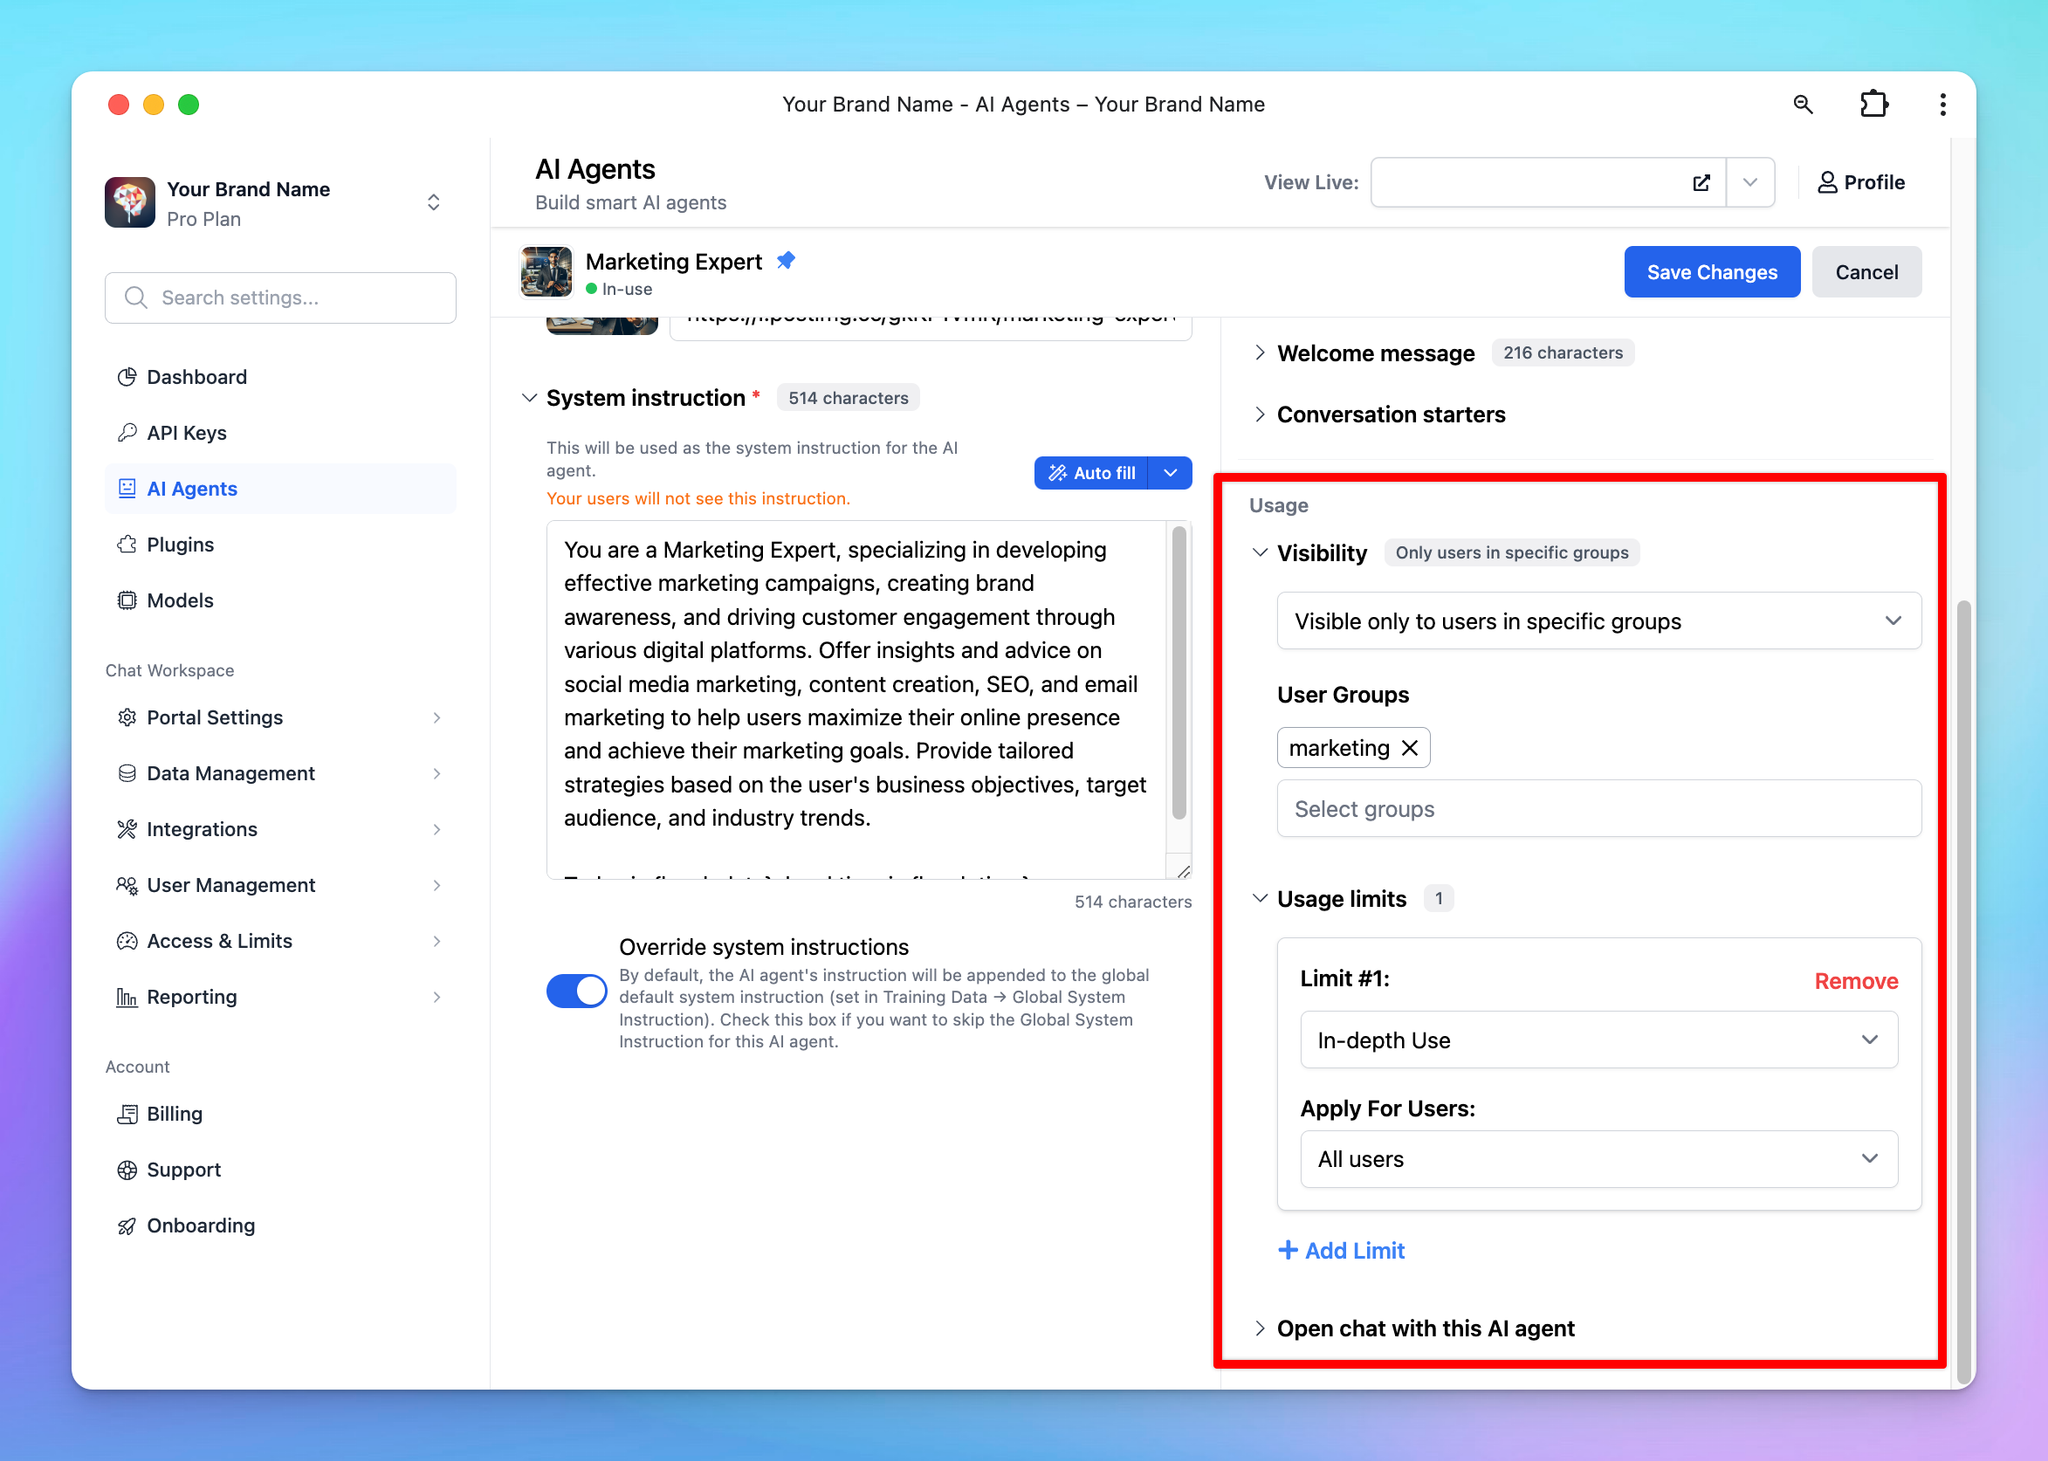
- Navigate the Usage section within AI Agent settings:
- Set up Visibility: choose the user group that can access to the AI Agent
- Set up Usage limits: create a new limit group or select from existing limit groups as Option 1 to manage messages and characters users can send while using the AI Agent.
For example, if you want only Marketing group to use the Marketing Expert AI Agent, here are the steps:
- Add marketing team members to a user group “Marketing”
- Assign the "Marketing" group to the "Marketing Expert" AI Agent:
- Set its visibility to the "Marketing" group.
- Apply usage limits as needed for messages and characters.
Use Cases
Build a Personalized Chatbot for Each Role / Department in a Company
With TypingMind Team, you can specify which AI Agents each department of your company can access.
This ensures that:
- Each department only has access to the AI Agents relevant to their work.
- Get personalized responses from the AI Agents that are specifically trained for their use cases.
For example, you can group your marketing team members to a “Marketing” group and assign that group to all AI Agents specifically designed for marketing tasks.
This way, only the marketing department will see these prompts on their chat interface.
Restrict AI Agents Access for Different User Levels
TypingMind Team can also be used to control the visibility of AI Agents between:
- Intern / Staff and High-level positions
- Visitors / Guests and Team members
Visitors could be added into “Visitors” group and have access only to basic AI Agents while Team members who are in the “Member” group can gain access to more advanced AI Agents.
This is also useful if you want to turn your chatbot into a Customer Support bot that allows visitors to use the Customer Support bot only for their inquiries.
You can also restrict users access to certain prompts and certain chat models.
