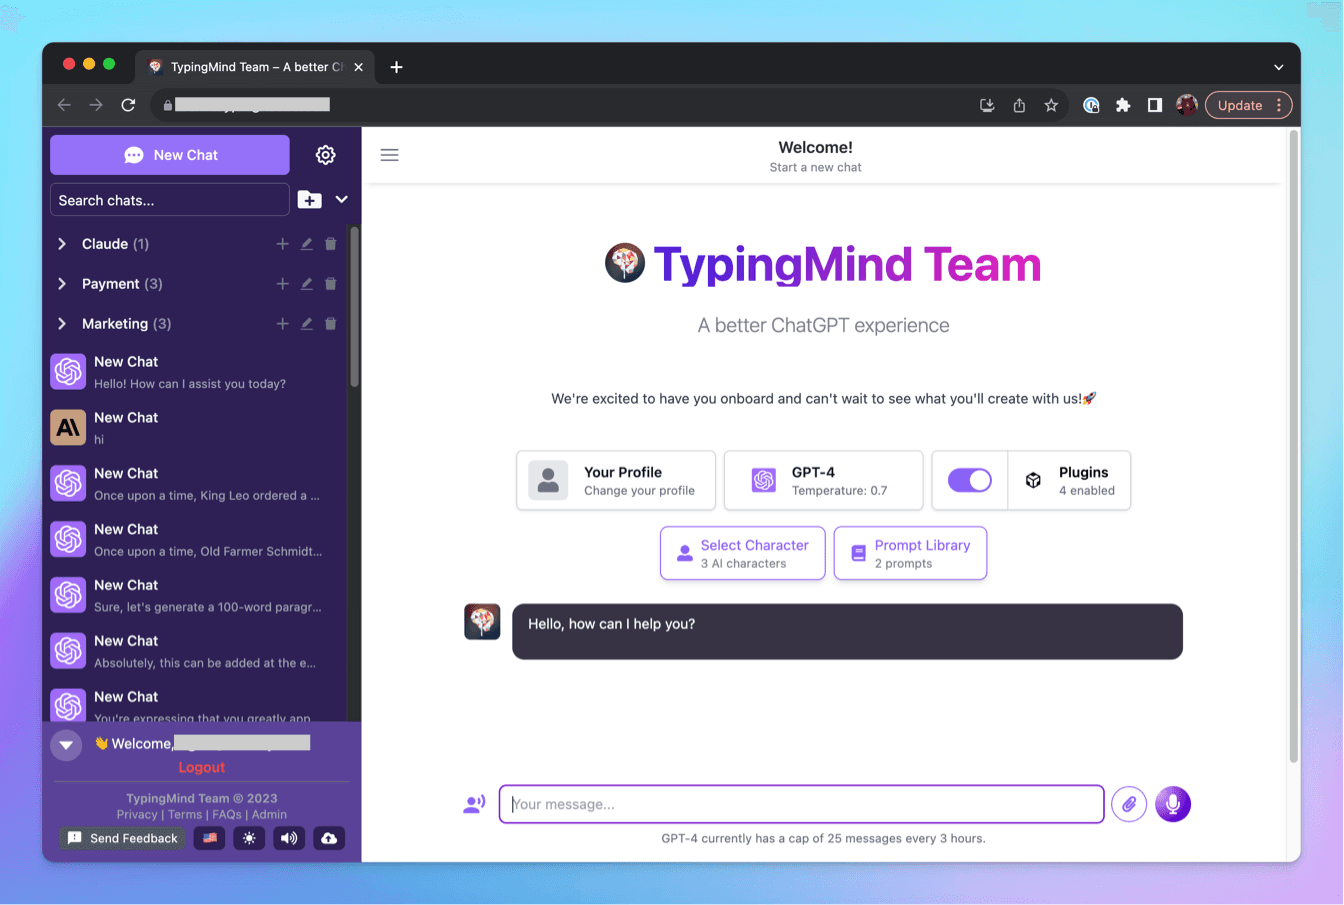
Personalize your chat instance to match your brand identity. From branding elements to custom messages and themes, gain control over how your chat interface should look and feel.
1. Brand Your Chat Instance
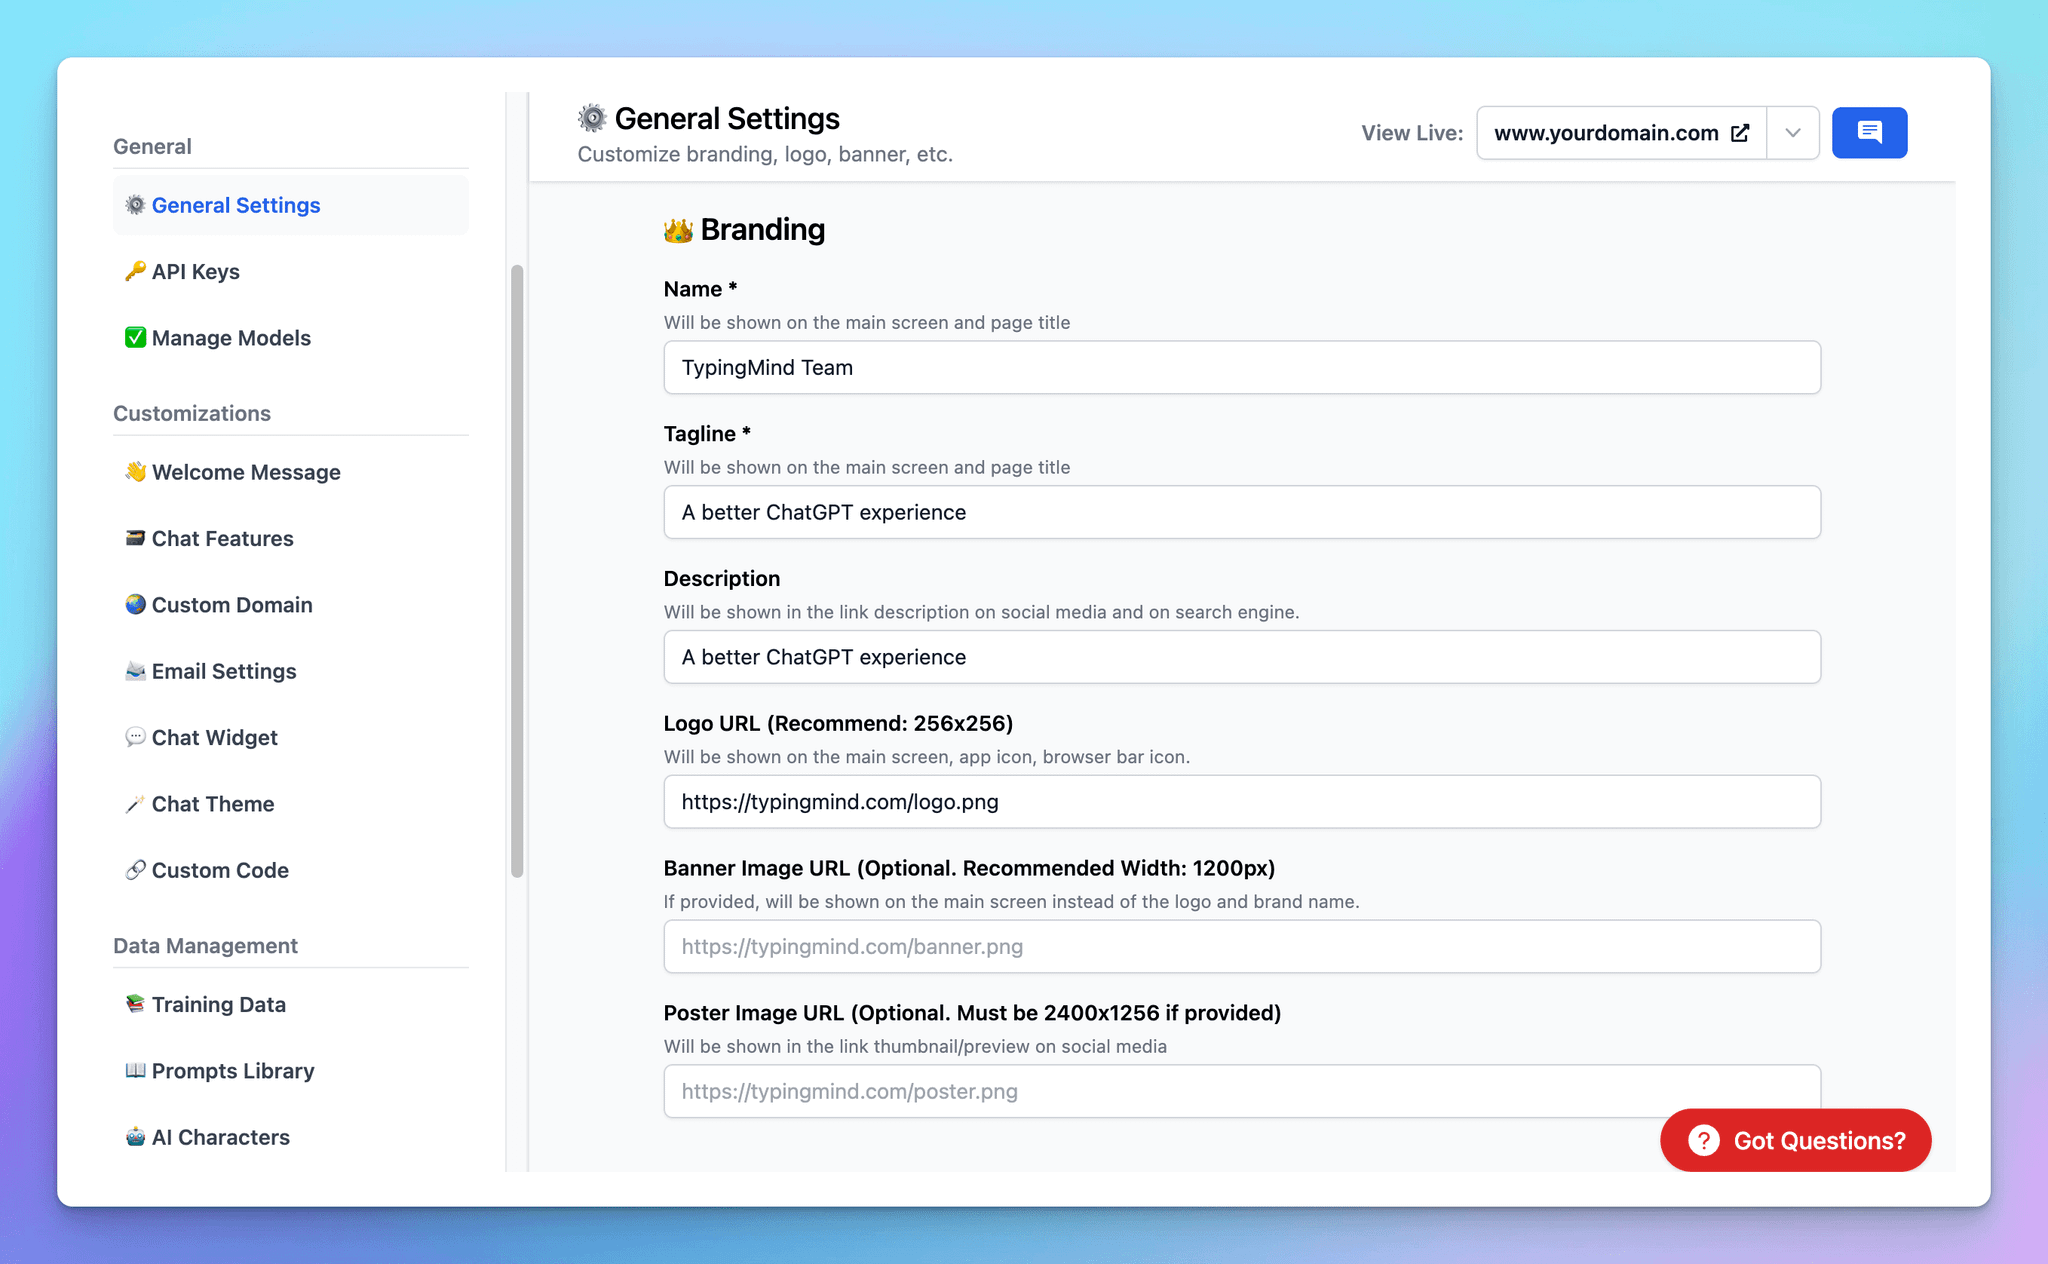
Start by branding your chat instance with your company's name, logo, and tagline.
Go to General Settings > Scroll down to the Branding section
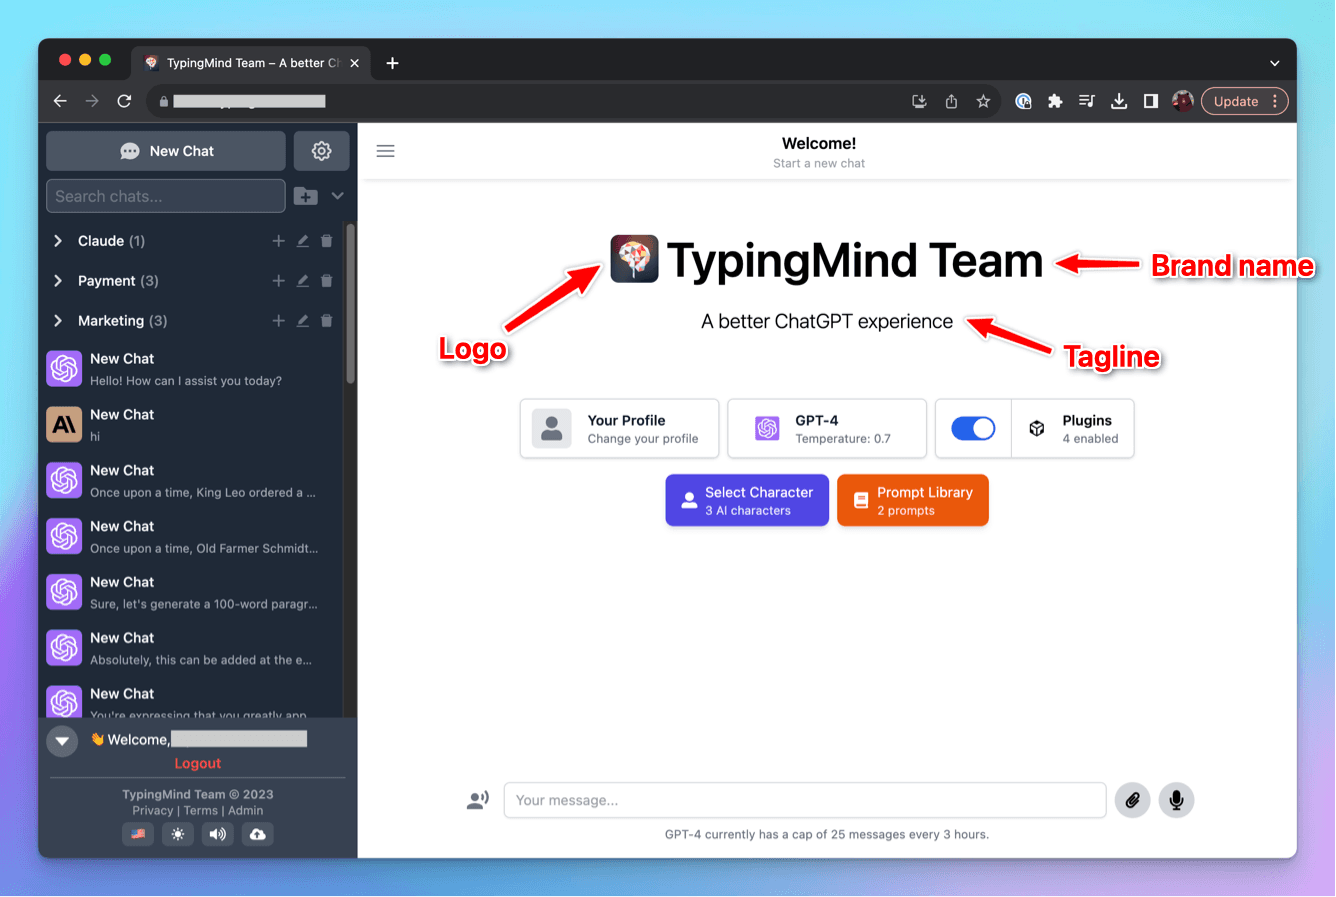
This is how your branding setups will appear on your Chat Interface:
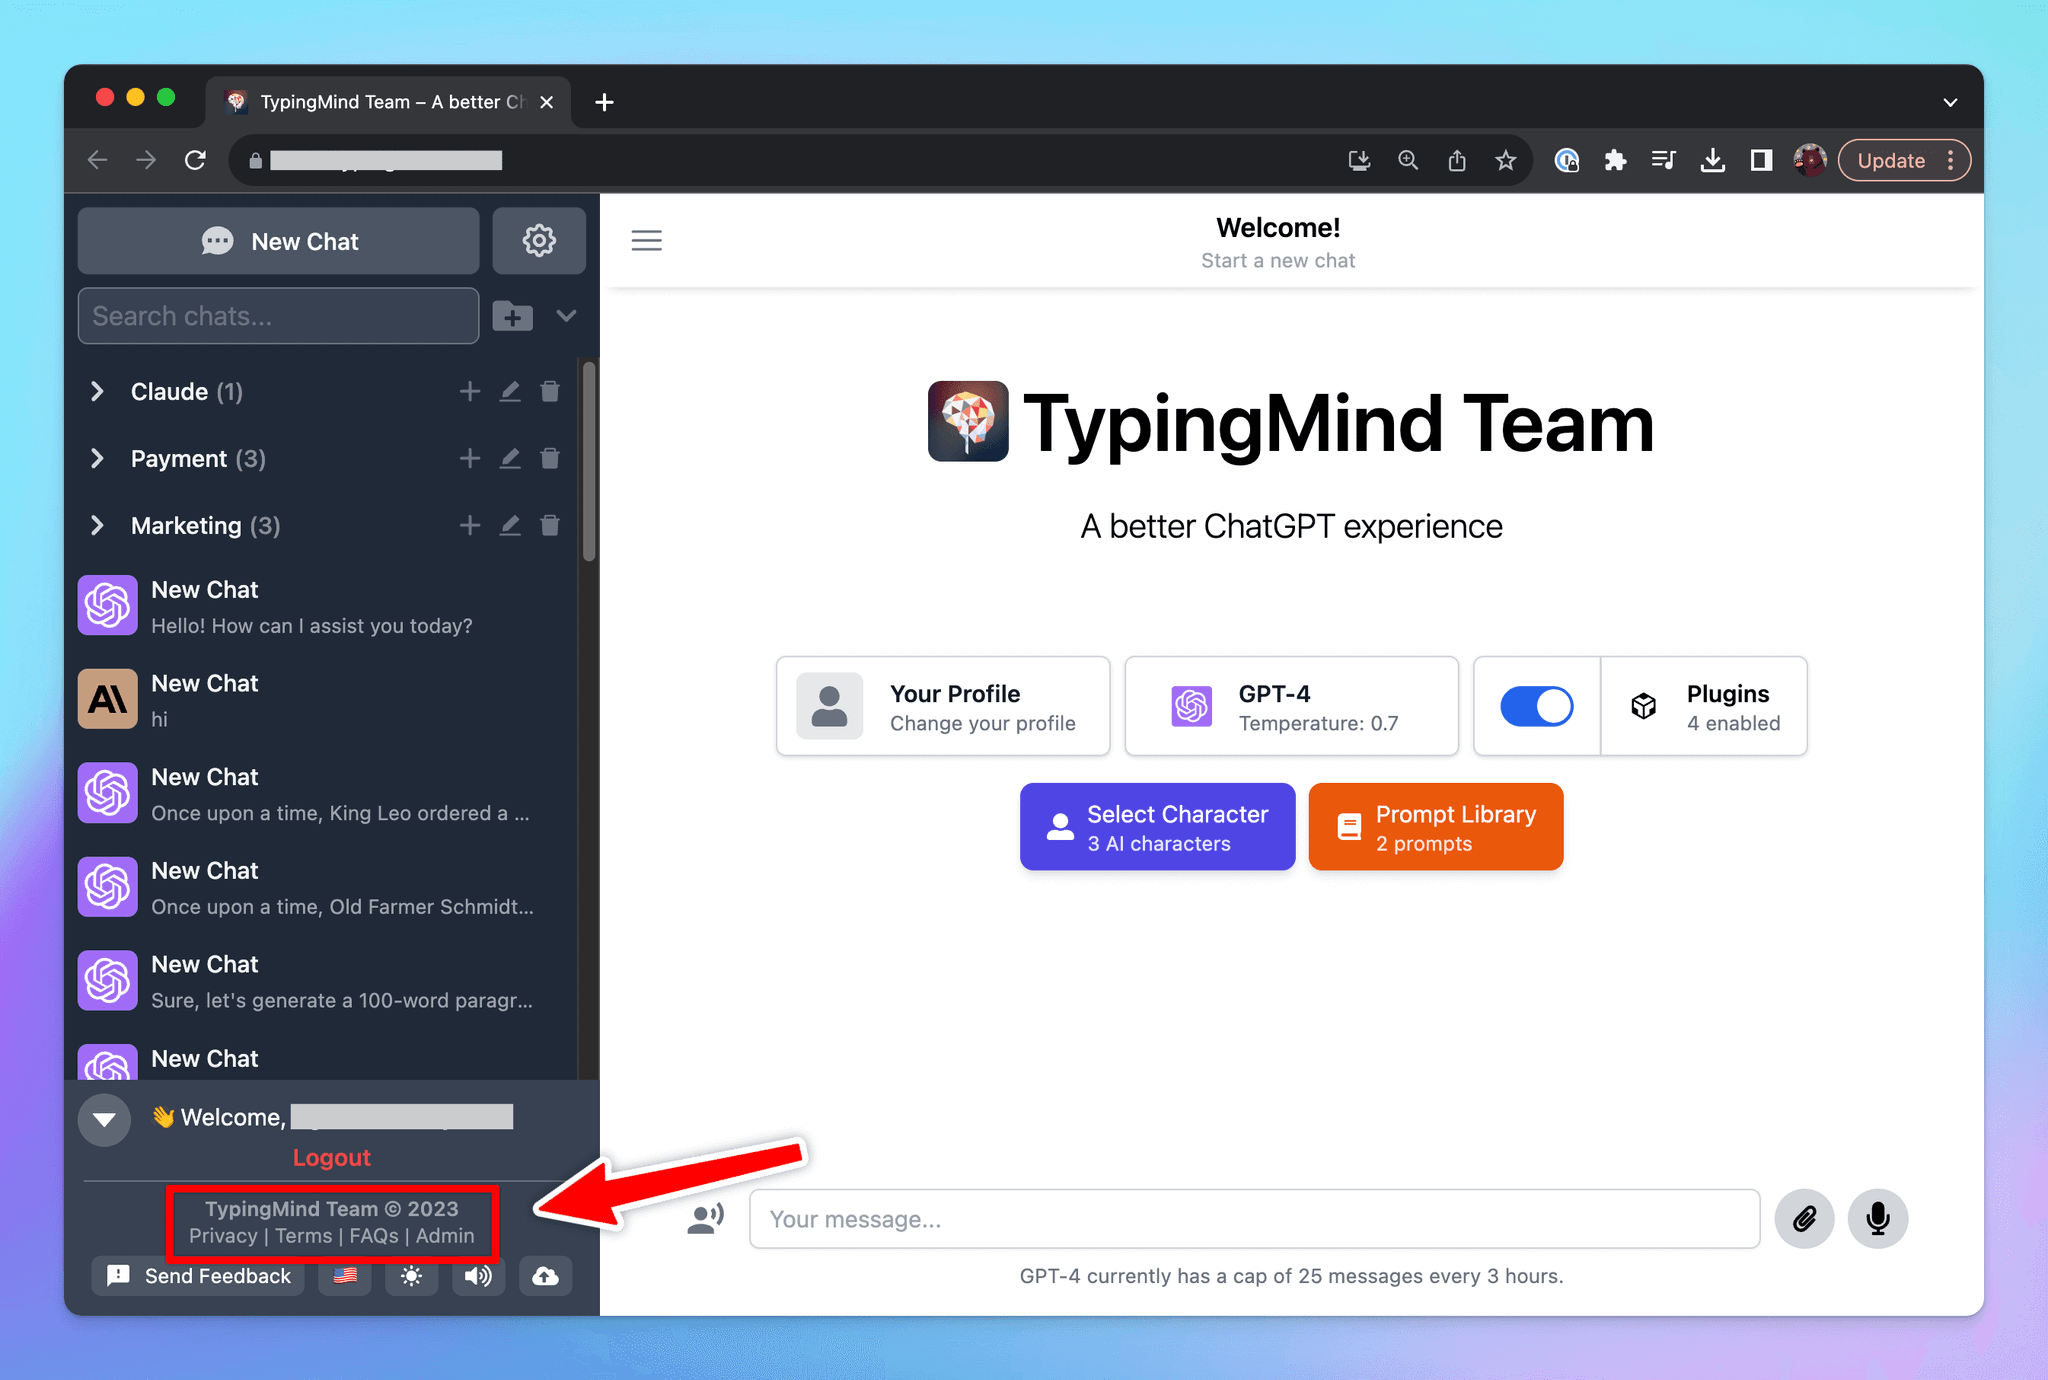
2. Customize Footer Links
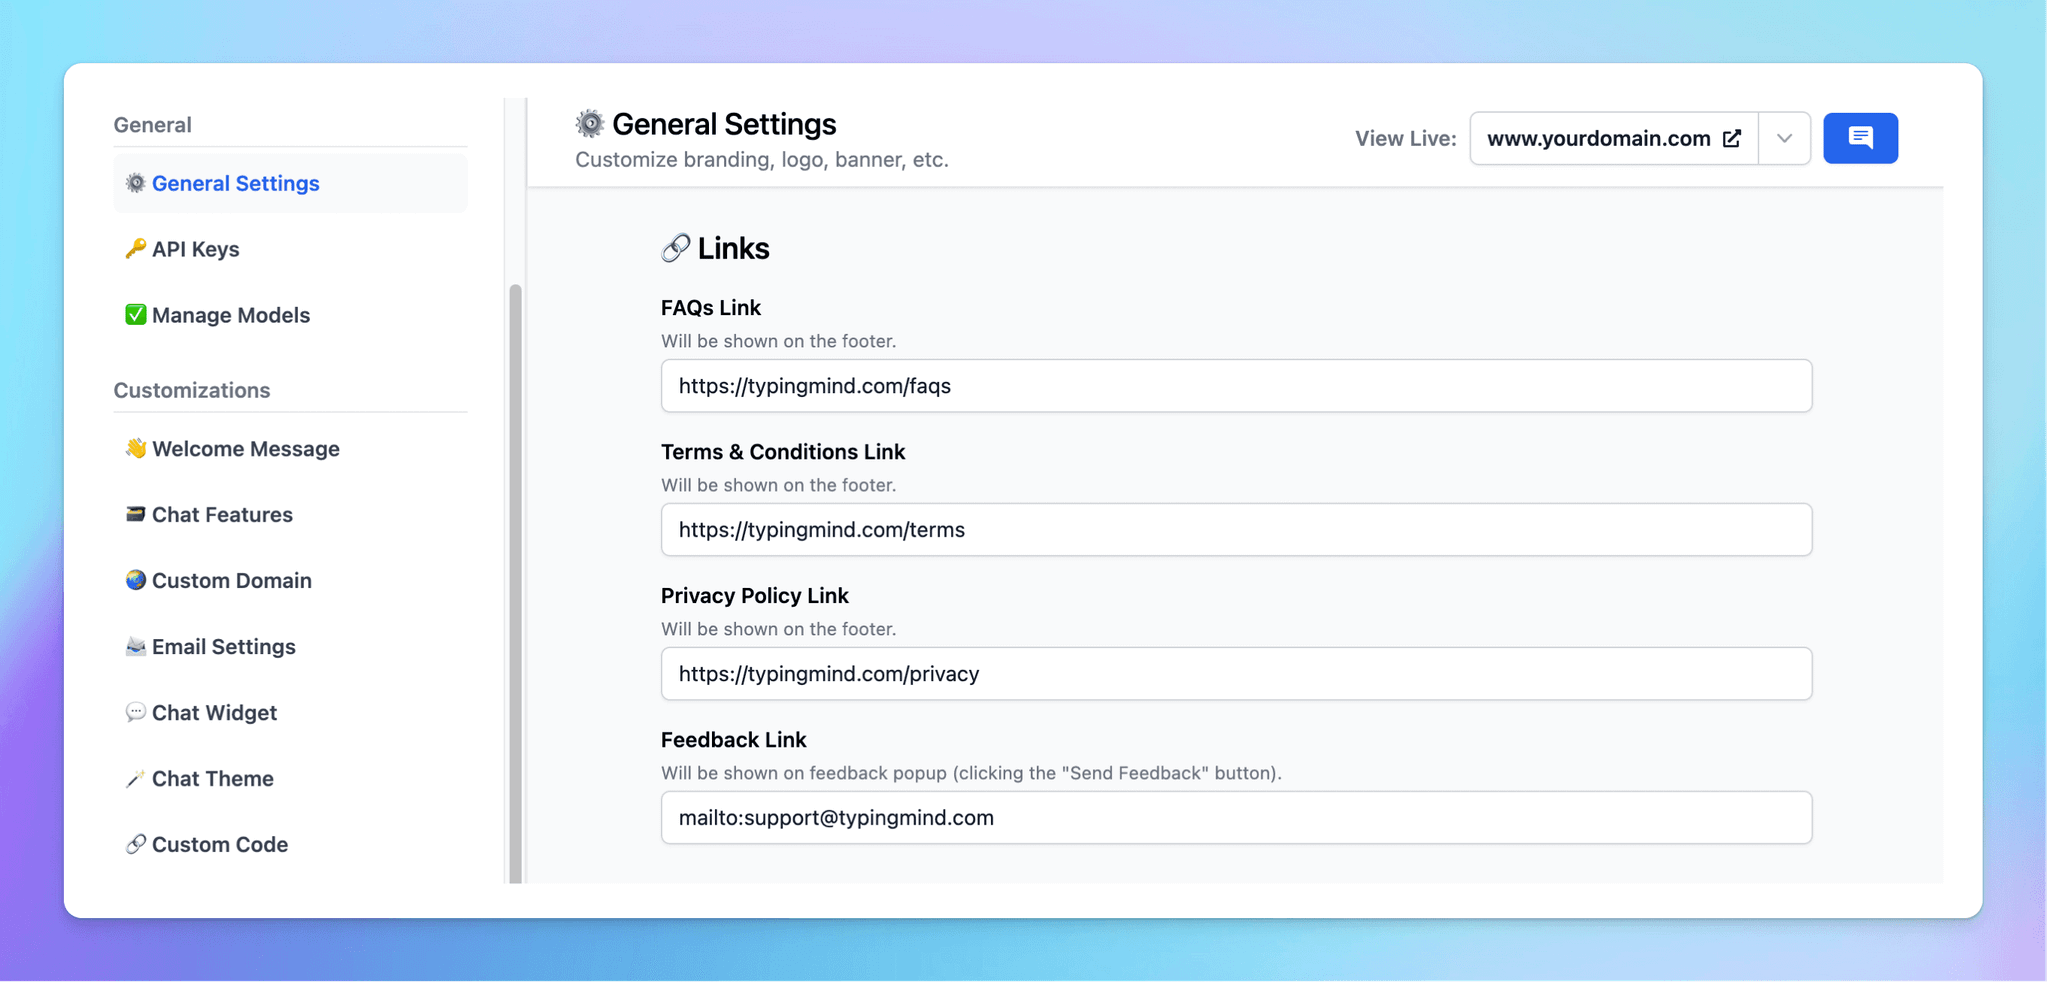
Customize the footer links with your FAQs, Terms & Condition, Privacy Policy, and Feedback email.
Go to General Settings > Scroll down to the Links section
Here’s how it looks on the chat UI:
3.Change the Document Links
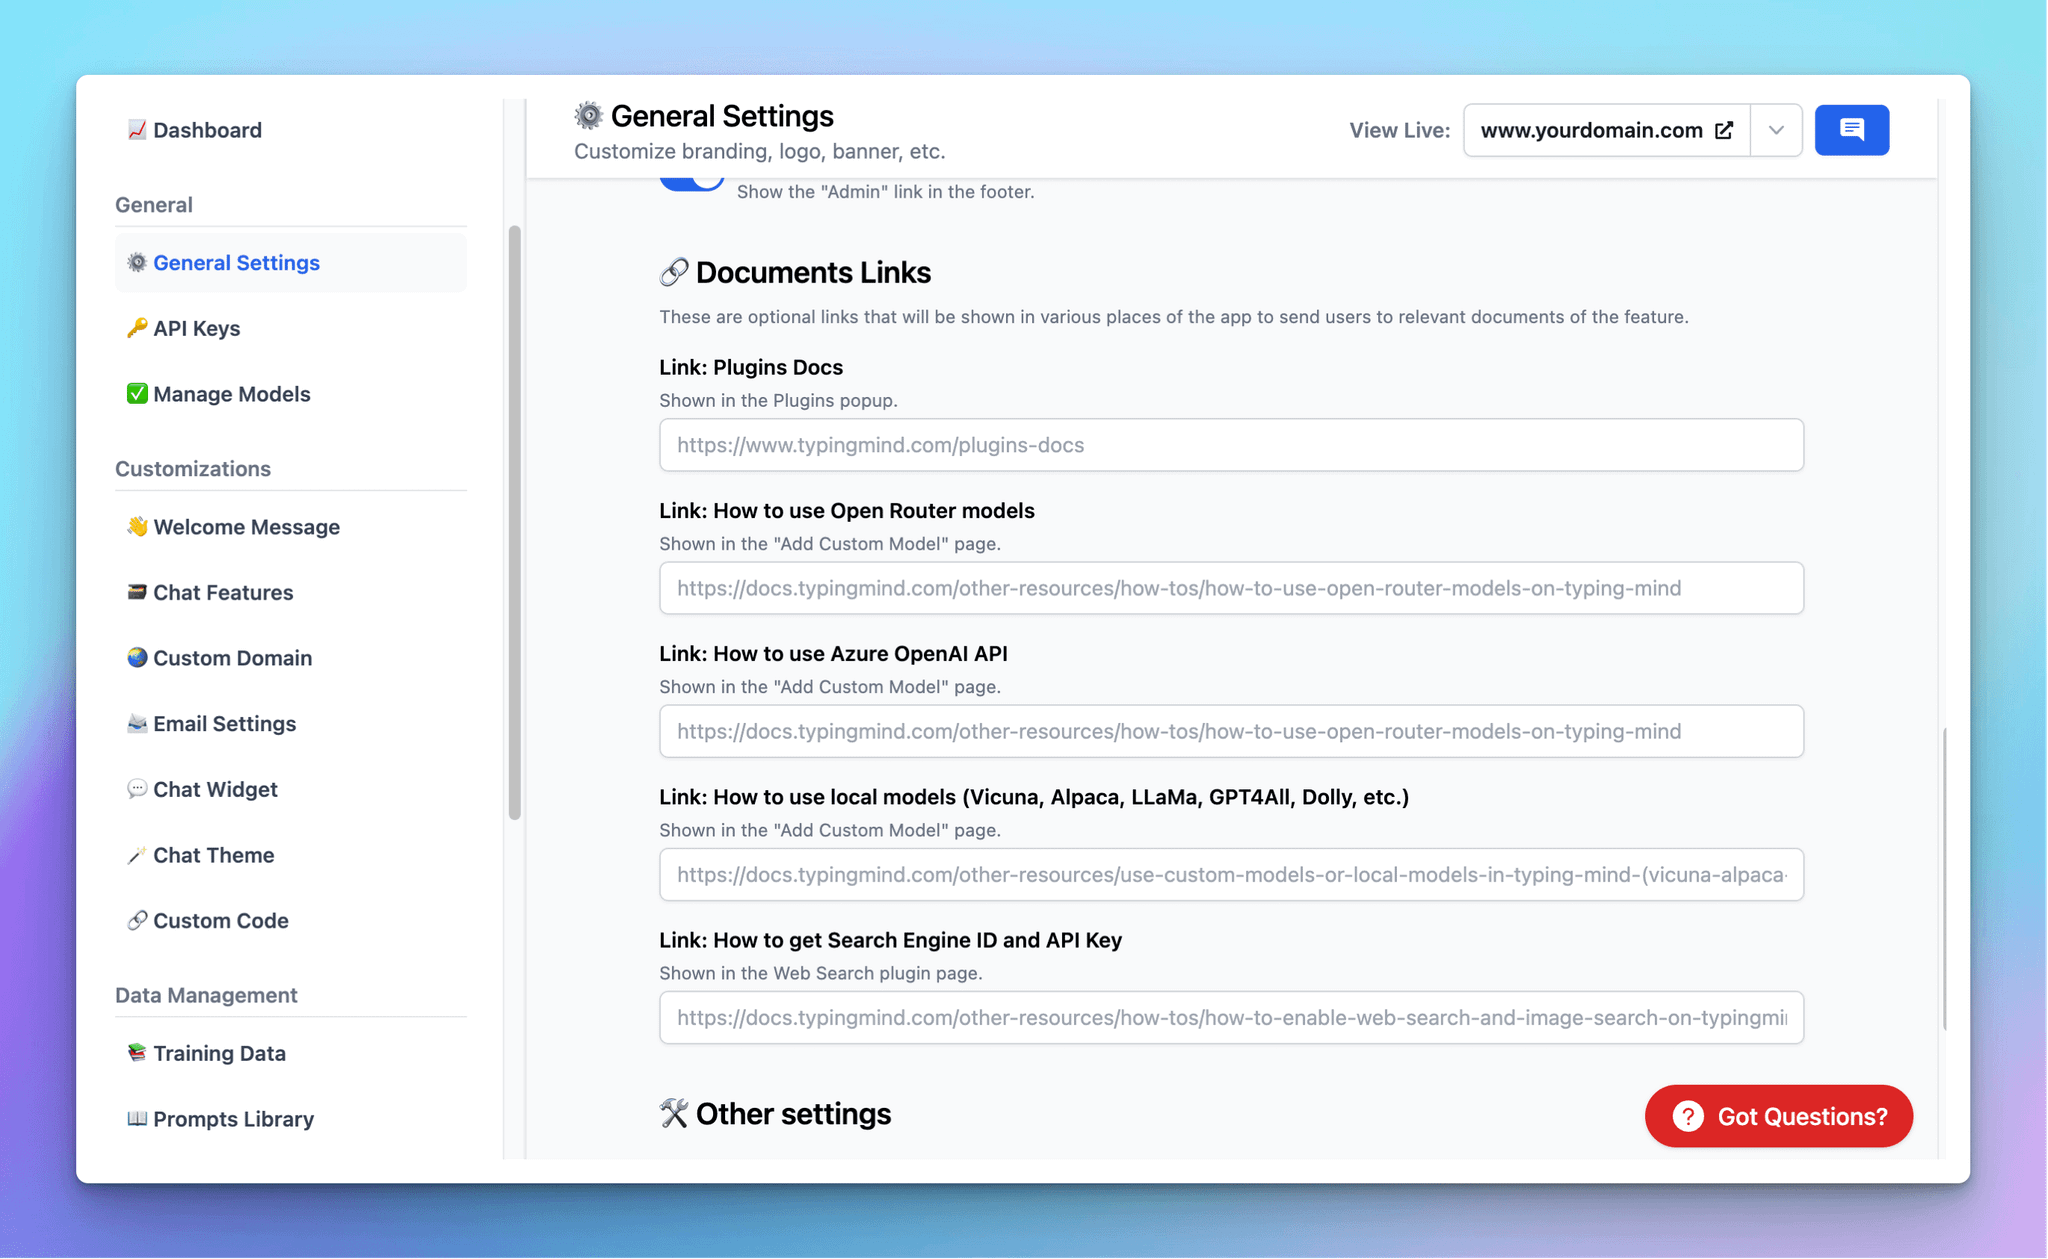
You can change the document links that are included within the chat interface such as Plugins docs, OpenRouter guide, Azure OpenAI guide, etc.
4. Customize to your local language
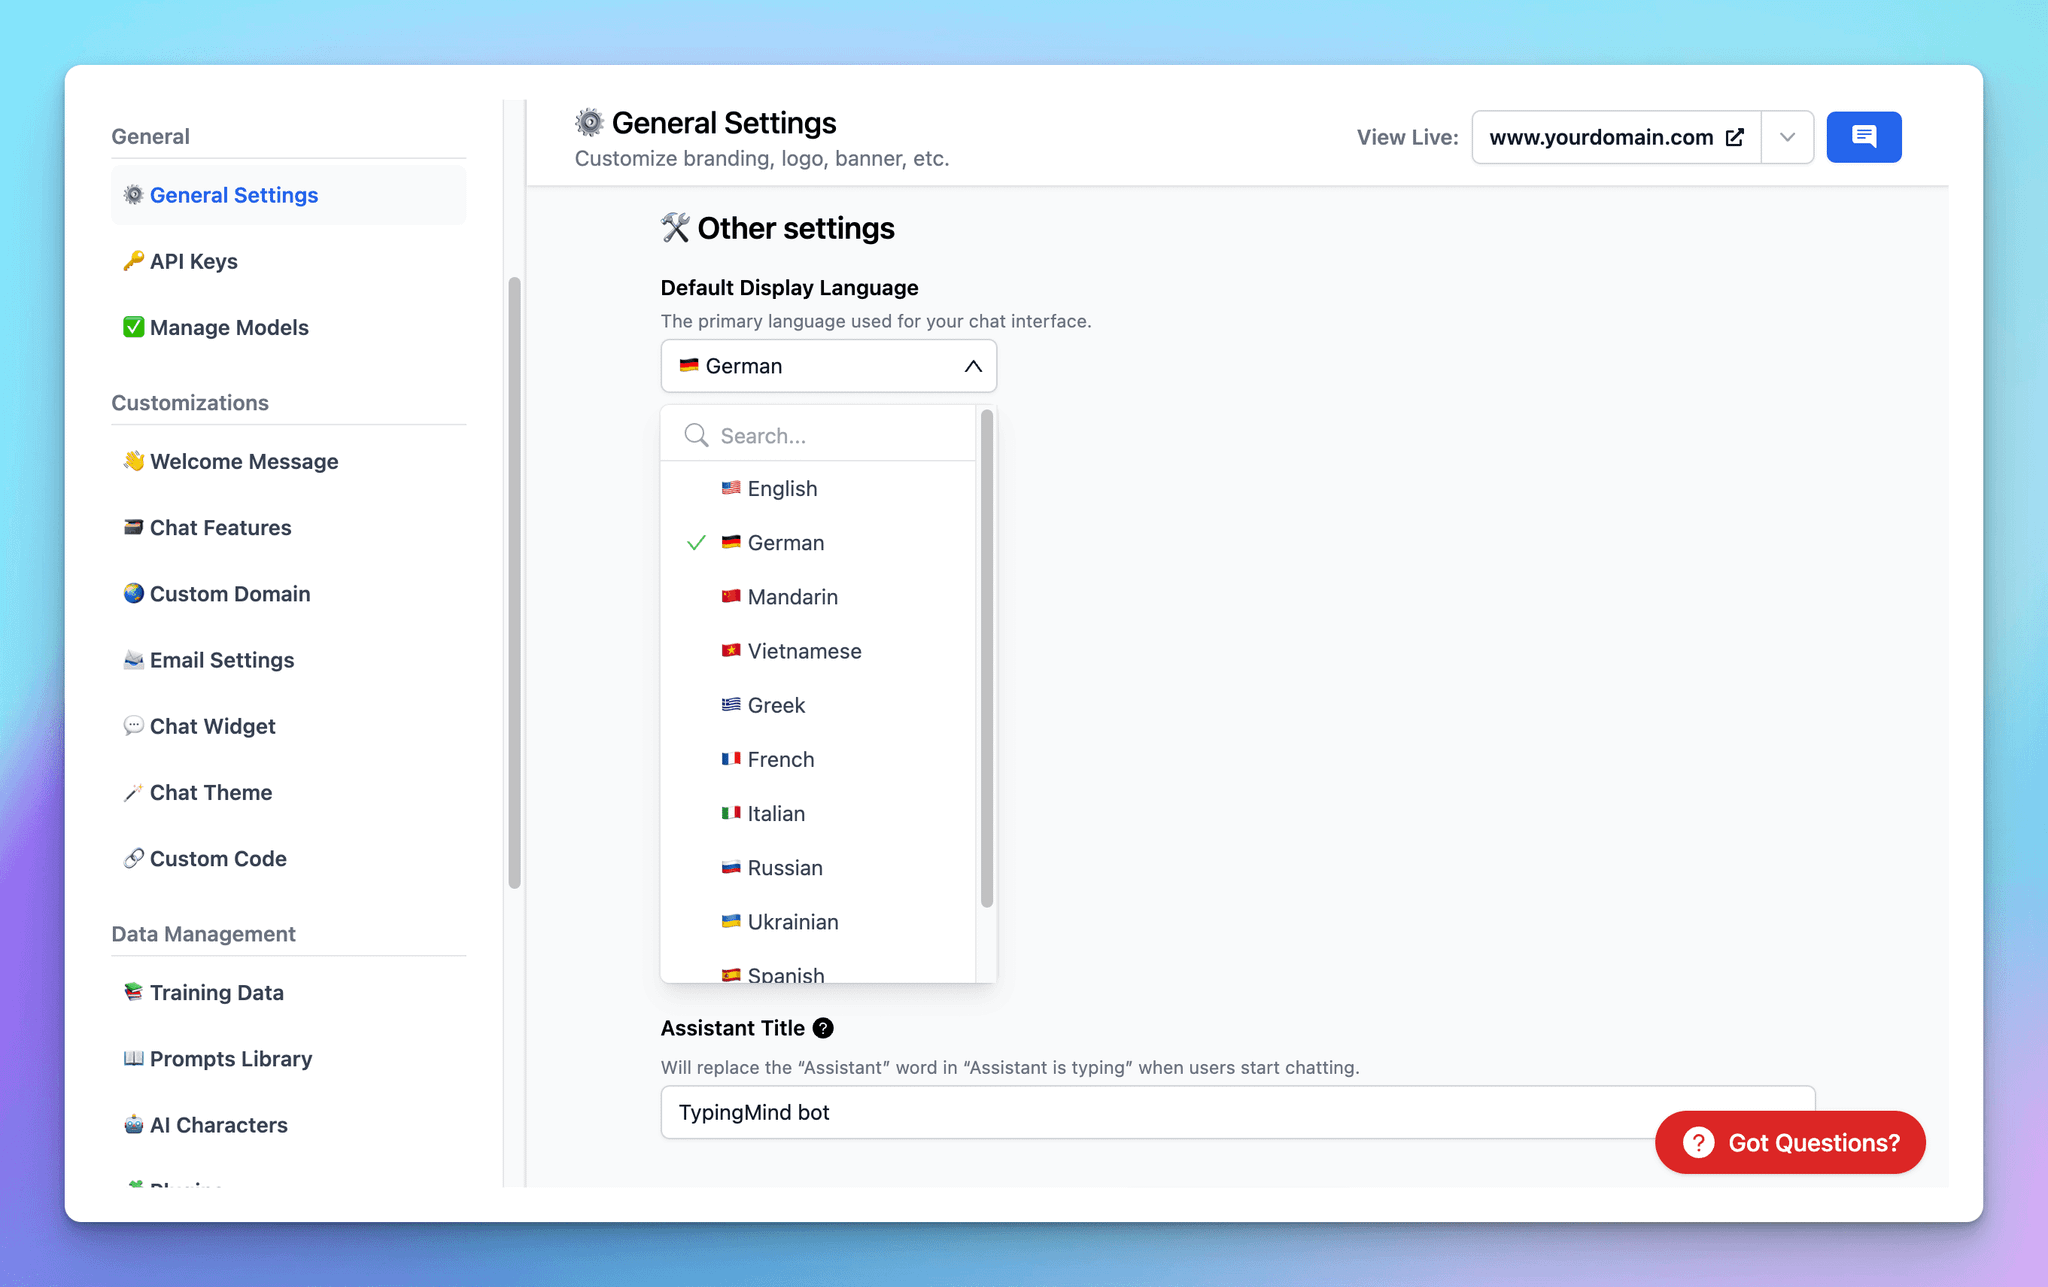
Adapt the chat interface to your local language to enhance user engagement.
Go to General Settings > Choose your preferred language for the UI
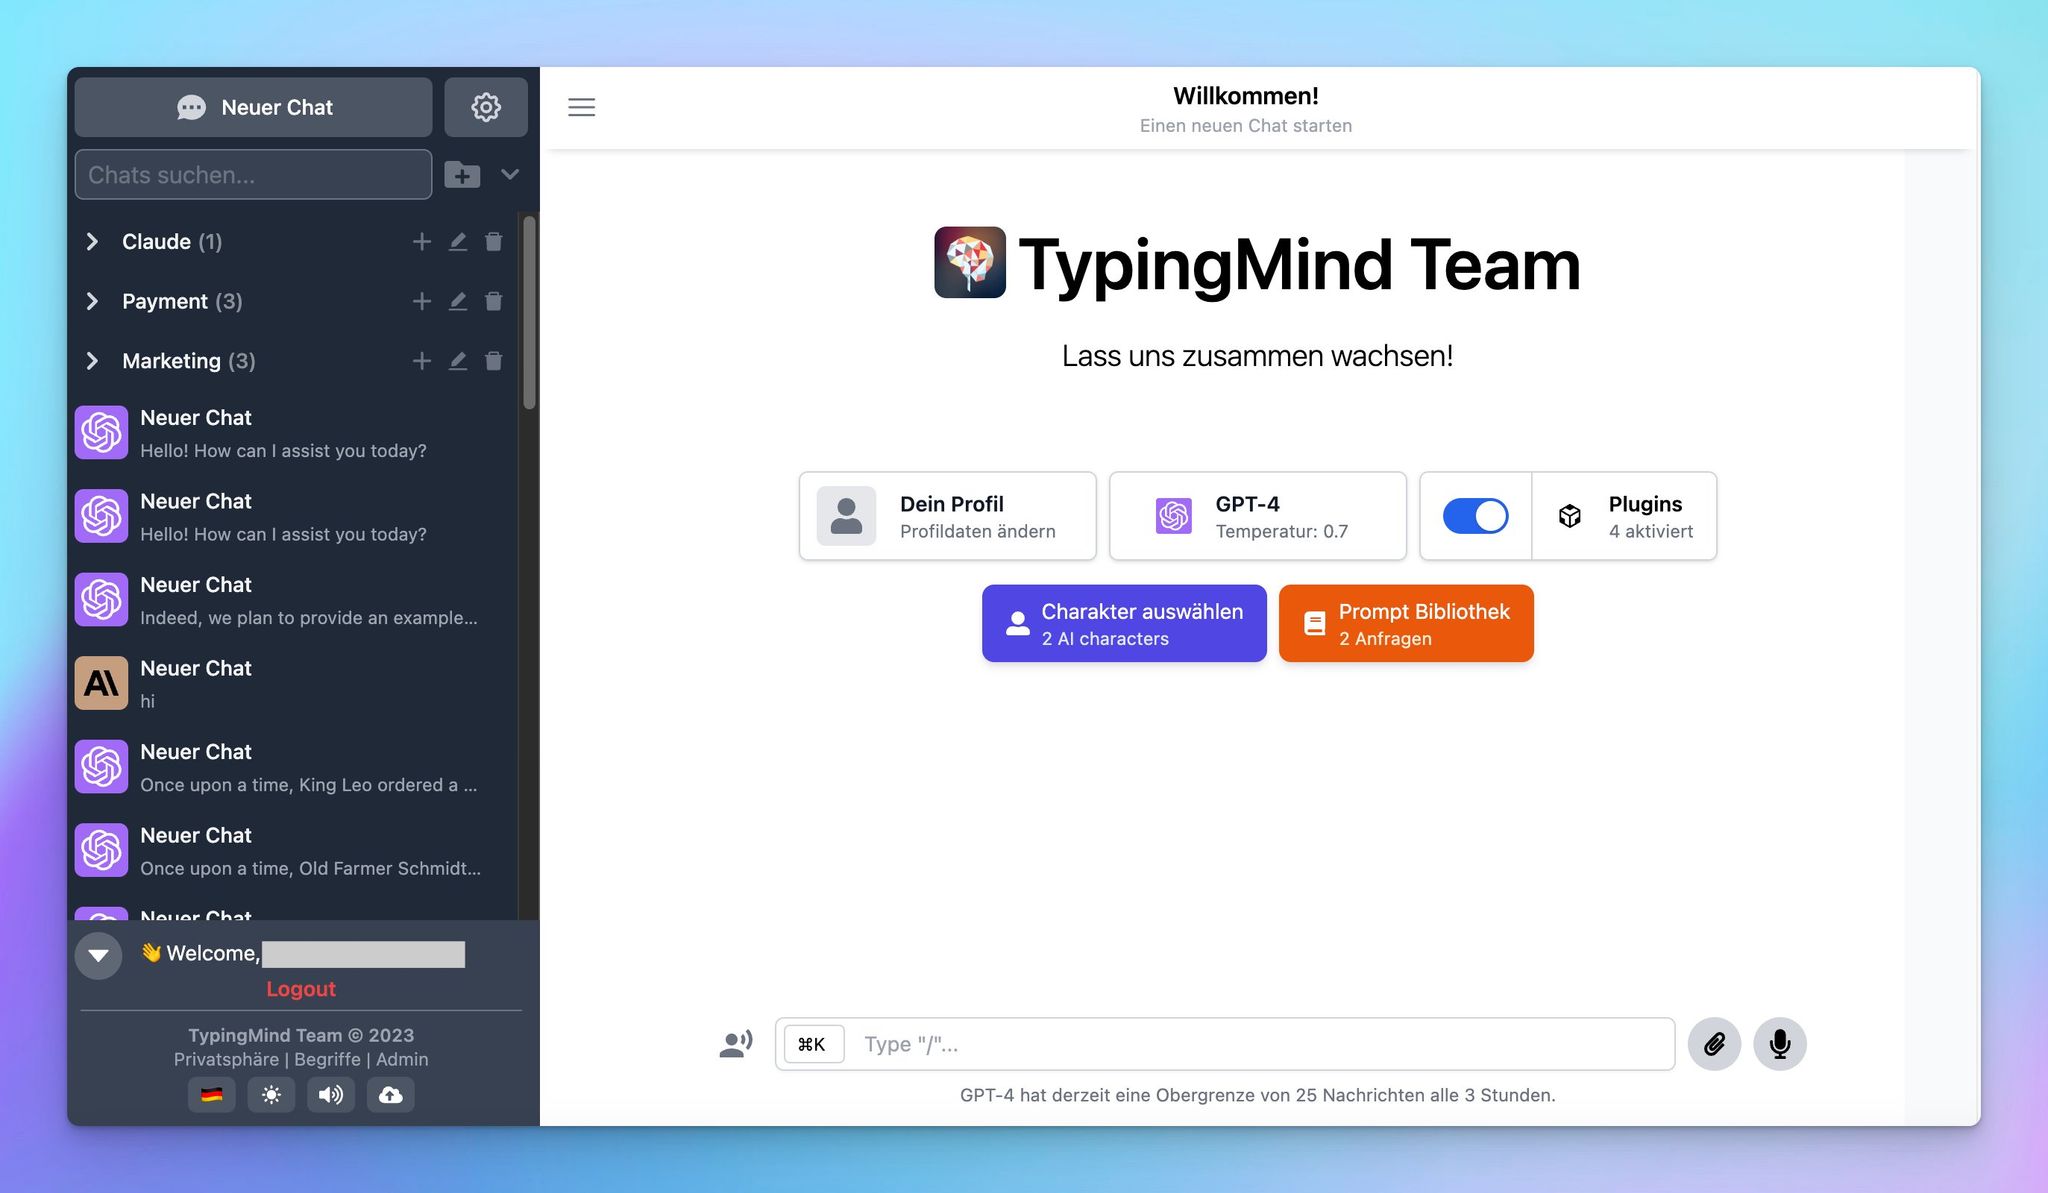
Here’s how it looks on the chat interface:
5. Edit Welcome Messages
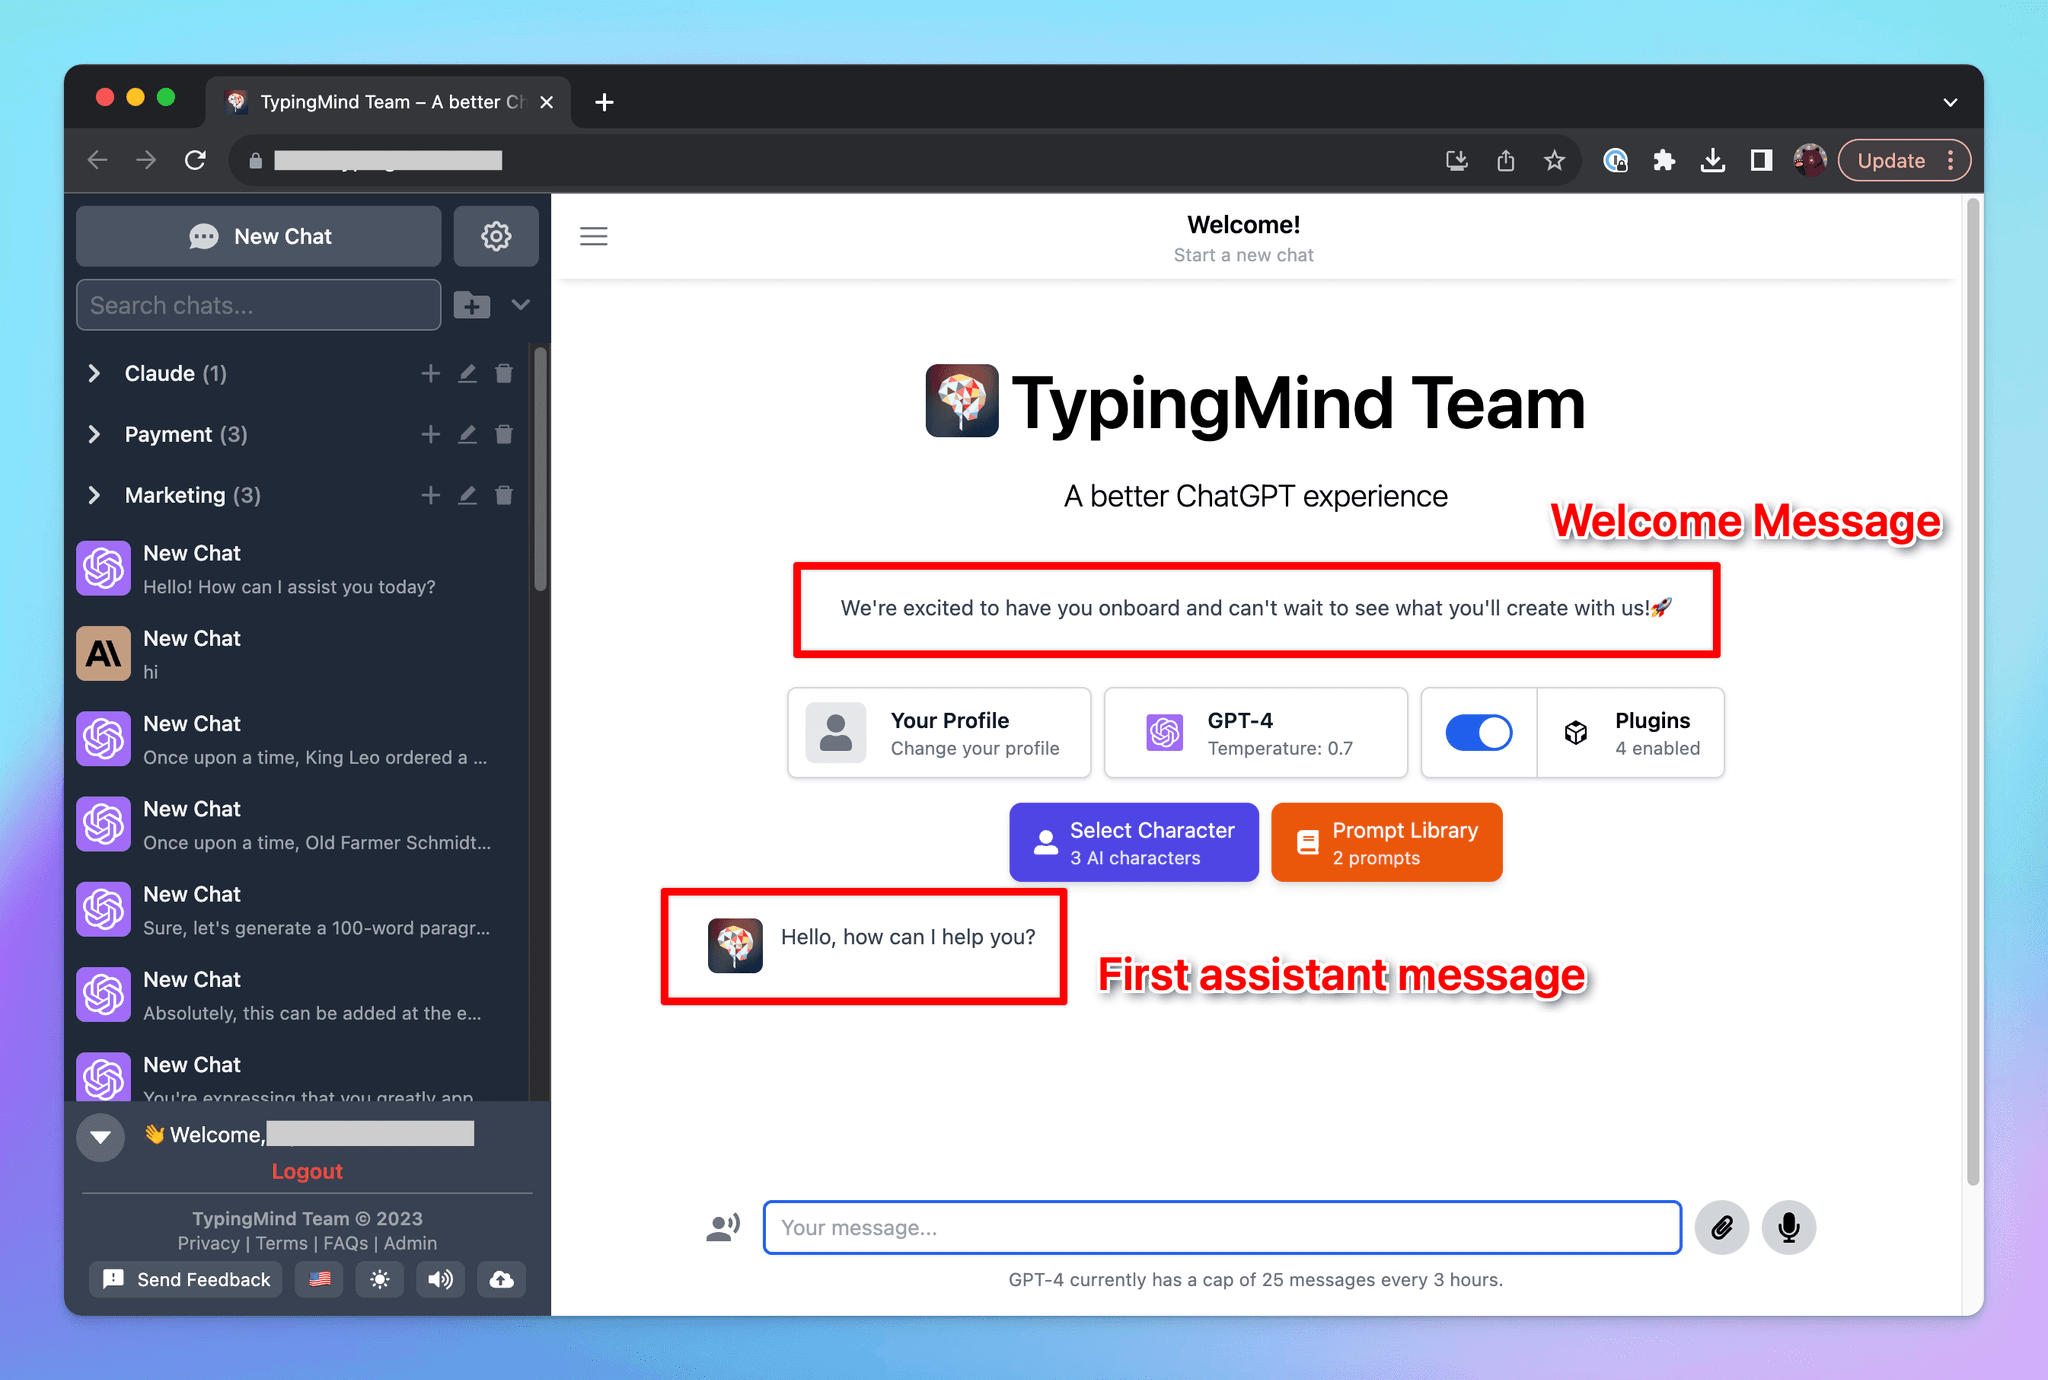
Customize the welcome messages to easily onboard your users. You can provide them with guidance on how to use the chat instance.
Go to Welcome Message > input your messages
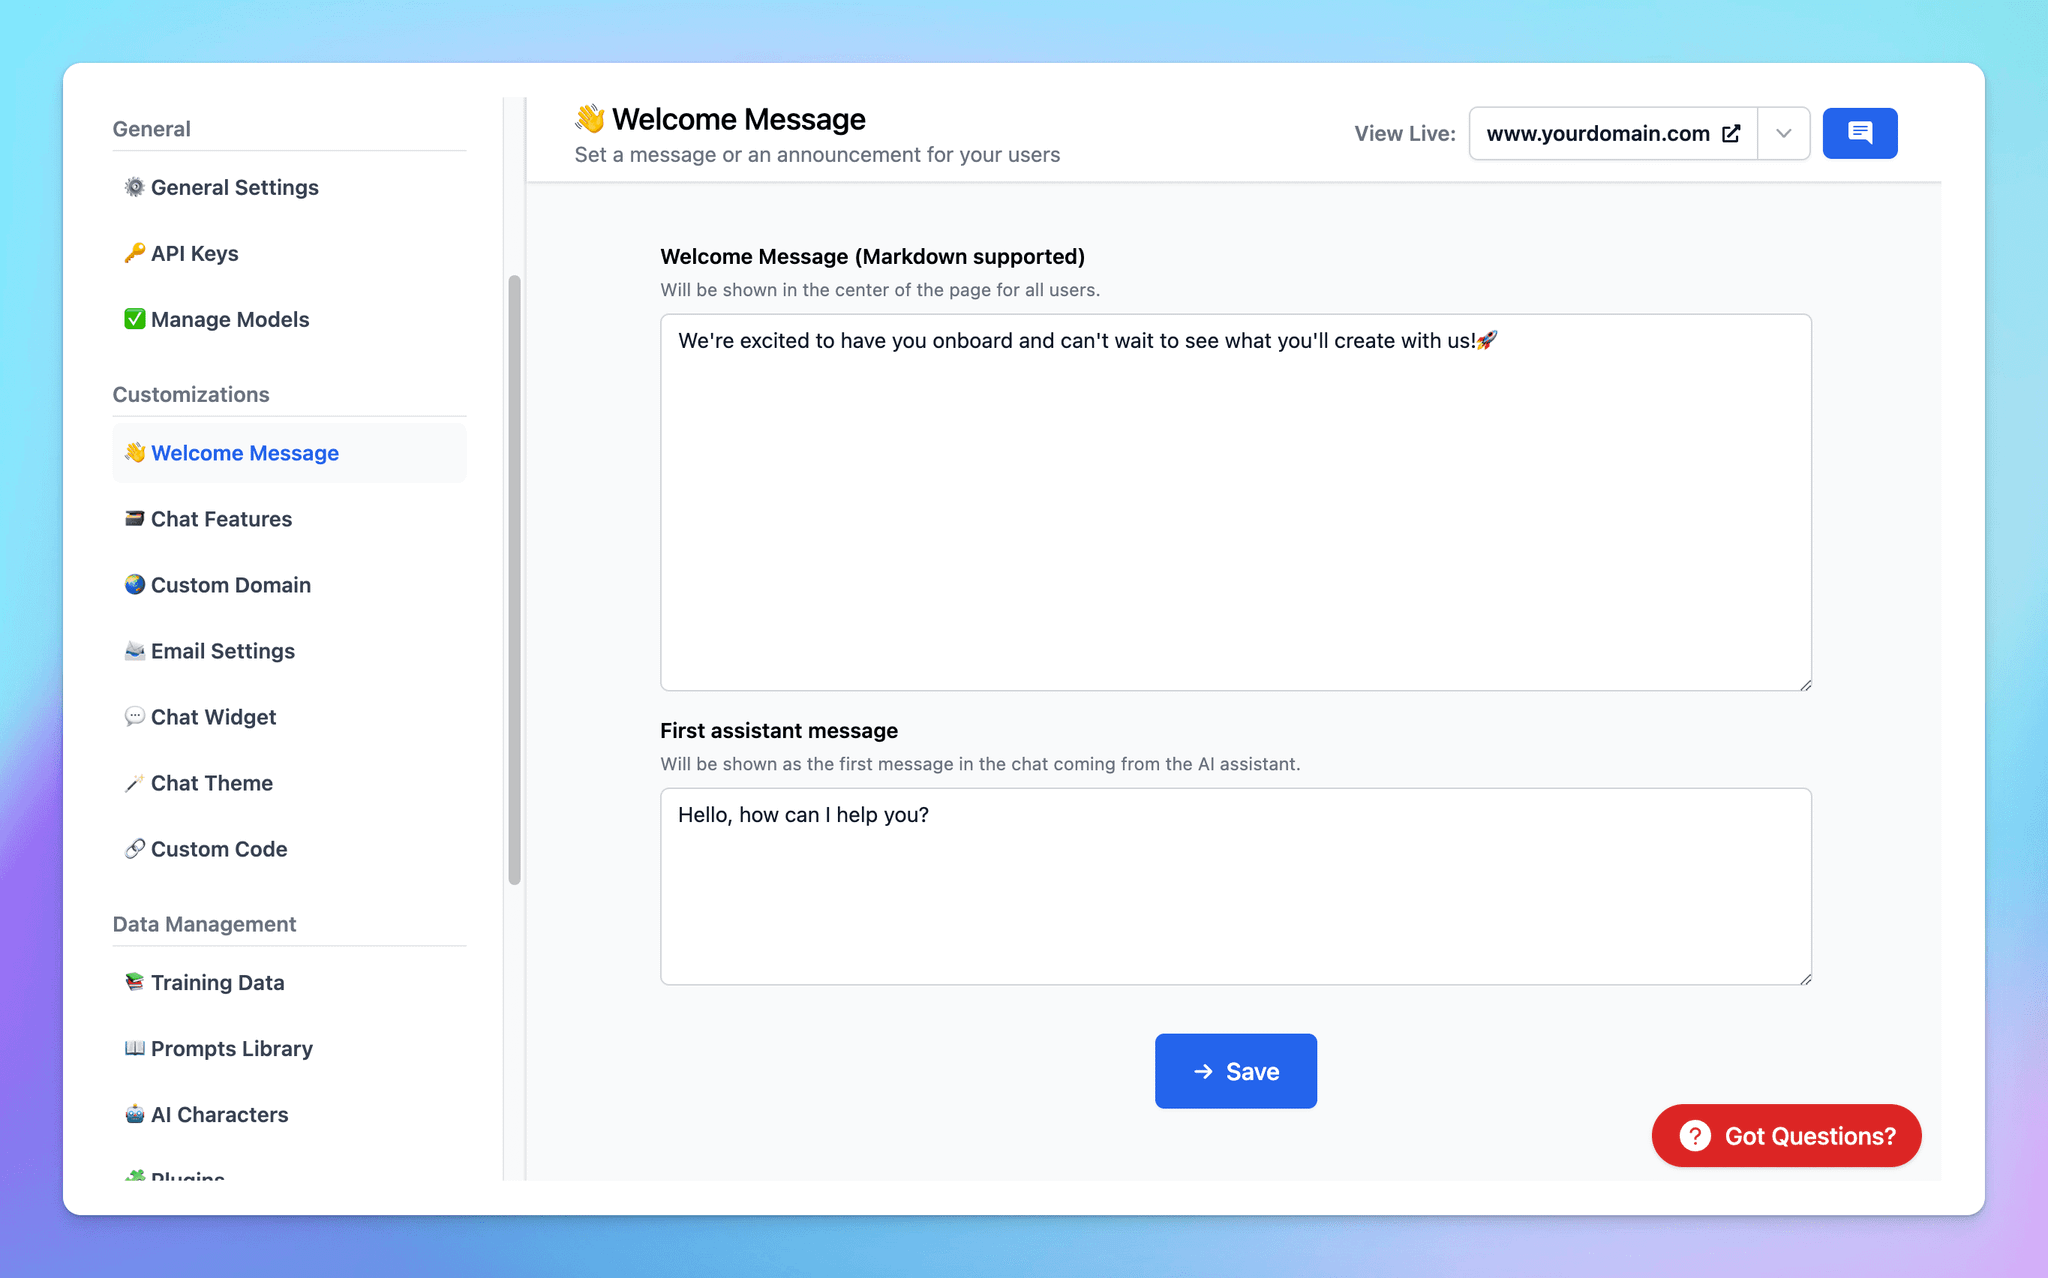
Your messages will be shown up on the chat interface as below:
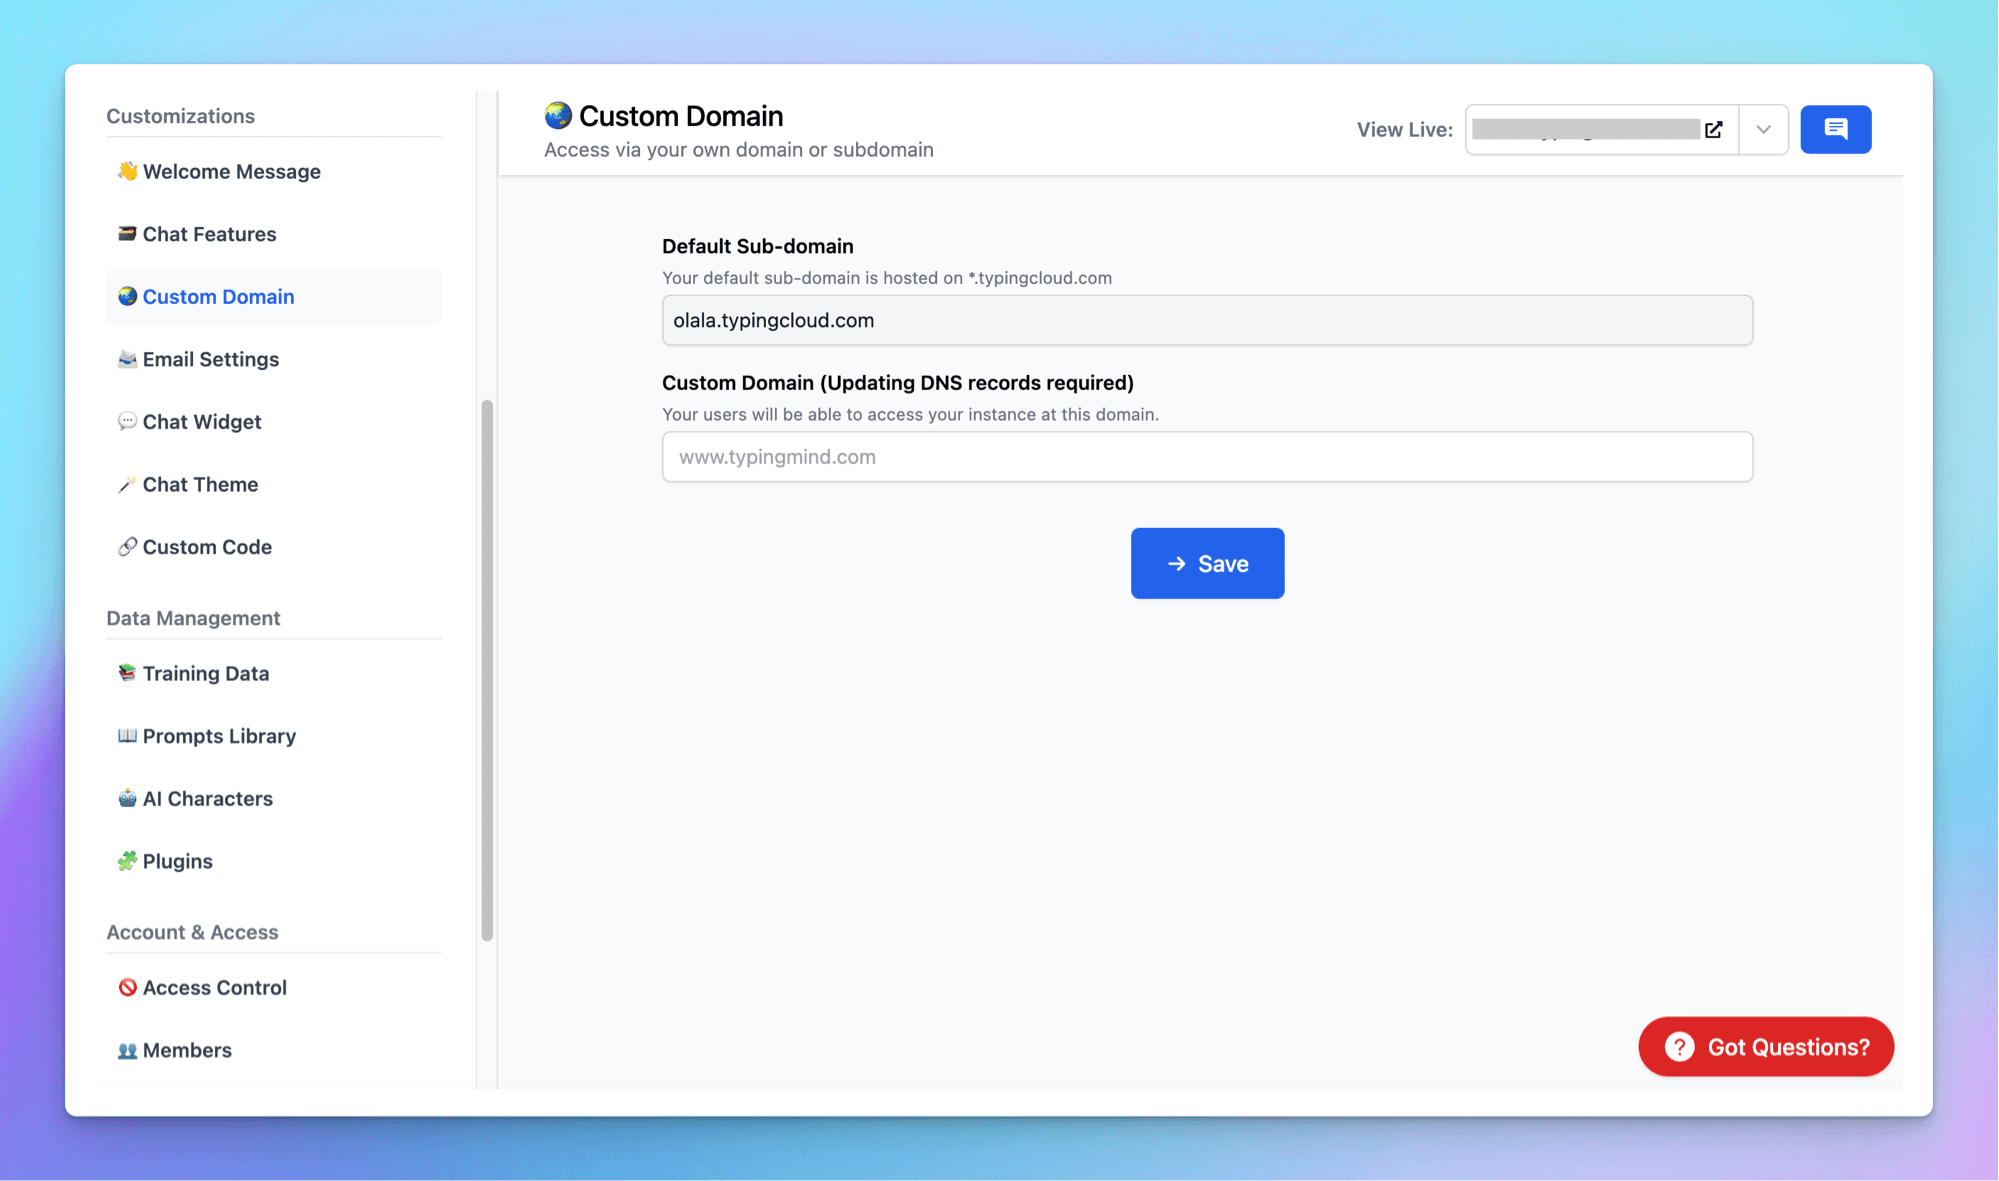
6. Use Your Own Domain
You can set up a custom domain for your chat interface.
Go to Custom Domain > Set up your custom domain as instructions in the app.
7. Customize the Chat Interface Theme
Customize the chat interface theme to match your brand color. You can use built-in themes or create a custom theme by adding your CSS code.
This ensures a seamless integration of the chat interface with your brand's visual identity.
Go to Chat Theme > Choose your preferred theme or add your custom theme
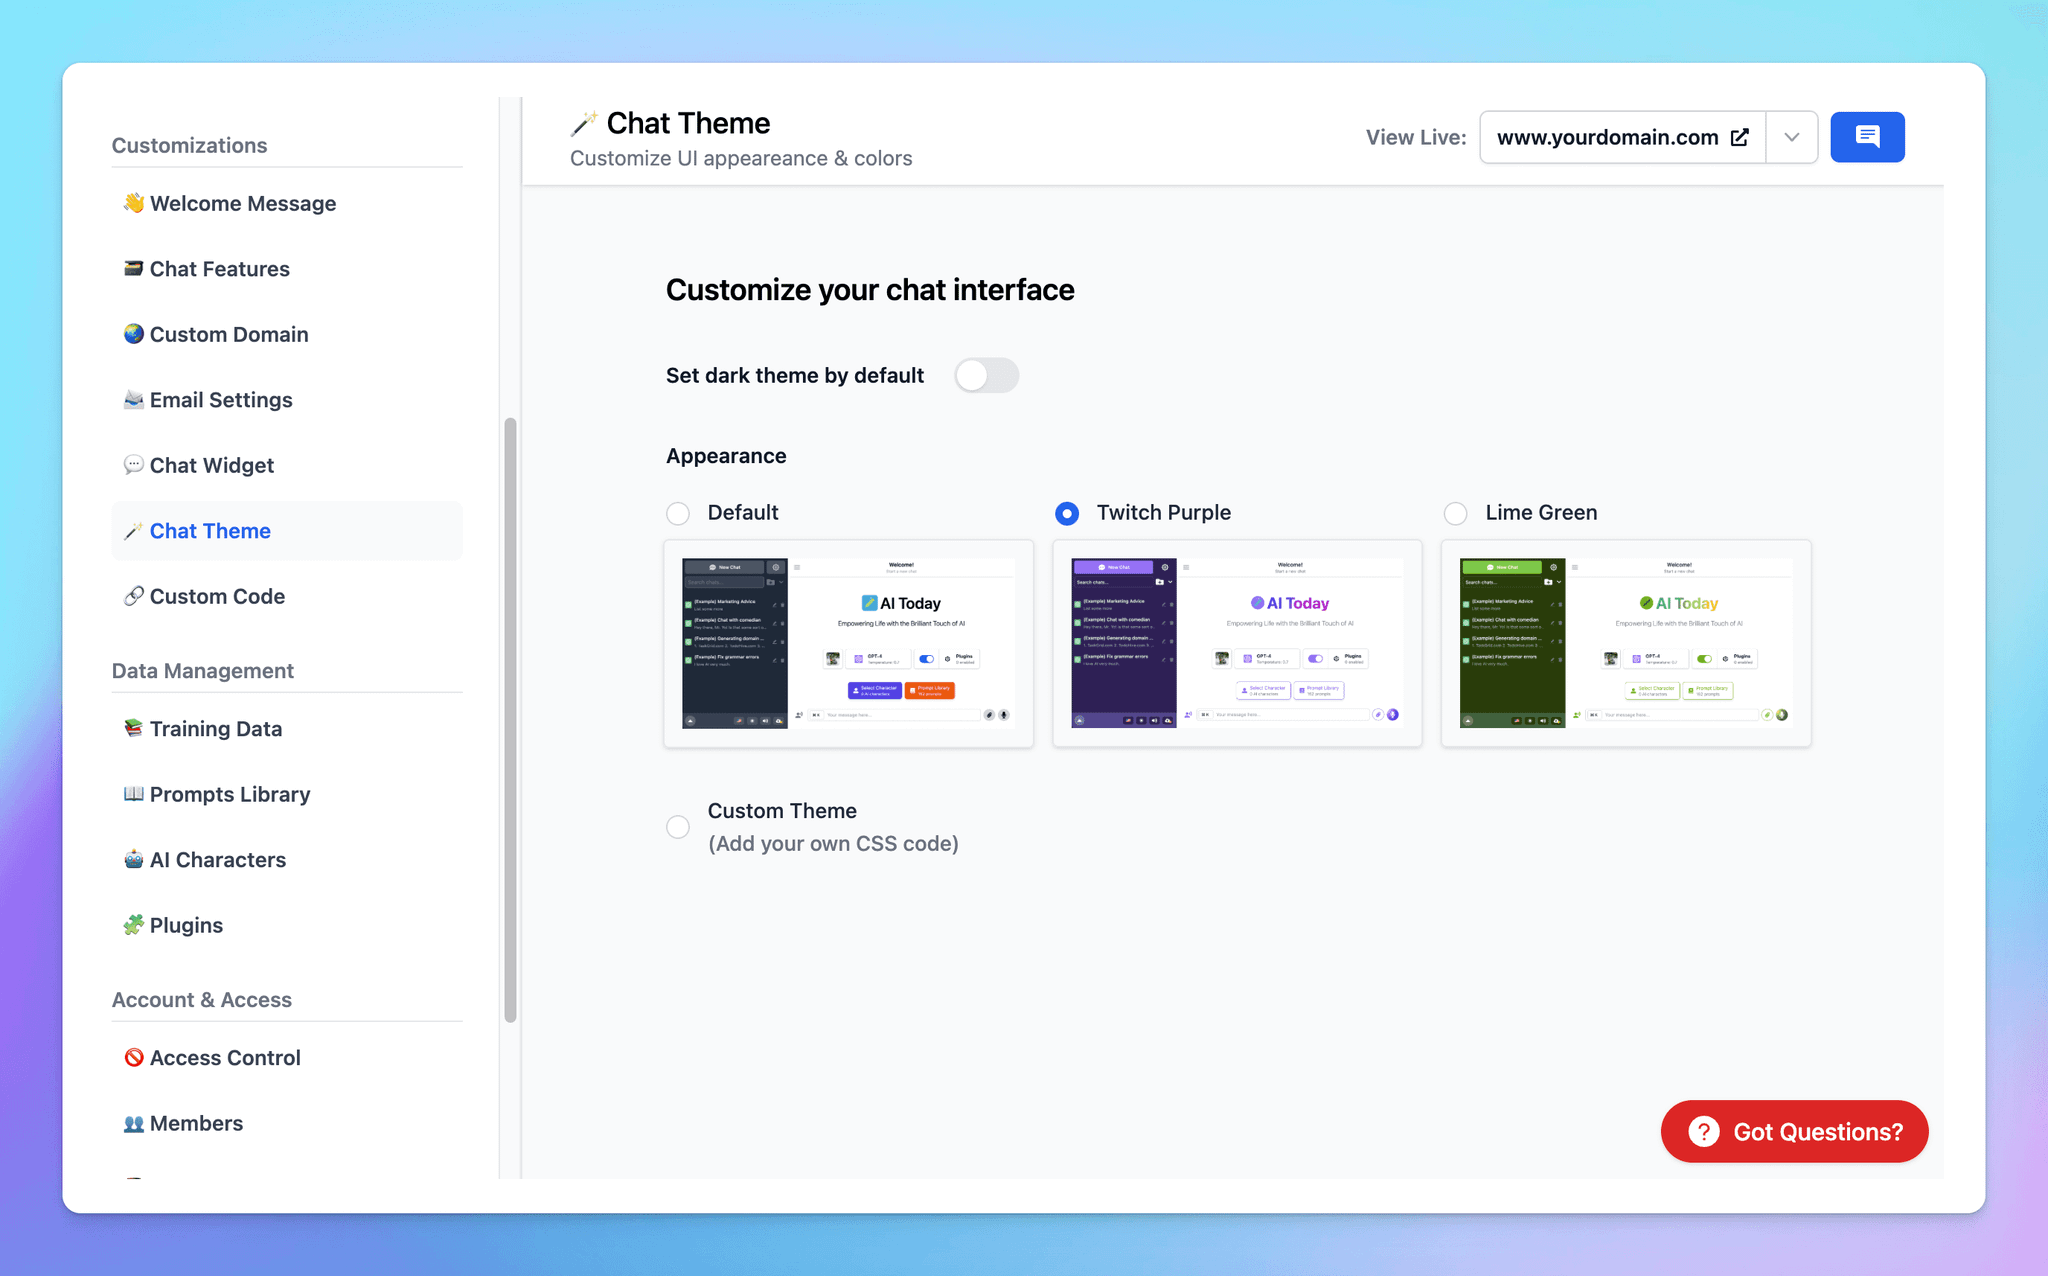
And see how the chat UI changes:
