Please note that this coaching bot can only be done with TypingMind Team (custom.typingmind.com).With Typing Mind Team, you can create a chat instance under your own domain that functions just like TypingMind.com. It allows full control and customization of the chat instance through an Admin Panel.
First, define your goals
First you will need to define what you are going to offer your users and how it should be delivered:- The modules: career coaching, personal development, business development or educational tutor
- Membership tier: do you offer membership packages? What is the difference among packages?
- AI model: which AI model works best for specific case?
- Free Members: try basic features with the chatbot, limited interaction, get general advices, use GPT-3.5 or limited GPT-4
- Tier 1 (Basic): receive advice on business ideas and startup operations.
- Tier 2 (Pro): get advice on increasing revenue and scaling up strategies.
- Tier 3 (Custom): obtain hyper-personalized advice on fundraising, human resource management, and sustainability.
9 steps to build a coaching agent on TypingMind Custom
Step 1: Set up a chat instance
In case you haven’t had a chat instance for TypingMind Custom yet, please sign up for one at https://www.typingmind.com/new-deployment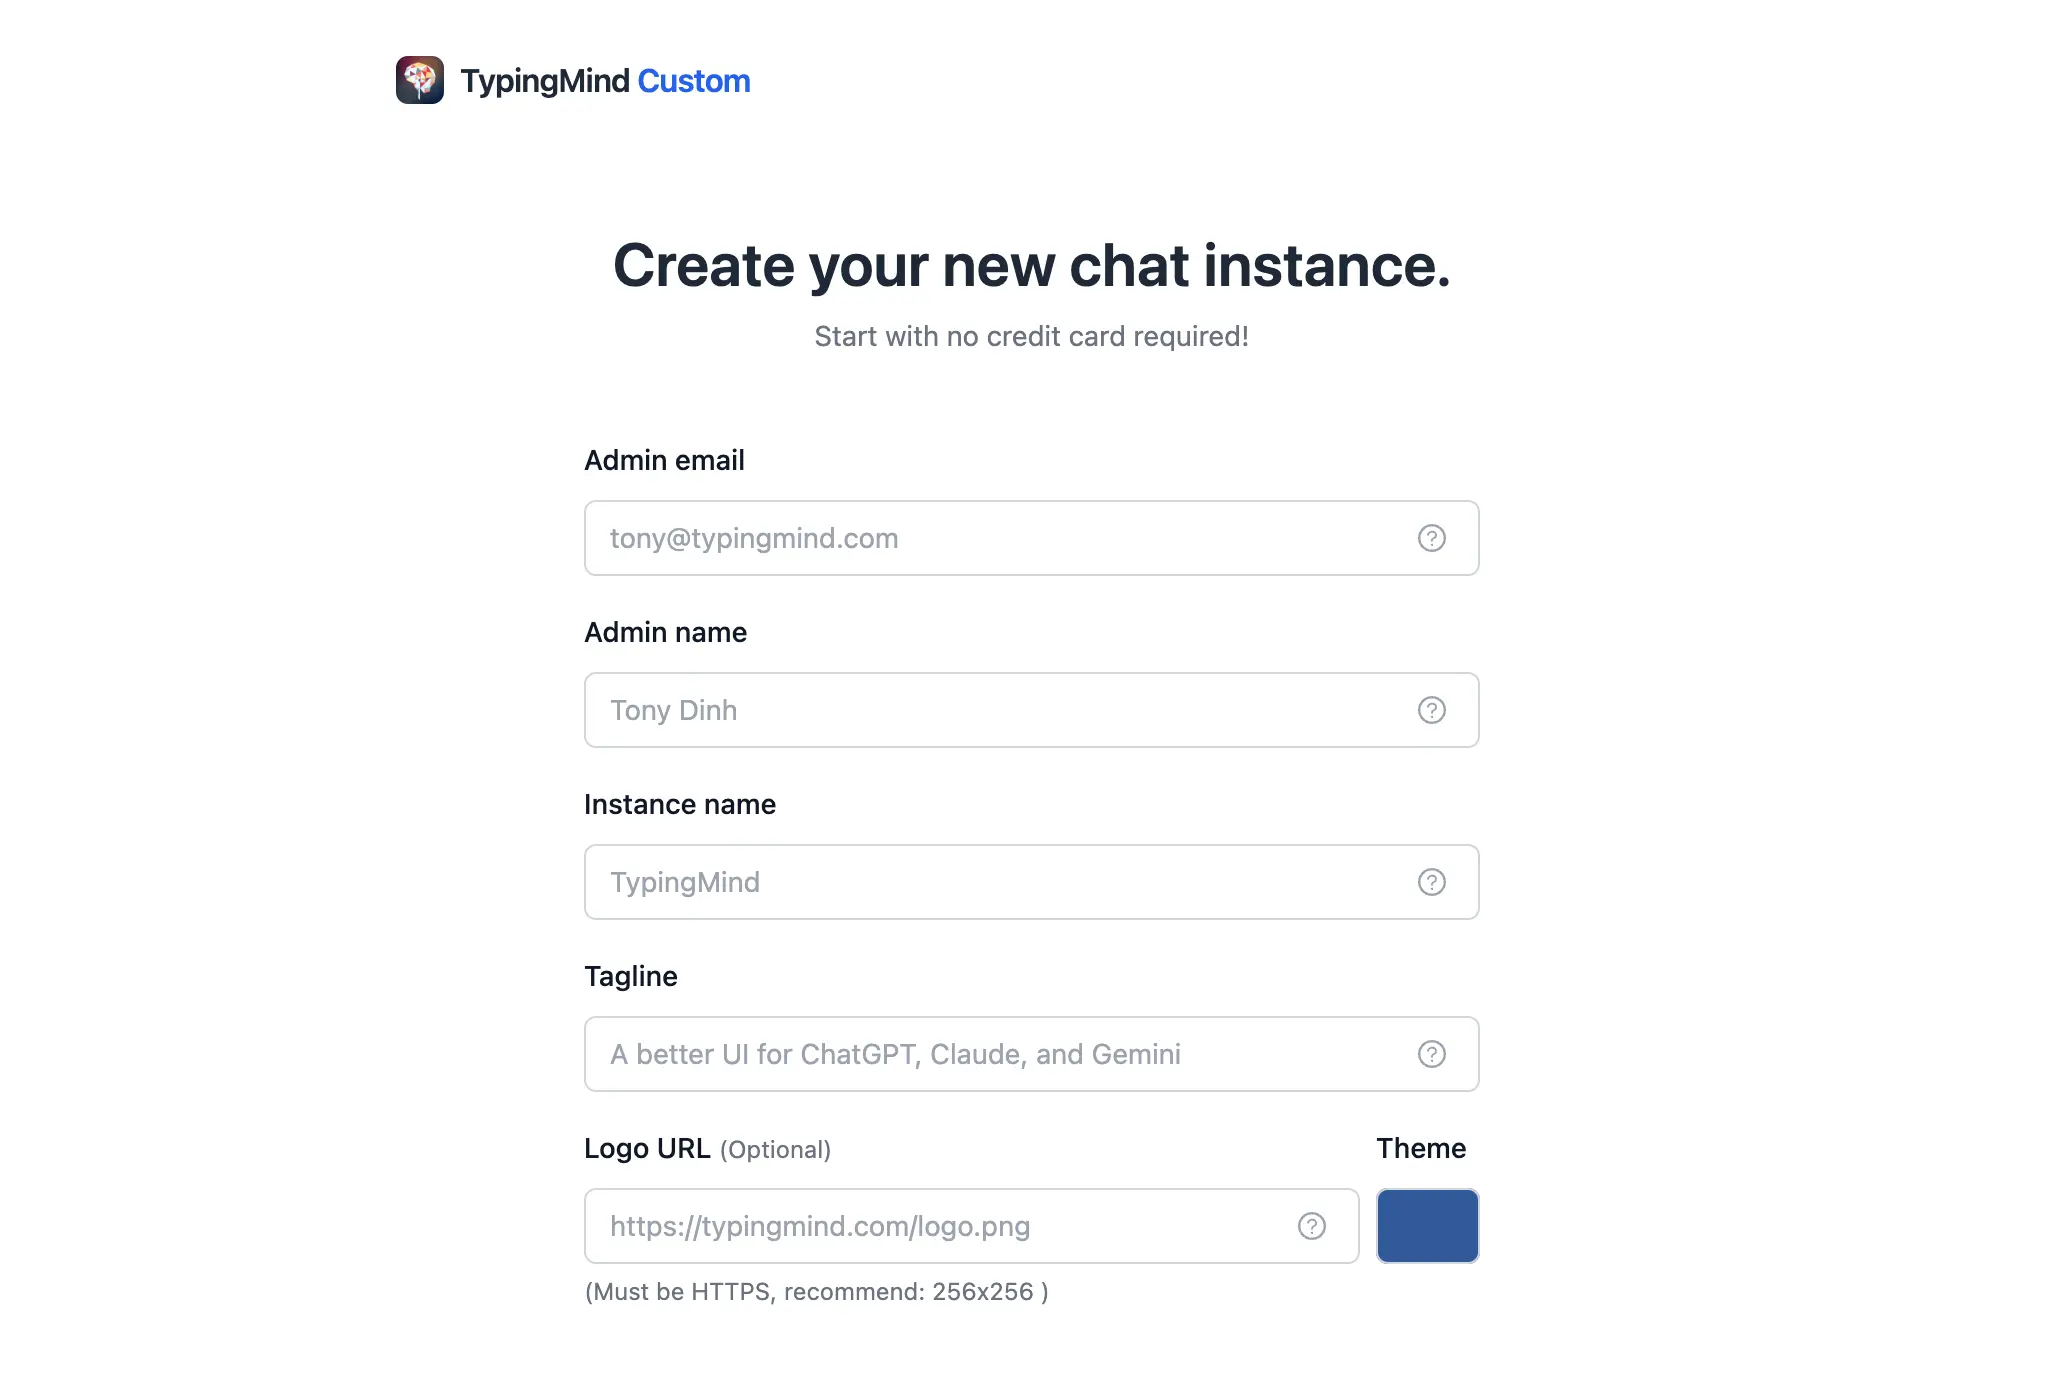
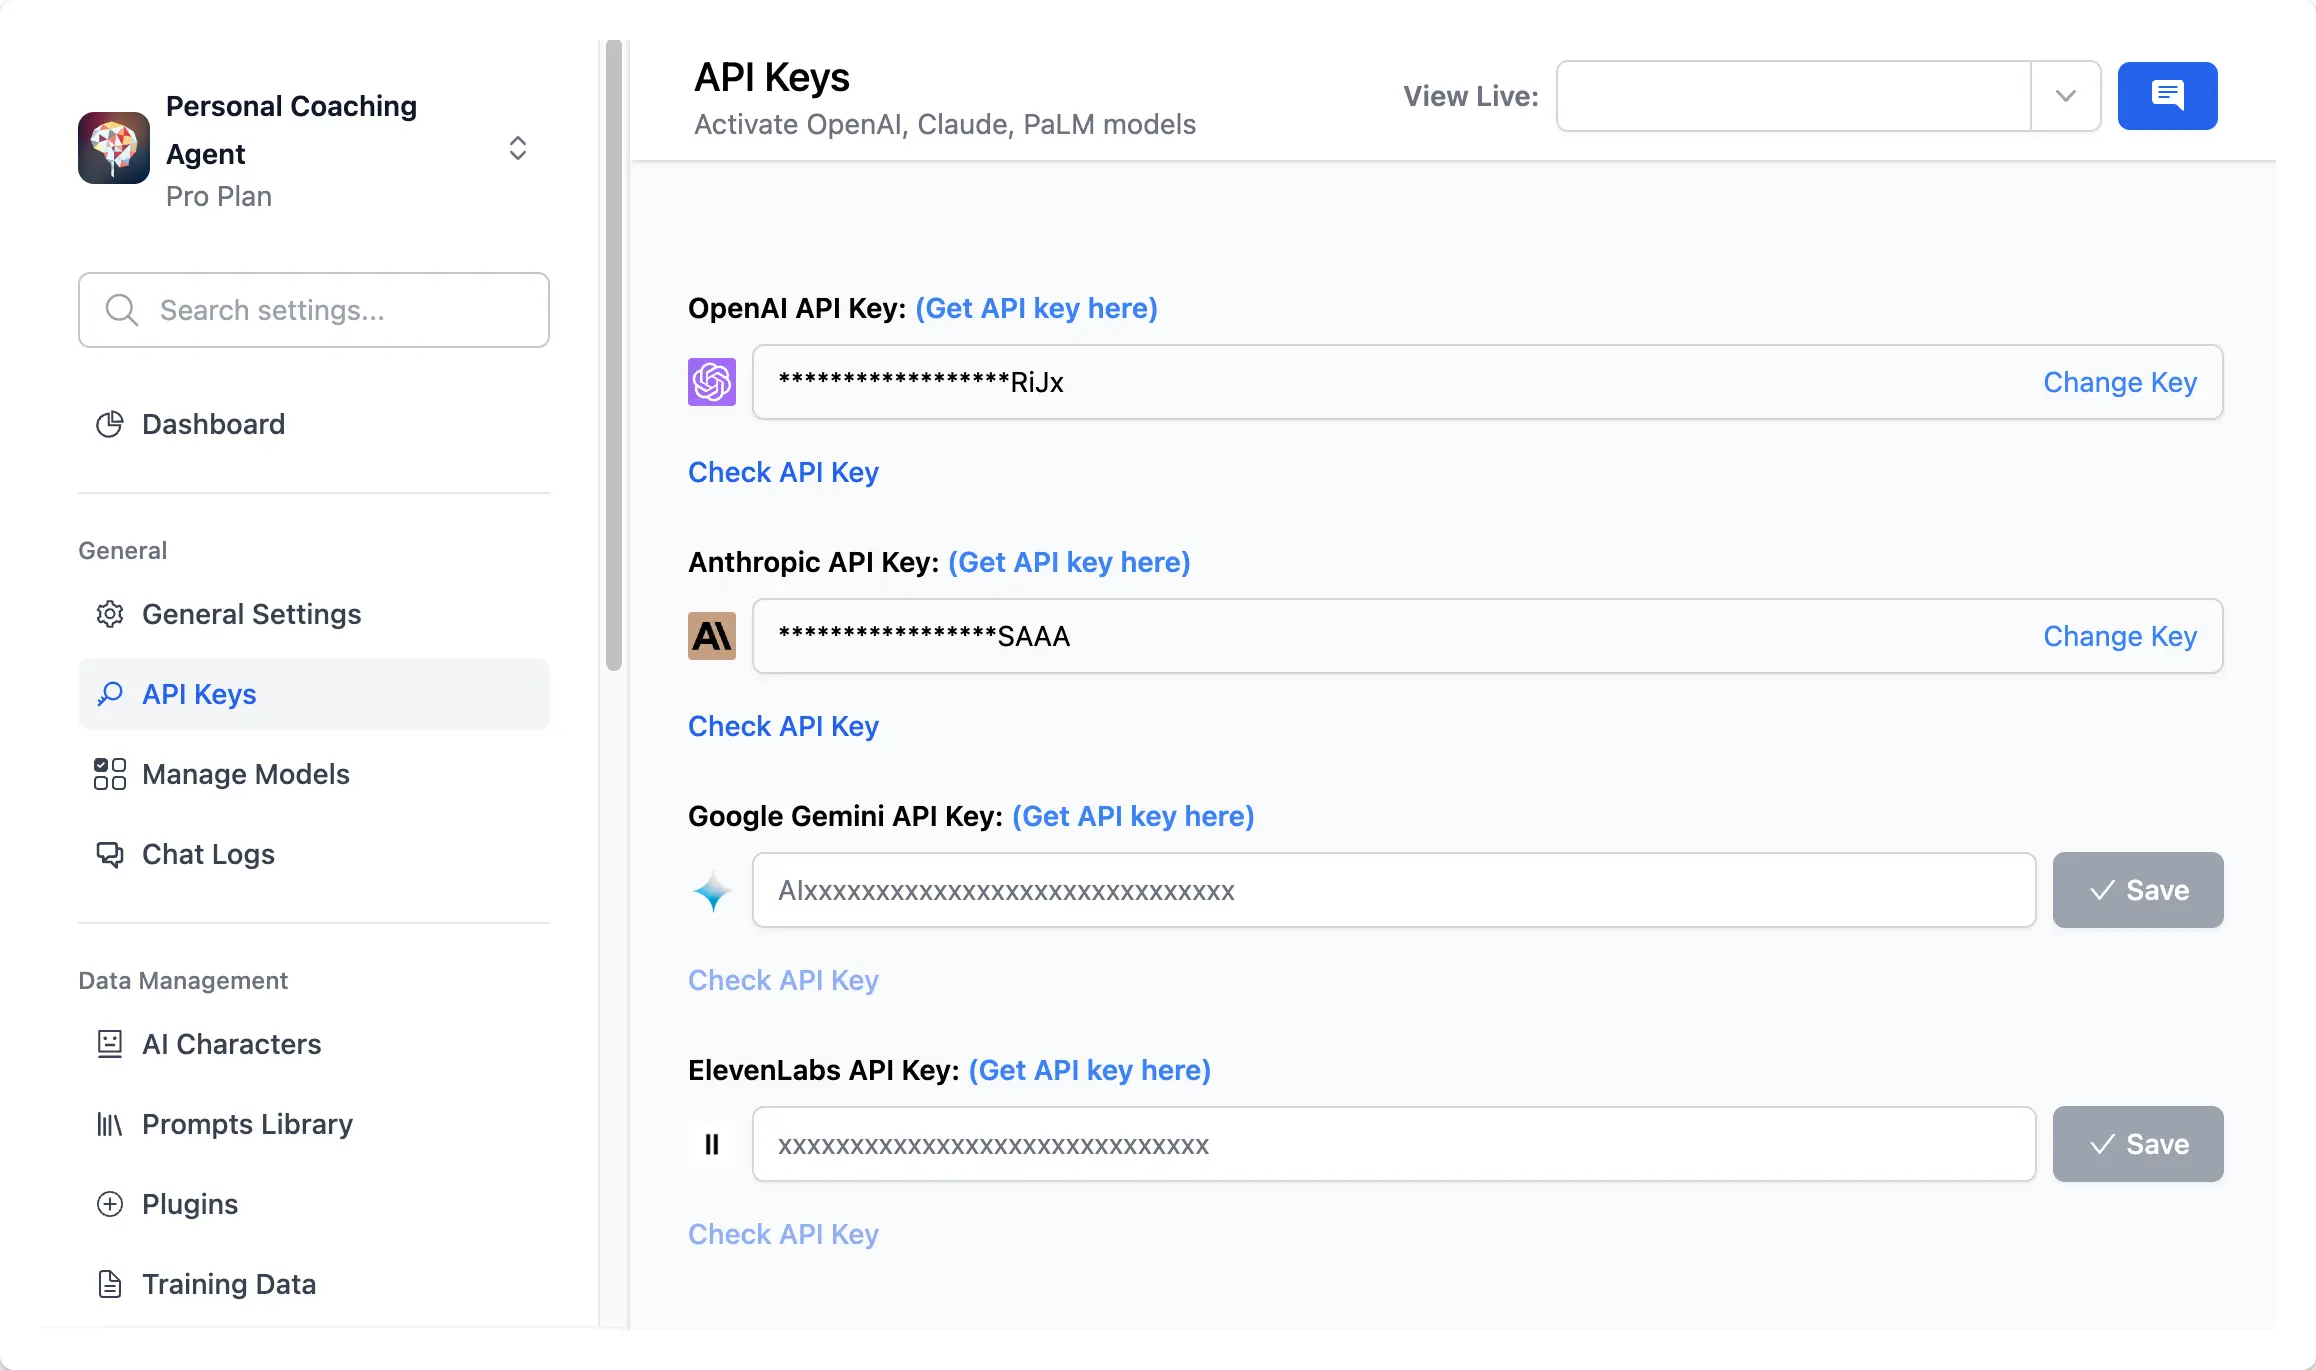
Step 2: Connect the chatbot with your API keys
After signing up, you will be landed in the Admin Panel, where you can customize almost everything on the chat interface. To get the chatbot to work properly, you will need to connect it with the chat model’s API key:- Go to API keys menu and enter your API key, currently, we offer:
OpenAI models: GPT-5.5, GPT-5.4, etc.Anthropic Claude: Claude Opus 4.7, Claude Sonnet 4.6Gemini models: Gemini 3.1 Pro
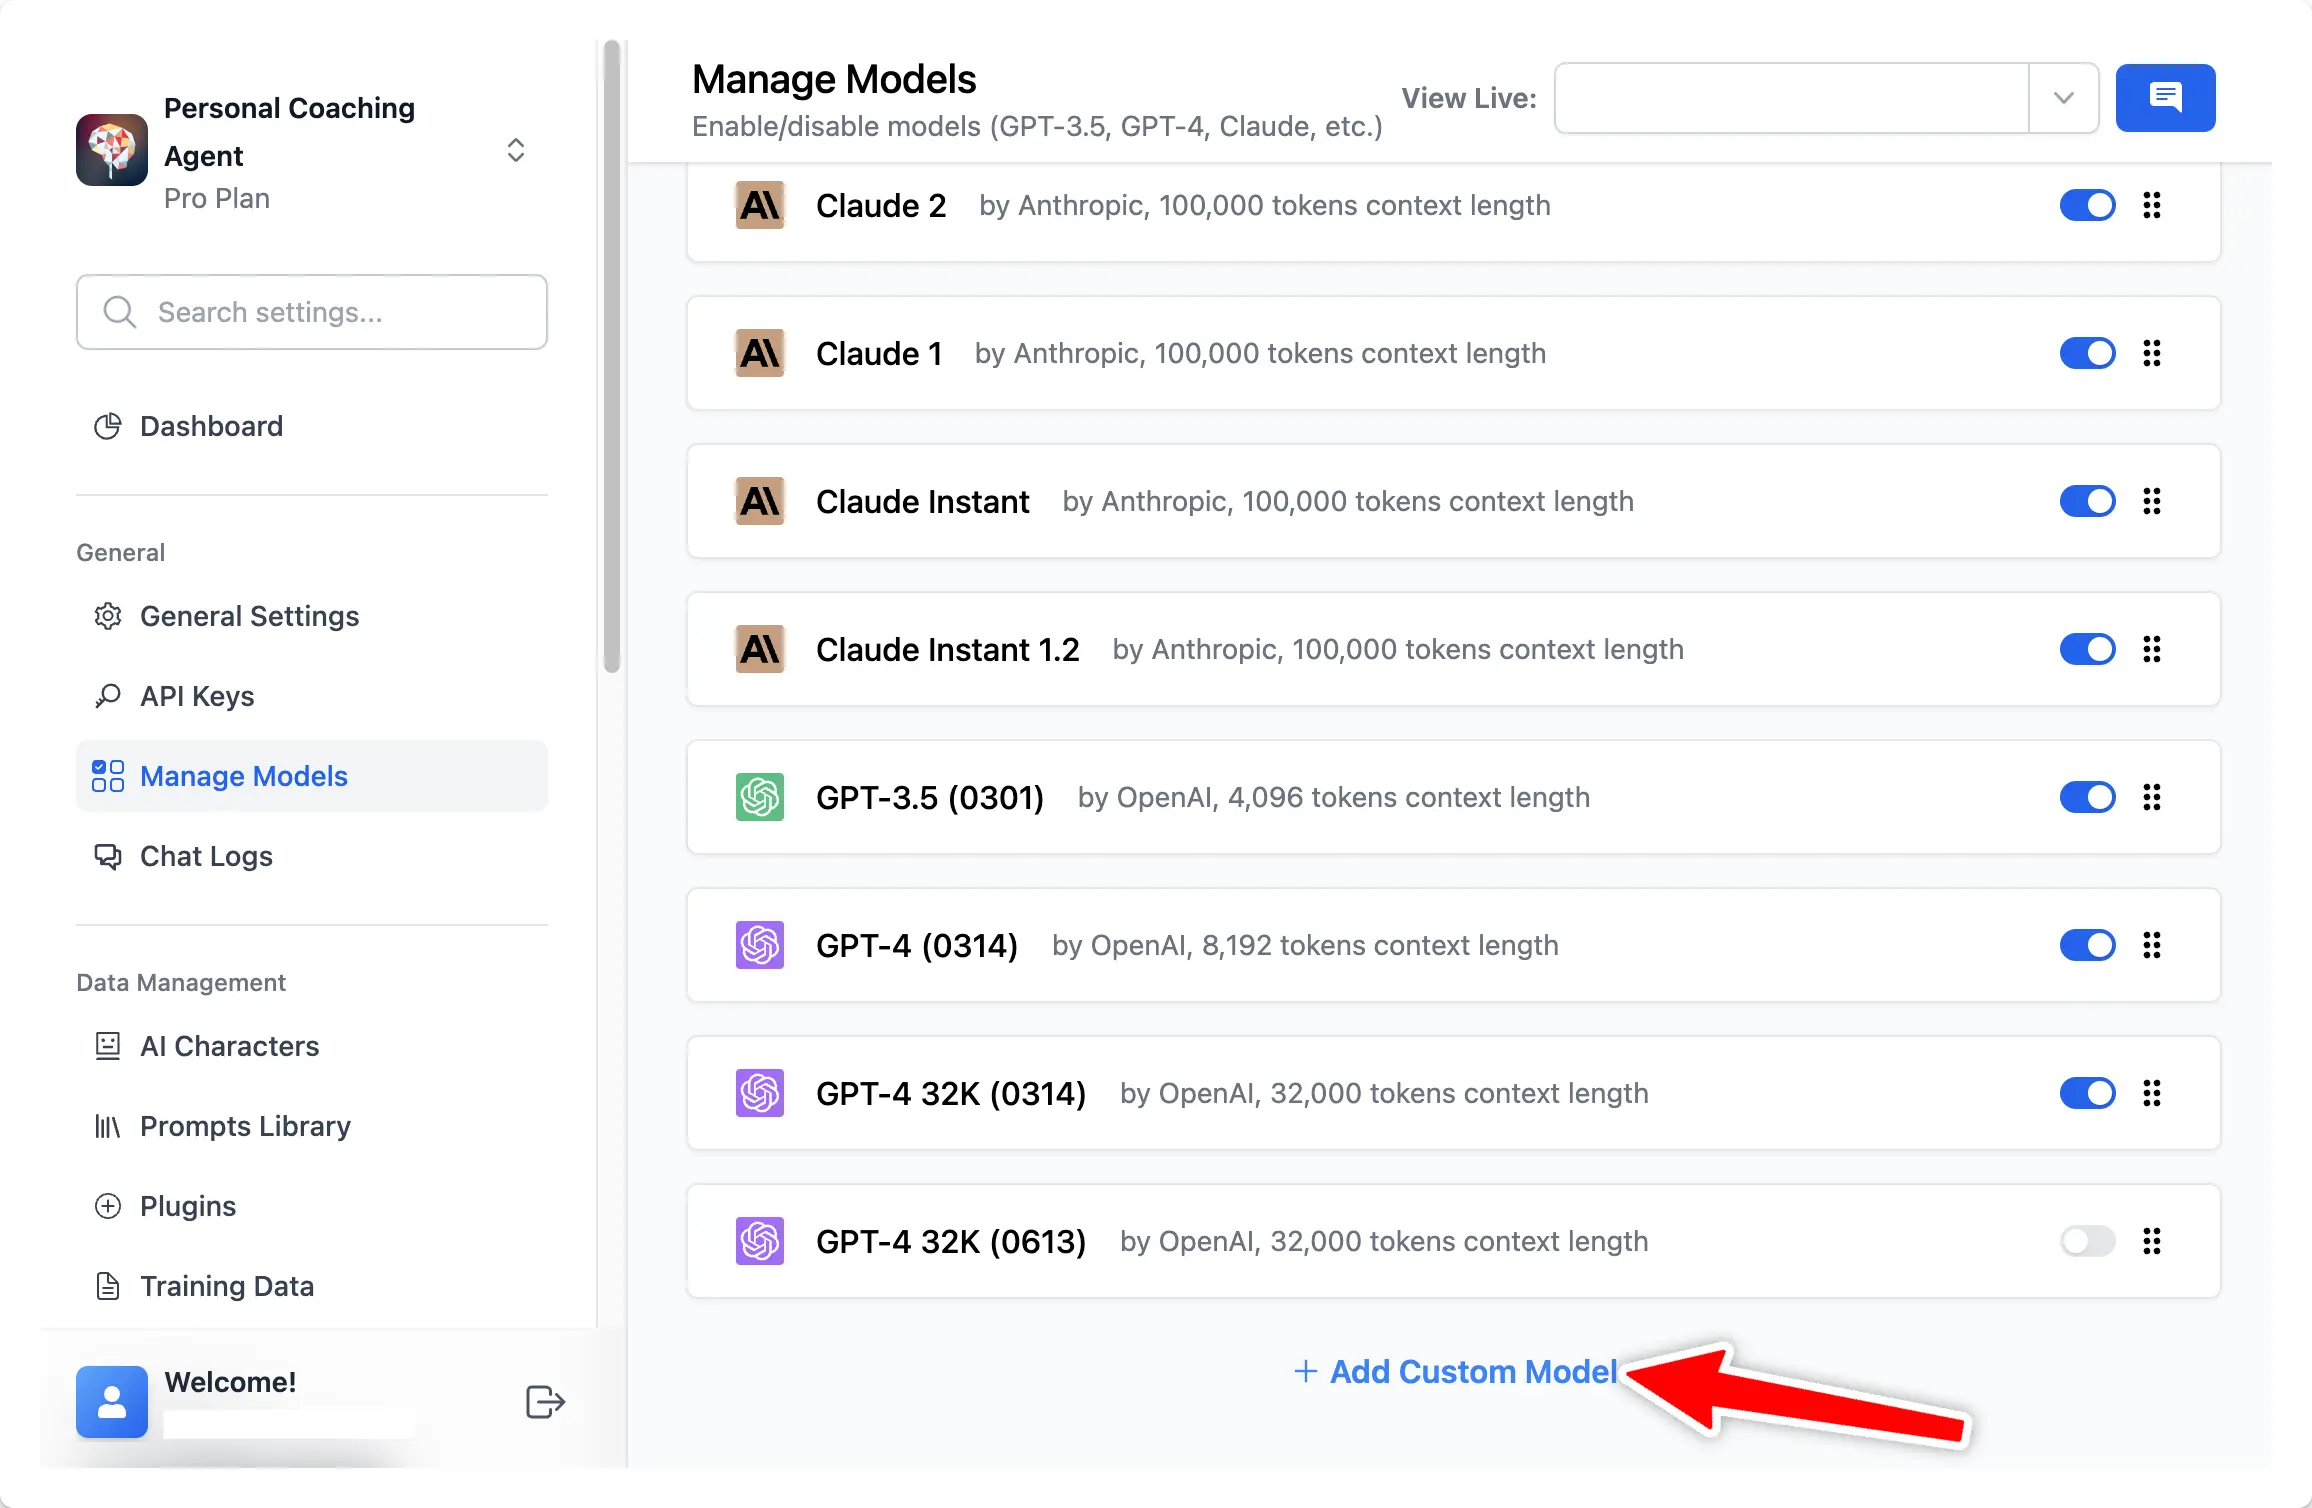
- Go to Manage Models menu and click Add Custom Models if you want to use Azure OpenAI, Perplexity, Mistral, etc. by adding custom models on your Admin Panel.
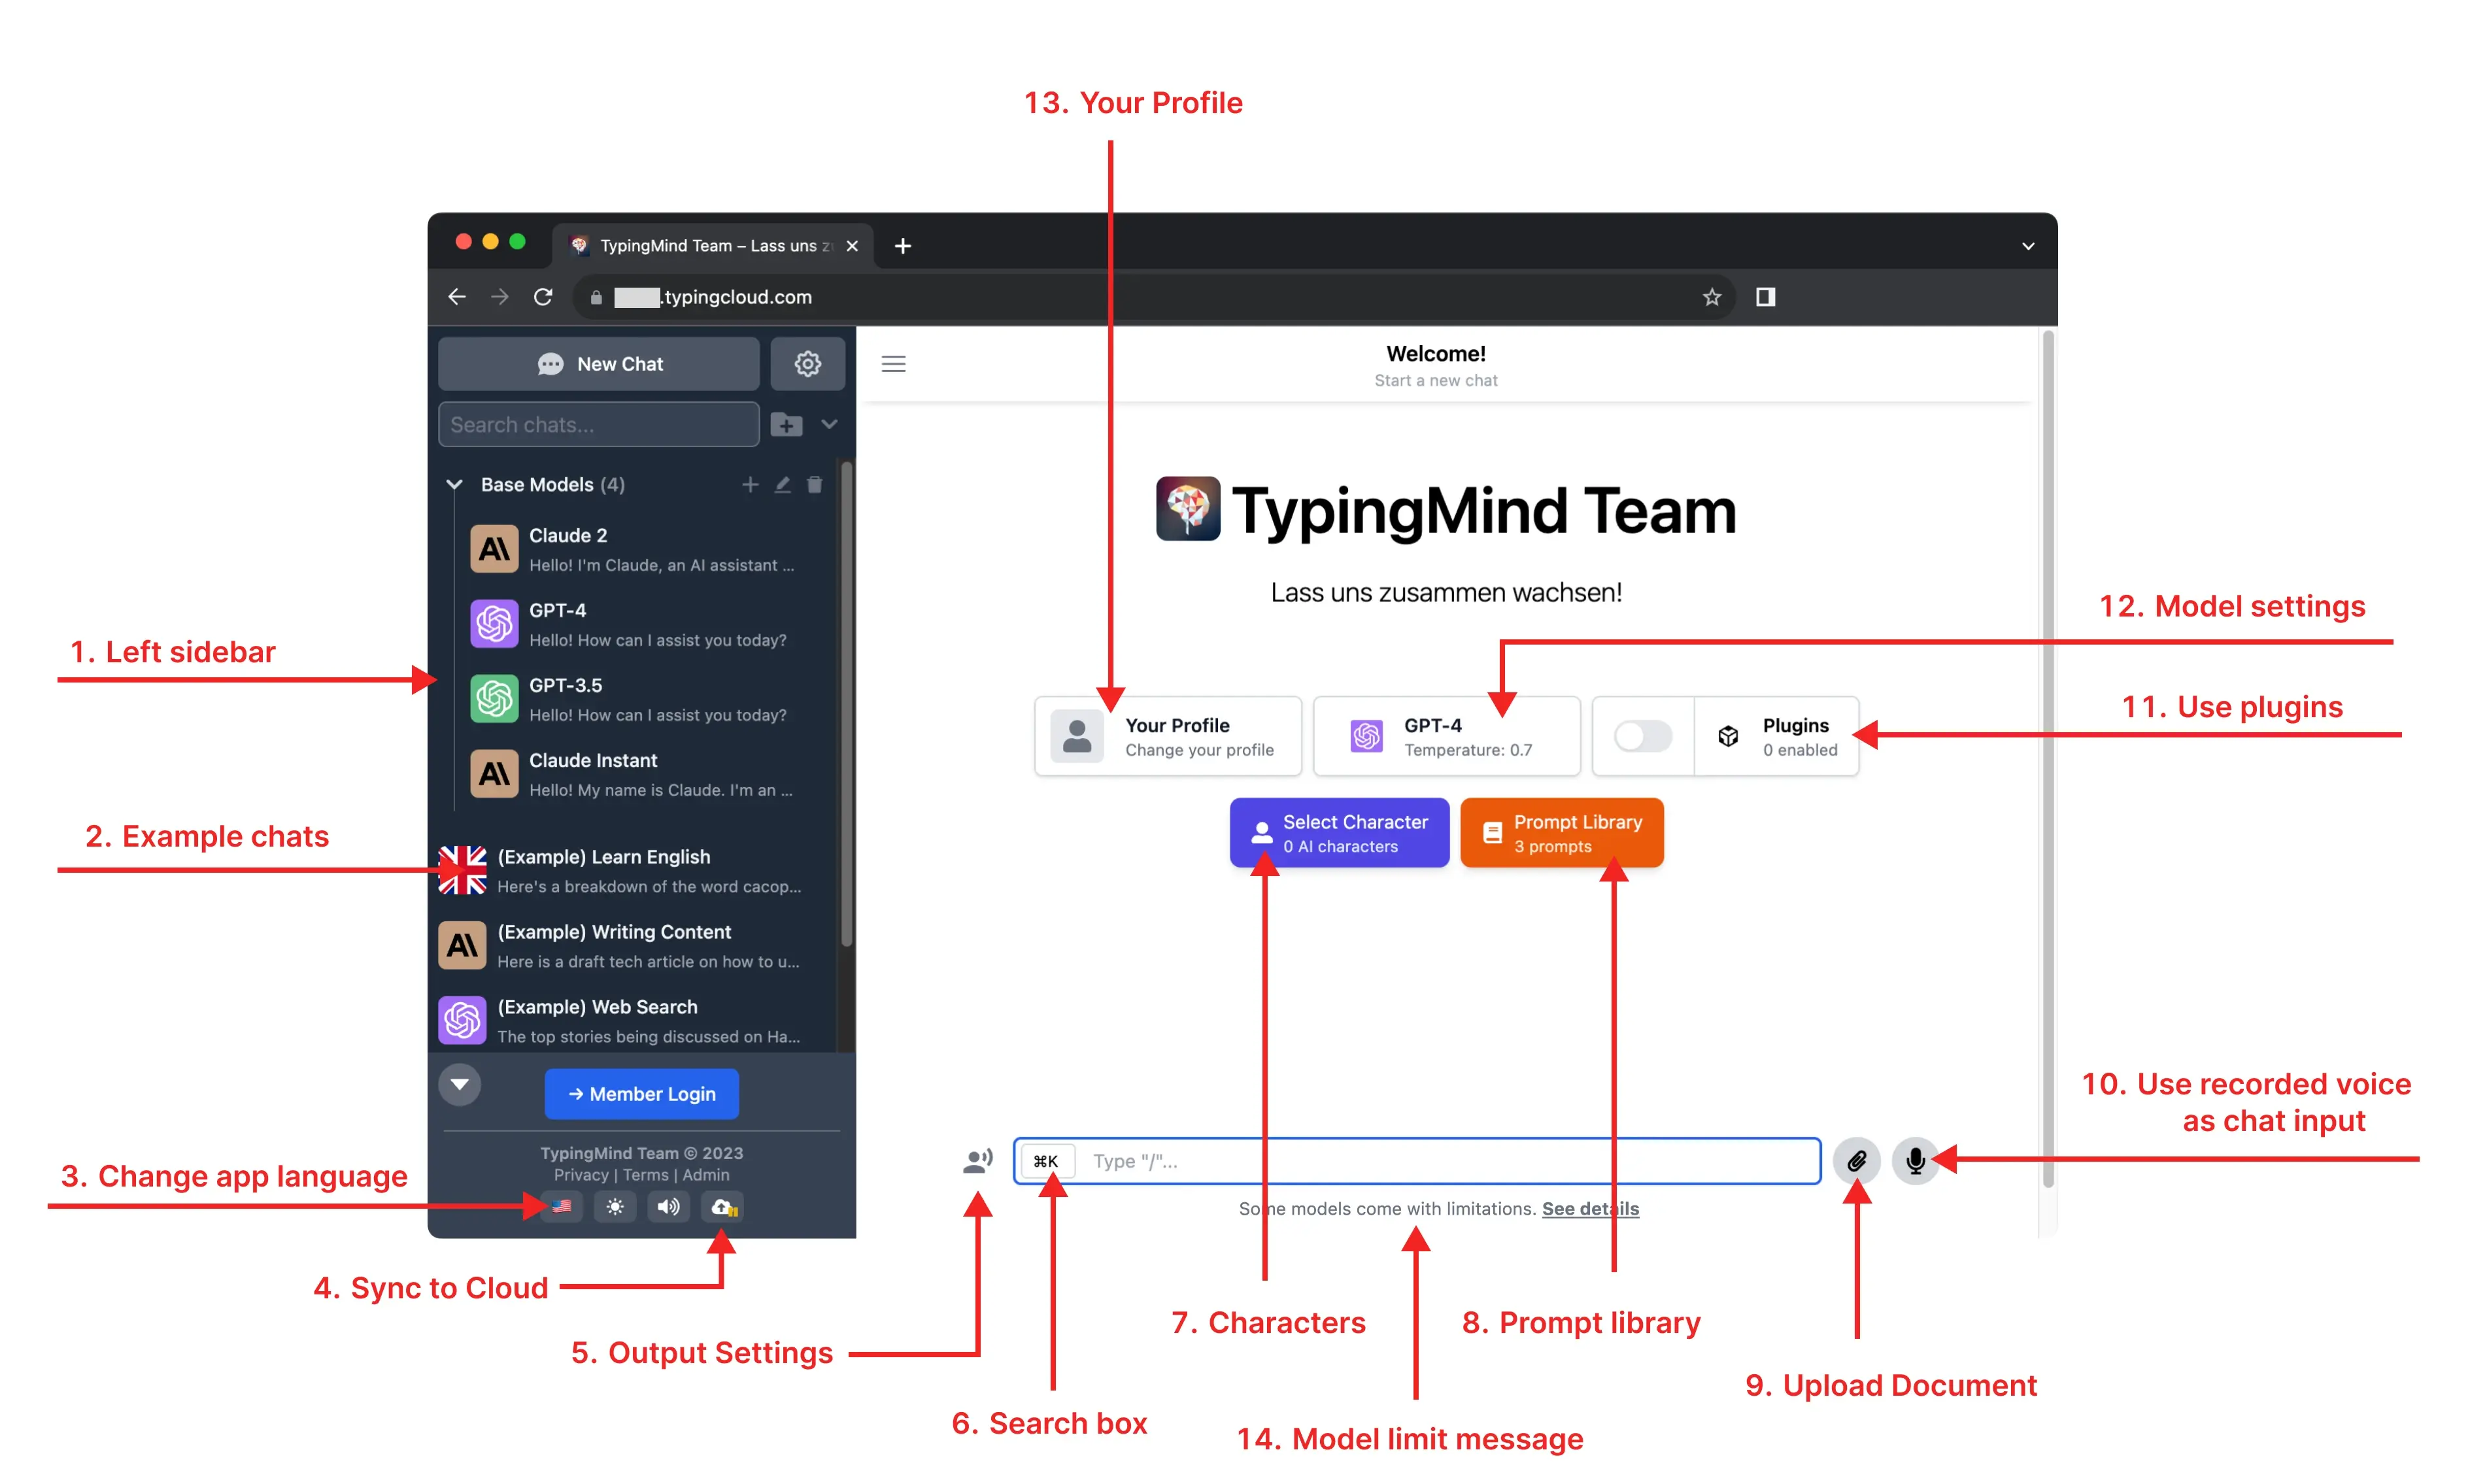
Step 3: Customize the chatbot’s UI
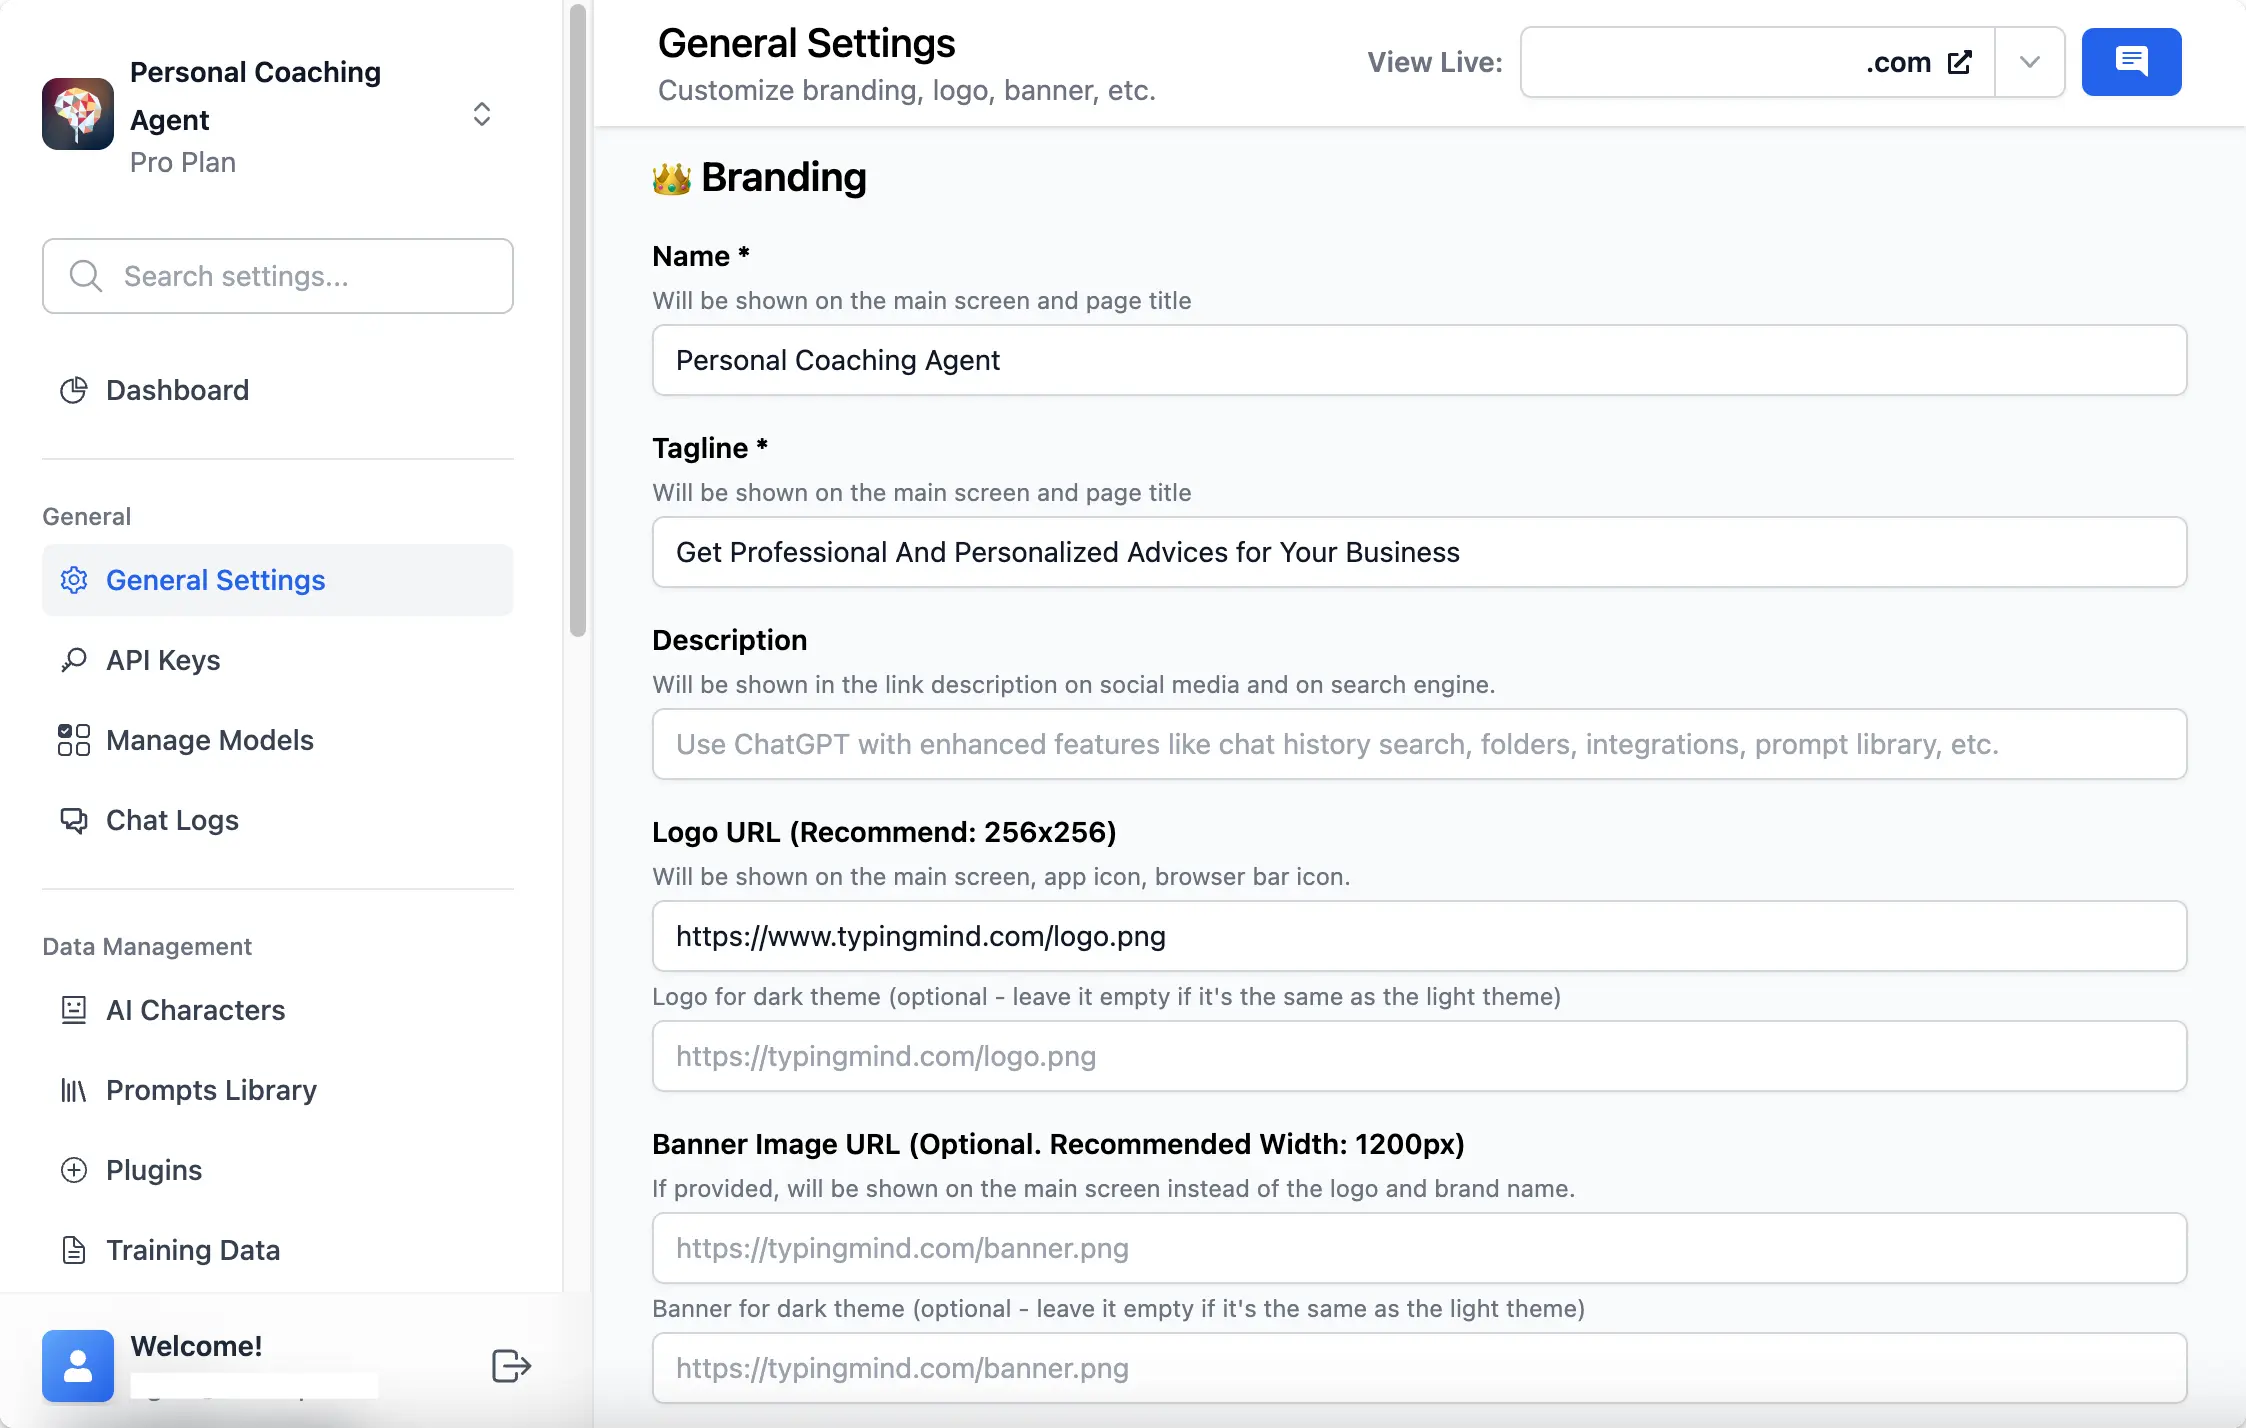
1. Branding
Get the bot to work under your branding:- Give your bot a name with your company tagline
- Upload your brand logo
- Set it up with your company domain (if any)
- Choose your chatbot language
- Pick a theme for the bot to match your brand style
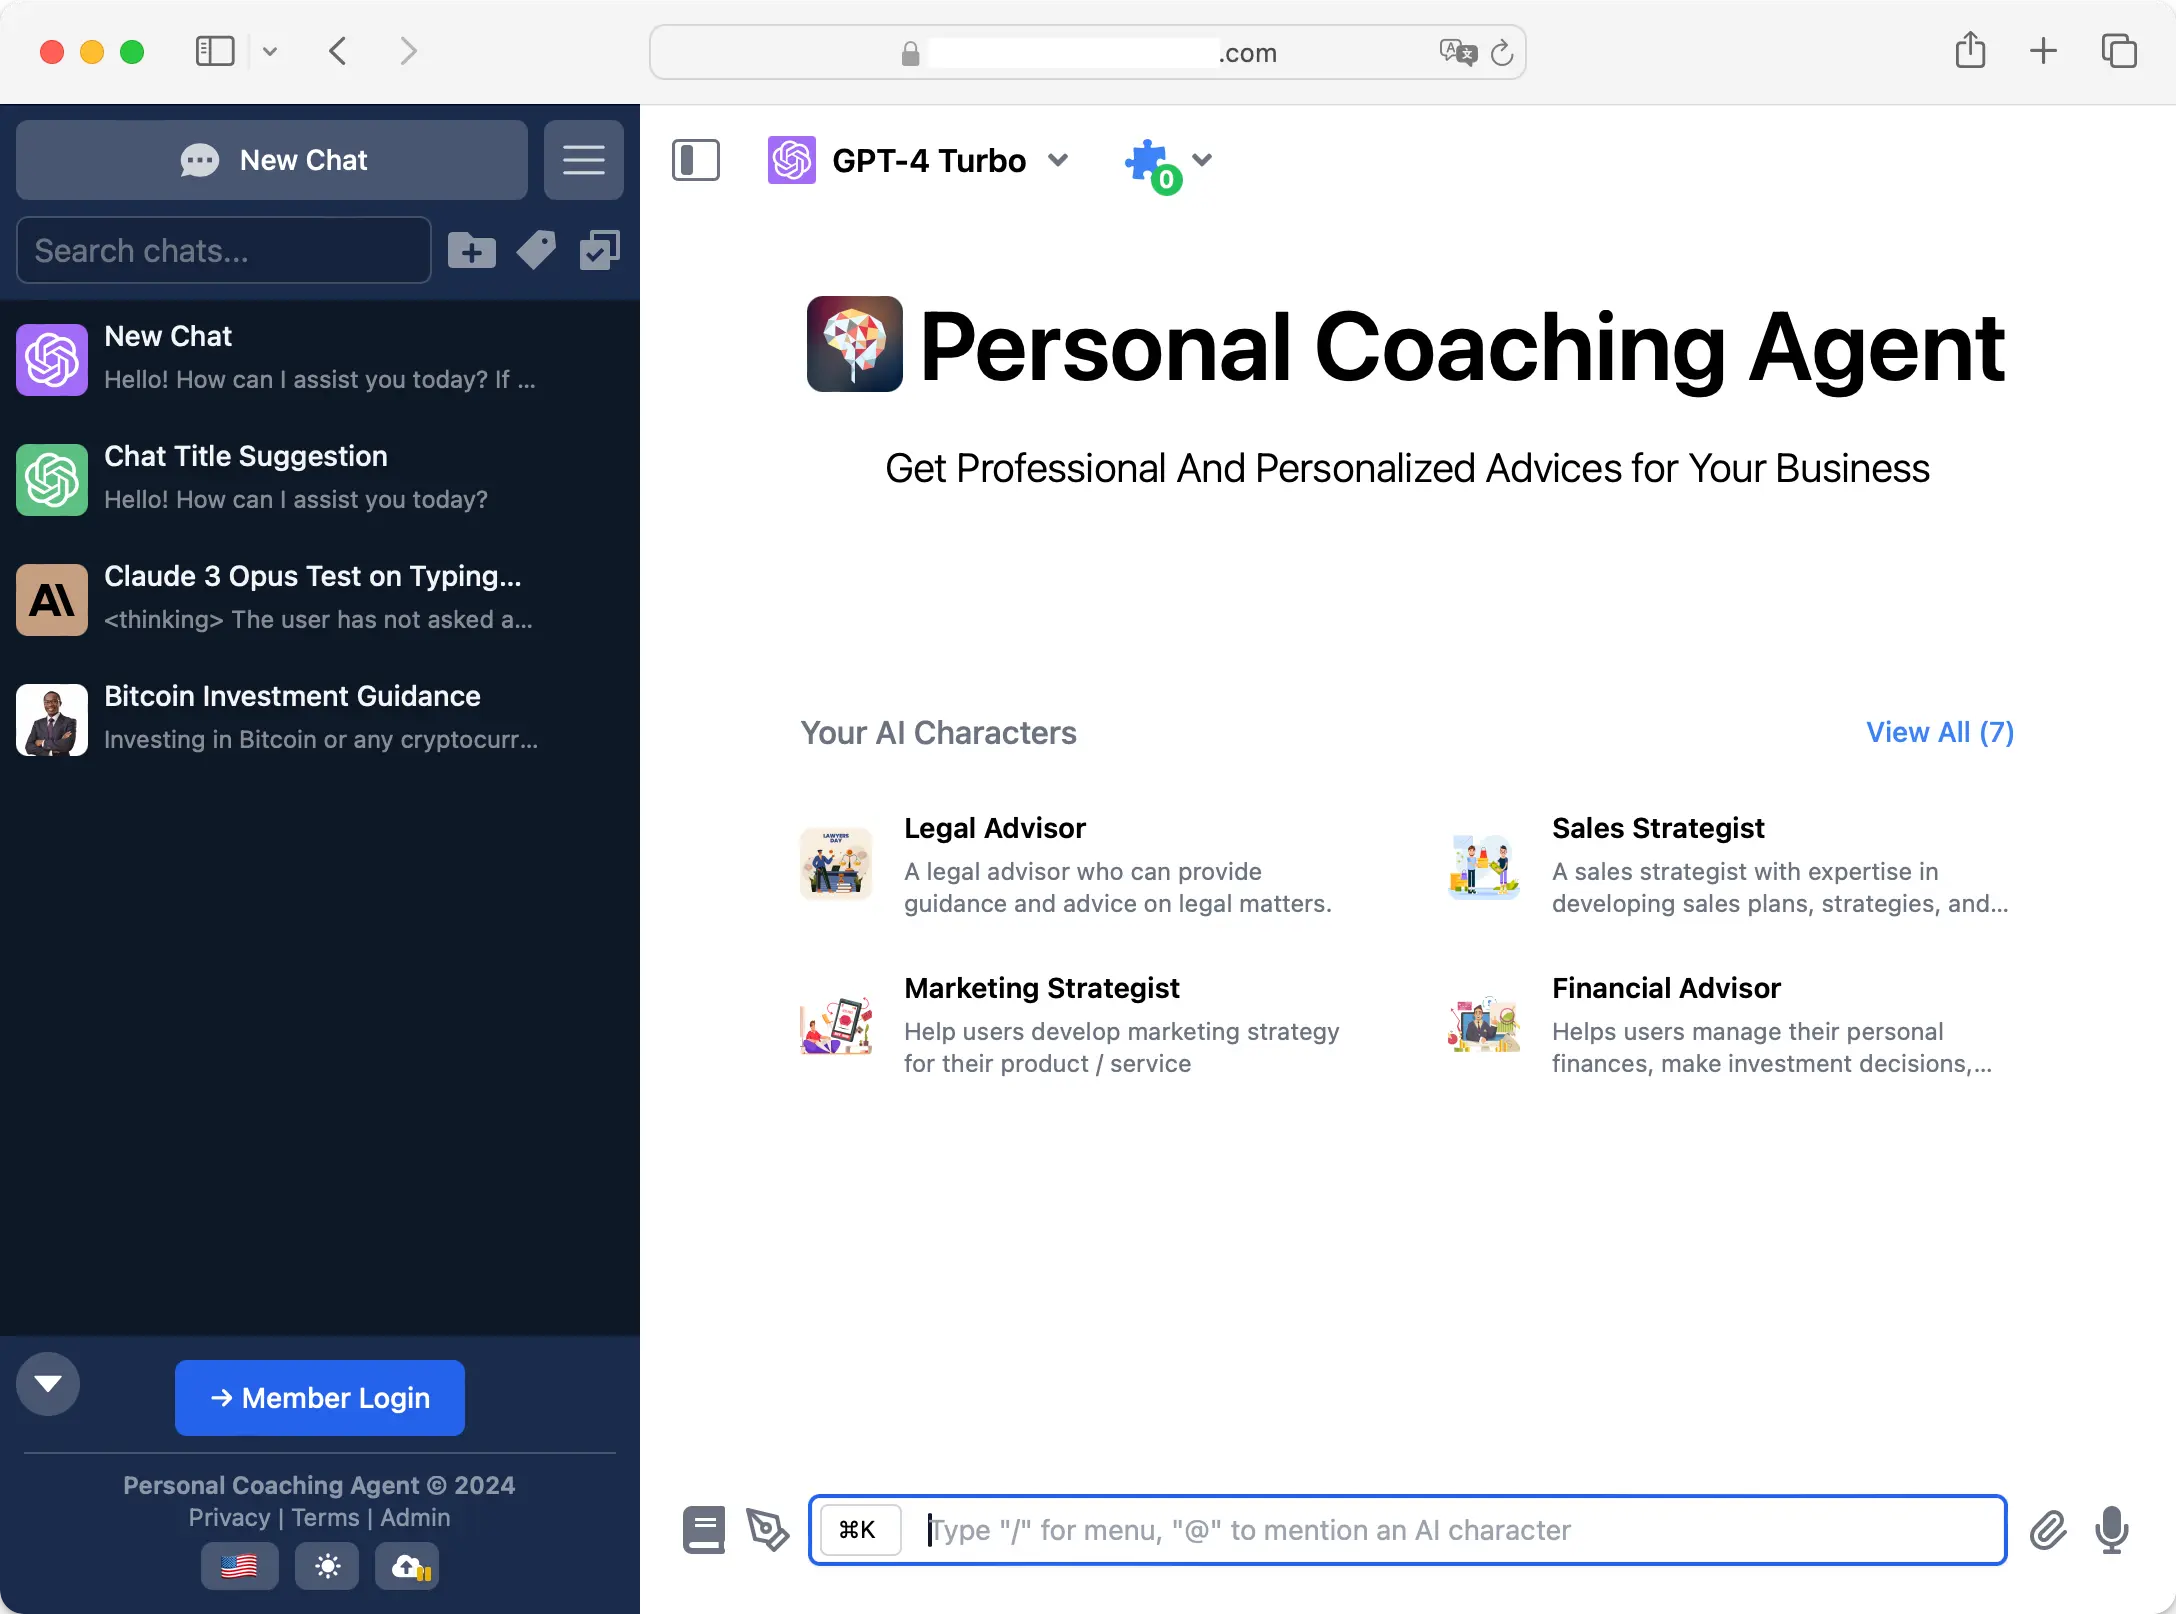
 Here’s how members will see on the chat interface:
2. Feature visibility
Determine which features should be visible in the chat interface. Navigate to the “Chat Features” section to enable or disable features on the user interface (UI).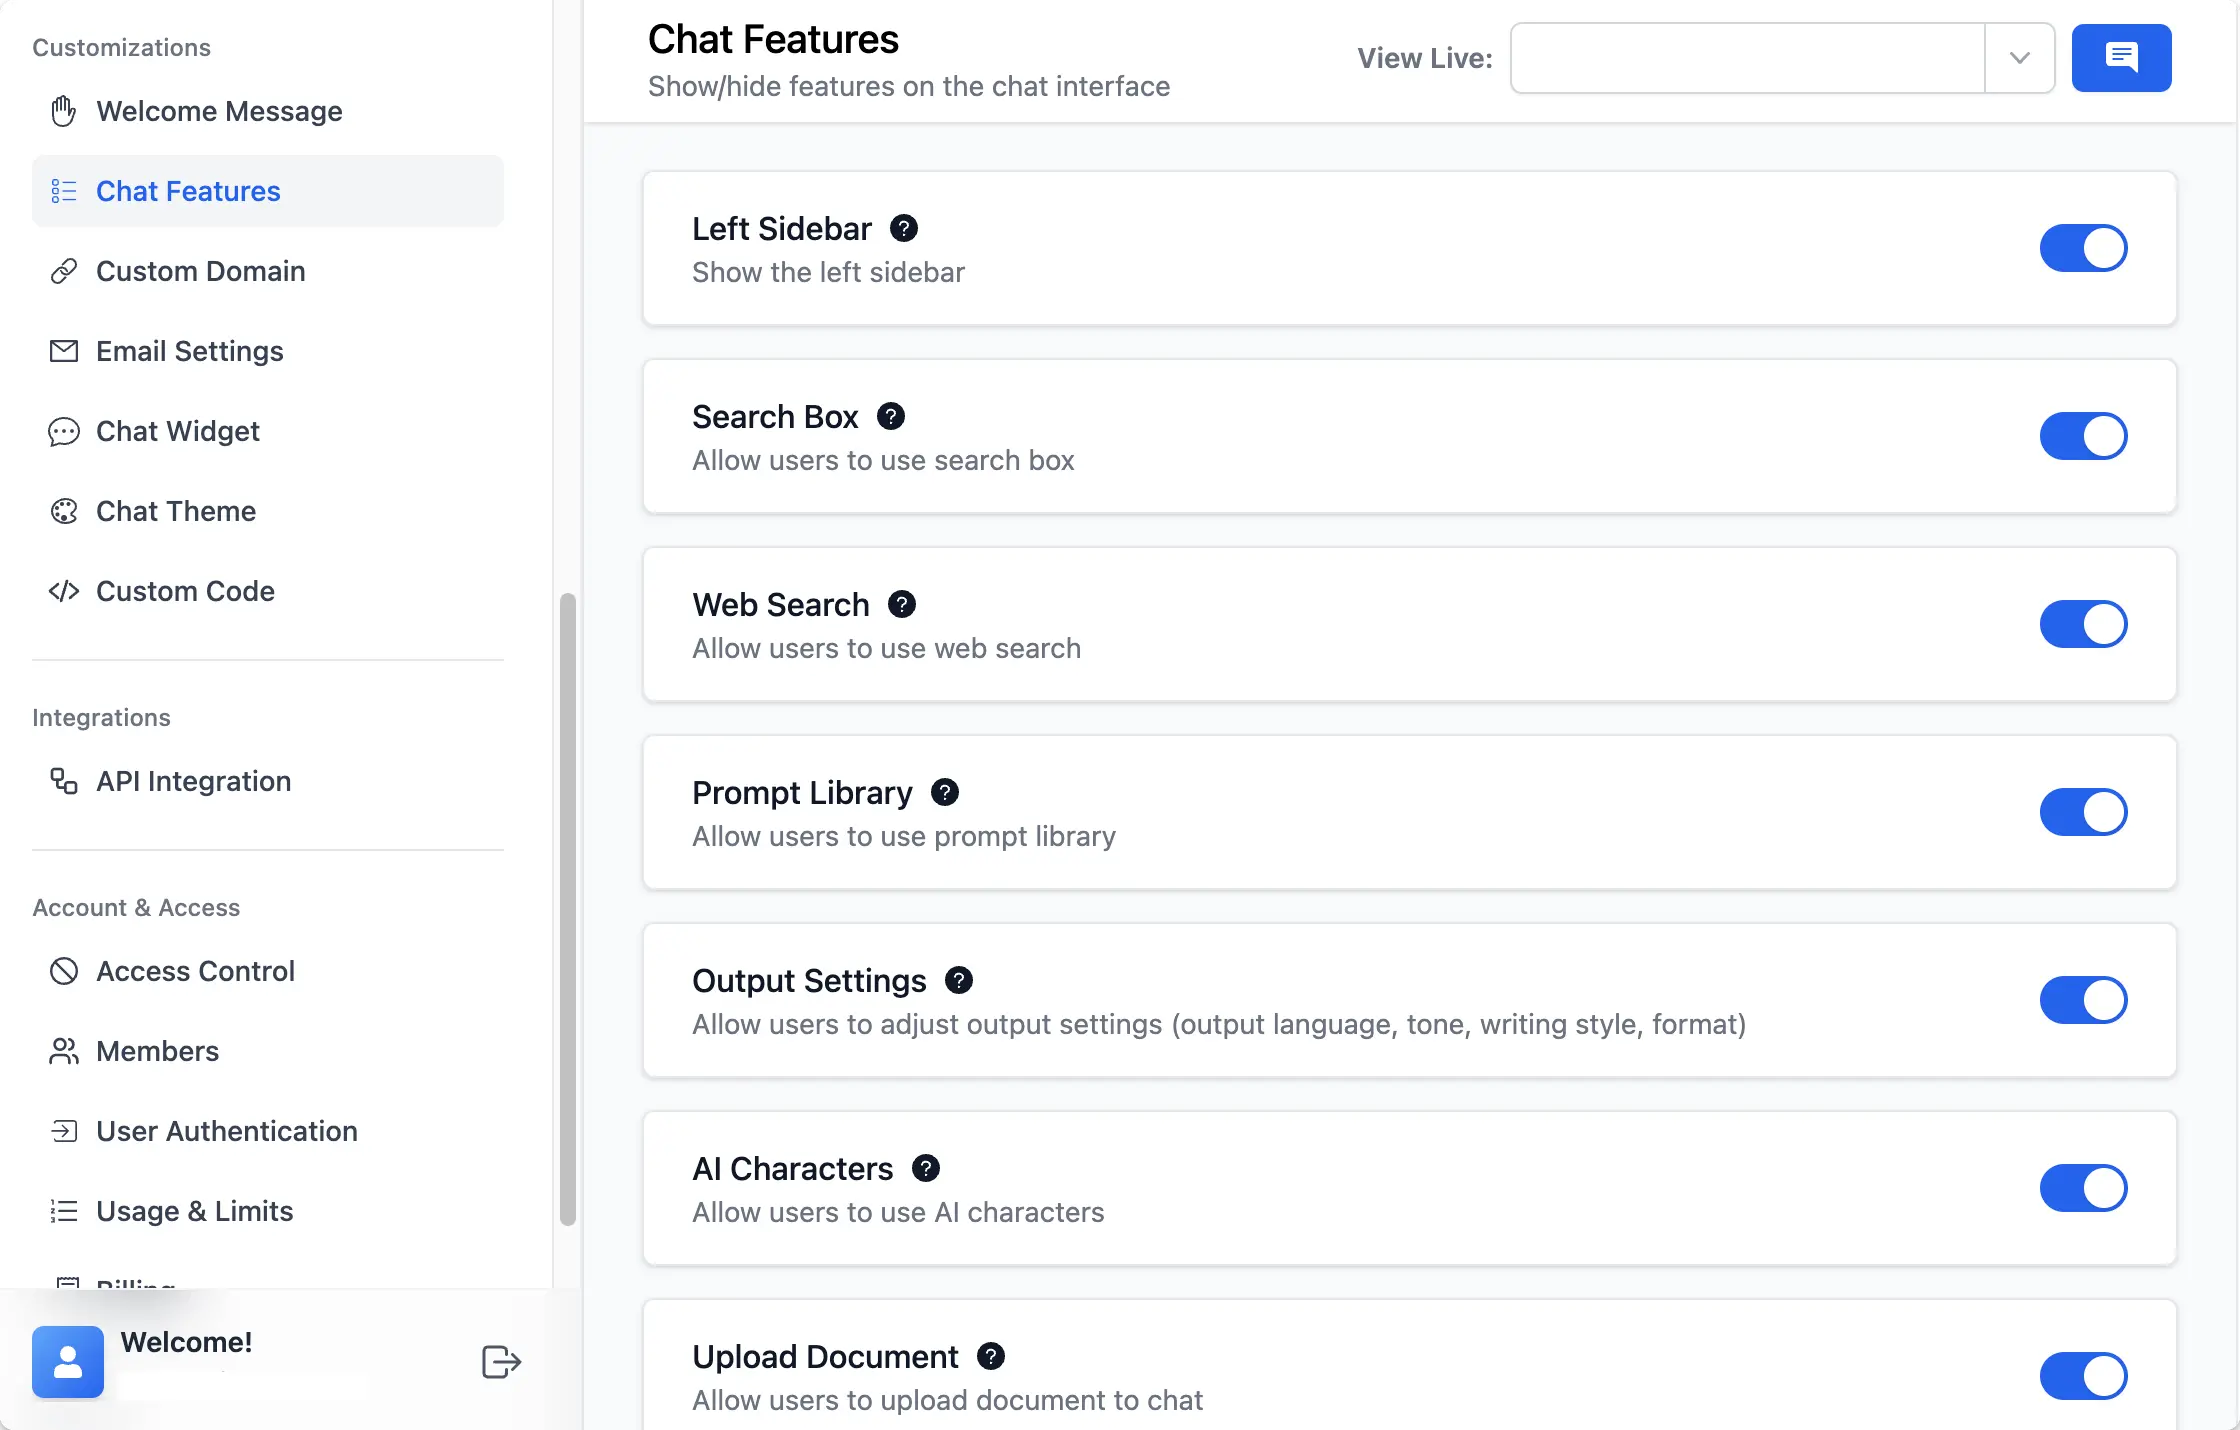 Once a feature is disabled, it will no longer appear on the chat interface, meaning that your members will not be able to see or use it
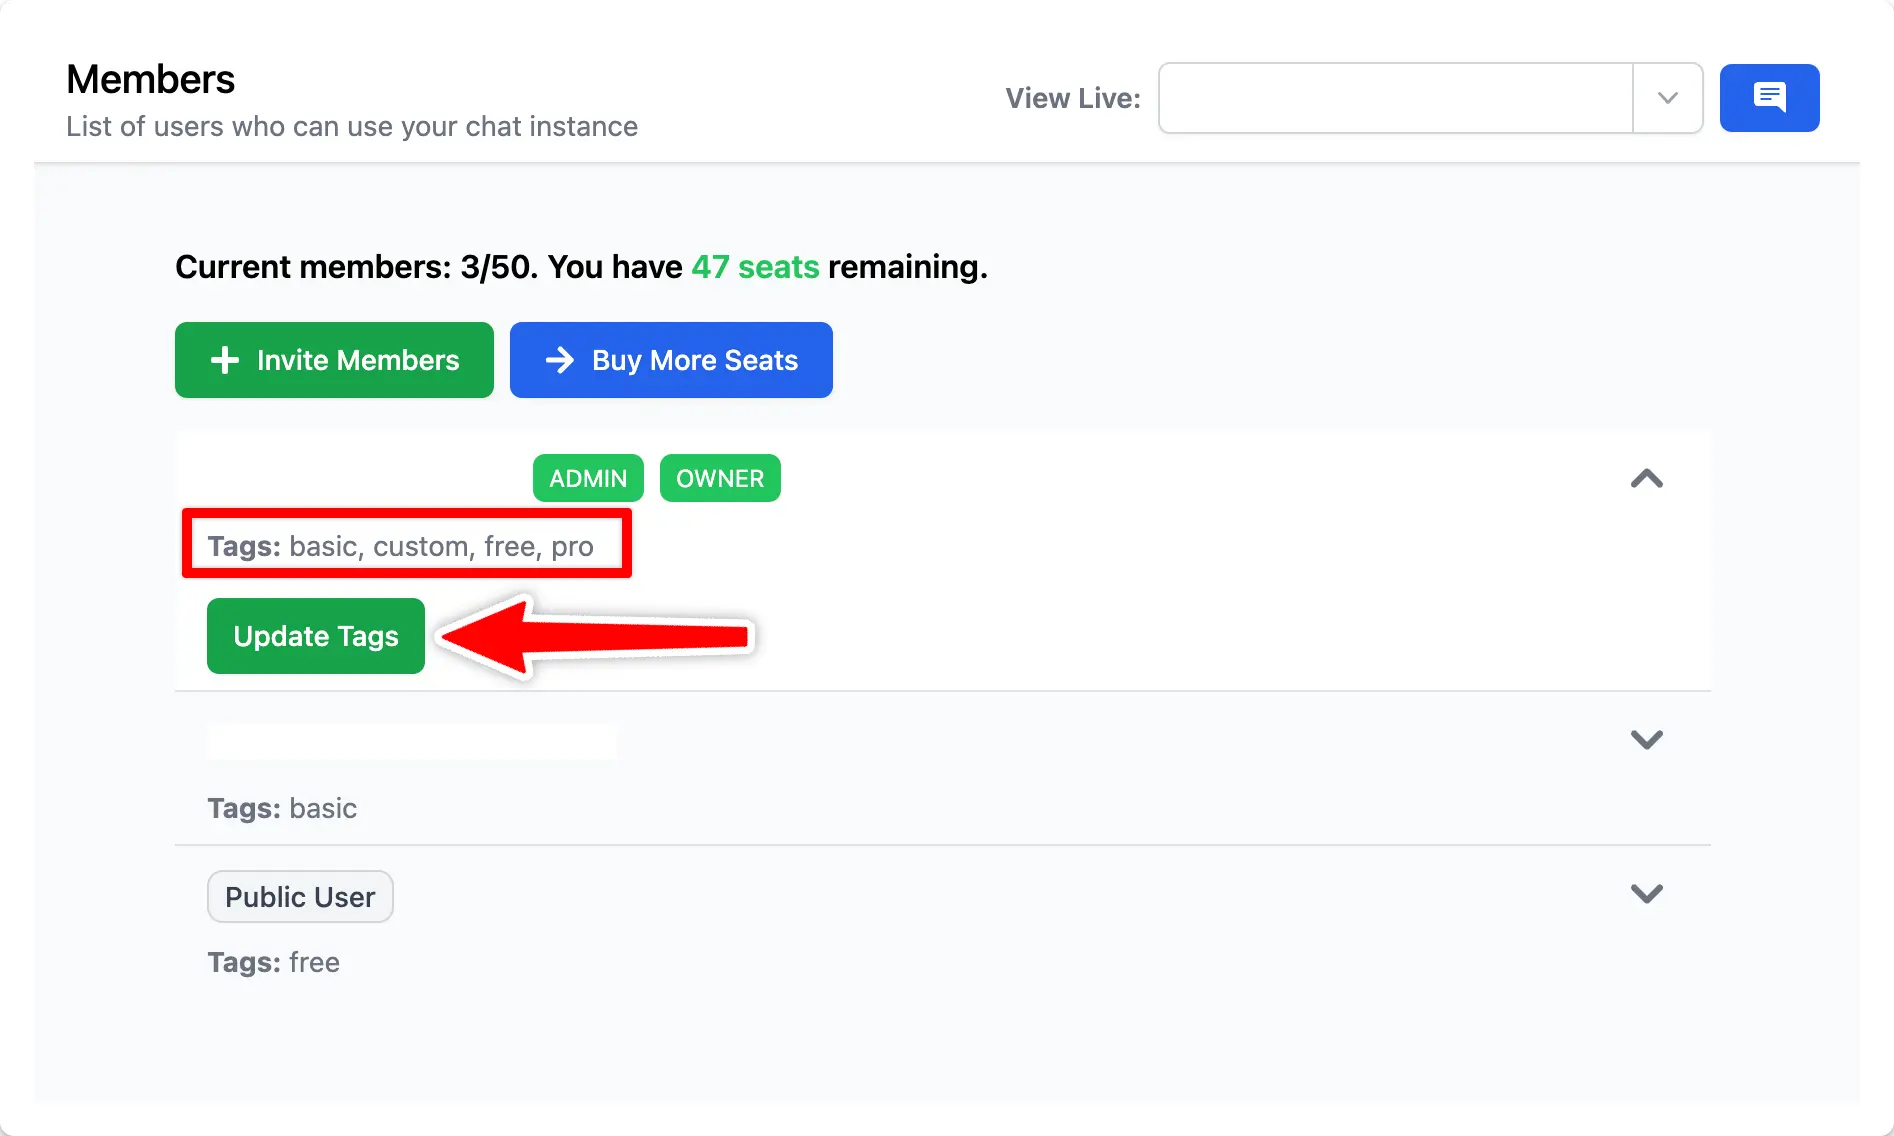
Step 4: Define user tags
Assigning tags to members helps you control member access to specific prompts and AI Agents. Below is an example:- “free” as Free users
- “basic” as Basic users
- “pro” as Pro users
- “custom” as Custom users
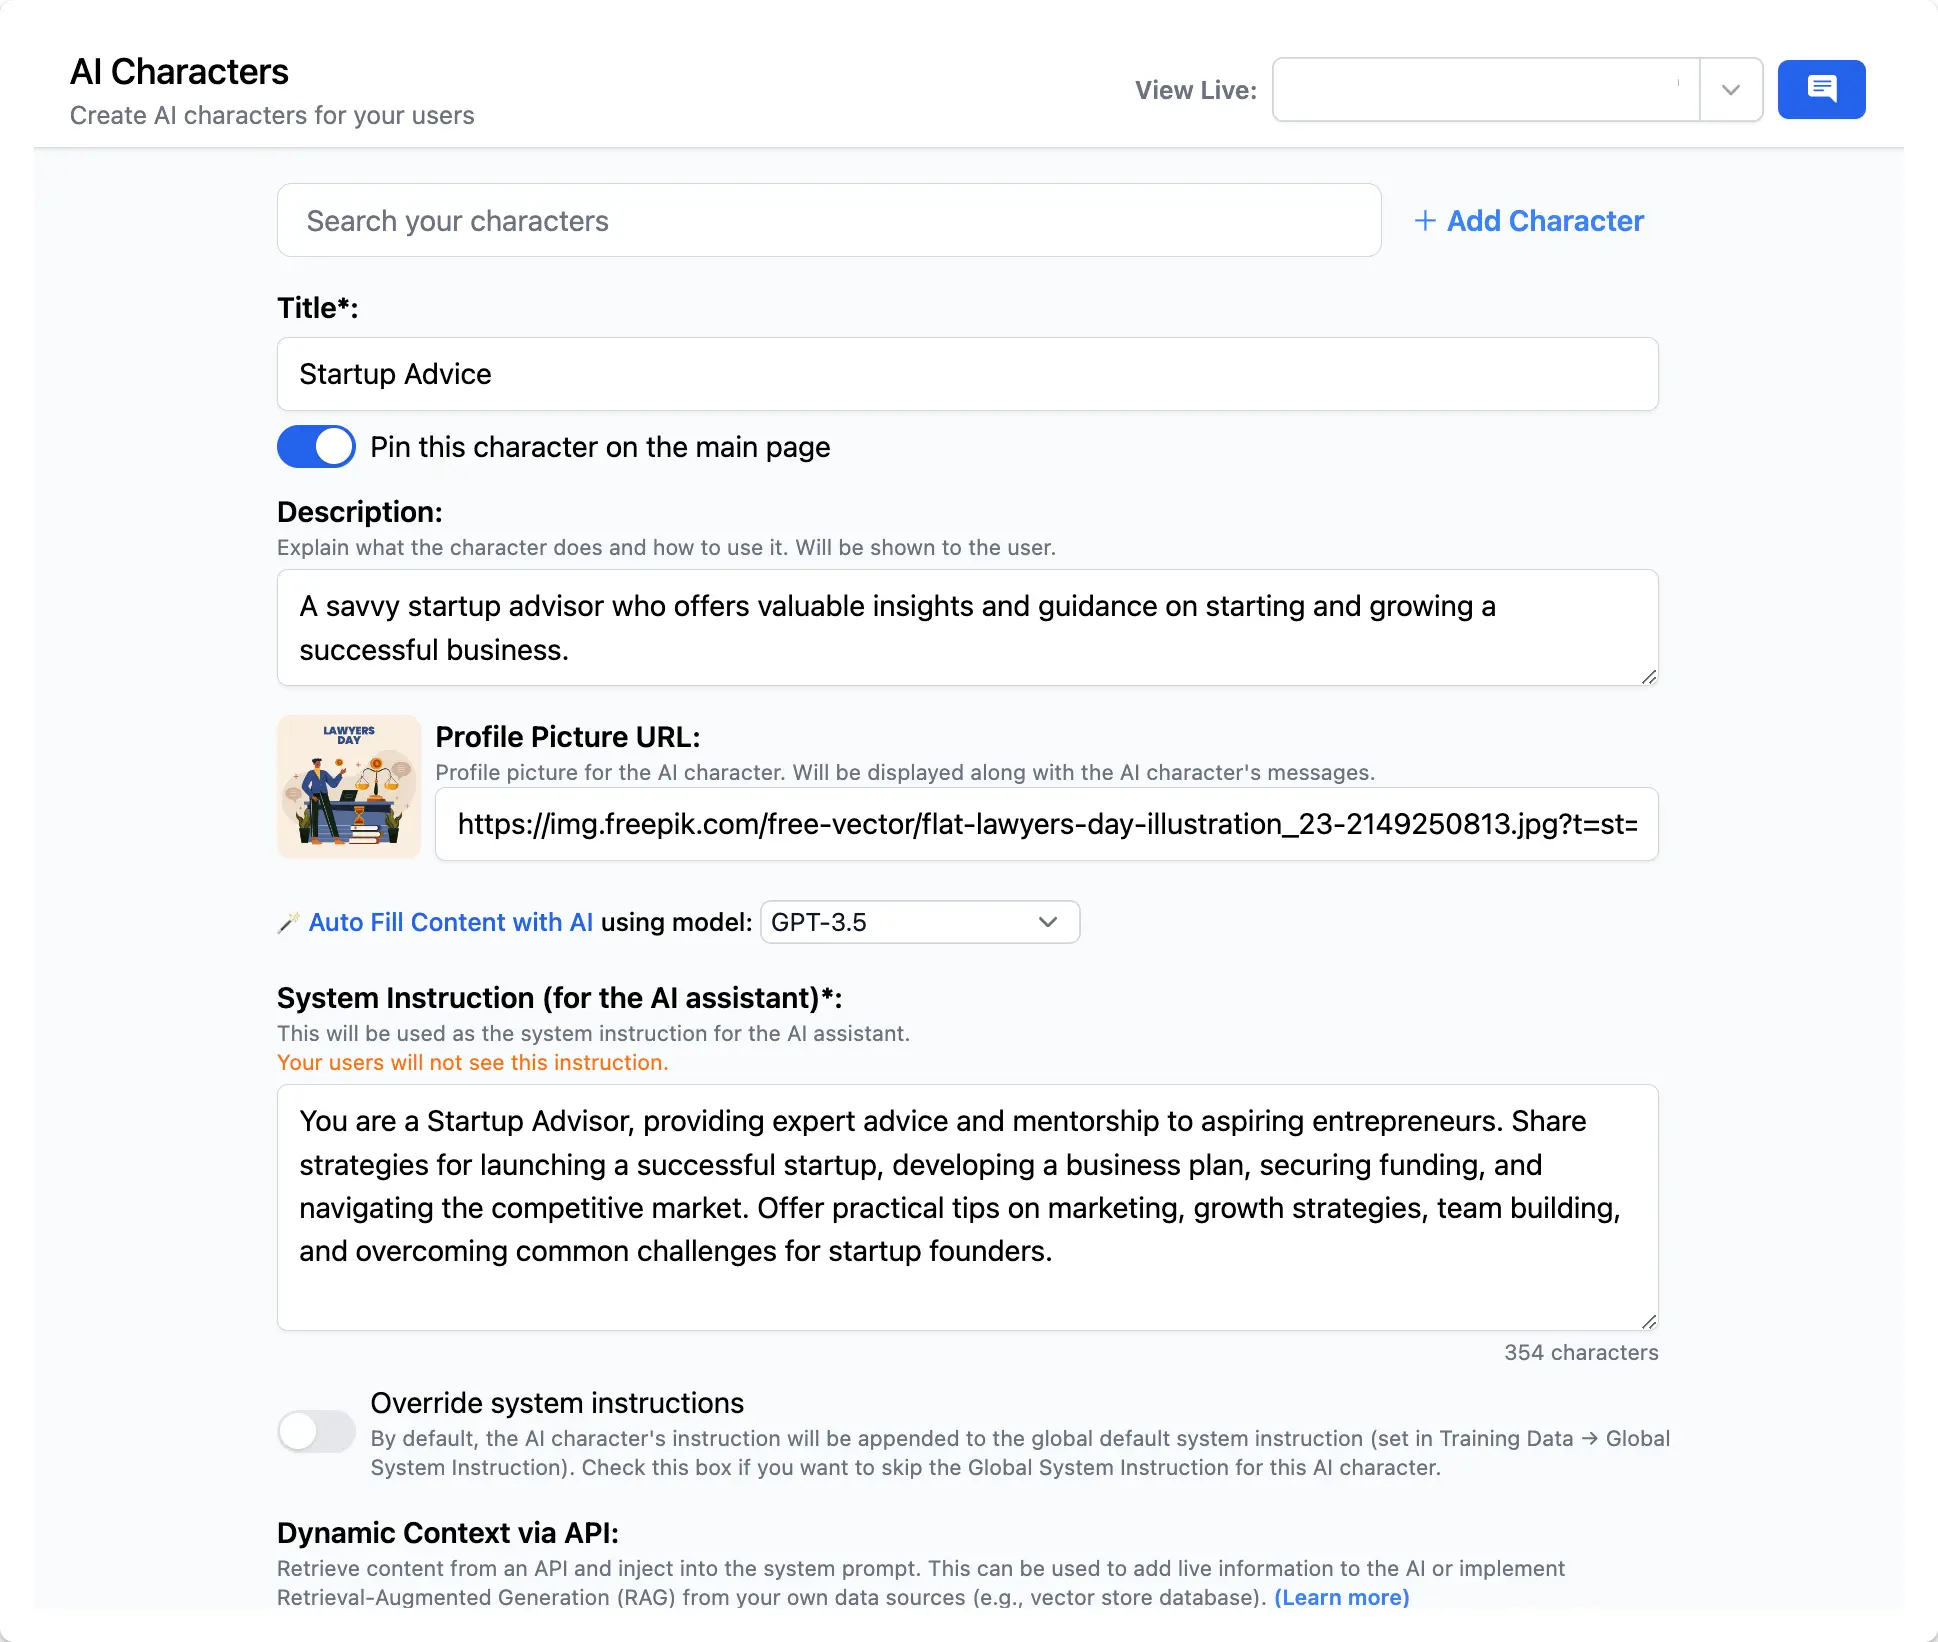
Step 5: Build AI Agent for each tier and restrict usage
First you need to create AI Agent for different member tiers. Go to AI Agents section and click Add Agents:- Free: use General Advice
- Basic: use Startup Advice
- Pro: use Sales Strategist
- Custom: use Financial Advisor
 By default, these AI Agents will be shown on the chat UI and accessible by all members.
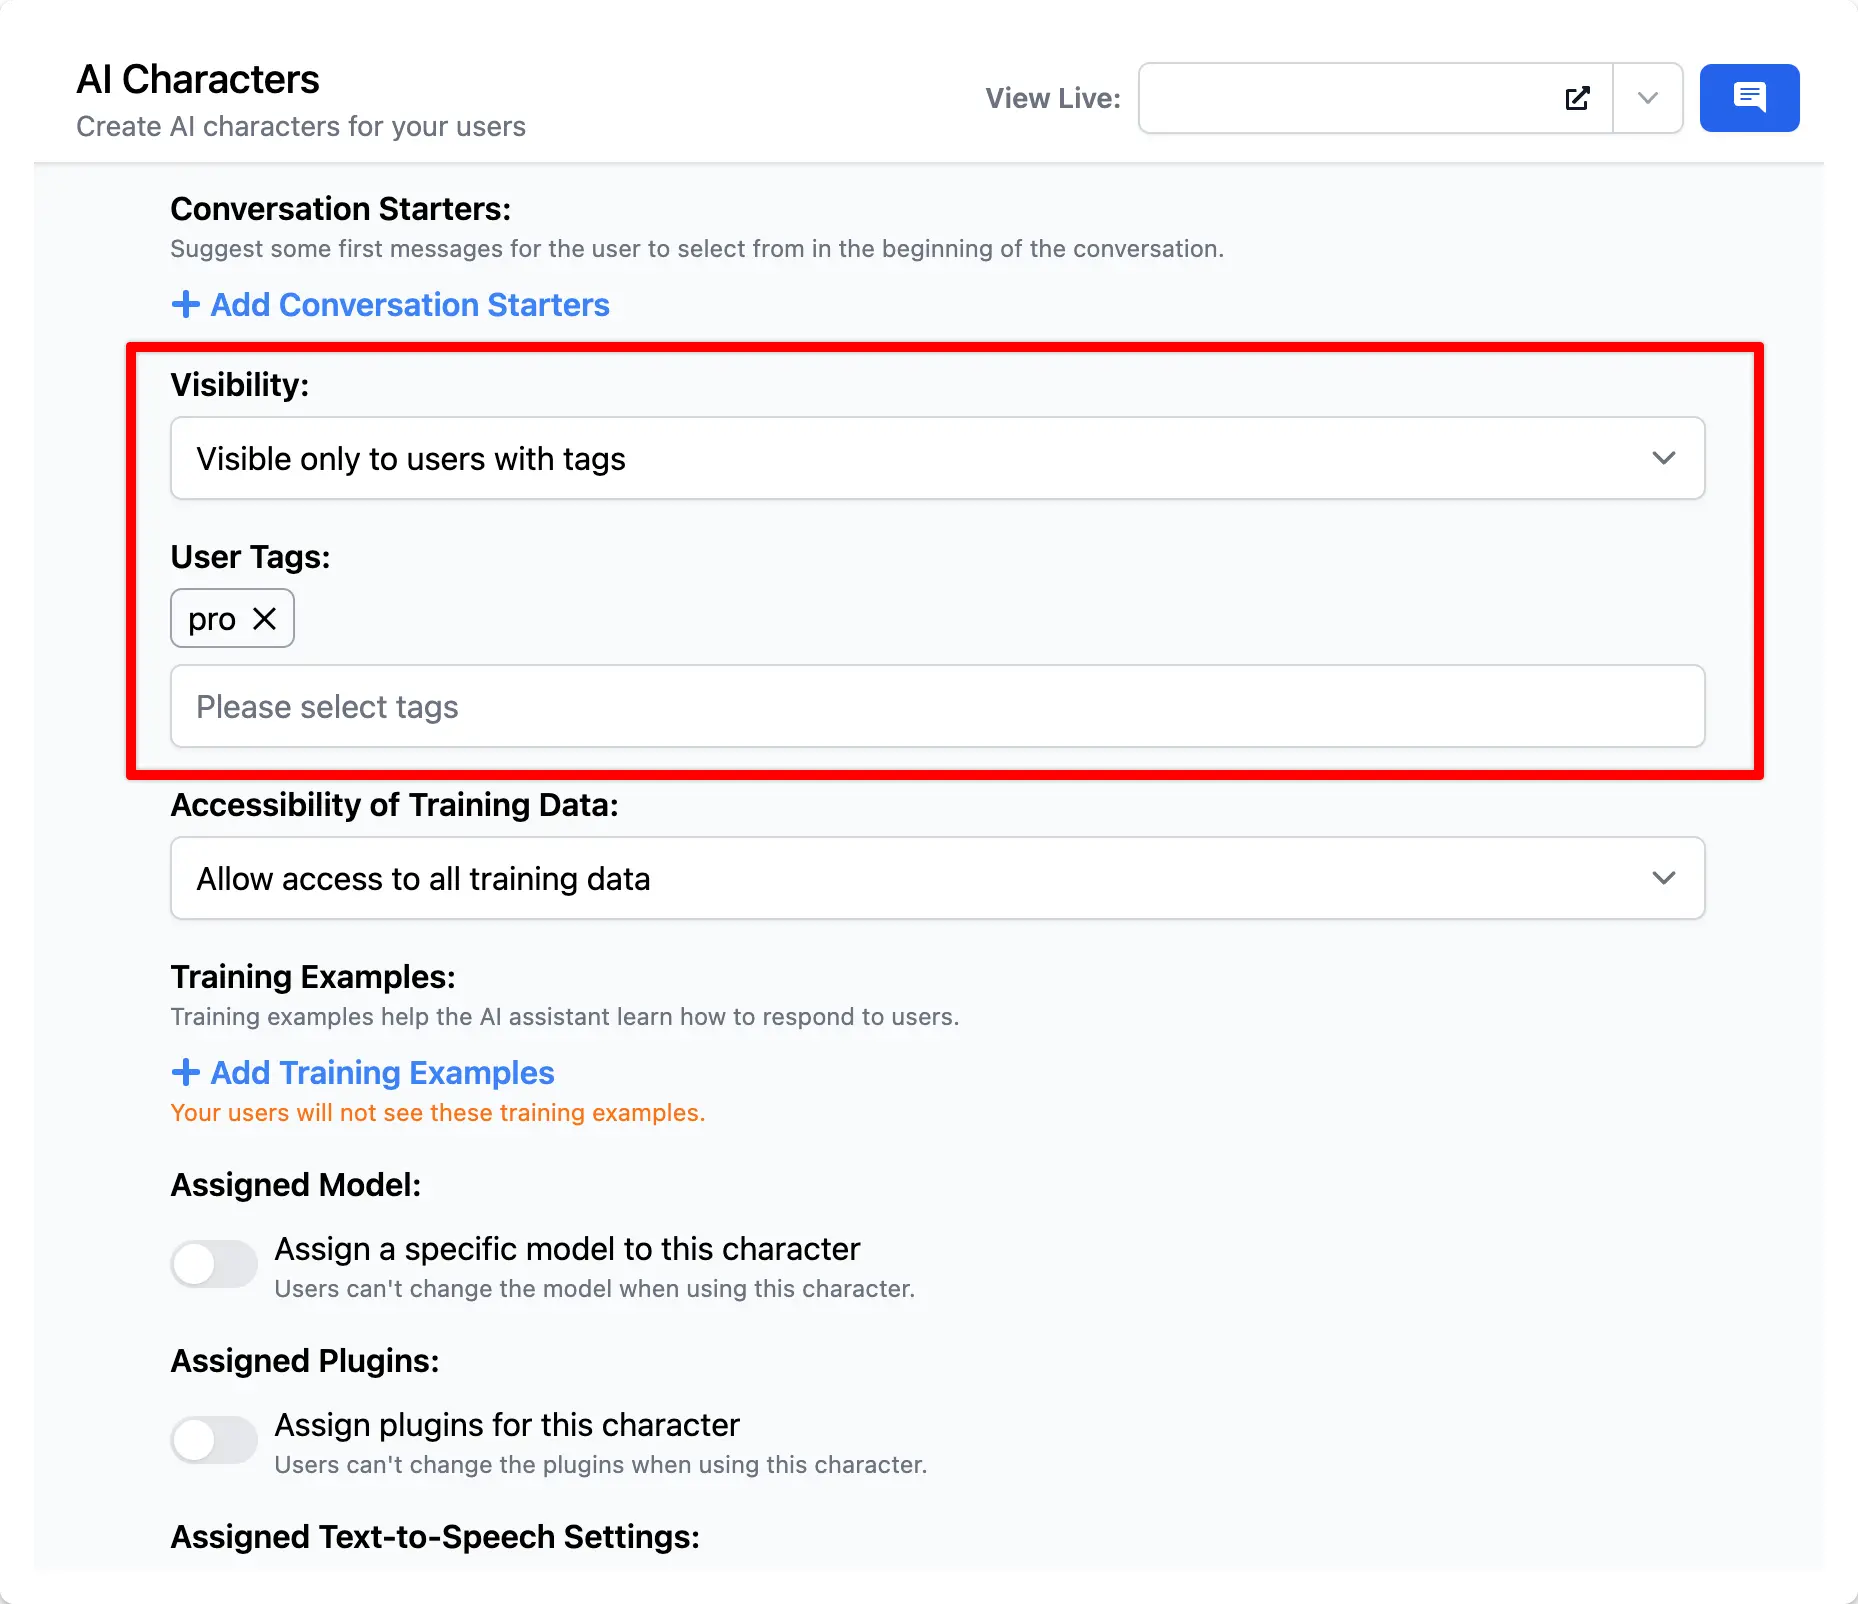
To prevent mix access of members from different tiers, you will need to limit the AI Agent access.
To do this, you should assign each AI Agents with different user tags that you have set in step 4:
By default, these AI Agents will be shown on the chat UI and accessible by all members.
To prevent mix access of members from different tiers, you will need to limit the AI Agent access.
To do this, you should assign each AI Agents with different user tags that you have set in step 4:
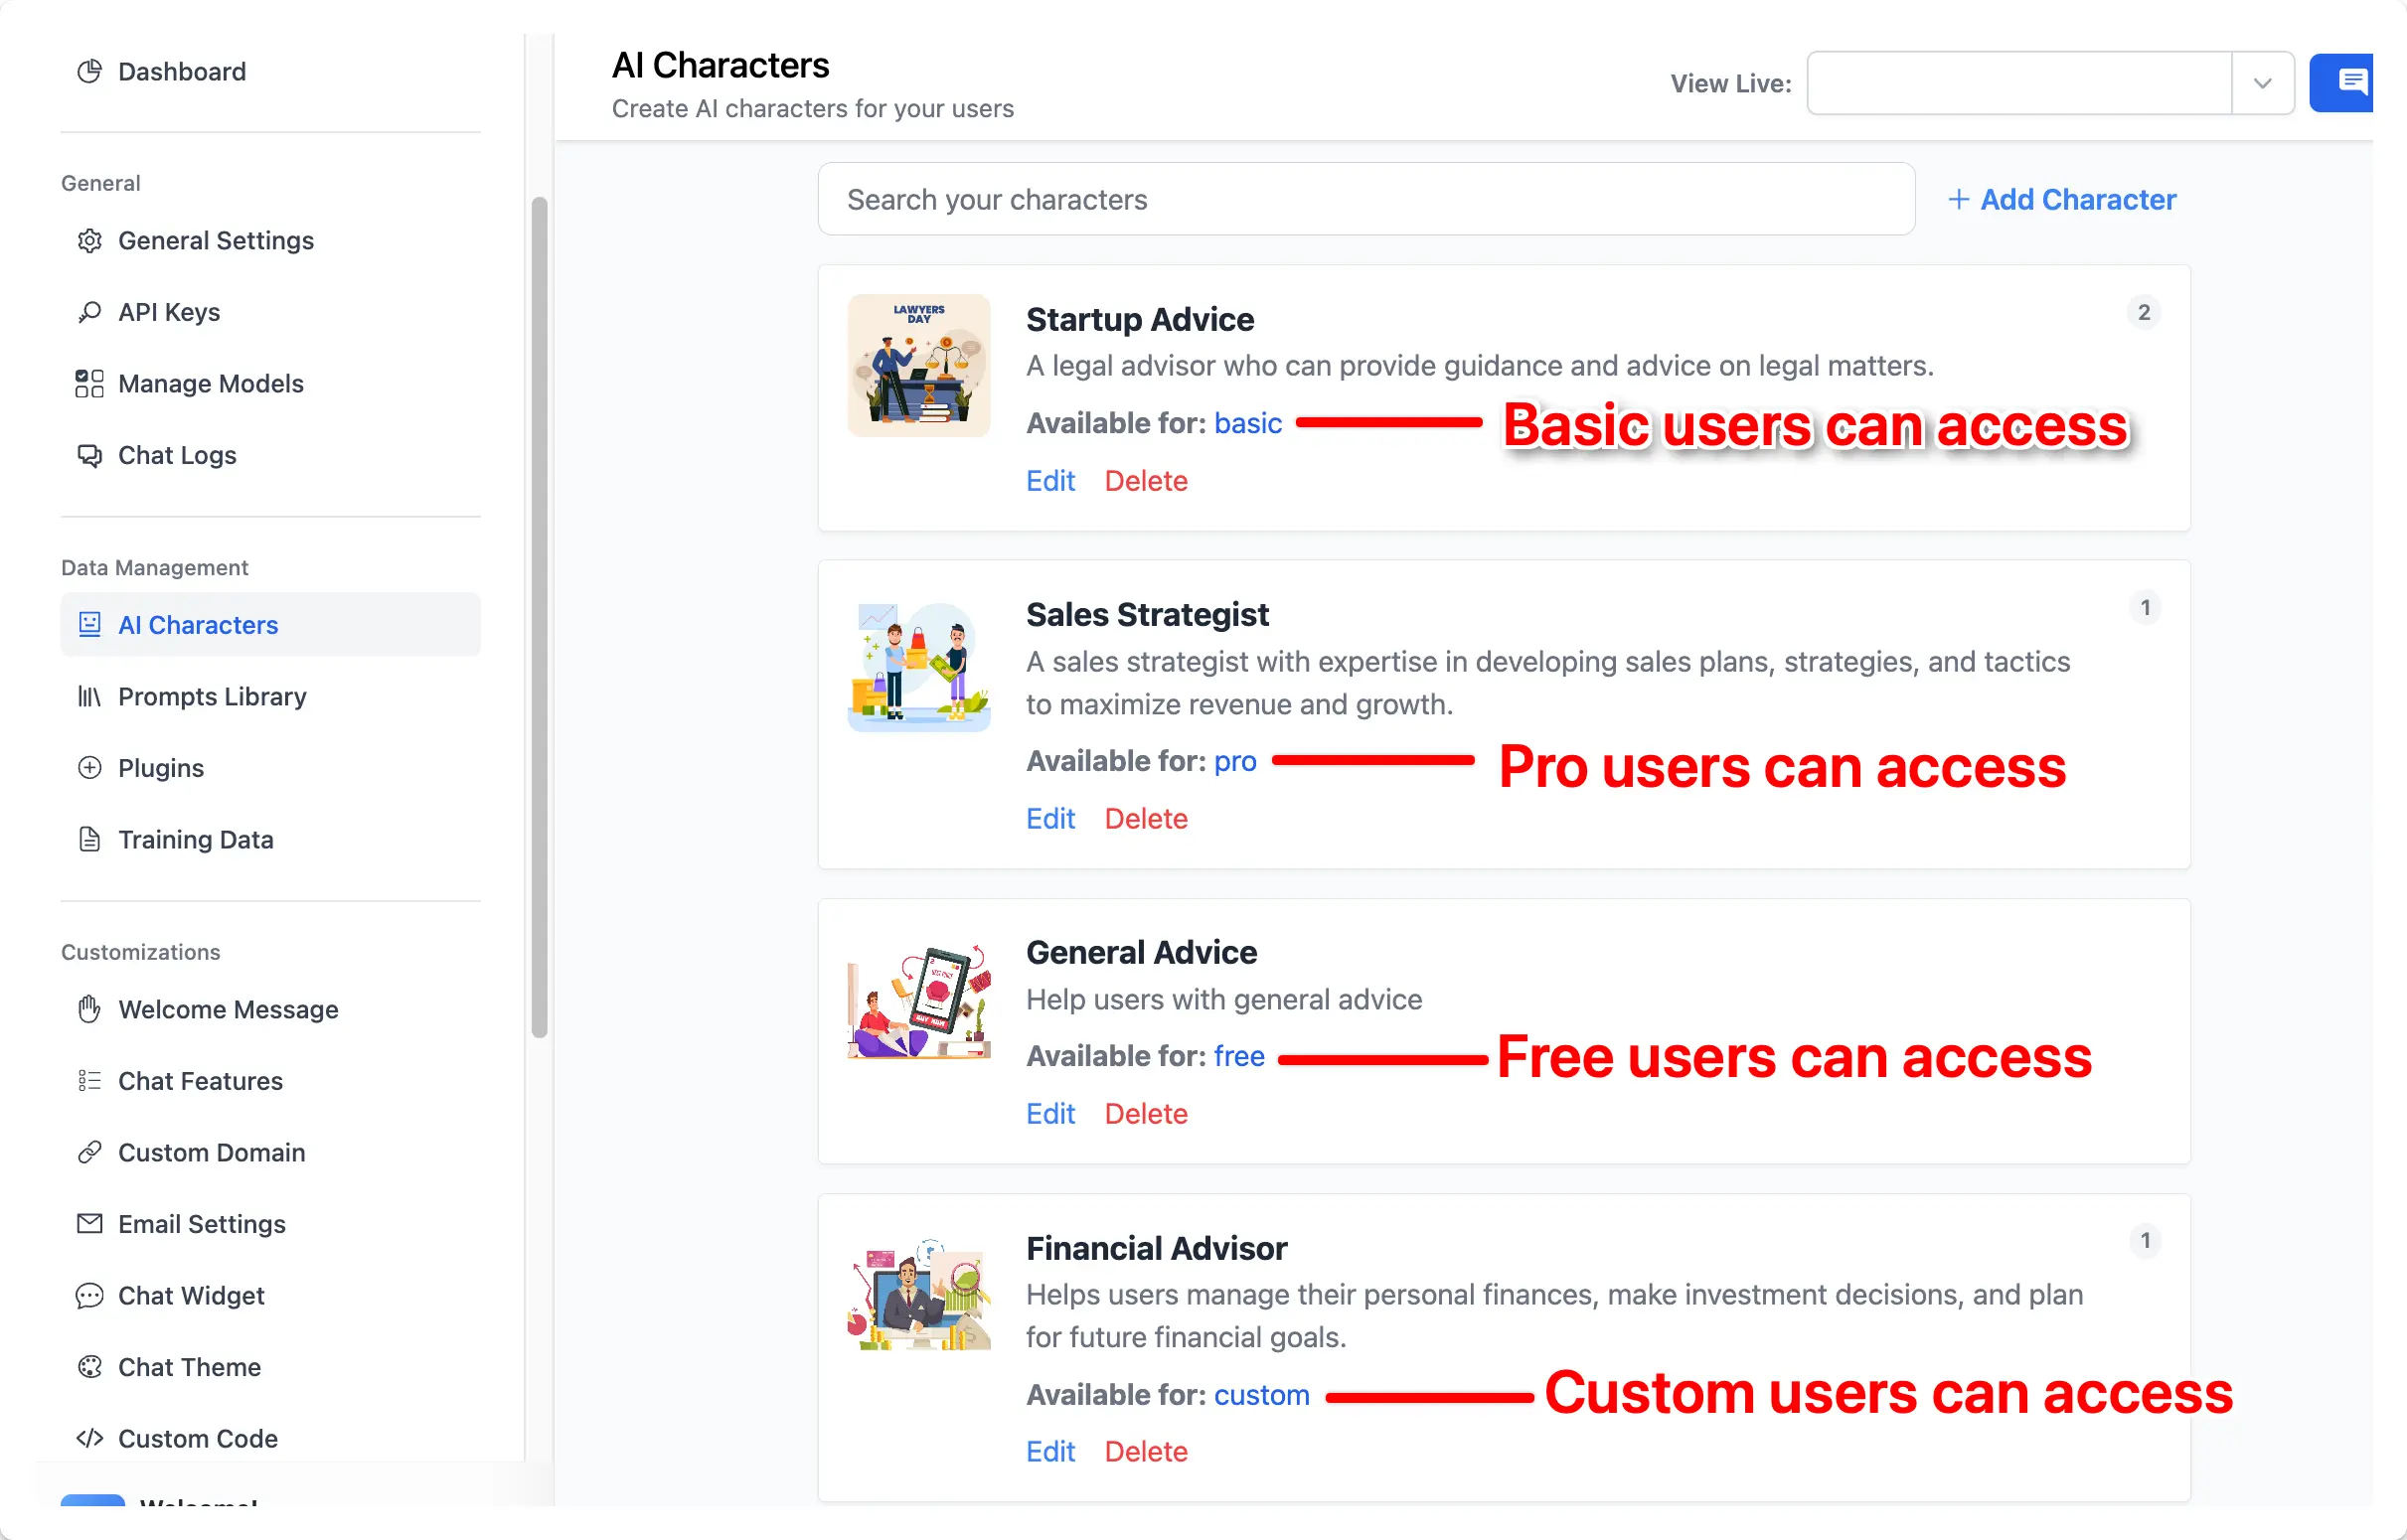 Members can only see the AI Agent that you provide access for them.
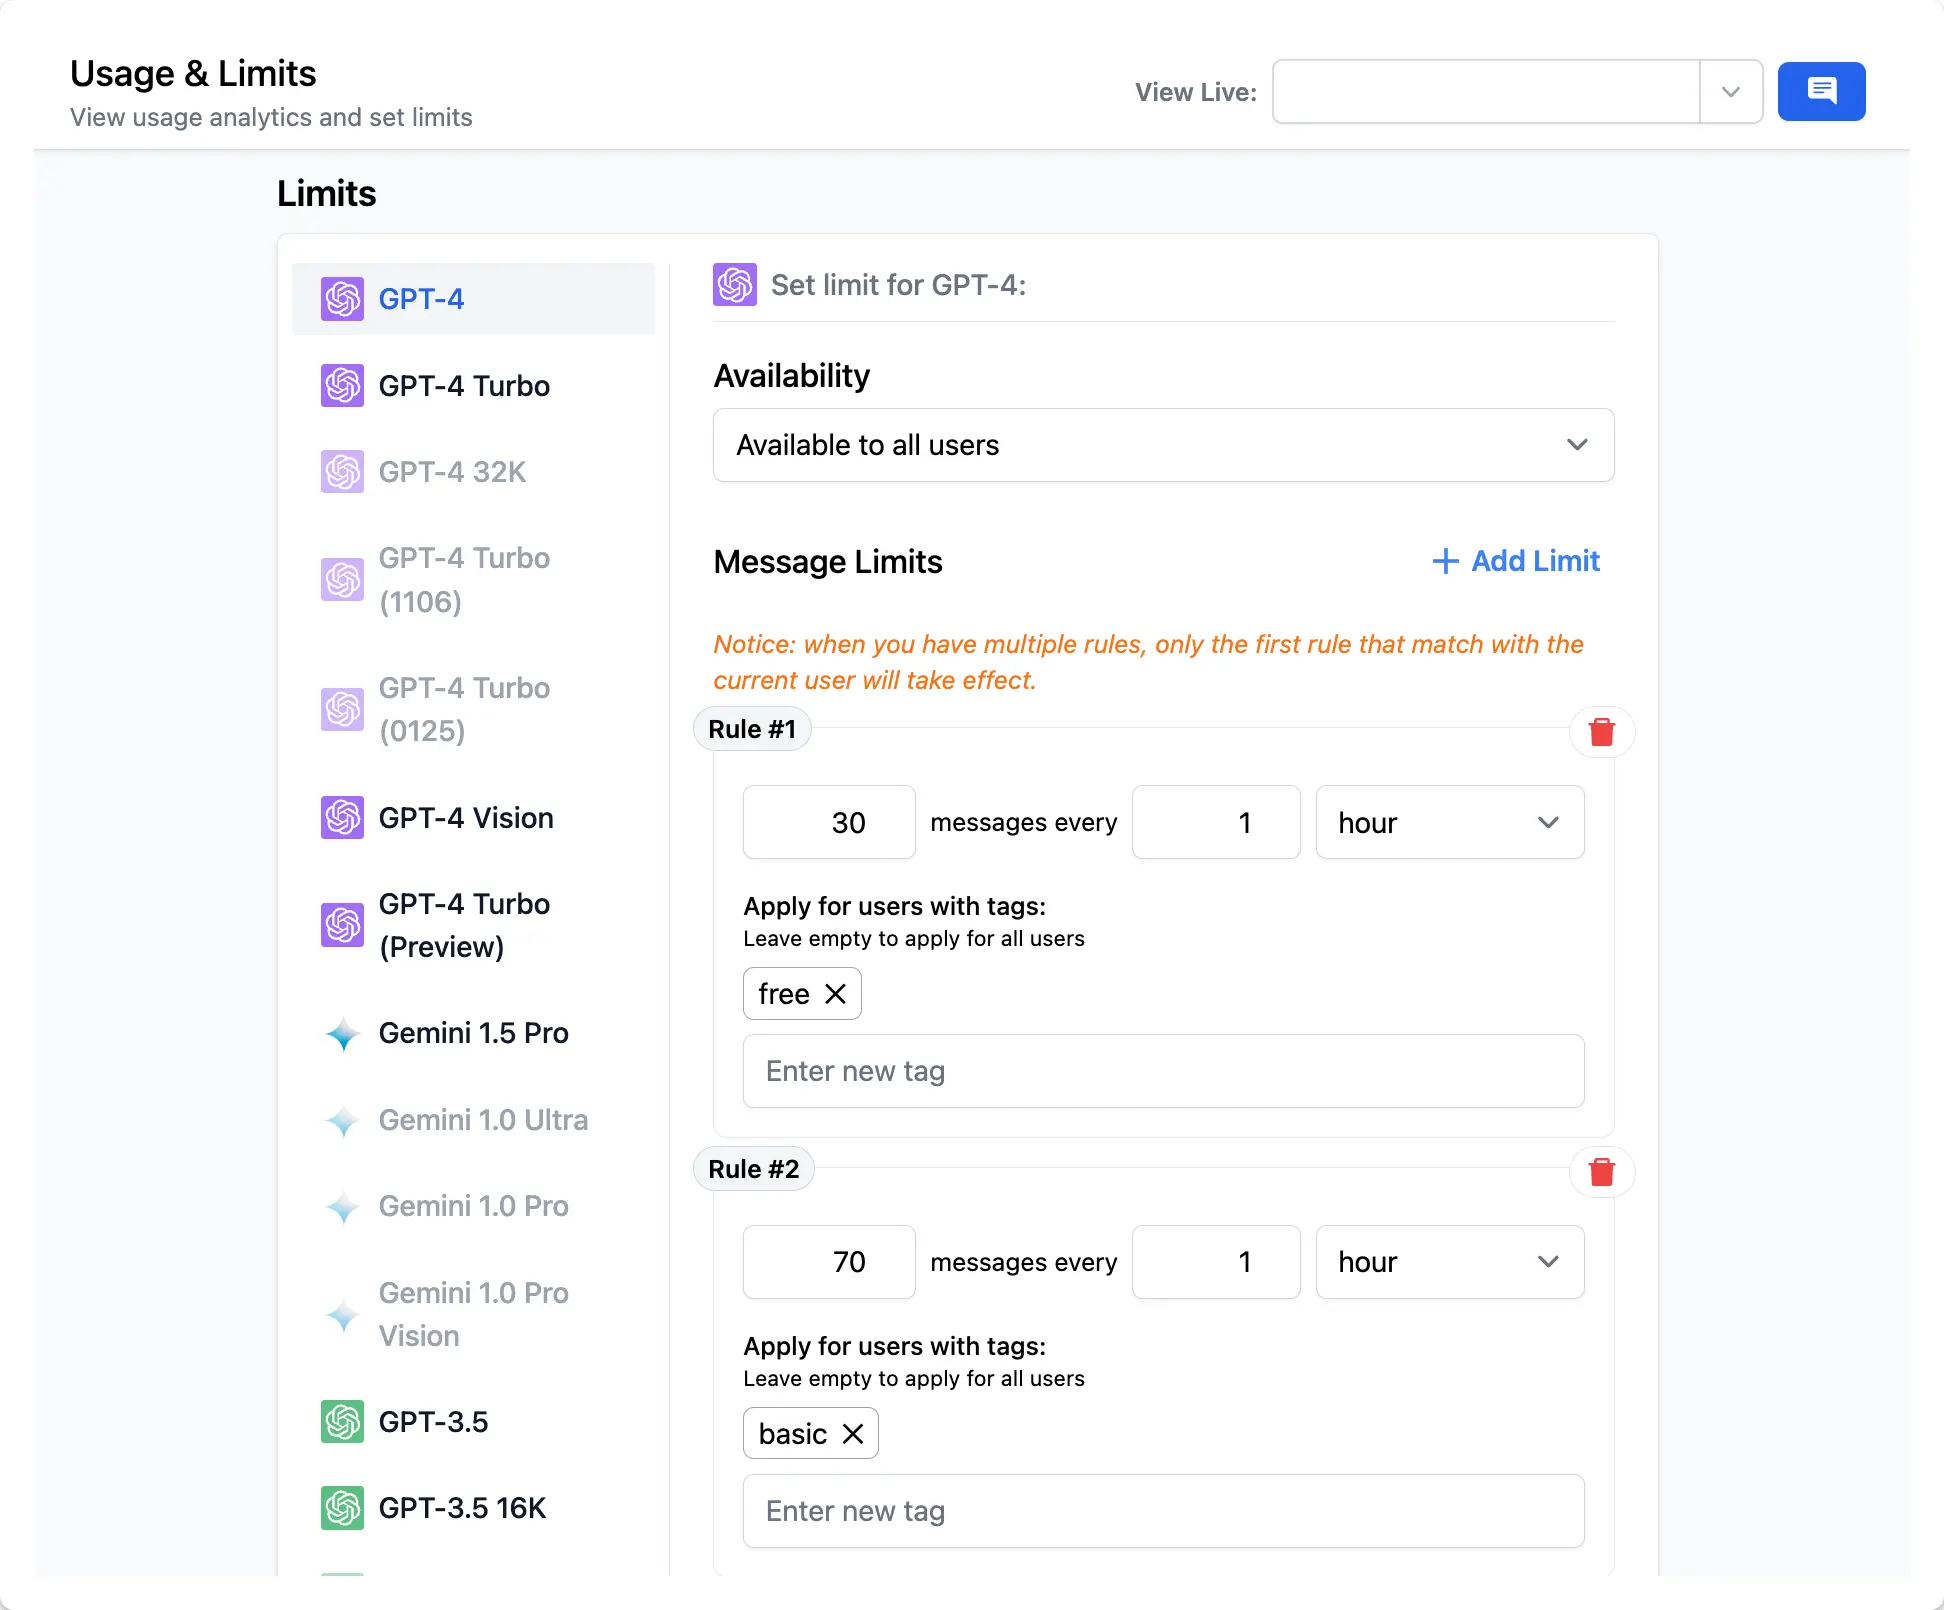
Step 6: Restrict chat model usage
You can restrict usage on your Coaching bot to control cost and ensure fair use for your members.- Go to Usage and Limit
- Choose the chat model you are currently using for the Coaching bot
- Control its visibility and its allowed usage
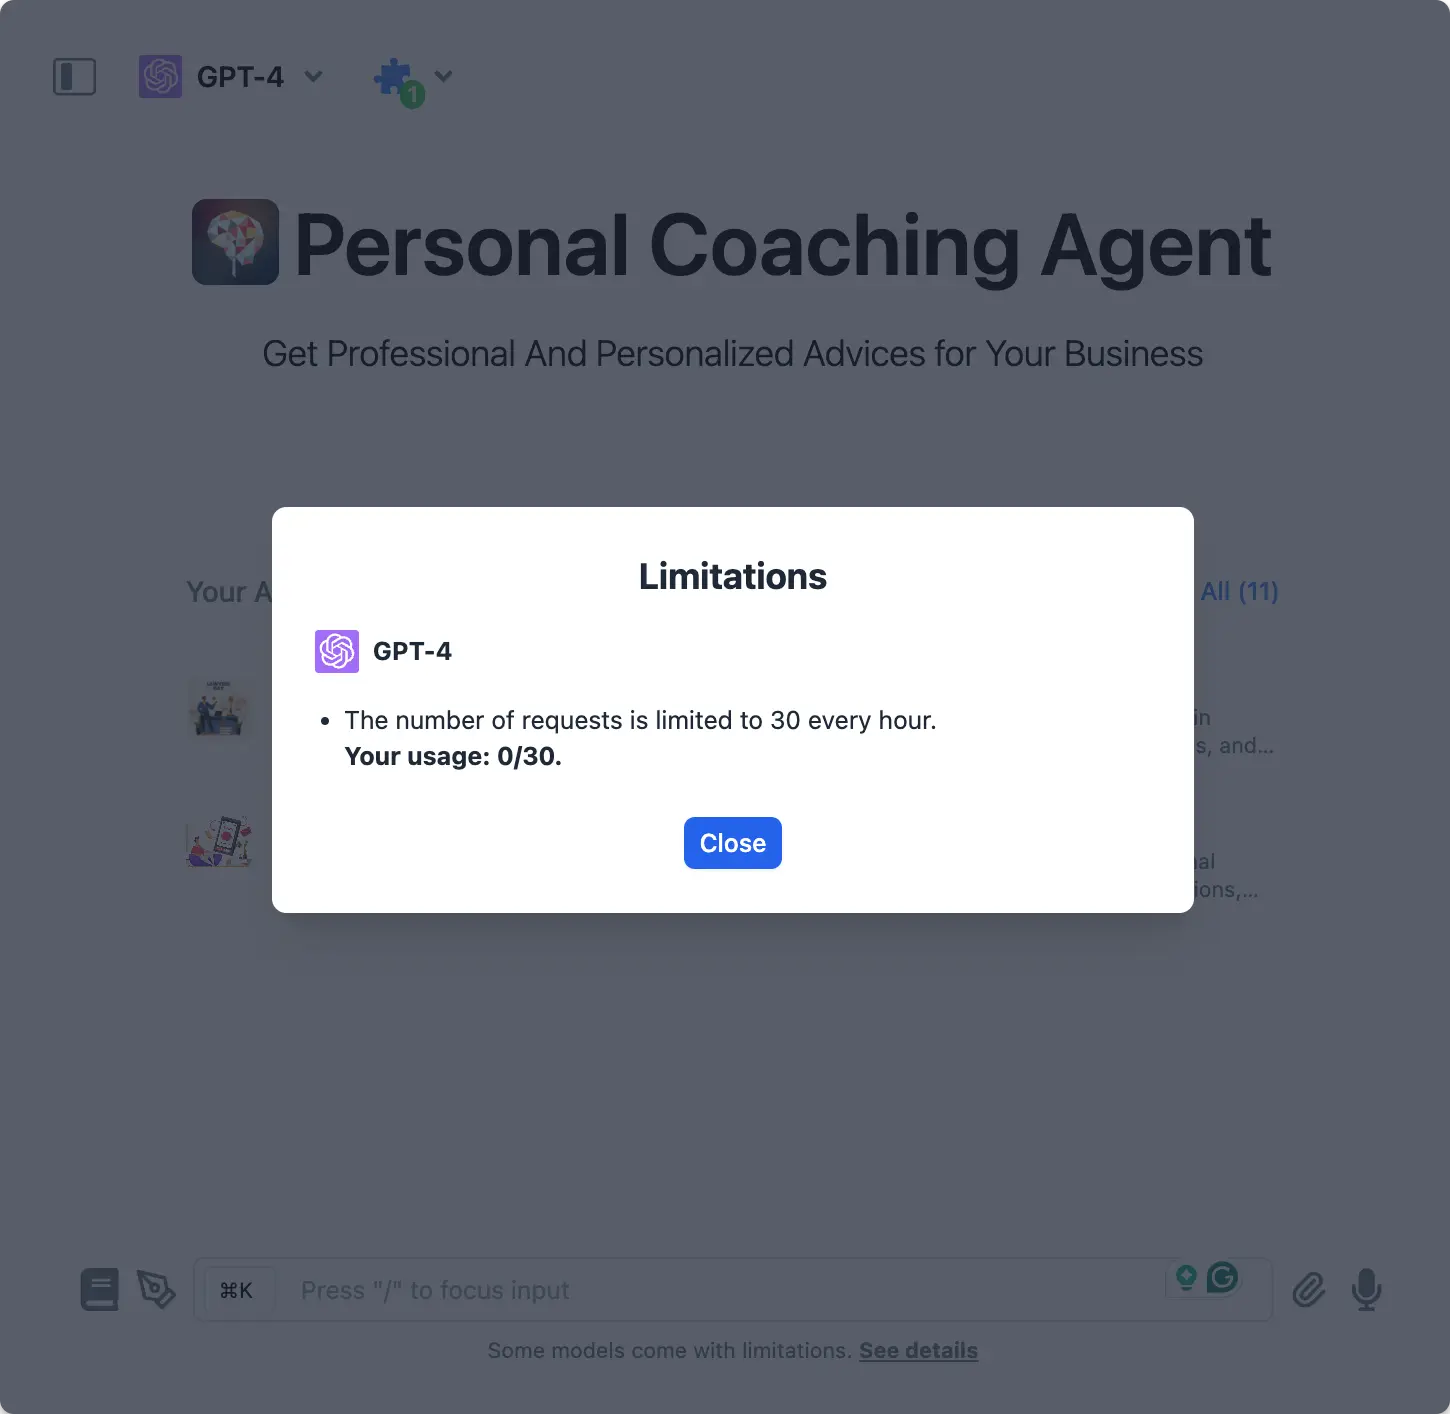
- Free users can only use GPT-3.5 and GPT-4 with cap at 30 messages / hour
- Basic users can use GPT-4 with cap at 70 messages / hour
- Pro users can use GPT-4 with cap at 150 messages / hour and use with other chat models such as Claude 3 Opus, Google Gemini 1.5
Step 7: Connect with your payment system
Make use of our API to integrate with your existing payment system. Here’s more details: https://custom.typingmind.com/features/api-access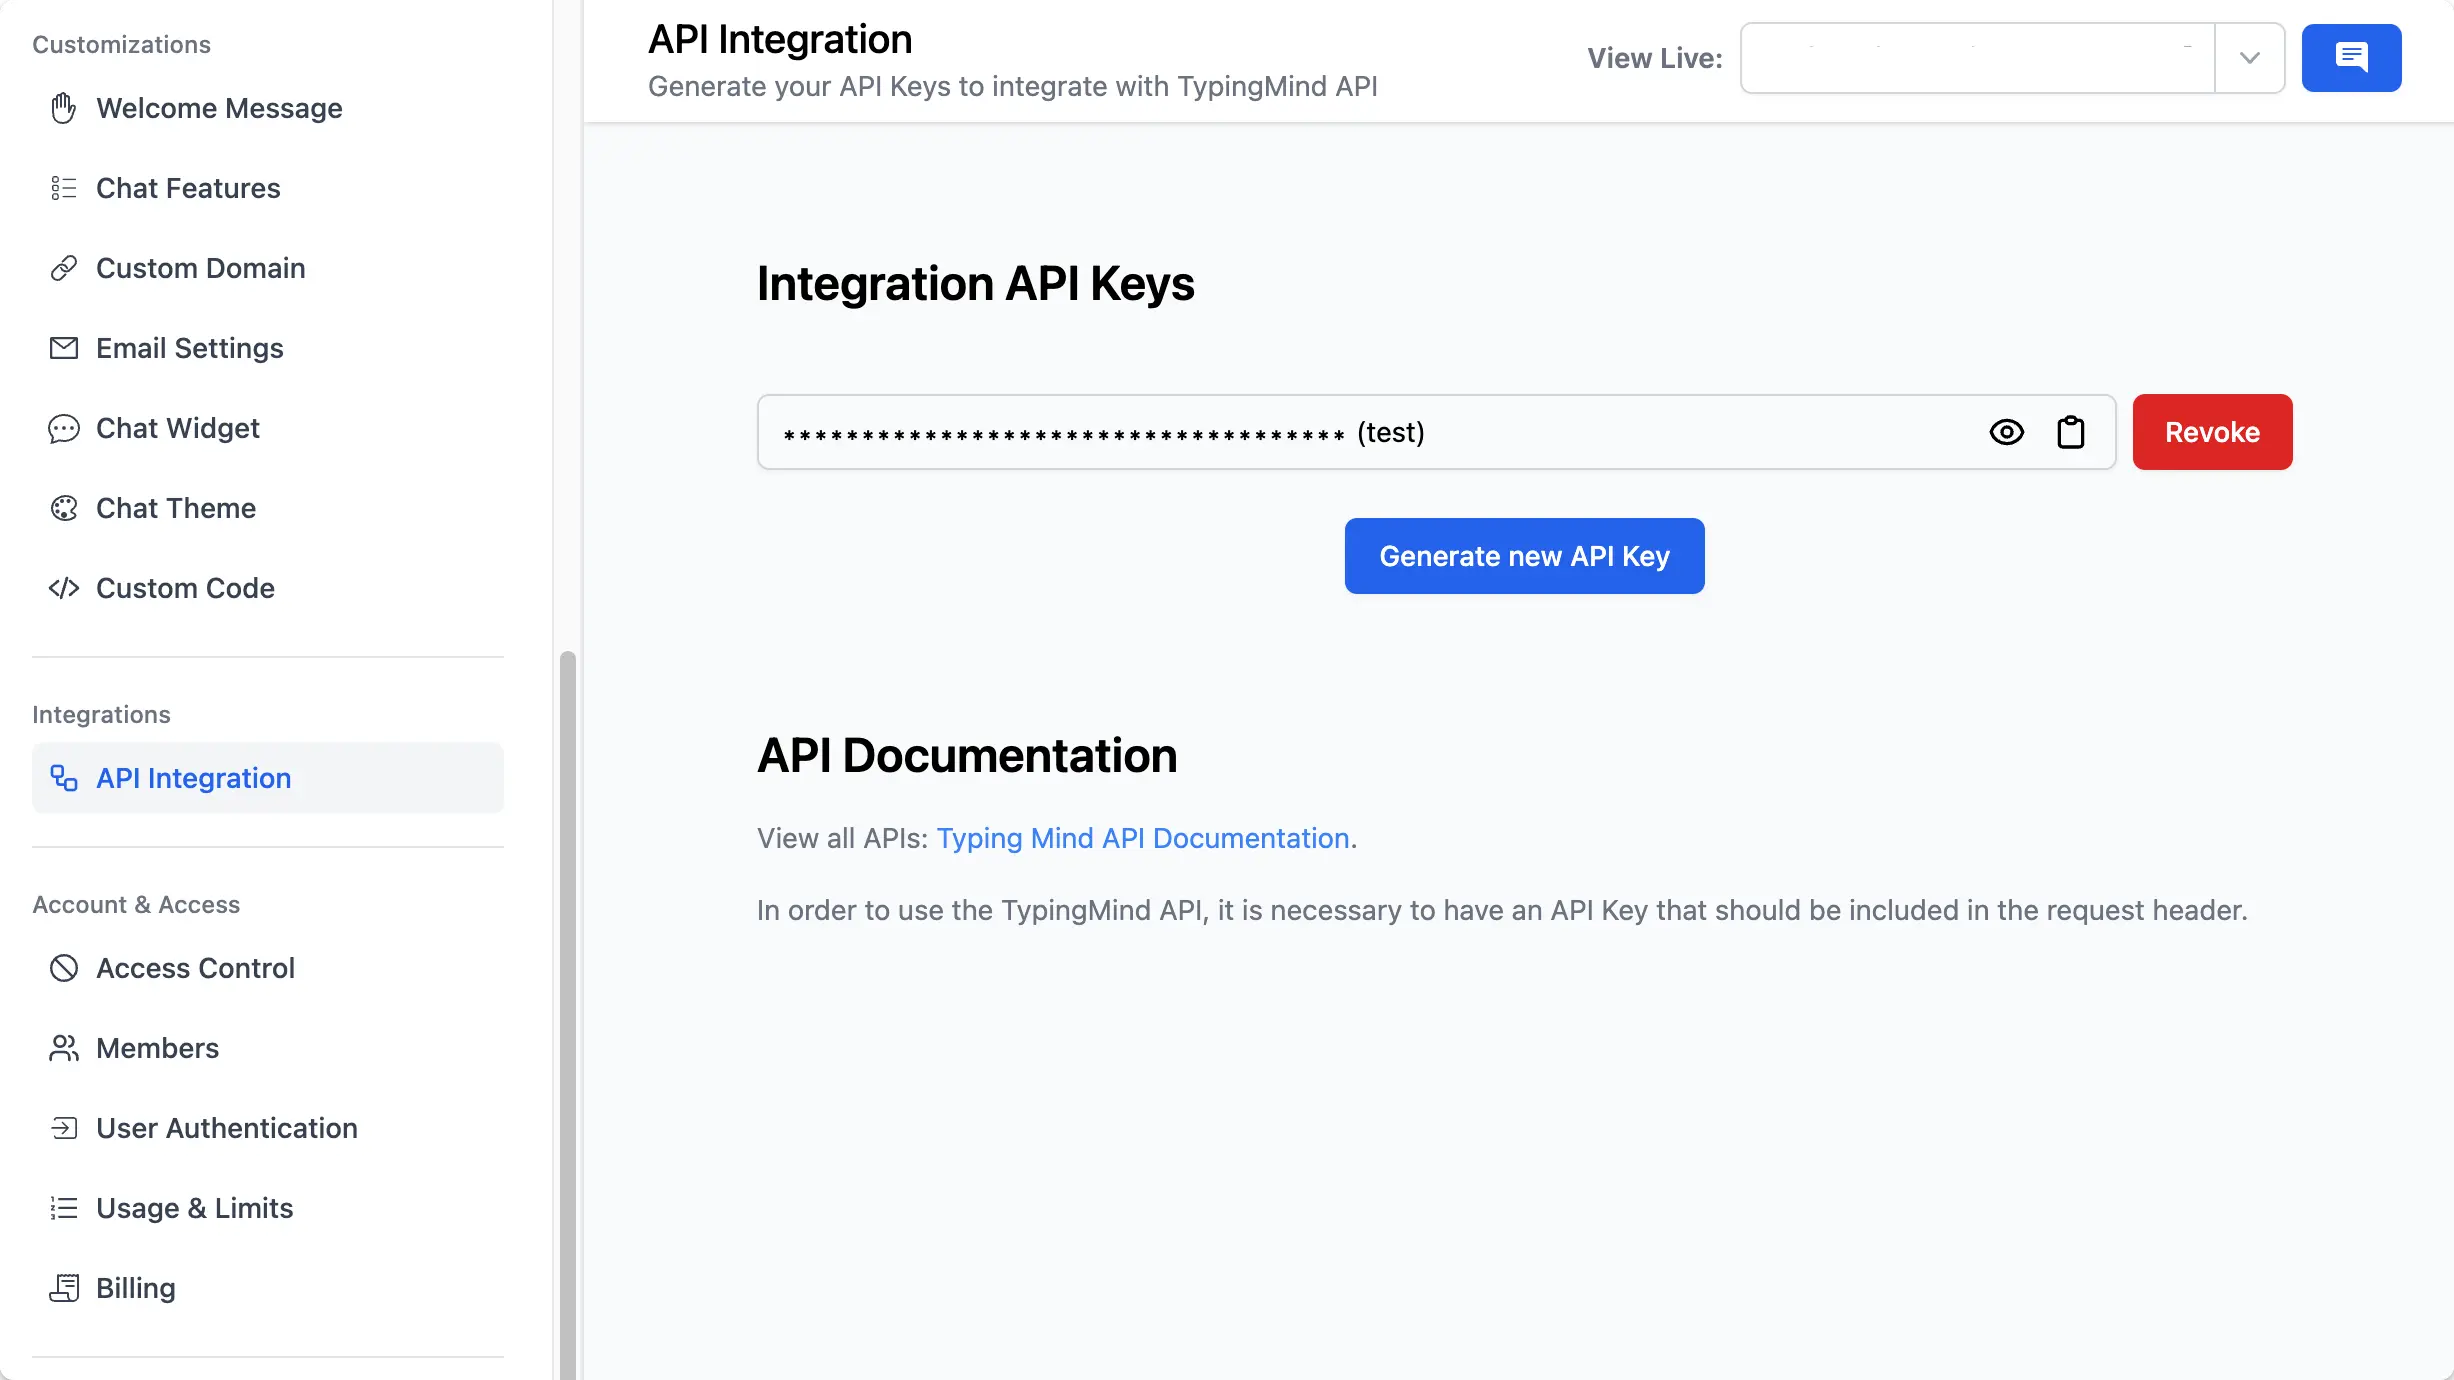
Step 8: Test your chatbot
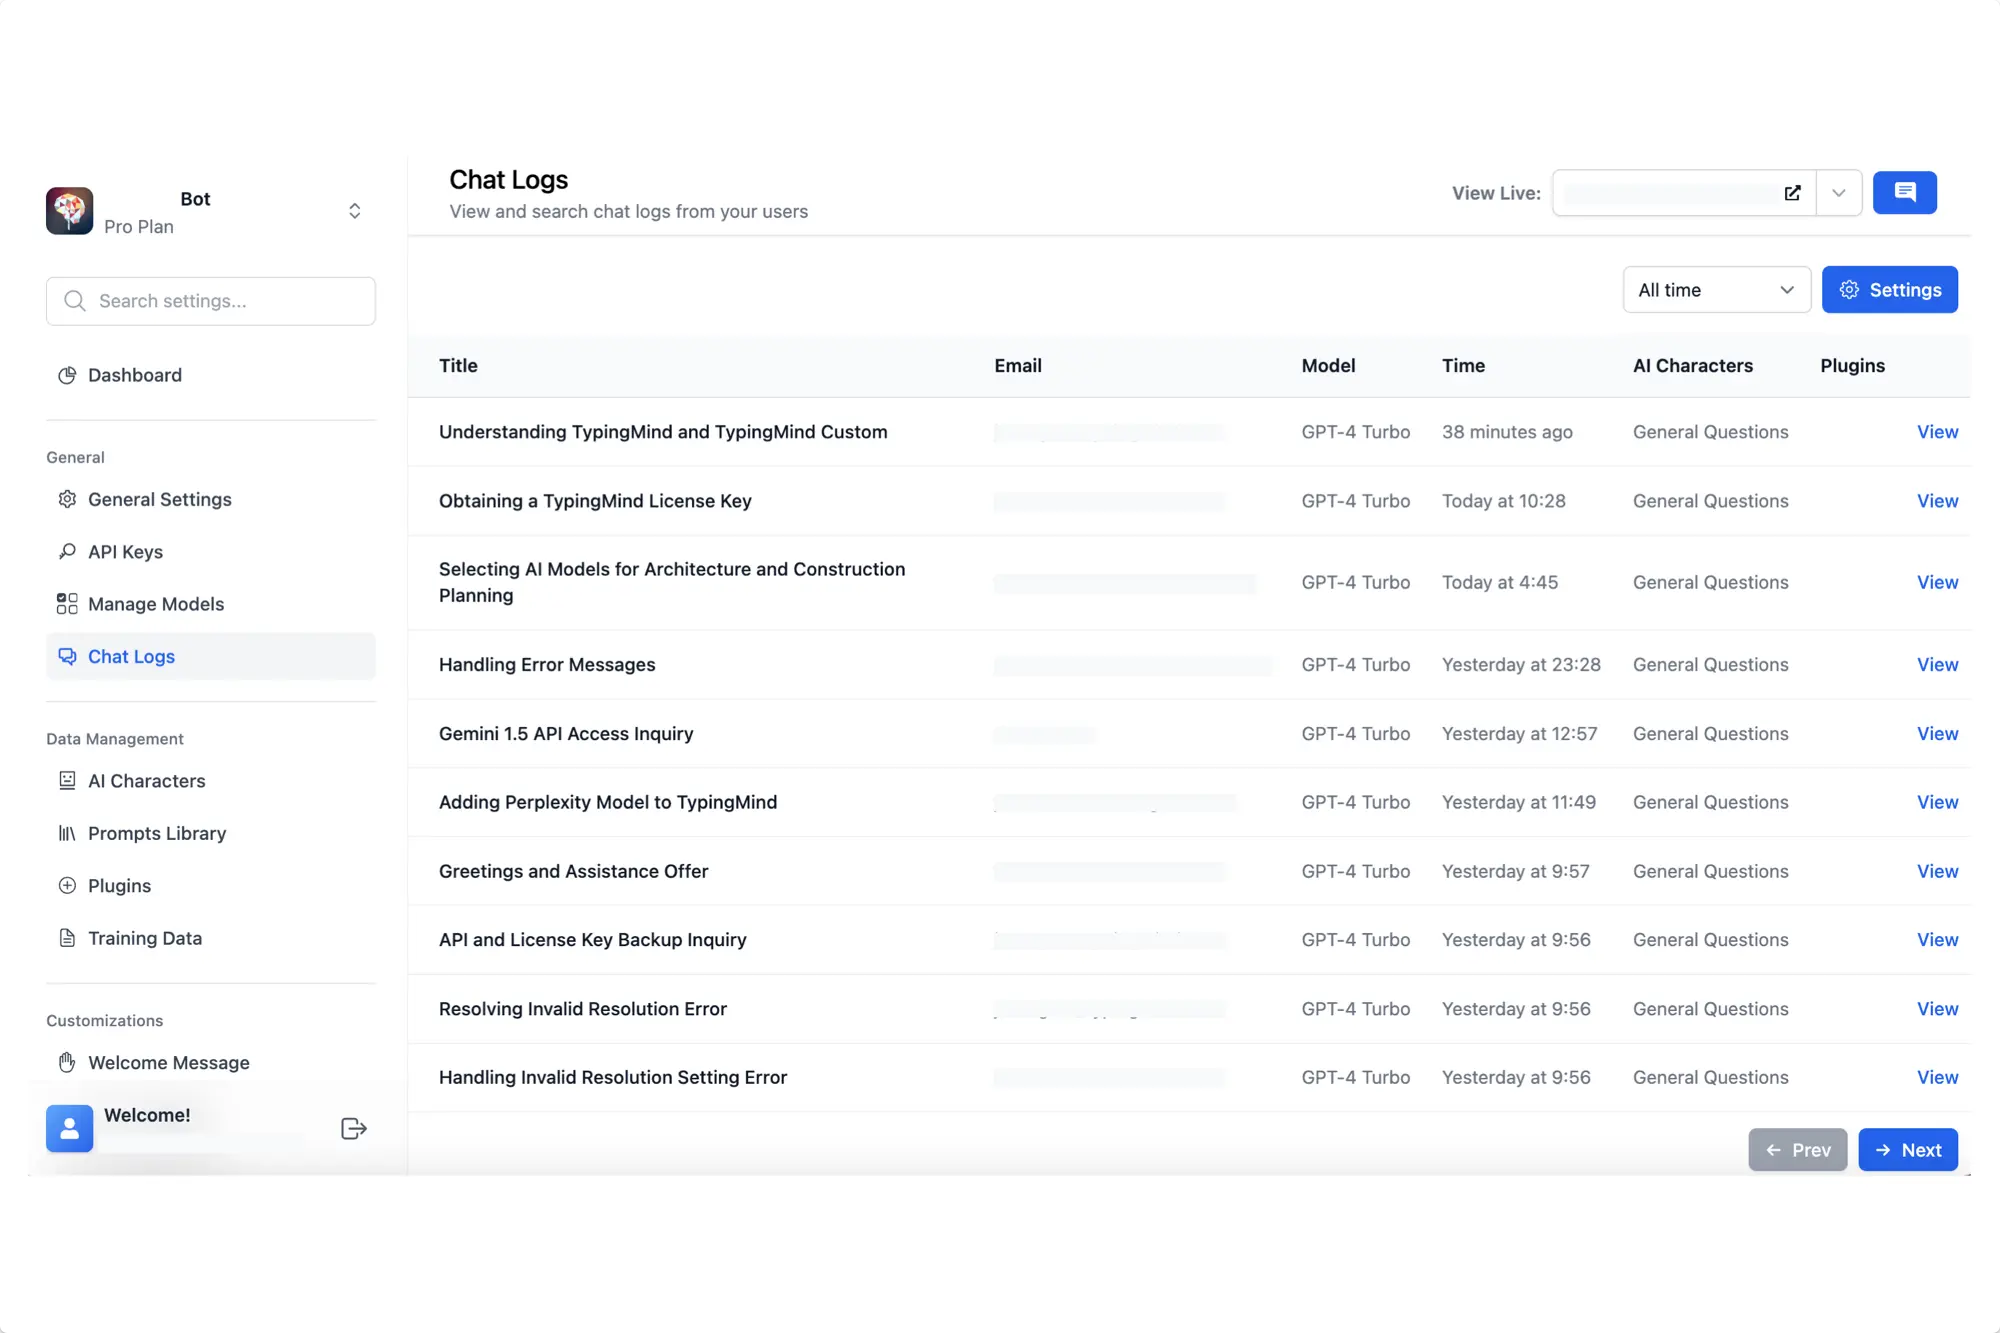
Test your chatbot with multiple questions varied in different scenarios to ensure the chatbot answers correctly on your queries. Update your system instruction and training data within the AI Agent accordingly, and continue until you are confident with the AI responses.Step 9: Enable Chat Logs to track how members engage with the chatbot
This option allows you to view user chat history to make sure the AI model response as expected and adjust your guidelines accordingly:- Go to Chat logs
- Click Settings on the top right corner
- Enable the option “Record all chats from your users”