> ## Documentation Index
> Fetch the complete documentation index at: https://docs.typingmind.com/llms.txt
> Use this file to discover all available pages before exploring further.
# Quickstart
[TypingMind](https://typingmind.com) is a unified chat interface for working with large language models — connect your own API keys and access ChatGPT, Claude, Gemini, and more in one organized workspace.
***
## What You Can Do
Folders, tags, forking, multi-tab, and full-text search across all conversations.
OpenAI, Anthropic, Google, Mistral, Grok, Azure, and more — all in one place.
Build a reusable prompt library and custom AI assistants with training data.
Upload files or connect Google Drive, Notion, GitHub, and more for RAG-powered answers.
Web search, image generation, deep research, custom tools, and MCP server integrations.
All chats stored locally by default. Optional cloud sync across devices.
***
## Setup Guide
### Step 1 — Activate your license & API keys
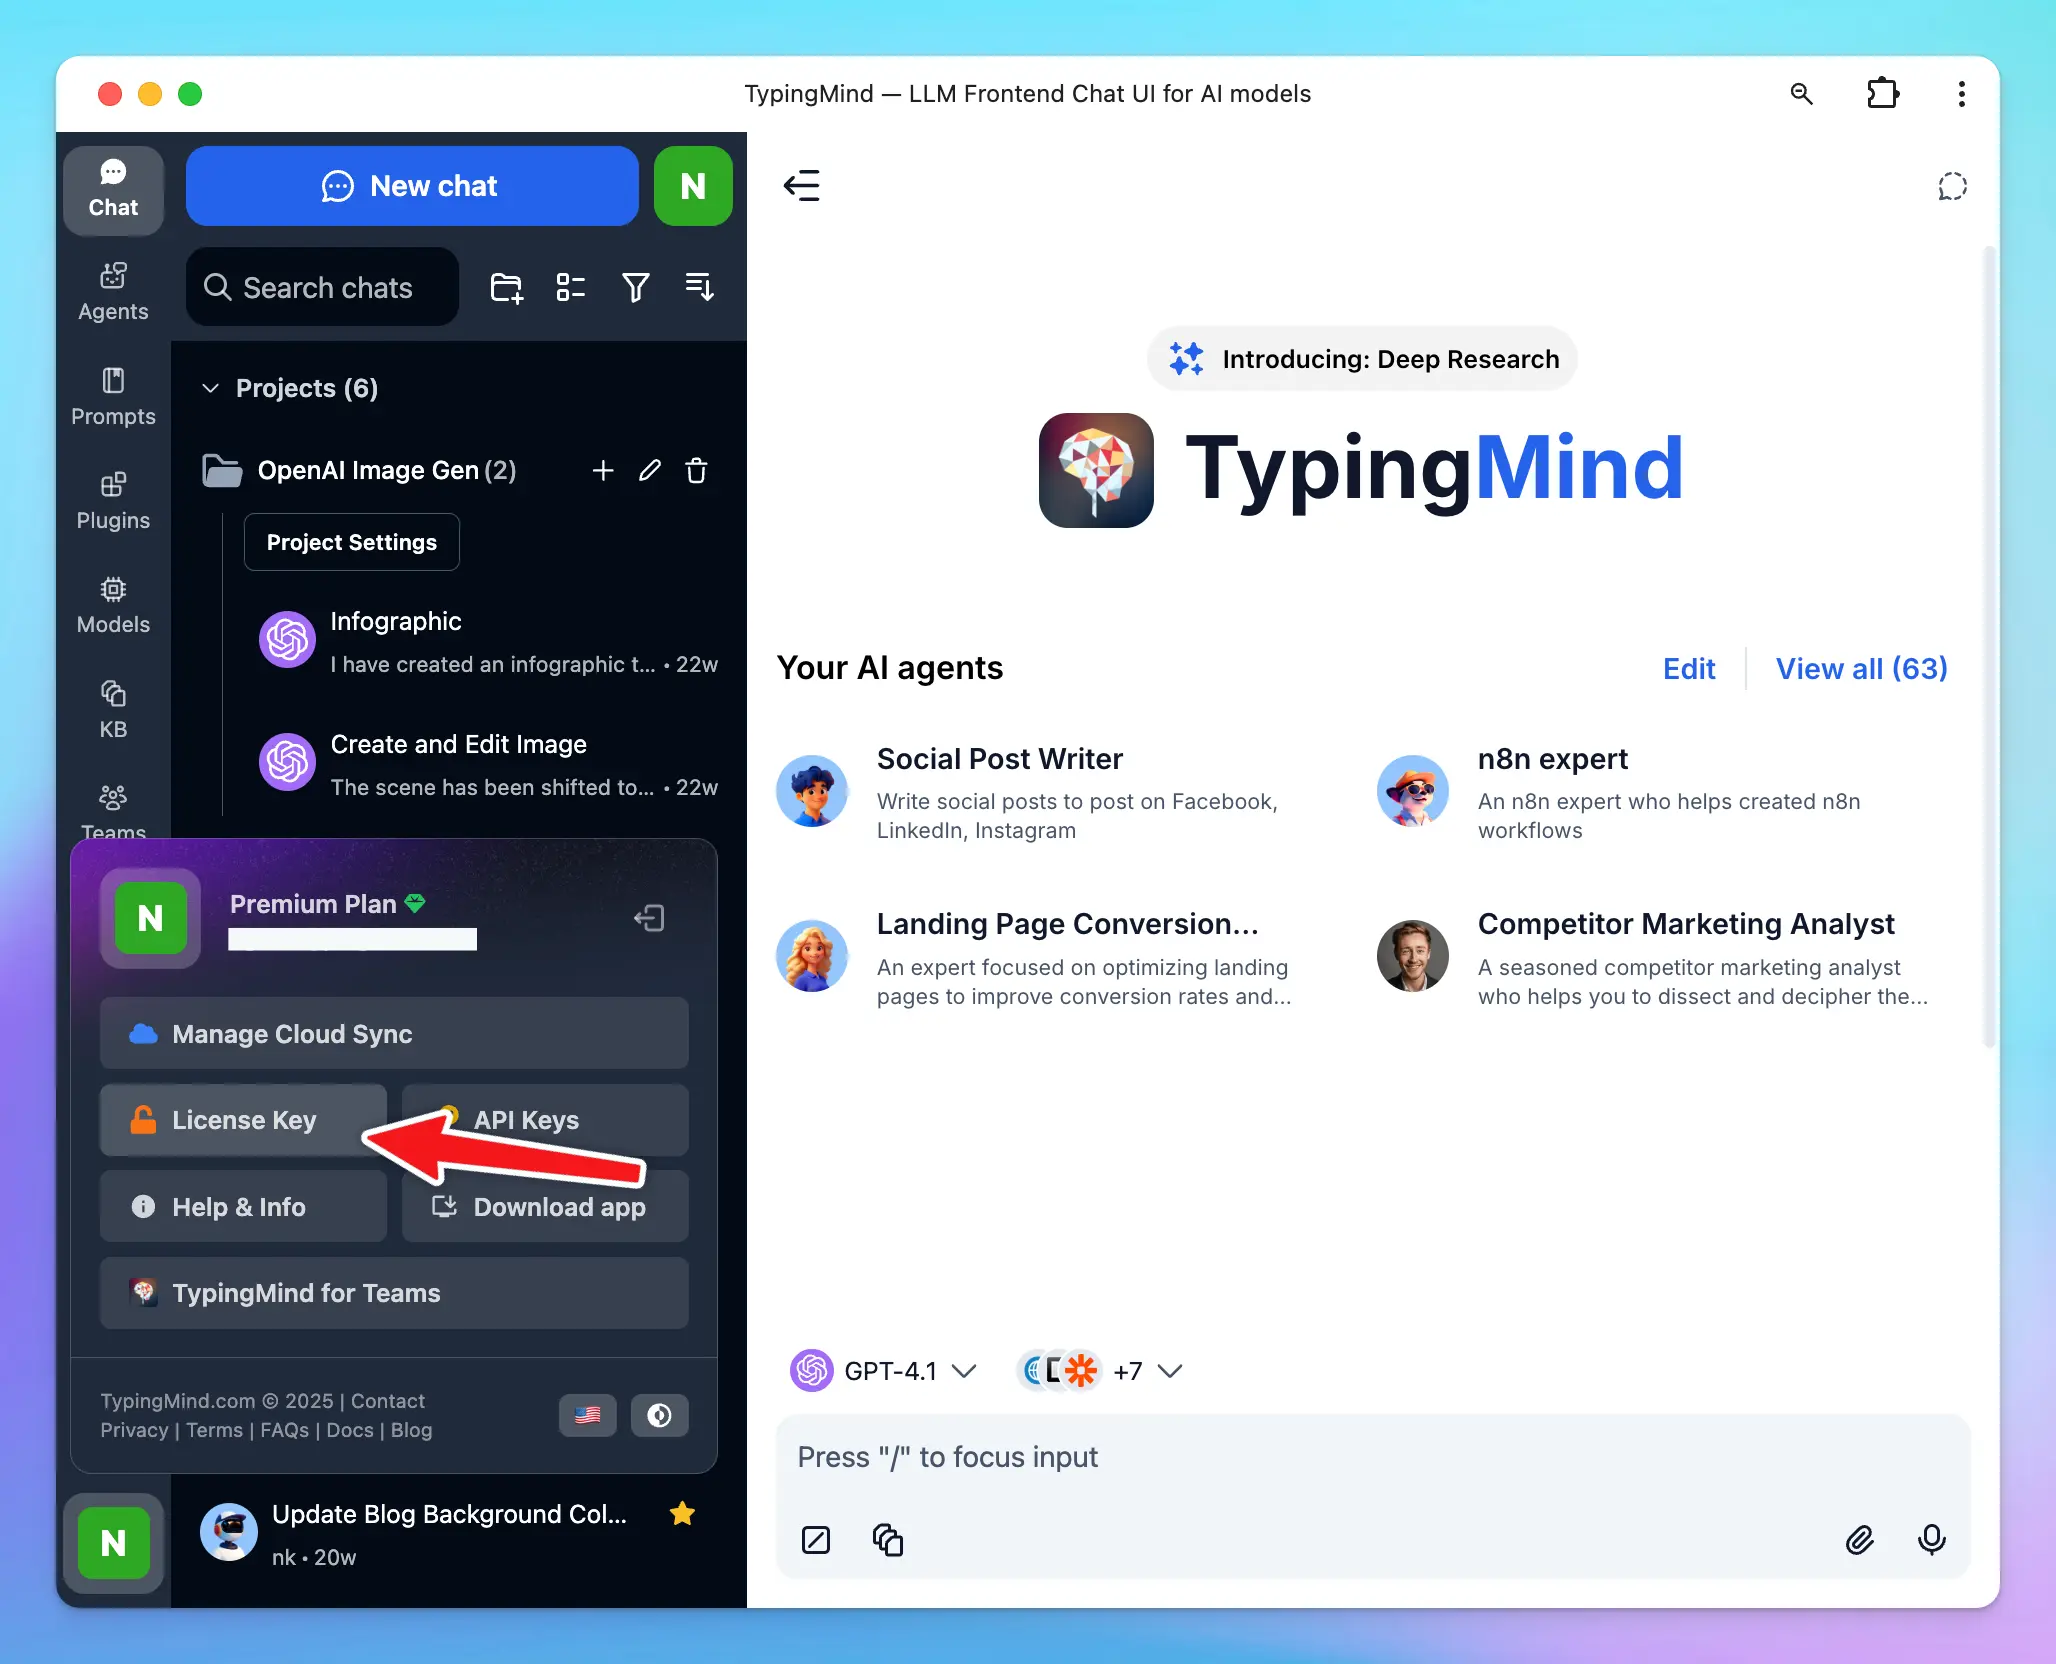
#### Activate your License Key
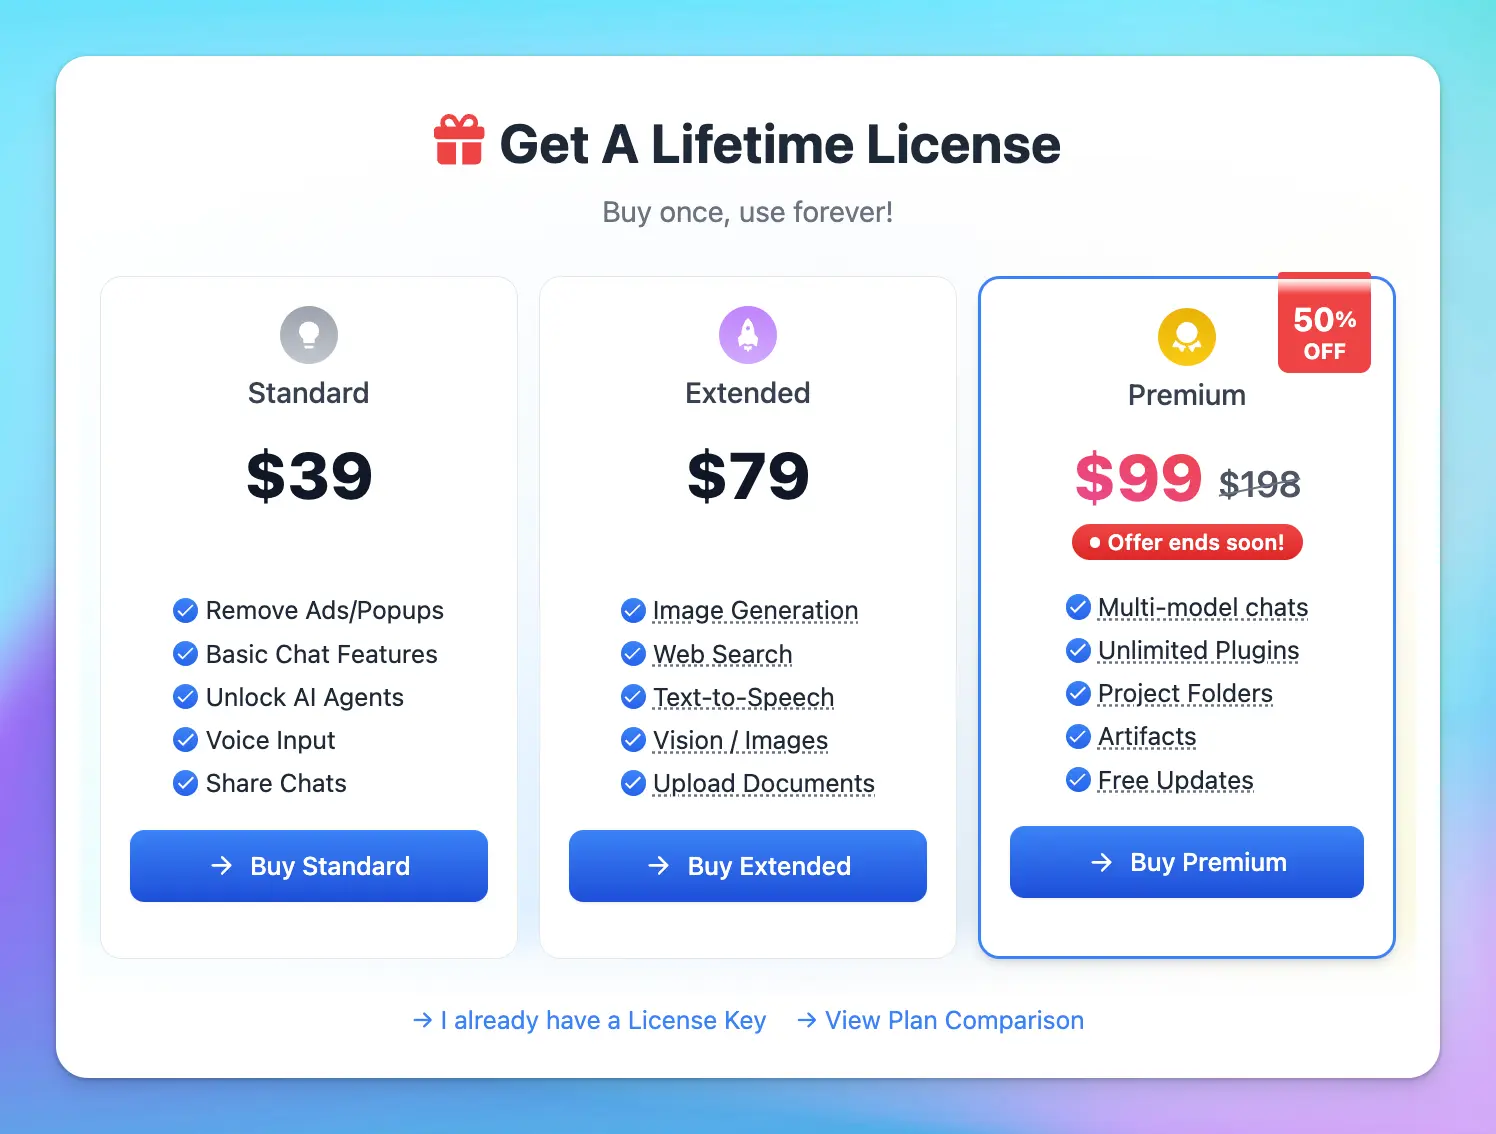
You can use TypingMind without a license key, but advanced features require one:
* Multi-model parallel chats
* Plugins (Web Search, Image Generator, etc.)
* Projects and Artifacts
* And more
[Compare license plans](/quickstart/typingmind-license-plans) to find the right tier. Once purchased, your license is automatically activated on your device.
 To manage or retrieve your license key later, see [Manage License & Devices](/manage-license-and-devices).
 #### Add your API Keys
TypingMind supports models from all major providers. You'll need to obtain an API key directly from each provider you want to use:
| Provider | Models |
| ------------------------------------------------------------------------------- | -------------------------------------------- |
| [OpenAI](/manage-and-connect-ai-models/openai-\(gpt-5-gpt-4.1\)) | GPT-4o, o1, GPT-4 Mini, GPT-3.5, and more |
| [Anthropic](/manage-and-connect-ai-models/anthropic-claude) | Claude 3.5 Sonnet, Claude 3 family, and more |
| [Google](manage-and-connect-ai-models/google-gemini-\(gemini-3.1-nano-banana\)) | Gemini 1.5 Flash, Gemini 1.5 Pro, and more |
| [Others](/manage-and-connect-ai-models) | Mistral, DeepSeek, Grok, and more |
One API key per provider unlocks all models from that provider. You do **not** need a ChatGPT Plus or Claude AI subscription — the API is a separate product.
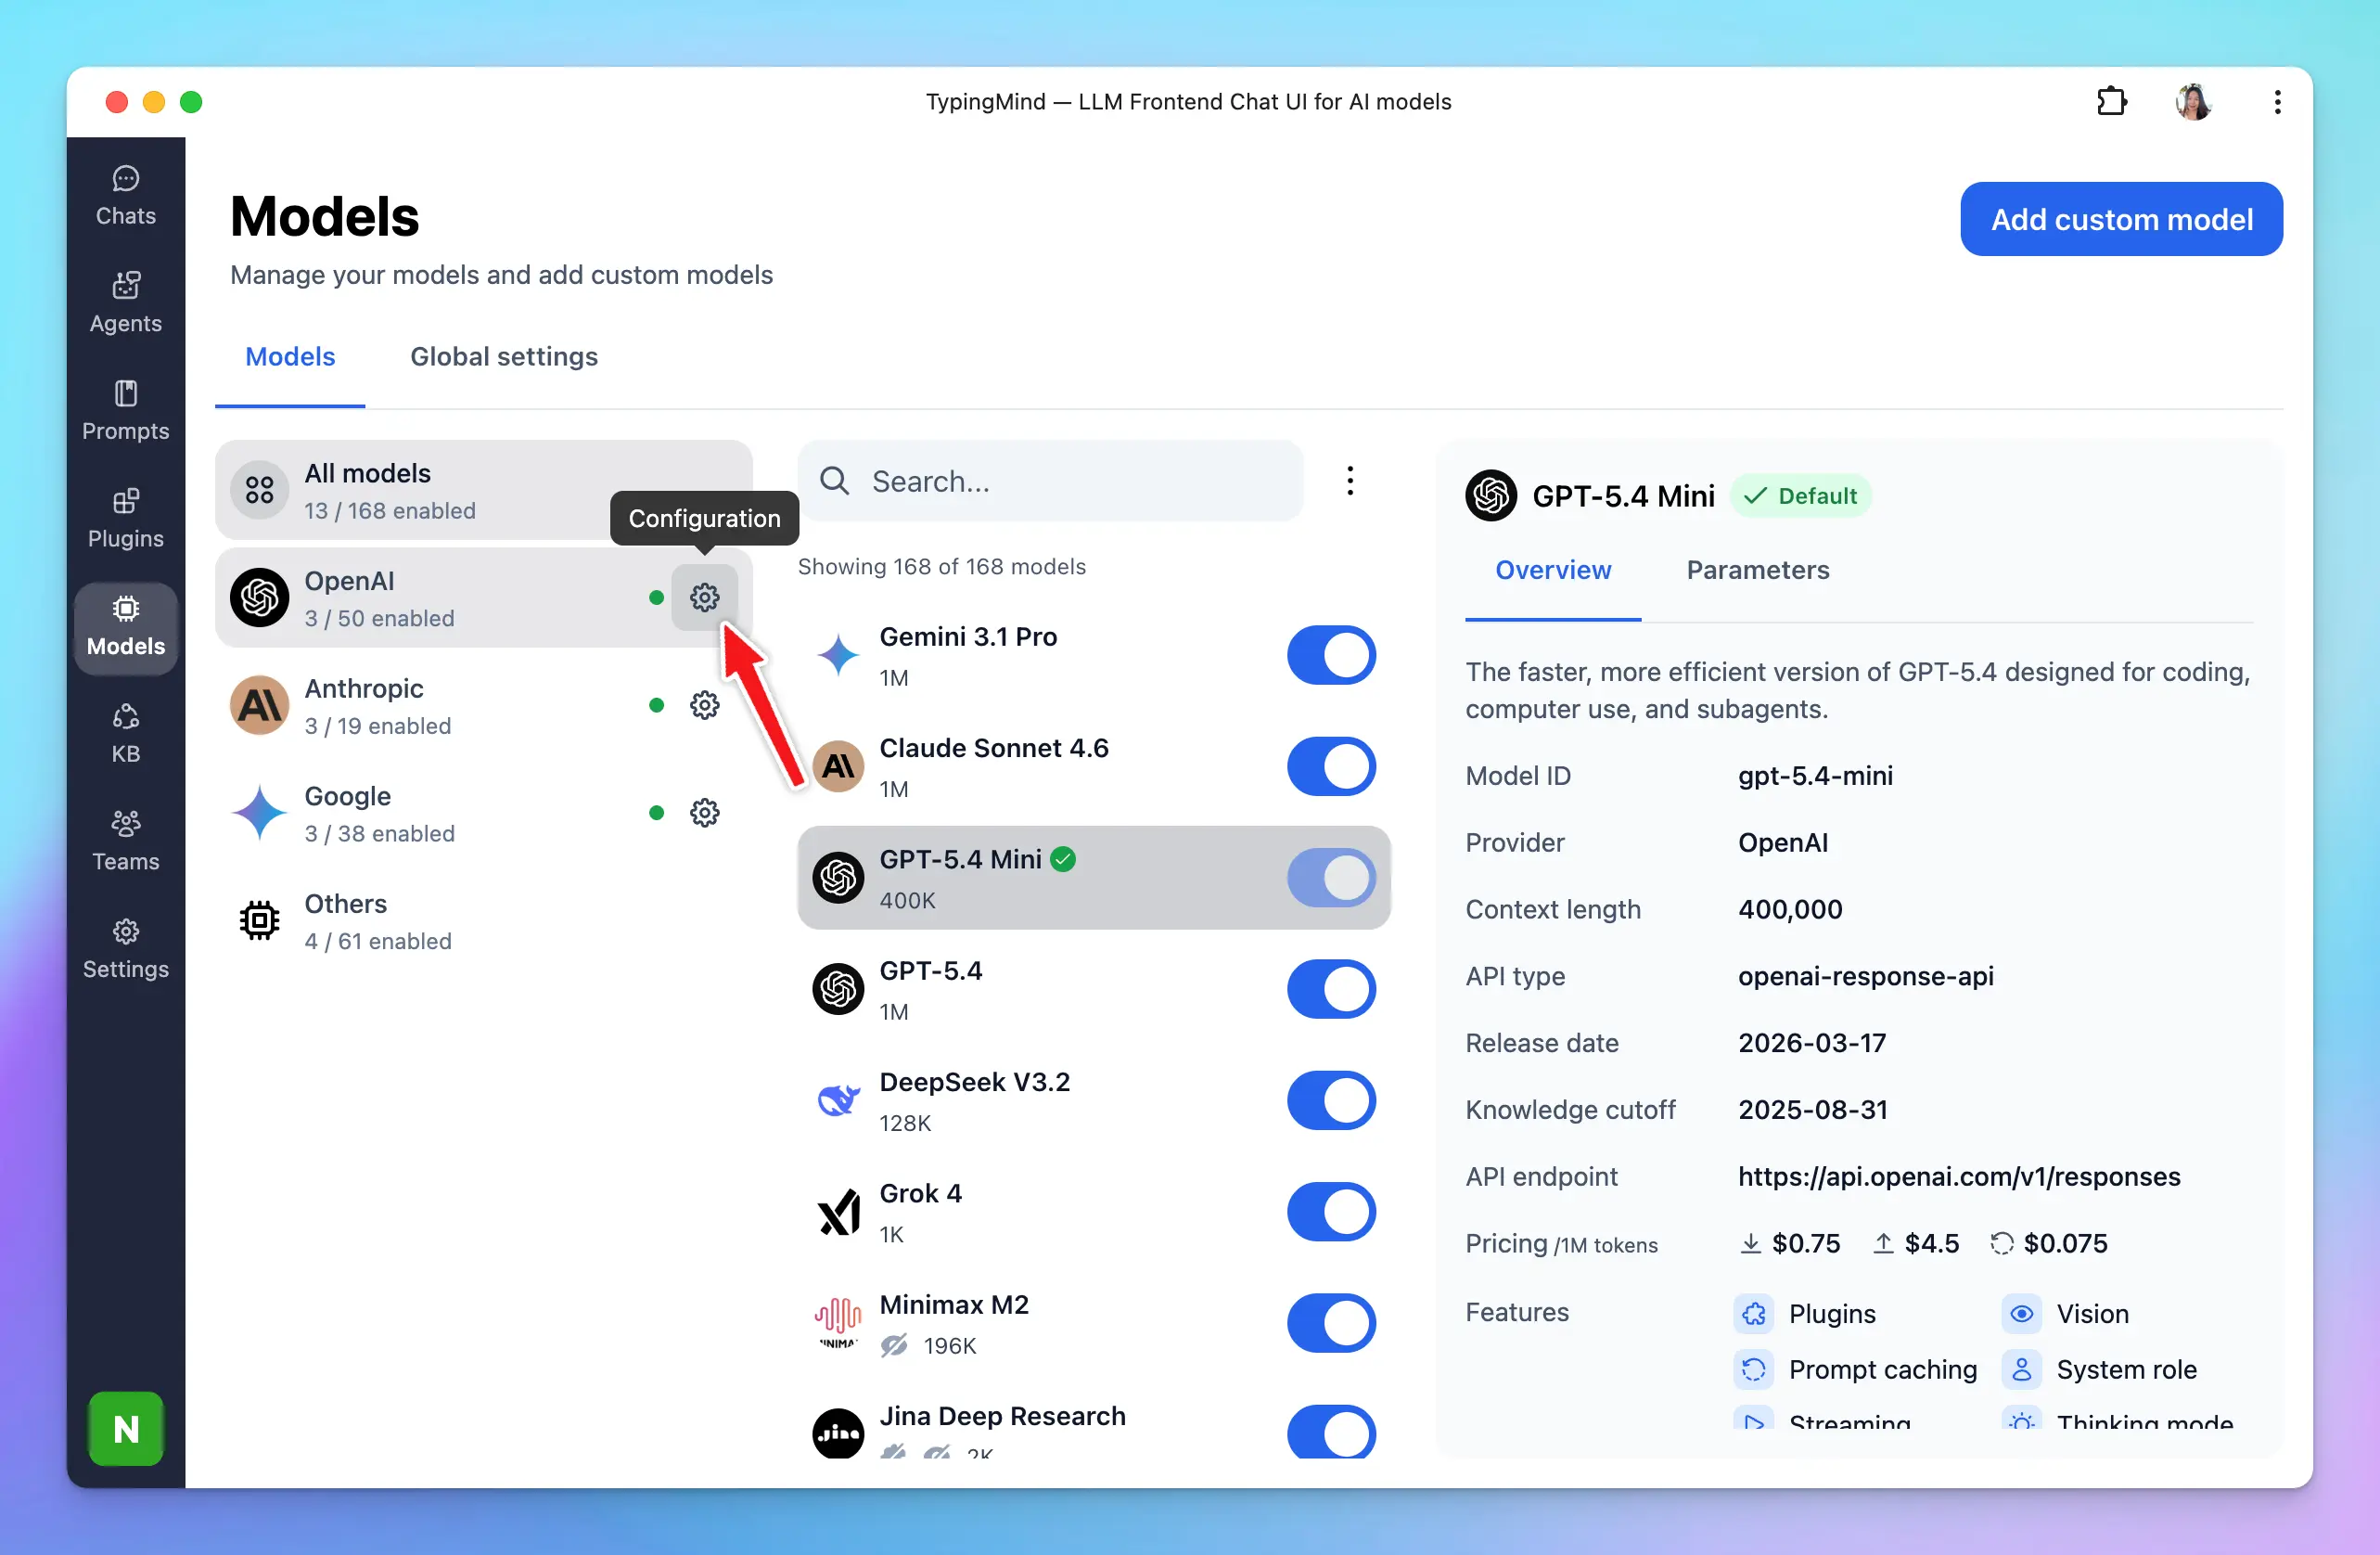
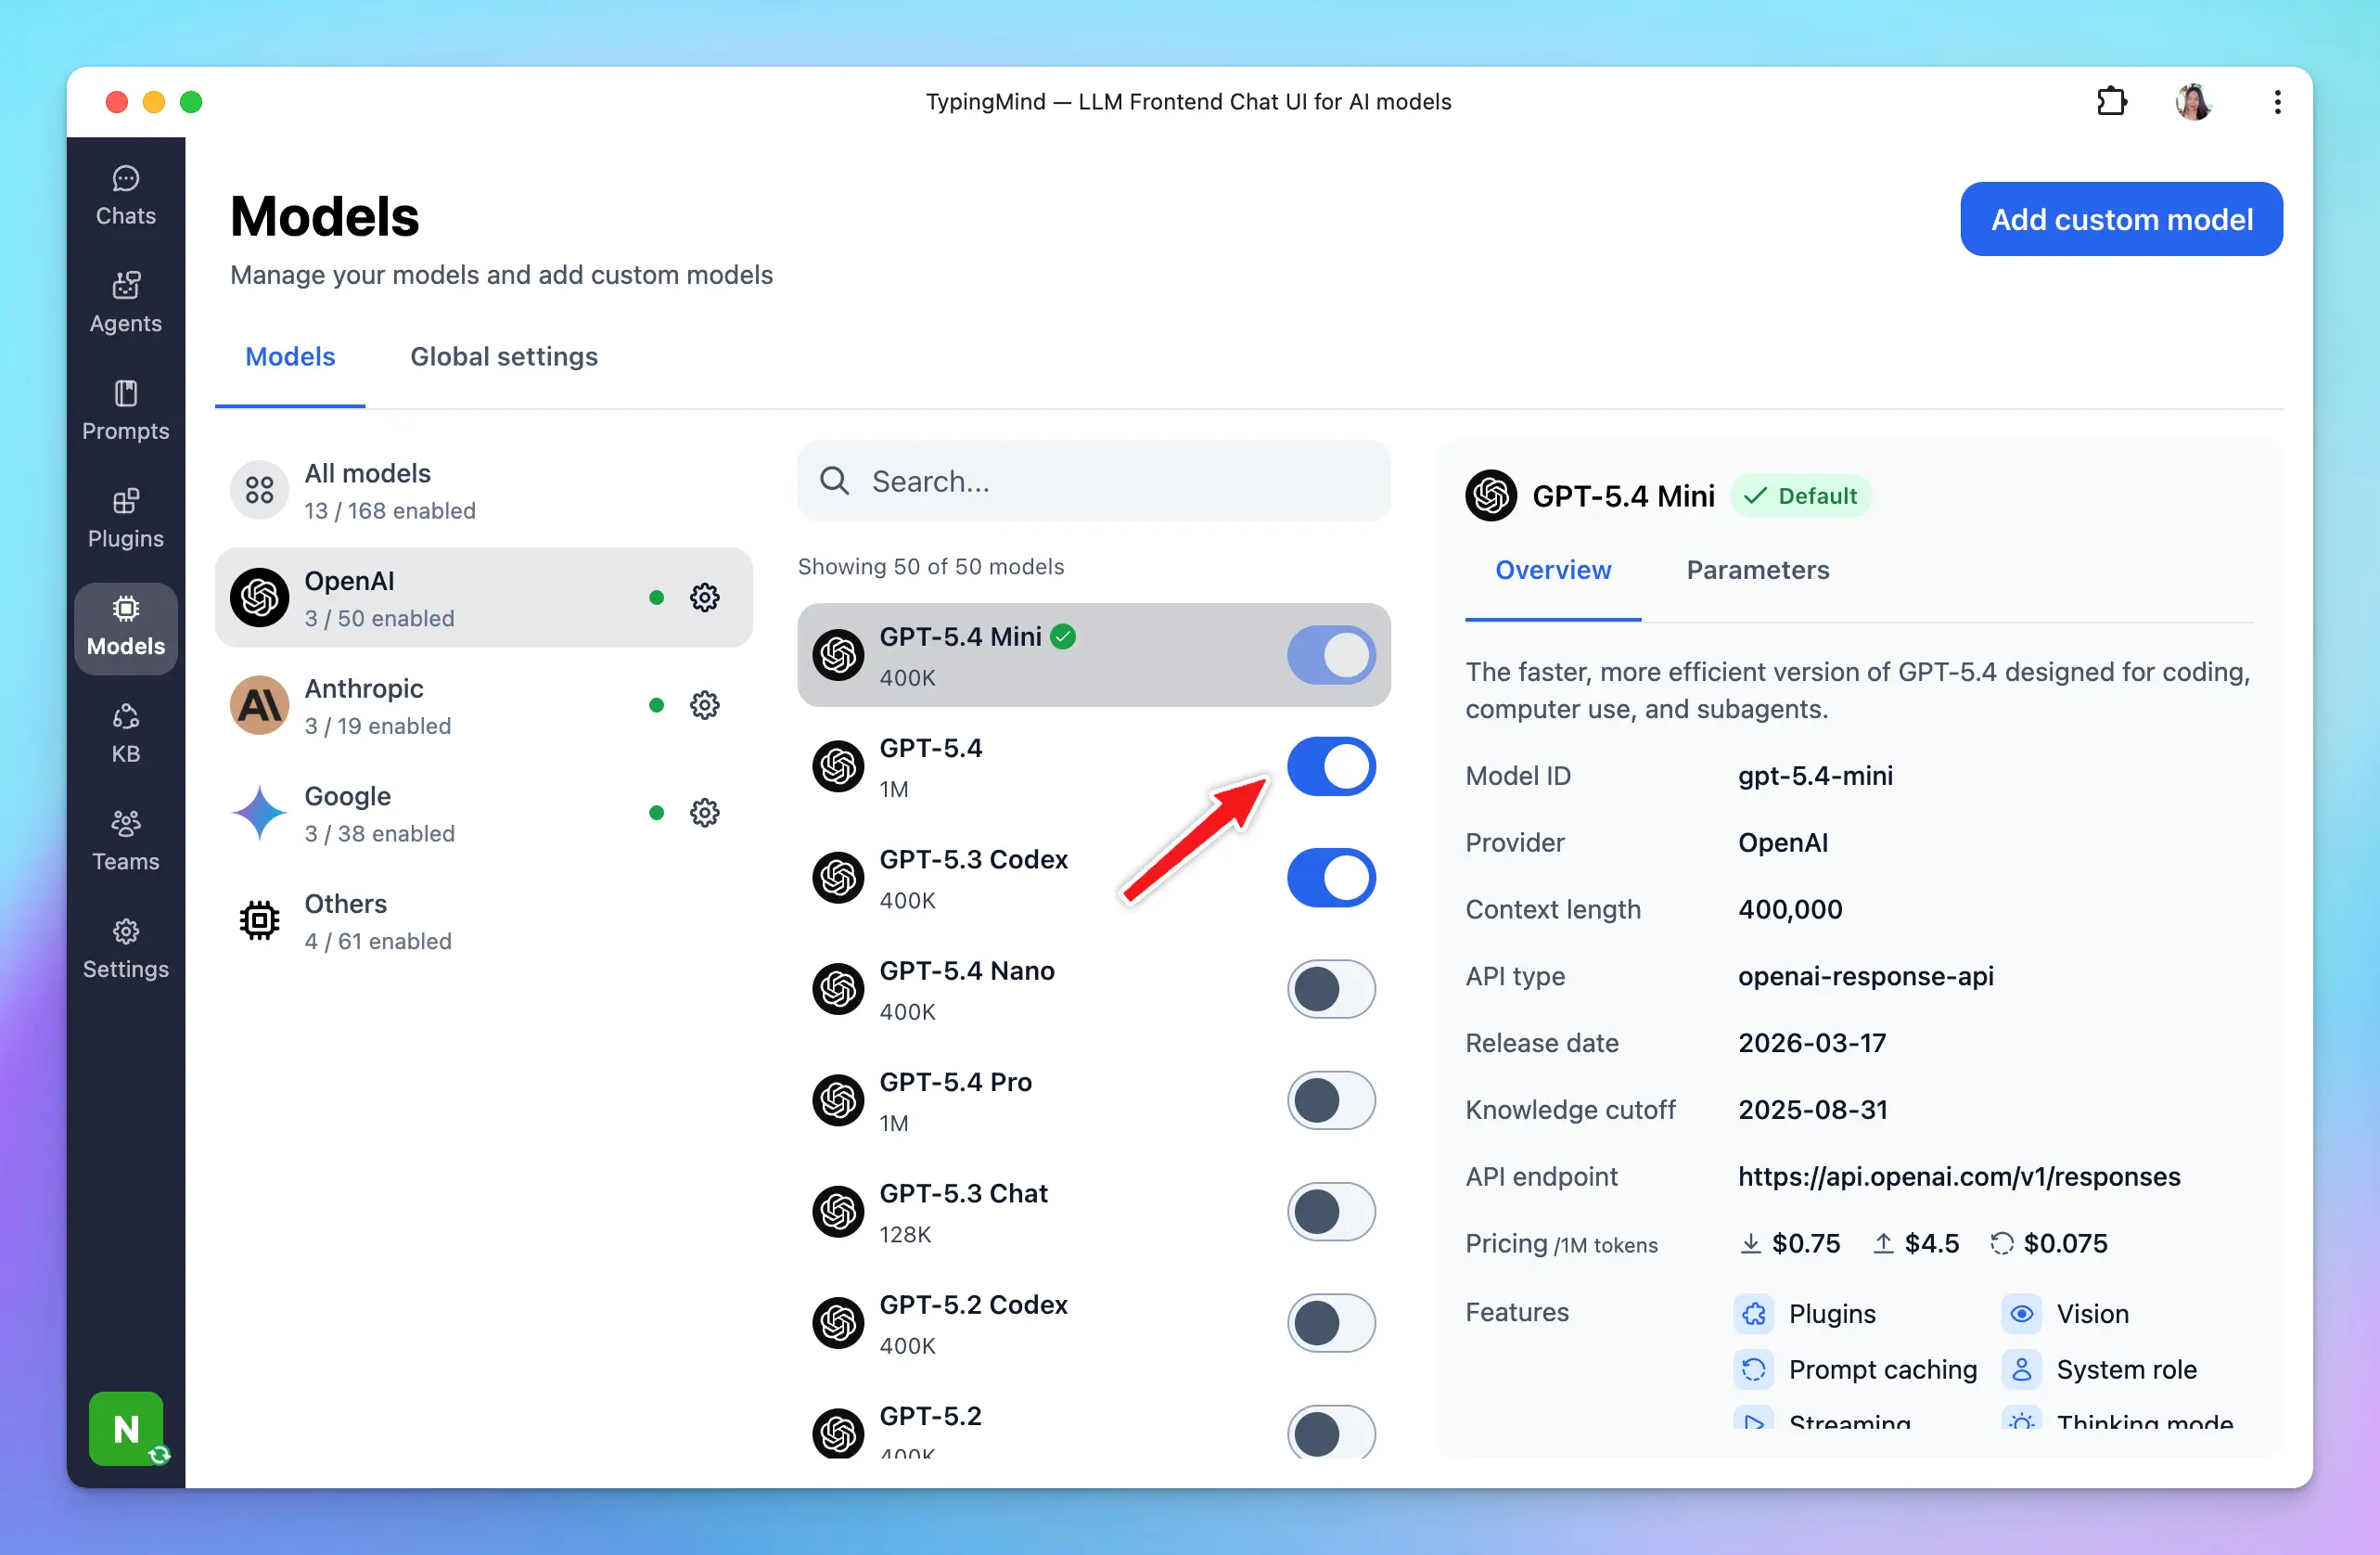
To add your keys: go to **Models** in the left sidebar → click the gear icon next to a provider → enter your key → enable the models you want.
#### Add your API Keys
TypingMind supports models from all major providers. You'll need to obtain an API key directly from each provider you want to use:
| Provider | Models |
| ------------------------------------------------------------------------------- | -------------------------------------------- |
| [OpenAI](/manage-and-connect-ai-models/openai-\(gpt-5-gpt-4.1\)) | GPT-4o, o1, GPT-4 Mini, GPT-3.5, and more |
| [Anthropic](/manage-and-connect-ai-models/anthropic-claude) | Claude 3.5 Sonnet, Claude 3 family, and more |
| [Google](manage-and-connect-ai-models/google-gemini-\(gemini-3.1-nano-banana\)) | Gemini 1.5 Flash, Gemini 1.5 Pro, and more |
| [Others](/manage-and-connect-ai-models) | Mistral, DeepSeek, Grok, and more |
One API key per provider unlocks all models from that provider. You do **not** need a ChatGPT Plus or Claude AI subscription — the API is a separate product.
To add your keys: go to **Models** in the left sidebar → click the gear icon next to a provider → enter your key → enable the models you want.
 For a detailed walkthrough, see [Manage & Connect AI Models](https://docs.typingmind.com/manage-and-connect-ai-models).
***
### Step 2 — Back up your data *(optional)*
Your chats are saved locally in your browser by default — nothing is sent to TypingMind's servers unless you opt in.
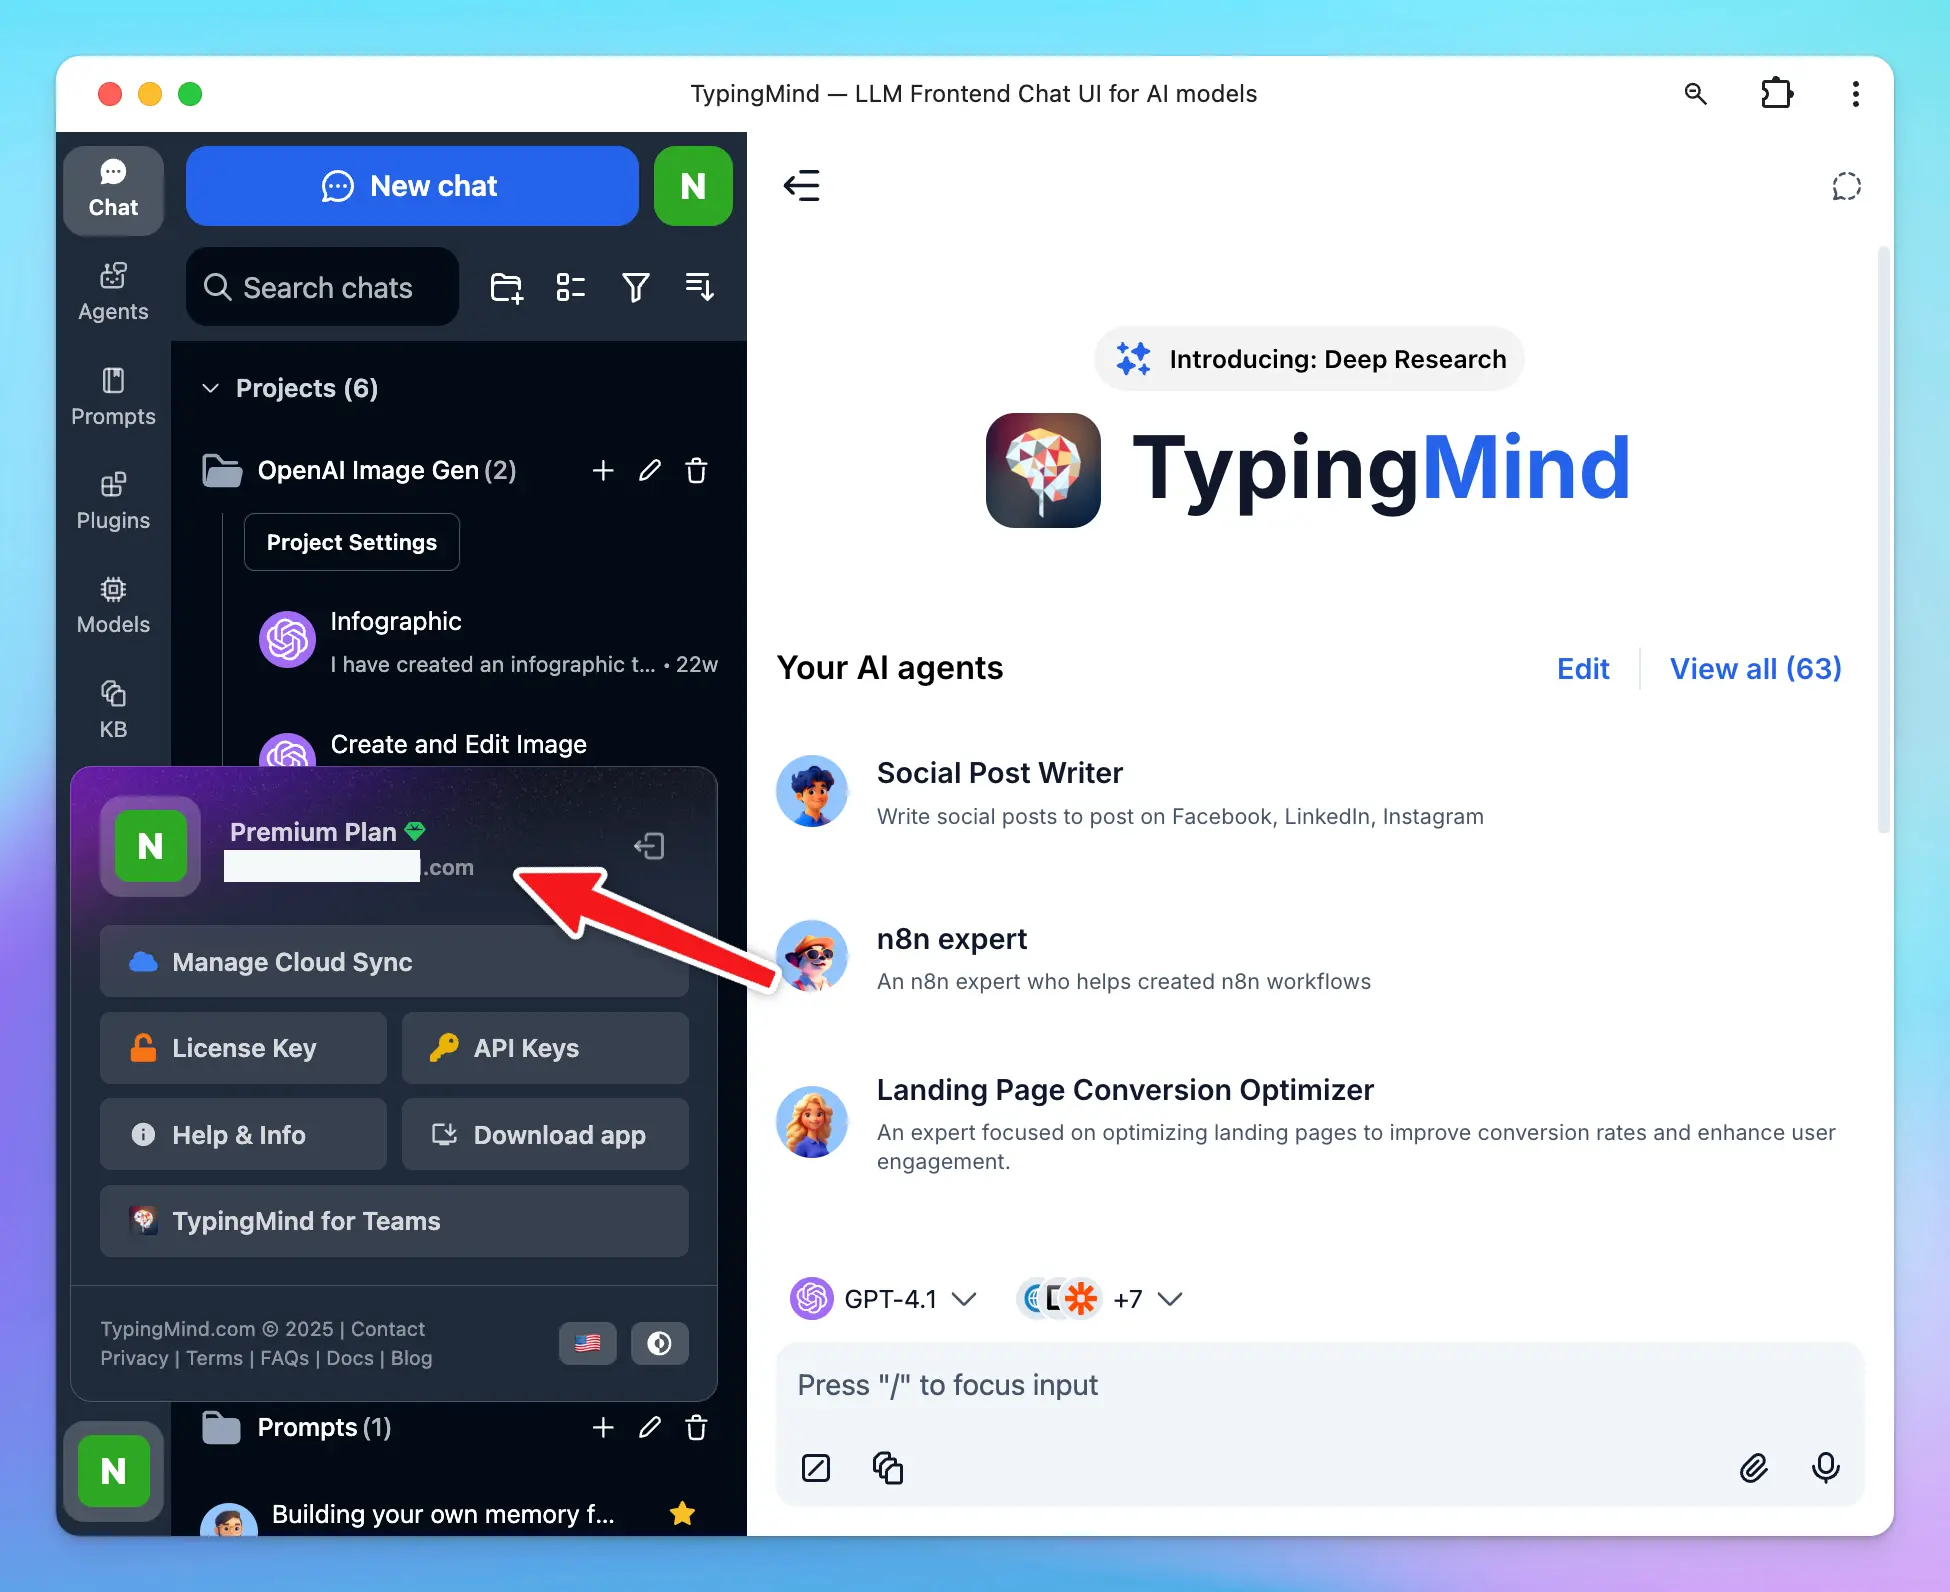
To protect against data loss and sync across devices, sign in with your email to enable **TypingMind Cloud**:
For a detailed walkthrough, see [Manage & Connect AI Models](https://docs.typingmind.com/manage-and-connect-ai-models).
***
### Step 2 — Back up your data *(optional)*
Your chats are saved locally in your browser by default — nothing is sent to TypingMind's servers unless you opt in.
To protect against data loss and sync across devices, sign in with your email to enable **TypingMind Cloud**:
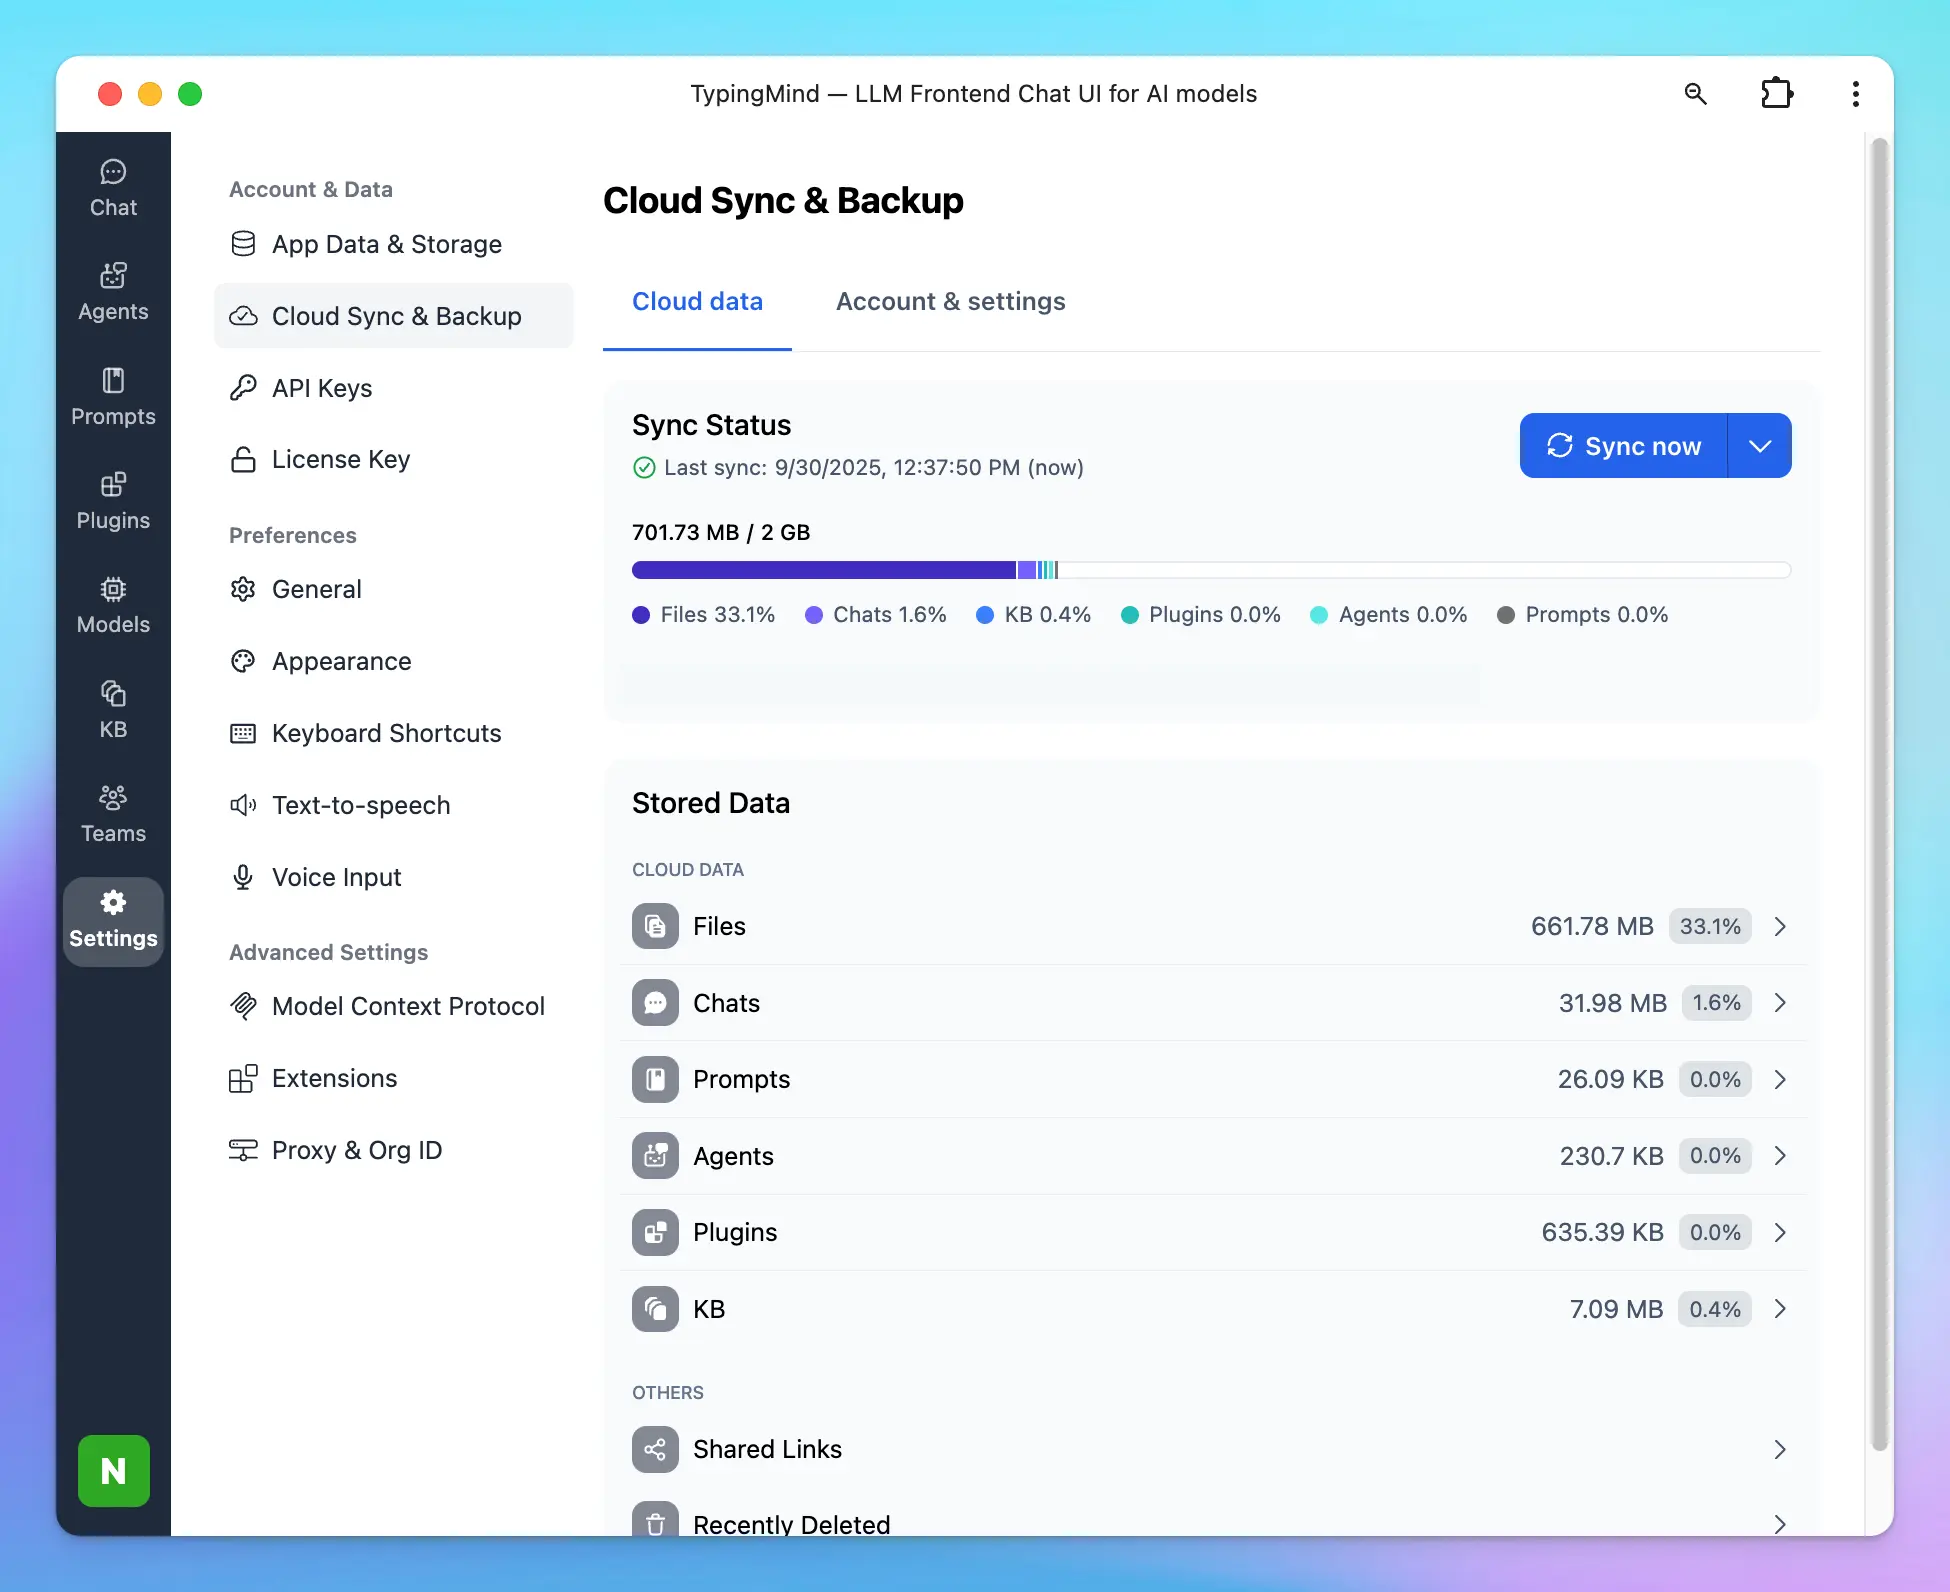
 Cloud sync includes:
* Chats, prompts, agents, plugins, API keys, and settings
* Up to **50 MB** free storage (expandable)
* Seamless sync across all your devices
Cloud sync includes:
* Chats, prompts, agents, plugins, API keys, and settings
* Up to **50 MB** free storage (expandable)
* Seamless sync across all your devices
 You can disable sync at any time by logging out, or connect your own cloud storage via [TypingMind Extensions](https://docs.typingmind.com/typing-mind-extensions). Learn more in [Cloud Sync & Backup](/cloud-sync-and-backup/cloud-sync-and-backup-overview).
***
### Step 3 — Start your first conversation
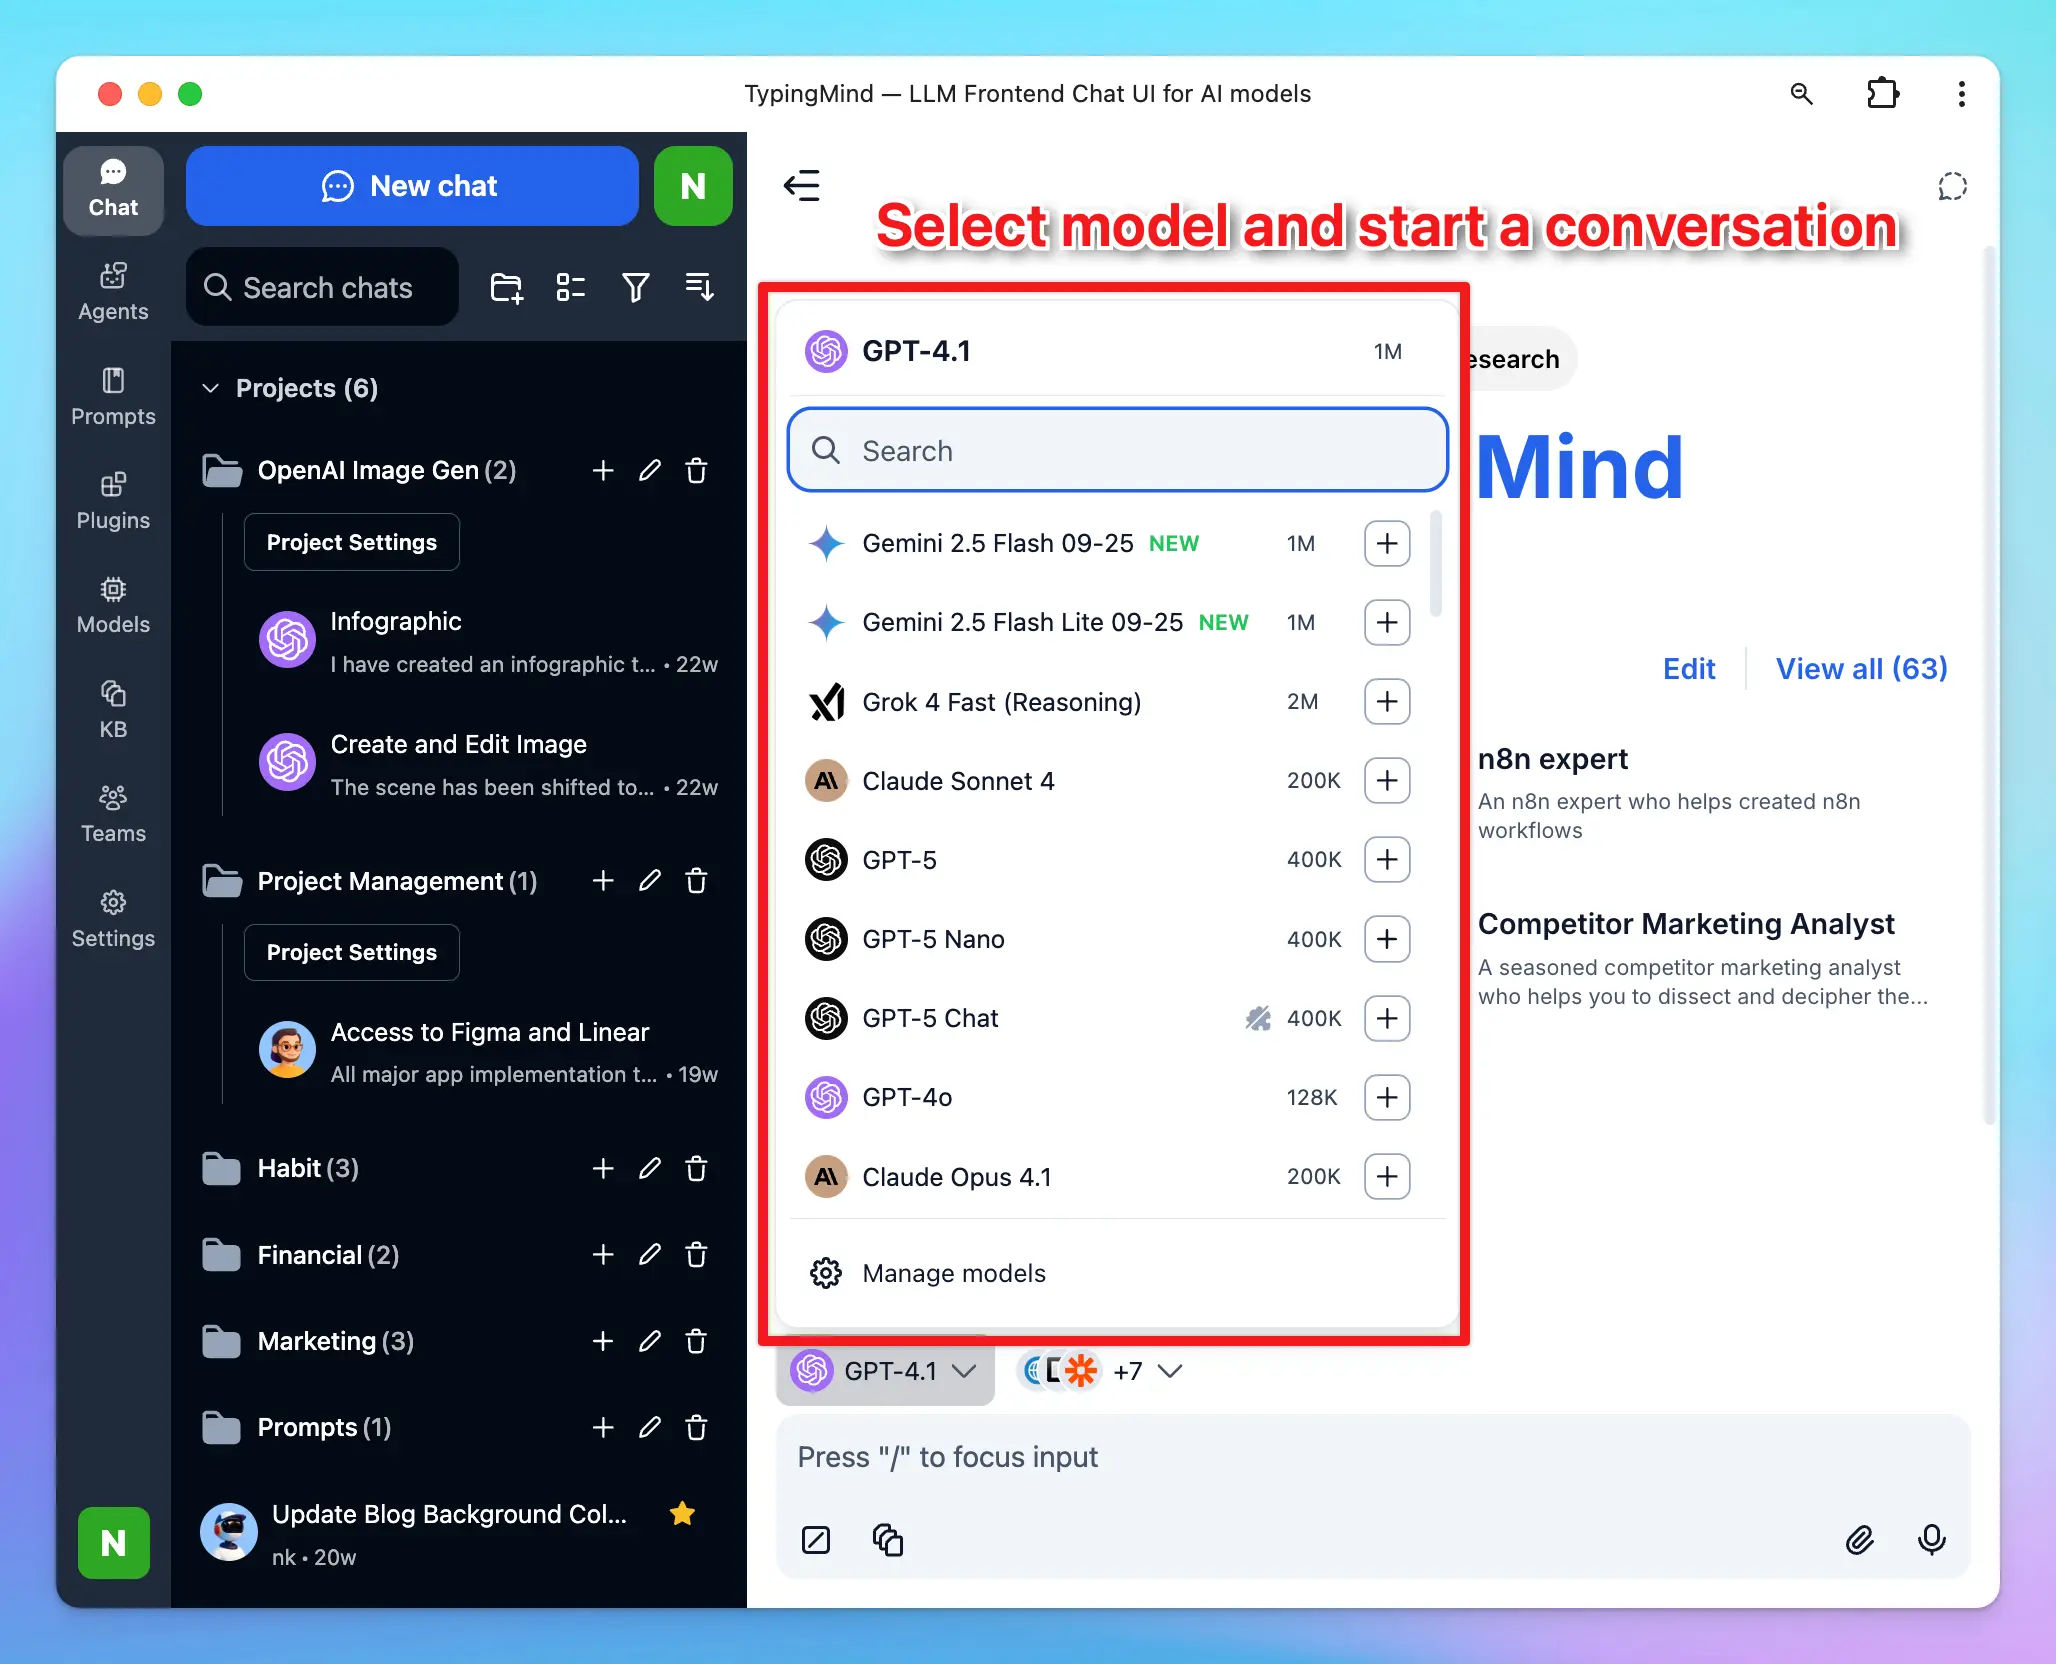
Once your API keys are set up, select a model and start chatting. You can only use models for which you've added an API key.
Start with clear, specific instructions. If a response misses the mark, refine your prompt — more detail almost always yields better results.
You can disable sync at any time by logging out, or connect your own cloud storage via [TypingMind Extensions](https://docs.typingmind.com/typing-mind-extensions). Learn more in [Cloud Sync & Backup](/cloud-sync-and-backup/cloud-sync-and-backup-overview).
***
### Step 3 — Start your first conversation
Once your API keys are set up, select a model and start chatting. You can only use models for which you've added an API key.
Start with clear, specific instructions. If a response misses the mark, refine your prompt — more detail almost always yields better results.
 ***
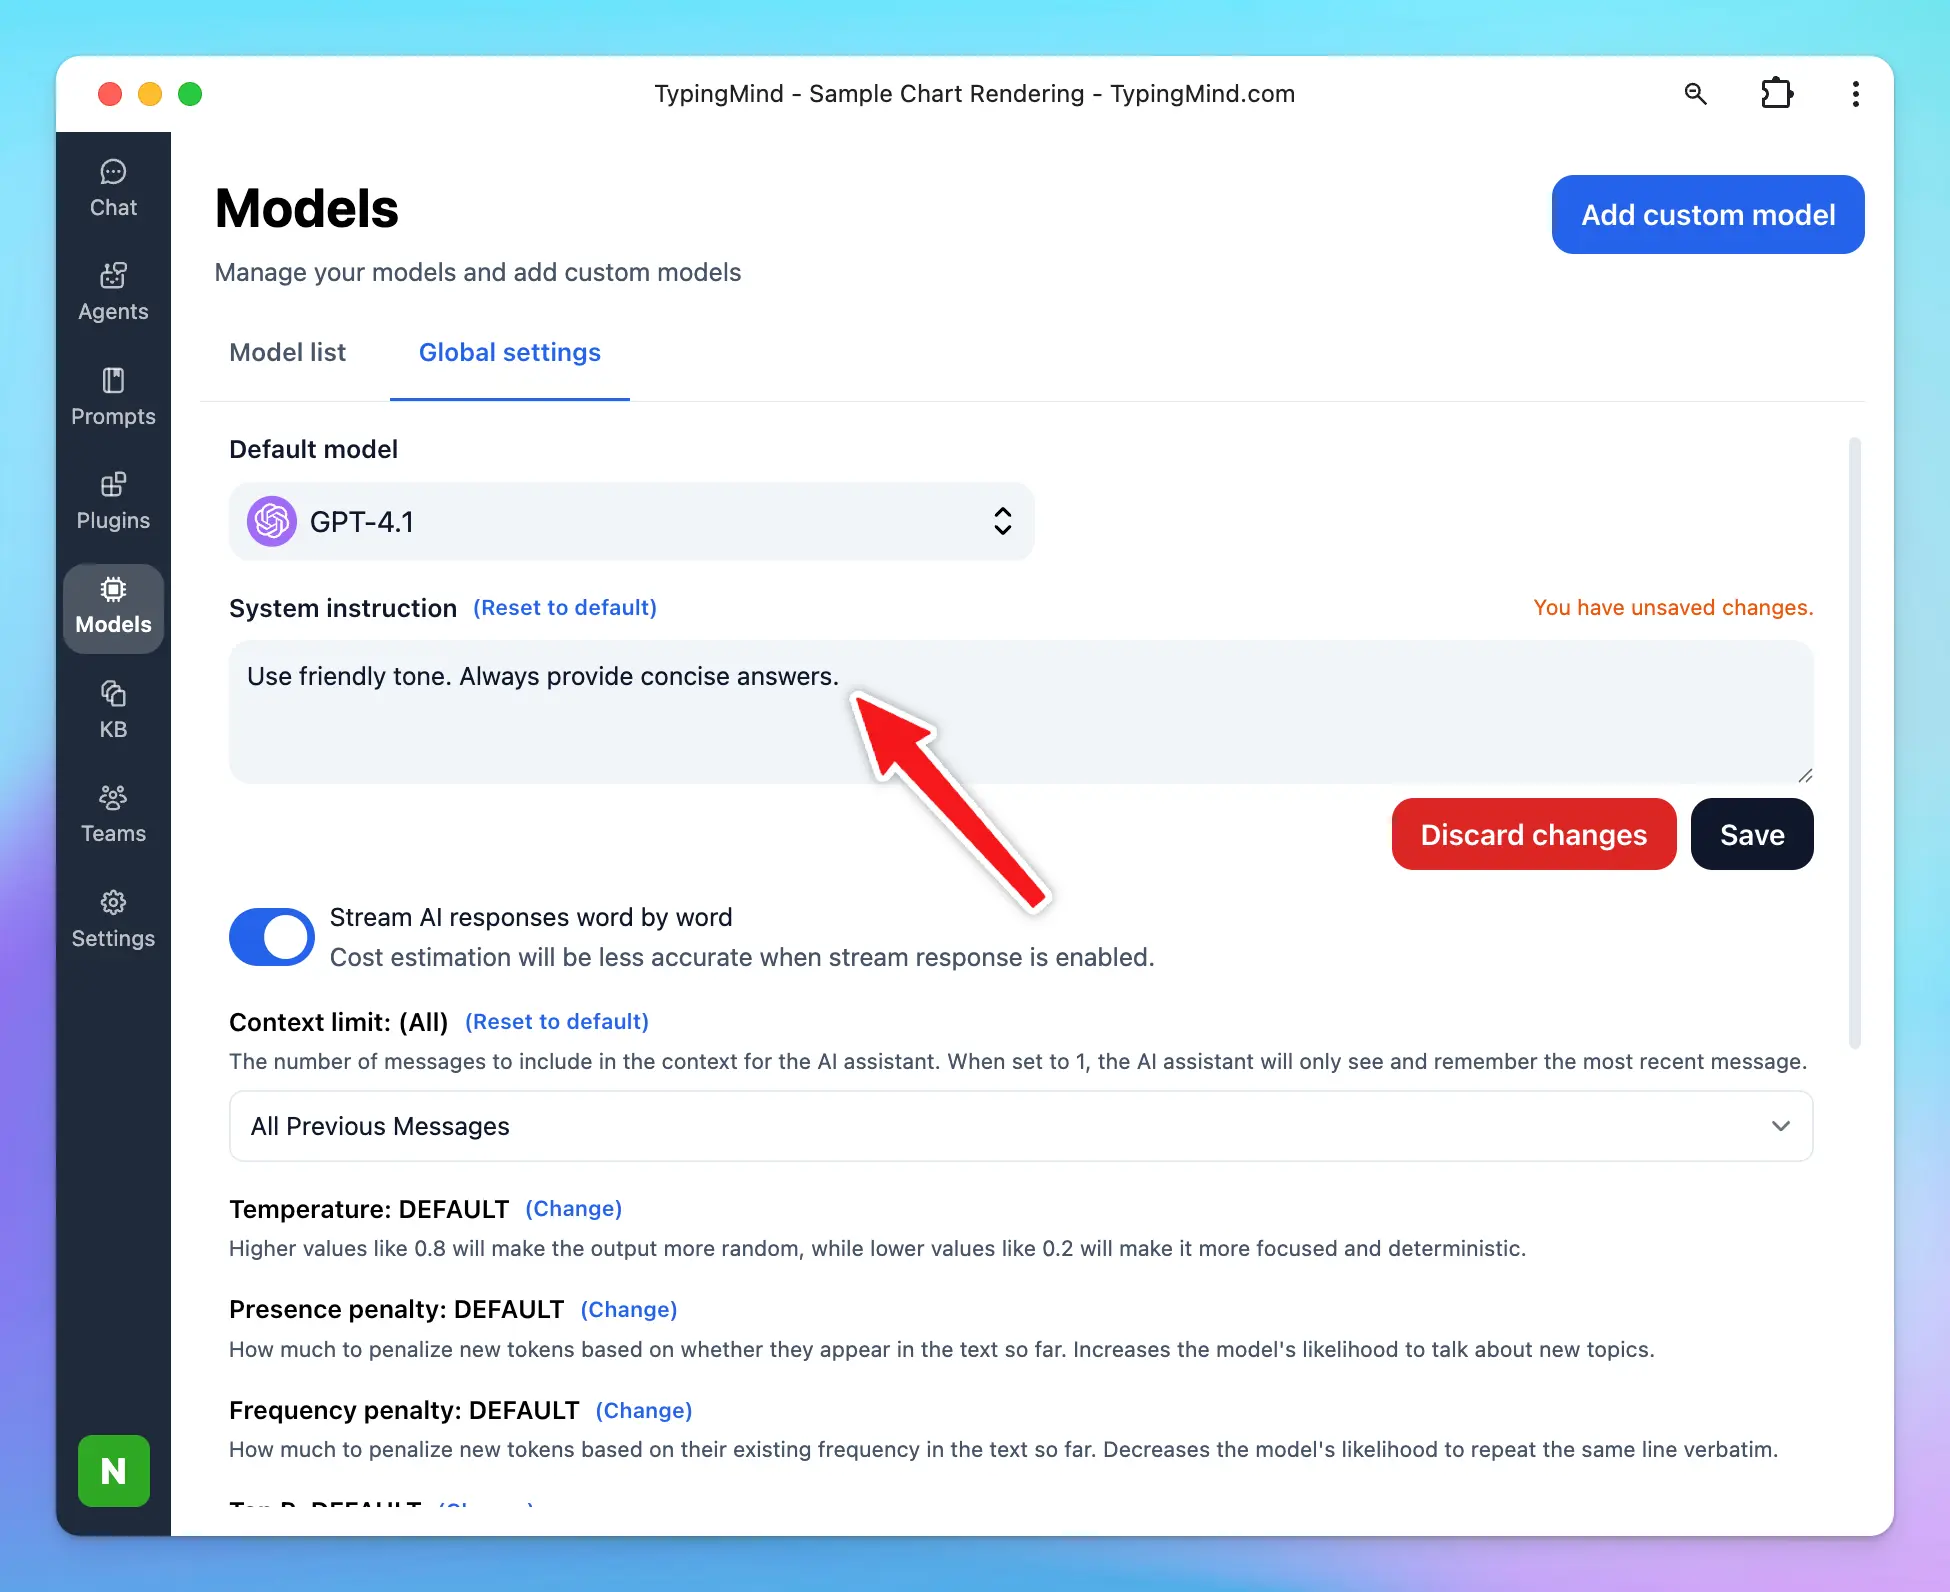
### Step 4 — Set global AI behavior with System Instructions
**System Instructions** define how the AI behaves across your entire session — its tone, personality, and scope. Set them in **Models → Global Settings**.
Context length is the maximum number of tokens (words/characters) an AI model can hold in memory during a conversation. Once the limit is reached, older messages are dropped.
System Instructions are **persistent** — the model always follows them, even after earlier messages fall out of context. For reference, GPT-4o supports up to 128,000 tokens.
***
### Step 4 — Set global AI behavior with System Instructions
**System Instructions** define how the AI behaves across your entire session — its tone, personality, and scope. Set them in **Models → Global Settings**.
Context length is the maximum number of tokens (words/characters) an AI model can hold in memory during a conversation. Once the limit is reached, older messages are dropped.
System Instructions are **persistent** — the model always follows them, even after earlier messages fall out of context. For reference, GPT-4o supports up to 128,000 tokens.
 Learn more: [System Instruction](/system-prompt/system-instruction)
***
### Step 5 — Get higher-quality responses
Save and reuse prompts for recurring workflows. Access your library from the **Prompts** menu in the left sidebar — use prebuilt prompts or create your own.
Learn more: [System Instruction](/system-prompt/system-instruction)
***
### Step 5 — Get higher-quality responses
Save and reuse prompts for recurring workflows. Access your library from the **Prompts** menu in the left sidebar — use prebuilt prompts or create your own.
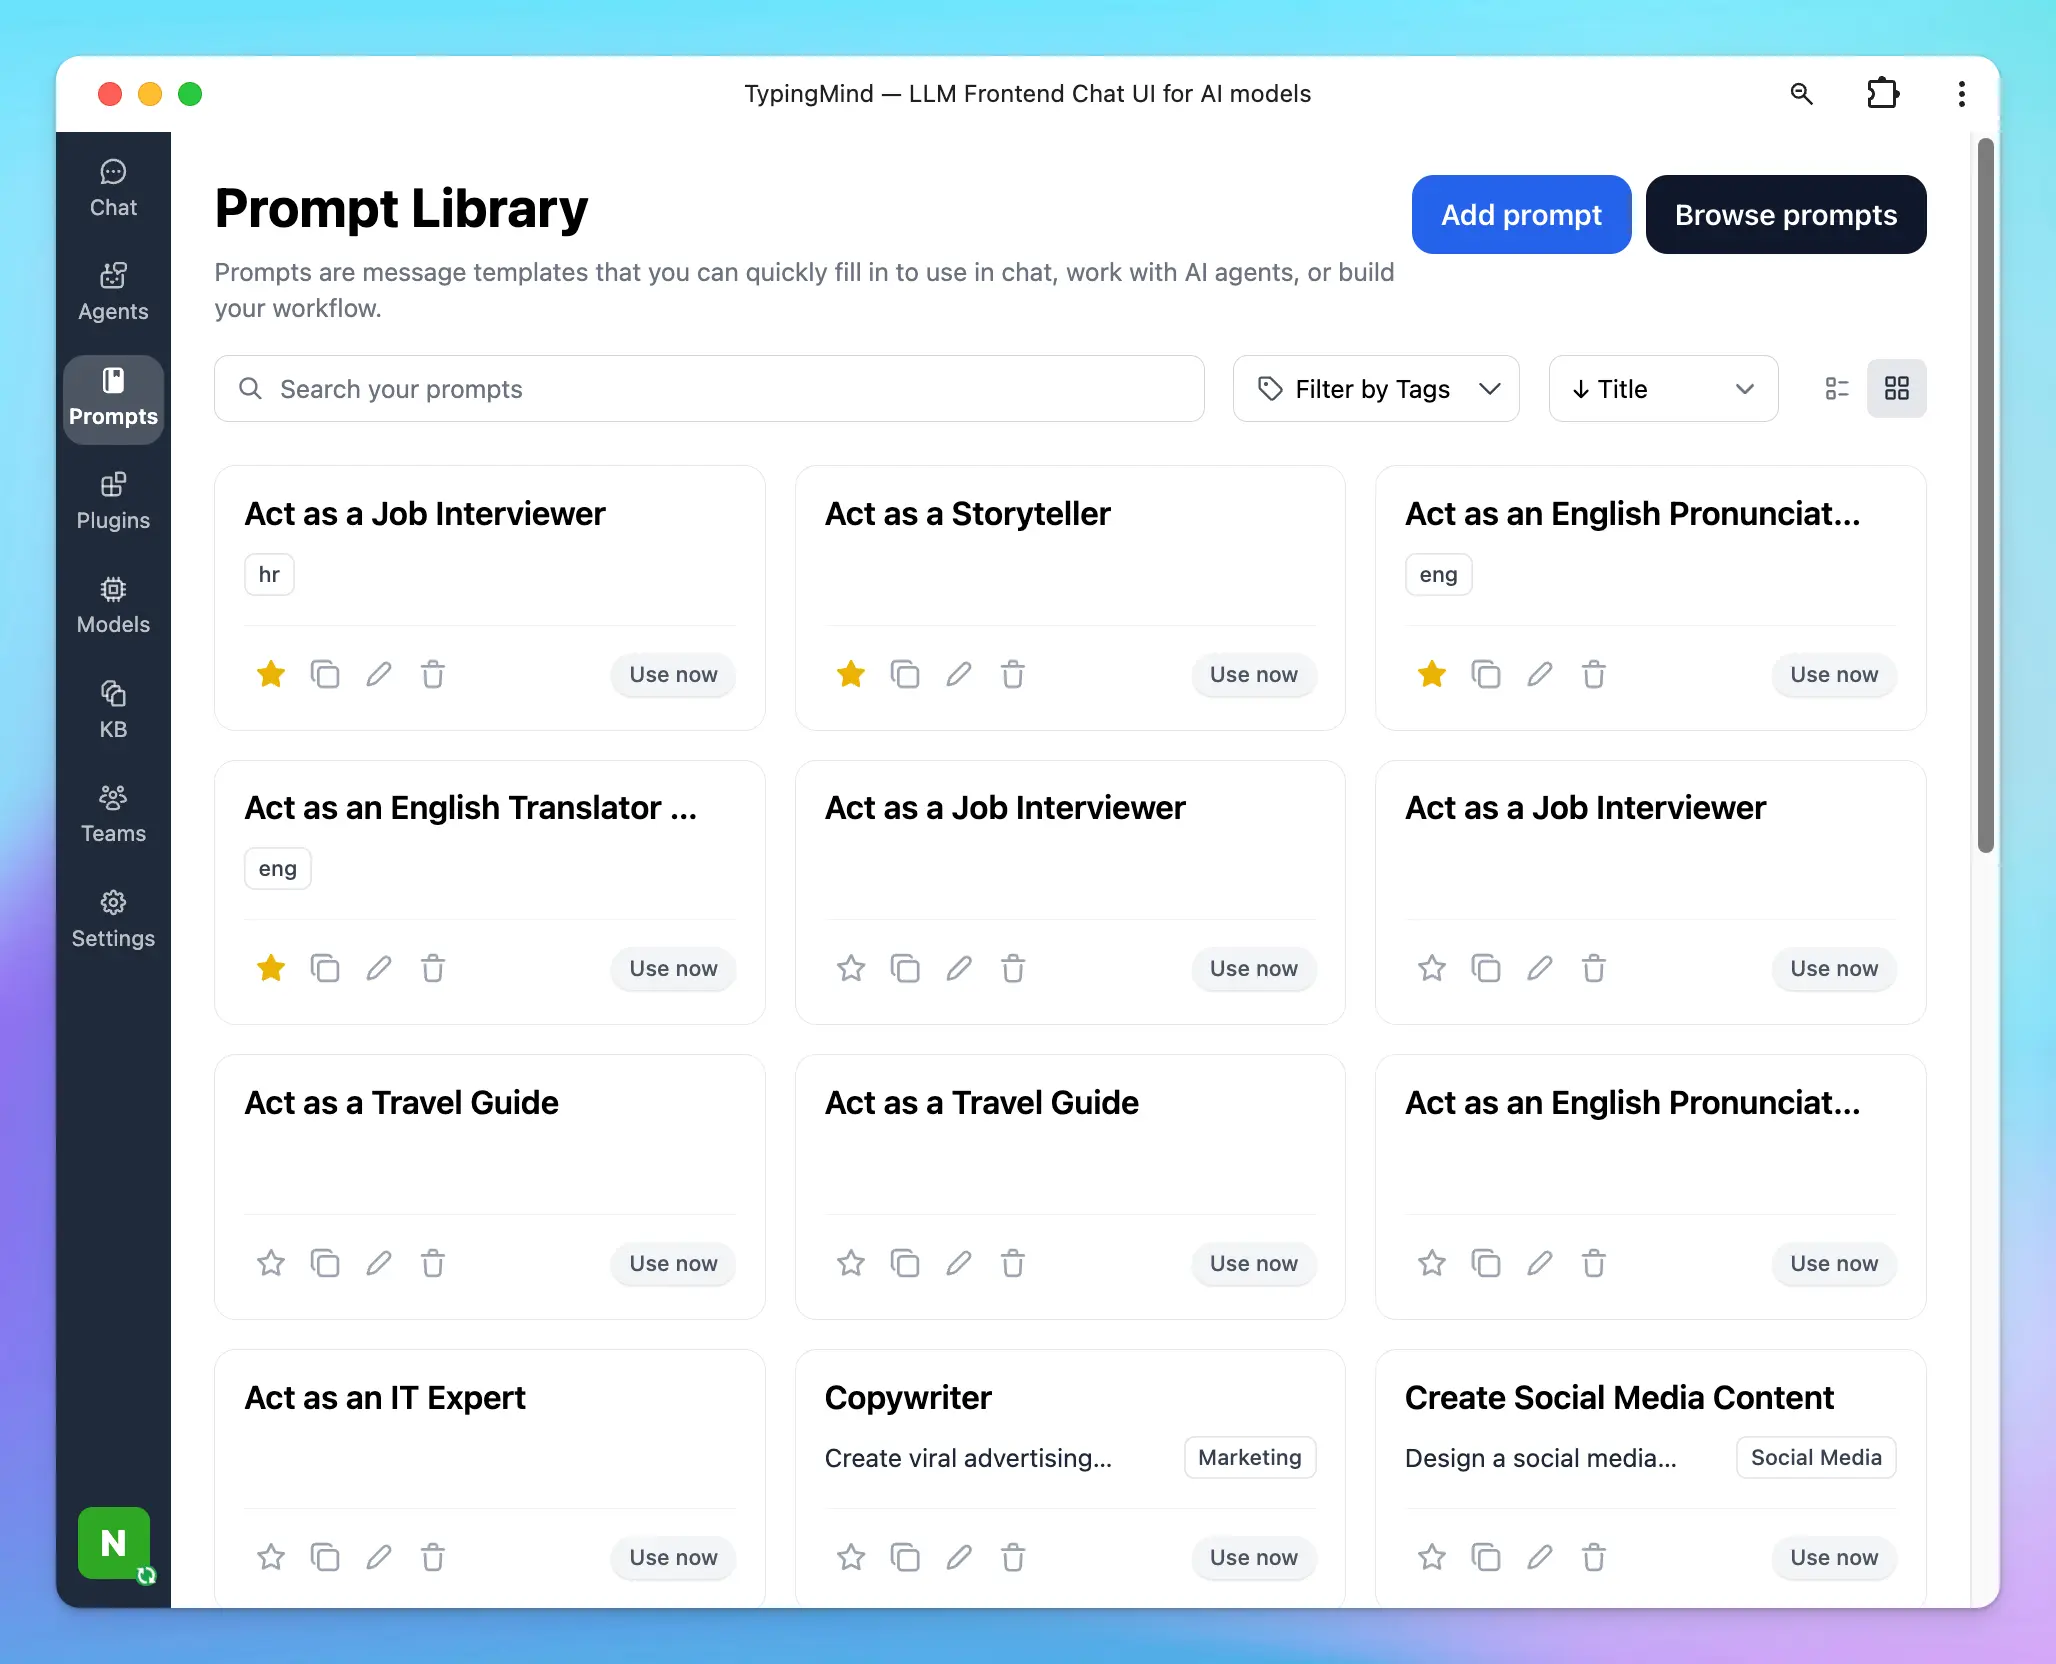 **Tip:** Be specific. *"Explain machine learning basics with examples of supervised and unsupervised learning"* will outperform *"Explain machine learning"* every time.
Learn more: [Use Prompt Library](/prompts/use-prompt-library)
Attach files directly to a conversation using the **attach icon** or drag-and-drop. The AI reads the content and can summarize, explain, or answer questions based on it.
**Tip:** Be specific. *"Explain machine learning basics with examples of supervised and unsupervised learning"* will outperform *"Explain machine learning"* every time.
Learn more: [Use Prompt Library](/prompts/use-prompt-library)
Attach files directly to a conversation using the **attach icon** or drag-and-drop. The AI reads the content and can summarize, explain, or answer questions based on it.
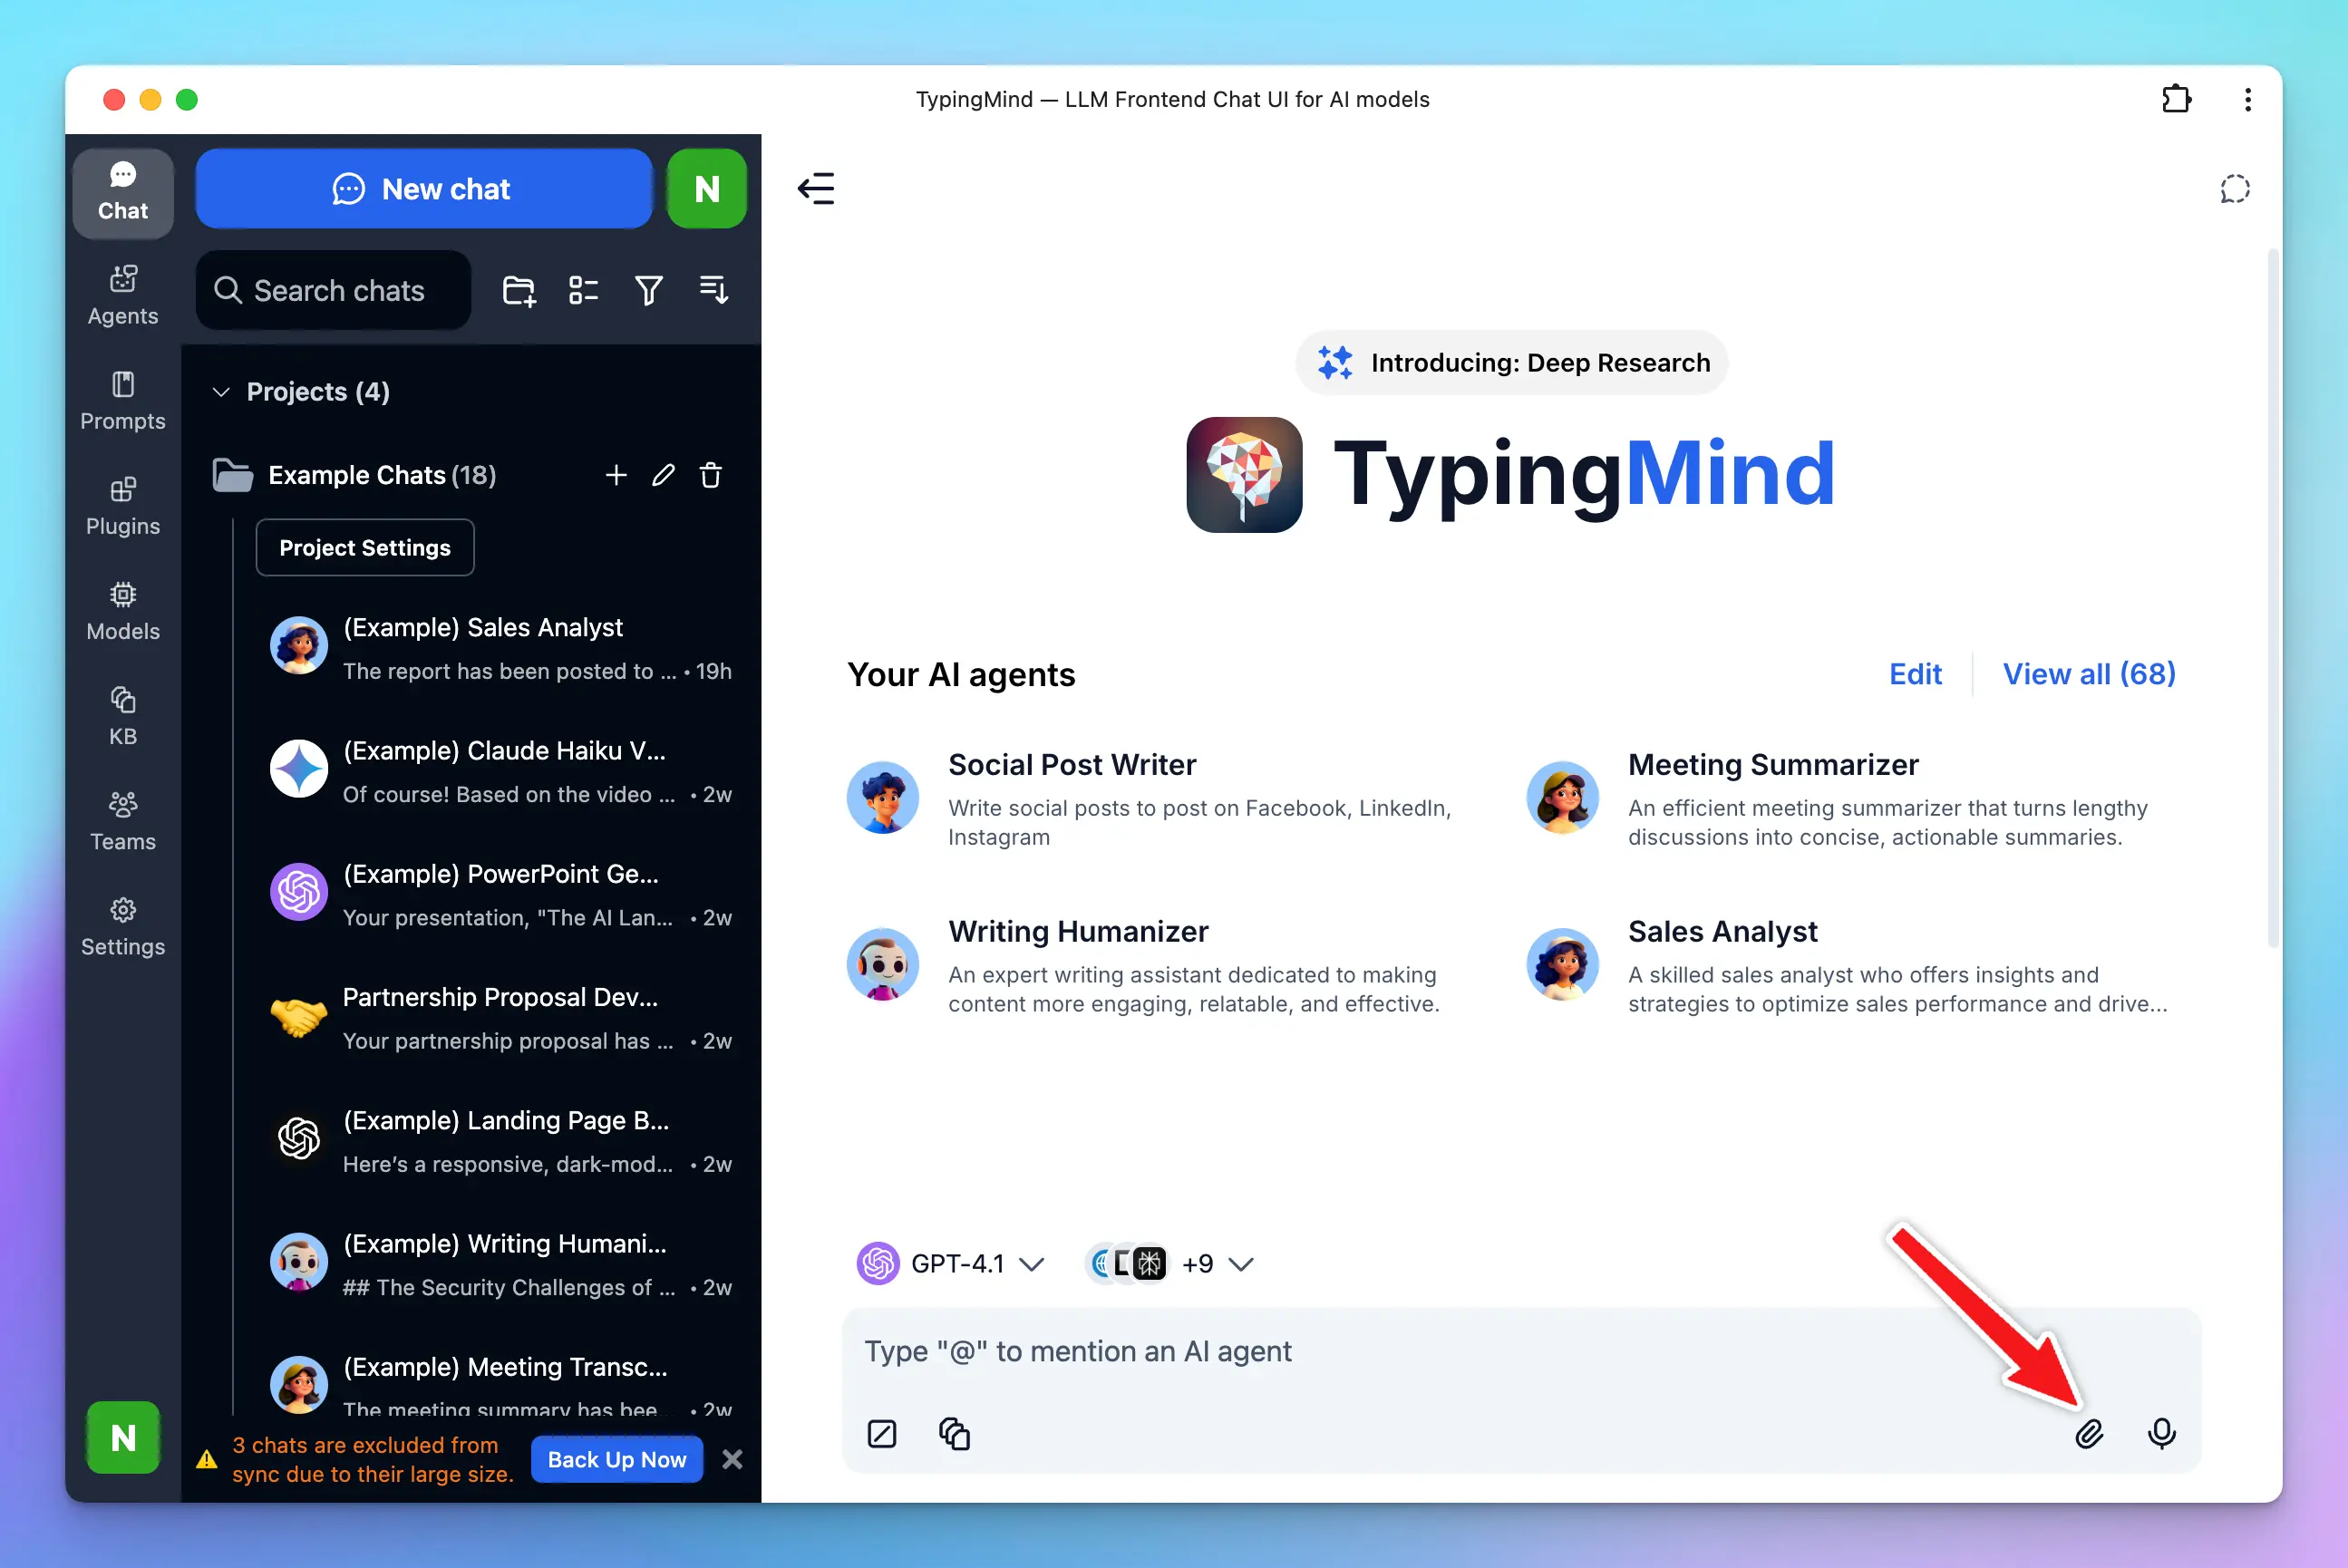 **Tip:** Well-structured, relevant documents yield the most accurate results — ideal for analyzing reports or summarizing long texts.
Learn more: [Chat with Files or Videos](/upload-and-chat-with-files)
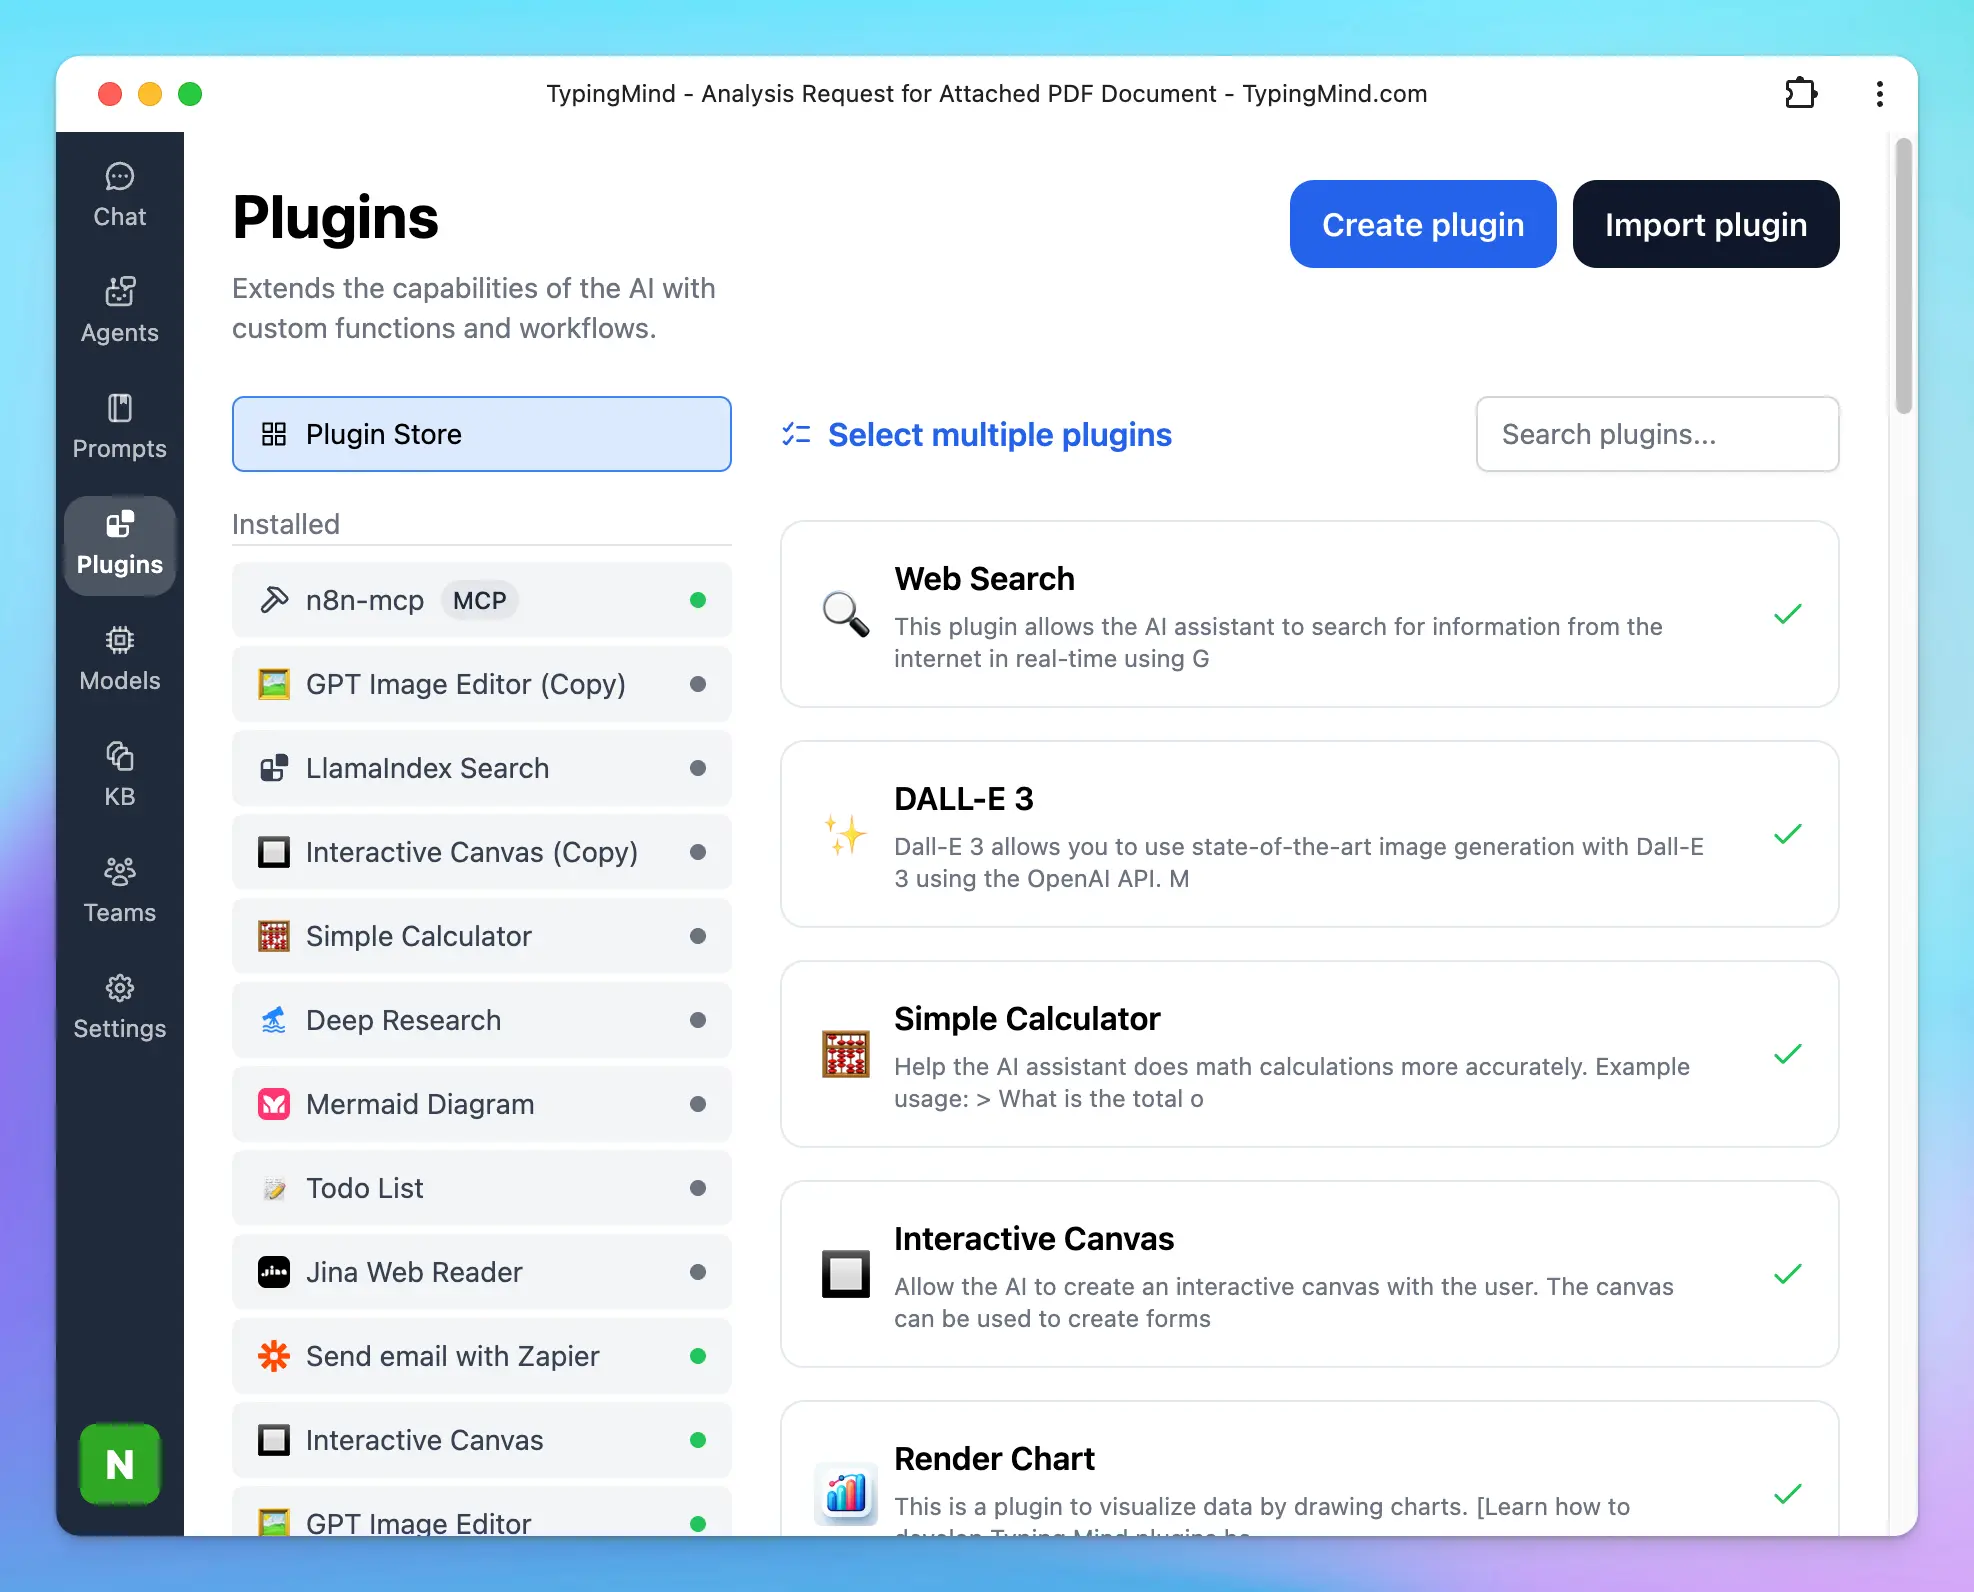
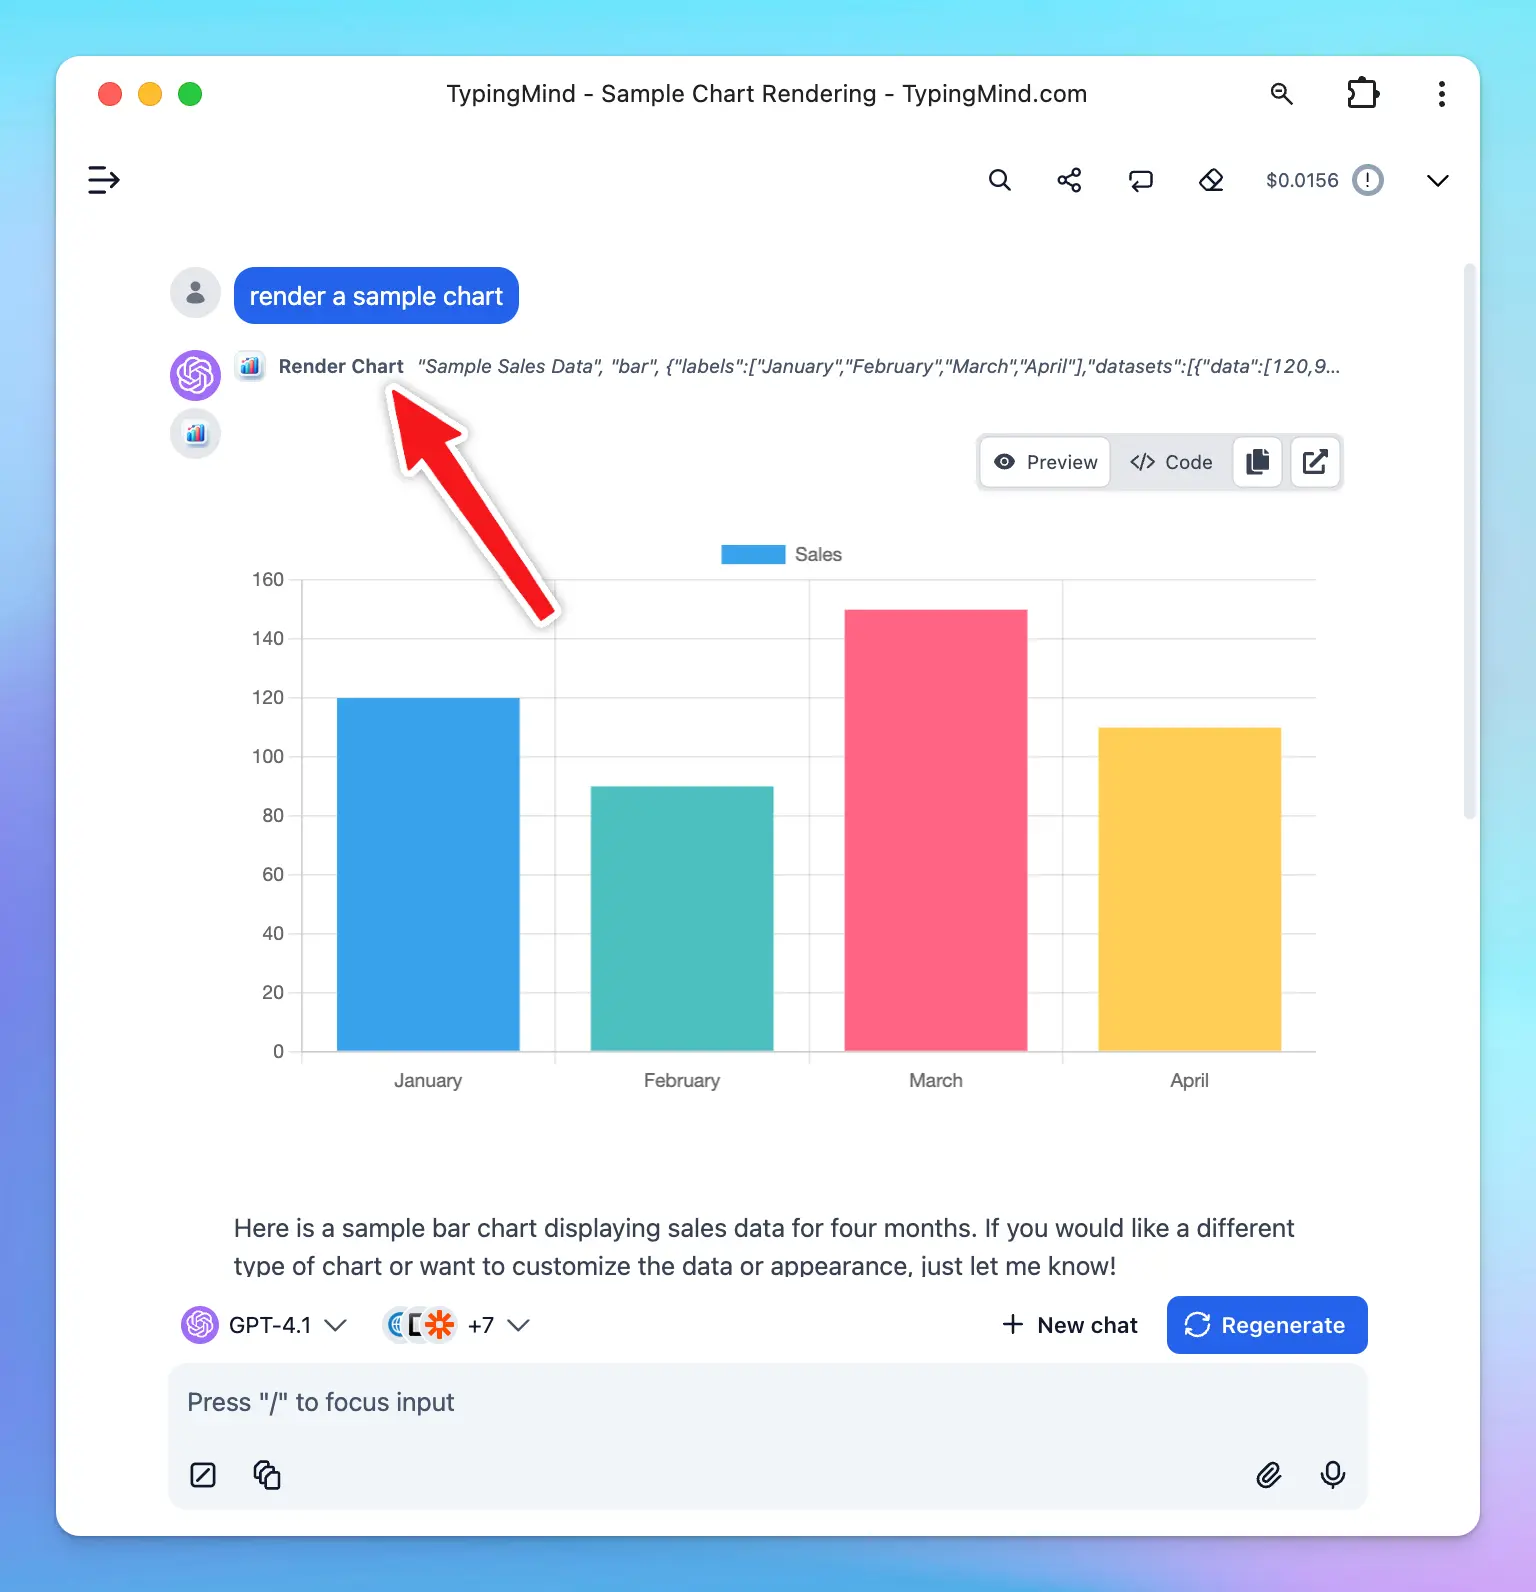
Plugins give the AI access to the internet, image generation, code rendering, and more. Find them in the **Plugins** section of the left panel.
Popular plugins include:
* **Web Search** (Model Tool) — real-time internet access
* [**GPT Image Editor**](https://docs.typingmind.com/plugins/gpt-image-editor) — generate and edit images
* [**Deep Research**](https://docs.typingmind.com/plugins/deep-research) — multi-step research on complex topics
* [**Interactive Canvas**](https://docs.typingmind.com/plugins/interactive-canvas-\(artifacts\)) — render charts and code
You can also build [Custom Plugins](https://docs.typingmind.com/plugins/build-a-typingmind-plugin) to connect your own APIs or MCP servers.
**Tip:** Well-structured, relevant documents yield the most accurate results — ideal for analyzing reports or summarizing long texts.
Learn more: [Chat with Files or Videos](/upload-and-chat-with-files)
Plugins give the AI access to the internet, image generation, code rendering, and more. Find them in the **Plugins** section of the left panel.
Popular plugins include:
* **Web Search** (Model Tool) — real-time internet access
* [**GPT Image Editor**](https://docs.typingmind.com/plugins/gpt-image-editor) — generate and edit images
* [**Deep Research**](https://docs.typingmind.com/plugins/deep-research) — multi-step research on complex topics
* [**Interactive Canvas**](https://docs.typingmind.com/plugins/interactive-canvas-\(artifacts\)) — render charts and code
You can also build [Custom Plugins](https://docs.typingmind.com/plugins/build-a-typingmind-plugin) to connect your own APIs or MCP servers.
 The **Knowledge Base** feature lets you upload files or connect external sources (Google Drive, GitHub, Notion, websites) so the AI can retrieve relevant context when answering your questions.
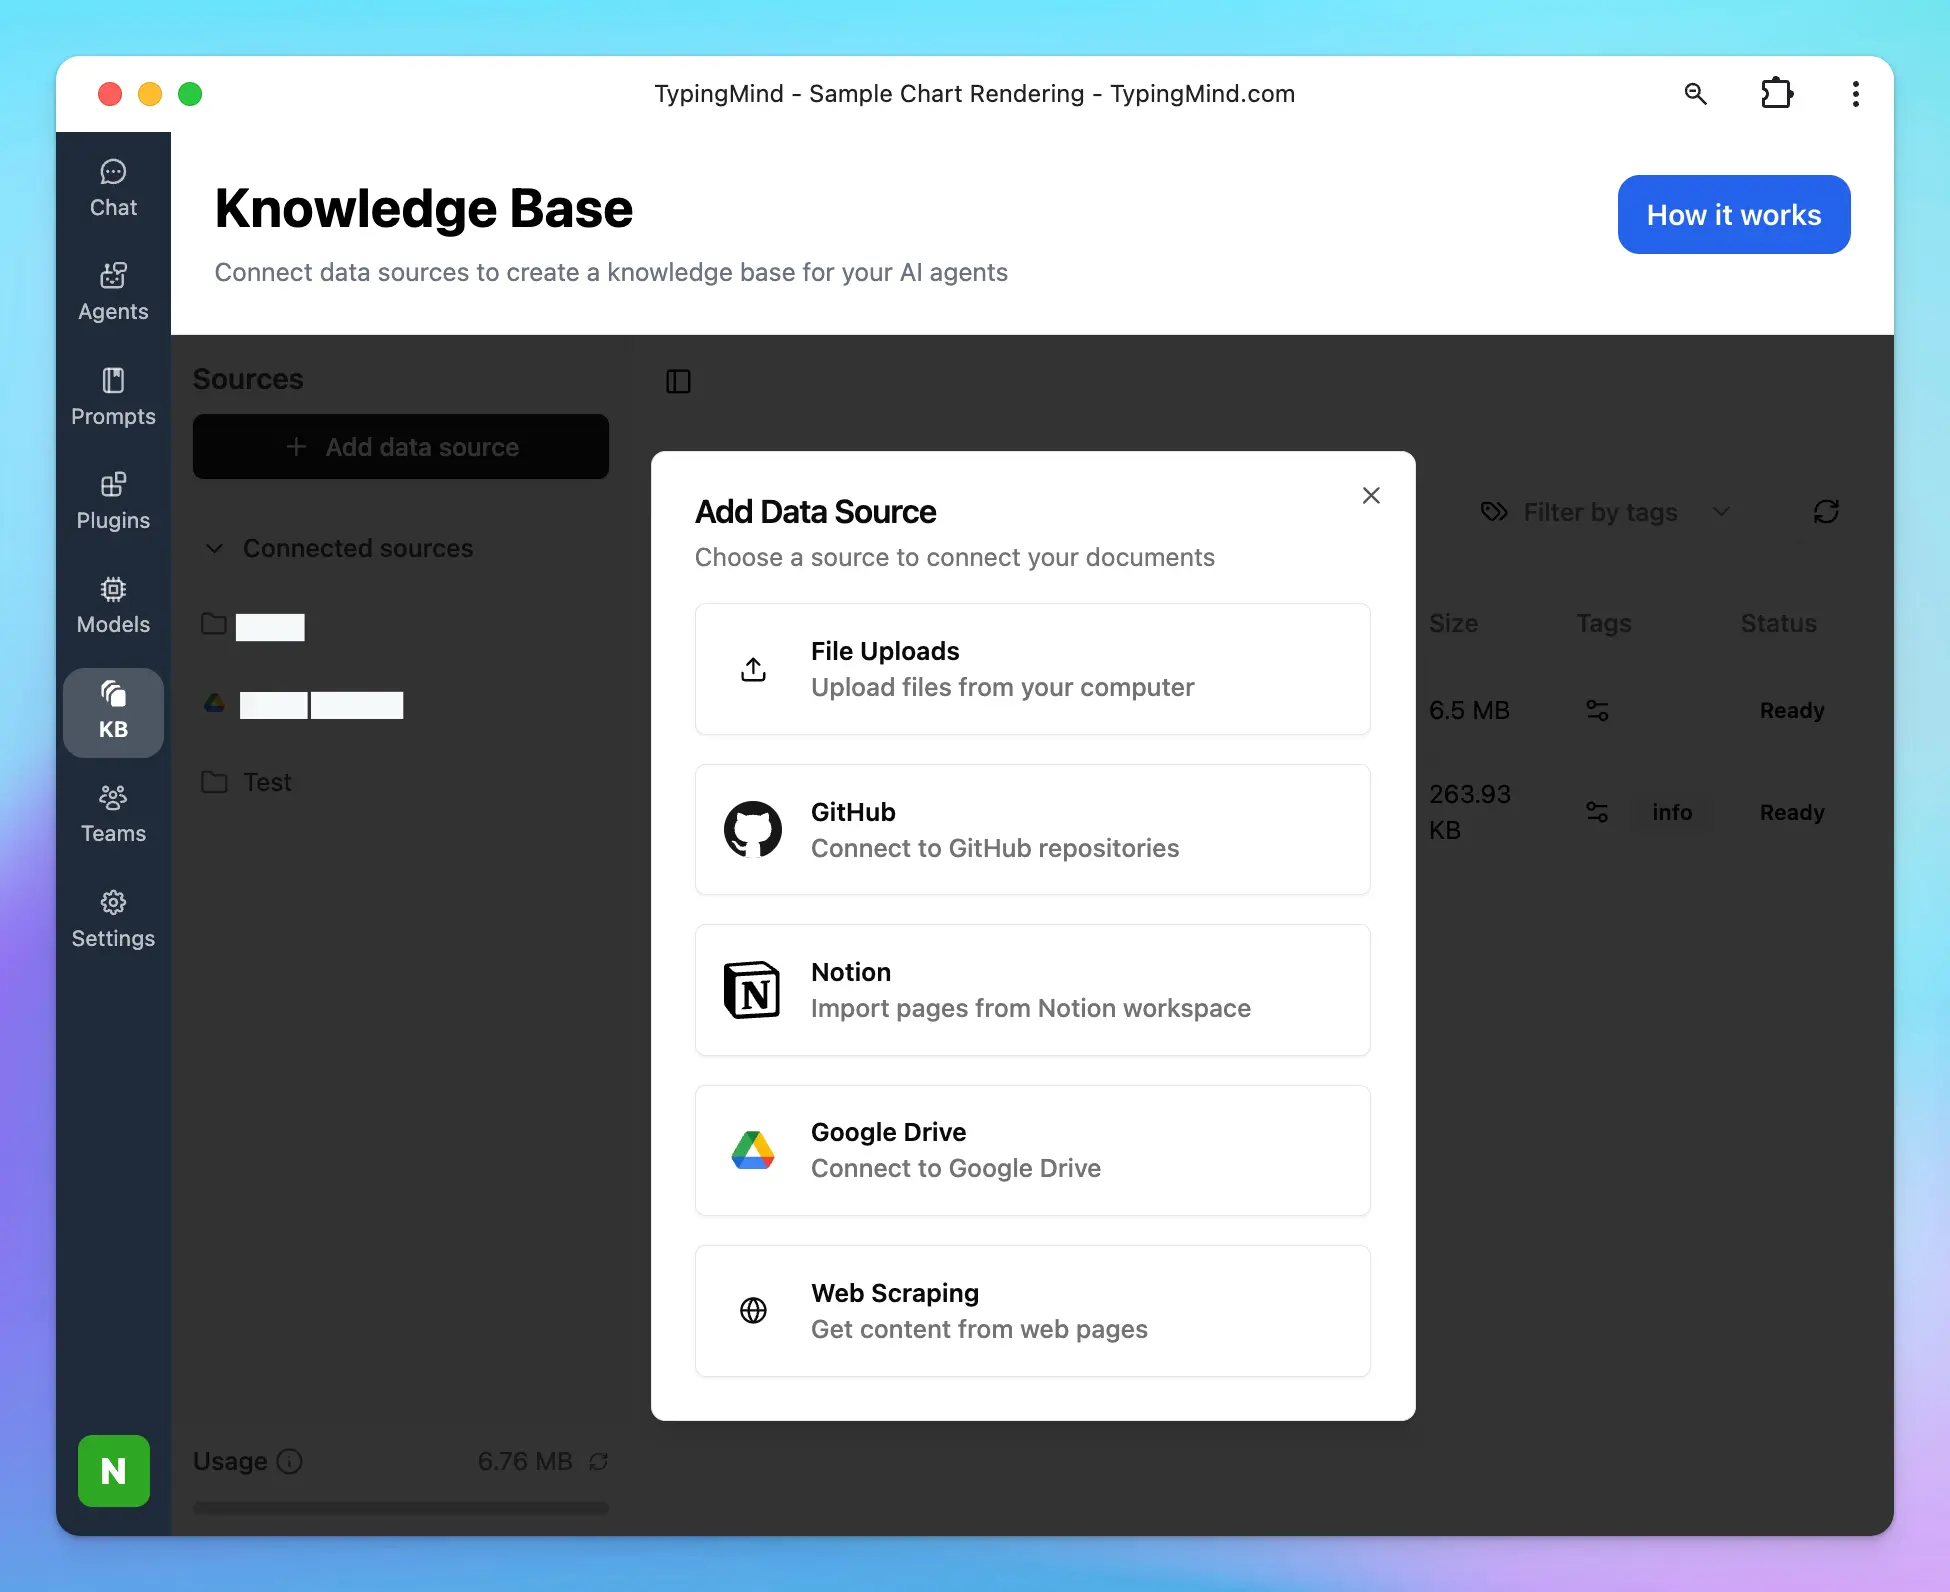 To get started: click the **KB** tab → **Add Data Source** → upload files or connect a source.
Learn more at [RAG Knowledge Base](/rag-knowledge-base)
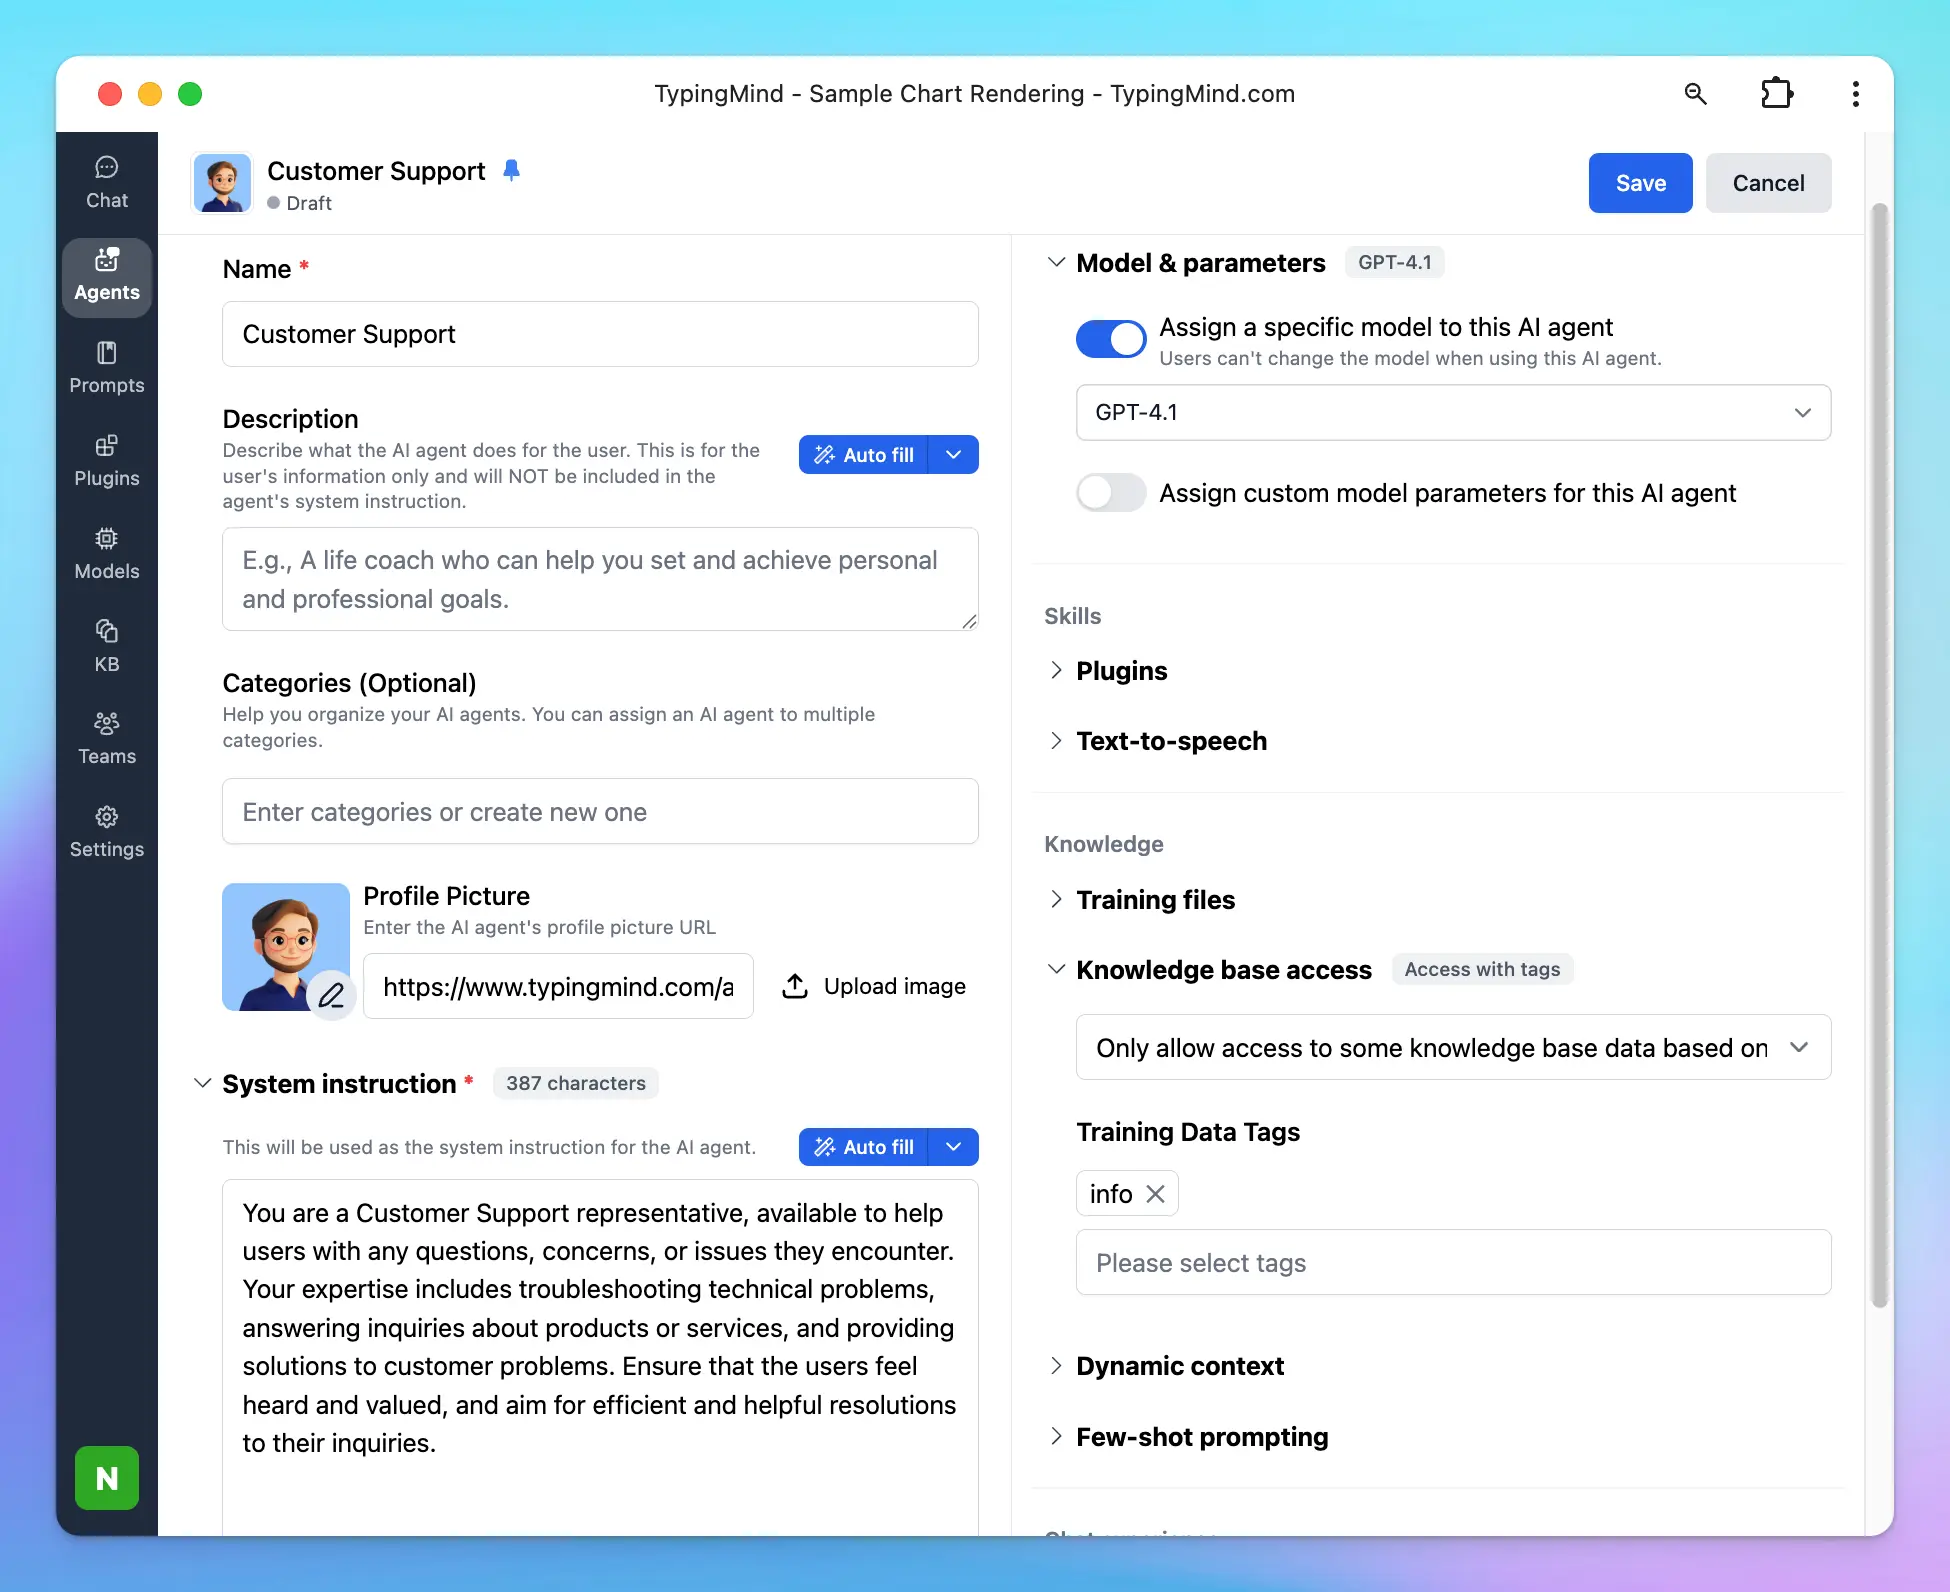
AI Agents are purpose-built assistants with their own model, instructions, plugins, and training data. Create them from the **Agents** section in the left panel.
Each agent can have:
* A dedicated base model (e.g. GPT-4o)
* Plugins for web search, image generation, or custom tools
* A connected knowledge base or uploaded training files
* Few-shot examples to guide behavior
To get started: click the **KB** tab → **Add Data Source** → upload files or connect a source.
Learn more at [RAG Knowledge Base](/rag-knowledge-base)
AI Agents are purpose-built assistants with their own model, instructions, plugins, and training data. Create them from the **Agents** section in the left panel.
Each agent can have:
* A dedicated base model (e.g. GPT-4o)
* Plugins for web search, image generation, or custom tools
* A connected knowledge base or uploaded training files
* Few-shot examples to guide behavior
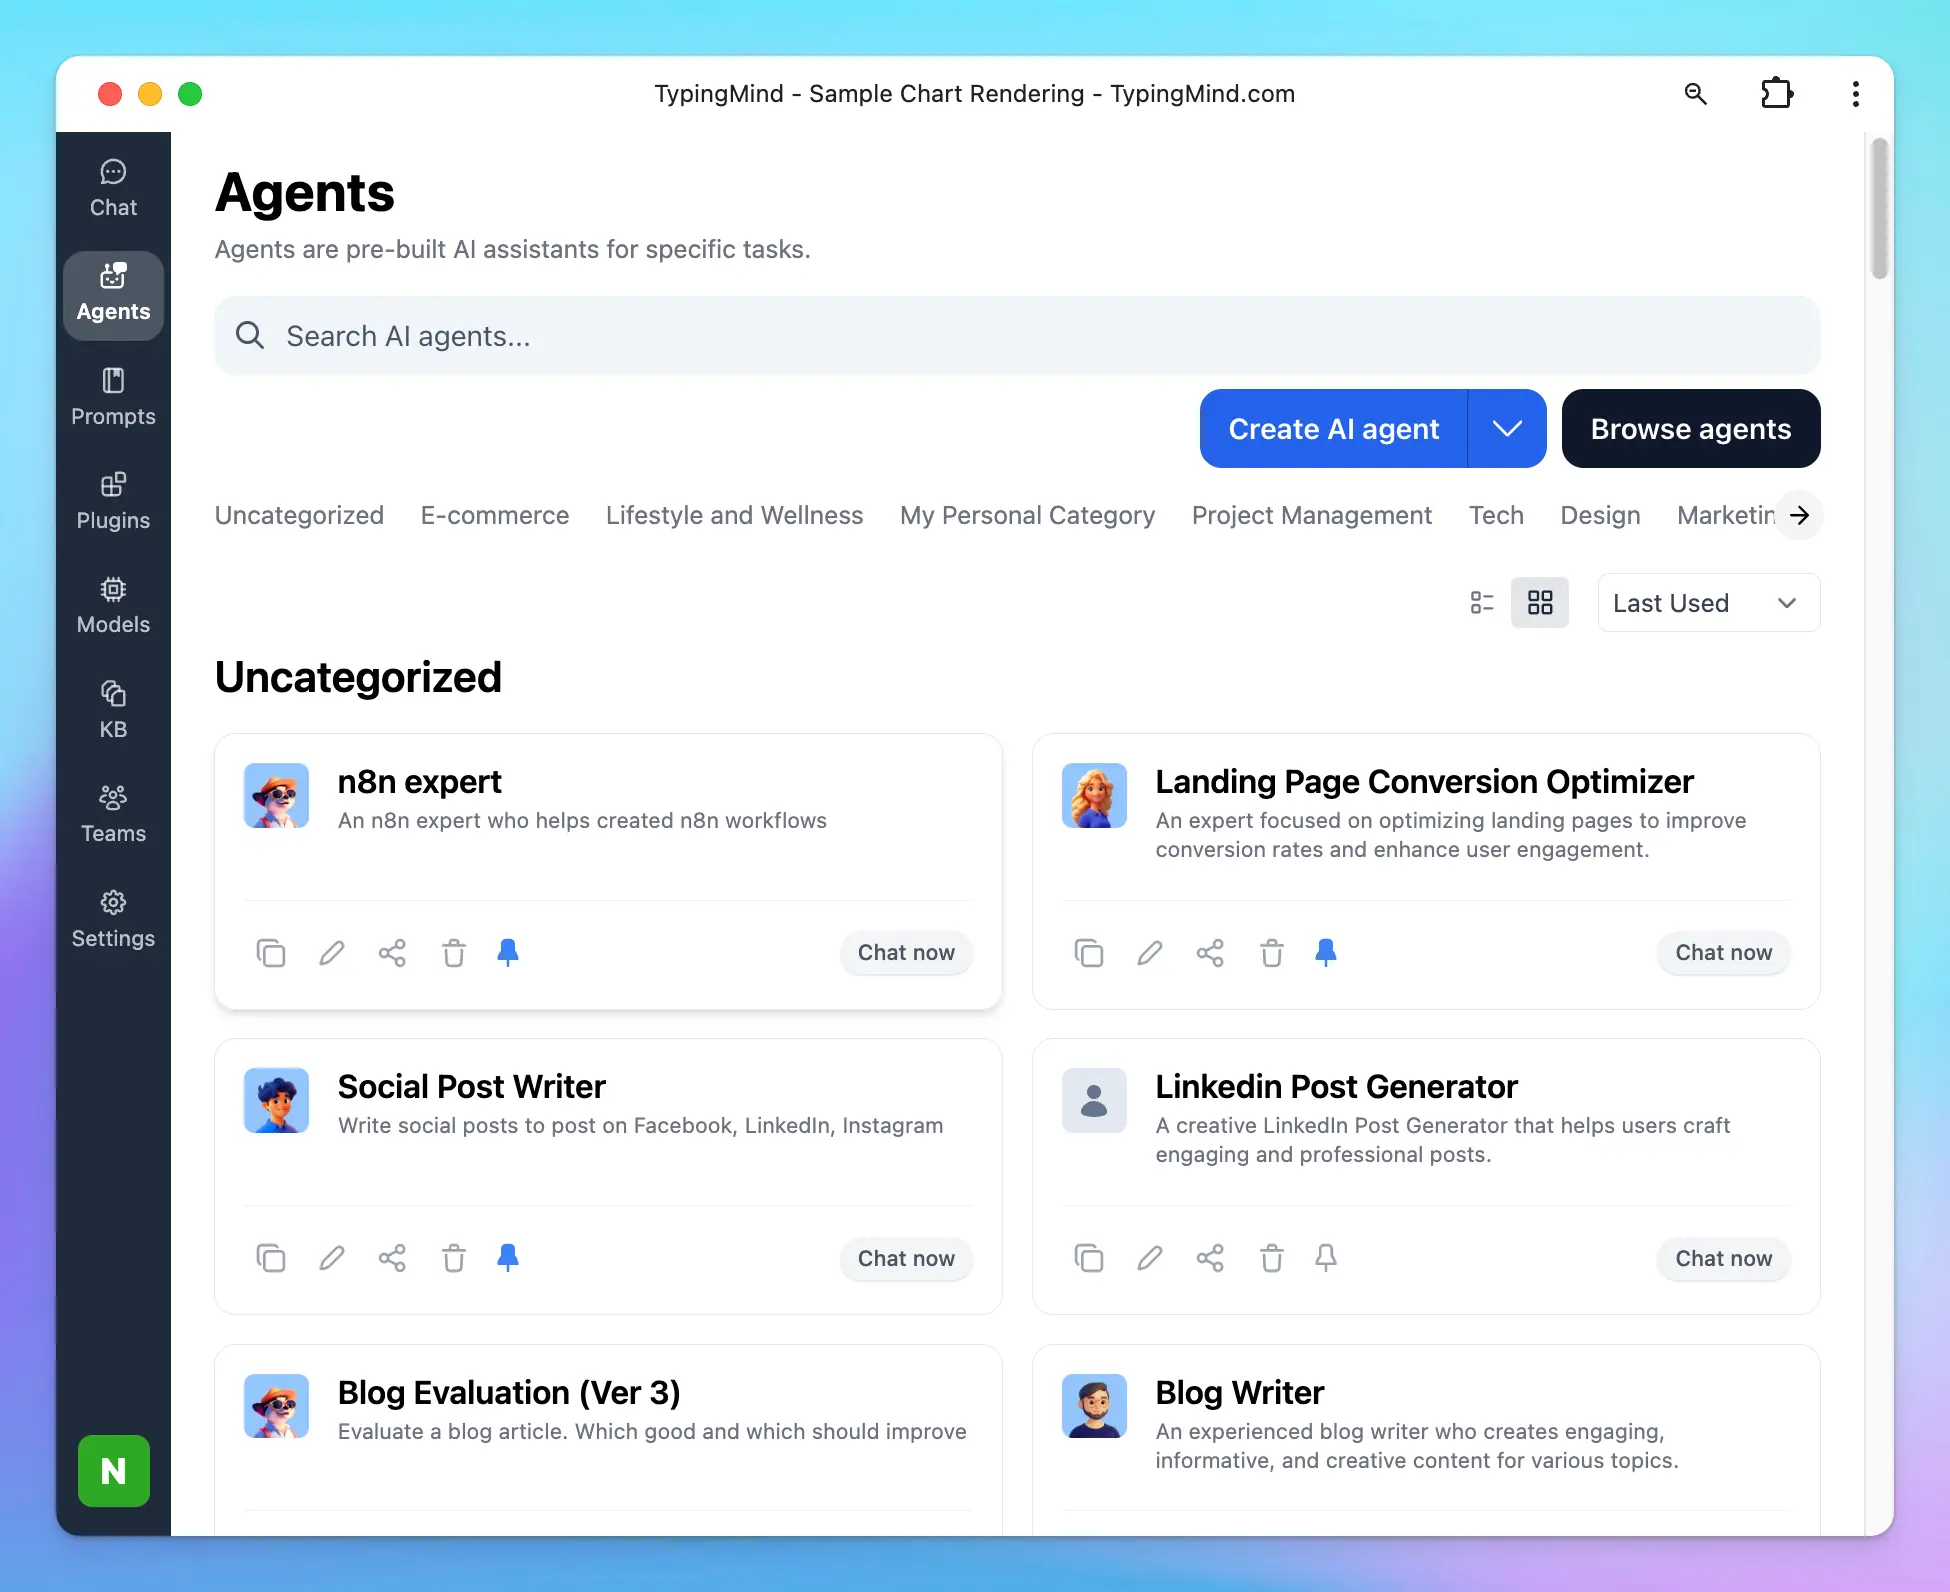 Great for recurring, specialized tasks — like a customer support agent trained on your company FAQs.
 Learn more: [AI Agents Overview](/ai-agents/ai-agents-overview)
***
### Step 6 — Organize your workspace
Your full chat history lives in the left panel. Keep it tidy by:
* **Dragging chats into folders**
* **Pinning** important conversations to the top
* **Deleting** stale chats
Learn more: [AI Agents Overview](/ai-agents/ai-agents-overview)
***
### Step 6 — Organize your workspace
Your full chat history lives in the left panel. Keep it tidy by:
* **Dragging chats into folders**
* **Pinning** important conversations to the top
* **Deleting** stale chats
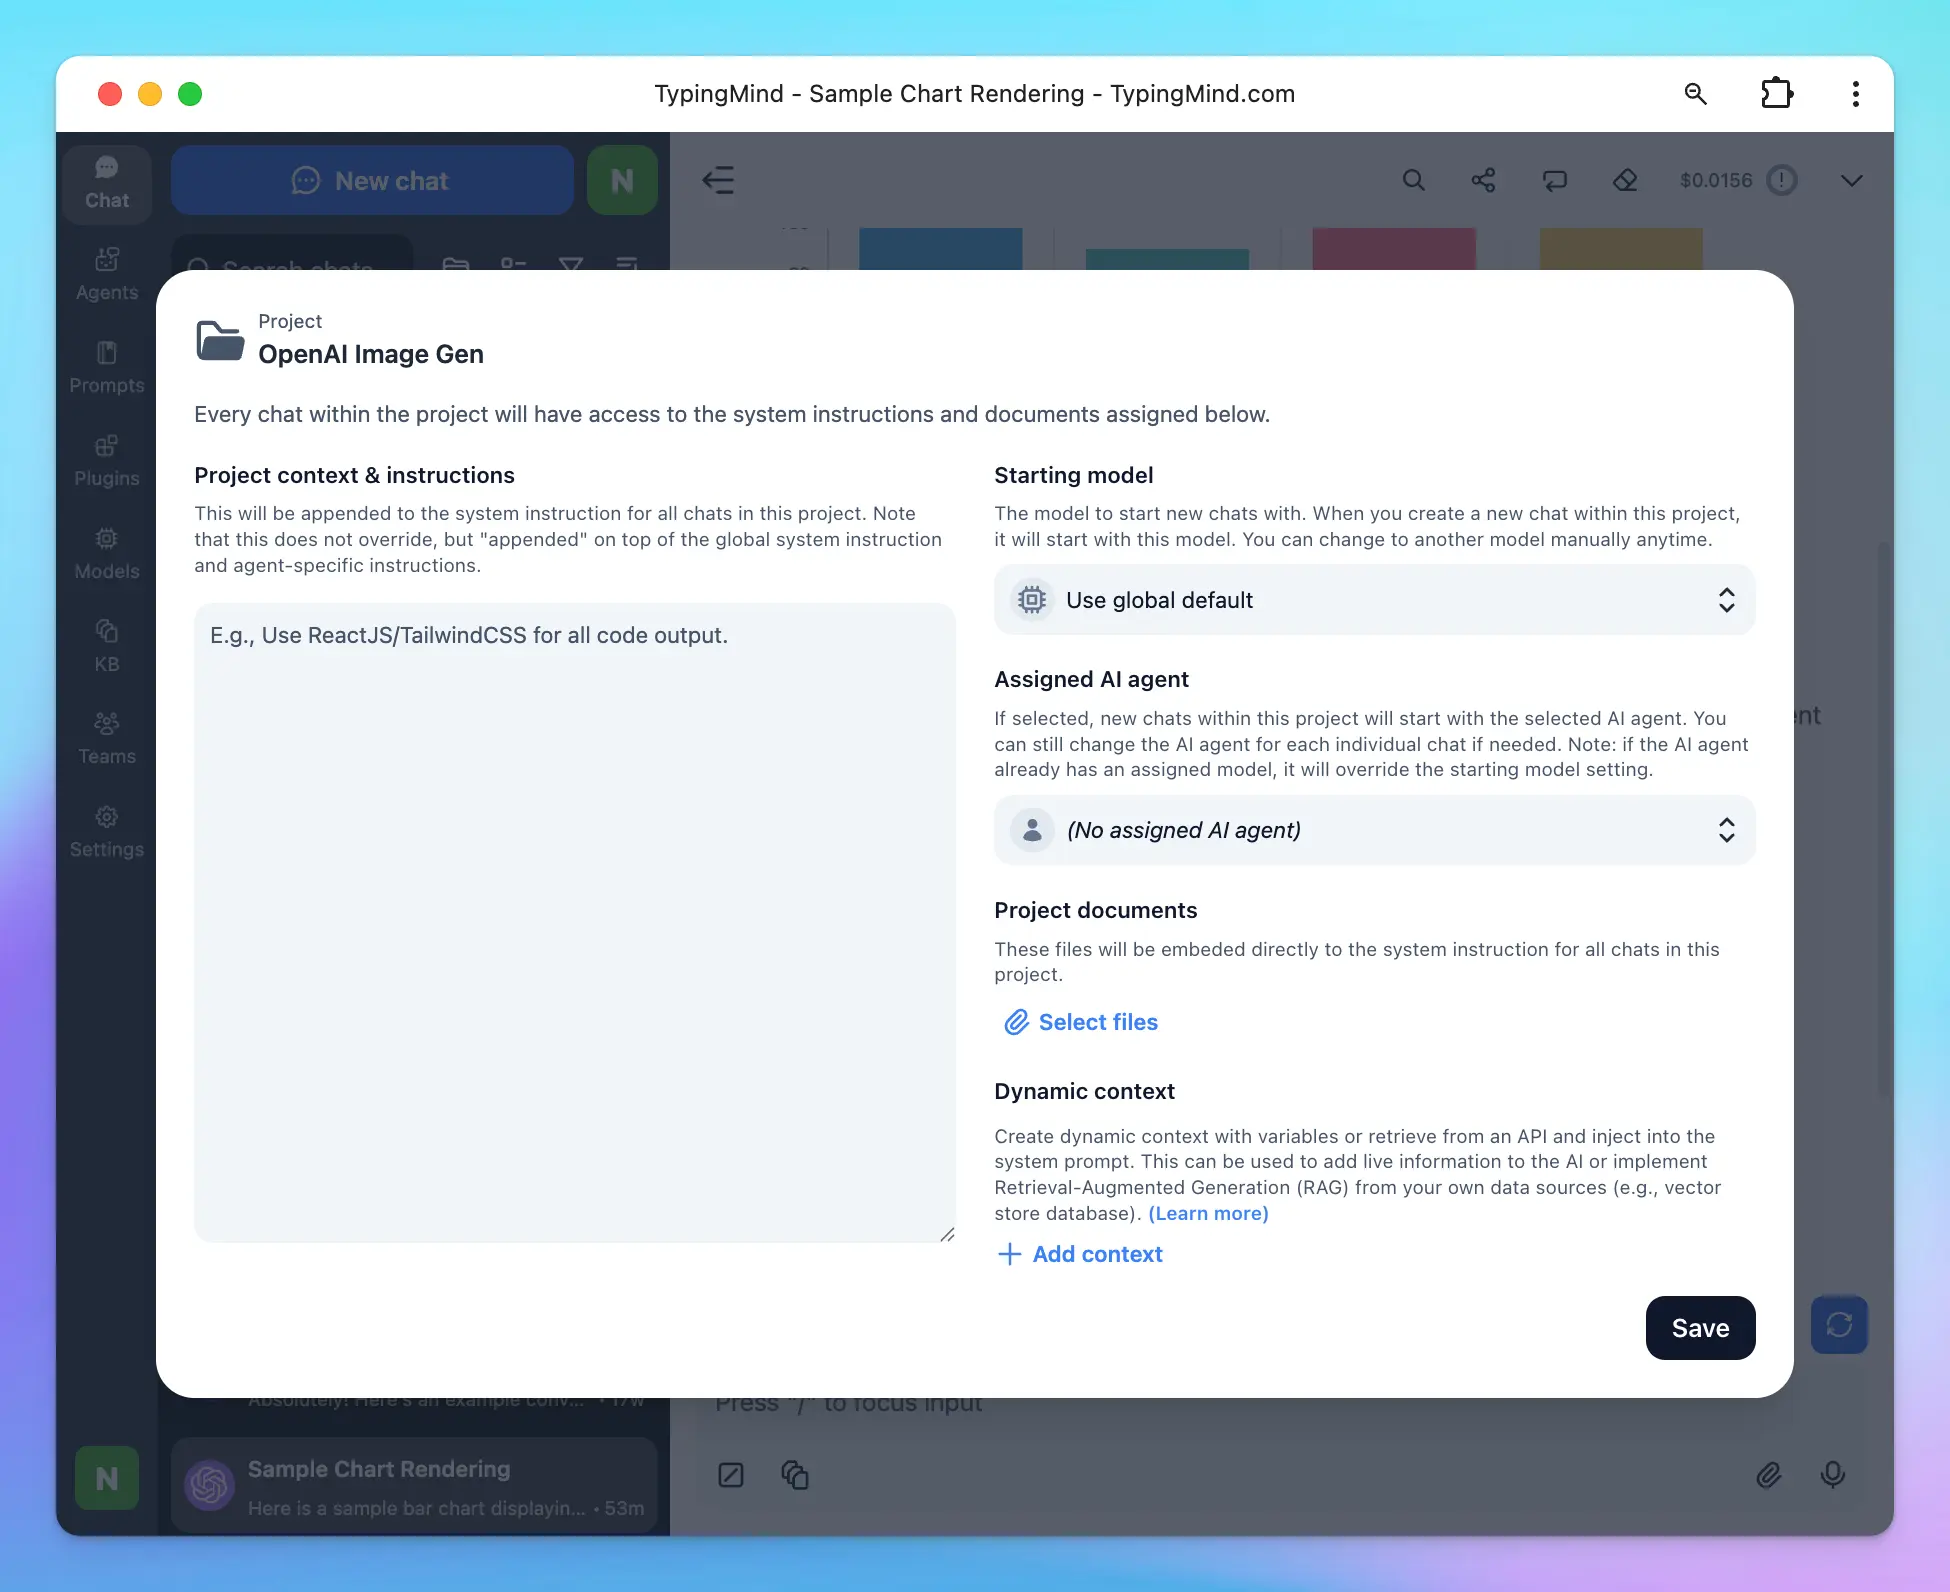
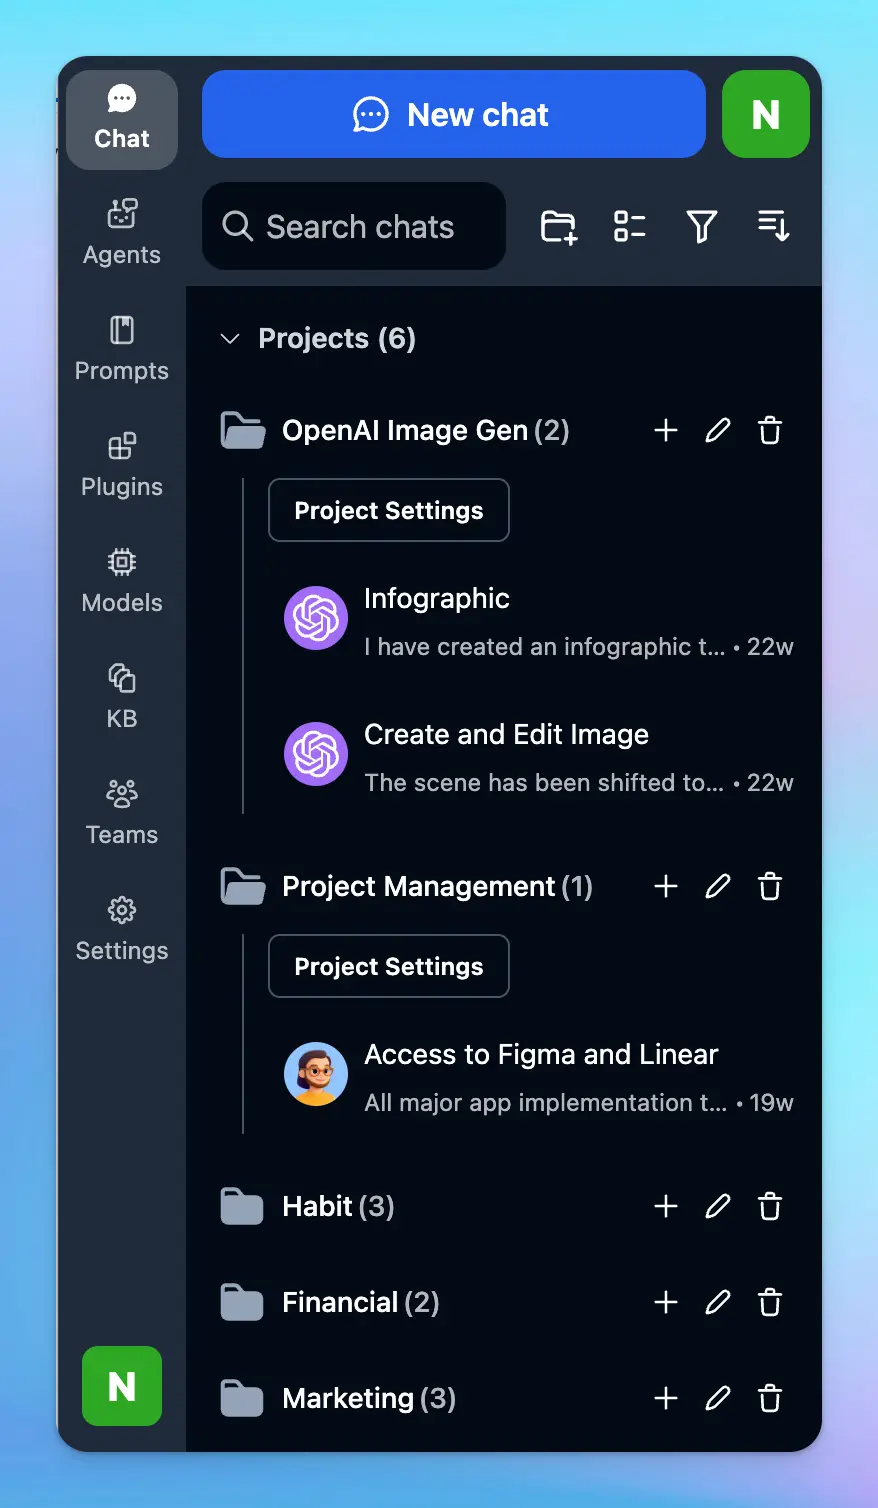 For longer-term work, use **Projects** — containers that group related chats with shared model settings, instructions, and agents.
 Learn more: [Organize Chats](/chat-management/organize-chats)
***
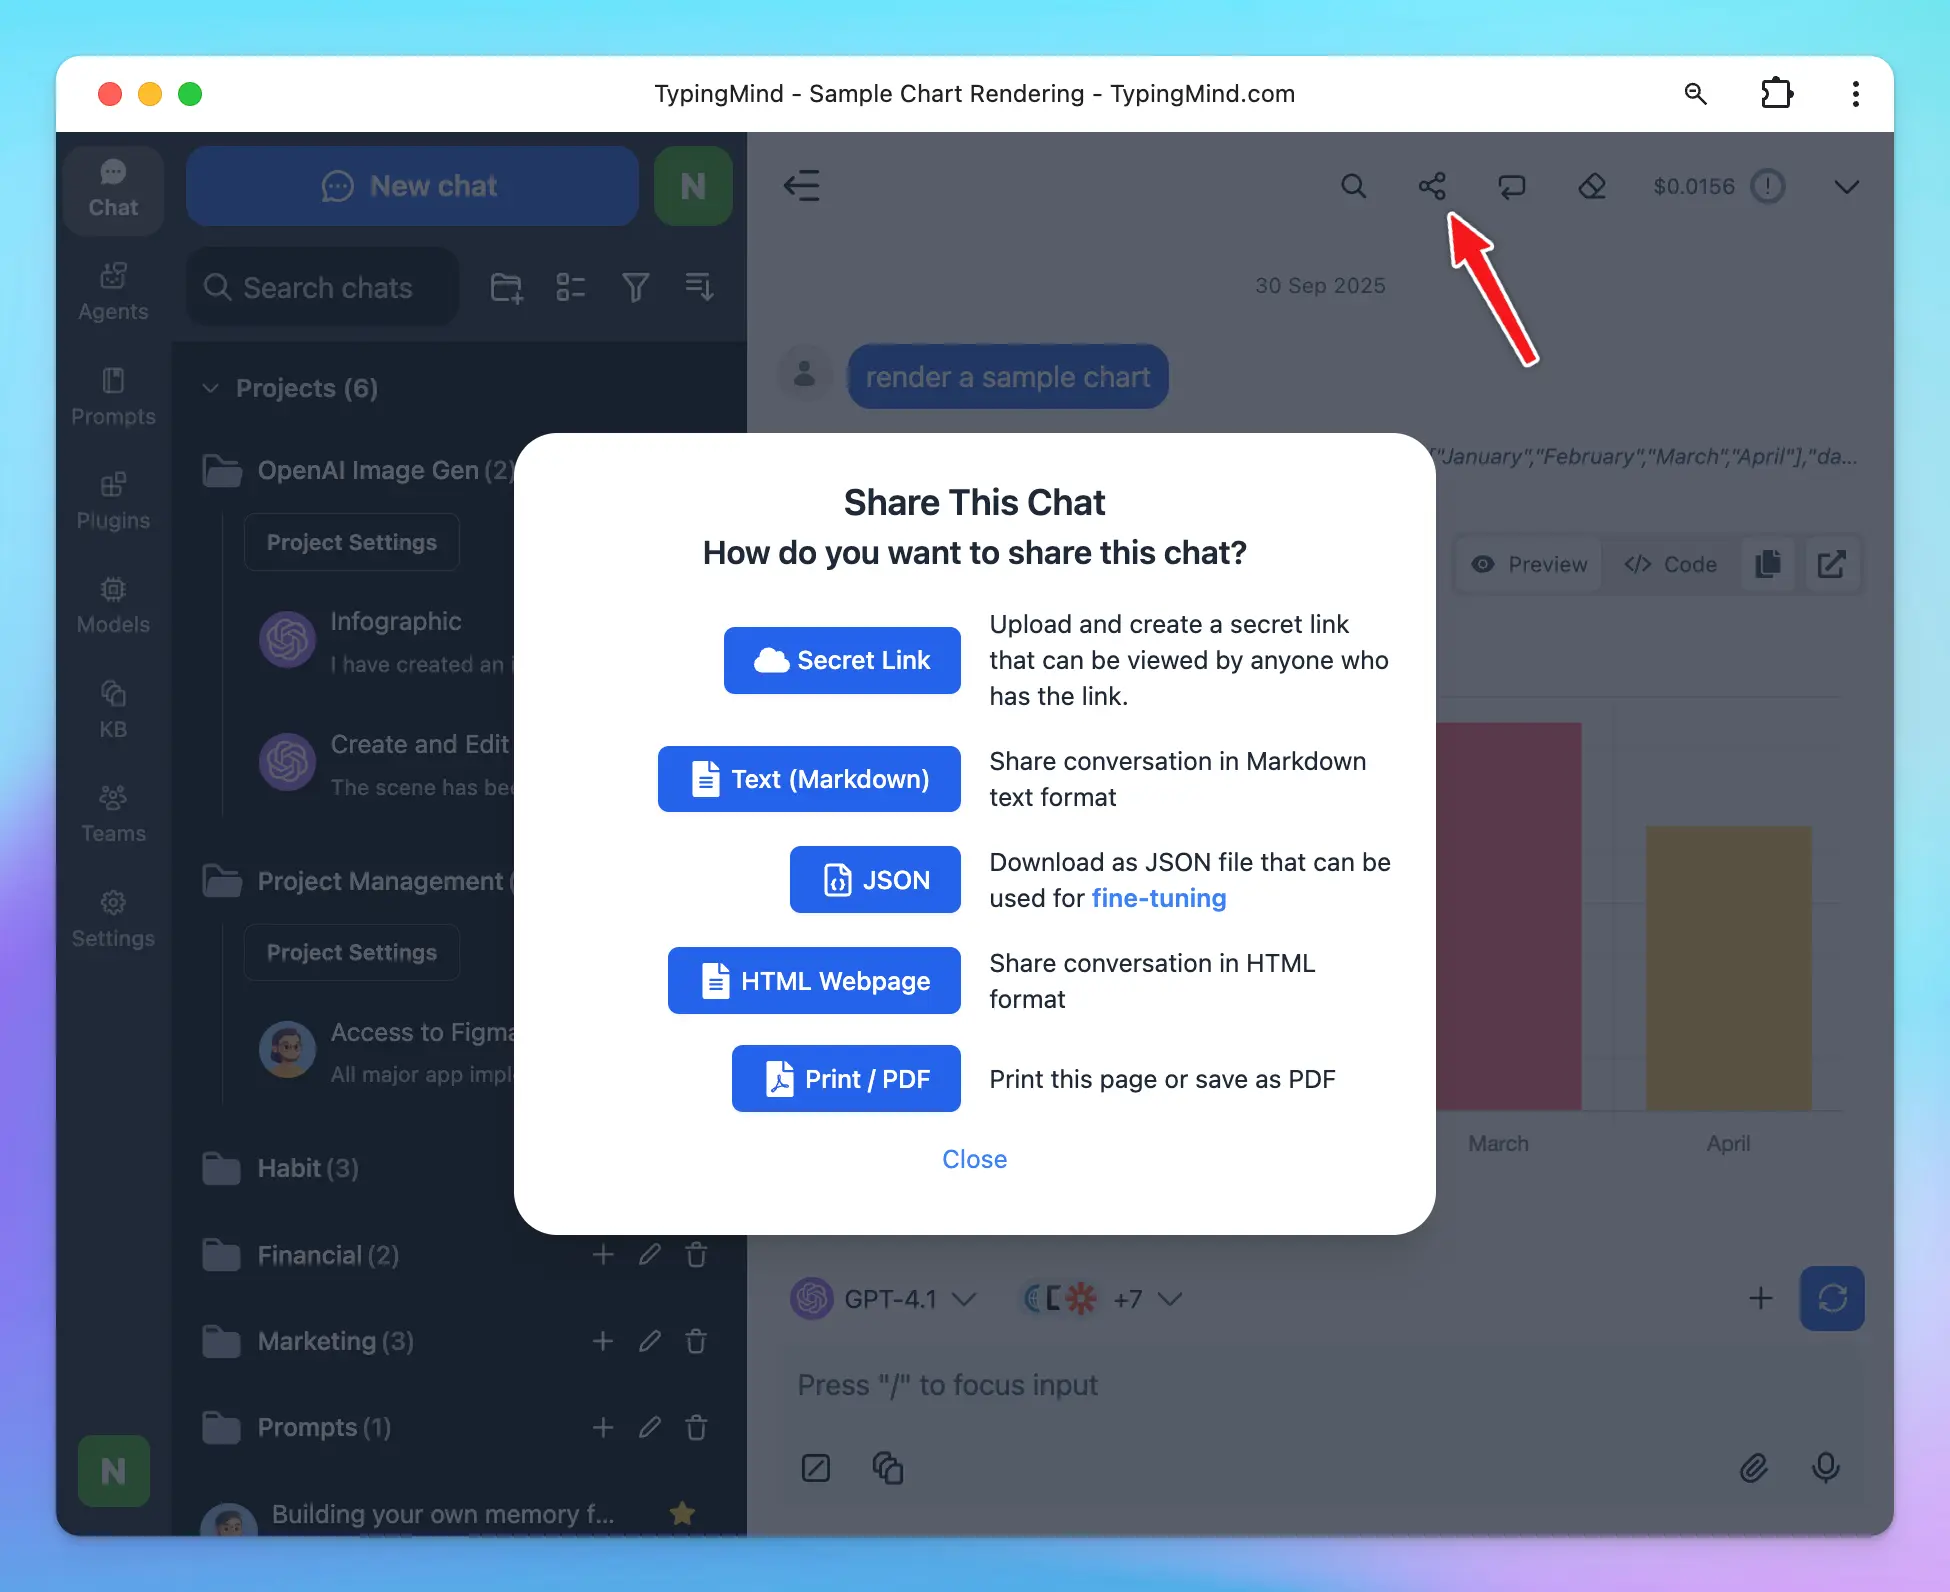
### Step 7 — Share your conversations
Click the **Share** button above the message area to export or share any chat in your preferred format:
* 🔗 Secret link
* 📝 Markdown
* 📦 JSON
* 🌐 HTML Webpage
* 📄 PDF
Learn more: [Organize Chats](/chat-management/organize-chats)
***
### Step 7 — Share your conversations
Click the **Share** button above the message area to export or share any chat in your preferred format:
* 🔗 Secret link
* 📝 Markdown
* 📦 JSON
* 🌐 HTML Webpage
* 📄 PDF