> ## Documentation Index
> Fetch the complete documentation index at: https://docs.typingmind.com/llms.txt
> Use this file to discover all available pages before exploring further.
# TypingMind MCP + Sequential Thinking
This guide will help you set up the **Sequential Thinking MCP server**, enabling your AI assistant in **TypingMind** to reason through tasks and problems using a structured, step-by-step approach.
## Why uses Sequential Thinking?
Sequential Thinking enhances AI reasoning by allowing it to:
* Break down complex problems into manageable steps
* Revise and refine thoughts as understanding deepens
* Branch into alternative paths of reasoning
* Adjust the total number of thoughts dynamically
* Generate and verify solution hypotheses
## Step-by-step to install Sequential Thinking on TypingMind
### Step 1: Set up MCP Connectors
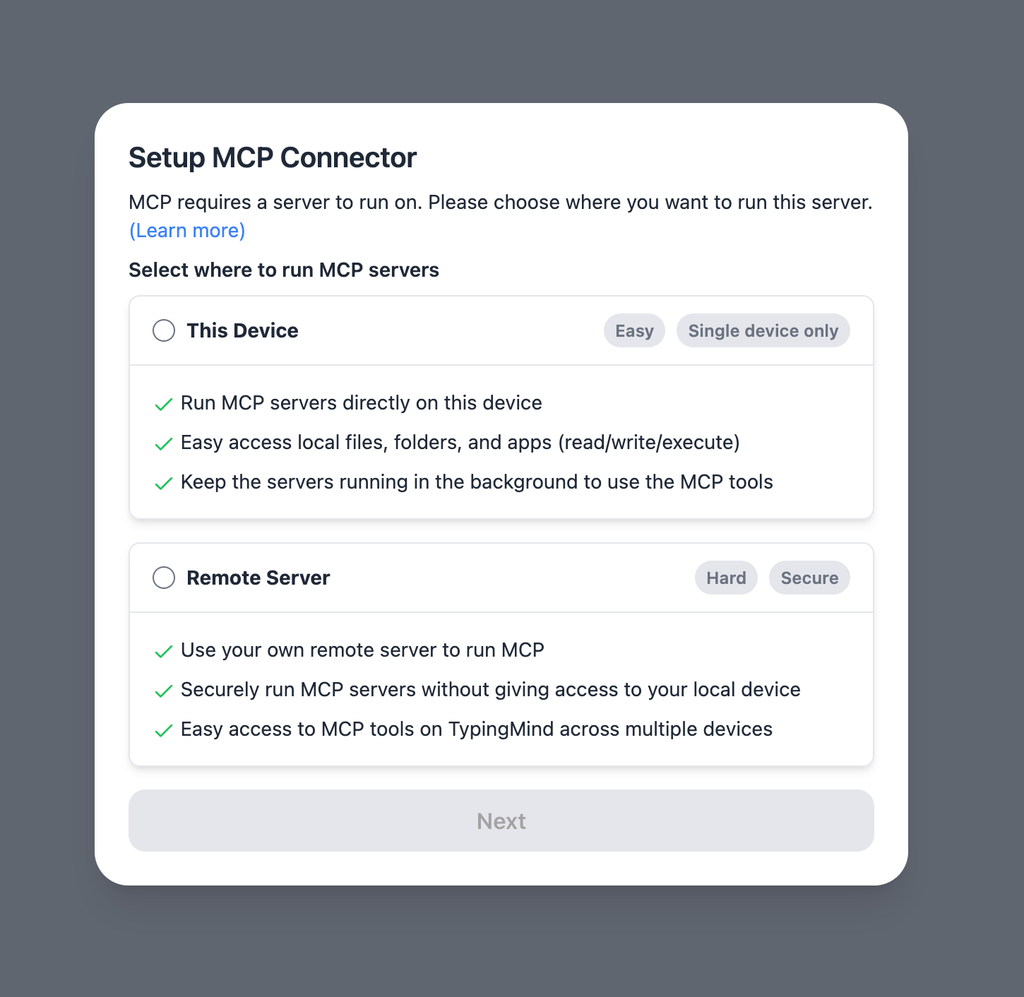
In TypingMind, go to Settings → Advanced Settings → Model Context Protocol to start setup your MCP connector. The MCP Connector acts as the bridge between TypingMind and the MCP servers.
MCP servers require a server to run on. TypingMind allows you to connect to the MCP servers via:
* Your own local device
* Or a private remote server.
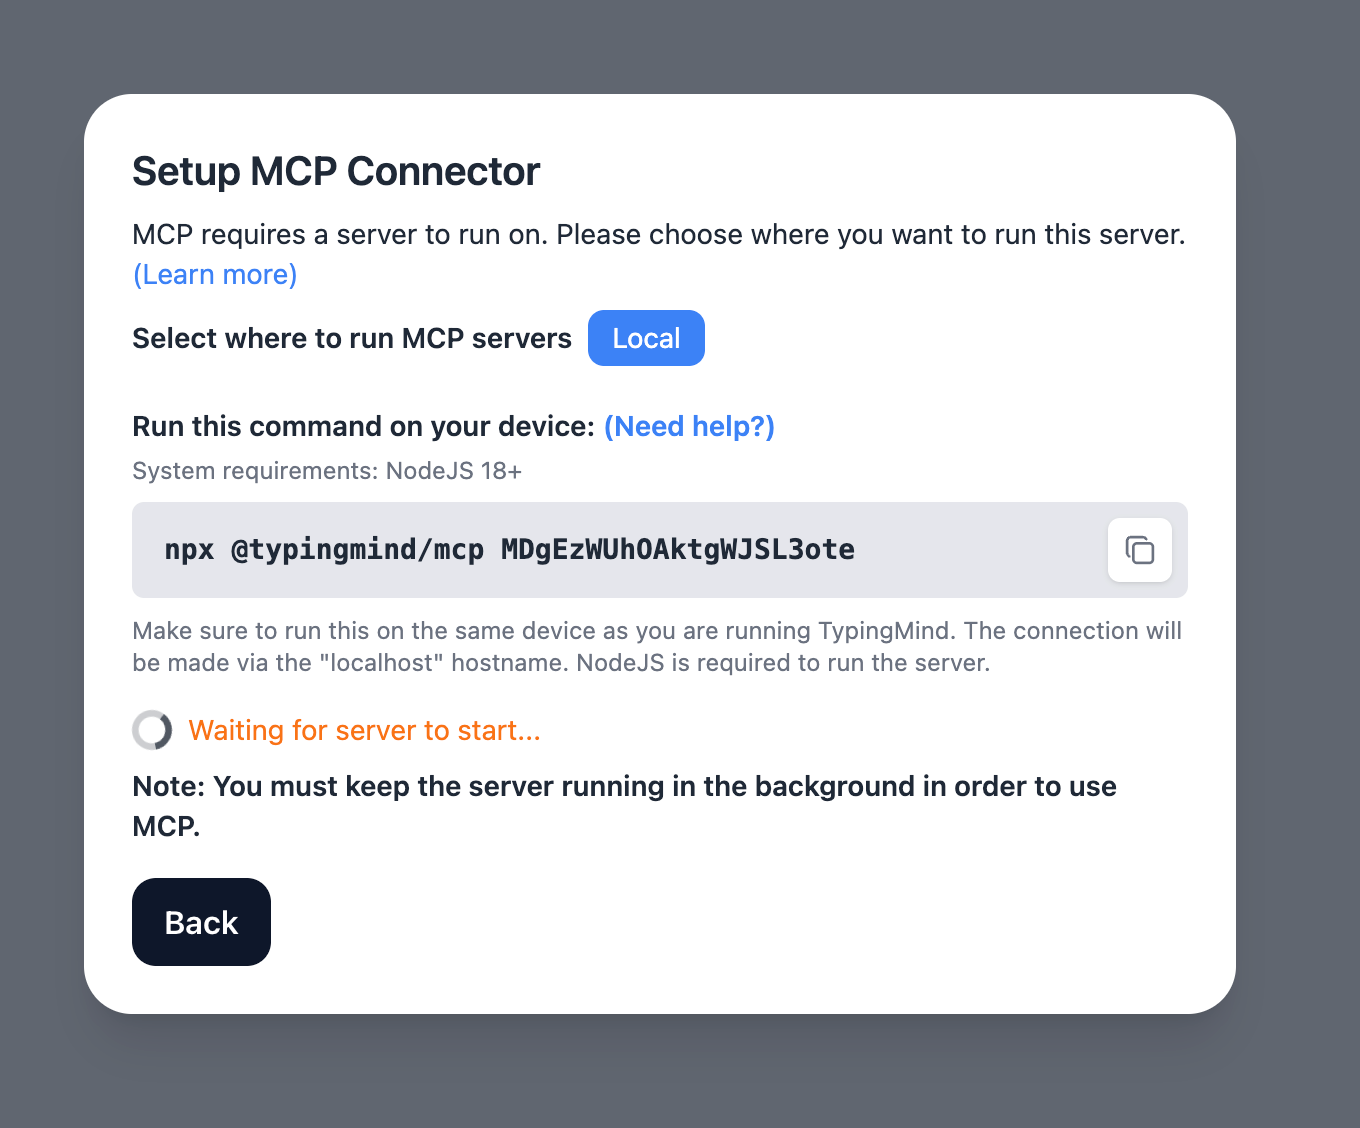
If you choose to run the MCP servers on your device, run the command displayed on the screen.
Detail setup can be found at [https://docs.typingmind.com/model-context-protocol-in-typingmind](https://docs.typingmind.com/model-context-protocol-in-typingmind)
### Step 2: Add the Sequential Thinking MCP Server
* Click on Edit Servers to add MCP server
* Add the following JSON to configure the Sequential Thinking MCP server:
```json theme={null}
{
"mcpServers": {
"sequential-thinking": {
"command": "npx",
"args": [
"-y",
"@modelcontextprotocol/server-sequential-thinking"
]
}
}
}
```
### Step 3: Enable sequential thinking via Plugin section
After the MCP servers are added successfully, it will show up in your **Plugins** page to be used like plugin. You can use the MCP tools directly or assign them to AI agent like other plugins.
* Go to the **Plugins** section in TypingMind.
* You should see a new plugin called **"sequential-thinking"**.
* Enable the plugin
### Step 4: Start chatting
You’re all set! Start chatting with your assistant using prompts that benefit from structured analysis.
Example prompt: "Decompose the task: "Build a Python CLI tool that resizes images using Pillow"”
 If you choose to run the MCP servers on your device, run the command displayed on the screen.
 Detail setup can be found at [https://docs.typingmind.com/model-context-protocol-in-typingmind](https://docs.typingmind.com/model-context-protocol-in-typingmind)
### Step 2: Add the Sequential Thinking MCP Server
* Click on Edit Servers to add MCP server
* Add the following JSON to configure the Sequential Thinking MCP server:
```json theme={null}
{
"mcpServers": {
"sequential-thinking": {
"command": "npx",
"args": [
"-y",
"@modelcontextprotocol/server-sequential-thinking"
]
}
}
}
```
Detail setup can be found at [https://docs.typingmind.com/model-context-protocol-in-typingmind](https://docs.typingmind.com/model-context-protocol-in-typingmind)
### Step 2: Add the Sequential Thinking MCP Server
* Click on Edit Servers to add MCP server
* Add the following JSON to configure the Sequential Thinking MCP server:
```json theme={null}
{
"mcpServers": {
"sequential-thinking": {
"command": "npx",
"args": [
"-y",
"@modelcontextprotocol/server-sequential-thinking"
]
}
}
}
```
-in-typingmind/typingmind-mcp-sequential-thinking/image.png) ### Step 3: Enable sequential thinking via Plugin section
After the MCP servers are added successfully, it will show up in your **Plugins** page to be used like plugin. You can use the MCP tools directly or assign them to AI agent like other plugins.
* Go to the **Plugins** section in TypingMind.
* You should see a new plugin called **"sequential-thinking"**.
* Enable the plugin
### Step 3: Enable sequential thinking via Plugin section
After the MCP servers are added successfully, it will show up in your **Plugins** page to be used like plugin. You can use the MCP tools directly or assign them to AI agent like other plugins.
* Go to the **Plugins** section in TypingMind.
* You should see a new plugin called **"sequential-thinking"**.
* Enable the plugin
-in-typingmind/typingmind-mcp-sequential-thinking/image%201.png) ### Step 4: Start chatting
You’re all set! Start chatting with your assistant using prompts that benefit from structured analysis.
Example prompt: "Decompose the task: "Build a Python CLI tool that resizes images using Pillow"”
### Step 4: Start chatting
You’re all set! Start chatting with your assistant using prompts that benefit from structured analysis.
Example prompt: "Decompose the task: "Build a Python CLI tool that resizes images using Pillow"”
-in-typingmind/typingmind-mcp-sequential-thinking/image%202.png)
-in-typingmind/typingmind-mcp-sequential-thinking/image%203.png)