> ## Documentation Index
> Fetch the complete documentation index at: https://docs.typingmind.com/llms.txt
> Use this file to discover all available pages before exploring further.
# TypingMind MCP + Figma
Using TypingMind with Figma via MCP allows you to access your Figma files so you can automate tasks, streamline collaboration, and bridge design-to-dev workflows
## Why use TypingMind MCP + Figma?
Connecting TypingMind’s Model Context Protocol (MCP) to Figma unlocks powerful automation and streamlined design workflows:
* **Generate code** directly from Figma design files
* **Quickly search and analyze** frames, components, or text layers across all pages
* **Transform design insights into structured tasks**, like creating Jira Epics or tickets in Notion or Linear
## Step-by-step to install
### Step 1: Set up MCP Connectors
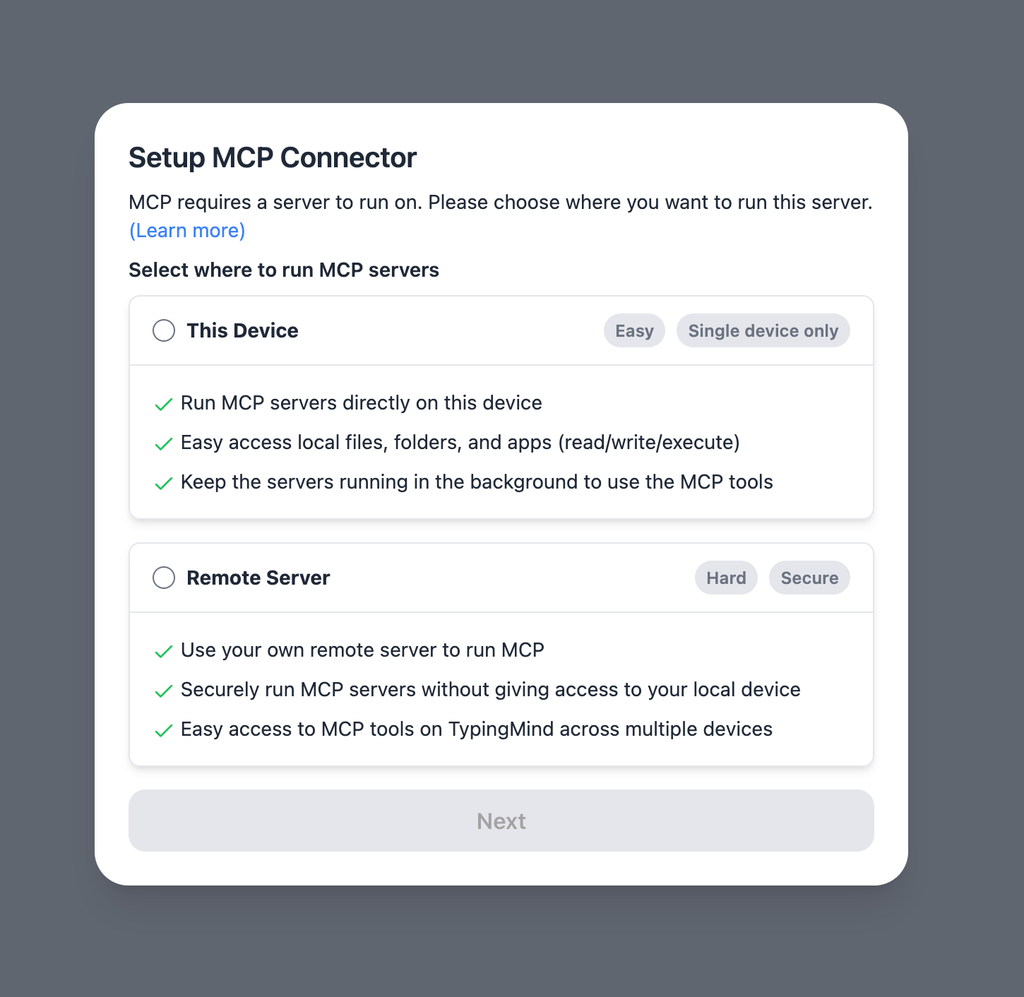
In TypingMind, go to Settings → Advanced Settings → Model Context Protocol to start setup your MCP connector. The MCP Connector acts as the bridge between TypingMind and the MCP servers.
MCP servers require a server to run on. TypingMind allows you to connect to the MCP servers via:
* Your own local device
* Or a private remote server.
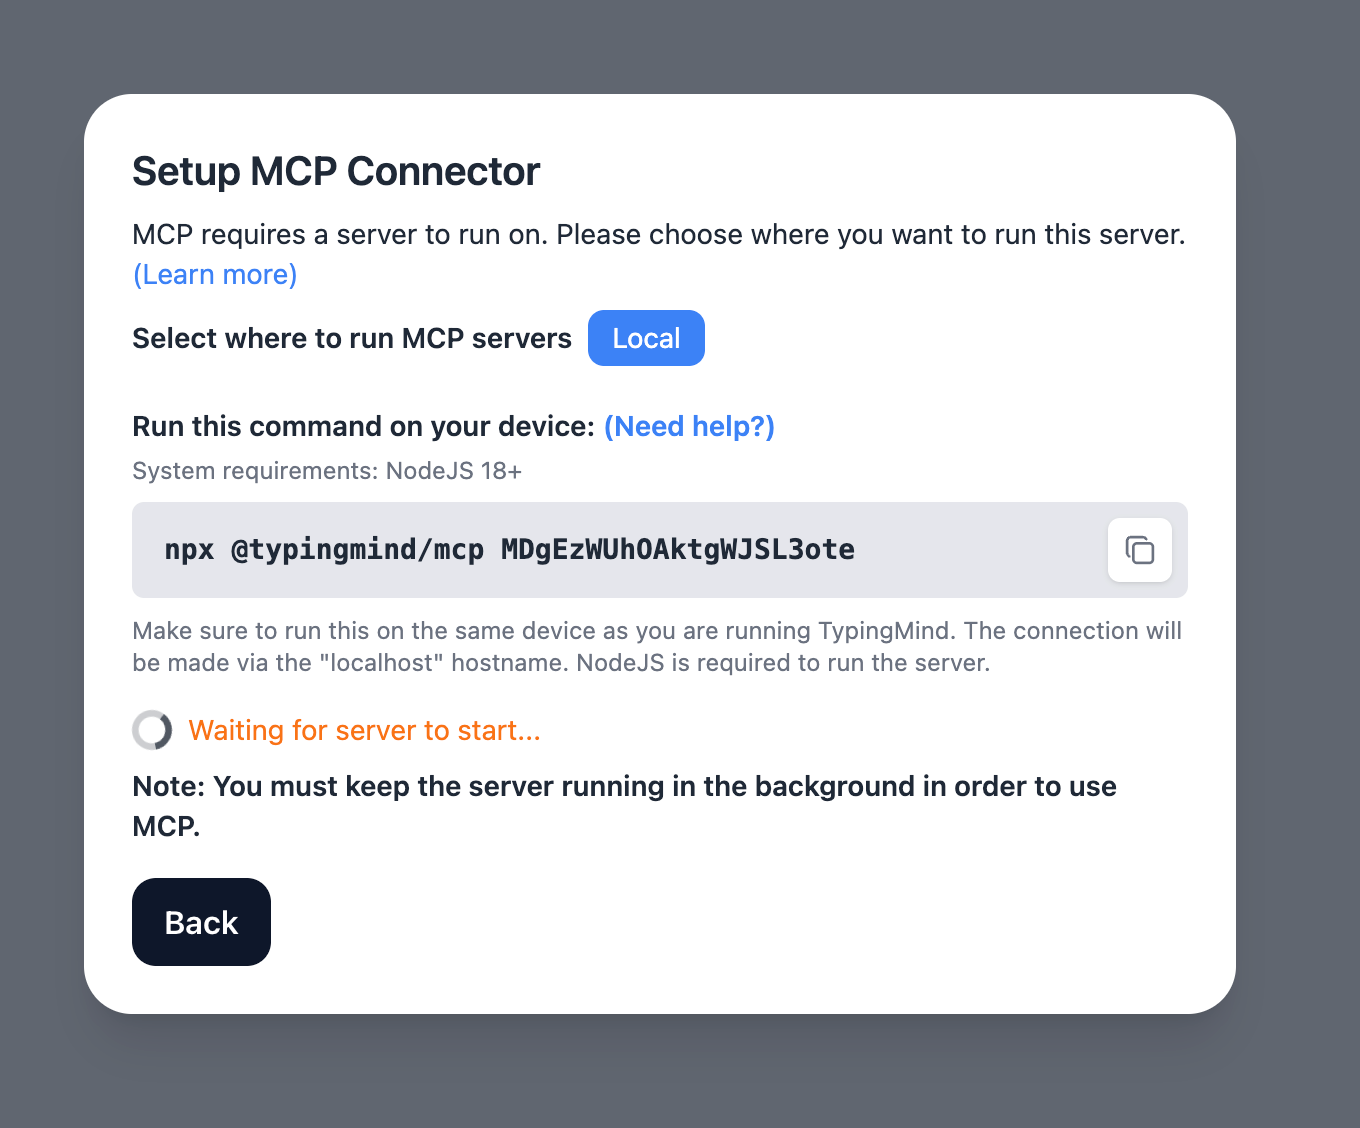
If you choose to run the MCP servers on your device, run the command displayed on the screen.
Detail setup can be found at [https://docs.typingmind.com/model-context-protocol-in-typingmind](https://docs.typingmind.com/model-context-protocol-in-typingmind)
### Step 2: Add the Figma MCP Server
* Click on Edit Servers to add MCP server
* Add the following JSON to configure the Figma MCP server:
```json theme={null}
{
"mcpServers": {
"Framelink Figma MCP": {
"command": "npx",
"args": ["-y", "figma-developer-mcp", "--figma-api-key=YOUR-KEY", "--stdio"]
}
}
}
```
Here’s how you can get the Figma API key to put into `` :
* From the file browser, click the account menu in the top-left corner and select **Settings**.
* Select the **Security** tab.
* Scroll to the **Personal access tokens** section, then click **Generate new token**.
* Enter a name for your new token and provide permissions for your token.
* Copy the token that is generated
* Click Save changes to save the MCP server
### Step 3: Enable Framelink Figma MCP via Plugin section
After the MCP servers are added successfully, it will show up in your **Plugins** page to be used like plugin. You can use the MCP tools directly or assign them to AI agent like other plugins.
* Go to the **Plugins** section in TypingMind.
* You should see a new plugin called **"**Framelink Figma MCP**"**.
* Enable the plugin
### Step 4: Start chatting
You can now interact with Figma files through TypingMind:
 If you choose to run the MCP servers on your device, run the command displayed on the screen.
 Detail setup can be found at [https://docs.typingmind.com/model-context-protocol-in-typingmind](https://docs.typingmind.com/model-context-protocol-in-typingmind)
### Step 2: Add the Figma MCP Server
* Click on Edit Servers to add MCP server
* Add the following JSON to configure the Figma MCP server:
```json theme={null}
{
"mcpServers": {
"Framelink Figma MCP": {
"command": "npx",
"args": ["-y", "figma-developer-mcp", "--figma-api-key=YOUR-KEY", "--stdio"]
}
}
}
```
Here’s how you can get the Figma API key to put into `
Detail setup can be found at [https://docs.typingmind.com/model-context-protocol-in-typingmind](https://docs.typingmind.com/model-context-protocol-in-typingmind)
### Step 2: Add the Figma MCP Server
* Click on Edit Servers to add MCP server
* Add the following JSON to configure the Figma MCP server:
```json theme={null}
{
"mcpServers": {
"Framelink Figma MCP": {
"command": "npx",
"args": ["-y", "figma-developer-mcp", "--figma-api-key=YOUR-KEY", "--stdio"]
}
}
}
```
Here’s how you can get the Figma API key to put into `-in-typingmind/typingmind-mcp-figma/image.png)
-in-typingmind/typingmind-mcp-figma/image%201.png) * Click Save changes to save the MCP server
* Click Save changes to save the MCP server
-in-typingmind/typingmind-mcp-figma/image%202.png) ### Step 3: Enable Framelink Figma MCP via Plugin section
After the MCP servers are added successfully, it will show up in your **Plugins** page to be used like plugin. You can use the MCP tools directly or assign them to AI agent like other plugins.
* Go to the **Plugins** section in TypingMind.
* You should see a new plugin called **"**Framelink Figma MCP**"**.
* Enable the plugin
### Step 3: Enable Framelink Figma MCP via Plugin section
After the MCP servers are added successfully, it will show up in your **Plugins** page to be used like plugin. You can use the MCP tools directly or assign them to AI agent like other plugins.
* Go to the **Plugins** section in TypingMind.
* You should see a new plugin called **"**Framelink Figma MCP**"**.
* Enable the plugin
-in-typingmind/typingmind-mcp-figma/image%203.png) ### Step 4: Start chatting
You can now interact with Figma files through TypingMind:
### Step 4: Start chatting
You can now interact with Figma files through TypingMind:
-in-typingmind/typingmind-mcp-figma/image%204.png)