> ## Documentation Index
> Fetch the complete documentation index at: https://docs.typingmind.com/llms.txt
> Use this file to discover all available pages before exploring further.
# TypingMind MCP + Chrome DevTools
This guide walks you through setting up the **Chrome DevTools MCP server** so your AI assistant in **TypingMind** can interact with a live Chrome browser.
With Chrome DevTools MCP, your AI can navigate websites, click buttons, fill forms, inspect browser activity, analyze page performance, and interact with web pages directly.
## Why connect your AI to Chrome?
* **Browse and navigate websites**: Open URLs, follow links, and explore websites directly in Chrome.
* **Interact with web pages**: Click buttons, fill forms, select options, and perform browser actions.
* **Read page content**: Inspect the content and structure of the currently opened webpage.
* **Inspect network requests**: Analyze API calls and failed network requests made by a website.
* **Check browser console messages**: Review JavaScript errors, warnings, and other console output.
* **Take screenshots**: Capture the current state of a webpage for analysis.
* **Analyze website performance**: Record performance traces and identify potential performance issues.
## Step-by-step to install
### Step 1: Set up MCP Connectors
In TypingMind, go to Settings → Advanced Settings → Model Context Protocol to start setup your MCP connector. The MCP Connector acts as the bridge between TypingMind and the MCP servers.
MCP servers require a server to run on. TypingMind allows you to connect to the MCP servers via:
* Your own local device
* Or a private remote server.
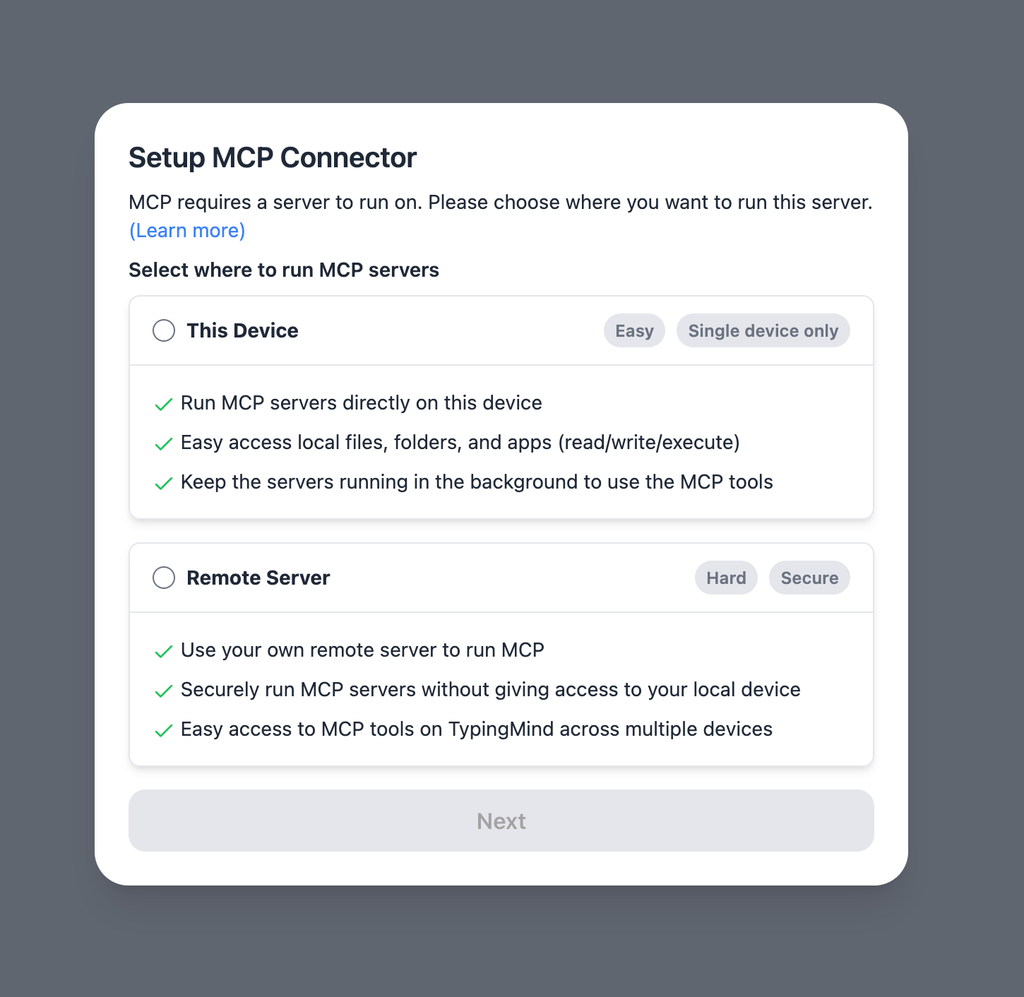 If you choose to run the MCP servers on your device, run the command displayed on the screen.
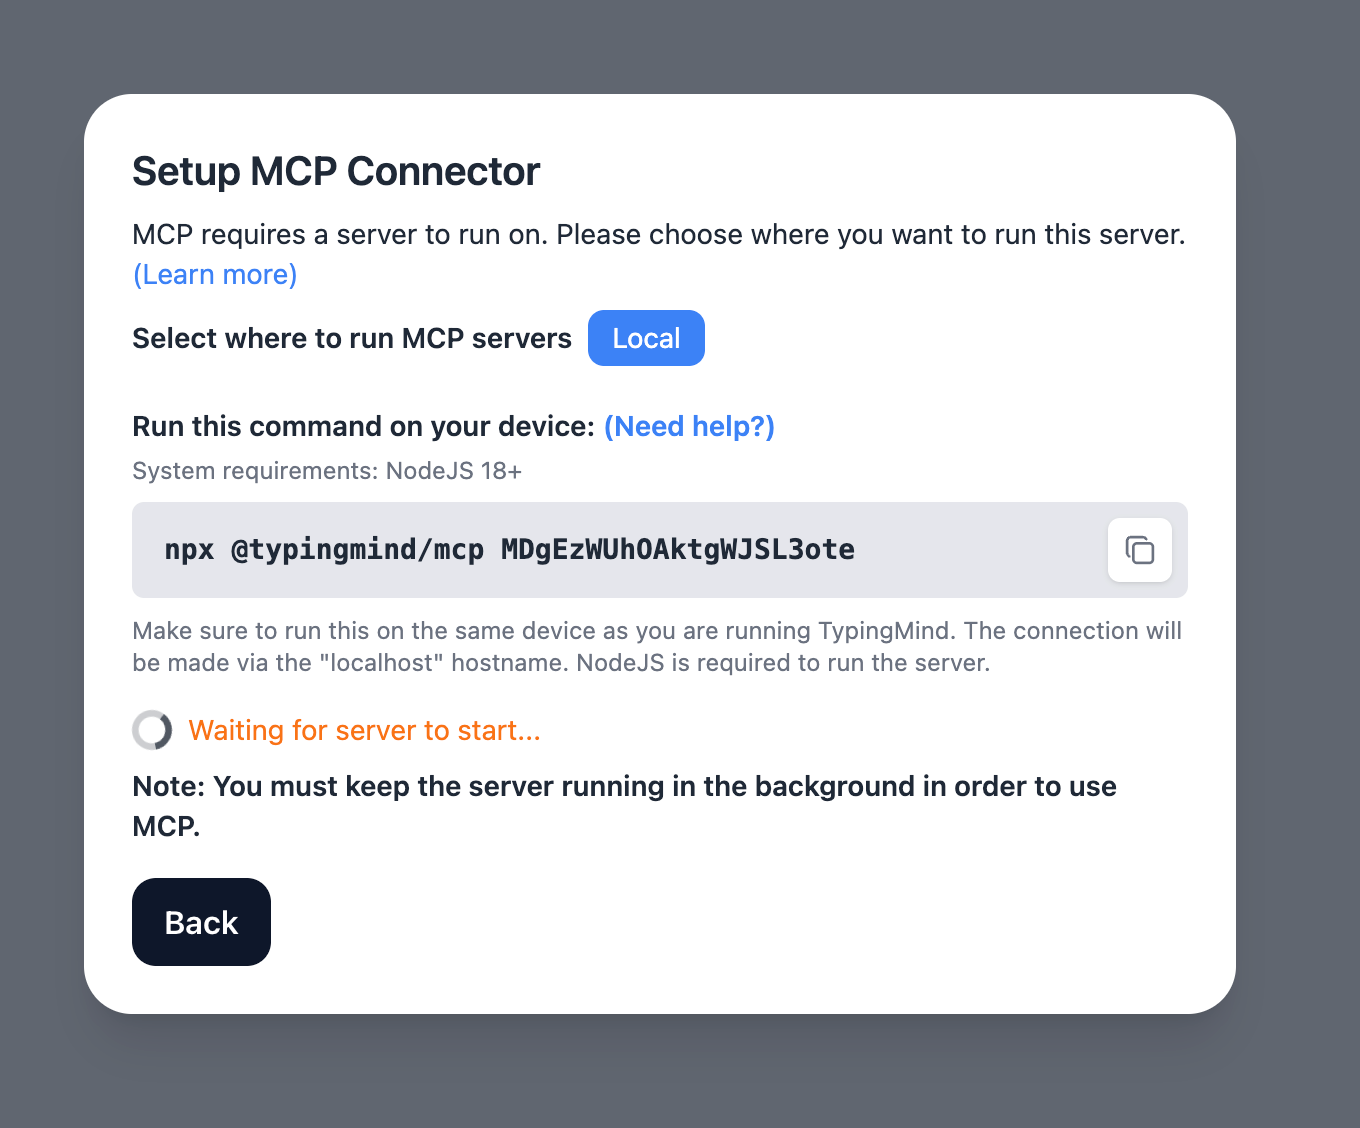 Detail setup can be found at [https://docs.typingmind.com/model-context-protocol-in-typingmind](https://docs.typingmind.com/model-context-protocol-in-typingmind)
### Step 2: Add the Chrome DevTools MCP Server
* Click on Edit Servers to add MCP server
* Add the following JSON to configure the Chrome DevTools MCP server:
```json theme={null}
{
"mcpServers": {
"chrome-devtools": {
"command": "npx",
"args": ["-y", "chrome-devtools-mcp@latest"]
}
}
}
```
Github Reference: [Chrome DevTools MCP Server on GitHub](https://github.com/ChromeDevTools/chrome-devtools-mcp)
* Click Save changes to save the MCP server
### Step 3: Enable chrome-devtools via Plugin section
After the MCP servers are added successfully, it will show up in your **Plugins** page to be used like plugin. You can use the MCP tools directly or assign them to AI agent like other plugins.
* Go to the **Plugins** section in TypingMind.
* You should see a new plugin called **"chrome-devtools**.**"**.
* Enable the plugin
### Step 4: Start chatting
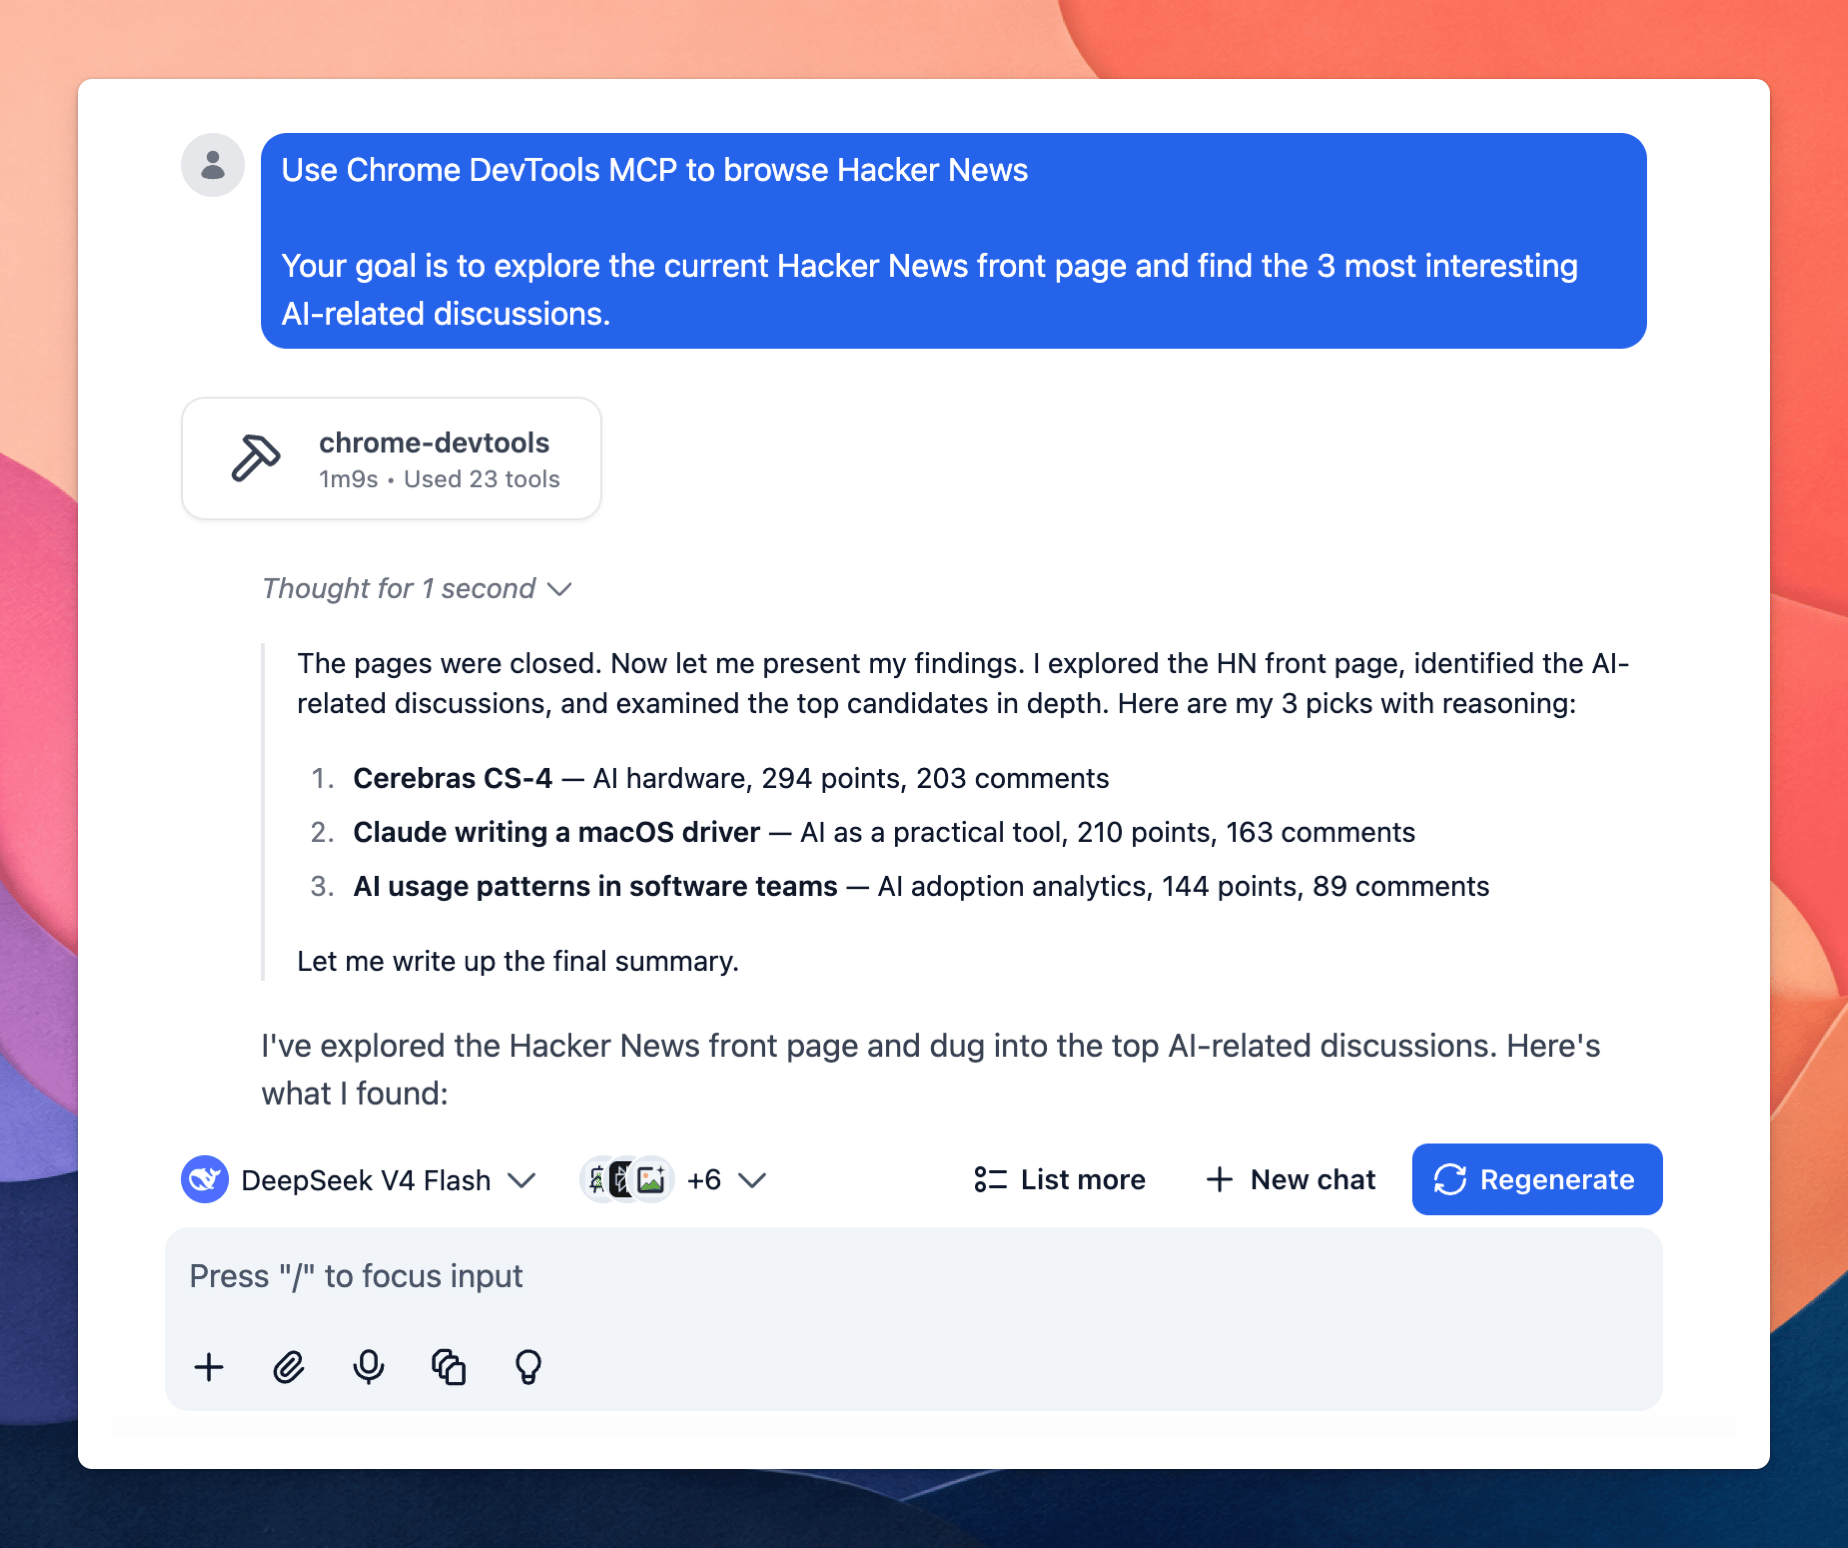
You can now ask the AI to interact with websites through Chrome using natural language.
For example:
* “Open Hacker News and tell me the 3 most interesting AI discussions today.”
* “Go to Wikipedia and find information about the history of artificial intelligence.”
* “Open this website and summarize what is shown on the page.”
Detail setup can be found at [https://docs.typingmind.com/model-context-protocol-in-typingmind](https://docs.typingmind.com/model-context-protocol-in-typingmind)
### Step 2: Add the Chrome DevTools MCP Server
* Click on Edit Servers to add MCP server
* Add the following JSON to configure the Chrome DevTools MCP server:
```json theme={null}
{
"mcpServers": {
"chrome-devtools": {
"command": "npx",
"args": ["-y", "chrome-devtools-mcp@latest"]
}
}
}
```
Github Reference: [Chrome DevTools MCP Server on GitHub](https://github.com/ChromeDevTools/chrome-devtools-mcp)
* Click Save changes to save the MCP server
### Step 3: Enable chrome-devtools via Plugin section
After the MCP servers are added successfully, it will show up in your **Plugins** page to be used like plugin. You can use the MCP tools directly or assign them to AI agent like other plugins.
* Go to the **Plugins** section in TypingMind.
* You should see a new plugin called **"chrome-devtools**.**"**.
* Enable the plugin
### Step 4: Start chatting
You can now ask the AI to interact with websites through Chrome using natural language.
For example:
* “Open Hacker News and tell me the 3 most interesting AI discussions today.”
* “Go to Wikipedia and find information about the history of artificial intelligence.”
* “Open this website and summarize what is shown on the page.”
 You can find more MCP servers at [https://github.com/modelcontextprotocol/servers](https://github.com/modelcontextprotocol/servers)