> ## Documentation Index
> Fetch the complete documentation index at: https://docs.typingmind.com/llms.txt
> Use this file to discover all available pages before exploring further.
# Xai
You can now set up xAI models as custom models on TypingMind!
/image.png) Here’s how!
## Step 1: Create an xAI account
Go to [https://console.x.ai/](https://console.x.ai/create-team) to sign up for an xAI account if you don’t have one yet.
Here’s how!
## Step 1: Create an xAI account
Go to [https://console.x.ai/](https://console.x.ai/create-team) to sign up for an xAI account if you don’t have one yet.
/image%201.png) ## Step 2: Create an xAI team
Next, you will need to create an xAI team to get into the console:
* Create a new team by entering a Team name and description.
* Click **Create Team**.
* You can skip inviting members if not necessary.
* Skip the API key creation for now - we’ll handle that later.
* Click **Go to Home** to return to the console dashboard.
## Step 2: Create an xAI team
Next, you will need to create an xAI team to get into the console:
* Create a new team by entering a Team name and description.
* Click **Create Team**.
* You can skip inviting members if not necessary.
* Skip the API key creation for now - we’ll handle that later.
* Click **Go to Home** to return to the console dashboard.
/image%202.png)
/image%203.png) ## Step 3: Purchase API credits
To use the API, you'll need to purchase credits:
* Go to **Billing**.
* Click on **Credits**.
* Select **Purchase Credits**.
*Note: Make sure to set up your billing profile and payment method before topping up credits.*
## Step 3: Purchase API credits
To use the API, you'll need to purchase credits:
* Go to **Billing**.
* Click on **Credits**.
* Select **Purchase Credits**.
*Note: Make sure to set up your billing profile and payment method before topping up credits.*
/image%204.png) ## Step 4: Create API key
* Go to **API Keys** in the console.
* Click **Create API Key**.
## Step 4: Create API key
* Go to **API Keys** in the console.
* Click **Create API Key**.
/image%205.png) * Click to copy to API key to a safe place to set up on TypingMind.
## Step 5: Use xAI on TypingMind
* Go to [**typingmind.com**](http://typingmind.com)
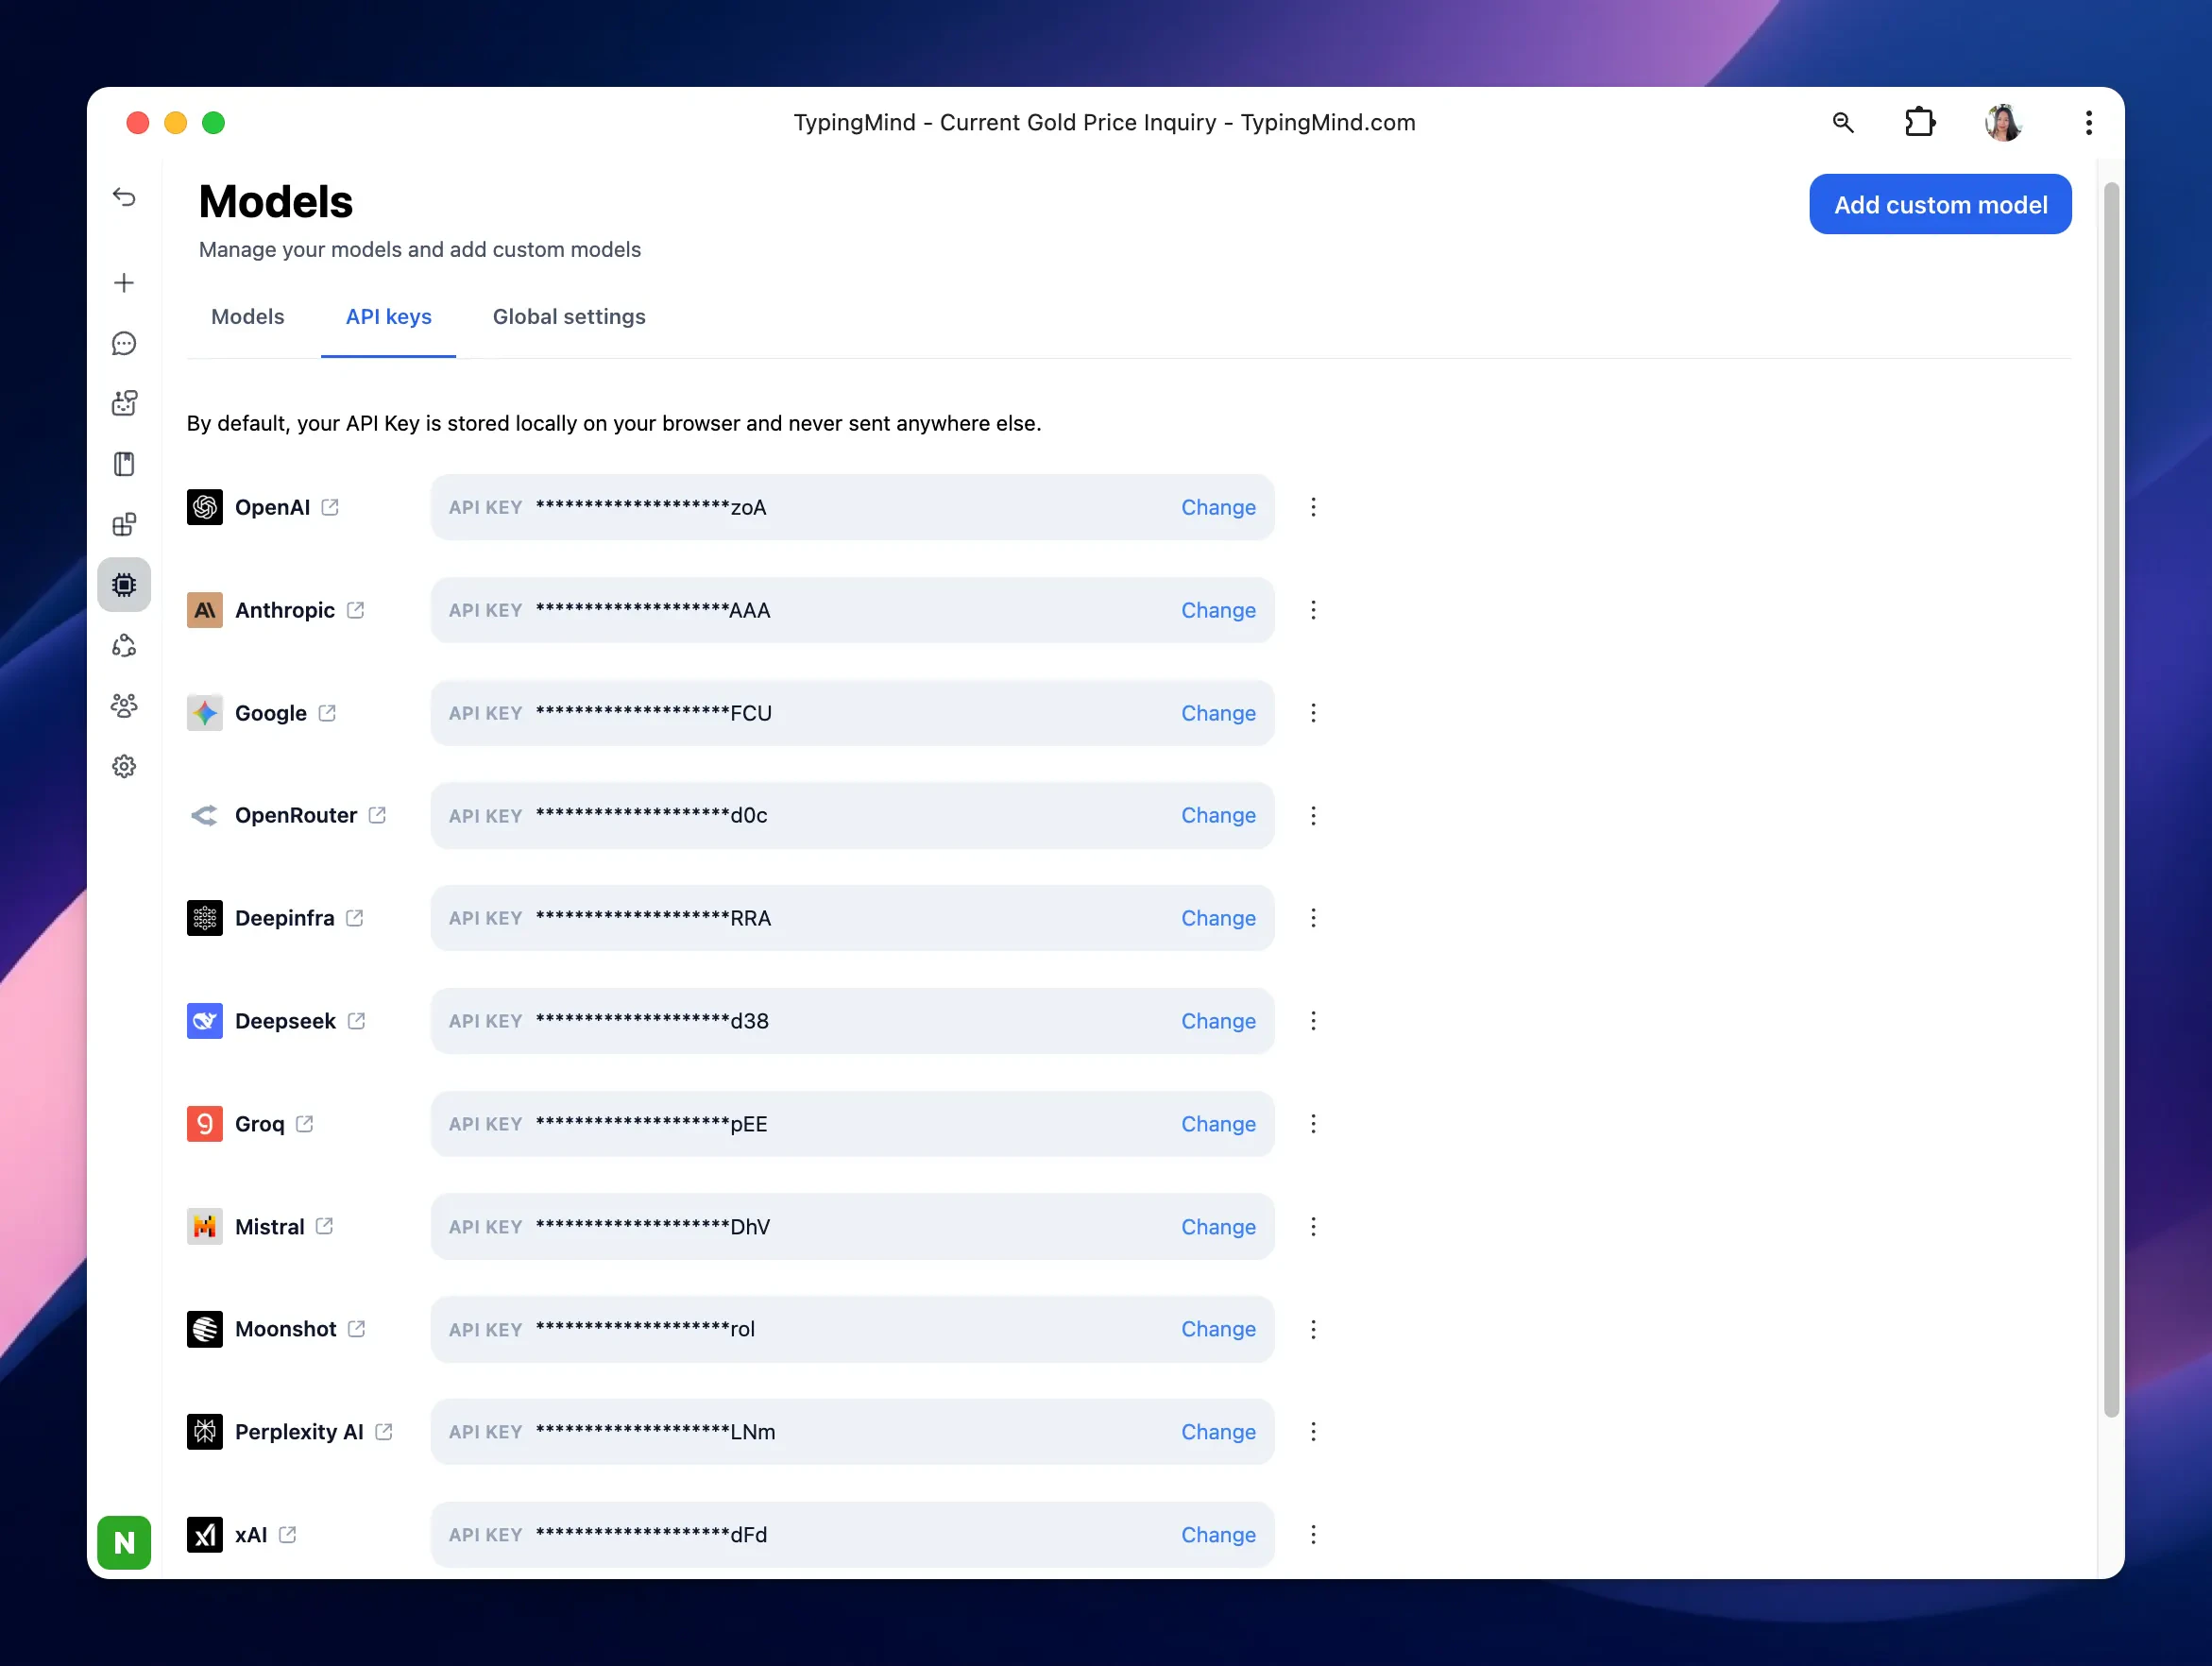
* Navigate the Models menu on the left sidebar → Switch to API key tab
* Input the copied API key for xAI.
* Click to copy to API key to a safe place to set up on TypingMind.
## Step 5: Use xAI on TypingMind
* Go to [**typingmind.com**](http://typingmind.com)
* Navigate the Models menu on the left sidebar → Switch to API key tab
* Input the copied API key for xAI.
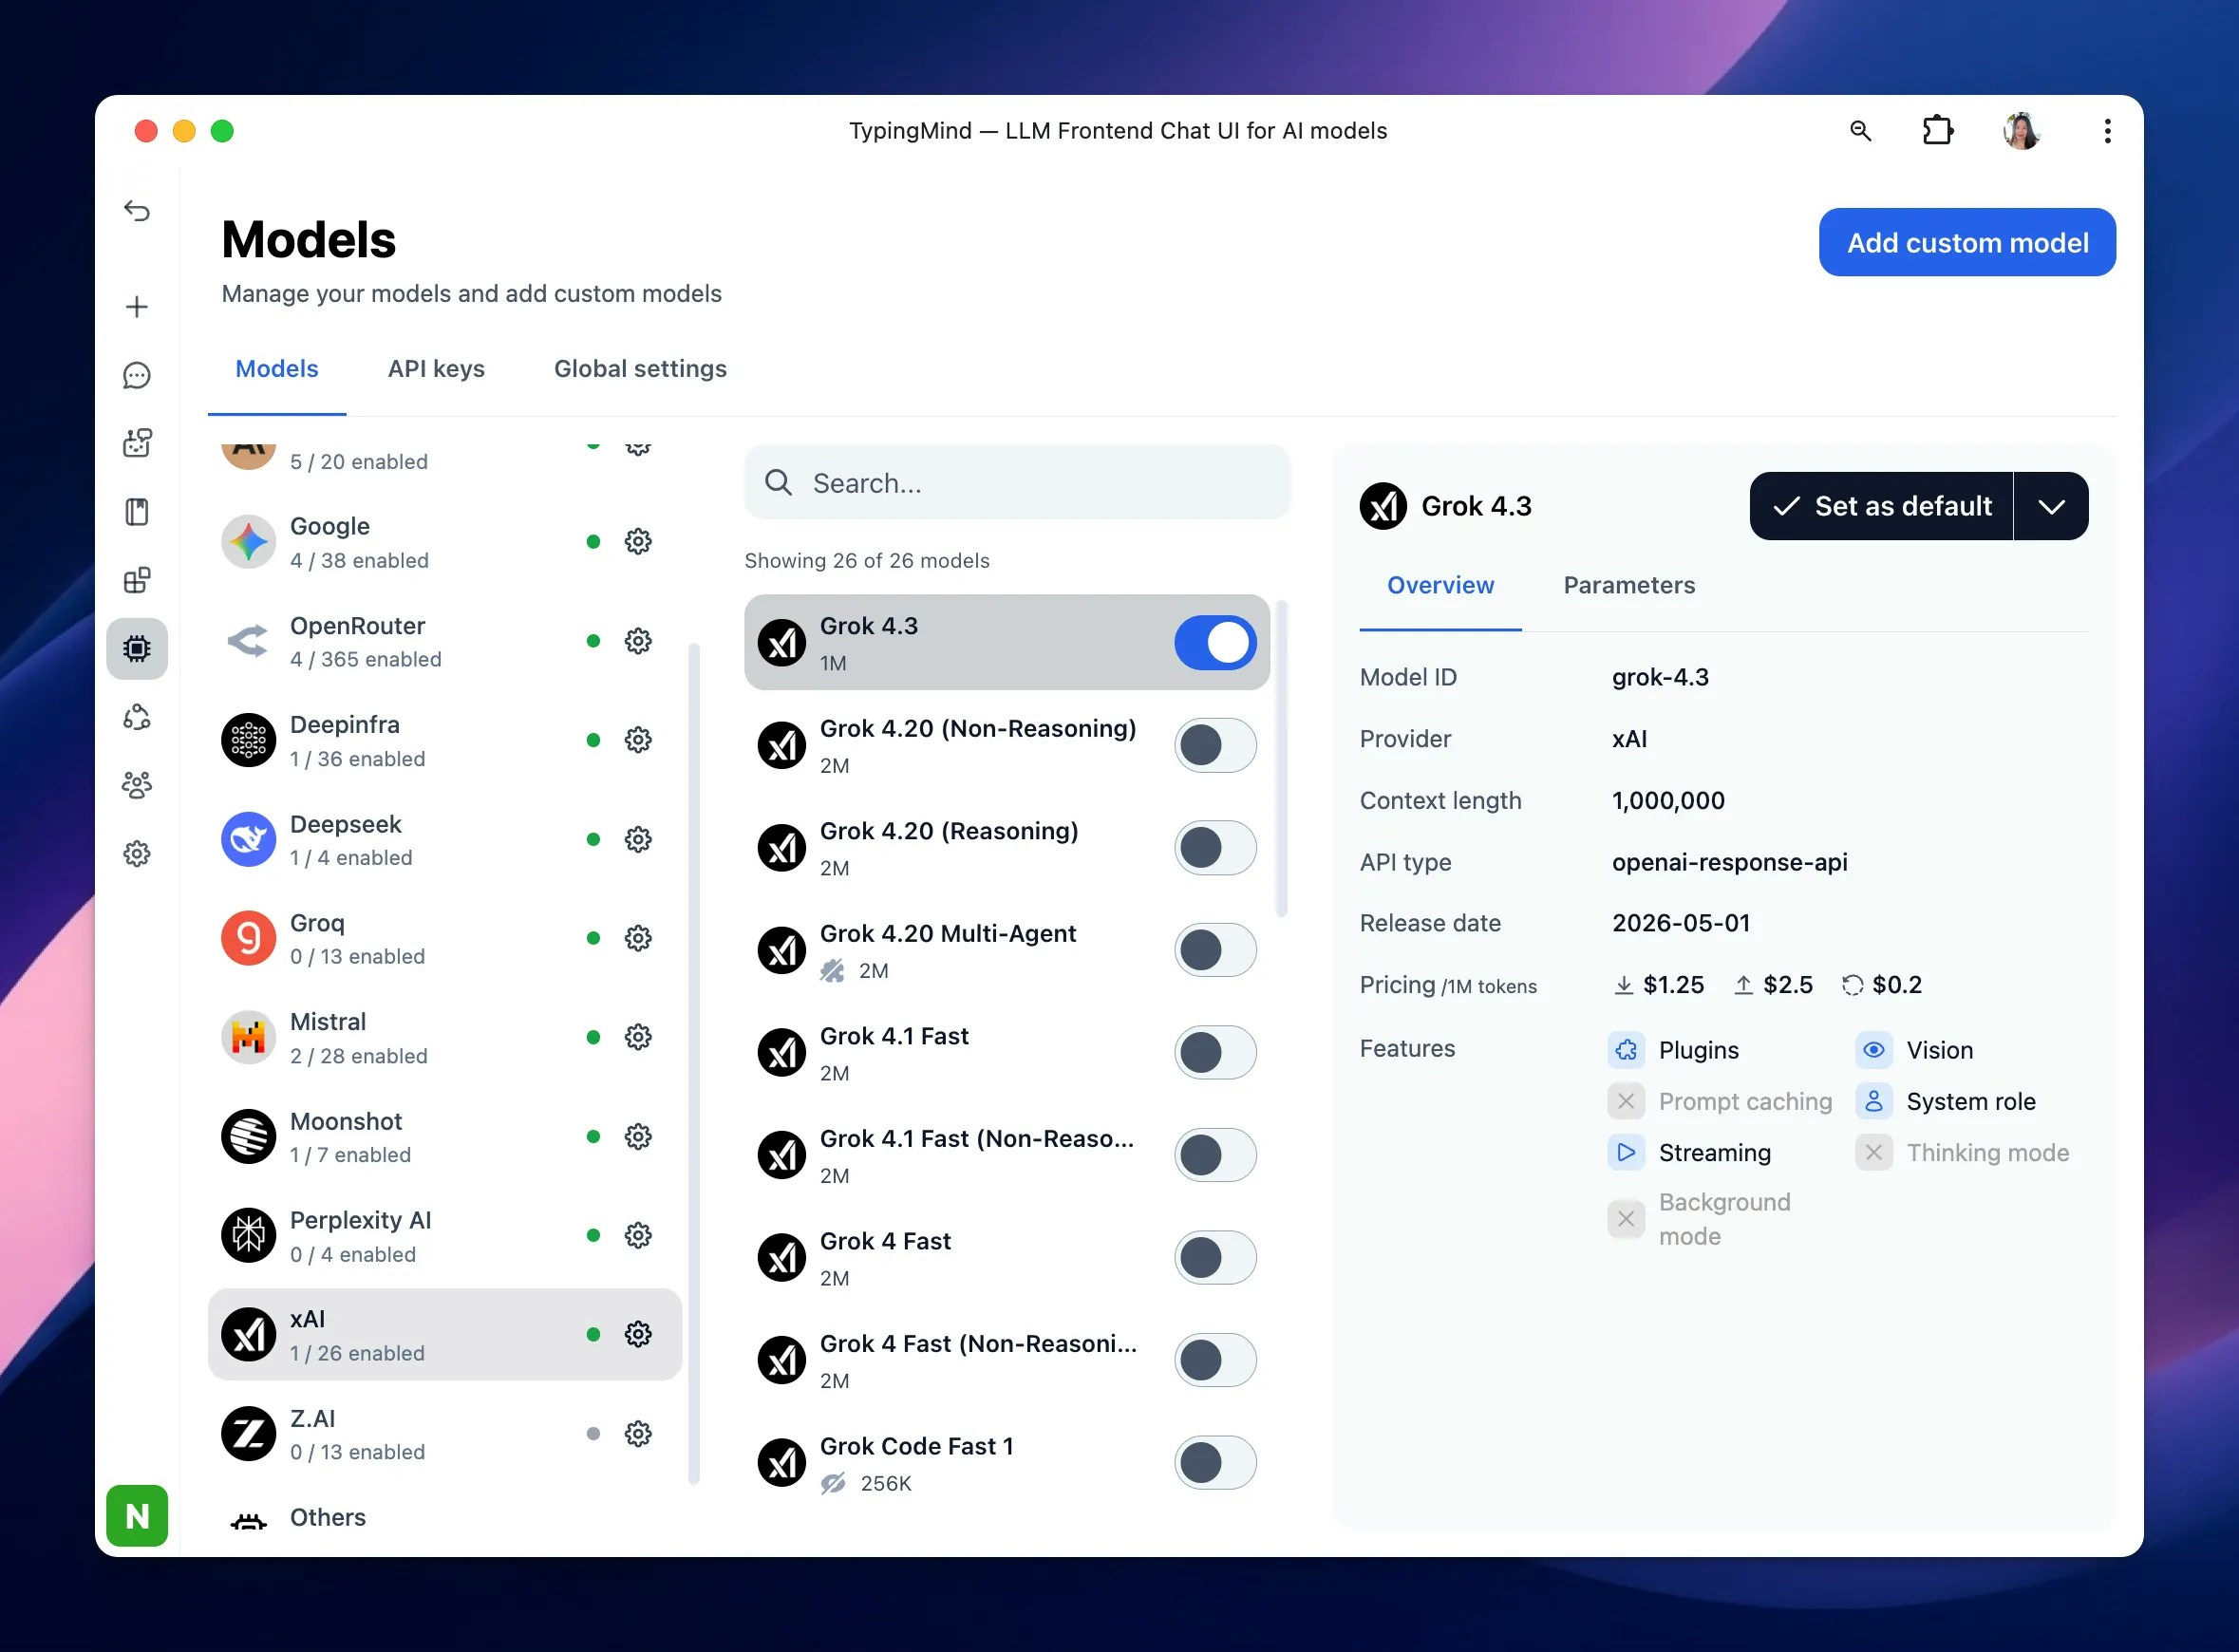
 After entering the API key for xAI, switch back to Models tab → select xAI → enable xAI models you want to chat with.
 ## Step 6: Start chatting!
You’re all set to use xAI within TypingMind. Enjoy!
## Step 6: Start chatting!
You’re all set to use xAI within TypingMind. Enjoy!