> ## Documentation Index
> Fetch the complete documentation index at: https://docs.typingmind.com/llms.txt
> Use this file to discover all available pages before exploring further.
# LMStudio
You can set up LMStudio models as Custom models on [TypingMind.com](http://TypingMind.com) .
LMStudio currently supports:
* Microsoft's Phi-3
* Meta's Llama 3
* Falcon
* GPT-Neo-X
* Gemma
* and more
Here’s how!
Note: This instruction is for the Typing Mind Web version ([https://www.typingmind.com](https://www.typingmind.com)). For the macOS version and Setapp version, due to **Apple’s security policy**, requests to `http` protocol are blocked. If you want to connect to the macOS app, you can still follow the instructions here, but with one additional step: you need to **setup HTTPS for LMStudio**. This can be done using various techniques (e.g., using a [local HTTPS proxy](https://www.npmjs.com/package/local-ssl-proxy)).
## Step 1: Download LMStudio
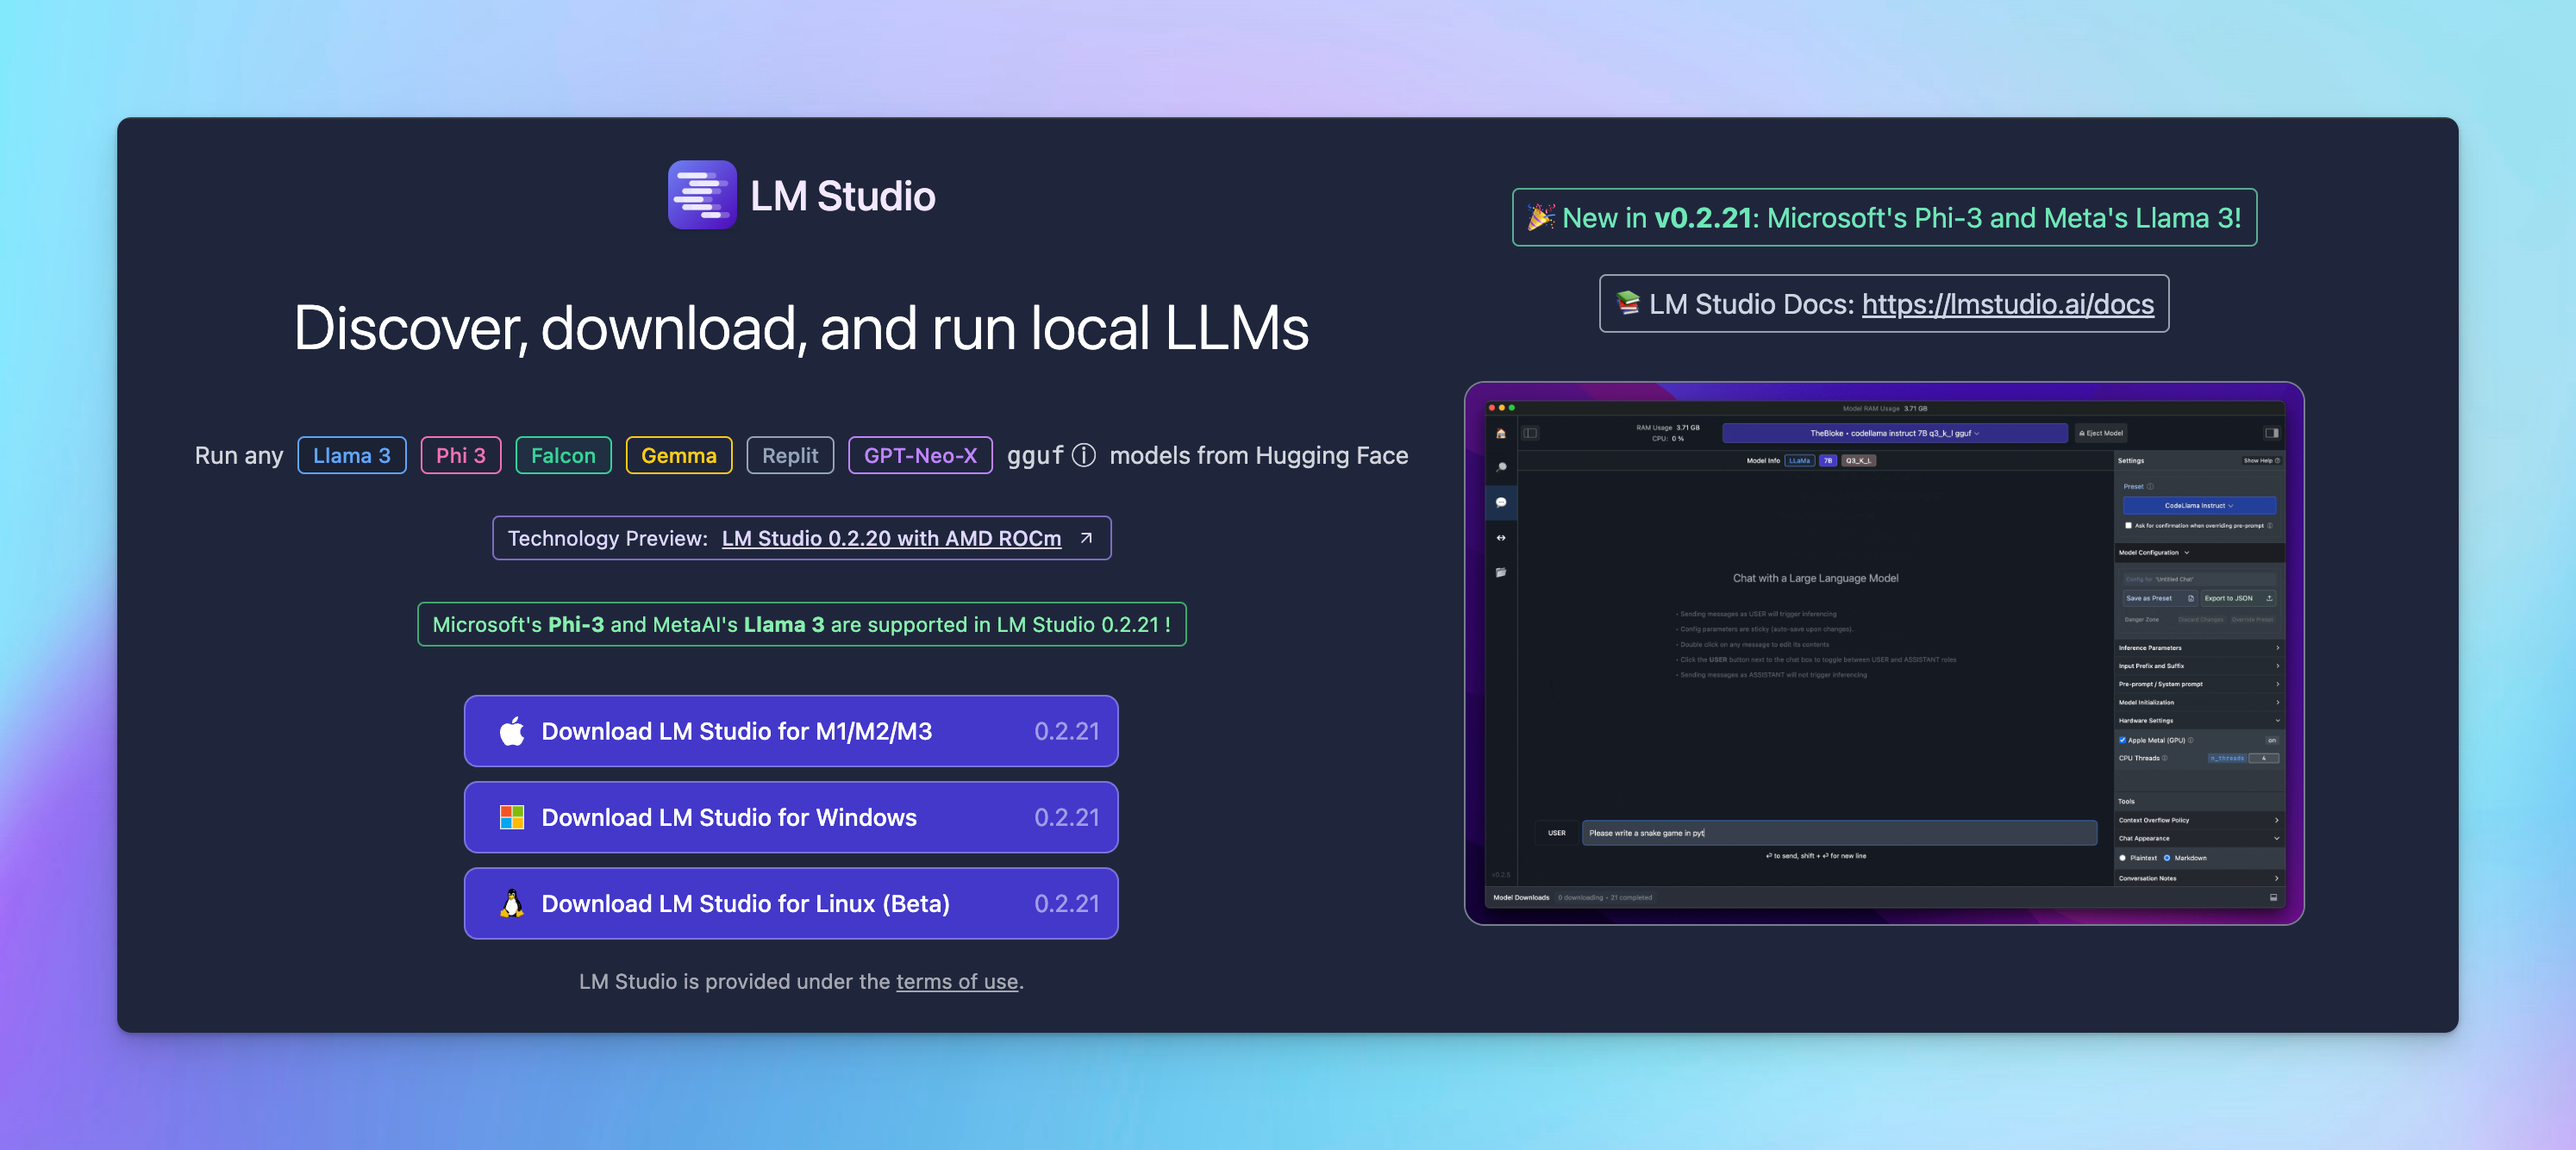
Go to [https://lmstudio.ai/](https://lmstudio.ai/) to download LMStudio for your device.
## Step 2: Download the AI model
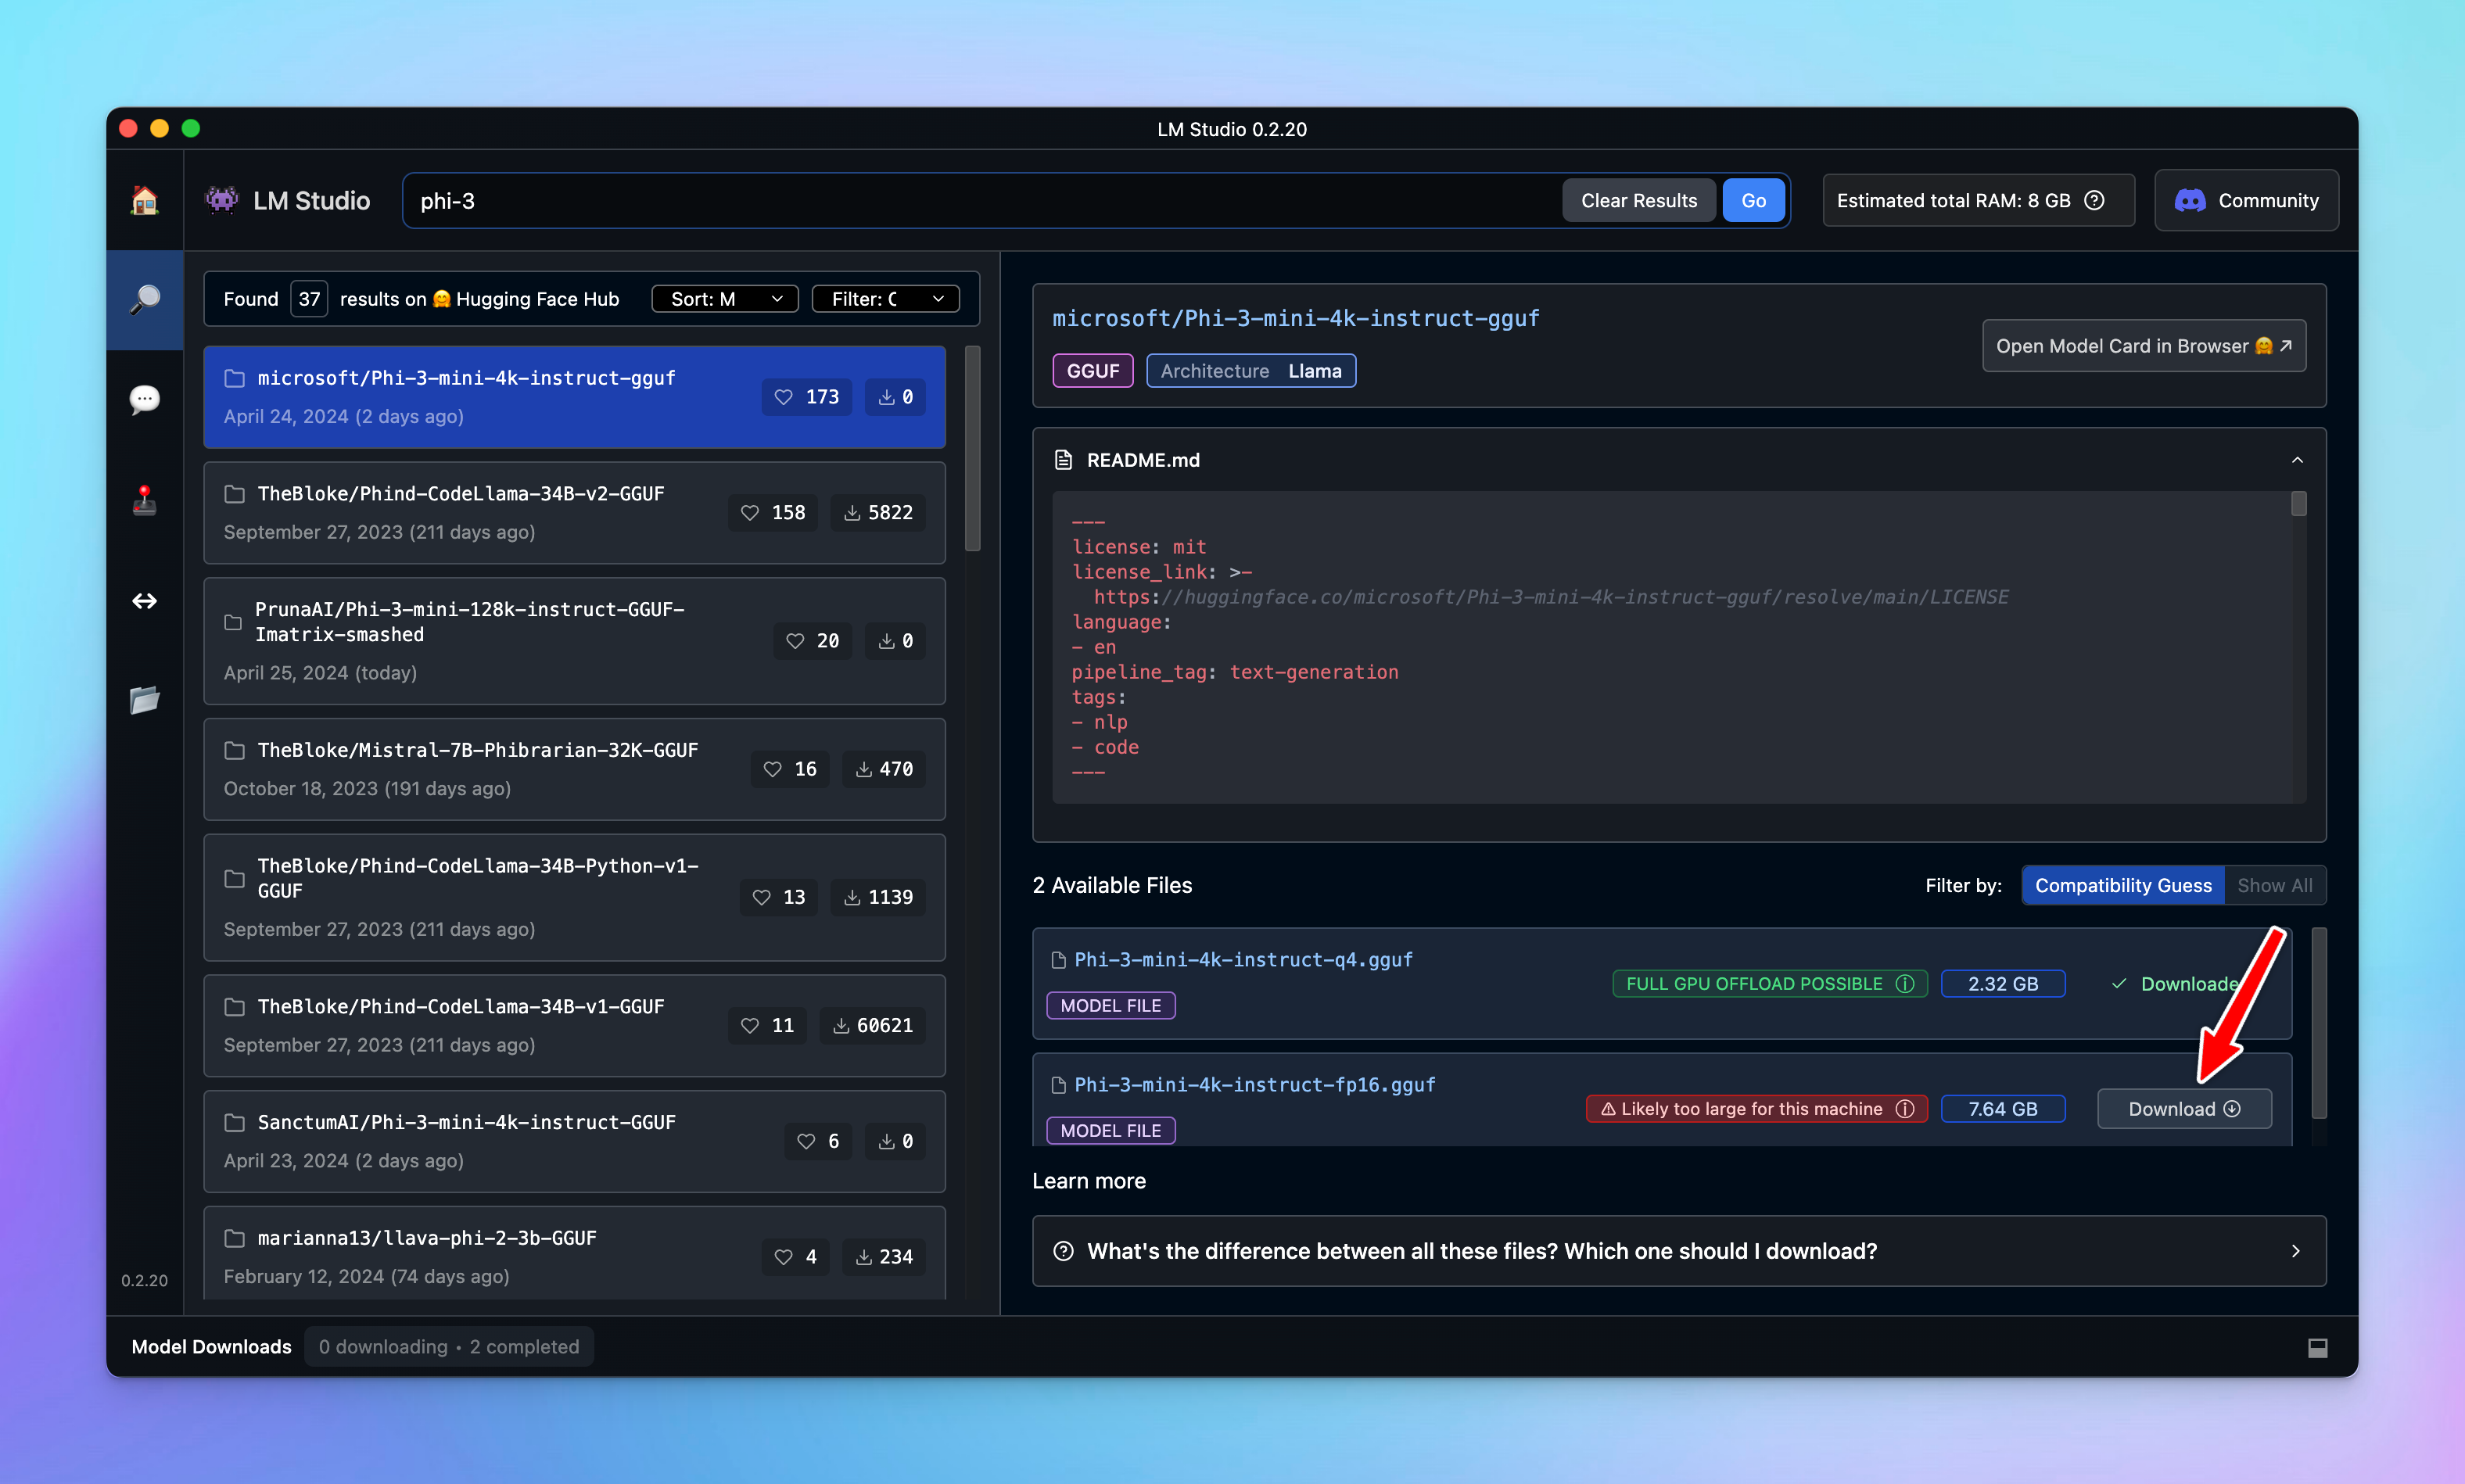
Search and download the specific AI model you want to use, such as Phi-3-mini-4k.
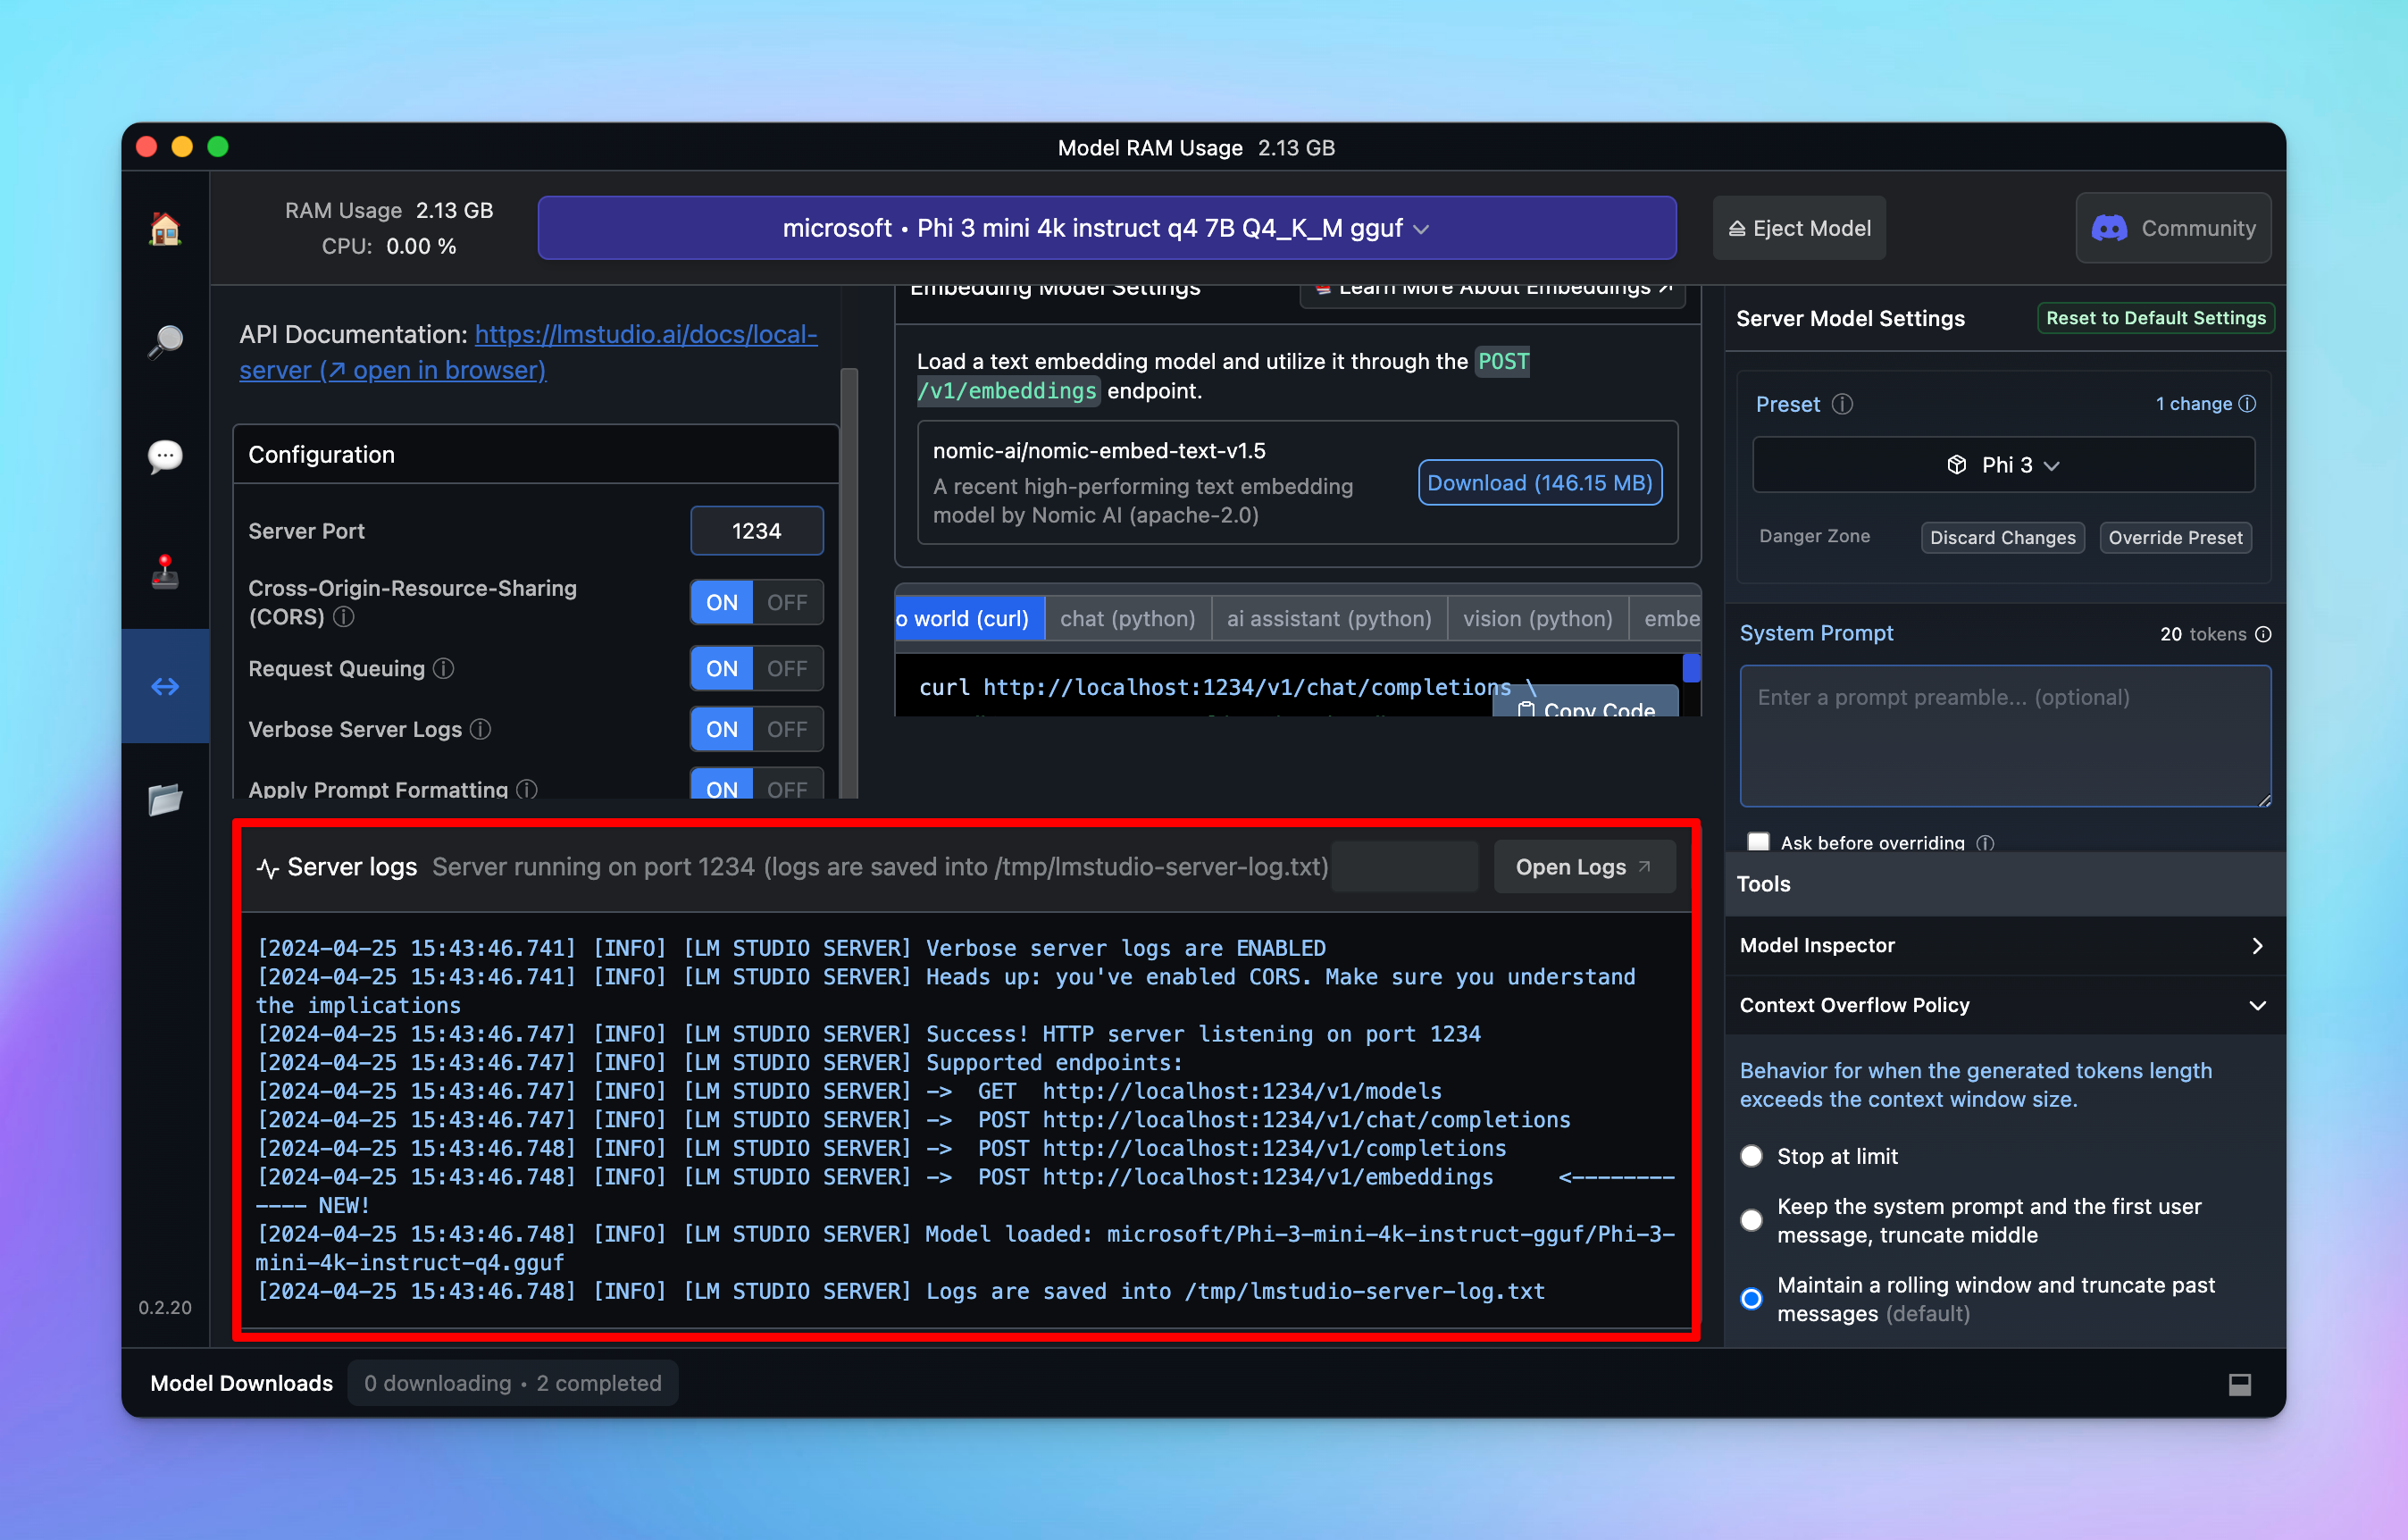
## Step 3: Set up Local Server
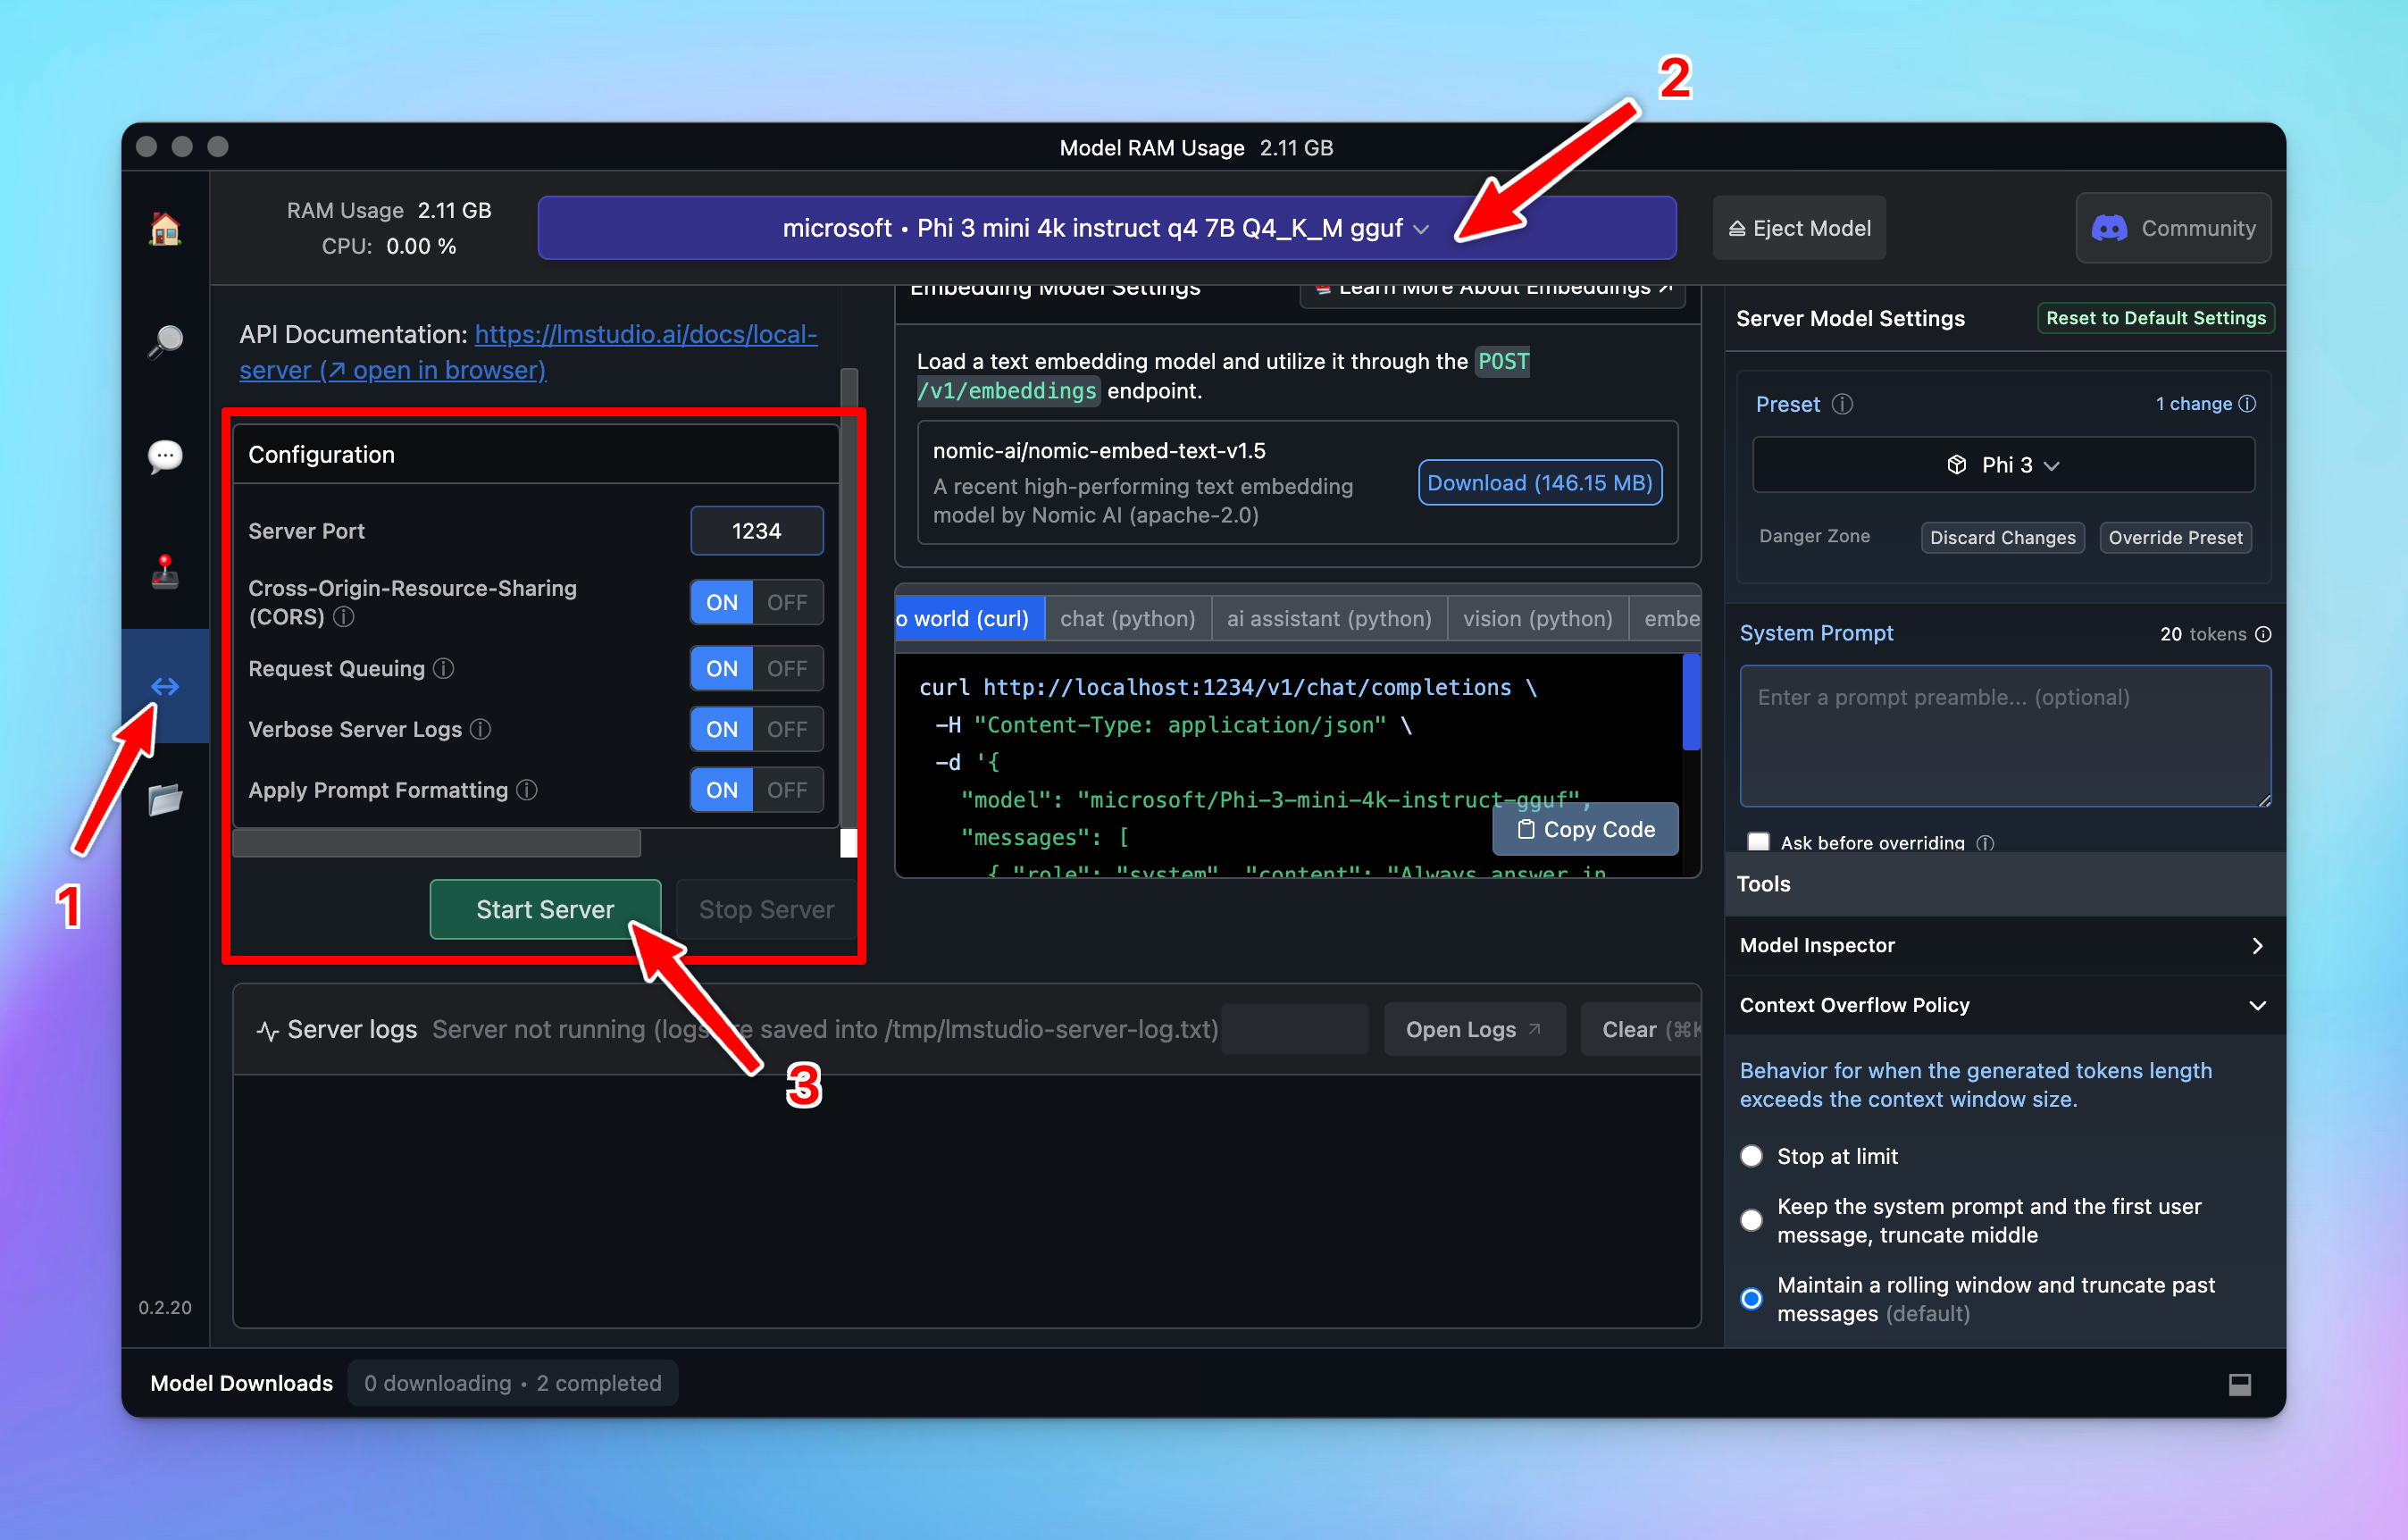
* Go to **Local Server**
* From the top drop-down list, choose the model you downloaded in Step 2.
* Go to the **Configuration** section, enable all options.
* Click **Start Server**
You should see a confirmation message once the server starts.
## Step 4: Set up LMStudio models on TypingMind
* Go to **Manage Models**
* **Add Custom Models**
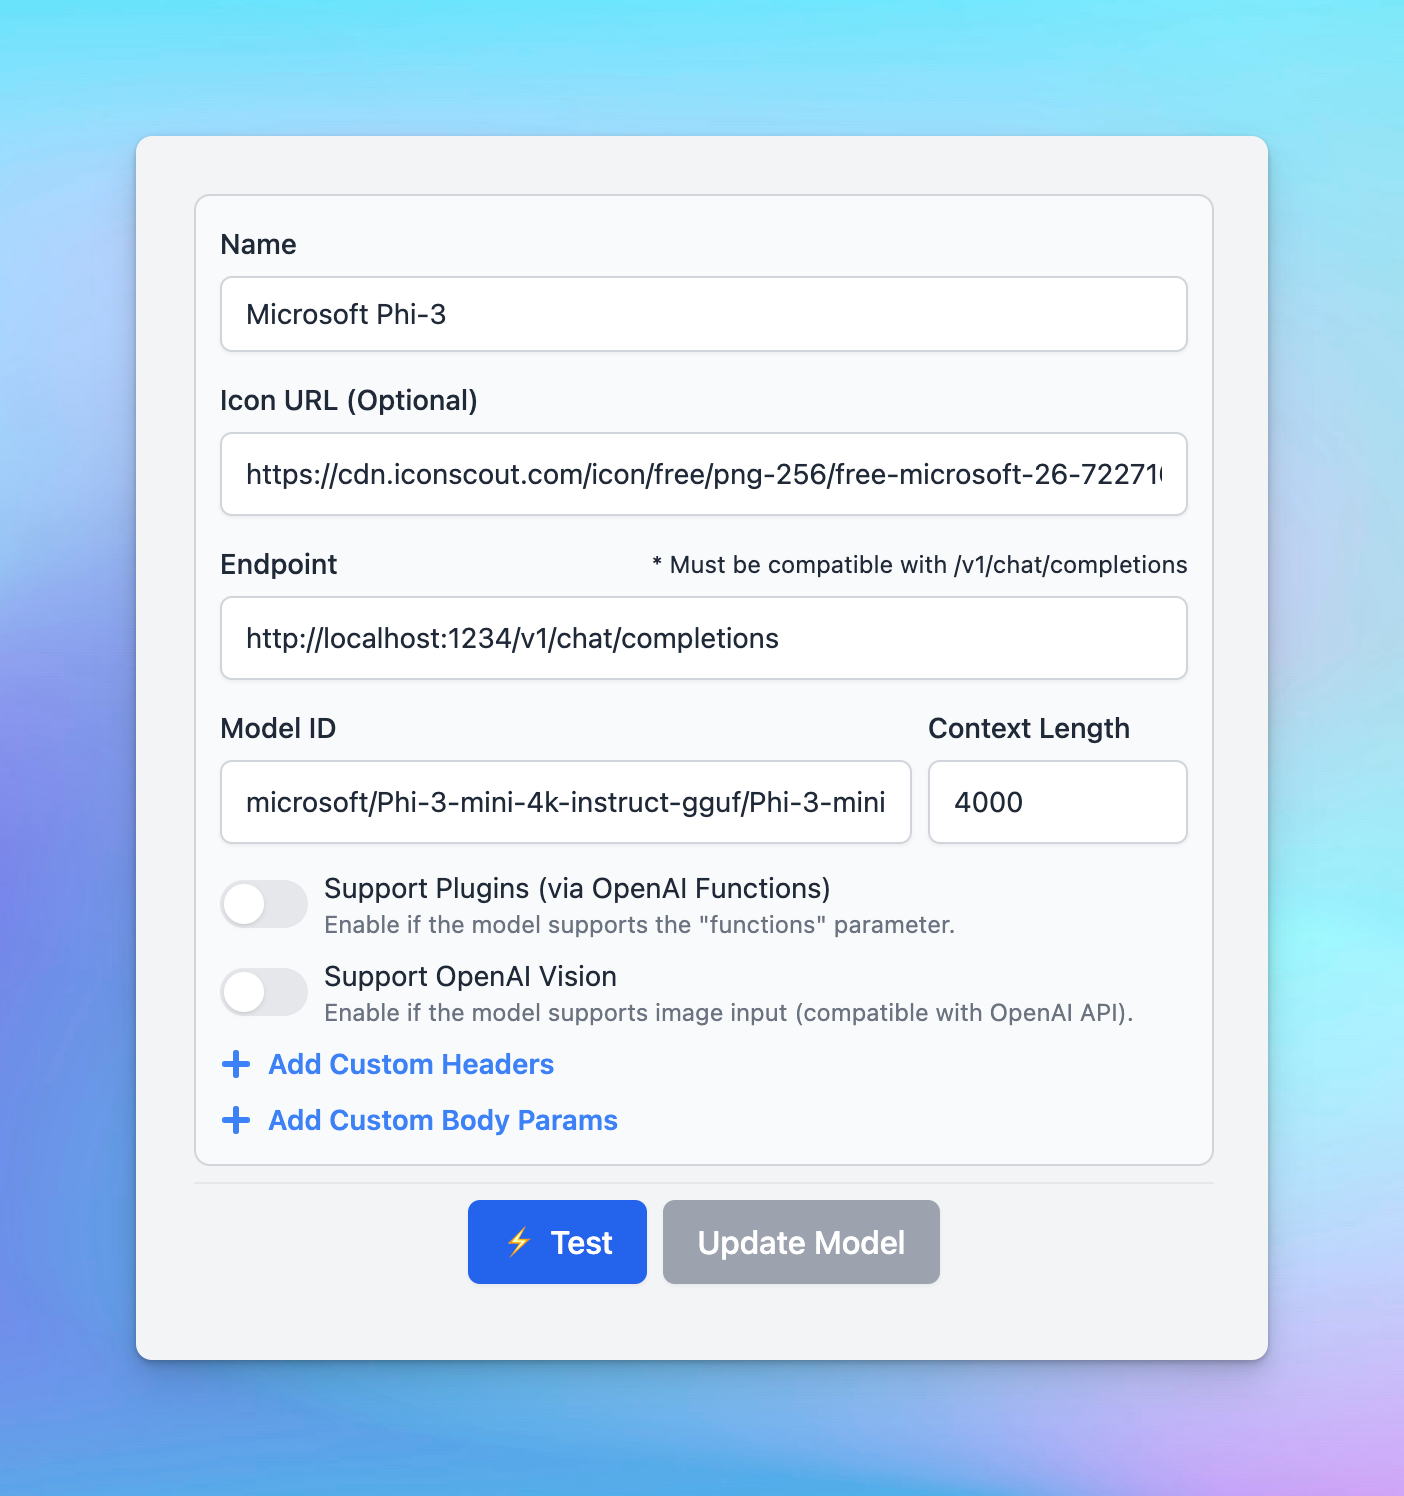
* Updates the following information to set up LMStudio models (example below is for Phi-3 mini)
* **Name**: Microsoft Phi-3 (or you can give it any name you want)
* **Icon URL (suggested):** [https://cdn.iconscout.com/icon/free/png-256/free-microsoft-26-722716.png](https://cdn.iconscout.com/icon/free/png-256/free-microsoft-26-722716.png)
* **Endpoint**: `http://localhost:1234/v1/chat/completions`
* **Model ID**: `microsoft/Phi-3-mini-4k-instruct-gguf/Phi-3-mini-4k-instruct-q4.gguf` (you can get your model ID after setting up local server here [http://localhost:1234/v1/models](http://localhost:1234/v1/models))
## Step 5: Start chatting
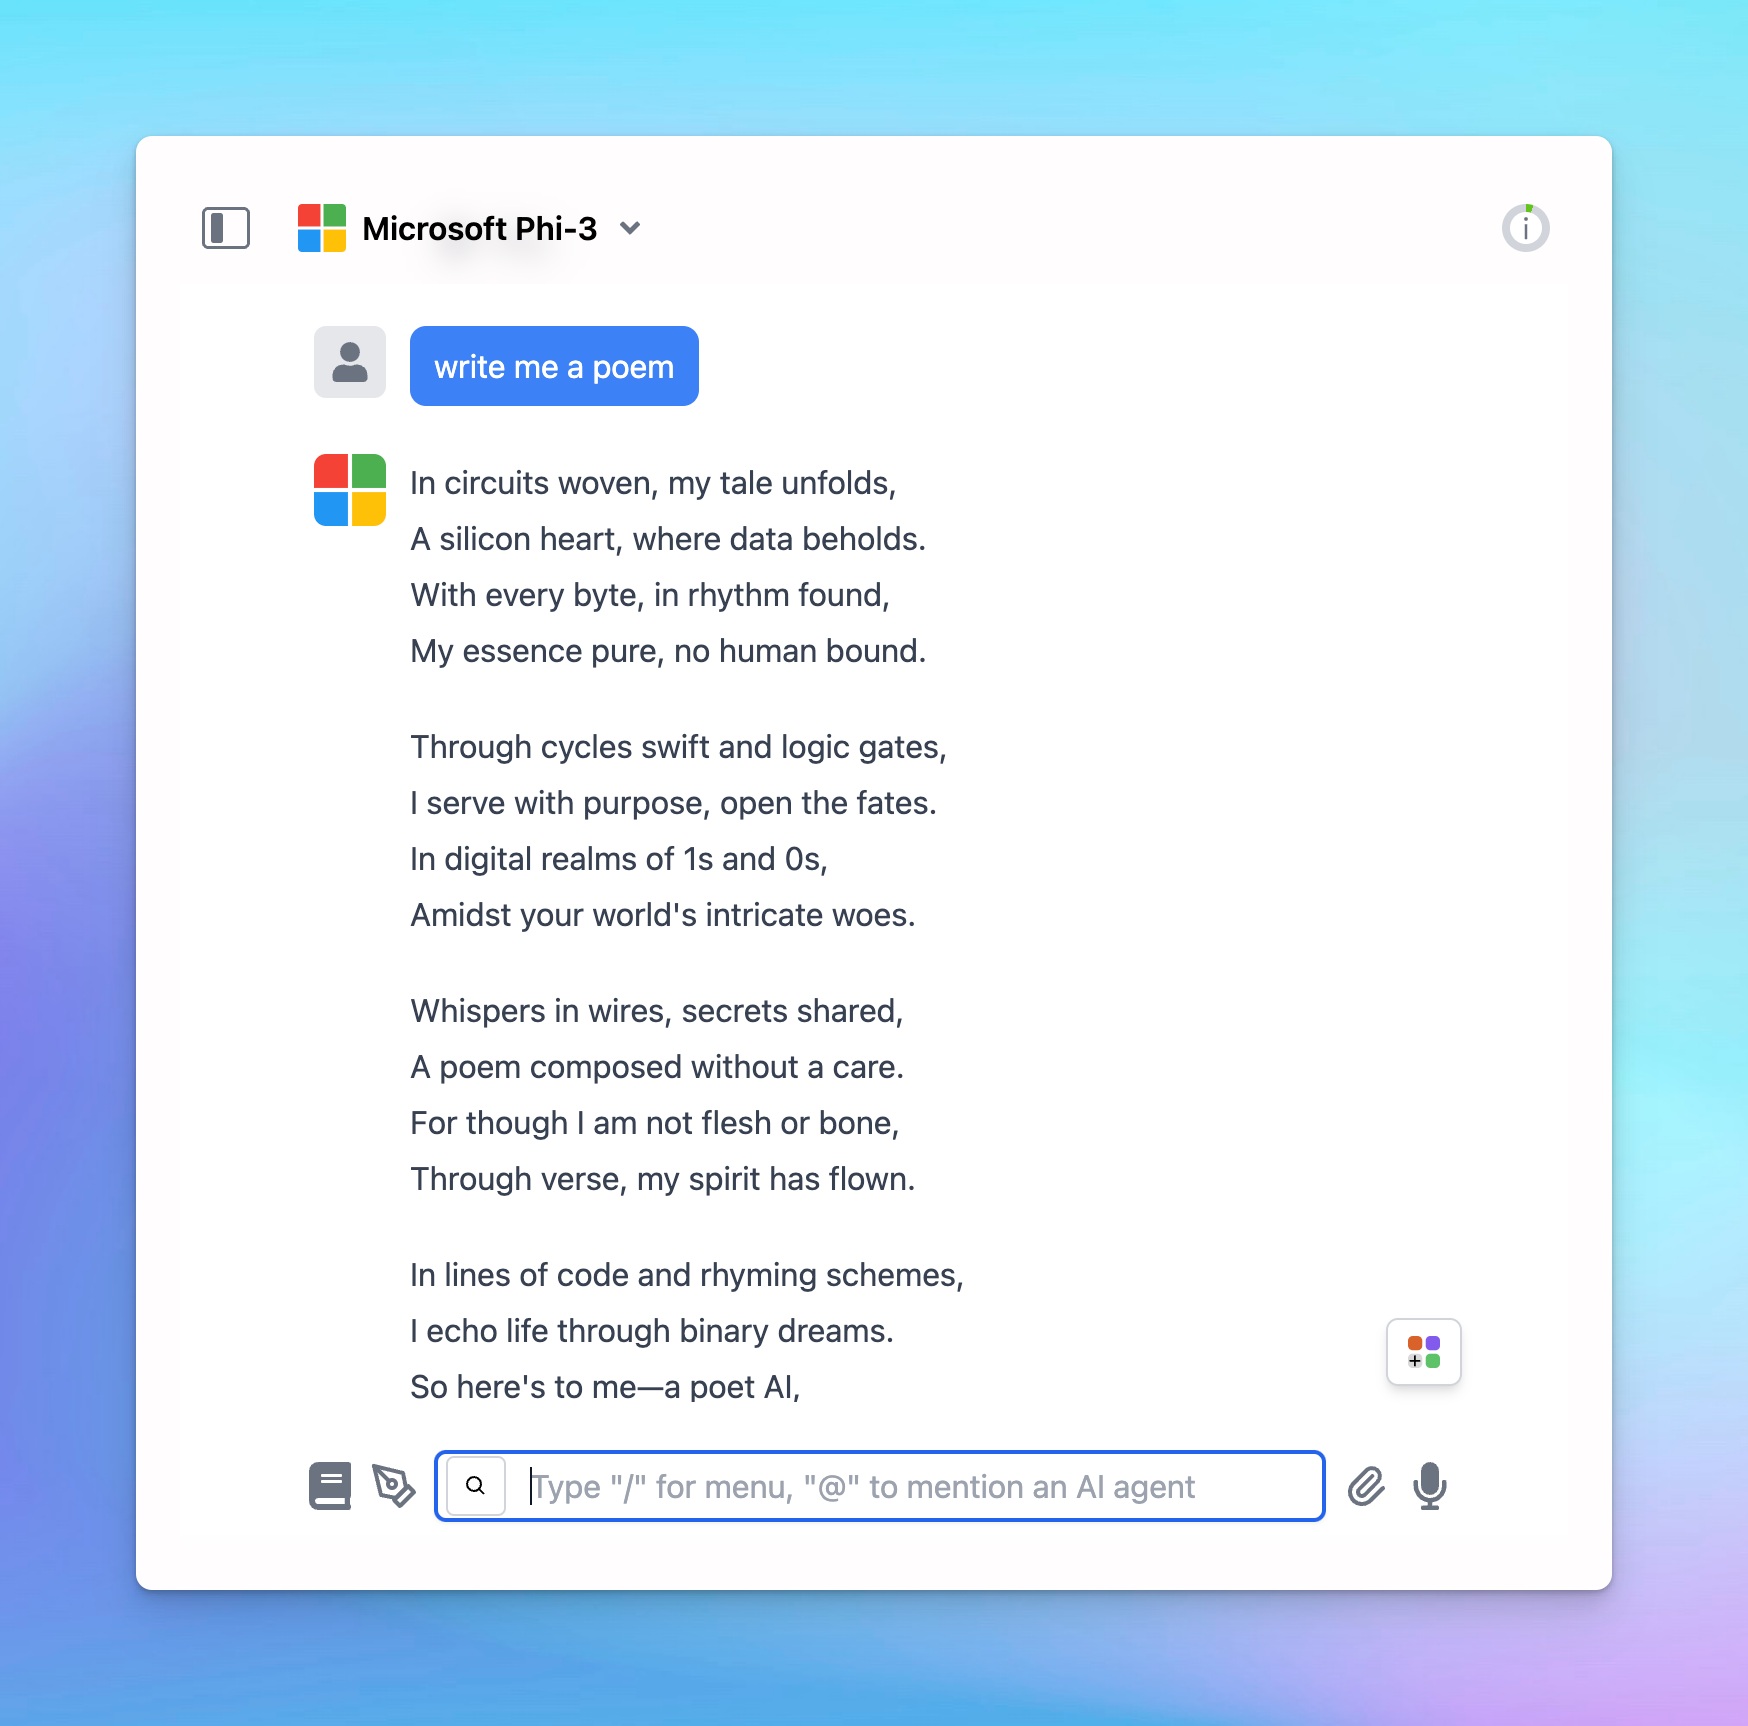
Interact with Phi-3 or your chosen AI model on TypingMind!
 ## Step 2: Download the AI model
Search and download the specific AI model you want to use, such as Phi-3-mini-4k.
## Step 2: Download the AI model
Search and download the specific AI model you want to use, such as Phi-3-mini-4k.
 ## Step 3: Set up Local Server
* Go to **Local Server**
* From the top drop-down list, choose the model you downloaded in Step 2.
* Go to the **Configuration** section, enable all options.
* Click **Start Server**
## Step 3: Set up Local Server
* Go to **Local Server**
* From the top drop-down list, choose the model you downloaded in Step 2.
* Go to the **Configuration** section, enable all options.
* Click **Start Server**
 You should see a confirmation message once the server starts.
 ## Step 4: Set up LMStudio models on TypingMind
* Go to **Manage Models**
* **Add Custom Models**
* Updates the following information to set up LMStudio models (example below is for Phi-3 mini)
* **Name**: Microsoft Phi-3 (or you can give it any name you want)
* **Icon URL (suggested):** [https://cdn.iconscout.com/icon/free/png-256/free-microsoft-26-722716.png](https://cdn.iconscout.com/icon/free/png-256/free-microsoft-26-722716.png)
* **Endpoint**: `http://localhost:1234/v1/chat/completions`
* **Model ID**: `microsoft/Phi-3-mini-4k-instruct-gguf/Phi-3-mini-4k-instruct-q4.gguf` (you can get your model ID after setting up local server here [http://localhost:1234/v1/models](http://localhost:1234/v1/models))
## Step 4: Set up LMStudio models on TypingMind
* Go to **Manage Models**
* **Add Custom Models**
* Updates the following information to set up LMStudio models (example below is for Phi-3 mini)
* **Name**: Microsoft Phi-3 (or you can give it any name you want)
* **Icon URL (suggested):** [https://cdn.iconscout.com/icon/free/png-256/free-microsoft-26-722716.png](https://cdn.iconscout.com/icon/free/png-256/free-microsoft-26-722716.png)
* **Endpoint**: `http://localhost:1234/v1/chat/completions`
* **Model ID**: `microsoft/Phi-3-mini-4k-instruct-gguf/Phi-3-mini-4k-instruct-q4.gguf` (you can get your model ID after setting up local server here [http://localhost:1234/v1/models](http://localhost:1234/v1/models))
 ## Step 5: Start chatting
Interact with Phi-3 or your chosen AI model on TypingMind!
## Step 5: Start chatting
Interact with Phi-3 or your chosen AI model on TypingMind!